Használati útmutató Serif PagePlus Essentials
Olvassa el alább 📖 a magyar nyelvű használati útmutatót Serif PagePlus Essentials (257 oldal) a Szoftver kategóriában. Ezt az útmutatót 5 ember találta hasznosnak és 2 felhasználó értékelte átlagosan 4.5 csillagra
Oldal 1/257

PagePlus Essentials
User Guide
How to Contact Us
Our main office
(UK, Europe):
The Software Centre
PO Box 2000, Nottingham,
NG11 7GW, UK
Main: (0115) 914 2000
Registration (UK only): (0800) 376 1989
Sales (UK only): (0800) 376 7070
Customer Service/
Technical Support:
http://www.serif.com/support
General Fax: (0115) 914 2020
North American office
(USA, Canada):
Serif Inc., The Software Center,
4041 MacArthur Blvd., Suite 120,
Newport Beach, CA 92660,
USA
Registration: (800) 794-6876
Sales: (800) 489-6703
Customer Service: (800) 489-6720
Technical Support: http://www.serif.com/support
Online
Visit us on the web at:
http://www.serif.com/
International
Please contact your local distributor/dealer. For further details, please contact us
at one of our phone numbers above.
This User Guide, and the software described in it, is furnished under an end user License
Agreement, which is included with the product. The agreement specifies the permitted and
prohibited uses.
Portions images © 1997-2002 Nova Development Corporation; © 1995 Expressions
Computer Software; © 1996-98 CreatiCom, In.; 1996 Cliptoart; © 1997 Multimedia
Agency Corporation; © 1997-98 Seattle Support Group. Rights of all parties reserved.
Digital Images ©2008 Hemera Technologies Inc. All Rights Reserved.
Digital Images ©2008 Jupiterimages Corporation, All Rights Reserved.
Digital Images ©2008 Jupiterimages France SAS, All Rights Reserved.
Bitstream Font content © 1981-2005 Bitstream Inc. All rights reserved.
Panose Typeface Matching System ©1991, 1992, 1995-97 Hewlett-Packard Corporation.
Portions graphics import/export technology © AccuSoft Corp. & Eastman Kodak
Company & LEAD Technologies, Inc.
THE PROXIMITY HYPHENATION SYSTEM © 1989 Proximity Technology Inc. All rights
reserved.
THE PROXIMITY/COLLINS DATABASE © 1990 William Collins Sons & Co. Ltd.; ©
1990 Proximity Technology Inc. All rights reserved.
THE PROXIMITY/MERRIAM-WEBSTER DATABASE
© 1990 Merriam-Webster Inc.; ©
1990 Proximity Technology Inc. All rights reserved.
The Sentry Spelling-Checker Engine © 2000 Wintertree Software Inc.
The ThesDB Thesaurus Engine © 1993-97 Wintertree Software Inc.
WGrammar Grammar-Checker Engine © 1998 Wintertree Software Inc.
Extensible Metadata Platform (XMP) Copyright © 2006 Adobe Systems Incorporated. All
rights reserved.
FontForge © 2000,2001,2002,2003,2004,2005,2006,2007,2008 by George Williams.
Portions of this software are copyright © 2008 The FreeType Project (www.freetype.org).
All rights reserved.
ODF Translator © 2006-2008, Clever Age, DIaLOGIKa, Sonata Software Ltd. All rights
reserved.
Office Binary Translator to OpenXML Copyright © 2008-2009, DIaLOGIKa. All rights
reserved.
Anti-Grain Geometry - Version 2.4
Copyright © 2002-2005 Maxim Shemanarev (McSeem)
Clipart samples from Serif ArtPacks © Serif (Europe) Ltd. & Paul Harris
TrueType font samples from Serif FontPacks © Serif (Europe) Ltd.
Microsoft, Windows, and the Windows logo are registered trademarks of Microsoft
Corporation. All other trademarks acknowledged.
PagePlus is a registered trademark of Serif (Europe) Ltd.
© 2010 Serif (Europe) Ltd. All rights reserved. No part of this User Guide may be
reproduced in any form without the express written permission of Serif (Europe) Ltd.
Serif PagePlus Essentials © 2010 Serif (Europe) Ltd.
Contents
Contents
1. Welcome .......................................................... 1
Welcome! .................................................................................. 3
Key features .............................................................................. 4
Installation ............................................................................... 10
2. Getting Started ............................................... 13
Startup Wizard ........................................................................ 15
Creating a publication from a design template ........................ 16
Starting a new publication from scratch .................................. 20
Opening existing publications ................................................. 21
Working with more than one publication ................................. 22
Saving your publication ........................................................... 22
Closing publications ................................................................ 23
Updating and saving defaults .................................................. 24
3. Working with Pages ........................................ 27
Setting up a publication ........................................................... 29
Understanding master pages .................................................. 31
Viewing pages ......................................................................... 32
Navigating pages .................................................................... 35
Adding, removing, and rearranging pages .............................. 36
Working with layers ................................................................. 38
Setting guides ......................................................................... 44
Using the rulers and dot grid ................................................... 47
Using headers and footers ...................................................... 50
Using page numbering ............................................................ 50
Contents
4. Working with Objects ..................................... 53
Selecting an object ................................................................... 55
Selecting multiple objects ........................................................ 56
Copying, pasting, and replicating objects ................................. 58
Snapping .................................................................................. 60
Creating groups ....................................................................... 62
Moving objects ......................................................................... 63
Resizing objects ....................................................................... 63
Ordering objects....................................................................... 65
Aligning and distributing objects .............................................. 65
Exporting as a picture .............................................................. 67
Rotating an object .................................................................... 68
Flipping an object ..................................................................... 69
Cropping and combining objects .............................................. 70
Anchoring objects .................................................................... 73
Joining object outlines .............................................................. 78
Applying a mesh warp envelope .............................................. 80
Adding borders......................................................................... 81
Adding logos ............................................................................ 84
Adding flashes ......................................................................... 86
5. Working with Text ........................................... 89
Importing text from a file .......................................................... 91
Understanding text frames ....................................................... 92
Fitting text to frames ................................................................ 99
Linking text frames ................................................................. 101
Using artistic text .................................................................... 103
Putting text on a path ............................................................. 105
Editing text on the page ......................................................... 108
Using Find and Replace ......................................................... 112
Setting text properties ............................................................ 113
Using fonts ............................................................................. 114
Substituting fonts ................................................................... 117
Contents
Using text styles .................................................................... 120
Wrapping text ........................................................................ 126
Creating a bulleted or numbered list ..................................... 127
Using AutoCorrect and Spell as you Type ............................ 131
Spell-checking ....................................................................... 133
Automatic proofreading ......................................................... 134
Using the thesaurus .............................................................. 135
Creating text-based tables .................................................... 136
Manipulating tables ............................................................... 138
Inserting a calendar ............................................................... 143
Hyperlinking an object ........................................................... 147
Creating a table of contents .................................................. 148
Creating an index .................................................................. 149
6. Pictures, Lines, and Shapes ......................... 151
Adding picture frames ........................................................... 153
Importing pictures.................................................................. 156
Using the Media Bar .............................................................. 158
Using Image Cutout Studio ................................................... 162
Applying PhotoLab filters ...................................................... 168
Importing TWAIN images ...................................................... 175
Drawing and editing lines ...................................................... 176
Setting line properties ........................................................... 180
Drawing and editing shapes .................................................. 182
Applying 2D filter effects ....................................................... 186
Using 3D filter effects ............................................................ 190
Adding dimensionality (Instant 3D)........................................ 194
Using object styles ................................................................ 196
Using the Gallery................................................................... 199
Using connectors .................................................................. 202
Contents
7. Color, Fills, and Transparency ..................... 205
Applying solid colors .............................................................. 207
Using schemes ...................................................................... 209
Working with gradient and bitmap fills .................................... 212
Working with transparency ..................................................... 216
8. Printing and Publishing ................................ 221
Previewing the printed page .................................................. 223
Printing basics........................................................................ 224
Printing special formats .......................................................... 227
Exporting PDF files ................................................................ 229
Creating a PDF bookmark list ................................................ 230
Sharing by email .................................................................... 233
9. Index ............................................................ 235

Welcome
1
2 Welcome
Welcome 3
Welcome!
Welcome to PagePlus Essentials, the affordable and easy way to design and
print high quality calendars, stationery, newsletters, signs, notices, invites,
and cards. Share as hardcopy print or by electronic PDF—the choice is yours!
Instead of starting from scratch, PagePlus comes with an impressive selection of
design templates, creative gallery content, and styles for you to use. You'll also
be able to reuse existing content by importing word processing documents.
PagePlus Essentials doesn't just stop at that. Its range of design studios makes
PagePlus stand out from the crowd—Image Cutout Studio for cutting pictures
out from their backgrounds, LogoStudio for custom logo design, and PhotoLab
for powerful image adjustment and effect combinations. You simply cannot
afford to miss them!
For a more detailed summary of what PagePlus can offer, see Key features
(p. 4).
Registration
Don't forget to register your new copy, using the Registration Wizard, on the
Help menu. That way, we can keep you informed of new developments and
future upgrades!
4 Welcome
Key features
Before you get started with PagePlus, we recommend you take the opportunity
to familiarize yourself with PagePlus key features and capabilities.
Ease of Use
• Dynamic guides
Align and resize objects with each other using dynamic guide
snapping, without the need for ruler guides or precise object
transforms.
• Learn in PagePlus
The Startup Wizard's new Learning Zone helps you get the very best
out of PagePlus. Tutorials, both PDF and video, are published along
with a host of other resources and product support details.
• Managing resources
Preview, relink, export, and replace individual pictures and other
resources in the more powerful Resource Manager. Display a
resource's creation, modified, and accessed date; modify a picture's
format, color depth, and placed resolution. Include master page
objects, or filter out multiple instances of the same object for bulk
replacement. Preview fonts, check if embedded, locate fonts on the
page, and export them. Views can be changed by switching columns
on or off.
Layout
• Versatile Setup with Auto-Imposition
Just click to specify layouts for small (business cards and labels),
folded (booklets and greetings cards), and large publications (banners
and posters)!
• Ready-to-use Design Templates
Fancy a quick route to produce stunning designs? Adopt one of an
impressive collection of eye-catching design templates or choose a
theme on which to base your publication! Each theme offers a choice
of publication types and differently designed layout options for the
theme. Pick multiple layouts as your new pages, then simply fill
picture placeholders with your own pictures.
Welcome 5
• Master Pages
Save time and maintain consistency by using multiple master pages
assigned to your publication pages.
• Layers
Each page can have multiple layers—so you can assign elements to
different layers for modular design.
• Anchor any object
Anchor pictures, shapes, tables, artistic text, and nested text frames
to your publication's artistic or frame text. Position horizontally and
vertically in relation to anchor point, indented text, column, frame,
page margin guides, or the whole page. Flow text around floating
objects in your text frame.
• Professional layout tools
Movable rulers, guide lines and a dot grid, as layout aids, help you
position objects precisely; snapping jumps an object to guide or grid.
Use Sticky guides, a great way of moving (in bulk) all objects
snapped to your guide lines—move the guide and objects will follow!
• Page control
Add and remove pages in just a few clicks of your mouse in the
Pages tab. Drag and drop pages within the tab to reorder sequence.
Assign master pages to several document pages at once. To view
pages, Multi-page view lets you see an array of pages, even show a
facing pages view!
• Tables and Calendars
Choose from a range of preset formats or create your own tables and
calendars. Use the convenient Table context toolbar to sort data,
format cells, and choose from a wide range of functions for
spreadsheet calculations (use absolute cell references). Calendars
are table-based for enhanced functionality, and support Year update,
inline personal events, and public holidays!
Pictures
• Import Pictures
Import commonly-used standard file formats, including all the latest
RAW digital camera formats. AutoFlow pictures (or drag and drop)
from the always-at-hand Media Bar into sequential picture frames!
Import Photoshop files directly into your PagePlus publications.
6 Welcome
• PhotoLab for non-destructive adjustment and effect filters
The powerful PhotoLab studio packs a punch with an impressive
selection of editable adjustments, creative, and artistic effects (pencil,
water color, oil, and more). Use integrated Straighten, Crop, Red-
eye, and Spot-repair tools for easy retouching. Apply filters to
selected areas of your photo by using brush-based masking. Save
adjustment/effect combinations as favorites for future use.
• Quick-and-easy Image Cutouts
Image Cutout Studio makes light work of cutting out your placed
pictures, directly in PagePlus. Use brushes to discard uniform
backgrounds (sky, walls, etc.) or keep subjects of interest (people,
objects, etc.).
• A versatile Metafile Format
Import and Export Serif Metafiles (.SMF), a proprietary image format
with improvements to the Windows Metafile format (WMF). Better
line, fill, and text definitions make them ideal for sharing graphics
between Serif applications.
Creativity
• Drawing Tools
Design stunning vector graphics with Pencil, Pen and Straight Line
tools, and add line endings like arrowheads, diamonds, and quills.
Alternatively, the array of fully-customizable QuickShapes let you
quickly create outlines for your designs, while Convert to Curves,
Crop to Shape, and curve drawing offer complete flexibility for
creating any shape imaginable! Mesh warp envelopes add
perspective, slant, and bulge to any object.
• Fills
Enhance shapes and artistic text with fantastic professional fills. Use
the Color tab to change fill, line, or text color with one click. Choose
preset fills (solid, gradient, or bitmap) from the Swatches tab's
palettes—even create stunning bitmap fills from your own images.
What's more, every color used is added to the Publication Palette so
that you can easily re-use it again and again.
• Intelligent Color Schemes
Choose from dozens of preset color schemes to change the overall
appearance of your publications with a single click. You can
customize the scheme colors, create brand new schemes, and apply
any scheme to a "from-scratch" publication.
Welcome 7
• Ready-to-use Styles
Choose various filter effects, glows, shadows, textures, and materials
from the Styles tab. Customize the preset styles or store your own!
• Photo-based borders
Exciting new ready-to-go borders can be applied around text frames,
tables and pictures alike. Create and save custom borders from your
own electronic border designs or scanned picture frames! The Gallery
tab's Picture frames have the same borders already applied.
• Transparency
Add transparency to your backgrounds, text frames, tables, shapes and
text to achieve a truly professional look. As with color fills, you can
apply solid, gradient, and bitmap transparencies—even create bitmap
transparencies from your own image collection.
• Filter Effects
Apply eye-catching Filter Effects to make your images and text really
stand out. Easily add shadows, glows, bevels, blurs, reflections,
outlines, feathering, or embossing effects and alter the flexible settings
for exactly the right look—your original object remains intact and
editable if you change your mind! Use the Shadow Tool for on-the-
page control of basic or skewed drop shadows.
• Astounding 3D Lighting and Surface Effects
Advanced algorithms bring flat shapes to life! Choose one or more
effects, then vary surface and multiple colored light source properties.
Start with a pattern or a function, adjust parameters for incredible
surface contours, textures, fills— realistic-looking wood, water, skin,
marble and much more. Combine 3D transparency and Reflection
Maps for realistic glass-like effects on non-reflective/reflective
surfaces.
• Instant 3D
Transform your artistic text and shapes into impressive 3D objects
directly on the page! Apply multiple colored lighting effects (with
directional control), along with custom bevel and lathe effect profiles
to create your very own unique contours.
• Connector Tools
Easily design organizational charts, family trees and other diagrams—
connectors will link your boxes, circles, or other shapes together, with
links being maintained during any object repositioning.
8 Welcome
• Stunning logos and flashes
Use the Gallery tab for a range of pre-designed logo designs—
alternatively, create from scratch in LogoStudio or base your logo on
existing PagePlus objects! Pick attention-grabbing flashes of varying
layout and design! Use for poster advertising or for a greetings card.
Even create your own flash from scratch (or from drawn objects) in
the powerful LogoStudio design environment.
• Joining object outlines
Combine QuickShapes, drawn shapes and artistic text together to
create more complex outlined objects, which can still be edited
further. Use Add, Subtract, Intersect, and Exclude to produce
different and exciting results.
Text
• Import Word 2007 and Open Office text documents
Add word processing content to any text frame without fuss! Import
doesn't need the application to be installed locally! Use a choice of
import converters to optimize text import.
• Text Frames
Compose story text in text frames then easily position, rotate or size
the frame to suit; connected frames host the same story text and can be
filled automatically by AutoFlow or manual text fitting. Enhanced
text wrap options and separate crop and wrap outlines mean you have
greater control over where text flows and how it appears. Import,
paste, export text in Unicode format... design with a foreign-language
or special fonts and characters. Text paths also benefit from intelligent
text fitting.
• Text Control
Apply text formatting from an on-hand text context toolbar; apply
multi-level bullet and numbering schemas to your paragraphs, even
to your text styles; a Text Styles tab for allocating text attributes to
chosen paragraphs; flexible bullet, numbering and indenting buttons;
and much more!
• Fonts
Substitute missing fonts when opening third-party publications. View
your currently installed font set in the Fonts tab, including those most
recently assigned to text, favorite fonts, and those considered
Websafe. Hover over a listed font for an "in-situ" font preview of
your selected text—simply click to apply the new font if you like it!
Welcome 9
Easily swap all selected instances of a common font for another font
in one fell swoop!
• Frame and Artistic Text
Create text with stunning transparency effects, gradient/bitmap (photo)
fills, 2D/3D effects and more. Use designer artistic text for high
impact headlines and powerful design elements—artistic text scales,
flips, and can follow a drawn path, while frame text flows and line
wraps.
• Find & Replace
Search through story text for words and phrases but also text
attributes, particular fonts, colors, special characters (Unicode),
regular expressions, and words at specific positions in sentences.
• Text Composition Tools
Includes word count, spell-checking, thesaurus, and proof reader.
AutoCorrect and Check spelling as you type proofing options are at
hand.
• Table of Contents & Index
Create automated Tables of Contents and Indexes for complex
documents. PagePlus refers to the named styles you've allocated to
headings, subheadings and titles to automatically create your Table of
Contents, with up to six levels. Indexing documents is simple too, use
the intuitive tools to select important terms and let PagePlus do the
rest.
Publishing and Sharing
• PDF Export
Export your documents to PDF, with powerful options to publish your
PDFs for the web (streaming supported).
• Printing
Print documents professionally on your home printer—as several
pages on one sheet, or for large format printing, a single page across
multiple sheets. For desktop printers without duplex support, use the
Manual Duplex printing to create any double-sided publication.
10 Welcome
Installation
System Requirements
Minimum:
• Windows-based PC with DVD drive and mouse
• Microsoft Windows® XP (32 bit), Windows® Vista, or
Windows® 7 operating system
• 512MB RAM
• 795MB free hard disk space
• 1024 x 600 monitor resolution
Additional disk resources and memory are required when editing large and/or
complex documents.
Optional:
• Windows-compatible printer
• TWAIN-compatible scanner and/or digital camera
• Stylus or other input device
• 3D Accelerated graphics card with DirectX 9 (or above) or OpenGL
support
• .NET 2.0 for text import filters (Word 2007 + OpenOffice) (installed
by default)
• Internet account and connection required for accessing online
resources
• Adobe® Flash® Player 9.0 or above to view Learning Zone resources
Welcome 11
First-time install
To install PagePlus Essentials simply insert the PagePlus Essentials Program
DVD into your DVD drive. The AutoRun feature automatically starts the Setup
process. Just answer the on-screen questions to install the program.
Re-install
To re-install the software or to change the installation at a later date, select
Settings/Control Panel from the Windows Start menu and then click on the
Add/Remove Programs icon. Make sure the PagePlus Essentials Program
DVD is inserted into your DVD drive, click the Install… button and then
simply follow the on-screen instructions.
12 Welcome

Getting Started
2
14 Getting Started

Getting Started 15
Startup Wizard
The Startup Wizard presents the following choices:
*Startup Wizard may differ in your program.
• Start New Publication, to open a blank page to work on.
• Use Design Template, to create an instant document from a pre-
designed template.
• Open Saved Publication, to edit a saved PagePlus file.
• Learning Zone, to access online videos, tutorials, PDF User Guides,
and more.
Use the Choose Workspace drop-down menu to choose your workspace
appearance (i.e., Studio tab positions, tab sizes, and show/hide tab status). You
can adopt the default workspace profile <Default Profile>, the last used profile
<Current Profile>, a range of profile presets, or a workspace profile you have
previously saved.

16 Getting Started
As you select different profiles from the menu, your workspace
will preview each tab layout in turn.
The Startup Wizard is displayed by default when you launch PagePlus. If you
don’t want to use the Startup Wizard again, check the “Don't show this wizard
again” box. You can switch it on again via the Use startup wizard check box in
Tools>Options... (use Options>General menu option).
You can also access the Startup Wizard at any time from
New>New from Startup Wizard... on the File menu.
Creating a publication from a design template
PagePlus comes complete with a
whole range of design templates
which will speed you through the
creation of all kinds of
publications!
Templates also help ensure continuity between your pages by preserving such
elements as page layout, contents, styles, and color palettes. They also offer
quality pictures that you can use royalty free.
Getting Started 17
Instead of a design template, you
can adopt a Theme Layout
instead; layouts offer picture
placeholders instead of actual
pictures. Different physical
document types (Brochure,
Business Cards, Flyer, Newsletter,
etc.) can be created from a chosen
theme (e.g., Arctic), each type
offering a choice of
complementary multiple page
designs.
Once selected, the publication is normally all but complete apart from adding
your own pictures to placeholders, personalizing placeholder text, or fine-tuning
object positioning.
To create a publication from a design template:
1. Open PagePlus, or choose New... from the File menu and select New
from Startup Wizard....
2. Click Use Design Template to display the Choose a Design Template
dialog.
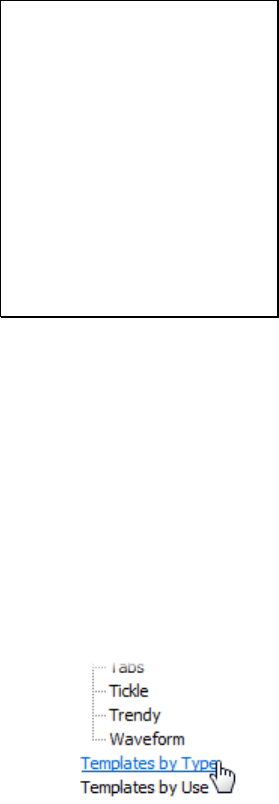
3. In the tree menu on the left, select either the "Templates by Type"
(shown below) or "Templates by Use" category.
4. Navigate the menu's categories, select one, then click a chosen
document type's thumbnail.
18 Getting Started
5. Examine the page sample(s) in the Pages pane.
If you're happy with the template pages, click Open.

Getting Started 19
To create a publication from a themed layout:
1. From the dialog's Templates list, select Theme Layouts, then select a
theme name from the list.
2. The adjacent pane updates to show document types for that selected
theme. Select a thumbnail.
3. In the upper-right corner of the dialog, choose a color scheme on
which to base your publication from the drop-down menu (the first
three schemes are designed specifically for the themed layout).

20 Getting Started
As each template is color schemed, you can swap the underlying
scheme, and the publication's appearance, for another scheme at any
time!
4. From the right-hand Pages pane, select one or more page layouts by
checking the box under each thumbnail. Some publication types only
offer an either/or selection.
5. Click OK. The page layouts are added as pages to your new
publication.
Starting a new publication from scratch
Although design templates can simplify your design choices, you can just as
easily start out from scratch with a new, blank publication. To make life easier
you can adopt a particular document type (regular/normal, folded, small/large
publication) as a starting point.
To start a new publication (via Startup Wizard):
1. Open PagePlus to display the initial Startup Wizard (if switched on).
- or -
With PagePlus loaded, choose New... from the File menu and then
select New from Startup Wizard....
2. Select Start New Publication.
3. From the list on the left, select a document type and then examine the
samples on the right. Click the sample that is the closest match to the
document you want to create.
- or -

Getting Started 21
You can define a custom publication by clicking Custom Page
Setup....
4. Click OK to open a new publication with a blank page.
If you click (or press Escape) from the Startup Wizard, PagePlus opens a
blank document using default page properties.
To start a new default publication:
• Click New Publication on the Standard toolbar (only if Startup
Wizard is turned off).
Opening existing publications
You can open a PagePlus publication from the Startup Wizard, Standard
toolbar, or via the File menu.
To open an existing publication from the Startup Wizard:
1. Select the Open Saved Publication option.
2. In the Documents pane of the Open Saved Publication dialog,
navigate to a publication file by either using your computer's Folders
structure or by History (shows saved publications by date).
3. Click the file name, then click Open.
Tthe dialog offers Print and Publish to PDF options without loading the selected
publication, plus Sort and Filtering options to change your view.
To open existing publications from within PagePlus:
1. Click Open on the Standard toolbar.
2. In the Open dialog, select the folder and file name(s). For multiple
publications, Shift-click to select adjacent multiple files or Ctrl-click
to select non-adjacent files.
3. Click the Open button.

22 Getting Started
To revert to the saved version of an open publication:
• Choose Revert from the File menu.
Font substitution
PagePlus supports automatic and manual font substitution if you open a
publication which uses fonts which are not stored on your computer. See
PagePlus help for more details.
Working with more than one publication
If you have multiple publications open at the same time it's easy to jump
between them using different methods.
Click on an open publication's tab on the Publications toolbar at the top of the
workspace to make it active (e.g., Rosette.ppp).
Alternatively, you can select the name of
a currently open publication from the
Window menu. Unsaved publications
are indicated by an asterisk; the
currently active publication is shown
with a tick.
Saving your publication
To save your work:
• Click Save on the Standard toolbar.
• To save under a different name, choose Save As... from the File menu.
Unsaved publications have an asterisk after their name in either
the PagePlus title bar or Window menu.

Getting Started 23
Closing publications
To close the current publication:
• Choose Close from the File menu or click the window's Close
button. If it's the only window open for the publication, the command
closes the publication and you'll be prompted to save changes.
To close all publications except current:
• Right click a Publication tab on the Publications toolbar and choose
Close All But This. You'll be prompted to save changes for any
unsaved publication.
To close PagePlus:
• Click the program's Close button at the top right of the
window.
You'll be prompted to save changes to any unsaved publications.
24 Getting Started
Updating and saving defaults
Object defaults are the stored property settings PagePlus applies to newly
created objects such as:
• lines and shapes (line and fill color, shade, pattern, transparency, etc.)
• frames (margins, columns, etc.)
• text (i.e., font, size, color, alignment, etc.). Defaults are saved
separately for artistic, shape, frame and table text.
You can easily change the defaults for any type of object via the Update Object
Default command or the Text Style Palette dialog.
Default settings are always local—that is, any changed defaults apply to the
current publication and are automatically saved with it, so they're in effect next
time you open that publication. However, at any time you can use the Save
Defaults command to record the current defaults as global settings that will be
in effect for any new publication you subsequently create.
To set local defaults for a particular type of object:
1. Create a single sample object and fine-tune its properties as desired—
or use an existing object that already has the right properties. (For
graphics, you can use a line, shape, or rectangle; all share the same set
of defaults.)
2. Select the object that's the basis for the new defaults and choose
Update Object Default from the Format menu.
Or, for line and fill colors, including line styles:
1. With no object selected, choose the required line and/or fill colors
from the Color or Swatches tab. Use the Line tab to set a default line
weight, style, and corner shape.
2. Draw your object on the page, which will automatically adopt the
newly defined default colors and styles.
Getting Started 25
To view and change default text properties:
1. Choose Text Style Palette... from the Format menu.
2. Click Default Text, then from the expanded list of text types, choose
an option (e.g., Artistic Text).
3. Click Modify... to view current settings for the selected text type.
4. Use the Text Style dialog to alter character, paragraph, or other
properties.
To save all current defaults as global settings:
1. Choose Save Defaults from the Tools menu.
2. From the dialog, check options to update specific defaults globally:
• Document and object defaults - saves current document settings
(page size, orientation) and object settings (context toolbar
settings).
• Text styles - saves current text styles in the Text Style Palette.
• Object styles - saves user-defined styles from Styles tab.
• Table and calendar formats - saves custom formats saved in
Table Formats dialog.
3. Click Save to confirm that you want new publications to use the
checked object's defaults globally.
26 Getting Started

Working with
Pages
3
28 Working with Pages

Working with Pages 29
Setting up a publication
A publication's page size and orientation settings are fundamental to your
layout, and are defined when the new publication is first created, either using a
design template or as a New Publication choice via File>New... and the Startup
Wizard. If the Startup Wizard is turned off, or you cancel the setup dialog, a new
publication is created to a default page size.
To adjust size/orientation of the current publication:
1. Select from the Pages context toolbar.
2. For a Regular/Booklet Publication, you can select a pre-defined
paper size, printer-derived paper size, or enter custom values for page
Width and Height, as well as setting the orientation (Portrait or
Landscape). For booklets only, select a type from the Booklet drop-
down menu, which page to start on (left/right), and if you require
Facing pages (including Dual master pages).
3. For other publication types, you can select the publication types:
Small Publications (for example, business cards, labels, etc.), Large
Publications (banners or posters), or Folded Publications (cards) .
• For Small publications, either enable Paper, then create a custom
paper size, or for creating Labels, enable the radio button and
pick an Avery label code which matches your labels.
• For Large and Folded publications, choose a pre-defined option
from the list (use the preview) or to define a custom publication
based on the selected option, click the Create Custom button.
Add additional custom settings if necessary.
4. Click OK to accept the new dimensions. The updated settings will be
applied to the current publication.
For regular/booklet publications, you can also adopt printer-derived paper sizes
that are supported by your desktop or network printer. These paper sizes are
shown in the Page Setup dialog and will be different depending on which
printer is currently chosen in the Print dialog.
On the Pages context toolbar, these page sizes are indicated by
the suffix "(From printer)" in the Paper size drop-down menu.
30 Working with Pages
Facing pages
You can set up your regular publication or booklet so that the PagePlus window
displays pages either singly or in pairs—as two facing pages side by side. You'll
need facing pages if you're creating a publication where you need to see both the
left-hand (verso) and right-hand (recto) pages, or one that employs double-page
spreads where a headline or other element needs to run from the left-hand page
to the right-hand page.
If you set up a publication to use facing pages, you can specify either a single or
dual master page. A single master page is (as the name implies) a single page; a
dual master page is a spread with both a left- and right-page component,
allowing you to run elements across the spread in the background of the
publication, or position left-side page numbers and right-side page numbers at
opposite corners. The Pages tab shows single master pages with a standard page
thumbnail, and dual master pages with a split-page thumbnail.
To set up facing pages:
1. In the Page Setup dialog, check Facing Pages.
2. If you plan to use background elements that span a double-page
spread, select Dual master pages. This will let you define master
pages with paired "left page" and "right page" components.
- or -
For a facing-page layout where both left and right pages initially share
the same master page, and you don't need to run background elements
across the spread, clear Dual master pages.
Because you assign master pages to individual page layers, one page at a time, it
takes two separate steps to assign a dual master page to both left and right facing
pages. For details, see Assigning master pages on p. 37.
You can assign different master pages to the left and right publication pages if
necessary. For example (see below), a left-hand "body text" page might use the
left-side component of one master page, while a right-hand page could use the
right side of a different master page.

Working with Pages 31
Understanding master pages
Master pages provide a flexible way to store background elements that you'd
like to appear on more than one page—for example a logo, background,
header/footer, or border design.
The key concept here is that a particular master page is typically shared by
multiple pages, as illustrated below. By placing a design element on a master
page and then assigning several pages to use that master page, you ensure that
all the pages incorporate that element. Of course, each individual page can have
its own "foreground" elements.

32 Working with Pages
Master pages are available in every publication, but in a simple publication you
may not need to use any master pages—or you may need only one master page.
Facing pages and multiple master pages prove valuable with longer, more
complex publications.
Using the Pages tab or Page Manager, you can quickly add or delete master
pages; for example, you could set up different master pages for "title" or
"chapter divider" pages. For details, see Adding, removing, and rearranging
pages on p. 36.
Viewing pages
Most of the PagePlus display is taken up by a page or "artwork" area and a
surrounding "pasteboard" area.
Working with Pages 33
In PagePlus, the Page area is where you put page layout guides, and of course
the text, shapes, and pictures that you want to print. The Pasteboard area is
where you generally keep any text, shapes, or pictures that are being prepared or
waiting to be positioned on the page area.
If you'd like a different pasteboard color for a different look or, more practically,
if you want to stop your off-page objects from contrasting with the existing
color, you can set this via Tools>Options>Layout>Display.
To move or copy an object between pages via the Pasteboard:
1. Drag the object from the source page onto the pasteboard (hold down
the Ctrl key to copy).
2. Use the page navigation buttons on the Hintline to jump to a target
page.
3. Drag (or Ctrl-drag to copy) the object from the pasteboard onto the
target page.
PagePlus makes it easy to see exactly what you're working on—from a wide
view of multiple pages to a close-up view of a small region. For example, you
can use the scroll bars at the right and bottom of the main window to move the
page and pasteboard with respect to the main window. If you're using a wheel
mouse, you can scroll vertically by rotating the wheel, or horizontally by Shift-
scrolling.
Magnifying pages
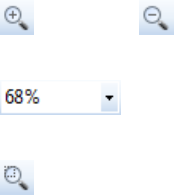
For magnification options, the View toolbar provides the:
Zoom In and Zoom Out tools so you can inspect and/or edit the
page at different levels of detail.
Zoom Percent option to set a level of magnification
(expressed as a percentage).
Zoom Tool to zoom into an area defined by a drawn marquee
selection.

34 Working with Pages
Pan Tool for moving the page area by dragging.
Actual size option for viewing the page at its true size (100%).
Zoom to selection option to focus on a selected area.
Page Width option to fit to the page's width.
Full Page option to fit the page into your current window.
Multi-page option to view multiples pages simultaneously (set page
number by dragging a page array from the flyout menu).
Switching view modes
You can switch between different view modes, which offer single or multiple
pages to view:
• Normal view, which displays one page at a time.
• Multi-page view, used for inspecting long documents, displays a
number of pages according to a configurable page array (e.g., a 3x1
grid).
In Normal and Multi-page view, the pasteboard is shared by all pages. In
Multipage view, it's also especially easy to move or copy objects between pages
using drag-and-drop and set the number of pages displayed.
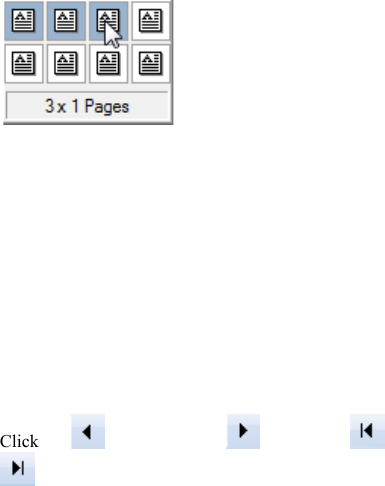
To view multiple pages (in Multi-page mode):
1. Click the Multi-page flyout on the View toolbar. An array
selector appears.
2. Click and drag to choose an array within the selector, for example 2x4
Pages or 3x1 Pages (as shown). To expand the number of choices,
drag down and to the right. Click Normal View if you change your
mind.
Working with Pages 35
The publication appears in Multi-page mode with the specified page array in
view.
To switch between views:
• Choose between Normal or Multi-page from the View menu.
Navigating pages
To switch between pages:
• Click the Previous Page, Next Page, First Page or
Last Page button on the Hintline.
- or -
On the Studio's Pages tab, double-click the page's thumbnail for the
page (or master page) you want to view. The lower Pages window of
the tab displays normal pages, while the expandable Master Pages
window shows only master pages.

36 Working with Pages
Adding, removing, and rearranging pages
Use the Pages tab to
quickly rearrange
standard pages using
drag-and-drop, add/delete
standard or master pages,
or assign master pages to
standard pages. The tab
displays master pages in
the upper Master Pages
window (shown
collapsed) and standard
publication pages in the
lower Pages window.
The Page Manager button provides additional options, such as duplicating
a particular page, assigning a specific master page to a layer, or adding/deleting
multiple pages.
To add a single page:
1. On the Pages tab, click once to select a page in the Pages window.
Note: The thumbnail that's shown as "selected" is independent of the
page you're currently working on. To work on a particular page,
double-click its thumbnail.
2. Click Add to add a page (or master page) before the one selected
in the window.
- or -
To add a new page at the end of the publication, deselect all pages by
clicking in the neutral-colored region of the lower window, then click
the Add button.

Working with Pages 37
To add master pages:
For master pages, the above procedure applies but within the Master Pages
window. The only exception is that you cannot create a new master page based
on a design template's pages (no dialog opens).
To delete a single page/master page:
1. On the Pages tab, select the page (or master page) to delete on the
appropriate window by clicking its thumbnail.
2. Click the Remove button.
To rearrange pages:
• On the Pages tab, in the lower Pages window, drag a page thumbnail
to a new location in the page sequence.
Assigning master pages
If you're only using one master page it is assigned to any newly created page by
default. However, if you're using multiple master pages you can assign a specific
master page to any standard page.

38 Working with Pages
To assign a master page:
From the Page tab's expanded
Master Pages window, drag a master
page onto a target standard page in
the lower window.
If the page has more than one layer,
you can specify the layer to which
you want to assign the master page.
Alternatively, use the Master
Page Manager (use the Set tab) in
the Pages tab.
Working with layers
Each new page or master page consists of a single layer. One layer may be
enough to accommodate the elements of a particular layout, but you can create
additional layers as needed. On each layer, objects such as text frames and
pictures are stacked in the order you create them, from back to front, with each
new object in front of the others. Layers themselves are stacked in a similar way,
and of course you can juggle the order of objects and layers as needed.
Layers are useful when you're working on a complex design where it makes
sense to separate one cluster of objects from another. You can work on one layer
at a time without worrying about affecting elements on a different layer.
Once you've displayed a page, you can normally edit any object on it—
regardless of which layer the object is on—simply by clicking the object.

Working with Pages 39
Each layer is situated along with
other layers (if present) within a
stack on the Layers tab. The
uppermost layer is applied over
any lower layer on the page.
Layer 1 and Layer 2 above could represent the following:
In order to create new objects on a particular layer, you'll need to "activate"
(switch to) that layer in the Layers tab.

40 Working with Pages
To activate a particular layer:
• Click at the beginning of a layer entry to activate that layer. You'll see
the layer arrow jump to the now activated layer (Layer 1 in the
Layers tab example above is currently active).
Don't confuse this with simply selecting a layer (Layer 2 in the example is
selected, but not activated), which is used to manage the layer itself (e.g., to
move it, preview it, view/change layer options, etc.).
To select a particular layer:
• Click (or right-click) a layer name. The layer entry then possesses a
blue background.
Right-clicking a layer name displays a menu of layer-related
actions, as well as Options for that particular layer.
Adding, removing, and rearranging layers
When you add a new page or master page to the publication, you can specify
whether to copy the layers and/or objects from a particular source page. Once
you've created a page, it's easy to add, delete, move, or merge layers as needed.
Moving a layer will place its objects in front or in back of those on other layers.
To add a new layer to the current page or master page:
1. In the Layers tab, click the Insert new layer button.
2. You'll be prompted to give the new layer a name and set its properties.
When you've made your selections, click OK.
To delete a layer:
• In the Layers tab, select the layer's name and click the Delete
selected layer(s) button.
Using the tab's buttons, you can move layers up or down in the
stacking order to place their objects in front or behind those on other layers. You

Working with Pages 41
can also move objects to specific layers, and merge and preview layers. (See
online Help.)
Selecting objects on layers
Once you've displayed a page or master page, you can normally select and then
edit any object on it—regardless of which layer the object is on—simply by
clicking the object. Alternatively, you can limit object selection and editing to
objects on a specific active layer.
To edit only objects on the active layer:
• In the Layers tab, select the chosen layer (the mark should
show next to the active layer) and uncheck Edit all layers.
To select all objects on a particular layer:
• In the Layers tab, right-click the chosen layer and choose Select All
Objects.
Normally the active layer stays the same regardless of which object you select.
For ease in identifying which layer a given object resides on, the object's
selection handles will be colored according to the layer it resides on; the layer
color is shown in the Layers tab (see Layer names and properties on p. 43) and
is configurable.
Layers and master pages
Master pages are special "background" pages that can be shared by more than
one regular page. They are assigned to each layer of a regular page rather than
to the page as a whole—so if a page has multiple layers it can also employ
multiple master pages! For example, one master page might include background

42 Working with Pages
text elements, while another included background graphics. By assigning the
two master pages to separate layers you could achieve a unified design while
keeping the elements separate. Page layers can each take a master page, but
master page layers cannot.
You can also set any layer to use no master page. Commonly, the first layer uses
a master page while subsequent layers use no master page, but there's no hard
and fast rule. You can assign the master page either when you first create the
layer, or subsequently, as the layout evolves.
Assigning master pages to layers
Each layer you add to a regular page can use its own master page. If your
publication uses more than one master page, you can reassign specific master
pages to specific page layers at any time.
To assign a master page to a page layer:
1. In the Layers tab, double-click in the Master Page(s) column of
the chosen page layer.
2. In the Select Master Page dialog, select the normal page and master
page from the displayed drop-down menus. The master page letter
(e.g., A, B, C, etc.) is shown on the chosen layer when assigned.
Master pages, like regular pages, can have more than one layer. Layers on
master pages work almost exactly like those on regular pages. The key
difference is that master page layers cannot themselves take a master page;
master pages can only be assigned to layers on regular pages.

Working with Pages 43
When you add a new master page to the publication, you have the option of
copying the layers and/or objects from an existing master page. If you choose
not to copy existing layers, the new master page starts out with one layer. You
can always add more as described above.
To switch to a master page from a particular layer:
• From the Layers tab, right-click a particular layer's name and choose
Go to Master Page.
Layer names and properties
The Layers tab lets you rename layers and set a variety of properties for one or
more layers.
To rename the layer:
• Click Layer Options, then edit the Name field.
To set layer properties:
1. Display the Layers tab.
2. Select desired settings for the selected layer.
• Click in the Master Page(s) column to optionally
assign a master page to the layer.
• Check the box in the Visible column to show the layer
and any objects on it; uncheck to hide the layer.
• Check the box in the Master Page(s) visible column to
show the layer's master page; uncheck to hide it.
• Check the Printable column to include the layer in
page printouts; uncheck to exclude it.

44 Working with Pages
• Check the box in the Locked column to prevent objects
on the layer from being selected/edited; uncheck to allow
editing.
• To set the Selection handle color, click the color selection
button and choose a color from the palette (click More
Colors... for a wider choice). This helps identify which
objects belong to which layer.
Setting guides
Layout guides are visual guide lines that help you position layout elements.
They can include page margins, row and column guides, bleed area guides,
and ruler guides.
Page margin settings are fundamental to your layout,
and usually are among the first choices you'll make after
starting a publication from scratch. The page margins
are shown as a blue box which is actually four guide
lines—for top, bottom, left, and right—indicating the
underlying page margin settings. If you like, you can set
the margins to match your current printer settings.
You also have the option of setting up row and column
guides as an underlying layout aid. PagePlus represents
rows and columns on the page area with dashed blue
guide lines. Unlike the dashed gray frame margins and
columns, row and column guides don't control where
frame text flows. Rather, they serve as visual aids that
help you match the frame layout to the desired column
layout.
Bleed area guides assist you in positioning "bleed"
elements that you want to run to the edge of a trimmed
page. To allow for inaccuracies in the trimming process
in professional printing, it's a good idea to extend these
elements beyond the "trim edge"—the dimensions
defined by your Page Setup. With bleed guides switched
on, the page border expands by a distance you specify,
and the trim edge is shown with dashed lines and little
"scissors" symbols. Note that these guide lines are just a

Working with Pages 45
visual aid; only the Bleed limit setting in the Print dialog
extends the actual output page size.
Ruler guides are free-floating lines that you set by
clicking and dragging from the rulers. They are "sticky"
so that objects can snap to them, then be moved
collectively with guide movement.
Defining layout guides
To define layout guides:
• Click on the Page context toolbar, Layout
Guides... from the File menu, or right-click on a blank part of the
page and choose Layout Guides. Then in the Layout Guides dialog,
use the Margins tab to set guide lines for page margins, rows and
columns, and bleed areas.
• In the Margin Guides section, you can set the left, right, top, and
bottom page margins individually, or click the From Printer
button to derive the page margin settings from the current printer
settings. The dialog also provides options for Balanced margins
(left matching right, top matching bottom) or for Mirrored
margins on facing pages where the "left" margin setting becomes
the "inside," and the "right" margin becomes the "outside."
Remember to set up your margins so that you leave enough
room for any intended header or footer.
• Use the Row and Column Guides section to define guides for
rows and columns. If you want rows or columns of uneven width,
first place them at fixed intervals, then drag to reposition them as
required.
• Use Bleed area guides to specify the extra margin you want to
allow around the original Page Setup dimensions or "trim area."
Note that if the setting is zero or you have View>Bleed Area
Guides unchecked, you won't see the bleed area displayed.

46 Working with Pages
• For ruler guides, use the Guides tab to precisely create, edit or
delete ruler guides, or more commonly, just drag the guides from
the rulers.
To show or hide guides:
• On the View menu, check or uncheck a guide option.
Creating ruler guides
PagePlus lets you to set up horizontal and vertical ruler guides—non-printing
lines you can use to align headlines, pictures, and other layout elements.
Guides are by default "sticky" so that stuck objects can be dragged around the
page by their ruler guide—a great way to move previously aligned objects in
bulk and simultaneously.
• To create a ruler guide, click on a ruler, hold down your mouse button,
then drag onto your page. A ruler guide line appears parallel to the
ruler (Alt-drag to create the guide at 90 degrees to the ruler).
• To move a guide, drag it.
• To remove a guide, drag and drop it anywhere outside the page area.
• For precise ruler guide placement, check Ruler marks in
Tools>Options>Layout to snap guides to ruler marks.
• To unstick a selected object, click one of two small red triangular
markers shown at the point where the object is attached to the guide.
You'll see a link cursor ( ) as you hover over the sticky guide
marker.

Working with Pages 47
Click red marker to make non-
sticky.
Markers become non-sticky and
change to black; object and guide are
unstuck and either can then be moved.
• To turn sticky guides on and off, check/uncheck Sticky Guides from
the Arrange menu (or the equivalent from Tools>Options>Layout).
Previously stuck objects will remain sticky even after sticky guides are
switched off—you'll have to make them non-sticky manually.
Using the rulers and dot grid
The PagePlus rulers mimic the paste-up artist's T-square, and serve several
purposes:
• To act as a measuring tool.
• To create ruler guides for aligning and snapping.
• To set and display tab stops (see p. 111).
• To set and display paragraph indents (see p. 110).
Ruler units
To select the basic measurement unit used by the rulers:
• Right-click the Ruler Intersection and set the measurement unit
from the flyout.

48 Working with Pages
Adjusting rulers
By default, the horizontal ruler lies along the top of the PagePlus window and
the vertical ruler along the left edge. The default ruler intersection is the top-
left corner of the pasteboard area. The default zero point (marked as 0 on each
ruler) is the top-left corner of the page area. (Even if you have set up bleed area
guides and the screen shows an oversize page, the zero point stays in the same
place, i.e. the top-left corner of the trimmed page.)
To define a new zero point:
• Drag the tab marker on the ruler intersection to a new zero point on
the page or pasteboard. (Be sure to click only the triangular marker!)
To move the rulers:
• With the Shift key down, drag the tab marker on the ruler intersection.
The zero point remains unchanged.
• Double-click on the ruler intersection to make the rulers and zero
point jump to the top left-hand corner of the currently selected object.
This comes in handy for measuring page objects.
To restore the original ruler position and zero point:
• Double-click the tab marker on the ruler intersection.

Working with Pages 49
To lock the rulers and prevent them from being moved:
• Choose Tools>Options... and select the Layout>Rulers page, then
check Lock Rulers.
Rulers as a measuring tool
The most obvious role for rulers is as a measuring tool. As you move the mouse
pointer, small lines along each ruler display the current horizontal and vertical
cursor position. When you click to select an object, shaded ruler regions indicate
the object's left/right and top/bottom edges on the horizontal and vertical rulers,
respectively. Each region has a zero point relative to the object's upper left
corner, so you can see the object's dimensions at a glance.
Using the dot grid
The dot grid is a matrix of dots based on ruler units, covering the page and
pasteboard areas. Like ruler guides, it's handy for both visual alignment and
snapping.
• To turn the dot grid on or off, click Dot Grid on the View menu.
You can also set the grid spacing, style, color, and positioning in the dialog (see
PagePlus help).

50 Working with Pages
Using headers and footers
Headers and footers are layout elements that are positioned at the top and
bottom of your master page(s), and are repeated on every page of your
publication. The Headers and Footers Wizard lets you create these elements
easily.
Remember to set up your margins so that you leave enough
room for any intended header or footer.
To create headers and/or footers:
• On the Insert menu, choose Headers and Footers... and follow the
Wizard instructions. The header and/or footer is automatically applied
to the master page (and not the current page).
To edit existing headers and footers:
• On the Insert menu, choose Headers and Footers.... In the Headers
and Footers Wizard, select Edit header, Leave header as it is, or
Delete header and then complete the Wizard instructions. Carry out
the equivalent operation for your footer if needed.
Using page numbering
Page number fields automatically display the current page number. Typically,
these fields are added automatically to the master page (so they appear on every
page) with the Header and Footers Wizard, but you can insert a page number
field anywhere in your text.
You can change the style of page numbers, the page on which numbering
begins, and number continuation across chapters (all via Page Number Format
on the Format menu).
Working with Pages 51
To define a header or footer that includes a page number field:
1. Create a header or footer on the master page by choosing Headers
and Footers... from the Insert menu.
2. In the wizard, press the Page Number button to insert a page number
field (as a prefix or suffix) along with any optional header/footer text.
3. Complete the wizard.
To insert a page number field:
1. Switch to the master page (if desired) by clicking the Current Page
box on the Hintline.
2. With the Artistic Text Tool selected (Tools toolbar), click for an
insertion point to place the page number.
3. On the Insert menu, choose Page Number.
52 Working with Pages

Working with
Objects
4
54 Working with Objects

Working with Objects 55
Selecting an object
Before you can change any object, you need to select it using one of these tools
from the Tools toolbar:
Pointer Tool
Click to use the Pointer Tool to select, move, copy, resize or rotate
objects.
Rotate Tool
Click to use the Rotate Tool to rotate an object around a rotation origin
(normally centered). See Rotating an object on p. 68.
To select an object:
• Click on the object using one of the tools shown above.
The above example shows an unselected and selected object (showing
Move and Group buttons).
If objects overlap, Alt-click until the desired object is selected.
When selecting a text object with the Pointer Tool:
• Clicking on a text object (artistic text or text frame) with the Pointer
Tool selects the object and also positions the blinking text selection
cursor within the object's text. In this mode, you can edit the text (see
p. 108).
56 Working with Objects
• Double-, triple-, or quadruple-click to select a word, paragraph, or all
text.
• To select only the text frame, click the frame's bounding box.
• Clicking on a group selects the grouped object. Ctrl-click to select an
individual object within a group.
Selecting multiple objects
Selecting more than one object at a time (creating a multiple selection) lets you:
• Position or resize all the objects at the same time.
• Create a group object from the multiple selection, which can then be
treated as a single object, with the option of restoring the individual
objects later. See Creating groups on p. 62.

Working with Objects 57
To create a multiple selection:
Drag a "marquee" box around the
objects you want to select.
Alternatively, hold down the
Shift key and click each object in
turn.
To add or remove an object from a multiple selection:
• Hold down the Shift key and click the object to be added or removed.
To deselect all objects in a multiple selection:
• Click in a blank area of the page.
To select all objects on the page (or master page):
• Choose Select>Select All from the Edit menu (or press Ctrl+A).
• Display the Layers tab, choose the layer name and right-click to Select
All Objects.

58 Working with Objects
Copying, pasting, and replicating objects
Besides using the Windows Clipboard to copy and paste objects, you can
duplicate objects easily using drag-and-drop, and replicate multiple copies of
any object in precise formations. You can also transfer the formatting of one
object to another, with the option of selecting specific attributes to be included
when formatting is pasted.
To copy an object (or multiple selection) to the Windows Clipboard:
• Click Copy on the Standard toolbar.
If you're using another Windows application, you can usually copy and paste
objects via the Clipboard.
To paste an object from the Clipboard:
• Click Paste on the Standard toolbar.
The standard Paste command inserts the object at the insertion point or (for a
separate object) at the center of the page. To insert a separate object at the same
page location as the copied item, use the Paste in Place command.
To choose between alternative Clipboard formats:
• Choose Paste Special... from the Edit menu.
To duplicate an object:
1. Select the object, then press the Ctrl key.
2. Drag the object via the Move button to a new location on the page,
then release the mouse button.
3. To constrain the position of the copy (to same horizontal or vertical),
also press and hold down the Shift key while dragging. A duplicate of
the object appears at the new location.

Working with Objects 59
Replicating objects
Duplicating an object means making just one copy at a time. The Replicate
command lets you create multiple copies in a single step, with precise control
over how the copies are arranged, either as a linear series or a grid. You can
include one or more transformations to produce an interesting array of rotated
and/or resized objects. It's great for repeating backgrounds, or for perfectly-
aligned montages of an image or object.
To replicate an object:
1. Select the object and choose Replicate... from the Edit menu. To
arrange copies in a straight line, select Create line. For an X-by-Y
grid arrangement, select Create grid.
2. Specify Line length (the number of objects including the original) in
the arrangement, or the Grid size. Note that you can use the Line
length setting to include an odd number of objects in a grid.
3. Set spacing between the objects as either an Offset (measured between
the top left corners of successive objects) or a Gap (between the
bottom right and top left corners). You can specify Horizontal and/or
Vertical spacing, and/or an angular Rotation. To set a specific
horizontal or vertical interval, check Absolute; uncheck the box to
specify the interval as a percentage of the original object's dimensions.
4. Click OK.

60 Working with Objects
The result is a multiple selection. Click its Group button if you want to
keep the separate objects linked for additional manipulations.
Pasting an object's formatting
Once you have copied an object to the Clipboard, you can use Paste Format
(Edit menu) to apply its formatting attributes to another object. Again from the
Edit menu, Paste Format Plus displays a "master control" Style Attributes
Editor dialog that lets you optionally select or deselect specific attributes to be
included when formatting is pasted. See Saving object styles on p. 198 for more
dialog information.
Snapping
The snapping feature simplifies placement and alignment by "magnetizing"
moved or resized objects to grid dots and ruler guides. Objects can also snap to
other guides on the page such as page margins, rows, columns, and bleeds
(see p. 60), as well as the page edge, and page/margin centers (i.e., the center of
the page in relation to the page edge or page margins).
In addition, dynamic guides can be used to align and resize objects to existing
object edges and centers by snapping. Guides appear dynamically as you drag
objects.
To turn snapping on/off globally:
• Click Snapping on the Hintline (don't click the drop-down
arrow). The button has an orange color when snapping is switched on.
Once snapping is enabled, you can selectively switch on/off snapping options
(i.e., Ruler Guides, Dot Grid, etc).
To turn individual snapping controls on and off:
• Click the down arrow on the Snapping button (Hintline) and
check/uncheck a snapping option via the drop-down menu.

Working with Objects 61
Tools>Options offers the full set of snapping options for the
user. You can also control Snapping Distance, i.e. the
distance at which an object will start to snap to a dot, guide,
etc.
For precise ruler guide placement, check Ruler Marks in
Tools>Options to snap guides to ruler marks.
Snapping with dynamic guides
For accurate object alignment and resizing, you can use dynamic guides instead
of setting ruler guides manually or performing selection, transform, and
alignment operations. These red-colored guides are shown between the vertices
of the last three selected placed page objects and the manipulated object and
"visually suggest" possible snapping options such as snap to the placed object's
left, right, center, top, right, bottom, or to the page center. You can include
objects to snap to by dragging over objects.
For alignment For resizing
To switch on dynamic guides:
• Click the down arrow on the Snapping button (Hintline) and
click Dynamic Guides on the drop-down menu.
62 Working with Objects
To snap to page centers as well, you must additionally check
Page center in Tools>Options>Layout>Snapping.
Creating groups
You can easily turn a multiple selection into a group object. When objects are
grouped, you can position, resize, or rotate the objects all at the same time.
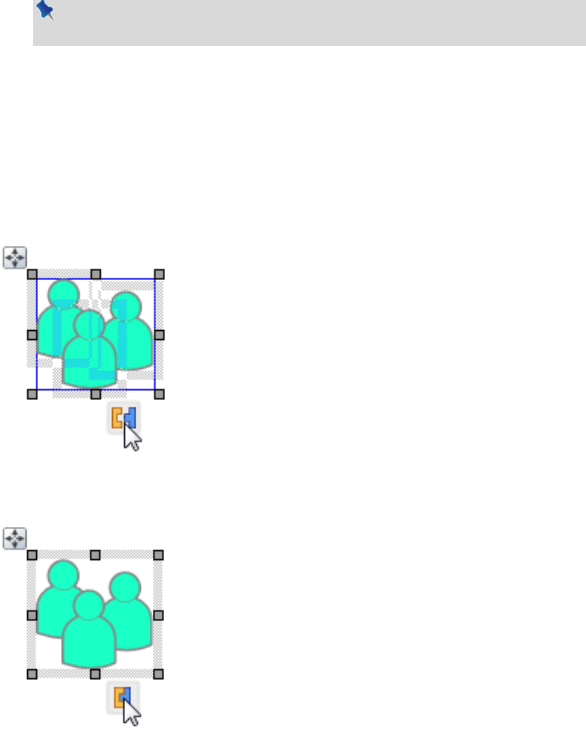
To create a group from a multiple selection:
• Click the Click to Group button.
To ungroup:
• Click the Click to Ungroup button.
The group turns back to a multiple
selection
Simply clicking on any member of a group selects the group object. In general,
any operation you carry out on a selected group affects each member of the
group. However, the objects that comprise a group are intact, and you can also
select and edit an individual object within a group.
To select an individual object within a group:
• Ctrl-click the object.

Working with Objects 63
Moving objects
To move an object (including a multiple selection):
• Drag the selected object by using its Move button. Once you see a
move cursor you can begin dragging.
To set exact horizontal and vertical positions, use the Transform
tab.
To constrain the movement of an object to horizontal or vertical:
• Select the object and use the keyboard arrows (up, down, left, right).
Resizing objects
PagePlus provides several methods of resizing single or grouped objects. Click-
and-drag is the simplest—watch the Hintline for context-sensitive tips and
shortcuts!
To resize an object (in general):
1. Select the object.
2. Click one of the selection handles and drag it to a new position while
holding down the left mouse button.

64 Working with Objects
Dragging from an edge handle resizes in one dimension, by moving that edge.
Dragging from a corner handle resizes in two dimensions, by moving two edges.
Use a ruler guide and center
snapping to scale an object in two
directions simultaneously. Center
snapping involves snapping to the
object edge, then dragging from a
corner (or edge) handle.
Text in frames and tables doesn't change size when the
container object is resized.
To set two or more objects to the same horizontal or vertical
size as the last selected object, you can use Arrange>Size
Objects....
You can also make fine resizing adjustments from the
Transform tab.
To resize freely:
• Drag from a corner (or line end) handle.

Working with Objects 65
To constrain a shape, frame object, or table object when resizing:
• Hold the Shift key down and drag from a corner (or line end) handle.
For shapes, this has the effect of keeping a square as a square, a circle as a
circle, etc.
For pictures, dimensions are constrained on dragging a corner
handle. Use Shift-drag to resize a picture freely.
Ordering objects
Each new page or master page consists of a single layer. One layer may be
enough to accommodate the elements of a particular layout, but you can create
additional layers as needed. On each layer, objects such as text frames and
pictures are stacked in the order you create them, from back to front, with each
new object in front of the others. You can change the stacking order, which
affects how objects appear on the page.
To shift the selected object's position to the bottom or top of the
stack:
• Click Send to Back or Bring to Front on the Arrange
toolbar, respectively.
To shift the object's position one step toward the back or front:
• Right-click on the object and choose Arrange>Back One or
>Forward One, respectively.
Aligning and distributing objects
Alignment involves taking a group of selected objects and aligning them all in
one operation by their top, bottom, left or right edges. You can also distribute
objects, so that your objects (as a multiple selection) are spread evenly
(optionally at spaced intervals).
Alignment or distribution can occur between the endmost objects on your page
(current selection), page margins, or the page edge.
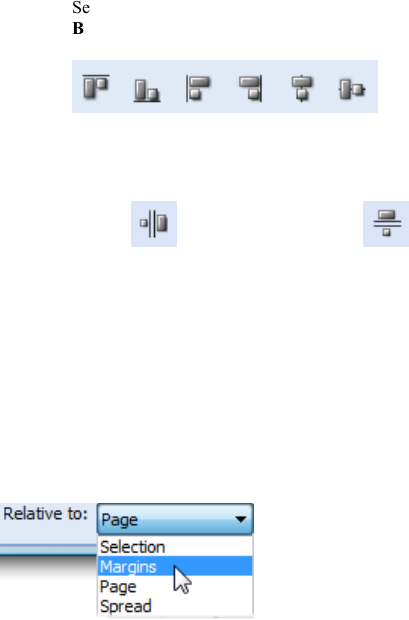
66 Working with Objects
To align the edges of two or more objects in a selection:
1. Using the Pointer Tool, Shift-click on all the objects you want to
align, or draw a marquee box around them, to create a multiple
selection.
2. Select the Align tab.
3. Select an option for vertical and/or horizontal alignment. Choose Top,
Bottom, Left, Right, Center Horizontally or Center Vertically, i.e.
To distribute two or more objects across a selection:
• Choose Space Evenly Across or Space Evenly Down to
spread selected objects uniformly between endmost objects in the
current selection (horizontally or vertically, respectively) or by a set
measurement (choose Spaced and set a value in any measurement
unit).
Rather than work within the current selection area you can align or distribute to
page margins (if set) or page edge.
To align/distribute objects to page margins or edges:
• Select from the Relative to
drop-down menu to align
the selected object(s) within
the page Margins, Page
edges, or Spread (for facing
pages) then choose an align
or distribute button
described above.
Working with Objects 67
Exporting as a picture
Exporting as a picture lets you convert all the objects on the page, or just the
currently selected object(s), to an image file, using a file format you specify.
To export as a picture:
1. (If exporting objects, not the whole page) Select the object or Shift-
click (or drag a marquee) to select multiple objects.
2. Choose Export As Picture... from the File menu.
3. In the Save as type drop-down list, select a image format, e.g. Serif
MetaFile Format (*.smf).
4. Specify a folder and file name for the picture.
5. To export just selected object(s), check Selected object(s). To export
the whole page, uncheck this box.
6. To choose from export options such as resolution, color, and
transparency, check Show Filter Options.
7. Click Save. You'll see export options, if available and requested, for
the particular export filter in use.
Exporting Serif Metafiles
PagePlus lets you export pictures in Serif Metafile Format (.smf). This
proprietary format, an improvement on the Windows Metafile Format (.wmf)
due to improved text, line and fill handling, is especially useful for interworking
between Serif products, i.e. you may want to utilize PagePlus objects in another
Serif application to save time and effort. The object is converted to a graphic
and becomes non-editable, but the object's original appearance will be honored.

68 Working with Objects
Rotating an object
You can rotate single and multiple objects, including pictures, text objects, and
groups using the Rotate Tool.
To rotate an object:
1. Select the Rotate Tool on the Tools toolbar's Selection flyout.
2. Click to select the object, hover over one of its handles until you see
the rotate cursor (below).
3. Hold the mouse button down and drag the cursor in the direction in
which you want to rotate the object, then release (use the Shift key for
15° rotation intervals).
The Pointer Tool can also be used to rotate objects in the same way (with the
cursor).
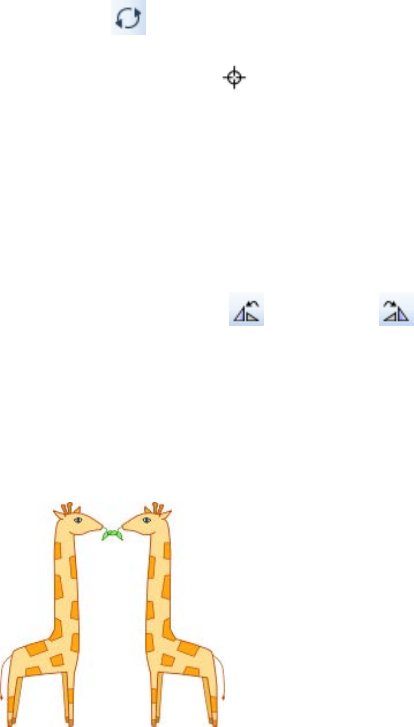
Working with Objects 69
To undo rotation (restore the original orientation):
• Double-click the object.
• To restore the rotated position, double-click again.
To change the rotation origin:
1. Select the Rotate Tool and click to select the object.
2. Move the rotation origin away from its original position in the
center of the object to any position on the page. The origin can also be
moved to be outside the object—ideal for rotating grouped objects
around a central point.
3. Drag the rotate pointer to a new rotation angle—the object will rotate
about the new pivot.
To rotate an object 90 degrees left or right:
• Select the object and click Rotate Left or Rotate Right on
the Arrange toolbar.
Flipping an object
You can flip objects horizontally (left to right; top and bottom stay the same) or
vertically (top to bottom; left and right stay the same).

70 Working with Objects
To flip an object horizontally/vertically:
• Select the object and choose Flip Horizontal or Flip Vertical from
the Arrange menu.
Cropping and combining objects
Cropping means masking (hiding) parts of an object, for example to improve
composition or create a special effect. The underlying object remains intact.
Two types of cropping are possible—square cropping or irregular cropping.
square crop
irregular crop
Combining starts with more than one object, but creates a special composite
object with one or more "holes" on the inside where the component objects' fills
overlapped one another—useful for creating mask or stencil effects.
To crop using the object's original outline:
1. Select the object, then select the Square Crop Tool on the
Attributes toolbar's Crop flyout.
2. Drag one of its edge or corner handles inward for unconstrained
cropping. Press the Shift key while dragging for constrained cropping
(aspect ratio is maintained).
To scale the object within the crop outline, Ctrl-drag either
upwards or downwards.

Working with Objects 71
To crop by modifying the object's outline:
• Select the object and select the Irregular Crop Tool on the
Attributes toolbar's Crop flyout. The Curve context toolbar appears,
which lets you control the displayed nodes and connecting segments
that define the object's crop outline. See Editing lines on p. 179.
• To move a node (control point) where you see the cursor,
drag the node.
• To move a line segment (between two nodes) where you
see the cursor, drag the segment.
To position a cropped object within its crop outline:
• With either crop tool selected, click the object and drag its center
(when you see the hand cursor).
To feather the crop outline:
• With either crop tool selected, click the object.
• From the Crop context toolbar, set a Feather value using the up/down
arrows, slider or by direct input. Feathering is applied outside the crop
outline by the set point size.
To uncrop (restore full visibility):
• Click the Remove Crop button on the Attributes toolbar's Crop
flyout.
Cropping one shape to another
The Crop to Shape command works with exactly two objects selected. Either or
both of these may be a group object. The lower object (the one behind the other)
gets clipped to the outline of the upper object, leaving a shape equivalent to the
overlapping region.
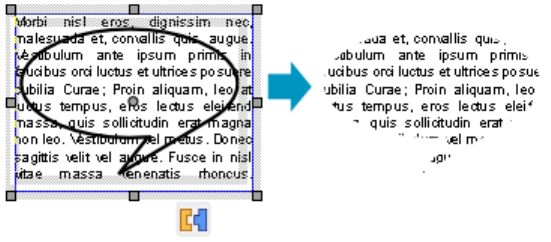
72 Working with Objects
To crop one shape to another:
1. Place the "clipping" object in front of the object to be cropped, using
the Arrange menu and/or Arrange toolbar as needed. In the
illustration above, a QuickShape is in front of a text frame.
2. With both objects selected (or grouped), choose Crop to Shape from
the Tools menu.
You can restore an object cropped in this way to its original shape, but the upper
"cropping" object is permanently deleted (use Undo to recover it if necessary).
Combining lines and shapes
Combining curves is a way of creating a composite object from two or more
lines or drawn shapes. As with cropping to a shape, the object in front clips the
object(s) behind, in this case leaving one or more "holes" where the component
objects overlapped. As with grouping, you can apply formatting (such as line or
fill) to the combined object and continue to edit individual nodes and segments
with the Pointer Tool. Unlike those other methods, a combined object
permanently takes the line and fill properties of the front object. Combining is
reversible, but the component objects keep the line and fill properties of the
combined object.
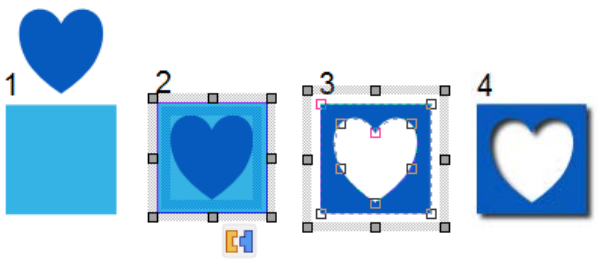
Working with Objects 73
Combining is a quick way to create a mask or stencil cutout:
QuickShapes Convert to
Curves
Combine Curves Drop Shadow
Added
To combine two or more selected lines or drawn shapes:
1. Draw your two lines or QuickShapes.
2. Place the "clipping" object in front of the object to be cut out.
3. Select each object and choose Tools>Convert To>Curves for both.
4. Select both objects.
5. Choose Combine Curves from the Arrange menu.
To restore the original shapes from a combined object:
• Select it and choose Split Curves from the Arrange menu.
Anchoring objects
If you're working with text frames you'll probably want to add supporting
shapes, pictures, tables, or even nested text frames within your publication's text
(artistic or frame text). Such objects can be positioned either in relation to a
position in your text (or other page element) or be simply placed inline in your
text.

74 Working with Objects
In PagePlus, this positioning is controlled by anchoring an object using
different positioning options.
• Float with text. The object is positioned horizontally and vertically
relative to an anchor point. This option is ideal for pictures, pulled
quotes, etc.
• Position inline as character. The anchored object is placed as a
character in the text and aligned in relation to the text that surrounds it.
The anchored object flows with the text as before.
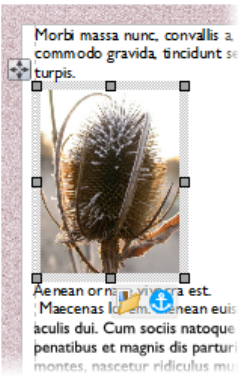
Working with Objects 75
• Detach from text. The anchored object is disconnected from its
anchor point, leaving a normal unanchored object.
PagePlus objects can be anchored to anywhere in your publication text, but the
floated object can be positioned in relation to indented text, column, frame, page
margin guides, the page itself, or most typically the anchor point in a text frame.
For text frames, when the text reflows, the anchor point (and therefore anchored
object) reflows with the text. This allows supporting anchored objects to always
stay with supporting text as more text is added to the frame.
To create an anchored object:
1. Position your unanchored object on the page.
2. Select Anchor Object... from the Arrange menu.
3. From the dialog, choose a positioning option:
Either, for a floating object:
1. Enable Float with text. This is the default positioning option.

76 Working with Objects
2. Specify a Horizontal (e.g., Inside, Left-Aligned) and/or Vertical
position (e.g., Inside, Top) in relation to different page elements (e.g.,
anchor point, frame, etc.). Check Mirror facing pages if you're using
facing pages and you want the object to automatically mirror its
position in relation to anchoring text moved onto a new page.
3. (Optional) Set an Offset X by or Offset Y by to further offset the
object horizontally or vertically from the Horizontal and Vertical
position in absolute units (centimeters or inches). Alternatively, check
Relative to offset by a percentage of the object size.
4. Check Keep within bounds to stop the anchored object from being
placed outside of the text frame. The object will move but only to the
frame edge or page margin guides. When unchecked there is no
restriction on object placement.
5. Click OK. The Anchor point appears and your object is now an
anchoring object (showing an anchor icon).
Or, for an inline object:
1. Enable Position inline as character.
2. To set the object's vertical alignment with respect to adjacent text,
select an Align with text option. Text will not flow around the
anchored object.
3. (Optional) Enter a Offset Y by value to set the percentage to which
the object will be vertically offset in relation to its height.
4. (Optional) Check Scale to to scale the object to a percentage of the
adjacent text point size. This keeps the same relative size if the text
size changes. 100% will scale precisely to current point size.
4. (Optional) Check Use these settings when pasting to update floating
and inline anchor defaults. Any subsequent object pasting will adopt
the anchor settings saved when the option was checked.
5. (Optional) For control of possible object overlap, select an option
from the If objects overlaps drop-down list.

Working with Objects 77
• Allow the overlap. The overlap is left as is.
• Pack into lines means the second object will be placed
beside the first object if there is room, or below it if not.
• Line up left to right/Line up right to left means the second
object will be placed to the right or the left of the first object,
respectively.
• Stack top to bottom/Stack bottom to top means the second
object will be placed below or above the first object,
respectively.
6. Click OK. The object appears inline with text, and shows an
Anchor Properties icon.
Objects inserted into text frames will automatically be anchored using "Float
with text" default settings. However, the anchored object can be dragged away
from the anchor point as an alternative method for creating an anchored object.
To view anchor properties:
1. Select an anchored object.
2. Click Anchor Properties shown under the object.
The Anchored Object Properties dialog is displayed. The options differ
depending on which of the three positioning options is enabled.
If you'd like to change the position of an anchor point you can drag it anywhere
else in your text frame. Dragging to an area of no text will disconnect your
anchored object. You can also disconnect the anchor point via Anchor Properties
dialog.
To disconnect an anchored object:
• Enable Detach from text.
The Anchor Properties button and anchor point both disappear.

78 Working with Objects
Notes
• Anchored object have all the same properties of unanchored objects;
you can modify them whilst anchored.
• Frame text can wrap around floating anchored objects, as described in
Wrapping text (p. 126). Inline anchored objects do not allow text
wrapping.
Joining object outlines
PagePlus includes some powerful tools to carve new shapes out of old
overlapping shapes. With add, subtract, intersect, or exclude commands you
actually produce a permanent new object (with a new outline) out of any
selected objects. The joined object can be further edited by adjusting nodes in
the new shape.
To join outlines (selected via marquee selection):
• Select an outlines option from the Join Outlines flyout on the
Arrange toolbar.
Add Creates one new object that’s the
sum of any two selected objects.

Working with Objects 79
Subtract
Discards the overlap between the top
and bottom object. The bottom
object is al
so discarded.
Useful as a quick way of truncating
shapes and pictures with another
object.
Intersect
Retains the overlap and discards the
rest.
Exclude
Merges two or more objects into a
composite object, with a clear
transparent “hole” where their
filled regions overlap.

80 Working with Objects
Applying a mesh warp envelope
Mesh warping lets you apply a Preset warp envelope to your PagePlus object
(below) or modify a flexible grid of points and lines that you can drag to deform
or distort an object and (optionally) its fill.
After applying a preset envelope from the Attributes toolbar's Warp flyout (or
context toolbar), you can use the Mesh Warp context toolbar to switch the warp
on/off, edit the mesh to match a particular object's geometry—for example,
curves that follow the facial contours in a bitmap image—for more precise
control of the warp effect. The effect is removable and doesn't permanently alter
the object.
The process of editing mesh warps and their envelopes is described in greater
detail in the PagePlus Help.

Working with Objects 81
Adding borders
A border is a repeating, decorative
element that can be set to enclose
objects, such as text frames,
pictures, and tables.
PagePlus comes with an impressive
range of categorized picture-based
border styles for you to use.
However, if you'd like to create
your own custom borders you can
import a border design as a picture,
and save it for future use.
Edge selection lets you apply the
border effect to all sides, top,
bottom, left, right, or both top and
bottom (opposite).
The Picture Frames category in the Gallery tab offers the same
set of border styles but already applied to placeholder picture
frames. (See p. 153.)
To add a border to an object:
1. Click Line/Border on the Tools toolbar's Fill flyout.
2. To define the border, select the Border tab, then select a border preset
from the Style drop-down list. You can preview each border in the
window at the right as you scroll down the open list with your
keyboard up/down arrows.
Working with Objects 83
• If Behind contents is checked, the inner half of the border
extends behind the object. If unchecked, the whole border
appears in front (the wider the border, the more it encroaches on
the filled region).
• If Scale with object is checked, both border and object change
together when you resize the object. If unchecked, the border
weight remains constant during resizing.
• If Draw center is unchecked (the default), the inside areas of a
framed picture (used to create your new border) will be left
empty, so you won't need to manually remove unwanted image
centers. When checked, the area inside a populated custom frame
is repeated.
6. Click OK when you're done.
Use the button to base your borders on your own bordered
picture design.
Once you've optimized the design of your new border, you might like to save it
for future use. The border is stored globally so you can make use of it in other
publications.
To save your custom border:
1. Click .
2. From the dialog, select a subcategory (e.g. Fun, Fabric, etc.) from the
drop-down list; alternatively, enter a new custom subcategory name in
the box.
3. From the dialog, enter your custom border name. The new border
appears in the Line and Border dialog's Style drop-down list (and also
as a categorized bordered picture frame in the Gallery tab).

84 Working with Objects
Adding logos
Logos are intended to send a
clear message to your target
audience, all within a simple
and identifiable design.
Whether you intend to
communicate a stylish,
business, fun or modern
message (opposite),
PagePlus allows you to
create impressive logos of
varying design.
Logos are great for adding
to master pages associated
with your publication.
To add a logo:
1. Select Insert Logo from the Tools toolbar's Logo flyout.
2. From the dialog, scroll the left-hand pane and select a suitable design
thumbnail; choose the blank layout in the Blank category to start from
scratch.
3. Select a logo from the left-hand pane, then pick from a choice of
designs from the right-hand pane (if a choice is available); some
designs allow customization of text.
4. To apply the publication's current color scheme to your design,
uncheck Apply color set. Alternatively, to adopt a color set
independent of your publication's current color scheme, keep Apply
color set checked and pick a color set option from the drop-down list.
5. Click Open.
6. For captioned logos, a further dialog lets you customize the design's
supporting text (company name and/or motto). Enter a new Name
(e.g., company or club name) and, optionally, a tag line (Motto) to
personalize it. Edit the text and then click OK.

Working with Objects 85
7. To insert the logo at a default size, simply click the mouse to leave a
logo placeholder (envelope).
- or -
To set the size of the logo, drag out a region and release the mouse
button.
PagePlus's Gallery tab also hosts the same selection of logos.
If you're looking to further modify your logo you can use LogoStudio, an
integrated design environment. This allows you to focus on your design without
the distractions of other objects on the page, i.e. the design is displayed in
isolation and centered on the page. Alternatively, a logo or flash can be created
from existing artistic text, shape, gallery object, picture, or grouped objects.
To edit an existing logo:
1. Click the button on the control bar under the selected logo.
LogoStudio is launched with your object(s) zoomed in to fit your
workspace.
2. Using standard PagePlus tools and tabs, customize your logo design to
your liking.
3. Click from LogoStudio's main toolbar to exit.
The modified logo is updated in its original position.
Converting objects to logos
It's just as easy to by-pass the pre-defined logos and base your custom logo on
objects already present in your publication. The logo can be converted back to
separate objects at any time by ungrouping.
To convert existing objects to a logo:
1. Select one or more objects (or a grouped object) on the page.
2. Select Edit in LogoStudio... from the Edit menu (or select via right-
click).
86 Working with Objects
3. Edit your logo design. In particular, you can use the upper Logo Text
input box to "caption" your logo (typically a company or club name),
then click the check box.
Adding flashes
In PagePlus, flashes can be created,
with each design intended to catch
the eye, especially for commercial
reasons or general attention
grabbing.
PagePlus's Gallery tab comes
complete with a host of flashes;
subcategories based on Retail,
Celebrations, Fun stuff (Shapes or
Text), and Pointers are available.
When dragging a flash design onto the page, three varieties of flash may be
encountered—those without text, with text, and those with optional layouts.
To add a flash:
1. From the Gallery tab, select the Flashes category.
2. Scroll the lower pane to preview flash subcategories; collapse
unwanted subcategories by clicking the button next to the
subcategory name (click to expand). Select a suitable flash
thumbnail from the pane.
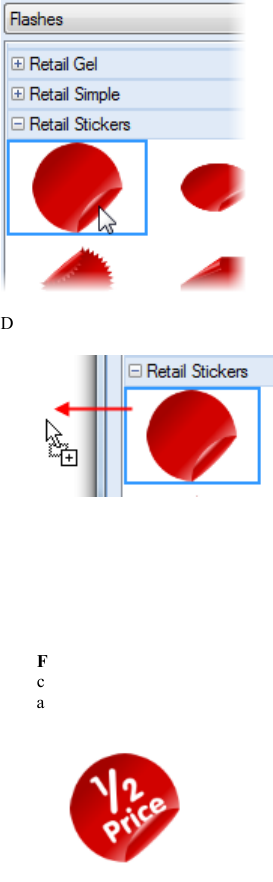
Working with Objects 87
3. Drag your chosen design to the page.
4. From the dialog, you can choose design variations, edit text and apply
colors, i.e.
• For design variations. Select a design from the Designs pane
(e.g., offering different text labels and positions).
• For text. If the selected design has supporting text, you can
customize it in the Text or Message field. Edit the text
accordingly to give your flash meaning.

88 Working with Objects
• For color: To apply the publication's current color scheme to
your design, uncheck Apply color set. Alternatively, to adopt a
color set independent of your publication's current color scheme,
keep Apply color set checked and pick a color set option from
the drop-down list.
5. Click OK.
Design variations and supporting text may not be available for
some designs.
If you're looking to further customize your flash design (or use existing page
objects) you can use LogoStudio. See Adding logos on p. 84.

Working
with Text
5

Working with Text 91
Importing text from a file
Importing text from a word-processor file is the traditional way to create text
content for Desktop Publishing layouts (but you can also create a story using
WritePlus). If you use your current word processor to create the text file for your
publication, you can import any number of files into one publication. Each file
becomes a story consisting of a self-contained section of text like a single article
in a newspaper, which resides in one or more linked text frames.
As well as the WritePlus format (.stt), a range of popular word processing and
text formats can be imported, including:
ANSI text
.txt
Microsoft Word 2007
.docx/.dotx
Microsoft Word 2000/2003
.doc/.dot
MS Works
.wps
Open Office text
.odt
Rich Text Format
.rtf
Wordperfect
.wpd
Write
.wri
For Microsoft Word formats created in any Windows operating system you don't
need to have Microsoft Word installed locally. This means you can reuse third-
party text content in PagePlus without the supporting application.
PagePlus will preserve the formatting of imported word-
processor text. However, if you're using your word processor to
create text specifically for PagePlus, you'll save time by typing
as text only, and applying formatting later in PagePlus.
To import text from a file:
1. (Optional) If using an existing empty text frame, select the frame. If
inserting text into a populated text frame, click for an insertion point
(or select a portion of text to be replaced).
92 Working with Text
2. Choose Text File... from the Insert menu.
3. From the Open dialog, locate and select the file to import.
4. Check the Retain Format box to retain the source file's formatting
styles. Uncheck the box to discard this information. In either case,
PagePlus will preserve basic character properties like italic, bold, and
underline, and paragraph properties like alignment (left, center, right).
5. Check the Ignore line wrapping box to ignore returns in the source
text—that is, only if the file has been saved with a carriage return at
the end of every line, and you want to strip off these extra returns.
Otherwise, leave the box unchecked.
6. Click Open.
7. The text will be imported into the pre-selected text object or a new
text frame. If all of the imported text cannot fit into the active text
frame you'll be prompted via dialog. You can either create extra
frames to accommodate overflow text (click Yes) or just overflow the
text into a hidden overflow area (click No).
Understanding text frames
Typically, text in PagePlus goes into text frames, which work equally well as
containers for single words, standalone paragraphs, or multipage articles or
chapter text. You can also use artistic text (see p. 103) for standalone text with
special effects, or table text (see Creating text-based tables on p. 136) for row-
and-column displays.
What's a text frame?
A text frame is effectively a mini-page, with:
• Margins and column guides to control text flow.
• Optional preceding and following frames.
• Text and optional inline images that flow through the frames.
The text in a frame is called a story.

Working with Text 93
• When you move a text frame, its story text moves with it.
• When you resize a text frame, its story text reflows to the new
dimensions.
Frames can be linked so that a single story continues from one frame to another.
But text frames can just as easily stand alone. Thus in any publication, you can
create text in a single frame, spread a story over several frames, and/or include
many independent frame sequences. By placing text frames anywhere, in any
order, you can build up newspaper or newsletter style publications with a story
flowing from one column to another (below) or even across pages.
When you select a frame you'll see its bounding box, indicated by a gray border
line plus corner and edge handles, and (if you clicked with the Pointer Tool) a
blinking insertion point in the frame's text. In this mode, you can edit the text
with the Pointer Tool. (For details, see Editing text on the page on p. 108.)
Text frames behave like other PagePlus objects—when selected, you can
manipulate them as for shapes, lines, artistic text, and tables. Here's a breakdown
of text frame capabilities.

94 Working with Text
Feature Supported
Margins and column guides
Breaks (column, page, and frame)
Resize/move frame
Crop frame
Rotate frame
Frame linking
Columns
Export as text
Line attributes
Solid fill and line color
Gradient and bitmap fill
Transparency
Borders
Warp
2D/3D Filter Effects
Instant 3D

Working with Text 95
Creating text frames
You add frames to a page as you would any other object. PagePlus supports a
wide variety of frame shapes which can be resized and morphed into new shapes
once placed on the page (just like QuickShapes; see p. 182).
To create a frame:
1. Select a standard or shaped text frame from the Text Frame
flyout on the Tools toolbar.
2. Click on the page or pasteboard to create a new frame at a default size.
- or -
Drag out to place the text frame at your chosen dimensions.
To create a frame (from a shape):
• You can also draw a shape and select Convert to>Shaped Text
Frame on the Tools menu (text is not auto-aligned).
- or -
• Type directly onto any shape to automatically create a shaped frame
(text is automatically centered vertically and horizontally). Useful for
creating objects for diagrams!
To delete a frame:
• Select the frame—click its edge until a gray border appears—and then
press the Delete key.
You can select, move, and resize text frames just like other objects. (See p. 55,
63, and 63, respectively.)
Putting text into a frame
You can put text into a frame using one of the following methods:
WritePlus story
editor: With a selected frame, click WritePlus on the
Frame context toolbar.
96 Working with Text
Importing text: Right-click on a frame and choose Insert Text File...
(shortcut Ctrl+T) to import text.
Typing into the
frame:
Select the Pointer Tool, then click for an insertion point
to type text straight into a frame, or edit existing text.
(See Editing text on the page on p. 108.)
Pasting via the
Clipboard:
At an insertion point in the text, press Ctrl+V.
Drag and drop: Select text (e.g. in a word processor file), then drag it
onto the PagePlus page.
If you drop onto a selected frame, the text is pasted
inline where the insertion point had been placed
previously. Otherwise, a new frame is created for the
text.
Frame setup and layout
The frame layout controls how text will flow in the frame. The frame can
contain multiple columns. When a frame is selected, its column margins appear
as dashed gray guide lines if set in Frame Setup. Note that unlike the page
margin and row/column guides, which serve as layout guides for placing page
elements, the frame column guides actually determine how text flows within
each frame. Text won't flow outside the column margins.
You can drag the column guides or use a dialog to adjust the top and bottom
column blinds and the left and right column margins.

Working with Text 97
To edit frame properties directly:
• Select the frame object, then drag column guide lines to adjust the
boundaries of the column.
(1)
(2)
(3)
The illustration above shows how the cursor will change when hovering over the
selected bounding box (1), after dragging inwards the column margin can be
adjusted (2), and after dragging downwards, the top margin blind can be moved
(3).

Working with Text 99
Fitting text to frames
Fitting story text precisely into a sequence of frames is part of the art of laying
out publications.
If there's too much story text to fit in a frame sequence, PagePlus stores it in an
invisible overflow area and the Link button on the last frame of the sequence
displays ; an AutoFlow button appears next to the Link button. You
might edit the story down or make more room for it by adding an extra frame or
two to the sequence. Clicking the AutoFlow button adds additional frames and
pages as needed (see below).
Once frames are in position it's still possible to control how text is distributed
throughout the frame(s) via tools on the Frame context toolbar.
The Text Sizing flyout offers three tools for controlling how
frame text scales through the text frame. These are "once-off"
operations (compared to the "continuous" Autofit options shown
below).
Fit Text
Click to scale the story's text size so it fits exactly into the
available frame(s); further text added to the frame will cause text
overflow. You can use this early on, to gauge how the story fits,
or near the end, to apply the finishing touch. Fit Text first applies
small point size changes, then small leading changes, then
adjustments to the paragraph space below value, until the text
fits.
Enlarge Text
Click to increase the story's text size one increment (approx.
2%).
Shrink Text
Click to reduce the story's text size one increment.
Each frame's story text can adopt its own individual autofit setting as follows:
The AutoFit Options flyout offers three autofit options which
continuously act upon a selected frame's story text.

100 Working with Text
No Autofit
This is the normal mode of operation where, if selected, text
won't automatically scale throughout the selected text frame,
possibly leaving partly empty frames at the end of the frame
sequence.
Shrink Text on Overflow
If selected, extra text added to a selected frame will shrink all
frame text to avoid text overflow.
Autofit
If selected, the frame will always scale text automatically by
adjusting text size (compare to Fit Text which fits text once,
with any additional text causing text overflow).
AutoFlow
When importing text, it's a good idea to take advantage of the AutoFlow feature,
which will automatically create text frames and pages until all the text has been
imported. This way, enough frames are created to display the whole story. Then
you can gauge just how much adjustment will be needed to fit the story to the
available "real estate" in your publication.
If you add more text to a story while editing, or have reduced the size of frame,
you may find that an overflow condition crops up. In this case you can decide
whether to use AutoFit or click the frame's AutoFlow button.
To AutoFlow story text on the page:
• Click the AutoFlow button just to the left of the frame's
Link button.
If no other empty frames are detected, you'll be prompted to autoflow text into a
new frame(s) the same size as the original or to new frame(s) sized to the page.
If an empty frame exists anywhere in your publication, PagePlus will flow text
into that instead, before commencing with autoflow.

Working with Text 101
Linking text frames
When a text frame is selected, the frame includes a Link button at the bottom
right which denotes the state of the frame and its story text, and which allows
you to control how the frame's story flows to following frames:
No Overflow
The frame is not linked to a following frame (it's either a standalone
frame or the last frame in a sequence) and the frame is empty or the end
of the story text is visible.
Overflow
The populated frame is not linked (either standalone or last frame) and
there is additional story text in the hidden overflow area. An
Autoflow button also appears to the left of the Link button.
Continued
The frame is linked to a following frame. The end of the story text may
be visible, or it may flow into the following frame.
Note: The button icon will be red if the final frame of the sequence is
overflowing, or green if there's no overflow.
There are two basic ways to set up a linked sequence of frames:
• You can link a sequence of empty frames, then import the text.
• You can import the text into a single frame, then create and link
additional frames into which the text automatically flows.
When frames are created by the AutoFlow option (for example
when importing text), they are automatically linked in
sequence.
To create a link or reorder the links between existing frames, you can use the
Link button under the frame (or the controls on the Frame context toolbar).
Remember to watch the cursor, which changes to indicate these operations.
• You can link to frames already containing text or are already in a link
sequence.
• If the frame was not part of a link sequence, its text is merged into the
selected text's story.

Working with Text 103
Using artistic text
Artistic text is standalone text you type directly onto a page. Especially useful
for headlines, pull quotes, and other special-purpose text, it's easily formatted
with the standard text tools.
Here are some similarities between frame text and artistic text. Both text types
let you:
• vary character and paragraph properties, apply named text styles, edit
text in WritePlus and even import text.
• apply different line styles, fills (including gradient and bitmap fills),
and transparency.
• access text via the Text Manager.
• track font usage with the Resource Manager.
• embed inline images.
• apply 2D/3D filter effects and rotate/flip.
• use proofing options such as AutoSpell/Spell Checker, Proof Reader,
and Thesaurus.
And some differences...
• You can initially "draw" artistic text at a desired point size, and drag it
to adjust the size later. Frame text reflows in its frame upon frame
resize (but doesn't alter its text size).
• Artistic text can be applied to a path but frame text cannot.

104 Working with Text
• Artistic text won't automatically line wrap like frame text.
• Artistic text doesn't flow or link the way frame text does; the Frame
context toolbar's text-fitting functions aren't applicable to artistic text.
To create artistic text:
1. Choose the Artistic Text Tool from the Artistic Text
flyout on the Tools toolbar.
2. Set initial text properties (font, style, etc.) as needed before typing,
using the Text context toolbar, Format menu, or right-click (and
choose Text Format>).
3. Click on the page for an insertion point using a default point size, or
drag the cross-hair cursor across the page to specify a particular size,
e.g.
4. Type directly on the page to create the artistic text.
Once you've created an artistic text object, you can select, move, resize, delete,
and copy it just as you would with a text frame. Solid colors, gradient/bitmap
fills, and transparency can all be applied.
To resize or reproportion an artistic text object:
• To resize while maintaining the object's proportions, drag the resize
handles.

Working with Text 105
• To resize freely, hold down the Shift key while dragging.
To edit artistic text:
• Drag to select a range of text, creating a blue selection.
You can also double-click to select a word.
Now you can type new text, apply character and paragraph formatting, edit
the text in WritePlus, apply proofing options, and so on.
Putting text on a path
"Ordinary" straight-line artistic text is far from ordinary—but you can extend its
creative possibilities even further by flowing it along a curved path.
The resulting object has all the properties of artistic text, plus its path is a Bézier
curve that you can edit with the Pointer Tool as easily as any other line! In
addition, text on a path is editable in some unique ways, as described below.

106 Working with Text
To apply a preset curved path to text:
1. Create an artistic text object.
2. With the text selected, on the Text context toolbar, click the
Path Text flyout and choose a preset path.
The text now flows along the specified path, e.g. for "Path - Top Circle".
To add artistic text along an existing line or shape:
1. Create a freehand, straight, or curved line (see Drawing and editing
lines on p. 176) or a shape (see Drawing and editing shapes on p. 182).
2. Choose the Artistic Text Tool from the Artistic Text flyout on
the Tools toolbar.
3. Bring the cursor very close to the line. When the cursor changes to
include a curve, click the mouse where you want the text to begin.
4. Begin typing at the insertion point. Text flows along the line, which
has been converted to a path.

Working with Text 107
To fit existing text to an existing line or shape:
1. Create an artistic text object.
2. Create a freehand, straight, or curved line or a shape.
3. Select both objects. On the Tools menu, choose Fit Text to Curve.
The text now flows along the specified path.
To create text and path at the same time:
1. Choose one of the Path Text tools from the Text flyout:
The Freehand Path Text Tool lets you sketch a curved line in
a freeform way.
The Straight Path Text Tool is for drawing a straight line.
The Curved Path Text Tool lets you join a series of line
segments (which may be curved or straight) using "connect the
dots" mouse clicks.
2. Create a line on the page. Your line appears as a path with an insertion
point at its starting end (for a curved path you'll need to press Esc or
double-click to get the insertion point).
3. Begin typing at the insertion point. Text flows along the path.
To remove the text path:
1. Select the path text object.
2. Click the Path - None button on the Text context toolbar's Path
flyout.
The text remains as a straight-line artistic text object and the path is permanently
removed.

108 Working with Text
Editing text on the page
You can use the Pointer Tool to edit frame text, table text, or artistic text
directly. On the page, you can select and enter text, set paragraph indents and
tab stops, change text properties, apply text styles, and use Find and Replace.
For editing longer stories, and for more advanced options, choose WritePlus
(Edit Story… from the Edit menu).
Selecting and entering text
The selection of frame text, artistic text, and table text follows the conventions
of the most up-to-date word-processing tools. The selection area is shaded in
semi-transparent blue for clear editing.
Double-, triple- or quadruple-click selects a word, paragraph or all text,
respectively. You can also make use of the Ctrl-click or drag for selection of
non-adjacent words, the Shift key for ranges of text.
To edit text on the page:
1. Select the Pointer Tool, then click (or drag) in the text object. A
standard insertion point appears at the click position (see below),
- or -
Select a single word, paragraph or portion of text.
2. Type to insert new text or overwrite selected text, respectively.
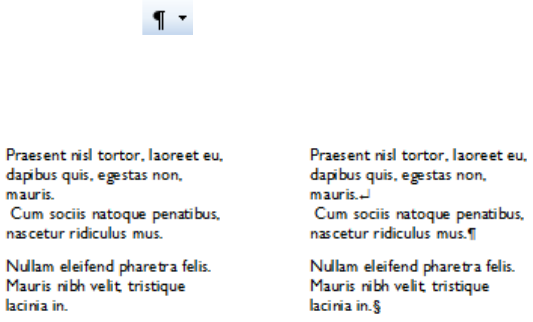
Working with Text 109
To start a new paragraph:
• Press Enter.
To start a new line within the same paragraph (using a "line break"
or "soft return"):
• Press Shift+Enter.
The following two options apply only to frame text. You can use these shortcuts
or choose the items from the Insert>Break submenu.
To flow text to the next column (Column Break), frame (Frame
Break) or page (Page Break):
• Press Ctrl+Enter, Alt+Enter or Ctrl+Shift+Enter, respectively.
To switch between insert mode and overwrite mode:
• Press the Insert key.
To show special characters:
• Click the drop-down arrow on the View toolbar, either for
Show Special Characters (paragraph marks and breaks; see below)
or Show Spaces (Show Special Characters plus tabs, non-breaking
spaces, hyphenation points, and "filled" normal spaces).

110 Working with Text
Copying, pasting, and moving text
You can easily copy and paste text using standard commands; drag and drop of
text is also supported.
If you don't place an insertion point on pasting, the text can be
pasted into a new text frame directly.
Setting paragraph indents
When a text object is selected, markers on the horizontal ruler indicate the left
indent, first line indent, and right indent of the current paragraph. You can adjust
the markers to set paragraph indents, or use a dialog.
• The Left indent is set in relation to the object's left margin.
• The 1st line indent is in relation to the left indent.
• The Right indent is in relation to the object's right margin.
For details on setting frame margins, see Frame setup and layout (on p. 96).

Working with Text 111
To set the indents of the current paragraph:
• Drag the appropriate ruler marker(s).
- or -
• For quick left indents, select the Increase Level or
Decrease Level button to increase or decrease indent, respectively.
Indent is by the currently set default tab stop distance.
- or -
• To adjust indent settings numerically, choose Paragraph... from the
Format menu. In the Indentation box, you can enter values for Left,
Right, 1st Line, or Hanging indents.
Setting tab stops
To set a tab stop:
1. Select the paragraph(s) in which you want to set tab stops.
2. Click the ruler intersection button until it changes to the type of tab
you want: (Left, Center, Right, or Decimal).
Left
Center
Right
Decimal
3. Click on the horizontal ruler where you want to set a tab stop. You'll
see your tab stop appear.
• To move a tab stop, drag it to a new ruler position.
• To delete a tab stop, drag it off the ruler.
If you want to set precise measurements for tabs, right-click
the frame and choose Text Format, then select Tabs... from
the submenu.
112 Working with Text
Working with Unicode text
PagePlus fully supports Unicode, making it possible to incorporate foreign
characters or special symbols.
• To paste Unicode text from the Clipboard to the page, use Edit>Paste
Special..., then select "Unformatted Unicode Text."
• Insert Unicode characters directly into your text by typing your
Unicode Hex value and pressing Alt+X. The Alt+X keyboard
operation toggles between the displayed character (e.g., @) and its
Hex value (e.g., U+0040) equivalent.
• To export text in Unicode format, use WritePlus.
Using Find and Replace
You can search publication text for an extraordinary variety of items: not just
words or parts of words, but a host of character and paragraph attributes such as
fonts, styles, alignment, bullets and numbering, missing fonts, drop caps... even
inline graphics and more! Once located, you can replace items either globally, or
on a case-by-case basis.
To use Find and Replace on frame text:
1. Choose Find & Replace... from the Edit menu.
2. In the dialog, type the text to be found in the Find box and its
replacement text (if any) in the Replace box. Click the down arrows to
view recent items. Click either box's button to use flyout menus to
select formats or special characters, or define a regular expression (for
a wildcard-type search).
3. Select the Range to be searched: Current Story (just the currently
selected text object or story), or All Stories (all text), or Current
Selection (only used with the Replace All function to operate on the
currently selected text).
4. Select Match whole word only to match character sequences that
have white space (space, tab character, page break, etc.) or
punctuation at each end, or which are at the start/end of a paragraph.
Select Match case for case-sensitive search. Select Regular
Working with Text 113
expressions to treat the contents of the Find box as an expression,
rather than as a literal string to be found.
5. Click Find Next to locate the first instance of the Find text.
- or -
Click Select All to highlight all instances of matching text in your
document simultaneously.
6. Click Replace if you want to substitute with replacement text.
Alternatively, click Find Next again to skip to the next matching text.
Continue using the Replace option as required until you reach the end
of your document.
- or -
Click Replace All to replace all instances of the found text with the
replacement text at the same time. PagePlus reports when the search is
completed.
7. Click Close to dismiss the Find and Replace dialog.
Setting text properties
PagePlus gives you a high degree of typographic control over characters and
paragraphs, whether you're working with frame text, table text, or artistic text.
To apply basic text formatting:
1. Select the text.
2. Use buttons on the Text context toolbar to change text style, font,
point size, attributes, paragraph alignment, or level.
To clear local formatting (restore plain/default text properties):
• Select a range of text with local formatting.
• Click on the Clear Formatting option on the Text context toolbar's
text styles drop-down list (or Text Styles tab).

114 Working with Text
Using fonts
One of the most dramatic ways to change your document's appearance is to
change the fonts used in your artistic text, frame text, or table text. Applying
different fonts to a character or entire paragraph can communicate very different
messages to your intended readership.
Font assignment is very
simple in PagePlus, and
can be done from the Fonts
tab, Text context toolbar,
or in the Character dialog
(via right-click, or from
the Format menu).
The Fonts tab lets you:
• Apply fonts easily without dialog navigation.
• Assign fonts to be Websafe or favorites.

Working with Text 115
• View most recently used, Websafe, and your favorite fonts
simultaneously.
• Search for installed fonts via search box.
• Hover-over preview of fonts applied to your document's text
(optional).
• Change a font for another throughout your publication (by right-click
Select All).
• Access Serif FontManager (if available in your region).
The Fonts tab is automatically hidden by default, but can be viewed by
clicking the arrow button at the left of your workspace. You may also need to
click the Fonts label to display the Fonts tab.
Assigning and previewing fonts
The fonts shown in the Fonts tab represent the currently installed fonts on your
computer. This means that these fonts are available to format any selected
character or paragraph.
To assign a font:
• Select some text, then click on the font name in the Fonts tab to assign
the font to the text.
You can preview how fonts will appear on your selected text by enabling
PagePlus's font preview feature.
To preview fonts:
1. From the tab's Tab Menu button (top-right of tab), check the
Preview Font option.
2. Select a section of text (a letter, word, or paragraph) in your
document.

Working with Text 117
2. Click the message label, making it shaded in blue—text formatted
with the chosen font is selected.
3. Hover over font names in your font list. Click on a chosen font to
apply it to the selected text (if you've used the Used fonts search you
may need to clear the results before selecting a replacement font).
Substituting fonts
Font substitution issues may arise when opening PagePlus Publications. This is
because the fonts used in the original document may not be present on the target
computer. If this occurs, font substitution of that unavailable font can be
initiated via a pop-up dialog.
PagePlus's font substitution mechanism makes use of the PANOSE Font
Matching System which intelligently finds the best font substitution match
between a missing and a locally available font. By default, clicking OK will
substitute the missing font for a locally available standard font (e.g., Arial)
automatically. Optionally, you can manually substitute the missing font with the
font of your choosing by enabling the Edit font substitutions manually button
instead.
A third option, is to use Serif's FontManager program which can search and load
uninstalled fonts if located (fonts are uninstalled after use). See Using
FontManager on p. 119.
To avoid font substitution, try to source original fonts from the
originating PC if possible.
Working with Text 119
Reset the Substitute with box by clicking the Default button.
This will replace the fonts listed with a single font, e.g. Arial or
Times New Roman, as governed by Windows (this is not
configurable).
To manually substitute a font any time:
1. Select Resource Manager from the Tools menu.
2. Choose the Fonts tab, select a font from the list, and click the
button.
3. In the dialog, select the missing font to be substituted from the Font to
substitute drop-down menu.
4. Carry out font substitution as described in the previous procedure.
Repeat for each font to be substituted using the Font to substitute
drop-down menu.
Using FontManager
FontManager is a standalone Serif application that works alongside PagePlus
with respect to font substitution. Its main feature is to locate and dynamically
install a publication's missing fonts. The following procedure assumes
FontManager is installed.
The Font Substitution dialog will indicate fonts found by
FontManager with the status "Located."
To install fonts dynamically with FontManager:
1. Launch Serif PagePlus and open a PagePlus publication.
2. From the dialog, enable the Use the FontManager... option (grayed
out if FontManager is not installed). This locates and dynamically
installs any missing fonts which are currently uninstalled but are
present on your computer.
When the current session is closed, the dynamically installed fonts will uninstall
automatically.
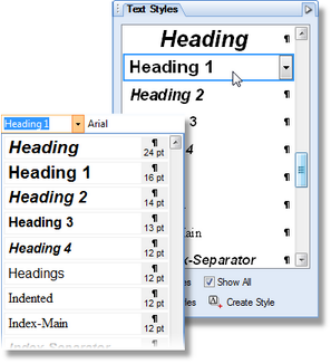
120 Working with Text
Using text styles
PagePlus lets you use named text styles (pre- or user-defined), which can be
applied to frame text, table text, artistic text, index text or table of contents text.
A text style is a set of character and/or paragraph attributes saved as a group.
When you apply a style to text, you apply the whole group of attributes in just
one step. For example, you could use named paragraph styles for particular
layout elements, such as "Heading 1" or "Body," and character styles to convey
meaning, such as "Emphasis," "Strong," or "Subtle Reference."
Styles can be applied to
characters or paragraphs
using either the Text
context toolbar or the Text
Styles tab. Both paragraph
and character styles can be
managed from the Text
Style Palette.
Paragraph and character styles
A paragraph style is a complete specification for the appearance of a
paragraph, including all font and paragraph format attributes. Every paragraph in
PagePlus has a paragraph style associated with it.
• PagePlus includes a built-in default paragraph style called "Normal"
which is left-aligned, 12pt Times New Roman. You can modify the
"Normal" style by redefining any of its attributes, and create or adopt
any number of new or pre-defined paragraph styles having different
names and attributes.
• Applying a paragraph style to text updates all the text in the paragraph
except sections that have been locally formatted. For example, a single

122 Working with Text
As both paragraph and character formatting can be applied to the same text, all
of the current text's formatting is displayed in the Current format box on the
tab. In the example below, currently selected text has a Strong character style
applied over a Normal paragraph style.
To update a named style using the properties of existing text:
1. Make your desired formatting changes to any text that uses a named
style.
2. On the Text Styles tab, right-click the style and choose Update
<style> to Match Selection.
All text using the named style, throughout the publication, takes on the new
properties.
To create a new style:
1. Either:
1. On the Text Styles tab, select the style on which you want your
new style to be based.
2. Click the button.
- or -
• Choose Text Style Palette... in the Format menu, and with a
"base" style selected in the dialog, click the Create... button.
2. In the Text Style dialog, define the style Name, the style to be Based
on, Style for the following paragraph, and the style to be changed to
if Increase Level is applied. Check Always list in Studio to ensure the
style will always appear in the Text Styles tab.
3. In the left tree menu change any character or paragraph attributes,
tabs, bullets, and drop caps you want to include in the new style
definition.
4. Click OK to create the style, or Cancel to abandon changes.

Working with Text 123
To create a new style using the properties of existing text:
1. Format the text as desired.
2. To define a character style, select a range of reformatted text. To
define a paragraph style, deselect text but leave a blinking cursor
(insertion point) within the newly formatted section.
3. Type a new style name into the Text context toolbar's Styles box and
press Enter.
The new style is defined with the properties of the selected text.
To modify an existing style:
1. From the Text Styles tab:
• Right-click on the character or paragraph style you want to
modify and then choose Modify <style>...
- or -
• With a style selected, pick the button from the
Text Styles tab, then choose the Modify... button.
2. From the Text Style dialog, define (or change) the style name, base
style, and any character or paragraph attributes, tabs, bullets, and drop
caps you want to include in the style definition.
3. Click OK to accept style properties, or Cancel to abandon changes.
4. Click Apply to update text, or click Close to maintain the style in the
publication for future use.
Alternatively, choose Text Style Palette... from the Format menu to modify
styles and to change text defaults (see p. 24).
To delete one or more text styles:
• Right-click a text style and select Delete <style>....
• From the dialog, click Remove. For deletion of multiple styles, check
multiple style names first. For removal of all or unused styles, use
appropriate buttons.
Termékspecifikációk
| Márka: | Serif |
| Kategória: | Szoftver |
| Modell: | PagePlus Essentials |
Szüksége van segítségre?
Ha segítségre van szüksége Serif PagePlus Essentials, tegyen fel kérdést alább, és más felhasználók válaszolnak Önnek
Útmutatók Szoftver Serif

21 Augusztus 2024
21 Augusztus 2024
20 Augusztus 2024
20 Augusztus 2024
20 Augusztus 2024
20 Augusztus 2024
20 Augusztus 2024
19 Augusztus 2024
19 Augusztus 2024
18 Augusztus 2024
Útmutatók Szoftver
- Szoftver Garmin
- Szoftver Canon
- Szoftver Casio
- Szoftver Omron
- Szoftver Apple
- Szoftver Microsoft
- Szoftver Zoom
- Szoftver Google
- Szoftver IRiver
- Szoftver Corel
- Szoftver Cyberlink
- Szoftver Adobe
- Szoftver Roxio
- Szoftver Acronis
- Szoftver Acoustica
- Szoftver Android
- Szoftver Nero
- Szoftver Envivo
- Szoftver Safescan
- Szoftver SMA
- Szoftver Bticino
- Szoftver Norton
- Szoftver Minolta
- Szoftver Pinnacle
- Szoftver Teasi
- Szoftver AVG
- Szoftver Suse
- Szoftver FileMaker
- Szoftver Lebara
- Szoftver Magix
- Szoftver Ulead
- Szoftver Fiber
- Szoftver Image-Line
- Szoftver Davilex
- Szoftver Skype
- Szoftver Osirius
- Szoftver Igo
- Szoftver Hercules
- Szoftver SAB
- Szoftver LibreOffice
- Szoftver Route 66
- Szoftver Trend Micro
- Szoftver Office
- Szoftver BlueGriffon
- Szoftver Startech
- Szoftver Enfocus
- Szoftver Wolters Kluwer
- Szoftver TeamViewer
- Szoftver Techsmith
- Szoftver Nedsoft
- Szoftver FreakinSoftMania
- Szoftver Solcon
- Szoftver Macromedia
- Szoftver DraftSight
- Szoftver ZTE Blade V8
- Szoftver Stentec
- Szoftver Foveon
- Szoftver Enra
Legújabb útmutatók Szoftver

14 Január 2025
14 Október 2024
13 Október 2024
10 Október 2024
7 Október 2024
5 Október 2024
5 Október 2024
5 Október 2024
23 Szeptember 2024
22 Szeptember 2024