Használati útmutató Serif MoviePlus X5
Olvassa el alább 📖 a magyar nyelvű használati útmutatót Serif MoviePlus X5 (232 oldal) a Szoftver kategóriában. Ezt az útmutatót 11 ember találta hasznosnak és 2 felhasználó értékelte átlagosan 4.5 csillagra
Oldal 1/232

How to Contact Us
Our main office
(UK, Europe):
The Software Centre
PO Box 2000, Nottingham,
NG11 7GW, UK
Main: (0115) 914 2000
Registration (UK only): (0800) 376 1989
Sales (UK only): (0800) 376 7070
Customer Service/
Technical Support:
http://www.support.serif.com/
General Fax: (0115) 914 2020
North American office
(USA, Canada):
Serif Inc, The Software Center, 17
Hampshire Drive, Suites 1 & 2,
Hudson, NH 03051, USA
Main: (603) 889-8650
Registration: (800) 794-6876
Sales: (800) 55-SERIF or 557-3743
Customer Service/
Technical Support:
http://www.support.serif.com/
General Fax: (603) 889-1127
Online
Visit us on the web at: http://www.serif.com/
International
Please contact your local distributor/dealer. For further details, please contact us
at one of our phone numbers above.

Credits
This User Guide, and the software described in it, is furnished under an end user License
Agreement, which is included with the product. The agreement specifies the permitted and
prohibited uses.
Trademarks
Serif is a registered trademark of Serif (Europe) Ltd.
MoviePlus is a registered trademark of Serif (Europe) Ltd.
All Serif product names are trademarks of Serif (Europe) Ltd.
HDV and the HDV logo are trademarks of Sony Corporation and Victor Company of Japan,
Ltd.
Microsoft, Windows, and the Windows logo are registered trademarks of Microsoft
Corporation. All other trademarks acknowledged.
PrimoSDK and Px Engine are trademarks of Sonic Solutions. All other trademarks are the
property of their respective owners.
Blu-ray Disc and Blu-ray, and the logos are trademarks of the Blu-ray Disc Association.
AVCHD and the AVCHD logo are trademarks of Panasonic Corporation and Sony
Corporation.
VST is a trademark of Steinberg Media Technologies GmbH.
Windows Vista and the Windows Vista Start button are trademarks or registered
trademarks of Microsoft Corporation in the United States and/or other countries.
QuickTime is a trademark of Apple Computer, Inc., registered in the U.S. and other
countries.
Copyrights
Digital Images ©2008 Hemera Technologies Inc. All Rights Reserved.
Digital Images ©2008 Jupiterimages Corporation, All Rights Reserved.
Digital Images ©2008 Jupiterimages France SAS, All Rights Reserved.
Content ©2008 Jupiterimages Corporation. All Rights Reserved.
Portions graphics import/export technology © LEAD Technologies, Inc.
Portions MPEG encoding technology © 1999/2000-2003 MainConcept AG.
Portions digital audio content © 2003-2005 Robert Bailey
(http://www.a1freesoundeffects.com).
Animations © 2003-2010 Suite Imagery LLC. All rights reserved.
© 2004 Sonic Solutions. Sonic and the Powered by Sonic logo are trademarks or registered
trademarks of Sonic Solutions in the U.S. and/or other countries.
Manufactured under license from Dolby Laboratories. Dolby and the double-D symbol are
trademarks of Dolby Laboratories. Confidential unpublished works. Copyright 1992–1997
Dolby Laboratories. All rights reserved.
© 2011 Serif (Europe) Ltd. All Rights Reserved. No part of this User Guide may be
reproduced in any form without the express written permission of Serif (Europe) Ltd.
Serif MoviePlus X5 © 2011 Serif (Europe) Ltd. All Rights Reserved.
Companies and names used in samples are fictitious.
Contents
Contents
1. Welcome .......................................................... 1
Welcome to MoviePlus X5!.............................................................................. 3
Key features ......................................................................................................... 4
New features ..................................................................................................... 10
Licensed feature unlocking........................................................................... 14
Installation.......................................................................................................... 14
2. Getting Started ............................................... 17
Startup Wizard .................................................................................................. 19
Starting a new project .................................................................................... 20
Opening an existing project ......................................................................... 23
Adding media files to your project ............................................................. 25
Capturing video ................................................................................................ 28
Trimming ............................................................................................................ 32
Scene detection ................................................................................................ 36
Previewing your project ................................................................................. 36
3. Editing in Storyboard mode ............................ 41
Storyboard basics............................................................................................. 43
Adding media files ........................................................................................... 46
Selecting clips ................................................................................................... 48
Arranging clips .................................................................................................. 49
Resizing clips ..................................................................................................... 50
Applying transitions (storyboard) ............................................................... 52
Using pan and zoom ....................................................................................... 55
Using CG clips ................................................................................................... 57
Contents
4. Editing in Timeline mode ................................ 63
Timeline basics .................................................................................................. 65
Adding and arranging tracks ........................................................................ 71
Adding media files ........................................................................................... 72
Selecting clips (timeline only) ...................................................................... 73
Zooming, scrolling, seeking, and scrubbing (timeline only) ............... 76
Arranging clips (timeline only) ..................................................................... 78
Using groups (timeline only) ........................................................................ 85
Splitting clips on the timeline ...................................................................... 88
Cropping ............................................................................................................. 88
Using envelopes ............................................................................................... 90
Adjusting keyframes (timeline only) .......................................................... 95
Applying transitions (timeline) ................................................................. 101
Using markers ................................................................................................. 108
Slowing down and speeding up ............................................................... 112
Transparency & opacity (timeline only) .................................................. 112
Removing Backgrounds .............................................................................. 114
Masking ............................................................................................................ 114
Blue/green screening (Chroma Key) ....................................................... 118
Video overlays (timeline only) ................................................................... 121
Introducing transforms (timeline only) .................................................. 128
5. Effects .......................................................... 131
Applying video effects ................................................................................. 133
2D filter effects ............................................................................................... 139
3D filter effects ............................................................................................... 141
Colour correction .......................................................................................... 144
Applying audio effects ................................................................................. 145
Contents
6. Audio ............................................................ 149
Introducing audio .......................................................................................... 151
Adding audio ................................................................................................... 153
Using audio buses.......................................................................................... 157
Volume and pan ............................................................................................. 160
Adding narration ............................................................................................ 162
Ripping audio discs ....................................................................................... 165
7. Text, Images, and QuickShapes................... 167
Adding text ...................................................................................................... 169
Selecting and editing text ........................................................................... 174
Formatting text ............................................................................................... 175
Animating text ................................................................................................ 178
Adding Images and QuickShapes ............................................................. 180
Manipulating objects .................................................................................... 182
8. Exporting ...................................................... 185
Exporting movies ........................................................................................... 187
Exporting movies to disc ............................................................................. 188
Using Menu Designer ................................................................................... 190
Exporting as a file ........................................................................................... 198
Exporting to iTunes/PSP .............................................................................. 199
Exporting to YouTube .................................................................................. 202
9. Appendices ................................................... 205
Performance Notes ........................................................................................ 207
Keyboard Shortcuts ....................................................................................... 215
10. Index ............................................................. 219
Contents

Welcome
1
2 Welcome
Welcome 3
Welcome to MoviePlus X5!
Welcome to MoviePlus X5, the powerful video-editing program from Serif.
MoviePlus is the program of choice for video editors looking for easy and
intuitive ways to create and share their own movies.
MoviePlus X5 offers an exciting experience at all the key steps of movie
creation—from importing media, media management (trimming and scene
detection), and video editing, through to exporting your project to DVD and
Blu-ray disc, as well as to YouTube, movie file, Apple devices, or PSP.
Video editing can be performed in storyboard or timeline mode (for ease-of-
use vs. editing power). Whichever mode you plan to work in, you'll be the envy
of your audience at your movie's first screening!
For a more detailed summary of what MoviePlus can offer, see Key features
(p. 4).
Upgrading?
If you've upgraded from a previous version, this new edition of MoviePlus
includes a host of exciting new features (p. 10) which keeps MoviePlus ahead of
its competitors and at a fraction of the price!
Registration
Don't forget to register your new copy, using the Registration Wizard on the
Help menu. That way, we can keep you informed of new developments and
future upgrades!
4 Welcome
Key features
Gathering and managing media
• Import Media
Copy from camcorder, USB mass storage devices (hard drive,
memory stick/card, flash drives), or CD/DVD. MoviePlus transfers
media files straight from your device, ready for use in your Media
pane.
• Trimming
Trim video clips to your preferred length in a dedicated Trim dialog,
without affecting your original video clip.
• Media Pane
Your project's media (video, image, and audio files) can be gathered
together in a Media pane before commitment to your storyboard (or
timeline). You can reuse media for subsequent projects by adding to
the pane's Library tab. Fix incorrectly oriented image and video files by
one-click rotation.
• Quick Sourcing of Video, Audio, Image Content
Capture video and audio directly from sources like a DV (digital
video) camcorder and video capture card. Take images straight off
your camera.
• Automatic Scene Detection and Management
Detect and utilize scenes within movies from tape-based camcorders
(even adjust detection sensitivity). Exclude unwanted scenes, merge
scenes together, or even add manual cuts to trim and split scenes to
your liking! The original file is left intact, not split into pieces by the
process.
Welcome 5
MoviePlus basics
• Storyboard Simplicity or Timeline Editing Power!
Use the Storyboard for basic movie projects or "slideshow" image
montages. Clips are automatically arranged in sequence one-by-one
with inter-clip transitions. The Timeline lets you arrange video and
audio clips with editing freedom, working with an unlimited number
of video and audio tracks (or groups).
Timeline essentials
• Tracks and Groups
Store clips across multiple "layered" tracks for stunning blending
effects (opacity control) or split-screens, spins, rotations, and rolls
(transform control). Control opacity and transforms at group level
using video groups (containing multiple video tracks).
• Clip-based Opacity, Crop, and Transform Control
Apply opacity, cropping, and transforms to any selected clip!
• Keyframe Controls
Transitions, effects, transforms, opacity, plus audio volume and stereo
panning are all "key-framable". You can specify changes over time and
all the in-between steps are calculated for you. The changes themselves
can also adopt different speeds or accelerations by changing the
keyframe properties.
• Preset Envelopes
Using MoviePlus’s advanced keyframe technology is even more
accessible through a comprehensive range of preset envelopes—these
can be simply dragged and dropped onto video and audio tracks and
will perform previously complex video editing techniques, such as
opacity, transform and crop, with ease.
• Transparent Overlays
All of MoviePlus's video tracks support video transparency to
superimpose not just titles but any 32-bit transparent image (or video)
over your movie's action. Make portions of existing video transparent
6 Welcome
by adding a mask (as you might in a bitmap-editing program like Serif
PhotoPlus) or by picking a solid colour to become transparent. Use
popular Blend Modes to adjust how your layered videos' pixels interact
with each other.
• Multiple Picture-in-Picture
Create professional picture-in-picture effects using video clips or still
frames by easily editing the size and position of your video in the
Video Preview pane. Perfect for showing supplemental visuals without
detracting from the main movie, or tiling multiple videos together for
a dynamic scene.
Audio
• Audio Levels
Avoid audio distortion with the Levels meter—audio level meters
indicate if your current audio levels hit the Red. Use as a master
control volume to normalize project audio levels prior to movie
export. Audio waveforms for any audio clip are optionally displayed
on the timeline to help synchronize audio events.
• Narration Recording
Record voice-overs while you play back your movie—simply set up
your microphone, press record and begin talking!
• Digital CD Ripping
Rip your audio CDs—great for creating movie soundtracks from your
favourite songs.
• Dolby® Digital Stereo Support
For DVD/Blu-ray disc export, MoviePlus now uses Dolby Digital to
encode and compress audio (leaving more room for video!). Video
files with Dolby Digital streams can also import without the need for
third party codecs.
Welcome 7
Text
• In-Place Text Editing
Add titles, captions, and credits as separate text clips or as overlaid
text ("floating" over your video).
• Text Styles
For titles, captions, and credits, the new Text Styles gallery offers
hand-picked styles for that professional look. Apply a full range of
character formatting for custom text styles.
• Text Animation
Bring text to life by choosing In and/or Out animations, all from the
Galleries pane. Fly, Spin, Blinds, Explode, and Type are among an
impressive collection of preset categories.
Transitions, CG Clips, and Effects
• Cool Transitions
Automatic transitions between two clips make MoviePlus a breeze.
MoviePlus offers dozens of built-in, customizable transitions allowing
you to use standard transitions like wipes and cross-fades through to
stretches, pushes, pixellation, and 3D transitions.
• Computer Generated (CG) clips
For movie interludes or backdrops to titles or credits, add coloured
Backgrounds (solid or gradient fills) or Images and QuickShapes
such as hearts, chevrons, teardrops, and zigzags (plus many more).
QuickShapes are also great for masking effects!
• Stunning Video Effects
Enhance your movies with a wide range of customizable correction
filters—pick from brightness, contrast, gamma adjustments, sharpen,
and many more! Special effects include Old Film, Motion Blur, Mask,
Noise, and Chroma Key. 2D filter effects, as well as 3D lighting and
surface effects are supported. Apply individually or cumulatively.
Even perform reverse video playback as a special effect.
8 Welcome
• Audio Effects
Choose from a range of audio special effects—Reverb, Bass, Fill Left,
Fill Right channel-related effects. Even use third-party VST effect
plug-ins.
Performance
• Pre-Rendering for Improved Video Playback
Render transitions, video clips, or a time range in the background for
improved preview performance; lightning fast previews for complex
timelines or clips with processor-intensive effects!
Ease of Use
• Easy-to-use Panes
Enjoy larger and more intuitive panes which can float and be resized—
design your own MoviePlus workspace! Make use of full screen
previews on additional monitors.
• Editing Toolbars for More Efficiency
Context-sensitive toolbars for storyboard and timeline; toolbars only
offer the tools you need, when you need them.
• Edit Multiple Attributes
Change individual, specific, or all attributes (e.g. transitions, clip
durations) at the same time.
• Switch Editing Modes
Swap between the simplicity of the storyboard and the editing power
of the timeline. A single click gives an easy jump between either mode.
Exporting
• Easy Exporting
Export to any media, file or device using either suggested project
settings, intelligentlycalculated by MoviePlus, or by creating custom
project settings, which can be saved.
Welcome 9
• Share Worldwide with YouTube
Export your movie then automatically upload to your YouTube
account.
• PSP/iPod Export
Export mp4 movies to play on these popular devices. Upload to PSP
directly from MoviePlus; import movie into iTunes for later syncing
with iPods.
• Built-in DVD Authoring!
Bring your movies to the masses with quick and easy authoring to disc
(includes auto-erase)!
• DVD Menu Designer
For handy chapter navigation, the Menu Designer lets you create your
very own menu designs from a diverse range of pre-built templates, by
changing layout, background images/music, titling, and button styles.
The designer now offers DVD Preview (with remote control
simulator), video menu backgrounds, and manual positioning of
menu buttons. For multi-page menus, each page can adopt its own
appearance (e.g., layout, background, etc).
10 Welcome
New features
General
• Multi-trimming and splitting (p. 34)
Create separate trimmed scenes per clip, removing unwanted video or
audio content with ease—perform via Media pane, timeline or
storyboard using the Trim dialog. Optionally, just split (cut) your clip
up into multiple scenes! Preview each created scene and re-trim
within the dialog. Scene slipping lets you change underlying content,
while keeping the same trimmed clip duration.
• Guides for Fine Positioning
Use for laying out your titles, images, shapes, and transform envelopes
on your clips. Guides are for display only, helping you arrange clips
and objects, and can be positioned either by drag-and-drop or dialog.
• View in Full Screen! (p. 39)
Make use of all your monitor workspace with Full Screen display,
equipped with pop-up transport controls!
• Images and QuickShapes for Enhanced Movie Titles (p. 180)
Combine images, QuickShapes, and text together in your text clip's
layout! Optionally, set your default text style for future text clips.
Ease of use
• Easy Project Setup (p. 20)
From the Startup Wizard and Media pane, importing media options
(Import and Copy from Device) offer to set up your project according
to the chosen media clip's properties. For example, import a clip from
your HD camcorder, and your project is set up as an HD project
automatically!
Welcome 11
• Customized Keyboard Shortcuts, Menus, and Toolbars
Take advantage of customizable keyboard shortcuts—assign your own
keystrokes to toolbar and menu commands! Tailor MoviePlus to your
needs with menu, toolbar, and icon customization.
Performance
• Background Task Management (p. 207)
For uninterrupted project development, pre-rendering and proxy file
generation are now background tasks. Prioritize or delete any
background tasks in Background Task Manager. For example,
prioritize a proxy task for a specific HD video clip to complete ahead
of other tasks.
• Helper File Manager (p. 212)
Monitor, manage, and remove helper files used for pre-render
preview, proxies, indexing, scene detection, waveform generation, and
motion control. Allocate disk space thresholds for automatic helper
file deletion—avoid running out of disk space ever again!
Effects
• Video Noise Reduction (p. 136)
Use MoviePlus's Noise Reduction video effect to minimize the effects
of luminance and chroma noise in your video clips.
• Image Stabilization (p. 136)
The Stabilize effect eliminates unwanted camera shake present in your
video clip.
Timeline
• Overlay Links (p. 81)
Keep control of caption titles, credits, or video overlays by linking to
your underlying clip—your overlay will be trimmed and moved as you
trim or move your clip.
12 Welcome
• Clip Grouping (p. 81)
Select multiple clips along your track and then group together—great
for making permanent associations between clips for bulk control, e.g.
when moving multiple clips simultaneously or simply when keeping
related content together.
• Clip Overlap (p. 105)
Control the extent of overlapping between clips. Use for uniformly
overlapping multiple clips by the same amount.
• On-demand Waveform Generation (p. 154)
Create waveforms for audio clips just when you need them.
Alternatively, generate waveforms in your Media pane before
committing to your timeline—ideal if you're working with many audio
clips.
Sharing via Discs
• Create Blu-ray Discs! (p. 188)
With MoviePlus you can create and share your completed project via
Blu-ray discs.
• AVCHD on DVD (p. 188)
Export your HD project (AVCHD) to DVD, either taking advantage of
cheaper media costs (compared to Blu-ray discs) or if you've not quite
purchased a Blu-ray writer!
• Multi-level Disc Menus (p. 196)
Create tiered disc menus, typically a main Titles menu (including Play
Movie) and a subsidiary scene selection menu.
Welcome 13
Importing/exporting
• Import media via Media pane's Explorer tab (p. 25)
Access your computer's drives and folders directly from the Explorer
pane and import media straight to the storyboard or timeline.
• Export to all the latest Apple devices (p. 199)
Share your movie via your Apple iPad, iPhone, or iPod Touch.
Other improvements
• Media pane improvements (p. 27)
Easily locate media files already on your storyboard/timeline
(indicated by green check mark). Filter by file type in your Media
pane—view only videos, images, or audio. Detailed view displays
frame size/rate, with the option to display pixel aspect ratio, interlace
method, bit depth, and more. Sort your media file list by column.
• Logical Clip Addition to Tracks (p. 72)
Linked video and audio clips always "snap" into adjacent video and
audio tracks when adding to the timeline.
• Alter Duration of your Transitions (p. 104)
In timeline mode, change the duration of one or more transitions on
your timeline.
• Live Timeline Rippling (p. 83)
Automatic rippling takes place as you move clips by dragging. Existing
clip overlaps are maintained when inserting clips, deleting clips, and
editing clip/transition durations.
• Pane layout control (p. 36)
Use buttons to maximize your Video Preview Pane or close the How
To tab for maximizing your workspace area.
• Background fills for text (p. 176)
Change the background to your text clips to any solid or gradient fill.

14 Welcome
Licensed feature unlocking
As part of the MoviePlus import or export process, a new feature may have to be
unlocked—this is purely for Serif licensing reasons and does not incur any
charge. If a feature needs to be unlocked, MoviePlus will connect to the internet
to automatically unlock it. If the automatic feature unlock fails (i.e., if there is no
Internet connection) you will be prompted to that effect, then you can manually
unlock the feature (see MoviePlus Help for details).
Once unlocked, the MoviePlus feature will be freely available and will not need
unlocking again on your computer.
In unlocking, Serif does not gather personal information from your
computer, or any other information that may impinge
confidentiality.
Installation
System requirements
• Windows-based PC with DVD drive and mouse.
• Microsoft Windows® XP (32 bit), Windows® Vista, or Windows® 7
operating system
• 1GB RAM
• 1.47GB free hard drive space*
• 1024 x 768 monitor resolution (1280x1024)
• An Internet account and connection (for Auto Update and export to
YouTube)
* Additional disk resources are required when exporting projects.
Welcome 15
For use with non-HD video and HD video (proxy support):
• Intel® Pentium® 4 Hyper-Threaded processor or AMD Athlon™ XP
processor
For use with HD video (optional proxy support):
• Intel® Pentium® 4 Hyper-Threaded processor or Dual-core processor
• Fast hard disk (≥7200rpm drive)
For use with Full HD video (native AVCHD 1080):
• Quad-core processor
• 2GB RAM
Input device support
• FireWire® (IEEE1394) support for connecting tape-based camcorders
• USB support for file-based camcorders
• Video capture card for digitizing and editing analogue video clips
Output device support (for disc creation)
• CD-R Writer (for VCD)
• DVD±R (for DVD and AVCHD)
• Blu-Ray™ Disc Writer
Optional
• Windows XP Service Pack 2 (for HDV video capture)
16 Welcome
First-time install
To install Serif MoviePlus X5, simply insert the disk into your computer's drive.
The AutoRun feature automatically starts the Setup process. Just answer the on-
screen questions to install the program.
Re-install
To re-install the software or to change the installation at a later date, select
Settings/Control Panel from the Windows Start menu and then click on the
Add/Remove Programs icon. Make sure the MoviePlus X5 disc is inserted into
your drive, click the Install… button and then simply follow the on-screen
instructions.

Getting Started
2
18 Getting started
Getting started 19
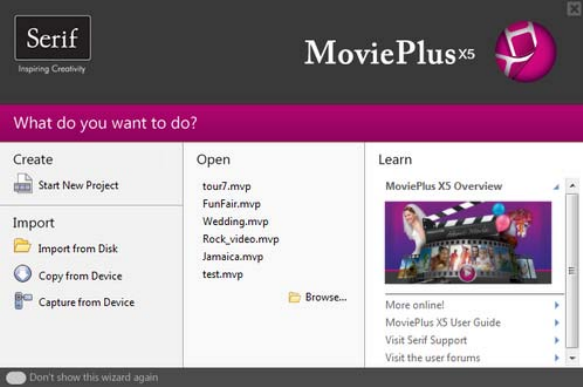
Startup Wizard
Once MoviePlus has been installed, you're ready to start. Setup adds a Serif
MoviePlus X5 item to the All Programs submenu of the Windows Start menu.
• Use the Windows Start button to start MoviePlus (or if MoviePlus is
already running, choose New>New from Startup Wizard... from the
File menu) to display the Startup Wizard.
The Startup Wizard offers different routes into the program for you to explore:
• Start New Project, to create a new project based on SD or HD project
settings.
• Import from Disk*, to add media files from your local disk or
network drive to a new project.
• Copy from Device*, to copy and add media files from your file-based
camcorder or removable device.
• Capture from Device, to capture video footage from your tape-based
camcorder or analog device.

20 Getting started
• Open, to quickly access previously saved or opened MoviePlus
projects.
• Learn, to access online tutorials and more resources.
* Project settings are matched to your media file's format.
The Startup Wizard is displayed by default when you launch MoviePlus. You
can switch it off via the Don't show this wizard again check box on the Startup
Wizard screen, or on again via Startup Wizard in Tools>Options... (use the
General menu option).
Click the Cancel button or press Escape on your keyboard to bypass the
Startup Wizard and launch MoviePlus with an empty project. The type of
project will match the last project you selected.
You can also access the Startup Wizard at any time from New>New
from Startup Wizard... on the File menu.
Starting a new project
By default, MoviePlus will be launched in Timeline mode (see p. 65), a time-
based multi-track workspace traditionally used by video editors.
Creating MoviePlus projects
MoviePlus bases its movie compositions around "projects". A MoviePlus project
file is a collection of project settings (the video size and shape, audio properties,
aspect ratio, etc.) plus information about how all your clips are arranged and
edited on the timeline.
The Startup Wizard lets you create projects either:
• without adding media files, as a blank project.
OR
• based on your imported or copied media (e.g., from your camcorder),
with media present in your Media pane.

Getting started 21
To create a new project without adding media files:
• From the Startup Wizard, choose Start New Project.
On first use, your project is based on PAL DVD project settings. For
subsequent sessions, MoviePlus will remember and use the project
settings used in the previous session.
The blank project is now ready to have media files added to it (see
p. 25).
You can quickly check your project settings from the Status Bar, or,
in more detail, via File>Project Settings....
If you want to add media files immediately, you can base your project on your
media file's source format. For example, as you add HD media files, your project
will intelligently use HD project settings matching those specific media files.
Your project is then set up with media files already present.
To create a new project that matches your media files:
1. From the Startup Wizard, choose:
• Import from Disk. Locate and select your media files, then click
Open.
OR
• Copy from Device. Using a wizard, choose your target device
(e.g., camcorder), select files, then click Finish.
2. From the dialog, click Yes to change project settings to match the
media file's source format. Click No to retain the project settings used
in the previous session (ignoring the media file's format). Check Don't
ask me again if you don't want to be prompted in future.
See Adding media files to your project (p. 25) for more information.
In timeline mode, you can base your project on a clip's source
format at any time by right-clicking a video or audio clip and
choosing Set Project Settings from Clip.

22 Getting started
As your project settings will be matched to your imported/copied
media file, your export settings will also be matched to those
modified project settings. As a result, choosing complicated project
settings when starting your project and exporting is not required.
Creating custom project settings
You can customize your current project settings at any time by modifying its
template.
To customize project settings:
1. Select Project Settings... from the File menu.
2. From the Project Settings dialog, pick a template in the Templates list
on which to base your new project settings (or select the Multimedia
preset for general use).
3. Click the Modify button to make a copy of the project, now named
(Untitled).

Getting started 23
4. Change various settings including the pixel size of your project, the
Pixel aspect ratio (many types of output use stretched pixels), the
video Frame rate (number of frames per second), Interlacing, and
Audio sampling rate.
5. When you are happy with your settings you can save your project
template for reuse—simply click the Save button, type a new preset
name and click OK.
Opening an existing project
You can open an existing MoviePlus project from the Startup Wizard, Standard
toolbar or the File menu.
To open a recently opened or saved project (via Startup Wizard):
1. From the Startup Wizard (at startup time or via File>New...), select
your project from the Open section. The most recently opened or
saved project will be shown at the top of the list.
2. Click the project name to open it.
Recently viewed projects also appear at the bottom of the File
menu. Simply select the file name to open it.

24 Getting started
To open any project:
1. From the Startup Wizard (at startup time or via File>New...), click
Browse....
-or-
Click Open on the Standard toolbar.
-or-
Choose Open... from the File menu.
2. In the Open dialog, navigate to, then select the project name and click
the Open button.
You can also open projects by file drag-and-drop from Windows
Explorer onto the MoviePlus workspace.
Getting started 25
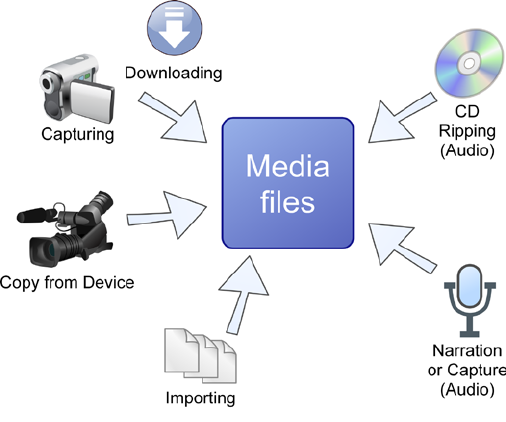
Adding media files to your project
The media files you use for your project could reside on a variety of devices,
typically on your camcorder's hard disk or flash card/drive, but also on your
mobile phone, digital camera, or computer drive (local, network, or removable
disc).
You can add media files from these location as you start a new project (p. 21) or
at any time by downloading, importing, capturing, or "ripping" media files into
MoviePlus's Media pane.
26 Getting started
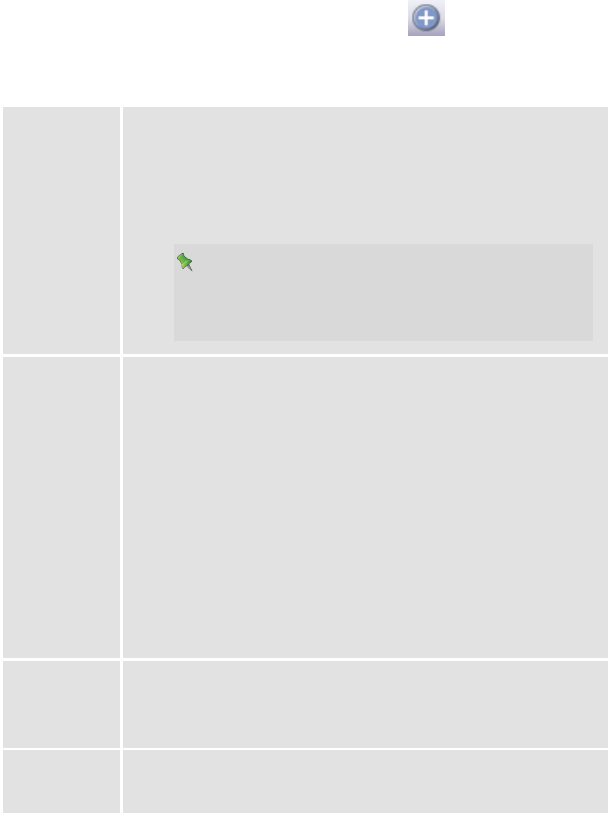
Media files are added by choosing an option from the Import Media
button on the Tasks toolbar or from the top of the Media pane. The drop-down
list lets you:
Import A standard dialog lets you navigate to, then select one or more
media files from your local disk or network drive for import
directly into your Media pane. Use Shift-select or Ctrl-select
for adjacent or non-adjacent multiple selection before
download.
You can also drag and drop files and whole folders
from Windows Explorer into your Media pane.
Folder names and any associated subfolders are
preserved in the pane.
Copy from
Device
Copy media from your HD/DVD camcorder, USB Hard
drive, USB memory stick, memory card reader, or
CD/DVD.
• From the Copy from Device button, select the
connected Device as a remote drive in the dialog,
then Browse... to a chosen folder, then click Next>.
• In the next screen, the device's media files can be
selected and downloaded to your computer's
Destination folder by clicking Finish.
Selected files show in the Media pane automatically.
Capture
With your tape-based camcorder connected via
USB/FireWire you can capture your movie's video footage
and/or audio to a file, with optional scene detection.
Rip CD Rip audio tracks from your favourite audio CDs straight into
the Media pane.

Getting started 27
The Media pane
The main purpose of the Media pane is to manage your media files before
committing media to your storyboard or timeline.
You can perform several important operations from the pane.
• You can reorder files by clicking and dragging thumbnails into the
position you wish them to appear on the storyboard (or timeline).

28 Getting started
• You can fix incorrectly oriented images or movies obtained
from your digital camera by using the Rotate Left and Rotate Right
buttons.
• Trimming (p. 32) can be carried out by using Trim.
Media files can then be added to your storyboard or timeline by drag and drop
(see p. 47 and p. 72, respectively).
Remember that MoviePlus does not rotate or trim your original media, but
instead on project "copies" of the original, thus preserving your valuable original
media in their original file locations. Thumbnails in the Media pane are just
links to their original files (try right-click Properties... to view file location). As a
result, changes made to files within MoviePlus will not affect the originals.
Until now, we've just been using the Project tab. Two other tabs, Library and
Explorer, are also available in the Media pane. The former stores media files for
future use while the latter provides a "window" to your computer's folders and
files—you can use media files directly from here but you won't be able to manage
your files as you can in the Projects tab. See MoviePlus Help for more details.
Capturing video
MoviePlus makes it easy to capture your own video and audio footage to your
PC from tape-based digital camcorders (e.g., Mini DV), analogue video sources
(e.g., analogue camcorders, VHS, or TV; all via a capture card) or USB web
cams.
Remember that videos stored on modern tapeless camcorders can be
downloaded directly from the device's hard disk, flash card, or internal DVD.
See Adding media files to your project on p. 25.

Getting started 29
To set up and initiate the video capture, a Capture Video dialog is used.
This example shows in-progress capture of digital video footage with associated
audio from a tape-based camcorder. As you capture (by pressing the Record
button), the footage is written to a file(s), which shows directly within the Media
pane.
To begin capture:
1. Click the Import media button on the Tasks toolbar (or Media
pane).
2. From the drop-down list, select Capture.
To connect your camcorder or other capture device:
If your camcorder is properly connected and supported (and is set to playback
mode rather than record mode if appropriate), you should see a video preview in
the preview window of the Capture Video dialog when your camcorder is
playing.

30 Getting started
If you are using an analogue video source, ensure that it is connected to your
video capture device (or a USB socket in the case of a web cam).
To choose an appropriate capture format:
If your source footage is on a tape-based camcorder, the video and audio capture
settings are greyed out in the Source Properties button as the capture format is
fixed to the camcorder's format. However, if your source footage is being
captured via a video capture device or USB web cam, you can choose a file
format suited to your video type by choosing this button.
It is recommended that you capture at a resolution and quality as high as
possible to achieve high quality results—it is best to aim as high as the source
footage resolution and quality. Even when you ultimately aim for your resulting
video to be very compact, for instance to make it suitable for download from the
Internet, you can defer the file-size-smashing resizing and compression
operations to final export time, don't compromise your captured quality!
To set a suitable file storage location:
Captured video footage can occupy a large amount of hard drive space when it is
transferred to your PC, so it is important to choose a drive location with lots of
room.
• Choose Options>Folders from the Tools menu, then Browse... for a
different Capture folder.
During capture, you can define a different destination Folder within
the Capture Video dialog (Output section).
To preview and cue your video footage:
For tape-based camcorders, transport controls under the preview window allow
you to cue your tape to the point at which you would like capture to start; for
other sources you'll need to control the device yourself, a remote control may be
handy here.
Getting started 31
To capture with scene splitting:
For DV video, the Split files by scene check box offers the chance for all your
scenes to be saved as separate video files as part of the capture process. For
capture from tape-based camcorder, the default is for the box to be checked so
that scenes are split (by timestamp) where the recording has been stopped and
restarted. For all other captures, if the box is unchecked, no splitting occurs so
you'll capture a single video file.
For non-DV video, e.g. from analogue devices, scene splitting is not possible; the
option is unavailable (greyed out) as time stamps are not present. Instead, scene
detection can be carried out (see MoviePlus Help). Scene detection does not
create separate video files but creates "virtual" scenes from a single video file.
For HD video, scene splitting may not be possible—if so, the Split
file by scene button will be greyed out.
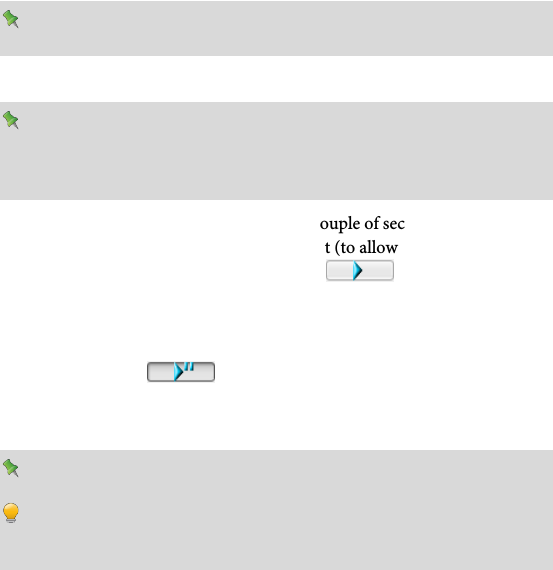
Record
Ensure that Video and Audio Capture check boxes in the Capture
Video dialog are checked if you want to capture both audio and
video. Check that your audio levels meter indicates that audio is
being played.
1. Play your video source from at least a couple of seconds before the
point at which you'd like capture to start (to allow the video device to
begin playing smoothly), then press the button.
2. Click Record in this dialog to begin the capture.
3. To skip footage, press Stop to finish capture, then pause the playback
by clicking the button, cue the tape to the point you would
like to proceed from, then play and record again to resume the
capture.
Don't use the "navigation" playback controls while recording!
It's better to capture too much footage rather than too little, it can
always be trimmed later, so don't worry too much about exactly
how much is captured if you are uncertain.

32 Getting started
4. When you are happy that all the required footage has been captured,
click the Stop button, then the Close button.
The captured video footage will show in your Media pane (see p. 27)
automatically on closing the Capture Video dialog. The files are still
physically located in your Capture Folder.
When MoviePlus captures your video or audio footage with scene detection, it
will automatically name and incrementally number your files if you do not
specify a particular filename (by default the Prefix "Capture" is used; the number
is added as a suffix). To change the prefix name, enter a new name in the dialog's
Prefix option.
Trimming
With audio or video clips, both duration and playback speed come into play.
Most often, you'll want to shorten a clip without altering its playback speed—
this is called trimming. For example, media files seldom begin or end exactly
where you'd like; there may be extra frames at the beginning or end, or you may
want to use a short section from the middle of the file. The solution is to trim the
media file—adjusting its start and end point, called "in" and "out" points, to
include just the section of video you want.
For any clip you can split your clip up into separate scenes, with each scene
capable of being edited as for any other clip.
Clips can be trimmed or split in either your Media pane, or via the Storyboard or
Timeline, by using the Trim dialog. Direct timeline trimming is also possible.

Getting started 33
(A) Frame Preview, (B) Clip timeline, (C) Discarded end frames, (D) Out point, (E)
Set In/Out Point, (F) Split, (G) Trim mode, (H) Playback controls, (I) Display
controls: Show/Hide Video, Show/Hide Audio, Undo/Redo, Delete Scene, Zoom
Out/In, (J) In point, (K) Discarded start frames.
To trim a single clip:
1. In the Media pane, select a clip and click Trim.
OR
Select a video clip on the storyboard (or timeline) and click Trim
on the context toolbar.

34 Getting started
2. From the Trim dialog, to trim to a specific time/frame (using the
Frame Preview):
1. Click on the ruler and drag the time indicator to the frame where
you wish to trim before (or after), or use the playback controls for
accurate frame-by-frame navigation.
2. Click the Set In Point (or Set Out Point button (or
use the keyboard shortcuts I or O, respectively). The unwanted
portion of the clip will appear in grey shading; the portion to be
kept is highlighted in orange.
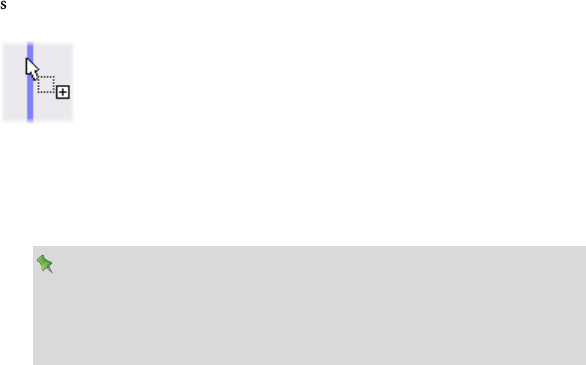
Or, for trimming visually by frame:
• Hover your mouse cursor over the furthest left (or right)
edge of the clip's timeline so that it changes to the Trim
cursor, then drag the mouse to the right (or left) to trim
away the start (or end) of your clip.
3. Click the OK button.
You can move the Slip handle to shift the in/out points of a
trimmed clip at the same time. This "sliding window" lets you
change the content of the trimmed clip without changing its
duration.
Multi-trimming and splitting
MoviePlus lets you create multiple trimmed clips, called scenes, from a single
video clip. You may want to do this to remove unwanted footage within your
clip, e.g. removal of poorly recorded frames, or simply just to create more
manageable scenes for flexible video editing.
Multi-trimming simply involves either the creation of multiple in/out points or
splitting your clip; both methods let you define a new scene equally. Splitting on
its own does not remove content (like trimming) but instead just chops the clip
up.

Getting started 35
To apply multi-trimming:
1. From the Scenes dialog, click Multi-trim.
2. Set the time indicator position successively for every in and
out point, clicking Set In Point then Set Out Point (or use the
keyboard shortcuts I or O, respectively) in turn as you move along the
timeline. Unwanted portions of your clip will appear in grey shading;
the portions to be kept appear as scenes in the dialog's right-hand
pane. The orange portion indicates current selection.
Newly created scenes are added to your Media pane's Project tab (under a Scenes
folder). They can then be added to your Storyboard or Timeline.
To split your clip:
1. Display the Trim dialog as described previously, then click the Multi-
trim button.
2. At the time indicator's position, click the Split button (or use the
keyboard shortcuts S). You'll see a new scene being created in the
dialog's right-hand pane.
3. Repeat for creating multiple split clips.

36 Getting started
The thin black vertical lines indicate the split positions (there are three
splits in the above example, creating four separate scenes).
Scene detection
For captured DV video not split at capture or captured analogue footage, you
can perform scene detection via the Trim dialog—simply enable Scene
Detection to create your virtual scenes. For more information, see MoviePlus
Help.
Previewing your project
The Video Preview pane will help you check that your movie editing is going
according to plan... you can preview your project at any time; MoviePlus will
begin playing your video, will compose a realistic end result from the contents of
your all video tracks, and will incorporate all transitions, effects, and other
envelopes on the fly. Audio levels can be checked at the same time.
You can even continue editing your project while the preview is playing as your
edits will be incorporated into the preview in real-time.

Getting started 37
The lower playback controls operate much like your DVD player controls and
allow you to navigate around your project during preview.
Go to Start
Jumps to the start of your project.
Previous Frame
Jumps to the previous frame in your project.
Click the Play or Pause button to start and
pause the video preview, respectively. On play,
the preview will begin from the current
preview marker's position.
Press the Space bar to play and
pause.
Click the Stop button (or ESC key) to stop
your video preview and reset the preview back
to where it originally started.
Next Frame
Jumps to the next frame in your project.
Go to End
Jumps to the end of your project.
Shuttle
Allows you to vary the preview playback speed
and direction by dragging from the centre
point to the left (to reverse) or to the right (to
fast forward); release the mouse to snap back
to normal play speed. This is known as "trick
play".

38 Getting started
Additional buttons at the bottom of the pane offer previewing and editing
options.
Select Tool
Lets you select objects (text, images, and shapes) in the pane for
editing.
Pan Tool
Lets you drag an area of your video around the pane. When used
with the right-click Zoom in option, this allows for more detailed
analysis of your project.
Transform Tool
(only shown for a transform envelope in Timeline mode) The
Transform button switches on the transform region to let you
adjust your transform positioning.
Add Text
The Add Text button can be used to add either one or more text
objects onto the currently selected clip or a new text clip (when
clips are not selected). (See Adding text on p. 169).
Add Image
The button is used to add an image object to your text clip. This
could be a saved frame (see below).
Add QuickShape
A QuickShape object can be created on your text clip within this
pane.
Guides and Borders
From the flyout, switch on/off layout guide lines and TV-safe
border.
Save/Copy Frame
The flyout allows the currently displayed frame to either be saved
to an image file (use Save Frame...) or copied to the Clipboard
(Copy Frame); the image can then be pasted as a graphic into a
photo editing program, e.g. Serif PhotoPlus. Saving a frame adds
the created image to your Media pane (Project tab).

Getting started 39
Previewing in full screen
At some stage you may want to view your project in full screen view. As well as
being able to see how your movie looks on a larger scale you'll be able view your
project without guides and make use of dual monitors (one set at default size
and one set as full screen).
To view in full screen:
• Click Full Screen on the Tasks toolbar.
Playback controls disappear during preview but reappear with a
mouse movement.
To close full screen view:
• Click Close to exit from full screen view.
Dual-monitor use
With dual monitors you can instantly preview your changes as you perform
video editing. If you're a dual-monitor MoviePlus user, you can display your full
screen view on your secondary monitor easily.
To operate dual monitors:
1. In full screen preview, click the button.
2. From the drop-down list, enable the "Monitor x" option from the
drop-down list (where x is the secondary monitor number).
After closing full screen preview, the setting is remembered. The secondary
monitor will automatically be used again for full screen preview.
• If you're experiencing poor playback performance (e.g., stuttering) you
can:
• Reduce the Render Quality (Preview menu).
• Use pre-rendering.

Editing in
Storyboard mode
3
42 Editing in Storyboard mode

Editing in Storyboard mode 43
Storyboard basics
If you're in Timeline mode, click Storyboard to switch to Storyboard
mode.
Storyboard mode provides the user with a simplified approach to movie
making. If you're a beginner to video editing or you've no requirement for more
complex multi-track editing techniques, the storyboard offers an easy-to-use
workspace to build up your project and visualize different scenes in your movie.
The easy-to-use storyboard is particularly suited to creating simple photo
slideshows or movies containing a mixture of image and video clips.
A major strength of the Storyboard mode is its simplicity. You'll only see
options, buttons, and dialogs that are needed for simple projects with the more
advanced multi-video-track editing controls being hidden in another mode,
called the Timeline mode (see p. 65). Think of the Storyboard and Timeline
modes as being like two sides of a coin—you can flip between modes to jump
between basic and advanced use any time you like.

44 Editing in Storyboard mode
(A) Text clip, (B) Video clip, (C) Time indicator, (D) Image clip, (E) Clip name,
(F) Duration, (G) Transition, (H) Chapter point, (I) Caption, (J) Effect(s),
(K) Pan & Zoom, (L) Audio clip, (M) Audio clip (Narration).

Editing in Storyboard mode 45
Text clip
A text clip can be added for use as a static or rolling title or as credits. The clip
has its own duration, and can be treated in a similar way to video/image clips.
Additional text, as separate text objects, can be added onto the clip as captions.
See Adding text on p. 169 for more information.
Video and image clips
Video and image clip thumbnails, representing your media elements, appear on
the storyboard when added by drag-and-drop from the Media pane.
Time indicator
In storyboard mode, the time indicator is used to carry out a preview playback of
your project from that point. The time indicator is also shown in the Video
Preview pane for the same purpose.
Clip name
The clip name is the name of your media file by default. If required, you can edit
the name in the Properties pane while the clip is selected.
Duration
The duration is the time the clip or transition will be displayed on screen. Video
clip durations cannot be edited, but for text clips, image clips and transitions,
click under their thumbnails to edit their values.
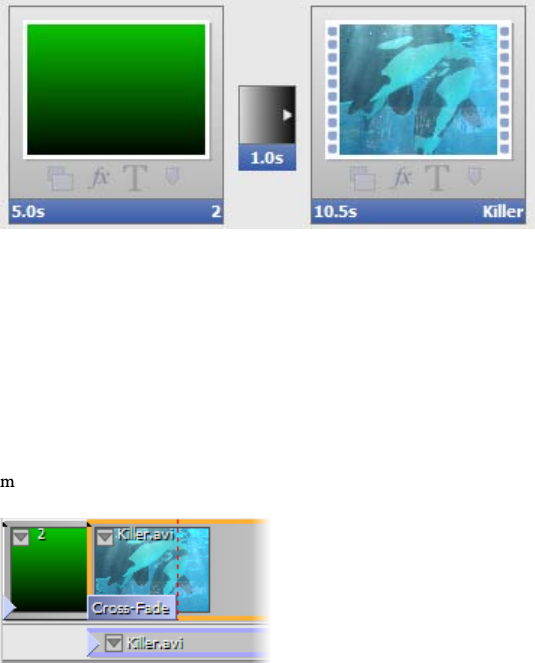
Transition
A cross-fade transition with a set duration is added between clips by default. The
default transition can be swapped for another and have its duration altered. See
Applying transitions on p. 52 for more information.
Chapter point
The icon indicates that a marker, used exclusively when creating menus for
your disc (DVD, Blu-ray, VCD), is associated with the clip. Your disc menu will
include your chosen clip as a chapter, which can be clicked to play from that
point in your movie. See Editing chapter properties on p. 194 for more
information.
Caption
Static or animated captions can be added to any clip. They are superimposed
onto the clip and, like text clips, can adopt a preset text style or be customized.
Caption text can appear for the clip's duration or for a shorter time.

46 Editing in Storyboard mode
Effects
The Effects icon indicates that an effect has been applied to the clip. Click
the icon to view currently applied effects in the Properties pane (Effects tab). See
Applying effects on p.136 for more information.
Pan & Zoom
The Pan & Zoom icon indicates that a Pan & Zoom effect has been applied
to the clip. Click the icon to view the current effect in the Pan and Zoom dialog.
See Using Pan and Zoom on p.55 for more information.
Audio clips and Narration clips
A narration clip is added to a narration strip under your video or image clips
after recording from a microphone. Likewise, audio clips show on their own
Music strip that lies below the narration strip. Use both in combination for
commentary over background music (e.g., soundtracks).
Adding media files
Media files show in your Media pane after capture, download or import (see
Adding media files to your project on p. 25). Once present, it's a great idea to
arrange the order of the files prior to adding them to the storyboard (see p. 47).
This avoids having to rearrange clips in bulk on your storyboard itself. Once
you're happy with the order you can add the media to the storyboard.

Editing in Storyboard mode 47
To add media to the storyboard:
1. From the Media pane, select your media, either:
• Click to select a single media file.
OR
• For multiple media files:
Use marquee select (to lasso files under a selection region).
OR
Use Shift key and click (to select a range of adjacent files).
OR
Use Ctrl key and click (to select a range of non-adjacent files).
OR
press Ctrl+A (to select all files).
2. Drag selected media onto your storyboard.
48 Editing in Storyboard mode
If the storyboard is empty, drag your clips directly into the empty workspace.
Video or image clips go to the "Drop clips here" target areas, while audio clips
snap onto horizontal narration or audio strips below the thumbnails.
If video clips are already present, insert your clip between existing clips. An
insertion point indicates where your clip is to be placed.
Multiple clips will be added one by one along your storyboard.
For most computers, MoviePlus will generate proxy files (p. 210)
from your HD media as it's added to your storyboard. You'll see a
progress bar appear on the bottom Status bar. This is expected
behaviour, and aids video playback on slower computers. Don't be
alarmed!
Selecting clips
When you are editing your movie and have already added a range of media clips
to your storyboard, all your editing operations (including moves, trims,
properties changes and other adjustments) are carried out on the selected clip.
Clip selection is straightforward but several options can be used for multiple
selection.
To select a single clip:
• Click on the clip. The clip's lower title bar turns orange.
To select multiple clips:
• Use Shift key and click (to select a range of adjacent clips).
OR
• Use Ctrl key and click (to select a range of non-adjacent clips).
OR
• Click Select all clips from the Edit menu (or press Ctrl+A).
Editing in Storyboard mode 49
When selected, the clip's thumbnail will
show an orange bar underneath it to show
that it is currently selected.
Arranging clips
The storyboard is a workspace that arranges clips automatically as they are
dragged to the storyboard. When you first add clips to the Storyboard from the
Media pane. the storyboard clip order is the same as the clip order in the Media
pane. It therefore makes sense to arrange your clips in the Media pane first. As
such there may not be a necessity to rearrange clips if the clip order is as
intended. Realistically, it's often the case that you may want to further modify
the clip order.
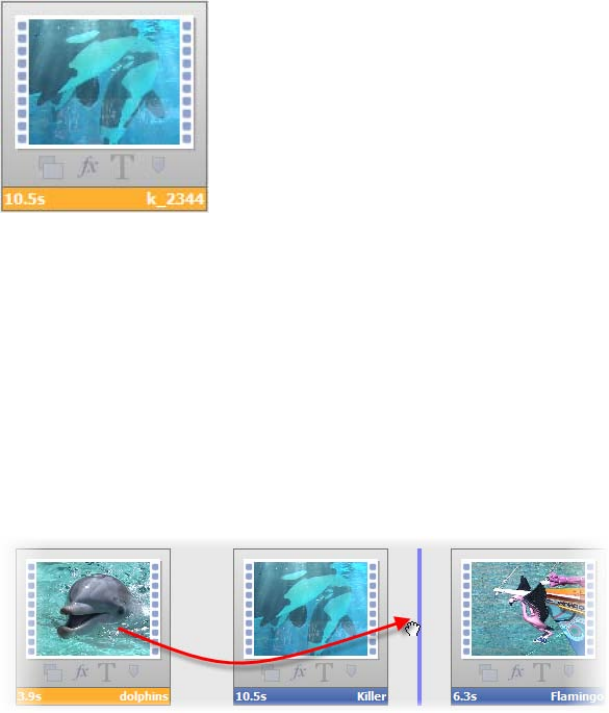
Once on the storyboard, an individual clip can be moved by drag and drop. The
vertical marker indicates the target location for the moved clip.
You can also copy and paste a clip by using options from the Edit menu. Both
methods can also be carried out on multiple clips simultaneously.

50 Editing in Storyboard mode
Deleting clips
• To remove a clip, select it and press the Delete key. By multiple
selection, you can remove more than one clip at the same time. Use
Ctrl-click to select non-adjacent clips, Shift-click for adjacent multiple
clips.
Resizing clips
If your added video or image clips are a different size and shape to your project
settings, MoviePlus will not resize your media to fit the project size, leaving
"black" bars (letterboxing) showing in the available space. Although you see
black, the letterboxing is actually transparent (you're really seeing the default
project background showing through).
The shape of the video in the Video Preview pane is determined by your project
settings; if your clip properties and your project settings are different, you can
decide what to do about the variance, i.e. you can leave the media with
letterboxing or correct it via cropping.
Cropping removes unwanted borders either automatically by fitting to the Video
Preview pane or by defining a crop area you draw yourself (anything outside the
area is discarded); the clip is resized to fit the project. While used frequently on
image clips (of unusual dimensions or if in Portrait orientation), you can also
apply cropping to video clips—although it's important to ensure items of interest
are not cropped out throughout the video clip's duration.
To resize a clip:
1. Select the clip.
2. Click Fit from the Storyboard toolbar and pick a resizing
option from the drop-down list.

Editing in Storyboard mode 51
Letterbox - This is not
normally set manually but can
be used to override auto-
cropping if this is deemed too
excessive an action (if the clip's
edges need to be preserved
rather than removed by
cropping).
Crop - This crops the clip to
make it fit with the project size
thus removing any letterboxing.
The clip's aspect ratio is
maintained so that the taller (or
wider) areas are left outside the
visible part of the project. See
Cropping on p. 88 for more
information.
Stretch - Stretches your clip
horizontally or vertically to
match the project video size—
removing the letterboxing
effect, but changing the clip's
aspect ratio.

52 Editing in Storyboard mode
Custom - Launches the Crop
dialog that lets you remove
everything outside a defined
crop area. Size the crop area by
moving corner (maintaining
aspect ratio) or side handles
(alters aspect ratio) then
position the crop area again by
dragging; the clip will resize to
fit the crop area. Click Match
project aspect to set the crop
area to the project aspect ratio.
You can double-click on the crop area to reset its size back to the
project’s dimensions.
Applying transitions (storyboard)
MoviePlus supports many different transition types. For example, you can
dissolve (Cross-Fade) between one clip and the next, or apply a variety of
patterned wipes that use a moving edge or outline. Transitions such as Iris
Wipe, Cross-Blur and Zoom & Spin are very popular in movie editing and are,
of course, fully supported. MoviePlus can also produce some awe-inspiring 3D
transitions—choose from 3D blinds, 3D Swap, 3D Flip, 3D Tumble, 3D Page
Roll, to name but a few.
Transitions are displayed as inter-clip thumbnails in Storyboard mode, which
change according to transition applied (the thumbnail represents the transition's
function). The transition's duration is shown under its thumbnail. Some
examples include:
Cross-fade
(default)
3D
Page Roll
Blinds
feathered
Editing in Storyboard mode 53
Each transition is applied to the start of a clip—this is called an In
transition.
You may notice a zero-length "transition" at the start and end of
your storyboard.
This is a straight cut, but you can create fade ins or fade outs
from/to black by changing the transition duration from 0.0s.
To change a transition's duration:
• Click the duration time under the transition thumbnail, enter a new
value, then press the Enter key.
Changing this value will automatically "ripple" all other subsequent clips along
the storyboard with respect to time.
To replace a transition:
1. Select one or more transitions on the storyboard. For multiple
transitions, Ctrl-click on each transition one-by-one; for all
transitions, right-click any transition, and select Select all transitions.
2. Click Transition Gallery on the context toolbar.

54 Editing in Storyboard mode
3. From the dialog, choose a category from the upper window. In the
lower window, review the presets available (their names indicate their
intended function). Select a preset, e.g. 3D Page Roll.
4. Click OK.
For a quick way to replace transitions, open the Galleries pane,
select the Transitions tab, then drag and drop a transition
thumbnail onto your transition.
Hover over any preset to see a preview of how your transition will
look!
To modify a transition:
1. Select the transition thumbnail.
2. From the transition's Properties pane, alter the transition's properties
at the bottom of the pane.
To delete a transition:
• Simply select a transition and press the Delete key.
The result is simply a cut: in less than the blink of an eye, the last frame of the
first clip is replaced by the first frame of a second clip. To reinstate the transition
at a later date, enter a transition value other than 0.0s.

Editing in Storyboard mode 55
To save a modified transition to a new name:
• Click Add to Gallery at the top of the Properties pane. Once
named, the transition appears as a new preset in the appropriate folder
in the Choose Transition dialog (or Transitions tab in the Galleries
pane).
Using pan and zoom
Pan and zoom "Ken Burns" effects can be used on any clip, but the effect really
comes into its own when used on image clips. Rather than displaying clips that
always display at the same size, you can easily apply panning and zooming
effects that create variety and interest in your project.

56 Editing in Storyboard mode
The effect is applied by using a dual-pane dialog, the left-hand Start pane
representing the start of the clip and the right-hand End pane, the end of the
clip. Simply adjusting the resizable selection area in each pane sets the zoom
level or pan position.
To pan and zoom your clip:
1. Click the clip on the storyboard (or timeline).
2. Select Pan & Zoom on the context toolbar.
3. From the dialog's Start pane, drag a corner or edge control handle (for
maintaining aspect ratio or unconstrained sizing) on the selection
area. Use the Alt key to resize the area in relation to the centre of the
area (rather than the opposite corner or edge). Once sized, reposition
the area with the hand cursor. If needed, click the Reset button to reset
each selection area back to the default size.
4. Adjust the area on the End pane in a similar way.
5. (Optional) Click Match project aspect on either pane to make the
aspect ratio of that pane's selection area match that of your project.
Editing in Storyboard mode 57
6. (Optional) Check Ease In or Ease Out on respective panes to apply a
non-linear rate of change to your pan and zoom (Quadratic slow
interpolation).
7. Click Close to save your resized or repositioned areas.
The result is two sized areas which, on playback, MoviePlus will pan and zoom
between according to the position and size of each area, respectively.
Using CG clips
Several types of Computer Generated (CG) clips exist within MoviePlus. They
differ from video or audio clips in that they are not captured by camcorder, but
are created from within MoviePlus itself. The following types of CG clip are
available:
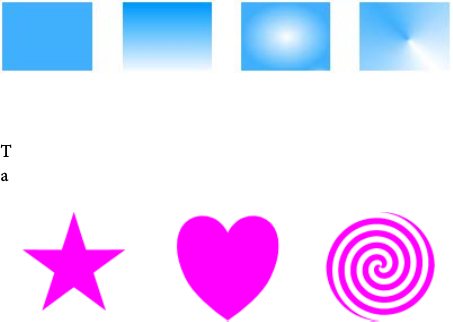
• Backgrounds
To apply simple solid or gradient colours as a clip. Use to introduce colour
either as part of a fade-in or fade-out or as a background to text. Other uses
include recolourizing semi-opaque video clips and masking shapes or text
over a background colour.
Solid Fill, Linear Gradient, Elliptical Fill, Conical Fill
• QuickShapes
To add modifiable ready-made drawn shapes such as stars, hearts, spirals
and many more. QuickShapes are great for techniques such as masking.
Star, Heart, Spiral
What CG clips all share is that they are managed in a very similar way within
MoviePlus, i.e. they can have colour, transparency and effects applied to them.

58 Editing in Storyboard mode
To apply a CG clip:
1. In Storyboard mode, select a clip (the clip before which the CG clip
will be added).
OR
On the timeline, position your time indicator on the timeline.
2. Select your chosen CG clip type from the CG Clip> option on the
Insert menu. By default, a white background or a QuickShape Ellipse
is added.
It's very likely that your CG clip will need to be modified, either to change its
colour or transparency. For QuickShapes, you'll more than likely want to change
the QuickShape type (see p. 61).
You'll find some ready-to-go sample gradient backgrounds or
QuickShapes in the Media pane (Library tab), under Samples>Fills or
Samples>Quickshapes. Simply drag to your storyboard or timeline.
Adjusting a clip's colour
MoviePlus offers a number of ways to apply colour to CG clips in MoviePlus.
You can apply solid or gradient colours to any clip's fill.
A new colour is selected from a spectrum of preset colours
or from a Colour Picker (both accessible via the Fill button
on the clip's Properties pane).
For gradient fills you can adjust the gradient path of any
gradient fill and the colours used to make up the gradient
(by clicking a square node and changing the colour).

Editing in Storyboard mode 59
Adjusting a clip's transparency
Transparency is great for highlights, shading and shadows, and simulating
"rendered" realism. It can make a huge difference between your clips looking
"flat" and appearing with depth and snap. MoviePlus fully supports variable
transparency and lets you apply solid or gradient transparency to your CG clips.
Like fills, transparency can be applied from the
clip's Properties pane. Select the Transparency
button and choose a percentage solid
transparency (via slider) or pick from a
spectrum of preset gradient transparencies. If
necessary, you can edit the transparency path.
• Solid transparency distributes the
transparency evenly across the object.
• Gradient transparencies (Linear, Ellipse,
and Conical), provide a simple gradient
effect, with a range from clear to opaque.
Varying the transparency of a CG clip gives the effect of variable erasure, but it
leaves the original object intact—you can always remove or alter the
transparency later. Transparencies work rather like fills that use "disappearing
ink" instead of colour. A gradient transparency varies from more "disappearing"
to less, as in the hexagon above.
To save your CG clip:
• Change the clip's name, then click the Add to Media pane at the
top of the clip's Properties pane. The clip will appear in the Media
pane's Project tab.
60 Editing in Storyboard mode
Fading with backgrounds
At the beginning or end of your project you can introduce a fade in or fade out
by using a background clip. Such clips can be editable gradient fills (linear,
ellipse and conical) as well as solid colours. They can equally be applied between
clips to act as a coloured interlude (possibly with added captions).
• On the storyboard, using a fade in as an example, you can introduce a
background clip before the initial clip (Insert>CG Clip>Background).
• On the timeline, you can do the same but ensure the time indicator is
set to the start of your project. If the clip you want to fade in to is
already at the left edge of your timeline, leaving no room for the
background clip at the beginning of the timeline, you should move
your video/image clip(s) further down the timeline, creating some
room at the start of your project. If you've already created a complex
composition with multiple clips and tracks—so moving the first clip
would disrupt the rest of your project—MoviePlus can move all of
your later clips at the same time when a clip is dragged. This automatic
moving of clips is called Rippling (see MoviePlus Help).

Editing in Storyboard mode 61
Other timeline fading methods can be carried out using Colour-
Fade or Cross-Fade transitions.
More about QuickShapes
You're more than likely to swap the default Ellipse for a different shape. An
impressive selection of QuickShape types can be chosen from, and once you've
picked a type, you can further morph its shape—all from within the
QuickShape's Properties pane. The ability to further alter the appearance of any
QuickShape type makes them more flexible and convenient than clipart pictures
with similar designs.
To change your QuickShape type:
Once added to your timeline, the QuickShape type can be edited in its Properties
pane (or by pressing F4). The lower portion of this pane hosts several options
which will affect your QuickShape's appearance, i.e.
• Click the QuickShape type drop-down list to swap the default
QuickShape Ellipse for your preferred shape.
• The QuickShape preview window updates to show the current
QuickShape, without colour fills or effect applied. This lets you focus
on the main purpose of the window—to morph your QuickShape with
ease.
The Stretch to project size checkbox, if checked, will ensure that
the QuickShape will fully occupy the frame size.
To morph your QuickShape design:
• In the preview window, select a square control handle appearing next
to the shape. Different QuickShapes have different handles. To find
out what each handle does for a particular shape, move the control
handles while reading the Status Bar. You can alter shapes
dramatically with combinations of control handle adjustments. It's
best to experiment!
62 Editing in Storyboard mode

Editing in
Timeline mode
4
64 Editing in Timeline mode

Editing in Timeline mode 65
Timeline basics
Introduction
Click Timeline to switch from Storyboard to Timeline mode.
For more advanced projects (compared to simpler storyboard-driven projects),
the timeline lets you organize all your video and audio footage on multiple
tracks, sequence clips one after the other, add and edit envelopes, effects, and so
much more. The timeline offers the equivalent of all the manual editing
operations that traditional film editors need and it allows for post-production
alterations.
The timeline has two basic dimensions, height and length. Horizontal length
relates to the duration of your project: your timeline has markings along a ruler
to indicate the passing of time, starting with zero at the left of the timeline. Any
clips added to your timeline will follow a playback sequence from left to right.
You can position the start point for previews (or the point at which you'd like to
perform an edit) using a vertical marker called the Time indicator—this shows
on both the timeline and as a preview marker in the Video Preview pane. The
height of the timeline is related to the number of video or audio tracks used—
you'll need to introduce more tracks if tackling advanced editing techniques
including overlays, masking, blue/green-screening etc.
We'll describe some terminology used for various parts of the timeline and your
project so that understanding timeline operations becomes clearer.

(A) Counter, (B) Chapter Point, (C) Marker, (D) Time Indicator, (E) Timeline ruler,
(F) Strips, (G) Video Clip, (H) Audio Clip, (I) Transition, (J) Selected Keyframe,
(K) Unselected keyframe, (L) Image Clip, (M) Effect, (N) Audio Track,
(O) Keyframe View, (P) Envelopes, (Q) Video Track, (R) Attributes menu button,
(S) Video Group, (T) Overlay Track.

Editing in Timeline mode 67
Timeline elements
Headers
Headers control the strip they are attached to. In the case of tracks and groups,
adjustments to the header can affect all the clips on a track or all the tracks in a
group (or both), respectively. You can select the track/group by clicking its
name, mute (and unmute) to disable or enable its contents in the project
composition, and display envelopes for opacity and transform (for video
tracks/groups) or volume and pan (for audio tracks or audio buses); a clip's crop
envelope may also be shown along with its opacity and transform envelope.
Track-wide effects may also be displayed.
The header may also show a clip's envelope or applied effects—these attributes
are revealed by clicking its Attributes button, and selecting an attribute.
Strips
Strips are the horizontal "stripes" running the length of the timeline (to the right
of the headers section) that can store your clips. Each strip allows you to edit and
arrange clips, as well as edit their effects, transitions, and envelopes. Each strip is
accompanied by a header to its left.
Video/Image/Audio Clip
A clip is a media element; an "object" you can place on a timeline track. Clips can
also include Computer-Generated (CG) clips (backgrounds, text, and
QuickShapes). It's important to appreciate the difference between clips, tracks
and groups because MoviePlus will allow you to add effects, for instance, to each
or all of them with differing results.
Video/Audio Track
A track is just a straightforward combination of a single strip and its header. You
can add multiple clips to a track by dropping a multiple selection from the
Media pane onto your track's strip. The clips will be added to the timeline in
succession with a default overlap. You can apply effects and envelopes (like
opacity or a transform) to tracks, which will have a resulting effect on all the
clips on that track. MoviePlus supports multiple audio and video tracks so that it
is possible to compose more complicated projects with "layers" of video using
fades to reveal underlying layers.
A Music Track is also provided for optional soundtracks.
68 Editing in Timeline mode
The Overlay Track, shown on a new project's timeline, is used to host text
captions such as movie titles as well as video overlays. Titles will be
superimposed over underlying movie content. These are dragged from the
Galleries pane (Titles tab).
Video Groups
Groups are not only a way of keeping complex compositions tidy—you can also
restrict editing to selected tracks by placing them inside a Video Group. Effect
Groups, for both Video and Audio, work in an identical way for global effect
control. The View menu also has an option to Show Master Groups, a top-level
group to allow you to mute, apply effects to, or adjust envelopes for all video or
all audio at once.
Keyframe View
When you add an envelope or effect to a clip, track, or group, or when you want
to edit an existing envelope, effect or transition, the Keyframe View is displayed
directly underneath the clip, track, or group.
Keyframes
Keyframes are points along a strip associated with a clip, track, or group's
attributes (envelope, effect, or transition). The keyframe stores your chosen
settings for use at a specific point of time along your timeline. Using more than
one keyframe along a strip, MoviePlus automatically (and gradually) changes
from one keyframe's settings to the next keyframe's settings as time passes
between them. For example, on an opacity envelope, a keyframe at time zero
with a setting of 0% opacity followed by another keyframe two seconds later with
a setting of 100% would cause a gradual "fade in" effect over a period of two
seconds. The keyframes can have their properties modified in the Properties
pane when selected, and can be moved along the timeline to different points.
Envelopes, Effects and Transitions
Any time a clip, track, or group's keyframe View is displayed via a common
Attributes menu, the strips that show belong to one or more attributes of that
object. Each attribute can be of type envelope, effect, or transition, and are
grouped together for easy management. Normally you'll see envelopes, effects or
transitions, but not all three attribute types all at once (this saves valuable
timeline space). Each clip, track, or group cannot possess more than one
envelope of the same type; only two transitions can be set on any single clip (you
can't set a transition on a track). There is no restriction on the number of effects
a clip, track, or group can have.
Editing in Timeline mode 69
Marker
Markers act as guides on your timeline to indicate key time location or events
that occur within your project. They can be labelled, positioned and navigated
equally.
Chapter point
A chapter point is a type of marker that is used exclusively for disc creation.
Each chapter point placed on your timeline defines the start of your chapters
shown in your disc menu.
Set Selection Start/End
Selection markers set a start and end range on your timeline within which any
encompassed clips will be either pre-rendered (for optimized preview
performance) and/or exported to file, PSP, or iTunes (Apple devices). The
markers apply to all clips, tracks and groups down the entire height of the
timeline. Limiting your export range is ideal for sharing only a chosen section of
the movie, rather than the whole movie.
Time indicator
The time indicator, the blue vertical line you can see spanning the height of the
timeline and its ruler, is most easily thought of as your editing marker. It allows
you to set a precise position for splits and trims, allows clips and keyframes to be
accurately positioned on your project timeline, and can be used along the
timeline ruler to play back a preview of your project from that point. You can
also position your time indicator over the start/end of a clip then single-click to
set a precise time indicator position. The time indicator is also shown in the
Video Preview pane to indicate your playback position during playback.
Timeline ruler
The ruler runs along the top of the timeline and shows you the current time
range for the visible part of your project. You can zoom in or out of the timeline
using a mouse wheel to display more or less of your project timeline on screen.
A single-click on the ruler will position the time indicator marker for editing or
video preview. You can alter your ruler units using the View menu's Ruler Units
flyout. The default setting of "Time and Frames" is in the format hh:mm:ss/ff,
representing hours, minutes, seconds and frames (of video), respectively.
Counter
The counter sits at the top-left of your timeline and shows you time at the time
indicator. It uses the format set in the View menu's Ruler Units flyout.

70 Editing in Timeline mode
Clip/track indicators and buttons
An LED in the top-left corner indicates if the clip (or track) is included in the
composition (green) or if it is temporarily disabled (red). If you mute a
track/group, the track/group header and each clip on that track/group would
show a red LED to indicate that they are disabled. Clips also have blue triangular
handles at each end that can be dragged to introduce an automatic cross fade
(the fade can be replaced with a different transition by dragging and dropping a
transition preset onto the clip's blue transition bar).
Attributes menu
On clips and track/group headers—clicking the Attributes button displays
an Attributes menu, which is used to show envelopes, effects or transitions
applied (along with their keyframes). The button will display in different colours
according to selection and if the object's attributes have been modified, i.e.
Grey/White. Attributes unselected and unmodified.
Red/White. Attributes selected and unmodified.
Grey/Yellow. Attributes unselected and modified.
Red/Yellow. Attributes selected and modified.
Mute
Any clip, track or group can be muted at any time during video preview. You
may want to temporarily switch off an audio track while you are editing and
previewing the same track again and again. Equally, you may want to mute or
“black out” a particular clip while testing your project.
Muting is possible by clicking the respective Mute buttons on a video
or audio track's header. For a video or audio clip, you can right-click and select
the Mute option.
To keep the attribute(s) on permanent display, click the drawing pin in the
header of your clip, track or group's attributes strip. Click again to hide.
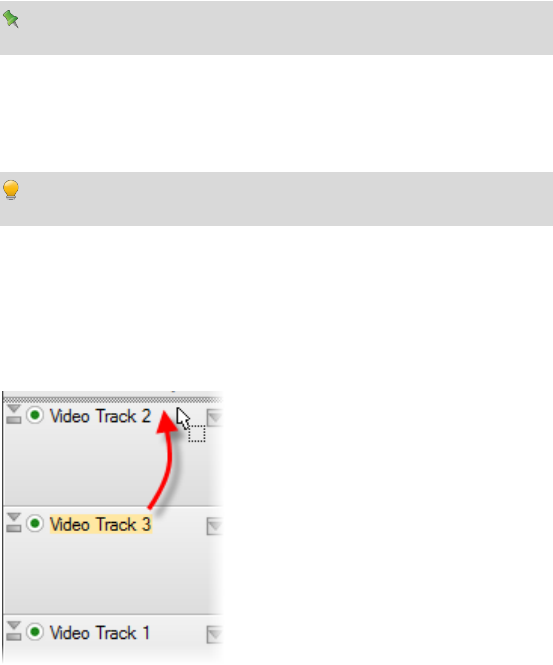
Editing in Timeline mode 71
Adding and arranging tracks
In Timeline mode, three tracks are displayed on the timeline by default, i.e. the
Overlay Track, Video Track, and Audio Track. The empty video and audio
tracks will allow a video and its linked audio clip (if present) to be dragged onto
each track from the Media pane.
The empty Overlay track can take text (as captions) or video (for
blended video overlays).
To add extra tracks:
• Choose Video Track or Audio Track from the Insert menu. The track
is inserted directly above any selected track of the same type.
Use the Shift key as you insert to add a new track below any
selected track rather than above it.
To change the track order:
• Drag the appropriate track header further up or down the stack of
headers at the left of the timeline. You'll see a grey line between tracks
and a place cursor where your track can be inserted. Release the mouse
button to place.
The above example reorders two simple video tracks (selected Video Track 3 is
dragged to be placed above Video Track 2).

72 Editing in Timeline mode
Adding media files
Media files show in your Media pane after download, import, or capture (see
Adding media files to your project on p. 25). Once present, it's a great idea to
arrange the order of the files prior to adding them to the timeline (see below).
This avoids having to rearrange clips in bulk on your timeline itself. Once you're
happy with the order you can add the media to the timeline.
To add media to the timeline:
1. From the Media pane, select your media, either:
• Click to select a single media file.
OR
• For multiple media files:
Use marquee select (to lasso files under a selection region).
OR
Use Shift key and click (to select a range of adjacent files).
OR
Use Ctrl key and click (to select a range of non-adjacent files).
OR
press Ctrl+A (to select all files).

Editing in Timeline mode 73
2. Drag selected media onto your timeline. Multiple clips will be added
one by one along your timeline. Tracks suitable to specific clip types
will be offered.
Video and image clips must be located on video tracks, and of
course audio on audio tracks.
For most computers, MoviePlus will generate proxy files (p. 210)
from your HD media as it's added to your timeline. You'll see a
progress bar appear on the bottom Status bar. This is expected
behaviour, and aids video playback on slower computers. Don't be
alarmed!
Selecting clips (timeline only)
When you are editing your movie and have already added a range of media clips
to your timeline, all your editing operations (including moves, trims, properties
changes and other adjustments) are carried out on the selected object(s). So, let's
cover how you go about selecting clips!
The good news is that you can simply click on clips to select them. Whether it's a
video, image, audio, or text clip, a click will outline it in orange to show you that
it is selected. Track or group names (in the header) also show in orange.
Clips obtained for your camcorder will have both a video and audio clip—you'll
see each displayed next to each other on the timeline. Selection of the video clip,
will always select the audio clip, and vice versa.
Selecting multiple clips
You can select multiple clips (including clips that are linked) as follows:
• To select non-adjacent clips, hold the Ctrl key down on your
keyboard and click each clip you would like to include in the selection.
Ctrl+click again to remove a clip from the current selection.
• To select adjacent clips on a single track, click a clip at one end of your
proposed selection range, hold the Shift key down and click on the
clip at the other end. All clips in between, plus the selected clips, are
selected.

74 Editing in Timeline mode
• For marquee selection, hold your primary mouse button down and
drag a rectangle on your timeline—anything touching (and also
anything inside) the rectangle will become selected.
When multiple clips are selected, you can perform stretching on all clips
simultaneously.
To make your multiple selection a permanent feature of your timeline for
continuous easy editing, you can create a Link as described in Arranging clips
(see p. 79).
How selected objects are displayed
Object Selection status
Clip has been clicked and is
selected (an orange border appears
around the object). You can now
modify its properties in the
Properties pane, and perform
other operations (trim, fit, etc).
The linked audio clip below the
video clip shows a blue border
when the video clip is selected.
When any object in a link is
selected, all other items in the link
take on this "blue" selection
highlight. Although not actually
selected, edits will affect it.
Link overlays show in light blue.

Editing in Timeline mode 75
This clip has had one of its
envelopes, effects, or transitions
modified (e.g., a keyframe below
the tracks in the Keyframe View
area) as the Attributes button has
changed from grey/white to
red/yellow.
(Grey) A keyframe on an envelope,
effect, transition, background,
QuickShape or text strip. This
keyframe is not selected.
(Red) A keyframe selected by
single-click. You can now modify
this keyframe's properties via the
attributes Properties pane.
A track is selected when its name is
highlighted. Other strip headers
(clip strip headers,
effects/envelope/transition strip
headers) have a similar
appearance.
This track has had one of its
envelopes, effects or transitions
modified.

76 Editing in Timeline mode
Zooming, scrolling, seeking, and scrubbing
(timeline only)
To see more or less of your project at one time or to navigate your project, you
can perform various operations along your timeline.
Zooming
The Timeline toolbar hosts a series of very useful tools for zooming your
timeline.
To see more of your project in the timeline area, click the Zoom
Out button or scroll your mouse wheel downwards. To see more detail on
your timeline to make it easier to perform fine edits, click the Zoom In
button or scroll your mouse wheel upwards.
You can use the zoom slider on your timeline as an
alternative to using the Zoom buttons.
To see your entire project within the available timeline area—simply
click the Zoom to All button.
If your time indicator is out of view due to a zoom operation or
playback of your project preview, select Scroll to Time Indicator from the
View menu to jump to the time indicator's current position.
Scrolling
To scroll the timeline horizontally, hold down the Shift key while using your
mouse wheel, or to scroll vertically, hold down the Ctrl key.
It's also possible to drag your time indicator to the left or right edge
of your window to scroll previously hidden parts of your timeline
into view.

Editing in Timeline mode 77
Seeking
The Video Preview pane also helps with some seek operations.
• The Go to Start and Go to End buttons let you jump to the
beginning or end of your project, respectively.
• For fine tuning the position of the time indicator (i.e.,
frame stepping or frame advance), for instance to perform a trim
operation at a specific frame of video, you can use the Previous Frame
and Next Frame buttons.
•
The Shuttle control allows you to vary the preview playback speed and
direction by dragging from the centre point to the left (to reverse) or
to the right (to fast forward).
Your preview will update any time the time indicator is moved, so you should
always use the preview in conjunction with your editing operations.
Scrubbing
Scrubbing might seem an unusual term but it is an extremely useful feature! You
may already know that clicking along the ruler above the timeline sets your time
indicator's position. However, if you click and drag along the ruler, MoviePlus
will preview your project at the speed of the drag—as your mouse passes along
the timeline in either direction, the preview will show you the current frame.
This allows you to pass your mouse over an area of the timeline to preview a
specific section without starting and stopping preview playback.

78 Editing in Timeline mode
Arranging clips (timeline only)
Arranging clips on your timeline is crucial to building interesting, more complex
projects—typically to create a rich multi-track multimedia project with the most
popular video editing techniques.
Simple arrangement—clips following one another
When you want one clip—a video or image—to directly follow on from another
clip, they need to touch each other on the timeline with no space in between
them. When one "scene" follows another in this way, it's often referred to as a
"cut" although you don't need to get the scissors out to achieve it with
MoviePlus.
Simply drag clips along on the same track so that they are positioned next to
each other. When two clips are close together the one you are dragging will snap
into place.
A default cross-fade transition shows between multiple clips when
dragged onto the timeline.
Making one clip appear on top of another
MoviePlus uses multiple tracks in a similar fashion to the way photo-editors
(such as Serif's own PhotoPlus) use multiple layers. Many compositions are
perfectly fine with one "layer" but you can introduce some interesting effects by
layering your images or videos on top of each other.
MoviePlus composes your video based on timeline content, working from the
top downwards. If you have multiple tracks in your project with a full-size video
on the top layer, it could well obscure all underlying tracks because you can't see
through it... but if your top-most track (or clips on it) contains Images (with
transparency), Background, QuickShape or Text clips with reduced opacity,
resized video or images using a transform envelope, video with a mask applied
or a Chroma Key effect, you will be able to see through to underlying tracks.
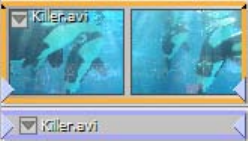
Editing in Timeline mode 79
So, to make one clip an overlay appearing on top of other clips, add an
additional video track (choose Video Track on the Insert menu), then place the
video or image you would like to appear as an overlay on the top track. All tracks
support images or video with transparency, and all tracks follow the same
timeline, so objects are almost as easy to arrange when using multiple tracks as
they are for single-track projects.
For caption text superimposed on underlying video, you can use the default
Overlay Track which can take any Title caption presets dragged from the
Galleries pane.
Deleting clips
Any selected clip on your timeline can be deleted by pressing the Delete key.
Any accompanying linked clip will also be deleted, i.e. a video clip and its
associated audio clip are removed simultaneously.
Linking clips together for easy editing
Automatically-linked clips
When you add a video clip to your timeline, you will normally find that two clips
are added to your timeline—one video clip and one audio clip, on an adjacent
video and audio track, respectively.
This is because the video file contained both an audio and video stream that
MoviePlus has separated for you for editing purposes. Because these two streams
came from the same location, MoviePlus automatically links them together.
When clips are linked, edits to one of the objects will affect other linked objects.
If you select your video clip and perform a split, for instance, the linked audio
clip will split in the same place.
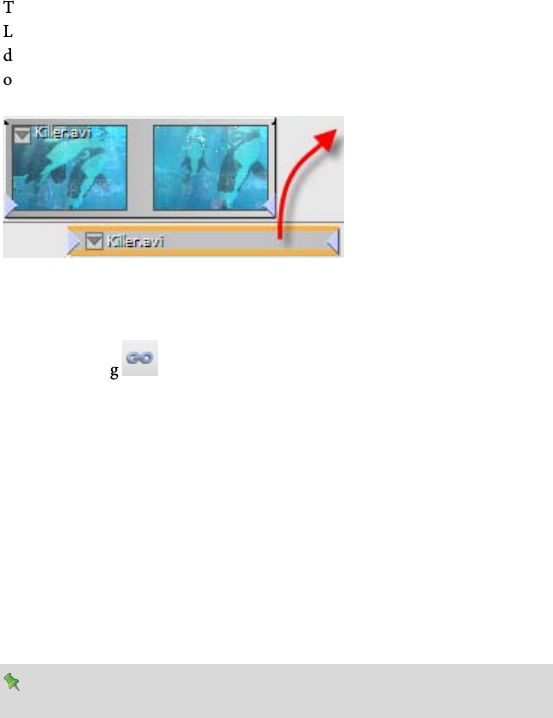
80 Editing in Timeline mode
When moving clips, any linked clips on different tracks will move to new relative
locations on the timeline providing there is enough space on each track for your
clips to relocate to.
Temporarily disabling Linking
There are occasions where you may find the need to temporarily disable
Linking, for instance when trying to trim clips that are part of a Link,
discard an unwanted audio track (below), or copying a clip independently
of its linked clips.
Unlinking/linking media
Linking operations can be carried out in several ways:
• By clicking Linking on the Timeline context toolbar. Ensure
clips are selected.
OR
• Via right-click Link and Group> submenu (or via Edit menu).
• Select Unlink to unlink the clips (or Unlink All to unlink all
currently linked clips).
• Select Link to establish a link between selected video and audio
clip (if the clips are not already linked).
MoviePlus lets you link between an unlimited number of clips,
either on the same or across different tracks.

Editing in Timeline mode 81
Unlinking/linking overlays
Link overlays are used to associate a video clip with an overlay, e.g. a caption
such as a movie title or credits, superimposed over your video footage.
By their nature, overlays have to occupy a higher level video track above any
given track. The overlay could equally be another video clip.
By linking, you can keep control of your overlays when moving your video clip,
as the overlay will move with it. The overlay can be moved independently, but
will always move with your video clip while linked.
Linking/unlinking operations are as described for Unlinking/Linking media
described previously but by using equivalent Link Overlay and Unlink Overlay
options instead.
Linked overlays show with a light blue border when selecting the
underlying video clip.
Grouping clips
The selection of multiple clips allows you to move those clips around your
timeline at the same time, but only while they remain selected. As a more
permanent solution for dragging, copying, and deleting, grouping clips makes a
connection between clips until you choose to ungroup them. The grouped clips
can be moved together at any time, until ungrouped.

82 Editing in Timeline mode
Grouping operations described below are provided in a Link and Group> right-
click menu, but are all also available from the Edit menu.
• Group: Groups two or more selected clips. If you've got grouped files
already selected, use Ctrl-click to select another clip to be grouped,
then select this option.
• Ungroup: Select a file already grouped, then choose this option to
remove just the selected file from the group.
• Ungroup All: Click any grouped file then select this option to ungroup
itself and all other files that are grouped.
Grouped clips show on your timeline with a dark-blue border; the selected clip,
being part of the group, will show with an orange border.
Groups are ignored when trimming—you'll be able to trim clips
without affecting the grouping.
Aligning frames
The Align To Frames option on the Arrange menu will enable and disable
snapping to the nearest frame of video. Video frames are typically about 30 or 40
milliseconds apart (there's typically 25 or 30 frames per second of video), so you
can choose whether your Time indicator-based editing snaps to these divisions
or is totally freeform. Frame snapping, or align to frames, is the normal mode to
work with unless you are trimming audio to a very fine degree.

Editing in Timeline mode 83
Rippling
Rippling is a design aid that takes some of the headache out of making
room on your timeline, or taking up slack (empty) space on the timeline by
keeping your clips' relative positions constant when you make edits (this also
includes a clip's keyframes). Rippling saves you the effort of moving multiple
clips for the sake of what is often a minor edit, perhaps to make room at the start
of your project for titles or a new intro or the deletion of a section of video from
the middle of a project. You can enable and disable Rippling using either the
Rippling button on the timeline's context toolbar, or by using the command on
the Arrange menu.
Moving clips
Rippling affects other clips (and their envelope, effect or transition's keyframes)
starting at the same time or after the clip you are moving. When you move a clip,
those other clips that start at the same point or later on the timeline will shuffle
left or right to account for your move.
When trimming or extending the end of a clip
Rippling only affects other clips that both start after your edited clip starts and
end after the end of your edited clip.
When trimming the start of a clip
Rippling affects other clips that start and end after the start of your edited clip,
and it also moves your edited clip to the same "start time" it had before you
trimmed its start, shuffling other affected clips at the same time.
Ripple mode
Rippling can be set to work in one of four modes: it can affect the track
you are working on, all tracks of the same level (e.g., those within a group), all
tracks on the same level including marker rippling, or the whole timeline (with
marker rippling). The last two options allow markers to maintain their positions
relative to the moved clips—otherwise marker positions will not alter when
rippling takes place.
84 Editing in Timeline mode
Rippling with complex projects
For complex multi-track projects, you might worry that Rippling won't manage
all the necessary moves—don't worry, Rippling works regardless of the number
and type of clips or tracks involved. Providing you have selected the appropriate
Ripple mode you can move a large number of clips that span multiple tracks by
having Rippling enabled. Be sure to select an appropriate timeline zoom level
when selecting and moving your clips—you may wish to use a low zoom level
(to see all of your project) to make the move easy, but you might find that using
a higher zoom level (seeing just a few small clips) allows you to more easily select
and drag the correct clip. MoviePlus will automatically scroll the timeline in the
direction of your drag until you centre your mouse to choose a "drop zone", but
you could instead type a new start time for your selected clip in the Properties
pane—Rippling works however a clip is moved.
Snapping
Snapping is a design aid that helps you achieve neat layouts. When you are
moving objects around on the timeline (or trimming/stretching them), snapping
makes your edit jump to the nearest clip, to the position of the time indicator, to
the beginning of the timeline, and to a default transition overlap value.
By default, snapping is enabled, although you can switch it off from the Arrange
menu. To control which elements do and do not get snapped to, or to adjust
snap sensitivity, visit the Snapping tab (Tools>Options). Hold down Alt during
your editing operations to temporarily switch snapping off (or on, if disabled).
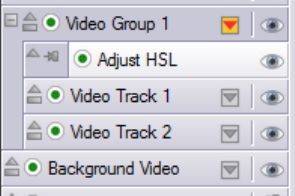
Editing in Timeline mode 85
Using groups (timeline only)
Video groups
Video groups serve a couple of important functions on MoviePlus's timeline.
Firstly, they can help keep related tracks together for easy management. For
instance, applying an effect to a video group means that all tracks within the
group inherit the effect.
Video Group 1 contains Video Track 1 and Video Track 2 (but not the
Background Video track). The Adjust HSL effect has been applied to the Group
(and therefore Tracks 1 and 2 simultaneously). Background Video is not subject
to the effect.
The next main function for video groups is more complicated but very useful,
i.e. limiting the range of a transparency effect or mask. Masks and the Chroma
Key effect are both methods of achieving transparency (see p. 114 and 118).
To add a video group:
1. Select the video track above which you want to insert a group.
2. Choose Video Group from the Insert menu.
Once you've created a group you have to then associate chosen tracks to the
group.

86 Editing in Timeline mode
To add a track to a group:
• Drag and drop the track over the group header.
The track will be nested under the group if the operation is successful.
To drag a track out of a group, aim to drop the track at the bottom edge of the
group or any header position that is as wide as the group's header.
If using video groups, click the Collapse/Expand button to collapse the
group's tracks, envelopes, or effects.
Applying opacity to video groups
You can adjust the opacity of a video group in two ways—either by adjusting the
group's Opacity slider in the group’s Properties pane, or by adjusting a group's
opacity on its opacity envelope. For the latter method, click the Attributes
button in the group header to reveal the Attributes menu—select Opacity to
reveal an editable inline opacity envelope. This will allow you to fade the result
of an affected section of video organized within a group, for instance, or to make
a series of still image overlays appear translucent—without having to edit each
clip or track in an identical way.
See Using envelopes on p. 90 for more information about revealing and editing
envelopes in general.

Editing in Timeline mode 87
Transforms—perspective, scaling, and motion
You can apply transforms, such as perspective effects, resizing, or animated
motion, to video groups. Such an effect would allow for the composite result of a
group to be used as an inset video, for instance. To learn how to edit a transform
envelope, see Adjusting keyframes on p. 95.
Master groups
Show Master Groups (View menu) lets you affect all the video groups and video
tracks separately but in one fell swoop. For example, you could apply a video
effect to all videos in your project by applying it to the master group.
The Master Group appears in your timeline header and contains all your tracks.
Video effect groups
Video effect groups are not used frequently but are essential if you wish to blend
affected and unaffected video. The affected video would have cumulative effects
applied, which could be blended in and out of the mix by adjusting the
keyframes of the Video Effect Group's envelope. See p. 133.
Audio effect groups
The audio equivalent of video effect groups. See p. 145.
Trimming clips on the timeline
You can perform multi-trimming via the Timeline toolbar’s Trim button (see
p. 32) or directly on the timeline.
To trim a clip on the timeline directly:
1. Hover your cursor over the start (or end) of your clip so that the
cursor changes (to or ).
2. Click and drag to the right (or left) to trim away the start (or end) of
your clip.
To trim accurately, position your time indicator at the exact position you want
to trim to, then drag the start (or end) of your clip to the time indicator.

88 Editing in Timeline mode
Splitting clips on the timeline
The Trim option in the Media pane allows you to split a clip into separate scenes
before adding to the timeline. However, you can still split any video clip once on
the timeline at the currently set time indicator's position.
Splitting a clip into two lets you insert another "filler" clip in between each split
clip. You can perform multiple splits to create distinct sections of your clips for
deletion.
To split a clip:
1. Select the clip you would like to split.
2. Position the time indicator on the ruler at the point in the clip where
you'd like to make the split.
3. Click Split on the Timeline toolbar.
If you have no clip selected, all clips across tracks are split at the
time indicator.
Cropping
You can perform simple crops on any clip by using the Fit button in
either Storyboard or Timeline mode (See Resizing clips on p. 50). This affects the
clip for its entire duration. However, the power of the Timeline mode lets you
change a clip's cropping over time (just as for transforming a clip).
The method for cropping and transforming over time is similar in the way it is
applied, i.e. like a transform, cropping uses a dedicated envelope, which is
accessible for any clip from the clip's Attributes menu. This crop envelope is
displayed, controlled and modified as for any other envelope. It can host one or
more keyframes along the envelopes length (called the strip) to dictate the crop
selection area, i.e. each keyframe sets the crop area size at that time.
For a quick recap on envelopes and keyframes, see p. 90 and p. 95.
MoviePlus opens up some interesting possibilities when cropping over time as
you can pan in any direction, zoom, pan/zoom together and create panoramas.

Editing in Timeline mode 89
To make life easier, you can perform the above operations by adopting a pre-
built crop envelope preset.
To use a crop envelope preset:
1. Select a clip and choose Apply Envelope... from the Insert menu.
2. From the dialog, pick the Crop folder, a crop preset from any child
folder, then click on a preset under that folder.
3. Click OK.
You'll notice the crop envelope appear under your clip.
The envelope typically shows two keyframes, each storing the crop area's size at
that time. The properties of the selected keyframe ( ) show the sized crop area.
You can modify the envelope by adjusting the crop area on each keyframe in the
envelope, and optionally saving the preset to a new name.
Alternatively, you can set the crop area manually by entering Top, Bottom, Left
or Right percentage values (click the Manual drop-down option).
To save your modified envelope:
• Click Add to Gallery in the envelope's Properties pane. You'll be
asked for an envelope name. The envelope is saved to the root Crop
folder of the Envelope dialog (or Galleries pane).
90 Editing in Timeline mode
Cropping with masks
As a very powerful way of cropping irregular shaped objects (as opposed to
cropping to square or rectangle areas), cropping video with masks involves using
a simple image overlay to describe which areas of your video should remain
visible and which areas should become transparent.
Masks are usually simple images made with a transparent region and a white
region; when applied correctly in the MoviePlus timeline, these images affect
underlying video, with white in the mask translating to visible regions of your
video and transparency in your mask translating to transparent (cut/cropped)
regions of the video. You can use this functionality to hide (or crop away)
portions of your video that you do not want included. Masks allow for irregular
cropping, cropping with soft edges, animated cropping; the possibilities are
infinite, as are the number of mask images or videos you can create.
For more information see Masks on p. 114.
Using envelopes
Envelopes in this context are not an item of stationery, they are a method of
applying change to a clip, track or group's properties over time. Imagine an
envelope as a hidden "track" that runs along with each clip, track, and group in
your project and at specific times you determine how it changes its properties.
Between the specific times you specify envelope settings, MoviePlus can
calculate smooth changes to the properties.
There are different types of envelopes that all work in very similar ways for
controlling cropping, opacity, and transforms for video clips, and volume and
stereo pan for audio clips. Once you learn how to display and modify one type of
envelope, you can apply the same principle to all other envelope types. However
there is a distinction between some envelope types.

Editing in Timeline mode 91
• Opacity, Volume and Pan: These simple envelopes can adjust the
properties of an object over its duration on the timeline. They appear
as thick strips because the envelope only affects one attribute (e.g.,
volume level). This lets you position buttons (called keyframes) in the
vertical axis to create fade-ins or fade-outs of opacity, volume and pan.
For example, a volume envelope could be used on an audio track to
fade-in the sound at the start of your video.
• Crop and Transform: These more complex envelopes can also adjust
the properties of an object over the timeline, but as they possess
multiple properties which are often inter-related, they can't be easily
represented on the timeline. Therefore, they appear as a thin strip
stretching the duration of the clip, track or group, leaving the
envelope's Properties pane to take on the configuration role.
Envelopes can be edited, copied, pasted and muted (to temporarily switch off its
effect). Editing of the envelope is possible on the whole envelope or on
individual keyframes within the envelope itself.

92 Editing in Timeline mode
Displaying envelopes
Envelopes can be displayed as strips that show under the selected clip, track or
group. Choose from the options below:
For clips
Click on the button on top of your clip
to reveal an Attributes menu. When an
opacity, crop or transform envelope is
selected from the menu, the clip's Keyframe
View is displayed directly below the clip.
All envelopes are shown in separate strips with your chosen envelope already
selected. To change to a different envelope either click another envelope's name
in the video header or click anywhere in the envelope strip on the timeline.
The button, being grey/white, will change colour to red/white when selected.
If your envelope has been modified it will adopt a red/yellow colour.
For video tracks and groups
Click on the button in the header section of a selected track or group to
reveal an Attributes menu. Like clips, selected envelopes and keyframes show
under track or group.
Adjustments to envelopes will affect all clips on the track, or all tracks in the
group. For example, adjustments to a video group's opacity envelope will result
in opacity changes to the composite result of the group's contents. For example,
if a video group contains four tracks each with a transform envelope that makes
each track fill just one quarter of the visible area, all four videos would
simultaneously have their opacity adjusted when you modify their group's
opacity envelope. Groups are also used when cropping or masking video, so you
may want to adjust the group's opacity—rather than individual tracks or clips.

Editing in Timeline mode 93
Preset envelopes
MoviePlus provides a great selection of preset crop, opacity, and transform
(video/image) and volume and pan envelopes (audio) to apply to your clips,
tracks or groups. Use the presets to get you started or to simply save you time.
To apply an envelope preset:
1. Select the clip, track or group.
2. From the Attributes menu, select Opacity, Crop (clip only), or
Transform to show its envelope.
3. From the Properties pane, select Gallery....
4. From the dialog, navigate the tree menu structure and choose a preset
envelope. Your envelope shows automatically under the object.
5. Click OK.
Editing envelopes
All envelopes are powerful because of the potential to manipulate existing or
added keyframes along the envelope's length. This keyframe control is at the
heart of not only envelope management, but also the management of effects and
transitions, and is described in detail in Adjusting keyframes (see p. 95).
All envelopes have one default keyframe positioned at the start of the object,
which defines how the envelope will operate either until the next keyframe on
the timeline or for the duration of the clip, track or group.
Resetting envelopes
An envelope cannot be deleted but instead its resident keyframes can be deleted,
effectively resetting the envelope back to its default state. Simply select the
envelope and press the Delete key.

94 Editing in Timeline mode
Copying and scaling envelopes
An envelope can be copied by right-clicking on its header and choosing Copy.
When an envelope is copied to the clipboard, it can be pasted to another selected
object to replace the existing envelope of that object, e.g. an opacity envelope
from one clip will overwrite the opacity envelope of another video clip by copy
and paste.
If an envelope is copied and pasted from one clip to another clip further down
the timeline, associated keyframes can be optionally scaled so they are in
proportion with the new clip. This is also useful if you are changing the total
length of the track as the key frames are scaled to that new length. To do this,
change each keyframe's Keyframe Mode to Proportional in the envelope's
Properties pane. Another advantage of scaling is that you can save your own
custom envelope to a new preset, safe in the knowledge that the keyframes are
never stored with absolute times, and instead can be scaled easily to any object
on the timeline in the future!
Saving envelopes
To save your envelope to a new name (in the Properties pane) along with
your existing presets, use the Add to Gallery button in the envelope's Properties
pane. After providing a name, your new envelope is saved in the envelope type's
root folder.

Editing in Timeline mode 95
Adjusting keyframes (timeline only)
The Keyframe View
When you add an envelope, effect or transition to a clip, track, or group, the
Keyframe View is displayed directly underneath the object as a white area, e.g.
for a clip.
When you want to edit an existing envelope, effect or transition, click on the
grey/white button on your object to reveal a drop-down Attributes menu. On
selecting a menu item, the object's currently applied envelopes, effects and/or
transitions are shown in one or more strips directly under the object (the button
changes to red/white). Each strip allows you to induce change over time,
whether it's for an envelope, effect or transition. The points in time that you
specify such change are represented on these strips by keyframes ( or when
selected).
The Attributes button will change to red/yellow ( ) if an envelope, effect or
transition has been edited and then to grey/yellow when a modified object
has all its strips hidden.
Once the Keyframe View is enabled, you will be able to edit envelopes and their
keyframes, causing change over time.
96 Editing in Timeline mode
What are keyframes?
A keyframe is the small grey circle that appears on the envelope, effect or
transition strips. For tracks and groups there is a default keyframe at the start of
the timeline. For selected clips, the default keyframe is set at the start of the clip,
so when you move your clip its envelope also moves in synchronization.
Keyframes store information about the property you are editing. If we use
opacity as an example, as it's such a simple property, MoviePlus draws a line of a
set height along the length of its envelope to describe whether the current
opacity value is high, low, or any stage in between (as shown).
The initial single keyframe defines the opacity level by its vertical position in the
envelope (see how the Properties pane's Opacity value changes as you drag the
keyframe up and down).
You can modify keyframe properties when a keyframe is selected—click a grey
(deselected) keyframe and it will turn red (selected).
Modifying the default keyframe
To modify the default keyframe you can either move it up and down within the
strip (for some simple envelopes) or just click the keyframe to select it (it will
turn red) then adjust its properties in the Properties pane (for complex
envelopes, effects, or transitions). You can also move the keyframe further along
the timeline to the right.
An important point about the first and last keyframes when moved
is that their properties will extend to the beginning and end of the
clip, track, or group.
Adding and modifying keyframes
To cause change over time (by changing an object's properties), it is essential to
add and subsequently edit keyframes along the attribute's strip (for crops,
transforms, effects, and transitions). For effects and transitions you'll need to
apply them in advance.
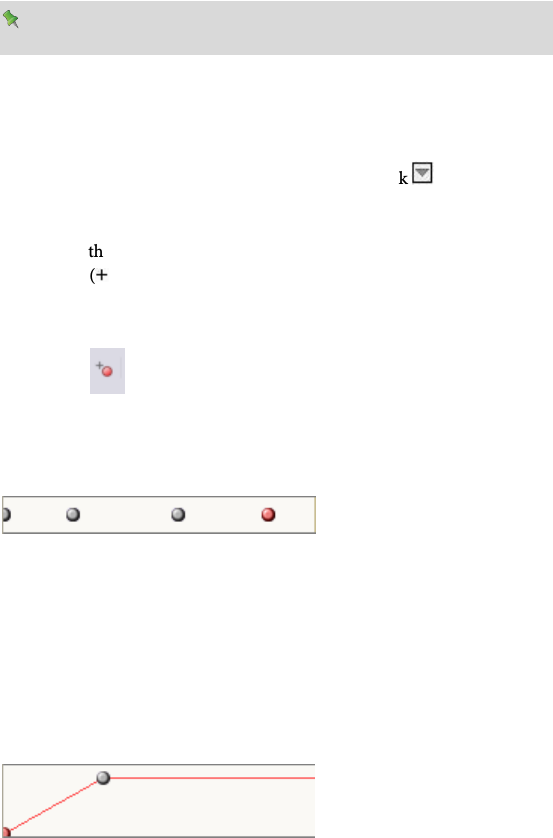
Editing in Timeline mode 97
Any added keyframe adopts the properties of the keyframe
immediately preceding it on the timeline.
To add a keyframe:
1. (Optional) Position your time indicator for accurate keyframe
placement.
2. Select the attribute from the Attributes menu (click ).
3. In the strip's header, select the attribute to add a keyframe to.
4. Hover the cursor along the object's strip until it changes to the Add
cursor ( ), then click to add the keyframe. If you've positioned your
time indicator, hover over the point where the indicator intersects
with the strip—you'll add a keyframe that snaps to an exact time.
You can also use Add Keyframe on the Properties pane; this adds a
keyframe at the current time indicator's position.
Whichever way keyframes are added, they can be arranged along a strip at
chosen intervals (a keyframe is red when selected).
For some simpler envelopes such as opacity, pan and volume, you can add and
edit keyframes as above but you can also drag the keyframe up or down to adjust
the keyframe's properties directly. These envelope strips are designed to have
more depth for this reason—great for fade-in and fade-outs on opacity and
volume envelopes.
In this example, a volume envelope on an Audio track fades in at the start of a
movie. MoviePlus draws the rate of volume change as a line between the
keyframes.
Any keyframe can be modified via the Properties pane—simply select the
keyframe (making it red) and display the Properties pane for editing.

98 Editing in Timeline mode
Selecting keyframes
At some point you may want to select more than one keyframe at the same
time—typically to cut, copy, or move keyframes. You can also change
Interpolation or Keyframe Mode by right-clicking on multiple keyframes and
accessing a flyout menu. MoviePlus lets you select multiple keyframes as for any
other object on the timeline.
• Use Ctrl-click to select each keyframe in turn.
OR
• Drag a marquee around a region containing your keyframes.
Moving keyframes
You can move one or more selected keyframes left and right along the strip
which has the effect of moving them earlier or later along the timeline. For more
precision, you can also set a selected Keyframe time position in the Properties
pane.
Navigating keyframes
• Use the Ctrl+< and Ctrl+> keyboard shortcuts to Select Previous
Keyframe and Select Next Keyframe on a strip (also available on the
Transport menu).
OR
• Use the button in the Properties pane.
Copying keyframes
Any selected keyframe can be copied to the clipboard. Simply select a single
keyframe (or multiple keyframes with the Ctrl key), right-click and select Copy.
When keyframes are on the clipboard, they can be pasted into any attribute strip
of the same type they came from. They will be pasted at the time indicator
location.
Editing in Timeline mode 99
If an envelope, effect or transition is copied and pasted from one clip to another
clip further down the timeline, associated keyframes can be optionally scaled so
they are in proportion with the new clip. This is also useful if you are changing
the total length of the track as the keyframes are scaled to that new length. To do
this, change each keyframe's Keyframe Mode to Proportional in the envelope's,
effect's or transition's Properties pane. Another advantage of scaling is that you
can save your own custom envelope, effect or transition to a new preset, safe in
the knowledge that the keyframes are never stored with absolute times, and
instead can be scaled easily to any object on the timeline in the future!
Altering rate of change between keyframes
By default, where you have two keyframes with different values, MoviePlus will
gradually step from one range of settings to the next in a smooth manner—this
is known as Linear interpolation. MoviePlus is interpolating (calculating) values
between the keyframes and the change is linear, i.e. half way between the values
you will have encountered half the required amount of change.
However, it's handy to be able to alter the rate of change, as in video production
it's usually a good idea to aim for smoothness—sudden starts or ends to
movement (as with other effects) is not always desirable and can sometimes
detract from the video content.
To alter the rate of change between keyframes:
1. Right-click a keyframe, to view the Interpolation flyout. This offers
handy previews of the rates of change as curved or straight lines, like a
graph or chart.
OR
Select a keyframe, and in the keyframe's Properties pane, click the
More option to reveal keyframe properties.
2. Choose an interpolation method via the Interpolation option.

100 Editing in Timeline mode
Using the volume envelope example below, a right-click on the first keyframe
will allow you to adjust the rate of volume change towards the second
keyframe—a curve appears between keyframes.
The first keyframe is subject to a Quadratic Slow curve to start and end the fade-
in slowly.
On occasion, you may wish to apply a Hold interpolation on a keyframe where,
instead of change over time, the keyframe's properties remain constant for its
duration. These are particularly useful on an audio clip's volume envelope where
you may want to switch the volume on and off at specific points along the
timeline (instead of fading).
Positioning keyframes
When you modify an object or you intend to copy and paste an attribute's strip
to another object's attribute strip (of different length) you can choose various
mode options to decide how MoviePlus will reposition a keyframe once it is
copied.
• For an envelope, effect, or transition, the Keyframe Mode setting
offers various positioning options for keyframes; this affects only the
currently selected keyframe(s).
The Keyframe Mode settings, found by right-clicking the Keyframe or from the
More section of the attribute's Properties pane, can be one of the following:
• Absolute: Selected Keyframe does not move (default). Great for
corresponding your keyframes to an event on the timeline.
• Proportional: Selected Keyframe moves in proportion to the new
object's length (i.e., duration). Useful for creating presets (e.g.,
envelopes) whose keyframes will scale to any target object.
• Relative to Start: Keyframe will move relative to the start of the strip if
the object's length is changed. Use for fade-ins.

Editing in Timeline mode 101
• Relative to End: Keyframe will move relative to the end of the strip if
the object's length is changed. Use for fade-outs.
• Proportional (excl. transitions): As for Proportional, but applies only
to the clip's inner range excluding transitions.
• Relative to Start (excl. transitions): As for Relative to Start, but
applies only to the clip's inner range excluding transitions.
• Relative to End (excl. transitions): As for Relative to End, but applies
only to the clip's inner range excluding transitions.
If you want to apply the same Keyframe Mode to multiple keyframes, you can
select your keyframes (see Selecting keyframes), right-click, and pick a new
setting from the flyout menu.
When keyframes have a Keyframe mode of "Absolute" they are
affected by Rippling (if turned on). Other modes will be unaffected
by rippling.
Applying transitions (timeline)
Any time one piece of video ends and another begins, a transition takes place. In
its simplest form, the transition is simply a cut: in less than the blink of an eye,
the last frame of a clip is replaced by the first frame of a second clip.
In MoviePlus, the term “transition” applies to a more gradual way of switching
from one clip to another. If you add multiple media files from the Media pane or
overlap two clips slightly on the same or separate tracks, you get a time-based
change between them, shown as a blue region. An In transition called "Cross-
Fade" is added by default to the second clip.
For audio, an equivalent transition is added to fade the audio from the first to
the second audio clip.

102 Editing in Timeline mode
The default Cross-Fade and Fade transition types have no
associated properties. However, all other transition types have
associated properties, which can be modified at any time.
Changing transition type
MoviePlus offers an impressive selection of transition types that you can swap
your default transition for. Types range from 3D blinds, bands, wipes, fades,
slides, spirals, and more.
To change transition type:
1. Select one or more transitions on the timeline.
• For specific transitions, Ctrl-click on each clip's transition region
one-by-one. This can be carried out across multiple tracks if
needed.
• For all transitions on a single track, select any single transition on
the track, then press Ctrl+A.
• For all transitions across multiple tracks, select a transition on
each of the tracks (with Ctrl-click), then press Ctrl+A.
2. Click Transition Gallery on the context toolbar.
3. From the dialog, choose a category from the upper window. In the
lower window, review the presets available (their names indicate their
intended function). Select a preset, e.g. 3D Page Roll.

Editing in Timeline mode 103
4. Click OK.
The Transition name(s) changes, e.g. from "Cross-Fade" to "3D Page Roll":
The end of the first clip is indicated by the vertical dashed red line.
For a quick way to replace transitions, display the Galleries pane,
select the Transitions tab, then drag and drop a transition
thumbnail onto your transition.

104 Editing in Timeline mode
Manual transitions
Another type of transition is a manual transition, which can be either an In
transition or Out transition. They are created manually at the start or end of a
single clip, respectively. The former can be useful as a fade-in on the first clip at
the start of a track (first example below). Conversely, an Out transition can be
applied to the last clip in any track as a fade-out (second example below).
In Transition Out Transition
You may have noticed that the above transition region's shapes are different
compared to previous examples. The arrow-shaped regions indicate manual
transitions—the arrow is actually a handle to drag left or right to adjust the
transition's duration.
To change a manual transition's duration:
Drag the left or right-hand end (as shown below) of the transition region to
stretch or shrink it, or specify an absolute value in the transition's Properties
pane.
Remember that each transition takes time to happen—so make sure the video in
the overlap region is not part of the main action. If you expect to use transitions,
it’s a good idea to allow a couple of seconds of non-essential material at the start
and end of clips when you initially capture them.
The duration of Automatic transitions is altered automatically by
moving either clip on the timeline.
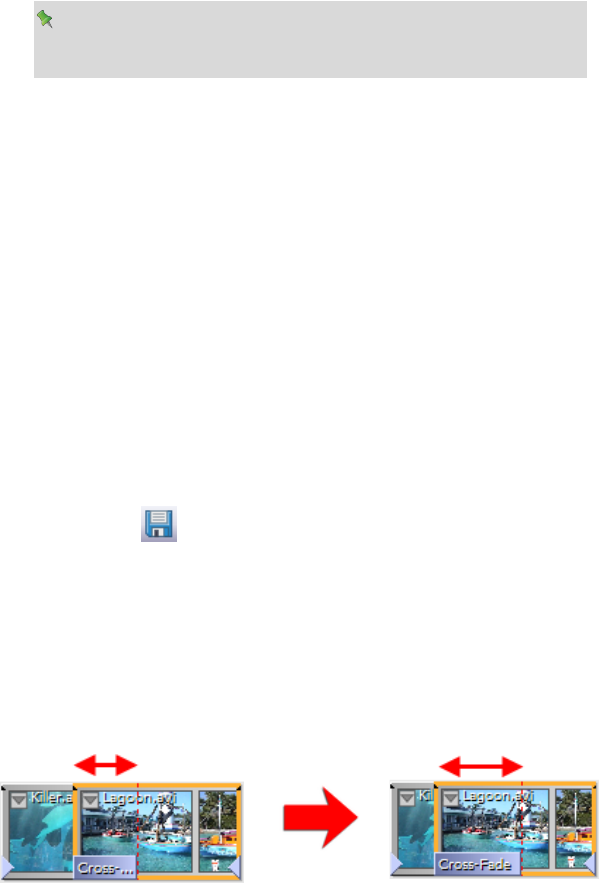
Editing in Timeline mode 105
You can also modify the transition duration of one or more
automatic or manual transitions using the Properties pane's
Duration option.
Modifying transitions
Transitions added to your project will have their own set of properties associated
with them. These are highly customizable via the Properties pane, just like any
other object in MoviePlus. Try selecting a transition region and check its
properties in the Properties Pane.
The ability to customize transitions by changing these property settings means
that the presets supplied are merely a starting point for you to further create and
save your own transitions to your own requirements.
To modify a transition:
1. Select the transition region.
2. From the transition's Properties pane, alter the transition' properties at
the bottom of the pane.
To save a modified transition to a new name:
• Click the Add to Gallery button at the top of the Properties
pane. Once named, the transition appears as a new preset in the
appropriate folder in the Choose Transition dialog (or Transitions tab
in the Galleries pane).
Overlaps
The overlap is the region in between overlapping clips where the transition will
be visible.

106 Editing in Timeline mode
The overlap region is the area between the start of the second clip and a red
vertical dashed line indicating the end of the first clip.
Overlap control is especially useful when creating photo slideshows in
MoviePlus. Even though your added clips will have a set overlap shown between
them, you can modify an individual or selected clip's overlap easily.
To change the clip overlap:
1. Select the clips on your track(s).
2. From the Timeline context toolbar, enter an Overlap value.
Changing the overlap doesn't affect the clip duration but will affect
the clip's position on the timeline if rippling is enabled.
If you want to use a specific overlap value for all clips, try setting the
Overlap value before dragging media onto your timeline. All clips
will adopt the currently set overlap. If you set an overlap of zero in
advance you'll add clips without automatic transitions.
Adjusting transition properties
A transition, when applied, possesses a single keyframe which dictates the
transition duration, interpolation, and settings particular to the type of
transition, e.g. blur, transition direction, etc. This applies a uniform setting
throughout the transition's duration.
A single keyframe is shown in a Transition strip, shown directly below the clip
when double-clicking the transition region (double-click again to hide the strip).
In and Out transitions are shown in separate strips with your chosen transition
already selected. For example, for an automatic In transition "3D Page Roll" and
manual Out transition "Iris Wipe" applied to a single clip:

Editing in Timeline mode 109
Using markers
Markers of any type can be added at any point on your timeline—they can be
labelled, repositioned by dragging, as well as navigated.
To insert a marker:
1. Click on the timeline ruler to set the time indicator's position.
2. From the context toolbar's Marker drop-down list choose:
• Insert Marker.
OR
• Insert Chapter Point.
OR
• Set Selection Start (or End).
By default, markers will be named according to type, i.e. Marker 1, Marker 2,
Chapter 1, Chapter 2, Selection Start, etc.
To rename your marker:
• Go to the selected marker's Properties pane and edit the Marker field.
To select a marker:
• Click the marker box (whether a basic marker, chapter point, or
selection marker) on the timeline ruler (use Ctrl-click to select
multiple markers; or Ctrl+A to select all markers).
To delete a marker:
• Click on the marker and press Delete.
110 Editing in Timeline mode
Navigating markers
If you're working on a long timeline you may need to navigate your markers so
you can check that each marker is of the correct type and position. The
navigation method is the same for any marker type (basic, chapter point, or
selection marker).
To navigate markers one by one:
• With any marker selected, use Ctrl+Shift+left or Ctrl+Shift+right
arrow keys
To navigate markers via dialog:
• From the context toolbar's Marker drop-down list, select Go to
Marker... to select from markers (of any type) listed in a dialog.
Using chapter points
Chapter points are a type of marker used to define where chapters play from in
your generated disc—much the same as the initial menu shown in any movie
DVD from your local movie store. When you decide to create your disc, these
named chapters will be shown as menu thumbnails that can be clicked to play
the movie from that point.
In the Menu Designer, chapter points inserted in your timeline will be detected
and the associated chapters will be thumbnailed automatically (see Menu
Designer on p. 190).
MoviePlus supports multi-level menus, where you can store your main chapters
on the top-level menu (first page) while subsidiary chapters can be made to
appear on a secondary menu (second page). For the former, select Top Level in
the Properties pane for any chapter point you want on the top level. Any other
chapter points (with Top Level unselected) appear on the secondary menu.
Optionally, add alternative title text that will display next to your menu's
thumbnail label. Otherwise, the Marker name is used as the menu label.
In Storyboard mode, chapter points can be inserted at the start
of any clip by clicking the thumbnail's Chapter Point button.

Editing in Timeline mode 111
As an example of chapter points on the timeline, a holiday movie could have
named chapter points which represent key points on the movie, e.g. Castle,
Dolphins, Flamingo, etc.
If you want to convert a basic marker to a chapter point, simply
select chapter point in the selected marker's Properties pane, and
set the additional chapter point options as required.
Using selection markers
Selection markers differ slightly from basic markers and chapter points. Instead,
they work in pairs to set a time range on your timeline within which MoviePlus
can perform operations limited to that set range. Operations include:
• Pre-rendering part of the timeline that contains complex MoviePlus-
applied effects and transitions, for improved preview playback.
• Exporting a part of your movie by setting an export range. Used for
exporting to file, PSP, or iTunes (for video-capable Apple devices).
To limit to a specific time range:
1. Click on the timeline ruler to set the time indicator's position.
2. From the context toolbar's Marker drop-down menu, choose
Set Selection Start (or right-click on the time indicator) to set the start
of your time range. From the same menu, select Set Selection End to
set the end of your range.
3. (Optional) Drag your Selection Start and Selection End markers
along the timeline to fine-tune your time range.
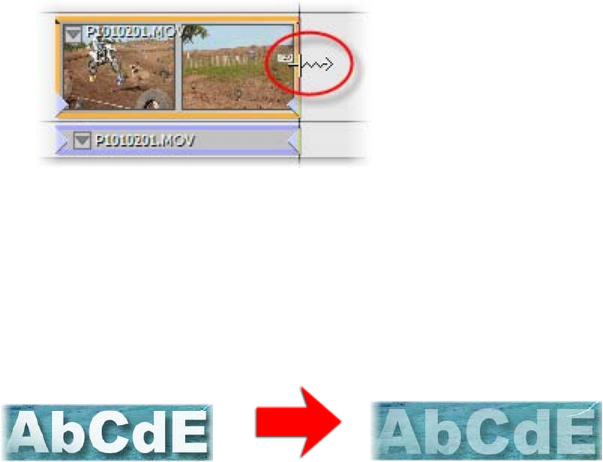
112 Editing in Timeline mode
Once set, any pre-rendering or exporting will be limited to the chosen time
range. Pre-rendering is carried out with the Pre-render Selected Range option
(Preview menu).
Slowing down and speeding up
Video clips can be slowed down (slow motion) or speeded up by decreasing or
increasing the Play speed on the clip's Properties pane. You'll see the duration
change on the chosen clip as you adjust this value—when a video plays slower or
faster, it has a longer or shorter duration, respectively. Image or text clips cannot
have their Play speed adjusted.
On the timeline, you can still adjust the Play speed as described above but to
increase or decrease the play speed, hold the Ctrl key down and drag an edge of
your video clip inwards or outwards, respectively.
Transparency & opacity (timeline only)
Transparency and opacity are intrinsically linked, like different sides of the same
coin. Opacity means a state of being opaque—you cannot see through a video or
other clip to those underneath if it is totally opaque. By contrast of course, you
can see through video that is partially or wholly transparent, or has regions that
are partially or wholly transparent, with no opacity.
Text clip over video clip
(90% opacity)
Text clip over video clip
(60% opacity)
114 Editing in Timeline mode
Removing Backgrounds
There are a number of reasons you might want to "remove" a region of your
video:
• To isolate a foreground subject in order to place them against a
different background, e.g. blue-screening such as used for movie
special effects and daily favourites like weather presenting.
• To cut out a hole in a video, e.g. a billboard advertising area or sports
stadium big screen, in order to place a video of your own in the cut out
region.
• To limit the extent of an effect e.g. to just mosaic someone's face to
respect their privacy but leave the remainder of the video unaffected.
• To crop your movie, e.g. leave just a rectangular or other-shaped
portion of your video and discard the remainder, perhaps leaving
room for other cropped videos on screen to sit alongside to form a
montage, popularized by comic book hero movies.
The cutting out of regular shapes and cropping of video is something you can
achieve using masks. The removal of a solid-coloured background can be
achieved using a Chroma Key effect, also called blue-screening/green-screening,
matting, colour keying and colour separation overlays.
Masking
Masks are a way of using an image to "cut out" a rectangular or other-shaped
portion from a video, leaving transparency around the subject, effectively
removing a background to give focus to a foreground element. You can also use
masks to crop video for multiple picture-in-picture effects. Masks can also
remove a foreground element to reveal another video or image clip through the
cut-out region.

Editing in Timeline mode 115
Masks as used in MoviePlus are best created as transparent images with a white
region to indicate the shape of underlying video to keep; the white region is like
the inside shape of a cookie cutter, the transparent region is discarded like the
outlying pastry around your cutter. You can also use images that contain a
mixture of different colours and transparent regions for advanced masking.
In addition, QuickShapes let you apply shaped masks directly onto the timeline
with no fuss. See Using CG clips on p. 57.
You can create your own masks with Serif PhotoPlus.
You can see the result of combining a "heart" mask with a video clip, each stored
on separate video tracks.
Original video.
QuickShape "heart"
applied
over video on an
added Video Track
renamed Mask
Track.
Resulting
composition only
has the mask-
shaped region
showing video
content.

116 Editing in Timeline mode
Try out some different QuickShapes by dragging them from the
Media pane's Library tab (Samples folder).
Masks should be added to separately created tracks.
Video tracks
Before you go ahead and add a mask to your timeline, it's useful to know in
advance how masks and the organization of your video tracks work together.
Masks need to occupy a track of their own to have an effect on underlying video
compositions... the mask's white regions determine which regions of underlying
video clips you see—the mask sits on top of other video clips to act as a virtual
cookie cutter.
Using the Mask blend mode
Masking is made possible by the correct arrangement of tracks (as described
above), but also by the setting of the Mask track's Blend Mode in its Properties
pane. When set to "Mask", the Blend Mode on the top-most track in your project
will affect transparency on tracks below it.
Restricting mask effects with video groups
To limit which tracks are affected (the depth to which the cookie cutter actually
cuts), you can store the mask track with blend mode applied (and other video
tracks you want affected) within a Video Group, leaving other video tracks you
do not want affected outside the group.

Editing in Timeline mode 117
Looking at the track names in the example below, "Holiday Track 2" is not
subject to the heart-shaped clipping that the Mask Track is performing because
it is outside the video group—the mask's effect is limited to tracks within its
video group, i.e. the Main Holiday Track only.
The Main Holiday
Track footage is
masked as it is in the
same group as Mask
Track; Holiday Track
2 is kept outside
Video Group 1.
The mask only cuts
out content from the
image of the dolphin.
The underlying video,
outside of the video
group, is unaffected
by the masking
operation!
Creating your own masks
To create a mask it is recommended you use a bitmap (photo) editing program
that fully supports transparency, such as Serif PhotoPlus. Some other programs
that can easily create shapes with or without soft edges (and can export images
with transparency, such as 32-bit PNG) are also useful for creating masks—Serif
DrawPlus is an example.

120 Editing in Timeline mode
Applying the Chroma Key effect
Effects in MoviePlus can be applied to individual video clips, whole tracks, or
video groups. While Chroma Key can also be applied to all three hierarchies, it is
most commonly used with individual video clips, as it is not usual for there to be
multiple clips with the same background colour to be made transparent.
The effect is applied like any other video effect, from the Effects button on
the Timeline context toolbar (see Applying video effects on p. 133).
The Chroma Key effect will automatically remove whichever colour is associated
with the Chroma Key effect applied to your video. For example, if you use the
"Blue screen" preset then the preset's colour (RGB 0,0,255) is removed if present
in your video clip. You'll more than likely need to accurately make your effect
colour to be the same as your blue screening backdrop colour:
To change the Chroma Key colour:
1. Display the effect's Properties pane.
2. Either:
• Use the colour picker to select a new colour value from the upper
clip that you want to remove (hold down the mouse button, and
drag the picker over the colour you require, and release). This
would normally be the backdrop colour.
OR
• Define a new colour by clicking the Colour spectrum and, from
the Adjust Colour dialog, select an RGB, HSL or HTML code.
Changing thresholds and blurring
MoviePlus lets you fine-tune the Chroma Key effect to help the colour-detection
processes determine which bits of your video to make transparent. It is very
useful to be able to set a Low and High threshold for colour detection—this
transparency is set according to brightness levels. Blur lets you blur the shape of
the transparent region generated by the Chroma Key effect.
Editing in Timeline mode 121
Changing the Chroma Key effect over time
You can adjust the Chroma Key settings so that they change over time, perhaps
to account for a change in lighting conditions that affects the colour you're
trying to remove. Your Chroma Key effect can start by removing pale blue and
slowly change to removing a stronger blue, for instance.
For more information, see Adjusting keyframes on p. 95.
Video overlays (timeline only)
You can "layer" all sorts of different kinds of clips on top of existing video or
image clips—this flexibility opens up a world of possibilities in your video
production.
Overlays, in basic terms, are two or more clips being displayed at once, one on
top of the other—these clips are layered on multiple video tracks. For the bottom
clip to still be visible despite having another clip on top of it, the top clips need
to:
• be smaller than the bottom clip.
• have transparent regions.
• have reduced opacity.
Top clip made smaller
When you add an opaque clip to the upper track, it is likely to occlude clips on
lower tracks completely, so all you can see is the content of the top-most track.
To see "around it" to underlying clips you can resize your top clip by using a
Transform envelope on the upper clip or track. You can also reshape your clip,
deform with perspective and even animate the resizing or reshaping process. See
Introducing Transforms on p. 128 to learn more.
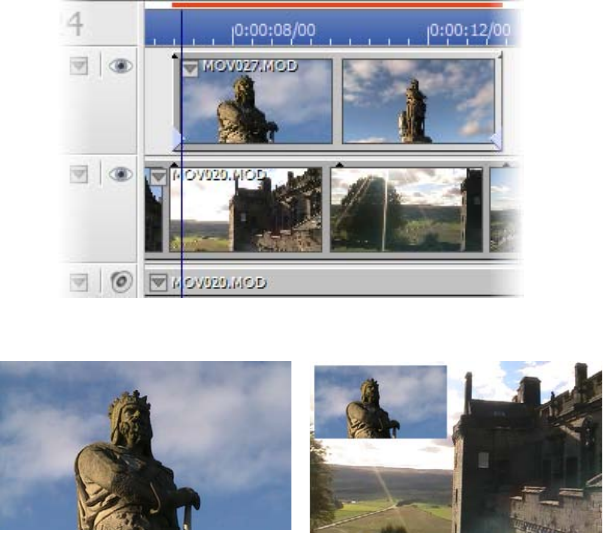
122 Editing in Timeline mode
Timeline
Video preview—before transform Video preview—after transform

Editing in Timeline mode 123
Top clip has transparent regions
Overlaid video
In the example above, the top clip was completely opaque and therefore
obscured all video underneath it. However, when you add a video with
transparent regions to the upper track, the content of underlying tracks will be
seen through the upper clip's transparent regions. We've added a sample from
the Library tab on the Media pane to make the above example more compelling.
Timeline
Video preview
Overlaid STV video
You can make your own overlay animations and effects using Serif DrawPlus, if
you export your keyframe animations as Serif Transparent Video (STV).
Remember to choose the STV format to export with a transparent background!
When you add an STV video file to a track above existing video or images,
MoviePlus will smoothly overlay the STV on top, revealing underlying clips
through the video's transparent region(s).

124 Editing in Timeline mode
Overlaid images
If the image on the top track has built-in transparency you will automatically be
able to see through the transparent region to any underlying clips. This principle
is frequently seen when television broadcasters display a static logo watermark in
the corner of the screen. We can do the same with our example, adding an image
with areas of transparency created in Serif DrawPlus and exported as a 32-bit
PNG file.
Timeline
Video preview
If you're looking to create an effect where your video is playing inside a
picture—e.g., a billboard displaying your video—this can be achieved in two
ways by:
• placing your video above a billboard image and shaping the video to
match the billboard area using a transform envelope.
• cutting out the billboard region of the image using a photo-editing
program such as Serif PhotoPlus (exported as a 32-bit PNG to
maintain transparency) and placing it on top of your video, perhaps
shaping your underlying video to match the billboard region using a
transform envelope.

Editing in Timeline mode 125
Both methods have similar results, but the second would allow some foreground
objects in the image, such as a street sign, to sit in front of the billboard (see
below).
Image in Serif PhotoPlus Video preview

126 Editing in Timeline mode
Overlaid text
Text overlays are generally used for captions but can also include overlaid titles
and credits. By adding a text clip to the upper video track, the text will be
displayed in front of any underlying video. See Adding Text (p. 169).
Returning to our previous example, a caption could be added to describe the
footage which is playing.
Timeline
Video preview
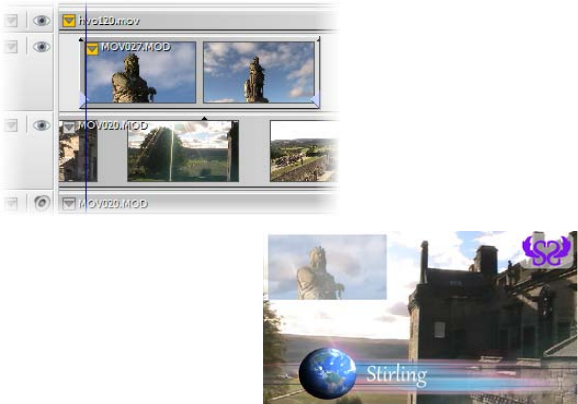
Editing in Timeline mode 127
Top clip with reduced opacity
There are a number of ways to reduce the opacity of upper clips to partially
reveal underlying clips—the quickest is to adjust opacity using the Opacity slider
in the upper clip's Video track's Properties pane.
Timeline
Video preview—
opacity set to 50%
You can also adjust the opacity of a track (or even the clip itself) over time by
manipulating its opacity envelope and associated keyframes. See Using
envelopes and Adjusting keyframes (p. 90 and p. 95) to learn how to modify
envelopes by making keyframe adjustments.

128 Editing in Timeline mode
Introducing transforms (timeline only)
Transforms allow you to resize your clips within the overall project size (which
helps achieve picture-in-picture effects), to add perspective, and to scroll video,
image, and CG clips (Backgrounds and QuickShapes) in any direction.
The possibilities are almost endless, because not only can you transform
individual clips, you can also transform entire video tracks and even collections
of video tracks in video groups.
Several key techniques use transforms—here's a quick summary, using the above
examples for reference:
Scaling and
picture-in-
picture
Scaling has been used in the second and third examples
above; each video clip started at full screen size.
In the third example above, a picture-in-picture effect is
created where a group of four videos is made smaller than
the background video. It combines scaling and a new
position, either static or animated.
Editing in Timeline mode 129
Motion
Motion can be used, e.g. to position the text to the left in
the first sample, and is illustrated by combining rotation
and scaling in the third sample. Transform settings can
collude to create video animation.
Perspective
Perspective has been applied to the "Florida" video in the
first sample above.
Transforms all involve manipulation of the transform envelope, which you'll
find discussed in Using envelopes (see p. 90).
130 Editing in Timeline mode

Effects
5
132 Effects
Effects 133
Applying video effects
Effects can add variety and visual excitement to a video. Some effects, like
Brightness/Contrast or Gamma, are designed to correct the original video;
others, like Filter Effects, Mosaic or Diffuse Glow, are simply special effects.
The supported special effects are described as follows (see also effects for colour
correction on p. 144):
• Chroma Key - A method of removing a colour (or a colour range)
from one video to reveal another video or image behind it. The
"removed" colour becomes transparent.
• Colourize - Offers an easy way to apply a colour tint/wash.
• Diffuse Glow - This broadens highlights in the video by brightening
gradually outward from existing highlights.
• Emboss - The Emboss effect remaps contours to simulate a bas-relief
effect. This creates a convex rounded edge and shadow effect.
• Filter Effects - Filter Effects encompass Shadows, Glows, Bevels,
Emboss, Colour fills and 3D special effects. Apply individually or in
combination.
• Gaussian Blur - The Gaussian Blur effect smoothes the image or video
by averaging pixels. It's especially useful for removing a moiré
(interference) pattern from scanned images and can help clean up
regions of visual interference from fine patterns.
• Gradient Map - The Gradient Map adjustment is for remapping
lightness information in the video to a new colour range. It makes for
great "posterized" effects and is a quick substitute where a pop-art feel
is being sought.
• Greyscale - This effect creates shades of grey; monotones ranging
from black through to white.

134 Effects
• Invert - This effect inverts the colours, in the same way that a photo
and its negative are opposites of each other.
• Mask - The Mask effect is a useful way to convert a clip into a more
suitable mask by adjusting its lightness or other tonal values.
• Mosaic - The Mosaic effect creates blocks of uniform colour for a tiled
appearance.
• Motion Blur - Exaggerate motion in your video, by blurring object
movement.
• Noise - The Noise effect adds graininess.
• Noise Reduction - This removes unwanted graininess in your video,
caused by poor environmental conditions, age of media, or poorly
captured media.
• Old Film - Use the effect to simulate vintage film; control ageing and
film quality.
• Solarize - The solarize effect is similar to a Negative Image function,
but lets you set the threshold value above which colours can be
inverted. (Solarization is a darkroom technique in which a partially
developed image is re-exposed to light, producing dramatic changes in
mid-tone regions).
• Stabilize - Use this effect to minimize camera shake present in your
video footage.
• Threshold - The Threshold effect creates a harsh duo-tone black and
white image, with no blend through shades of grey.
• Unsharp Mask - Unlike many sharpening tools that affect the entire
video, the Unsharp Mask effect works mainly at edges. It's excellent for
improving clip quality.
Audio special effects (see p. 147) can also be applied to audio clips.

136 Effects
Applying effects
To apply an effect:
1. Select the clip on the storyboard (or clip, track, or group on the
timeline).
2. Click Effects on the context toolbar.
3. From the Properties pane (Effects tab), click Add Effect....
4. From the dialog, choose a category (see explanations above) from the
upper window. In the lower window, review the presets available
(especially their names, which indicate their intended function). Select
a preset.
5. Click OK. The effect is added to the Effects tab's effects list.
In Storyboard mode, a clip with an effect shows the symbol
under its thumbnail. Click the symbol to view applied effects.
Any effect added to your project will have its own set of properties associated
with it. The effect's properties can be altered in the Properties pane (Effects tab).
138 Effects
effect is modified for the duration of the clip, track or group (you can alter each
keyframe's properties in the Properties pane under the More section).
While it's possible to apply an effect for the entire duration of a clip, track or
group as discussed previously, it may be more effective for effects to be applied
more sparingly over a specific, perhaps shorter, time duration. To do this you
can use keyframes at different points. These keyframes are added along the clip's,
track's or group's effect strip, and can each be modified in turn, to define how an
effect's properties are to be applied at that point on the timeline. During
playback, as the time indicator passes over each keyframe the clip will use the
effect properties of the last visited effect keyframe. The effect can therefore be
faded-in, faded-out, toggled on or toggled off.
Keyframe control is described in detail in Adjusting keyframes on p. 95.
While it is not necessary to use effects groups in many cases, they are necessary if
you wish to blend affected and unaffected video. This is extremely useful, as
most effects do not offer "opacity" (strength of visibility) of their own. Mix back
can be achieved by manipulation of the Video Effect Group envelope (see Using
envelopes on p. 90).
See MoviePlus Help for more information.

Effects 139
2D filter effects
MoviePlus provides a variety of filter effects that you can apply to any clip with
transparent regions (e.g., an overlay or CG QuickShape clips). The effect works
on the edges of the visible portion of your image to offer shadows (below),
glows, bevels, and emboss effects.
"3D" filter effects (see p. 141) let you create the impression of a textured surface
and are covered elsewhere.
To apply 2D filter effects:
1. Select your clip and click Effects on the context toolbar, then
from the Properties pane (Effects tab), click the Add Effect... button.
2. From the Choose Effect dialog, select the Filter Effects category and
choose a preset from the lower window.
3. Click OK.
For a quick way to apply 2D filter effects, display the Galleries pane,
select the Video Effects tab, then drag and drop a Filter Effects
thumbnail onto your clip.

140 Effects
To edit a filter effect:
1. From the Properties pane (Effects tab), select "Filter Effects" in the
effects list and click the Edit Effects... button. The Filter Effects dialog
is displayed.
2. (Optional) Expand the preview pane by clicking the Show/Hide
Preview button. When expanded, the effects are applied only in the
preview window. While the pane is collapsed (click the button again),
filter effects are applied directly to the clip.
3. To adjust the properties of the effect, select its name and vary the
dialog controls. Adjust the sliders or enter specific values to vary the
combined effect. (You can also select a slider and use the keyboard
arrows.) Options differ from one effect to another.
4. Click OK to apply the effect or Cancel to abandon changes.
Creating outlines
MoviePlus lets you create a coloured outline around objects, especially text and
shapes (as a filter effect). For any outline, you can set the outline width, colour
fill, transparency, and blend mode. The outline can also take a gradient fill, a
unique contour fill (fill runs from the inner to outer edge of the outline width),
or pattern fill and can also sit inside, outside, or be centred on the object edge.
As with all effects you can switch the outline effect on and off. You'll be able to
apply a combination of 2D or 3D filter effects along with your outline, by
checking other options in the Filter Effects dialog.
Blur
Various blur effects can be applied to MoviePlus objects. The types of blur
include:
• Gaussian: the effect smooths by averaging pixels using a weighted
curve.
• Zoom: applies converging streaks to the image to simulate a zoom
lens.

142 Effects
To edit a filter effect:
1. From the Properties pane (Effects tab), select "Filter Effects" in the
effects list and click the Edit Effects... button. The Filter Effects dialog
is displayed.
2. (Optional) Expand the preview pane by clicking the Show/Hide
Preview button. When expanded, the effects are applied only in the
preview window. While the pane is collapsed (click the button again),
filter effects are applied directly to the clip.
3. Check the 3D Effects box in the list (unless you've already selected a
3D preset). The 3D Lighting box is checked by default.
• 3D Effects is a master switch for this group,
and its settings of Blur and Depth make a
great difference; you can click the button
to unlink them for independent adjustment.
• 3D Lighting provides a "light source"
without which any depth information in the
effect wouldn't be visible. The lighting
settings let you illuminate your 3D landscape
and vary its reflective properties.
4. Once 3D Effects is enabled (see Overview), adjust the "master control"
sliders here to vary the overall properties of any individual 3D effects
you select, i.e.
• Blur specifies the amount of smoothing applied. Larger blur sizes
give the impression of broader, more gradual changes in height.
• Depth specifies how steep the changes in depth appear.
• The button is normally down, which links the two sliders so
that sharp changes in Depth are smoothed out by the Blur
parameter. To adjust the sliders independently, click the button
so it's up.
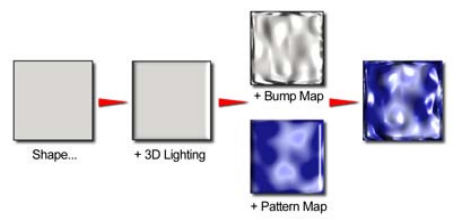
Effects 143
You can combine multiple 3D filter effects, as in the illustration above. The
effects are applied cumulatively.
The procedures for applying 3D Filter Effects are covered in the MoviePlus Help
but here's a quick review of each effect type.
3D bump map
The 3D Bump Map effect creates the impression of a textured surface by
applying a mathematical function you select to add depth information, for a
peak-and-valley effect. You can use 3D Bump Map in conjunction with one or
more additional 3D filter effects.
3D pattern map
The 3D Pattern Map effect creates the impression of a textured surface by
applying a mathematical function you select to introduce colour variations. You
can use 3D Pattern Map in conjunction with one or more other 3D filter effects.
Transparency
The uniform transparency of a clip can be controlled via the Opacity setting in
the clip's properties. However, for more sophisticated transparency control,
especially for simulating reflective lighting effects, transparency settings can
instead be set within the 3D filter effects dialog (check the Transparency
option). Transparency can be adjusted independently for both non-reflective
surfaces (typically a clip's edge shadows shown when side-lit) and top-lit
surfaces.
144 Effects
3D lighting
The 3D Lighting effect works in conjunction with other 3D effects to let you
vary the surface illumination and reflective properties.
Colour correction
MoviePlus offers a wide variety of colour adjustment presets that you can apply
to clips. These adjustments—to brightness, contrast, hue, and so on—are
normally carried out on clips, as most deficiencies will be inherited from the
recording of the clip (e.g., over-exposure, poor weather conditions, etc.).
Colour correction effects are applied and managed in the same way as for any
other effect, i.e. go to the Properties pane (Effects tab), choose Add Effect, then
choose an effect category thumbnail from the upper window of the dialog then a
preset from the lower window (these change according to your selected effect
category). Use the effect's Properties pane to alter the adjustment settings. See
Applying video effects on p. 133 for more information.
Let's take a look at the colour adjustment effect categories in turn. Only some of
the categories are related to colour correction.
Adjust HSL Hue, Saturation, and Lightness (HSL) are components of a
standard colour model that's used to identify colours.
Generally speaking, Hue refers to the colour's tint—what
most of us think of as rainbow or spectrum colours with
name associations, like "blue" or "magenta." Saturation
describes the colour's purity—a totally unsaturated video
has only greys. Lightness is what we intuitively understand
as relative darkness or lightness—ranging from full black
at one end to full white at the other. Adjust HSL lets you
alter these components independently.
Brightness /
Contrast
Brightness refers to overall lightness or darkness, while
contrast describes the tonal range, or spread between
lightest and darkest values. This is a "quick and dirty" way
of correcting a clip, for example one that was over-exposed
or under-exposed.
Effects 145
Channel
Mixer
The Channel Mixer adjustment lets you adjust each
separate colour channel (Red, Green, or Blue) using a mix
of all the current colour channels.
Colour
Balance
The Colour Balance adjustment lets you adjust colour
balance for general colour correction in the clip.
Combinations of Cyan/Red, Magenta/Green and
Yellow/Blue can be adjusted to lower or raise each colour
mix.
Curves
The Curves adjustment lets you correct the tonal range of a
clip—the spread of lightness values through shadow,
midtone, and highlight regions—and control individual
colour components.
Gamma
The Gamma adjustment lets you adjust the amount of
mid-tone brightness in your clip. Think of midtones as the
grey shading that lie between shadows and highlights
present throughout your clip.
Levels
The Levels adjustment lets you emphasize mid-tone
lightness regions in each or all of the three primary video
colours, red, green, and blue.
Applying audio effects
In the same way that you can apply video effects to video clips, you can apply
audio effects to audio clips also. In fact the process of applying and editing
effects is identical for both—MoviePlus treats them equally.
Audio effects range from more commonly encountered effects such as Bass and
Reverb, to more technical effects such as Low Pass, High Pass, Compressor,
Expander, and many more.
Whichever effect you want to apply you'll need to have recorded, captured, or
imported your audio file in advance; the file must also be present as a clip on
your storyboard or timeline. Once present, the clip can have an effect applied.

146 Effects
Individual or cumulative
audio effects can be added
and managed from the
Effects tab on the Properties
pane. They can also be
replaced, deleted, edited, and
rearranged all from this tab.
• Applied effects are shown in an effect list; effects at the top of the list
are applied to the clip first.
• When selected, an effect’s properties can be adjusted directly under the
list.
• Any modified effect can optionally be saved for future use.
In Timeline mode, an audio effect can be equally applied to an
audio track or group, as well as an audio clip. This will influence the
audio of a clip on the same track or group.

Effects 147
Applying audio effects
To apply an effect:
1. Select the audio clip on the storyboard (or clip, track, or group on the
timeline).
2. Click Effects on the context toolbar.
3. From the Properties pane (Effects tab), click the Add Effect...
button.
4. From the dialog, choose a category from the upper window. In the
lower window, review any presets available (especially their names,
which indicate their intended function). Select a preset.
5. Click OK. The effect is added to the Effects tab's effects list.
Any effect added to your project will have its own set of properties associated
with it. The effect's properties can be altered in the Properties pane (Effects tab).
To modify an audio effect:
1. Select the audio clip, track or group which has the effect applied.
2. From the Properties pane (Effects tab), choose the effect to be edited
from the effects list.
3. Alter the effects' properties at the bottom of the tab.
To save a modified effect to a new name:
• Click Save in the Properties pane (Effects tab). Once named, the
transition effect appears as a new preset in the appropriate folder in
the Choose Effect dialog (or Audio Effects tab in the Galleries pane).

148 Effects
Using third-party effects
While MoviePlus is packed with a range of preset audio effects you can also
adopt third-party plug-in VST effects (up to V2.4). If you've already
downloaded such effects independently of MoviePlus you can make them appear
in your Galleries pane by copying them to the MoviePlus install sub-folder called
"VST". You'll need to do this before running MoviePlus. By default, this folder
will be C:\Program Files\Serif\MoviePlus\X5\VST\.
The installed VST effects can be applied in exactly the same way as MoviePlus's
audio effects—you can adjust their properties in the Properties pane (Effects
tab). Note that some more advanced VST effects can be modified with a VST
Properties button (in the same pane).
You can optionally store your VST effect plug-ins in a folder of your choice, but
you'll have to point to this folder via Tools>Options (Folders menu option) for
the effects to show in the Galleries pane.
Installed VST effects are shown in the Galleries tab's Audio Effects
tab in folders named with a [VST] suffix.
Applying audio effects over time
In timeline mode, you can change effects over time by adding and modifying
keyframes along the timeline. See Applying video effects on p. 133.
Audio effect groups
While it is not often necessary to use audio effect groups, they can be used to
mix multiple audio effects in and out of your project simultaneously. Groups are
extremely useful as they offer a Mix setting; most individual effects do not offer
mixing individually. This mixing can be achieved by manipulation of the Audio
Effect Group (see Using envelopes). Such a group is created on an audio clip,
track (below), or group by selecting Audio Effect Group from the Insert menu.
Effects can be dragged into the group once created.

Audio
6
150 Audio

Audio 151
Introducing audio
In MoviePlus, it's possible to use audio clips which have been collected by a
variety of methods.
• Capturing audio: The capture process is capable of capturing just the
audio element from a tape-based camcorder's combined video/audio
input or audio from a microphone (see Capturing video on p. 28).
• Importing: You can make use of audio files already on your computer
by simply importing them into your project.
• Recording Narration: Narrate commentary via microphone as you
playback your movie. Narration can play back over existing audio
(e.g., on a Music soundtrack).
• CD Ripping: Digital ripping of music CDs means that you can adopt
your favourite songs as supporting soundtracks in your movie.
152 Audio
Whichever method you choose, audio files will be added to your Media pane.
Narration files are also added to the storyboard or timeline automatically (at the
time indicator position at which you started recording).
In many instances, the capture or copying of a video file from your respective
tape- or file-based camcorder to your project will introduce accompanying audio
along with your video clip automatically. For instance, copying an HD video file
from your HD camcorder will add the file to your Media pane; the file normally
contains separate but linked video and audio streams. When you introduce the
file to the storyboard or timeline, the associated linked audio will follow.
Audio editing
Audio can play an essential part in any movie, and creative audio editing is an
art in itself. Standard ingredients of audio might include:
• Production sound as originally recorded (and later captured) “in sync”
along with the video, e.g. camcorder footage of your last holiday.
• Narration (or voice-over passages) which serves as a commentary or a
bridge between sections of your movie.
• Theme music or background sound from a variety of clips, often
added as one or more longer clips that run “under” audio narration.
• Sound effects or single-shot audio events, perhaps added for emphasis
(“sweetening”) or comic relief.
If you would like your movie to include more than basic production sound,
allow yourself some time to do it right! Skilful sound editing is a combination of
technique and judgment. Fortunately, MoviePlus makes the technical part
straightforward. Getting sound to coincide properly with the visual track, to
come in on cue and end (or fade out) at just the right moment, to blend well
with other audio... all are easily accomplished in the Timeline mode.

154 Audio
Adding audio to the timeline
Whenever you add a video clip with an audio component to the timeline, the
audio portion (if present) is automatically added to an available audio track
underneath the video track. These two clips maintain a linkage by default, as
shown when you select either clip—an orange border indicates the current
selection, while a light blue border indicates the linked accompanying clip.
However, when you add a standalone audio file (wav, wma, mp2, mp3) it can be
dragged onto the available Music track (or you can create your own audio track).
Audio tracks are managed in much the same way as video tracks, and by the
same token, audio clips are managed as for video clips. See Adding and
arranging tracks and Arranging clips on p. 71 and p. 78, respectively, for more
information.
In terms of playback, the audio clip is treated as for a video clip—seek controls
can be used, along with trick play and scrubbing.
Audio waveform displays (Timeline mode only)
mono
stereo
Audio Waveform Displays provide a visual
indication of the audio's dynamic range
along the clip's length—typically used to
spot cues and any unforeseen audio events.
The waveform shows over the audio clip
instead of a poster thumbnail as seen on
video clips.

Audio 155
Note that the waveform display does not reflect the audio volume, as volume
and dynamic range represent two different elements of audio. If you increase the
volume the dynamic range does not change (and vice versa).
Waveforms are not generated automatically when your audio is added to the
timeline. Instead you generate audio waveforms as you require them on the
audio track.
To generate waveforms for audio clips:
• On the audio track's header, click the Minimize/Restore button.
The audio waveforms for all clips on the track are generated.
The waveform displays can be hidden again by clicking the
Minimize/Restore button in the track header.
To switch off waveform generation:
• In Tools>Options>General, uncheck Generate audio waveforms
automatically. When you restore an audio track, waveforms are no
longer generated.
If you've already generated waveforms for clips they will still display.
As waveforms are actually stored in waveform files (per clip) you'll
need to delete these waveform files in Helper File Manager on the
File menu.
Even though you may have switched off waveform generation, you can still
generate waveforms per clip.
To generate a waveform per clip:
• Right-click an audio clip and select Generate Waveforms.
You can generate waveforms before adding clips to the timeline by
right-clicking your clip in the Media pane and selecting Generate
Waveforms. This avoids having to process all waveforms
simultaneously when adding to the timeline/storyboard.

156 Audio
Interpreting waveforms
The following example waveform shows a typical stereo waveform display. You
can interpret your waveform by analysing peaks in the dynamic range indicative
of passages of conversation and audio events (shouting, gunshots, bangs on the
microphone, etc.).
By being alerted to these, you can perform audio trimming and splitting more
effectively.
Audio fading (Timeline mode only)
In a similar way to video in/out transitions, any audio clip can have an audio
transition. By default, when overlapping audio clips have been placed on the
timeline (normally as a result of adding multiple video clips with accompanying
audio clips) an automatic transition of type "Fade" is produced between
overlapping audio clips. The transition smoothly blends the first clip's audio
with the second clip's audio while maintaining the same audio levels throughout
the transition's duration.
For non-overlapping audio clips, perhaps at the start or end of the timeline, a
manual transition can be applied—this fades-in or fades-out an audio clip at the
start or end of that clip, respectively. To apply, simply drag the blue triangular
handle to the left (shown below) or right to produce the Fade transition. The
length of the transition dictates the duration of the fade-in/out.

158 Audio
In the example above, independent Pan/Gain control of audio tracks is shown,
with overall Pan/Gain control via the Master bus. The created custom Bus 1 can
be used to apply an effect (e.g., Reverb) to audio tracks 2, 3, and 4.
Gain and pan adjustments, plus audio effects, can be applied to any bus.
Envelopes are used to change the extent of Gain, Pan or effects over time; please
see Using envelopes and Adjusting keyframes for more information.
Displaying buses
Select Show Audio Buses from the View menu.
The Master Bus is displayed at the bottom of your timeline, along with any
previously created custom audio buses.
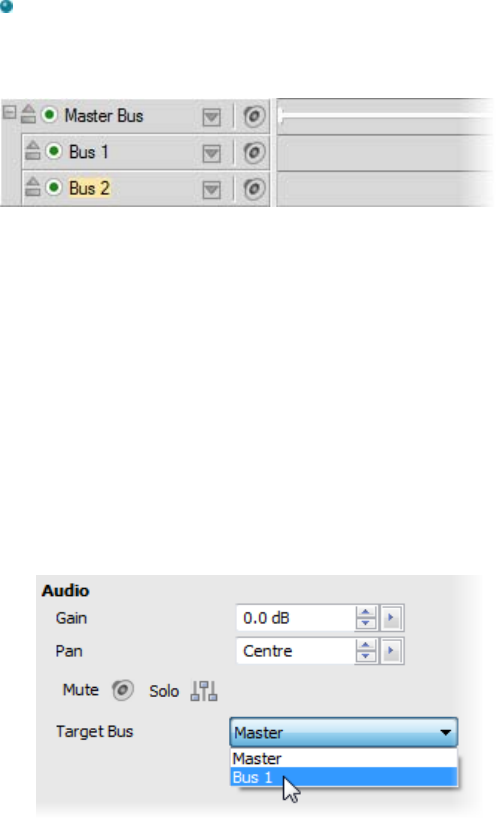
Audio 159
Creating audio buses
Select Audio Bus from the Insert menu.
The new bus is added under the Master Bus at the bottom of your timeline, and
is named Bus 1 or Bus 2, etc.
Modifying a bus
1. Select the bus on the timeline, by clicking its name.
2. From the Properties pane, alter properties (name, Gain, and/or Pan).
By default, all audio tracks are directed to the Master Bus. If you've created a
custom bus, you'll need to direct the appropriate audio tracks to that new bus.
Assigning audio tracks to custom buses
1. Select an audio track.
2. From the Properties pane (Properties tab), select the chosen bus from
the Target drop-down list.

160 Audio
Volume and pan
Checking audio levels
The Levels meter can be used to study project-wide volume
and pan settings, and to help you to attain optimum volume
and pan—this is just as essential to a well-designed movie
project as hours devoted to video editing.
The meter is hidden by default but can be
switched on by selecting Show Levels Meter on
the Preview menu. The meter is displayed on the
Video Preview pane.
Two meters which shows the entire project's audio levels.
The left and right meters represent the left and right stereo
channels, respectively, and report the audio levels in decibels
(dB).
The meter levels will increase and decrease according to the
volume level at that point in the project's playback.
The concept of the Levels meter is straightforward—the
levels will peak and dip according to currently played audio
levels. You may have experienced this on music systems
while recording.
At some point, the meters may indicate that excessive
volume levels are being experienced, i.e. the levels go above 0
on any meter. This is known as digital clipping (also known
as square wave clipping). It is vital that such clipping does
not occur in your project, so you have to set the loudest part
of your audio clip to peak below 0 dB (or face audio
distortion).
How do you know when clipping occurs? At the top of the
example meters opposite, you'll notice two numbers at the
top of each meter. The values represent the maximum level
or "high-watermark" for each channel if clipping occurs
during the current playback.
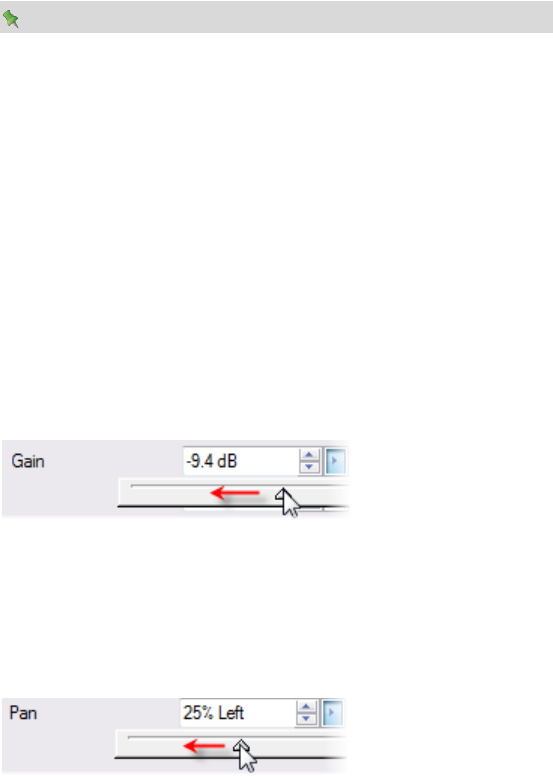
Audio 161
Again using the example, the left and right channel have at
some point during playback peaked at +7.1 dB. You can
leave your project to play, then return to check for clipping—
if no values appear in red then no clipping has occurred. This
saves you from having to watch the entire project's playback!
These values are always reset when playback is restarted.
Assuming you've managed to prevent any clipping from occurring, you have to
then consider how the audio sounds when played on a target device (e.g. via the
web or on a created disc). You should aim to peak your audio levels at
approximately -20dB (used for professional digital audio).
The meters only gives an accurate indication of incorrectly set audio clips or
tracks—whether high or low. The prime objective is therefore to resolve
unacceptable volume levels which we'll look at next.
Adjusting volume
Volume adjustment of clips
The volume adjustment on any selected audio clip (or even video clip with audio
stream) can be made by altering Gain in the object's Properties pane (shown
under the Audio section). For example, the Gain can be reduced by dragging the
slider to the left (from its default 0.0 dB position).
Adjusting pan
Adjusting the pan follows the same principles as adjusting volume. The
adjustment can be made by altering Pan in the object's Properties pane (shown
under the Audio section). For example, the pan can be reduced by dragging the
slider to the left (from its default "Centre" position).

Audio 163
Setting up your microphone
Two microphone setups are likely: either a separate microphone and stereo
headphones, or an integrated microphone in headphones. Devices may connect
either via USB or via your computer's sound card (sometimes indirectly from
your computer's front panel). Connected devices should be plug-and-play so
don't need to be set up manually.
Most headphones are generally equipped with 3.5 mm jack plugs.
Check the symbols on the jack plug then match these up with the
same symbols on your computer's input sockets.
Consult your microphone documentation and Microsoft Windows for details on
how to set up your audio device on your computer.
Recording
The Record Narration dialog lets you alter your recording setup (e.g.,
microphone clip) and start (and stop) the recording. During recording, a Levels
meter indicates the current audio level.
To record a narration:
1. Move the time indicator in the Video Preview pane to a chosen
recording start point (or select a clip on the storyboard to record from
the beginning of that clip).
2. Click Record Narration on the Storyboard or Timeline toolbar.
3. From the Record Narration dialog, optionally choose a different
Source (e.g., "Microphone") if you have multiple audio input devices,
an Input, or a different audio Format.
4. Speak into your microphone to check levels. If the volume is excessive,
the Levels meter will show clipping (red areas showing at the top of
each meter). To rectify, lower the Master Volume slider until
clipping no longer occurs.

164 Audio
5. Uncheck Mute audio when recording if you want existing audio to be
played through your computer speakers (and picked up via
microphone) as you record. Normally, you'll want to keep this checked
to mute your audio as you record (or use headphones), to avoid
"echoing".
Another source of echoing is when the Windows Volume Control
outputs the microphone audio through the speakers, so it gets
picked up by the microphone again (feedback). Avoid echoing in
this case by use of headphones or by muting the microphone
output.
6. To start recording, click the Record button and begin your narration.
Click Stop button when you've finished speaking. If the end of the
project is reached the recording will stop automatically. Your
narration shows on your storyboard or timeline when you stop
recording.
Click the Windows Mixer... button if you need to adjust MoviePlus
volume levels from Windows.

Audio 165
Ripping audio discs
There may be occasion when you may want to adopt some of your favourite
audio for use in your MoviePlus project, whether as a complete song, piece,
narration, or as a smaller excerpt. If located on an audio CD, MoviePlus can use
ripping to capture each audio track sequentially; each track shows in your Media
pane after audio ripping. By default, tracks are saved as compressed wma files.
The dialog shows in-progress track-by-track digital ripping from an audio CD.
Track 1 is being ripped from the audio disc in drive F (and saved in
c:\musicroom\).
To rip an audio CD:
1. Click Import Media on the Tasks toolbar or from the top of the
Media pane.
2. From the drop-down list, select Rip CD.
3. From the dialog, choose a Device from the drop-down list; this is the
disc drive currently containing your audio disc.

166 Audio
4. (Optional) Use the playback controls under the track list to review
tracks on your CD, e.g. use the button to play a selected
track. A bar under the play control buttons indicates the audio
playback progress. For ripping selected track only, uncheck unwanted
tracks from the list. Otherwise, all tracks are ripped.
5. Use the Browse... button to specify a location that the audio files will
be ripped to.
6. (Optional) Instead of a file name Prefix of "Capture" enter your own
prefix. MoviePlus will name each captured file with an incremented
number suffix.
7. (Optional) Enable the "WAV (uncompressed)" option, if you want
uncompressed larger files. For wav rips, a typical 4 minute audio track
will occupy about 40MB of hard drive space (typically 700MB per
audio CD). Otherwise, keep the "WMA" option enabled to create
smaller file sizes.
8. Click the Rip CD button to start ripping your checked audio tracks. A
currently ripped track will show a symbol next to it; a green
progress bar indicates that ripping of that track is in progress.
You'll notice that ripped audio files will appear in your Media pane (in the root
of your Project tab).
When you've finished capturing your audio, click the Close button to return to
MoviePlus.

Text, Images, and
QuickShapes
7
168 Text, Images, and QuickShapes

Text, Images, and QuickShapes 169
Adding text
MoviePlus provides a high level of support for managing text in your project.
Typically, text within MoviePlus can be used for titles, captions, or credits.
Titles
No movie is complete without initial
titling to introduce the movie's name to
the viewer.
Captions
Captions are always overlaid over an
existing video or image clip, and display
for that clip's duration. They are used to
explain and provide context to the clip
currently being displayed.
Credits
Credits tend to be closing credits, i.e.
appearing at the end of your project,
where you may want to acknowledge
actors, and copyright information.
Credits look great when
animated!
However you plan to use your text, you create text as a text clip. This clip
behaves much like a video clip but is purely a container for your text. You can
position your clip on the same video track as your video clip, or above a video
track for use as captions. By default, MoviePlus offers an Overlay Track on your
timeline which is ideal for storing text clips as captions.
The text within your text clip is called a text object. A text object is a single
instance of text which can be easily edited, when selected, using the following
tabs on the text object's Properties pane.

170 Text, Images, and QuickShapes
• Format: Apply font type, font size, attributes, alignment, filter effects,
and text styles.
• Properties: Control scrolling, playback and opacity.
• Animation: Make your titles and credits come to life—apply Blinds,
Fly, Slide, Spin, and more.
• Effects: Include eye-catching special effects.
You can add additional text objects to your text clip at any time. Text clips can
also have supporting images and QuickShapes added to them. (See Adding
images and QuickShapes on p. 180.)
Titles
Titles are typically presented at the very beginning of your project. They tend to
be a single word or at best only a few words long, but are usually shown in a
large font size.
To add a title:
1. On the storyboard, select a clip (usually the first).
OR
On the timeline, set your time indicator's position.
2. From the Insert menu, select CG Clip>Text.
OR
Select Add Text from the Video Preview pane.
3. In the Video Preview pane, type directly into the text box to add you
own title text.
4. Drag over the text to highlight and choose a preset text style from the
Properties pane (Format tab) or choose your font type, font size, text
alignment, font colour, transparency, line style and whether text is to
be bold, italic and/or underlined. See Formatting text on p. 175.
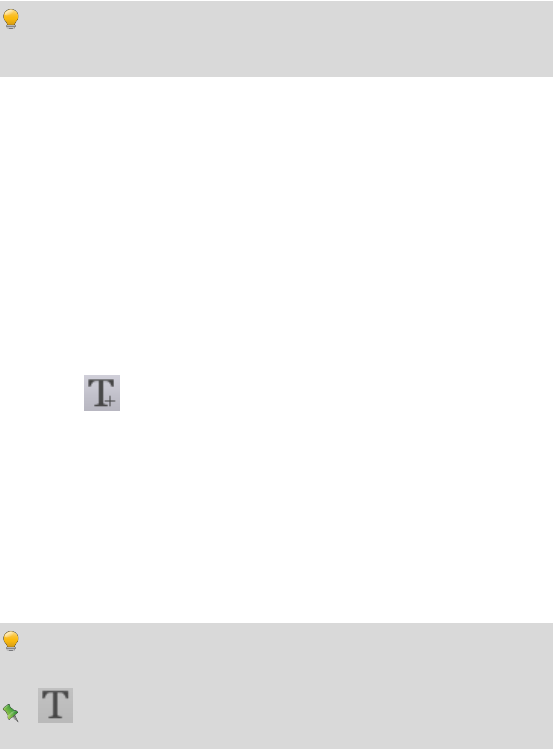
Text, Images, and QuickShapes 171
Alternatively, you can use ready-to-go Titles presets from the
Galleries pane (Titles tab); simply drag and drop onto your
storyboard or timeline.
Captions
Captions are typically superimposed onto an existing clip to explain the
underlying clip in text form. An example could be an overlaid title at the start of
your project. For image clips, you could describe each photo's location, subjects
in shot, etc.
To add a caption:
1. Select an existing video or image clip.
2. From the Insert menu, select Caption.
OR
Select Add Text from the Video Preview pane.
In the Video Preview pane, you'll see default caption text added in
front of the clip.
3. Type directly into the text box to enter your own caption text.
In Timeline mode, the caption text clip is added directly above the selected clip;
both clips will be of equal duration. The Overlay Track, shown above all other
tracks is intended to store your caption text clips.
You can change a caption's start time and/or duration from the text
clip's Properties pane (Properties tab).
In Storyboard mode, a clip with a supporting caption will show
a Text icon under its thumbnail.

172 Text, Images, and QuickShapes
Credits
Credits are used to acknowledge cast and crew, as well as copyrights. They
usually close a movie and tend to be presented on a neutral background
(typically black). As a result, in MoviePlus it's best to present credits on their
own text clip rather than as an overlay. This stops the viewer from being
distracted by the underlying video clip.
A possible requirement when adding credits is the ability to display more than
one frames worth of text (you may have a long list of cast, crew, and copyright
information to acknowledge!). This is made possible by using rolling credits—
the credits are made to move up, down, left, or right.
To add credits:
1. Deselect all clips on the storyboard
OR
Move the time indicator to the end of the last clip on your timeline.
2. From the Insert menu, select CG Clip>Text.
OR
Select Add Text from the Video Preview pane.
3. Type directly into the text box selected in the Video Preview pane and
edit as described on p. 175.
4. (Optional) To scroll overflowing credit text, set Scrolling in the
Properties tab of the text clip's Properties pane—choose from Up,
Down, Left, or Right. Set the Duration of the text clip to a value which
allows credits to be read comfortably (the greater the duration the
slower the credits).
Alternatively, you can use ready-to-go Credits presets from the
Galleries pane (Titles tab); simply drag and drop onto your
storyboard or timeline.
To import text from other Word processing packages, cut and paste
directly into selected text in your Video Preview pane. For
paragraphs, you'll need to add your own line breaks to set line
lengths before copying.

Text, Images, and QuickShapes 173
Adding more text
It's easy to add a single passage of text by clicking and typing. However,
MoviePlus can include more text, in addition to the initial text associated with
the text clip. More text lets you build up additional subtitles, captions, or credits.
Each text object is independent of each other and can therefore adopt its own
format, properties, animation, or effect properties. The example below shows a
title and subtitle, each possessing very different styles.
To add more text:
1. Select an existing text clip or video/image clip with overlaid text.
2. Click Add Text on the Video Preview pane. An additional text
box appears which can be edited as before. This creates a new text
object associated with the original text clip.
Setting a default text style
If you've spent time creating the perfect text style and layout you might want to
apply this to other text clips you subsequently create. This is done by making
your chosen style the default style.
To set a default text style:
• Right-click the text clip, and select Set Default Text Style.
The next text clip you create will be based on the text clip you chose as the
default.
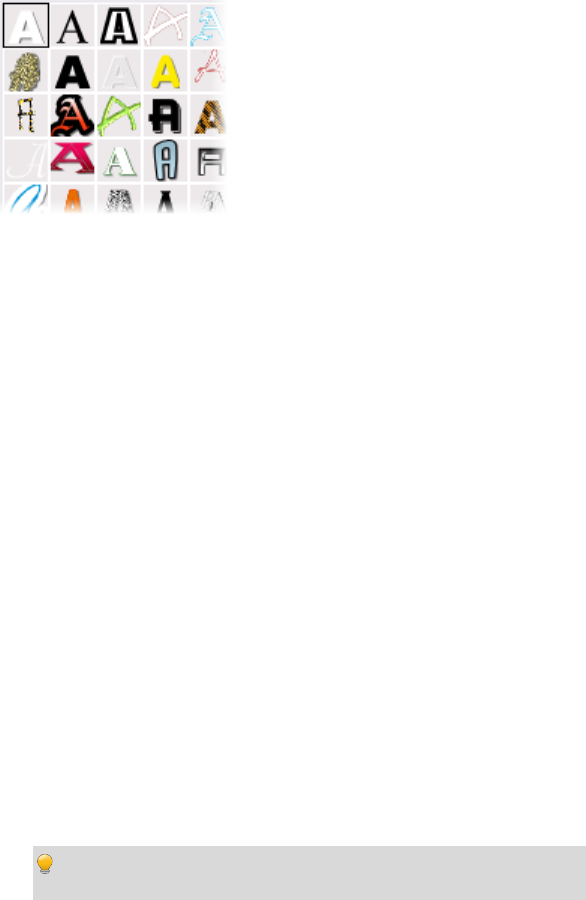
176 Text, Images, and QuickShapes
Instead of designing text styles from
scratch you can adopt a text style preset
from the Properties pane's Format tab
instead. If needed, you can then
customize text further by using the
settings above the text style gallery.
To format text:
1. Select a text clip on the timeline (or an added text object in the Video
Preview pane).
2. From the Properties pane's Format tab, you can alter (or apply):
• Font (typeface), font size, text attributes (bold, italic, underline).
• Paragraph alignment (left/centre/right).
• Fill (solid or gradient colour). The swatch, when clicked, lets you
apply a different preset fill (or edit a fill of your own). The swatch
changes to reflect the text's current colour setting.
• Transparency (solid or gradient). The swatch, when clicked, lets
you apply a different Transparency preset (or a edit a
transparency of your own). The swatch changes to reflect the
clip's current transparency setting.
• Line. When clicked, displays a Line Style dialog so that line
weight and fill can be applied.
• Effects. When clicked, a dialog for applying multiple 2D and 3D
filter effects is displayed. 2D effects include shadows, glow,
outline, bevel, emboss, colour fill, and feathering.
Add solid or gradient background colours to your text clip using Fill
on the text clip’s Properties pane (Properties tab).

Text, Images, and QuickShapes 177
The following examples show each 2D filter effect when applied to the letter "A."
Drop Shadow
Inner Shadow
Outer Glow
Inner Glow
Inner Bevel Outer Bevel Emboss Pillow Emboss
Gaussian Blur Zoom Blur Radial Blur Motion Blur
Colour Fill Feather Outline
See 2D filter effects (on p. 139) for more information.
Changing the line style:
• To adjust the currently selected text's line weight either drag the slider
left or right or enter a point size value in the input box.
• For changes to Line fill, click the Line fill swatch to apply a different
fill (or edit a fill of your own).
• Uncheck Behind Fill if you want the line fill to show over the top of
your colour fill rather than behind it.
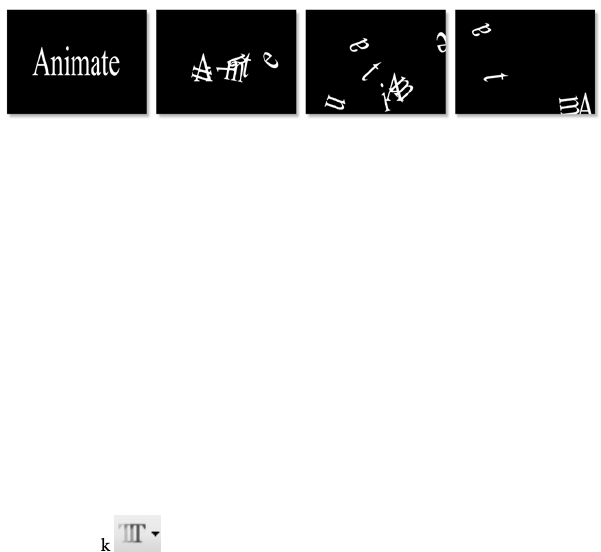
178 Text, Images, and QuickShapes
Animating text
Animation brings your text to life, creating titles, captions, or credits of great
visual appeal. MoviePlus not only offers some familiar animations such as Zoom
and Fade, Fly, Slide, Spin, and Explode but controls whether the animation is
applied at the start or end of your text (or both). These are called In Animations
and Out Animations and are key to understanding how to get the best out of
your animations. As an example, the Out animation called Explode can be
applied to the text clip containing the text "Animate".
Animation presets for In and Out animations can be applied from the context
toolbar or from the Galleries pane. This saves you from having to create your
own animation, although you're able to customize any presets and save the
resulting animation for future use.
For text clips with multiple text objects:
• to apply the same animation to all text objects, apply the effect with no
text objects selected.
OR
• to apply independent animations to individual text objects, apply the
effect with the text object selected.
To apply an animation:
1. Select a text clip (or text object).
2. Click Animation on the context toolbar.
3. From the drop-down list, pick either Set In Animation... or Set Out
Animation... from the list (for a respective In or Out animation).

Text, Images, and QuickShapes 179
4. From the Choose Animation dialog, choose an animation category
from the upper window. In the lower window, review the presets
available for that category (especially their names, which indicate their
intended function). Select a preset, e.g. Blinds.
5. Click OK.
If you've already applied an In or Out animation, repeat the above procedure to
apply the complementary Out or In animation, respectively.
For an alternative way to apply an animation, open the Galleries
pane, select the Titles tab, choose a preset from the Animations
folder then drag and drop it onto your text clip (or object). A dialog
lets you choose whether to add an In or Out animation.
Hover over any preset to get a preview of how your animation will
look!
Once you've applied animation, you can edit animation properties. As well as
being able to check which animation is applied (and it settings), you can swap
out one animation for another, alter its duration, and edit other animation-
specific properties.

180 Text, Images, and QuickShapes
To edit an animation:
1. Select a text clip (or text object).
2. Choose Edit Animations from the context toolbar's
Animation drop-down list.
3. From the Animation tab on the text clip's Properties pane, modify the
In or Out animation.
To save your animation (Timeline only):
• From the text clip's Properties pane (Animation tab), expand In or
Out Animation, click Select, then click Add to Gallery. The
animation will appear in the relevant folder under the Animations
folder in the Galleries pane's Titles tab.
To delete an animation:
1. Select a text clip (or object) with the animation applied.
2. From the text clip's Properties pane (Animation tab), select Reset for
the In or Out animation you want to delete.
Adding Images and QuickShapes
Images and QuickShapes can be added to your text clips to improve visual
appeal.
Text, Images, and QuickShapes 181
Once added, you can position, resize, rotate, transform, align, and order the
image or QuickShape in relation to other objects. (See Manipulating objects on
p. 182.)
Adding images
1. Select your text clip.
2. From the Video Preview pane, click Add Image.
3. From the dialog, locate and select the file to import, the click Open.
The dialog disappears and the mouse pointer changes to the
Image Size cursor. What you do next determines the initial size,
placement, and aspect ratio (proportions) of the image.
4. Either:
• To insert the image at a default size, simply click the mouse.
OR
• To set the size of the inserted image, drag out a region and release
the mouse button.
By default, the image's aspect ratio is preserved.
Adding QuickShapes
1. As above, but click Add QuickShape instead of Add Image.
All QuickShapes are created initially as a square (or rectangle).
2. With the QuickShape selected, the Properties pane allows you to:
• swap the QuickShape to another QuickShape type, including
Ellipses, Stars, Spirals, and Speech Bubbles.
• morph any QuickShape to create many different shape variations.
See Using CG Clips (p. 57) for more information.

Text, Images, and QuickShapes 183
Shearing
With the Ctrl key pressed, drag an
edge handle to shear.
Skew
Drag a corner handle with the Ctrl
key pressed.
Ordering (Arranging)
To order a selected object in
relation to other objects (by Z-
order), right-click the object and
choose Arrange> then one of the
following options:
• Send to Back
Sends the selected object
to the back of the Z-
order stack, behind all
other objects.
• Bring to Front
Brings the selected
object to the front of the
Z-order stack, in front of
all other objects.
• Back One
Shifts the selected object
one position toward the
rear in the Z-order stack.
• Forward One
Shifts the selected object
one position toward the
front in the Z-order
stack.

184 Text, Images, and QuickShapes
Aligning
To align multiple selected object in
one operation and within their
selection box, right-click the
selected objects and choose
Align>, then one of the following
options:
• Left, Right, Top,
Bottom: Aligns all
objects to leftmost
object, rightmost object,
etc.
• Horizontal
Centre/Vertical Centre:
Aligns all objects to
centre of the selection
area (horizontally or
vertically).
To centre object(s) horizontally or
vertically in relation to their frame
width/height, right-click on the
selected object(s), and choose
Horizontally or Vertically from
the Centre> flyout.

Exporting
8
186 Exporting

Exporting 187
Exporting movies
There are a number of ways you can export your movie once you've edited it
with MoviePlus... the project might look fantastic in your Video Preview pane,
but there's likely to be an upper limit to how many people can crowd around
your monitor and watch your preview, so you'll need to export your movie in a
standard distributable format to allow others to share the experience!
The considerations you'll face when deciding how to export your project are the
same for all video editors—the most important is "what device will the video be
watched on and how am I going to deliver the video to the intended viewers?"
This double-barrelled question, once answered, will help determine how you
should export your movie for best results.
To play on: You can: Reference
computer (with CD)
create a Video CD
(VCD)1
p. 188
DVD player (TV)
DVD drive
(computer)
create a DVD1
create an AVCHD DVD1
p. 188
Blu-ray player (TV)
Blu-ray drive
(computer)
create a DVD1
create an AVCHD DVD1
create a Blu-ray Disc2
p. 188
iPad
iPod
iPhone/iPod Touch
Add to iTunes (for sync
with Apple device)
p. 199
PSP upload to PSP device3 p. 201
YouTube upload to YouTube4 p. 202
Internet standalone file p. 198
1 Requires DVD Writer/Rewriter or CD Writer.
2 Requires Blu-ray Writer.
3 Requires a USB-connected PSP (set to USB mode).
4 Requires a valid YouTube account.

188 Exporting
Exporting movies to disc
MoviePlus can export your project directly to disc (DVD, Blu-ray Disc, or
VCD), producing a movie which will play on your TV or computer (via an
appropriate disc player).
Optionally, you can create your own easy-to-navigate disc menus based on one
of an impressive array of templates—all easily modifiable to suit your taste.
For DVD/Blu-ray export, Dolby® Digital is used for audio encoding.
Disc settings
By default, MoviePlus will suggest the most appropriate export settings for your
project, although you can alter these settings specifically for export if you have
custom requirements. For example, PAL DVD and HD project settings are used
directly for export settings in DVD and Blu-Ray disc creation.
Several stages make up the disc creation process:
1. Chapter point set up. If you want a menu on your disc, chapter points
define locations in your project from which menu chapter thumbnails,
when clicked, will begin playing the relevant video—much the same as
the initial menu shown on any movie disc from your local movie store.
See Using chapter points on p. 110.
2. Disc Setup. To setup basic and advanced disc settings. Includes Menu
Designer, a template-driven tool to easily create optional disc menus.
3. Write Project. To initialize and create the disc.
The user is led through each stage seamlessly, culminating in the completion of
your MoviePlus project.
To create a disc (using project settings):
1. Select Export on the Tasks toolbar.
2. From the drop-down list, choose a disc-related option (DVD, Blu-ray
Disc, AVCHD, or VCD).
3. If you haven't already created a disc menu you'll be asked if you want
to create one. If so, select Yes and the Menu Designer is launched.

Exporting 189
Otherwise, the Export settings dialog is displayed (i.e., your disc will be
menuless).
4. (Optional) From the dialog, choose a different export template from
the list if needed. Normally, the already selected export setting is
chosen by MoviePlus as the most appropriate setting and should be
kept as is.
5. Click Next>.
6. From the Disc Settings dialog, review whether a Disc menu is required
(check or uncheck as needed), and if necessary click the Edit... button
to edit your menu in Menu Designer (see p. 190). The preview shows
your currently selected menu.
7. (Optional) Check Loop Playback to make your movie start from the
beginning after playback.
8. Use the Disc Type drop-down list to select your media. You can check
that your project will fit intended blank media (e.g., DVD 4.7GB for
DVD, BD-RE 25GB for Blu-ray Disc). Click Detect... to discover your
writable disc drive(s).
9. Click the Finish button.
From the Write Disc dialog, choose a write Speed and Drive where your target
media is located. Your completed disc will be ejected once the process is
completed.
For subsequent disc creation, caching technology is used to speed up the process.
The AVCHD option lets you write HD projects to DVD.
The Disc Settings dialog also lets you create either an ISO disc image
or a disc folder (great for viewing disc-related projects without
writing to disc). For ISO images, you can write a disc from image
instead of immediately committing to physical media at a later date
(see MoviePlus help).

Exporting 191
Disc menus are also hierarchical, allowing main titles (e.g., Play Movie) to be
placed on the top-level menu page, with other menu options (e.g., Scenes) able
to be placed on a secondary-level page.
For movies with multi-page menus, typically for projects with many chapters, all
pages can adopt the same design or each page can be designed differently. (See
Creating multi-level menus on p. 196).
Once the disc is created the menu will display when the disc is loaded, allowing
easy access to important parts of your movie. When viewing the movie on
computer, simply navigate via mouse; for TV, use the remote control's
navigation buttons to jump between disc menu's chapters and pages.
To launch Menu Designer:
• Click Menu Designer on the Tasks toolbar.
You can also access Menu Designer during Disc setup (see
p. 188), accessed via the Export button (pick a disc option).

192 Exporting
Galleries
To make life as simple as possible you can adopt one of a series of "themed"
templates, stored in galleries such as Modern, Seasons, Funky, and Moods,
amongst many others.
Gallery
Click the Gallery button to display an upper menu above
a gallery of template presets for a selected menu item (as
shown in example above). Choose a menu item, navigate
the gallery, click a thumbnail of your chosen template,
and then view your design.
Double-click on "Your Title" text and type your own disc
title, then either close Menu Designer or, more typically,
customize your template further.
Customizing a template
The Background, Layout, Title, Thumbnail, Buttons, and Labels buttons can all
be used to modify your chosen template. By clicking any one of these options
along the top bar the user interface refreshes to display an appropriate menu and
accompanying gallery on the right-hand side of the Menu Designer workspace.
For example, if you click Title, then a text-related menu will be shown above a
gallery of title presets. Try it out by clicking on each button on the Menu Bar!
Background
Click the button to display an upper menu of background
types above a series of gallery thumbnails for the selected
menu item. You can choose from a gallery of solid or
gradient colours, or from a range of artistic background
images.
To import your own image or video for use as a
background, click My Image or Video, then click the Add
button. From the Open dialog, choose a media file to add to
the background gallery—click the media file to apply it as a
background.
Termékspecifikációk
| Márka: | Serif |
| Kategória: | Szoftver |
| Modell: | MoviePlus X5 |
Szüksége van segítségre?
Ha segítségre van szüksége Serif MoviePlus X5, tegyen fel kérdést alább, és más felhasználók válaszolnak Önnek
Útmutatók Szoftver Serif

21 Augusztus 2024
21 Augusztus 2024
20 Augusztus 2024
20 Augusztus 2024
20 Augusztus 2024
20 Augusztus 2024
20 Augusztus 2024
19 Augusztus 2024
19 Augusztus 2024
18 Augusztus 2024
Útmutatók Szoftver
- Szoftver Sony
- Szoftver Garmin
- Szoftver Canon
- Szoftver Casio
- Szoftver Omron
- Szoftver Apple
- Szoftver GoPro
- Szoftver Microsoft
- Szoftver Zoom
- Szoftver Google
- Szoftver Antares
- Szoftver IRiver
- Szoftver Corel
- Szoftver Cyberlink
- Szoftver Adobe
- Szoftver Roxio
- Szoftver Acronis
- Szoftver Acoustica
- Szoftver Aritech
- Szoftver Android
- Szoftver Omni Group
- Szoftver Nero
- Szoftver Envivo
- Szoftver Safescan
- Szoftver SMA
- Szoftver Bticino
- Szoftver McAfee
- Szoftver Norton
- Szoftver Minolta
- Szoftver Pinnacle
- Szoftver Teasi
- Szoftver AVG
- Szoftver Suse
- Szoftver FileMaker
- Szoftver Lebara
- Szoftver Magix
- Szoftver Ulead
- Szoftver Fiber
- Szoftver Image-Line
- Szoftver Davilex
- Szoftver Skype
- Szoftver Osirius
- Szoftver Igo
- Szoftver Hercules
- Szoftver SAB
- Szoftver LibreOffice
- Szoftver Route 66
- Szoftver Trend Micro
- Szoftver Office
- Szoftver BlueGriffon
- Szoftver Startech
- Szoftver Enfocus
- Szoftver Wolters Kluwer
- Szoftver TeamViewer
- Szoftver Techsmith
- Szoftver Nedsoft
- Szoftver FreakinSoftMania
- Szoftver Solcon
- Szoftver Macromedia
- Szoftver DraftSight
- Szoftver ZTE Blade V8
- Szoftver Stentec
- Szoftver Foveon
- Szoftver Enra
Legújabb útmutatók Szoftver

14 Január 2025
14 Október 2024
13 Október 2024
10 Október 2024
7 Október 2024
5 Október 2024
5 Október 2024
5 Október 2024
23 Szeptember 2024
22 Szeptember 2024