Használati útmutató Pioneer DV-310
Pioneer
DVD-lejátszó
DV-310
Olvassa el alább 📖 a magyar nyelvű használati útmutatót Pioneer DV-310 (158 oldal) a DVD-lejátszó kategóriában. Ezt az útmutatót 10 ember találta hasznosnak és 2 felhasználó értékelte átlagosan 4.5 csillagra
Oldal 1/158
Register Your Product at
http://www.pioneerelectronics.com (US)
http://www.pioneerelectronics.ca (Canada)
Enregistrez votre produit sur
http://www.pioneerelectronics.com (Éstas-unis)
http://www.pioneerelectronics.ca (Canada)
DVD Player
Lecteur DVD
DV-410V-K
DV-310-K
Operating Instructions
Mode d’emploi
2
En
WARNING
D1-4-2-1_En
IMPORTANT NOTICE
D1-4-2-6-1_En
CAUTION : USE OF CONTROLS OR ADJUSTMENTS OR PERFORMANCE OF PROCEDURES OTHER THAN THOSE
SPECIFIED HEREIN MAY RESULT IN HAZARDOUS RADIATION EXPOSURE.
CAUTION : THE USE OF OPTICAL INSTRUMENTS WITH THIS PRODUCT WILL INCREASE EYE HAZARD.
D6-8-2-1_En
NOTE: ! # " ! " !" # " '%" " "! " $ # !# !! ""
" " ! ! "! ! " $ ! " " # !" #"
! " !" " ! # " " !#! ! " # ' ' "
!" #! %" " !" # "! ' #! #" " # "!
% $ " ! # " " "" %" # " # !" " ! # " ! "
#! #" " " $! "% " '"# " # "
" #! ! # "" '" "" " ' " % !# !
( " " " $ "
( ! " ! " "% " # " $
( "" # "" #" " #" " " ""% " $ ! "
( !#"" & "
D8-10-1-2_En
Information to User
D8-10-2_En
WARNING:
D36-P4_A_En
Wash hands after handling
The exclamation oint within an equilate al p r
t iangle is intended to ale t the use to the r r r
pr p r p resence of im o tant o e ating and
maintenance (se vicing) inst uctions in the r r
lite atu e accom anying the a liance. r r p pp
The lightning flash with a owhead, within rr
an equilate al t iangle, is intended to ale t r r r
the use to the esence of uninsulated r pr
"dange ous voltage" within the oduct'sr pr
enclosu e that may be of sufficient r
magnitude to constitute a isk of elect ic r r
shock to e sons.p r
CAUTION:
TO PREVENT THE RISK OF ELECTRIC
SHOCK, DO NOT REMOVE COVER (OR
BACK). NO USER-SERVICEABLE PARTS
INSIDE. REFER SERVICING TO QUALIFIED
SERVICE PERSONNEL.
CAUTION
RISK OF ELECTRIC SHOCK
DO NOT OPEN
D1-4-2-3_En
IMPORTANT
Thank you for buying this Pioneer product.
Please read through these operating instructions so you will know how to operate your model properly.
After you have finished reading the instructions, put them away in a safe place for future reference.

3
En
English
READ INSTRUCTIONS — All the safety and
o e ating inst uctions should be ead befo e the p r r r r
pr p roduct is o e ated.
RETAIN INSTRUCTIONS — The safety and
o e ating inst uctions should be etained fo p r r r r
futu e efe ence.r r r
HEED WARNINGS — All wa nings on the oduct r pr
and in the o e ating inst uctions should bep r r
adhe ed to.r
FOLLOW INSTRUCTIONS — All o e ating and use p r
inst uctions should be followed.r
CLEANING — The oduct should be cleaned only pr
with a olishing cloth o a soft d y cloth. Neve p r r r
clean with fu nitu e wax, benzine, insecticides r r
o othe volatile liquids since they may co ode r r rr
the cabinet.
ATTACHMENTS — Do not use attachments not
r pr r recommended by the oduct manufactu e as
they may cause haza ds.r
WATER AND MOISTURE — Do not use this
pr r r r p roduct nea wate — fo exam le, nea a
bathtub, wash bowl, kitchen sink, o laund yr r
tub; in a wet basement; o nea a swimming r r
pool; and the like.
ACCESSORIES — Do not lace this oduct on an p pr
unstable ca t, stand, t i od, b acket, o table.r r p r r
The oduct may fall, causing se ious injupr r ry to a
child o adult, and se ious damage to the r r
pr r r poduct. Use only with a ca t, stand, t i od,
b acket, o table ecommended by the r r r
manufactu er r, o sold with the oduct. Anyr pr
mounting of the oduct should follow the pr
manufactu e ’s inst uctions, and should use a r r r
mounting accesso y ecommended by the r r
manufactu er r.
CART — A oduct and ca t combination should be pr r
moved with ca e. Quick sto s, excessive fo ce, r p r
and uneven su faces may cause the oduct r pr
and ca t combination to ove tur r rn.
VENTILATION — Slots and o enings in the cabinetp
a e ovided fo ventilation and to ensu e r pr r r
r p r pr preliable o e ation of the oduct and to otect
it f om ove heating, and these o enings mustr r p
not be blocked o cove ed. The o enings should r r p
neve be blocked by lacing the oduct on a r p pr
bed, sofa, ug, o othe simila su face. Thisr r r r r
pr poduct should not be laced in a built-in
installation such as a bookcase o ack unless r r
pr p r pr ro e ventilation is ovided o the
manufactu e ’s inst uctions have been adhe ed r r r r
to.
POWER SOURCES — This oduct should be pr
o e ated only f om the ty e of owe sou ce p r r p p r r
indicated on the ma king label. If you a e notr r
su e of the ty e of owe su ly to you home, r p p r pp r
consult you oduct deale o local owe r pr r r p r
com anyp.
LOCATION – The a liance should be installed in a pp
stable location.
NONUSE PERIODS – The owe co d of the p r r
a liance should be un lugged f om the outlet pp p r
when left un-used fo a long e iod of time.r p r
GROUNDING OR POLARIZATION
• If this oduct is equi ed with a ola ized pr pp p r
alte nating cu ent line lug (a lug having one r rr p p
blade wide than the othe ), it will fit into the r r
outlet only one way. This is a safety featu e. Ifr
you a e unable to inse t the lug fully into the r r p
outlet, t y eve sing the lug. If the lug should r r r p p
still fail to fit, contact you elect ician to e lace r r r p
you obsolete outlet. Do not defeat the safety r
p rp p r pu ose of the ola ized lug.
• If this oduct is equi ed with a th ee-wi e pr pp r r
g ounding ty e lug, a lug having a thi d r p p p r
(g ounding) in, it will only fit into a g ounding r p r
ty e owe outlet. This is a safety featu e. If you p p r r
a e unable to inse t the lug into the outlet,r r p
contact you elect ician to e lace you obsolete r r r p r
outlet. Do not defeat the safety u ose of the p rp
g ounding ty e lug.r p p
POWER-CORD PROTECTION — Power pp-su ly
co ds should be outed so that they a e not likely r r r
to be walked on o inched by items laced r p p
u on o against them, aying a ticula p r p p r r
attention to co ds at lugs, convenience r p
r p p r rece tacles, and the oint whe e they exit f om
the product.
OUTDOOR ANTENNA GROUNDING — If an
outside antenna o cable system is connected tor
the oduct, be su e the antenna o cable pr r r
system is g ounded so as to ovide somer pr
pr r potection against voltage su ges and built-u
static cha ges. A ticle 810 of the Nationalr r
Elect ical Code, ANSI/NFPrA 70, ovides pr
info mation with ega d to o e g ounding ofr r r pr p r r
the mast and su o ting st uctu e, g ounding ofpp r r r r
the lead-in wi e to an antenna discha ge unit,r r
size of g ounding conducto s, location ofr r
antenna-discha ge unit, connection tor
g ounding elect odes, and equi ements fo the r r r r r
g ounding elect ode. See Figu e A.r r r
LIGHTNING — For pr r added otection fo this
pr r r roduct du ing a lightning sto m, o when it is
left unattended and unused fo long e iods ofr p r
time, un lug it f om the wall outlet and p r
disconnect the antenna o cable system. Thisr
will event damage to the oduct due topr pr
lightning and owe -line su ges.p r r
POWER LINES — An outside antenna system
should not be located in the vicinity of ove head r
p r r r r r p rowe lines o othe elect ic light o owe
ci cuits, o whe e it can fall into such owe r r r p r
lines o ci cuits. When installing an outside r r
antenna system, ext eme ca e should be taken r r
to kee f om touching such owe lines o p r p r r
ci cuits as contact with them might be fatal.r
OVERLOADING — Do not ove load wall outlets, r
extension co ds, o integ al convenience r r r
r p r r r rece tacles as this can esult in a isk of fi e o
elect ic shock.r
OBJECT AND LIQUID ENTRY — Never p ush
objects of any kind into this oduct th ough pr r
o enings as they may touch dange ous voltage p r
p r r p r roints o sho t-out a ts that could esult in a
fi e o elect ic shock. Neve s ill liquid of any r r r r p
kind on the product.
SERVICING — Do not attem t to se vice thisp r
pr r p r r roduct you self as o ening o emoving cove s
may ex ose you to dange ous voltage o othe p r r r
haza ds. Refe all se vicing to qualified se vicer r r r
p re sonnel.
DAMAGE REQUIRING SERVICE — Un lug this p
pr r r r roduct f om the wall outlet and efe se vicing
to qualified se vice e sonnel unde ther p r r
following conditions:
• When the p r pp r r powe -su ly co d o lug is
damaged.
• If liquid has been s illed, o objects have fallen p r
into the oduct.pr
• If the oduct has been ex osed to ain o watepr p r r r.
• If the oduct does not o e ate no mally by pr p r r
following the o e ating inst uctions. Adjust only p r r
those cont ols that a e cove ed by the o e atingr r r p r
inst uctions as an im o e adjustment of othe r pr p r r
cont ols may esult in damage and will oftenr r
r r requi e extensive wo k by a qualified technician
to esto e the oduct to its no mal o e ation.r r pr r p r
• If the oduct has been d o ed o damaged inpr r pp r
any way.
• When the product exhibits a distinct change in
p r r r re fo mance — this indicates a need fo se vice.
REPLACEMENT PARTS — When r p p re lacement a ts
a e equi ed, be su e the se vice technician has r r r r r
used e lacement a ts s ecified by the r p p r p
manufactu e o have the same cha acte istics r r r r r
as the o iginal a t. Unautho ized substitutions r p r r
may esult in fi e, elect ic shock, o othe r r r r r
haza ds.r
SAFETY CHECK — Up p ron com letion of any se vice
o e ai s to this oduct, ask the se vicer r p r pr r
technician to e fo m safety checks to p r r
dete mine that the oduct is in o e r pr pr p r
o ep rating condition.
WALL OR CEILING MOUNTING — The product
should not be mounted to a wall o ceiling.r
HEAT — The oduct should be situated away f om pr r
heat sou ces such as adiato s, heat egiste s, r r r r r
stoves, o othe oducts (including am lifie s) r r pr p r
that produce heat.
GROUND
CLAMP
ELECTRIC
SERVICE
EQUIPMENT
ANTENNA
LEAD IN
WIRE
ANTENNA
DISCHARGE UNIT
(NEC SECTION 810-20)
GROUNDING CONDUCTORS
(NEC SECTION 810-21)
GROUND CLAMPS
POWER SERVICE GROUNDING
ELECTRODE SYSTEM
(NEC ART 250, PART H)
NEC — NATIONAL ELECTRICAL CODE
Fig. A
D1-4-2-2_En
! #
CAUTION:
D8-10-3a_En

4
En
S001_En
Selecting fine audio equi ment such as the unit p
you’ve just u chased is only the sta t of you p r r r
musical enjoyment. Now it’s time to conside how r
you can maximize the fun and excitement you r
equi ment offe s. This manufactu e and thep r r r
Elect onic Indust ies Association’s Consume r r r
Elect onics G ou want you to get the most out of r r p
you equi ment by laying it at a safe level. One that r p p
lets the sound come th ough loud and clea without r r
annoying bla ing o disto tion-and, most im o tantly,r r r p r
without affecting you sensitive hea ing.r r
Sound can be deceiving. Ove time you hea ing r r r
“comfo t level” ada ts to highe volumes of sound.r p r
So what sounds “no mal” can actually be loud and r
ha mful to you hea ing. Gua d against this by r r r r
setting you equi ment at a safe level BEFORE you r p r
hea ing ada ts.r p
To establish a safe level:
• Sta t you volume cont ol at a low setting.r r r
• Slowly inc ease the sound until you can hea it r r
comfo tably and clea ly, and without disto tion.r r r
Once you have established a comfortable sound
level:
• Set the dial and leave it the e.r
Taking a minute to do this now will hel to event p pr
hea ing damage o loss in the futu e. Afte all, we r r r r
want you listening fo a lifetime.r
We Want You Listening For A Lifetime
Used wisely, you new sound equi ment will r p
provide a lifetime of fun and enjoyment. Since
hea ing damage f om loud noise is oftenr r
undetectable until it is too late, this manufactu e r r
and the Elect onic Indust ies Association’sr r
Consume Elect onics G ou ecommend you avoid r r r p r
pr p rolonged ex osu e to excessive noise. This list of
sound levels is included fo you otection.r r pr
Decibel
Level Example
30 Quiet lib a y, soft whis e sr r p r
40
Living oom, ef ige ator r r r r, bed oom away f om t afficr r r
50 Light t affic, no mal conve sation, quiet officer r r
60 Ai conditione at 20 feet, sewing machiner r
70 Vacuum cleaner, hai d yer r r, noisy estau antr r
80
Ave age city t affic, ga bage dis osals, ala m clock r r r p r
at two feet.
THE FOLLOWING NOISES CAN BE DANGEROUS
UNDER CONSTANT EXPOSURE
90
Subway, moto cycle, t uck t affic, lawn mower r r r
100 Ga bage t uck, chain saw, neumatic d illr r p r
120 Rock band conce t in f ont of s eake s, r r p r
thunde clar p
140 Gunshot blast, jet lanep
180 Rocket launching adp
Info mation cou tesy of the Deafness Resea ch Foundation.r r r
POWER-CORD CAUTION
!$%!"!""!!
"%!"!#!"!$
$%" $! ! ""
!"!! !!"!
"!"!!$!
#!!!!$!!
$ ""! "!!!%
!%! !$
" #%"!
!$$%"!
%" !"!&
#!%"!
S002_En
This product includes FontAvenue® fonts licenced by
NEC Corporation. FontAvenue is a registered
trademark of NEC Corporation.
This product incorporates copyright protection
technology that is protected by method claims of
certain . . patents and other intellectual property U S
rights o ned by acrovision Corporation and other w M
rights o ners. se of this copyright protection w U
technology must be authori ed by acrovision z M
Corporation and is intended for home and other,
limited vie ing uses only unless other ise authori ed w w z
by acrovision Corporation. everse engineering or M R
disassembly is prohibited.
01
6
En
Chapter 1
Before you start
Features
• PureCinema Progressive Scan video
When connected to a progressive
scan-compatible TV or monitor using the
component video outputs, you can enjoy
extremely stable, flicker free images, with the
same frame refresh rate as the original movie.
• 24-bit/96 kHz compatible DAC
The integrated 24-bit/96 kHz DAC means that
this player is compatible with high
sampling-rate discs, capable of delivering
exceptional sound quality in terms of dynamic
range, low-level resolution and high-frequency
detail.
What’s in the box
Please confirm that the following accessories
are in the box when you open it.
• Remote control
• AA/R6P dry cell batteries x 2
• Audio/video cable (red/white/yellow plugs)
• Warranty card
• Operating instructions
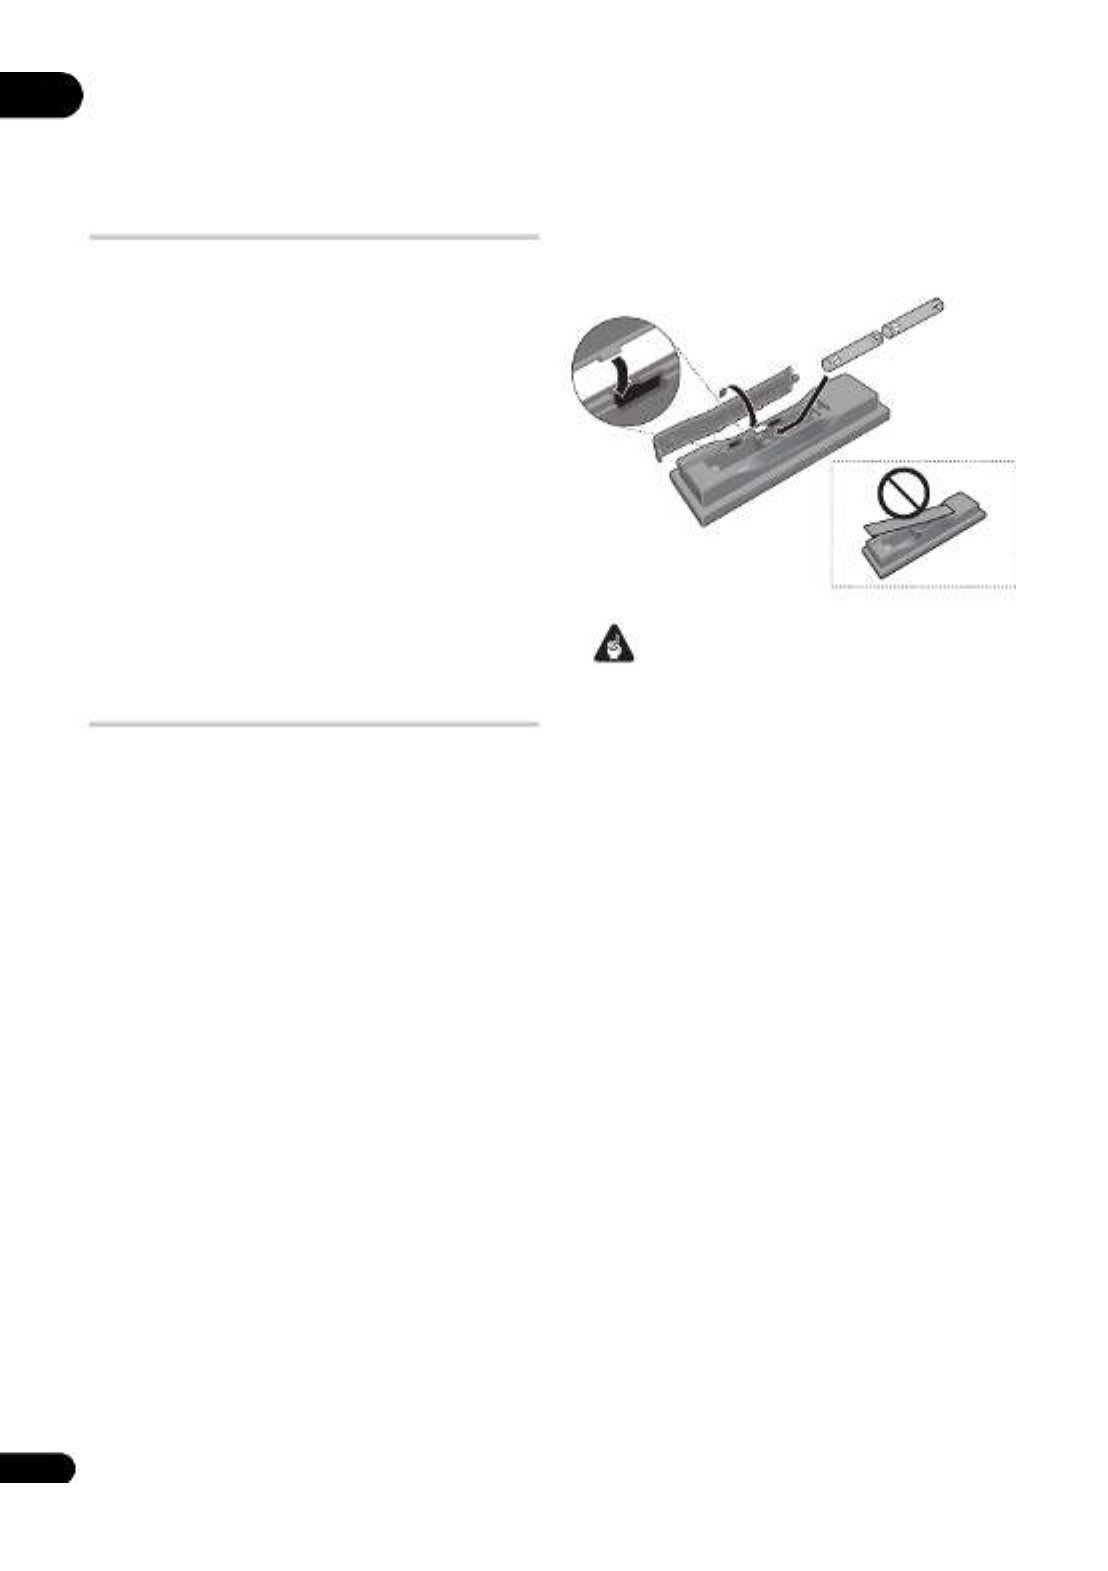
Putting the batteries in the remote
• Open the battery compartment cover
and insert the batteries as shown.
Use two AA/R6P batteries and follow the
indications ( , ) inside the compartment.
Close the cover when you’re finished.
When closing the cover, align the notch and
tab, and slide in the direction indicated by the
arrow .
Important
Incorrect use of batteries can result in hazards
such as leakage and bursting. Please observe
the following:
• Don’t mix new and old batteries together.
• Don’t use different kinds of battery
together — although they may look
similar, different batteries may have
different voltages.
• Make sure that the plus and minus ends of
each battery match the indications in the
battery compartment.
• Remove batteries from equipment that
isn’t going to be used for a month or more.
• When disposing of used batteries, please
comply with governmental regulations or
environmental public instruction’s rules
that apply in your country/area.
• Do not use or store batteries in direct
sunlight or other excessively hot place,
such as inside a car or near a heater. This
can cause batteries to leak, overheat,
explode or catch fire. It can also reduce the
life or performance of batteries.

01
8
En
About DualDisc playback
A DualDisc is a new two -sided disc, one side
of which contains DVD content video, audio,
etc. while the other side contains non-DVD
content such as digital audio material.
The non-DVD, audio side of the disc is not
compliant with the CD audio specification and
therefore may not play.
The DVD side of a DualDisc plays in this
product.
For more detailed information on the DualDisc
specification, please refer to the disc
manufacturer or disc retailer.
CD-R/-RW compatibility
• Compatible formats: CD audio, Video CD,
ISO 9660 CD-ROM* containing MP3,
WMA, MPEG-4 AAC, JPEG or DivX video/
WMV files
* ISO 9660 Level 1 or 2 compliant. CD
physical format: Mode1, Mode2 XA Form1.
Romeo and Joliet file systems are both
compatible with this player.
• Multi-session playback: No
• Unfinalized disc playback: No
• File structure (may differ): Up to 299
folders on a disc; up to 648 folders and files
(combined) within each folder
DVD+R/+RW compatibility
Only DVD+R/DVD+RW discs recorded in
‘Video Mode (DVD Video Mode)’ which have
been finalized, can be played back. However,
some editing made during the recording may
not be played back accurately.
DVD-R/-RW compatibility
• Compatible formats: DVD-Video, Video
Recording (VR)*
* Edit points may not play exactly as edited;
screen may go momentarily blank at edited
points.
• Unfinalized playback: No
• MP3/WMA/MPEG-4 AAC/JPEG or
DivX video/WMV file playback on DVD-R/
-RW: Yes
Compressed audio compatibility
• Compatible formats: MPEG-1 Audio Layer
3 (MP3), Windows Media Audio (WMA),
MPEG-4 AAC
• Sampling rates: 32 kHz, 44.1 kHz or 48 kHz
• Bit-rates: Any (128 kbps or higher
recommended)
• VBR (Variable Bit Rate) MP3/WMA/
MPEG-4 AAC playback: No
• WMA lossless encoding compatible: No
• DRM (Digital Rights Management)
compatible: No (DRM-protected audio files
will not play in this player — see also DRM
in the Glossary on page 49)
• File extensions: .mp3, .wma, .m4a (these
must be used for the player to recognize
MP3, WMA and MPEG-4 AAC files — do
not use for other file types)

01
9
En
English
About MPEG-4 AAC
Advanced Audio Coding (AAC) is at the core of
the MPEG-4 AAC standard, which
incorporates MPEG-2 AAC, forming the basis
of the MPEG-4 audio compression technology.
The file format and extension used depend on
the application used to encode the AAC file.
This unit plays back AAC files encoded by
iTunes® bearing the extension ‘.m4a’.
DRM-protected files will not play, and files
encoded with some versions of iTunes® may
not play, or filenames may display incorrectly.
• Apple and iTunes are trademarks of Apple
Inc., registered in the U.S. and other
countries.
Windows Media™ Audio (WMA)
compatibility
This player can playback Windows Media
Audio content.
WMA is an acronym for Windows Media Audio
and refers to an audio compression
technology developed by Microsoft
Corporation. WMA content can be encoded by
using Windows Media Player for Windows XP,
Windows Media Player 9 or Windows Media
Player 10 series.
• Windows Media is a trademark of Microsoft
Corporation.
• This product includes technology owned by
Microsoft Corporation and cannot be used
or distributed without a license from
Microsoft Licensing, Inc.
About DivX video
DivX is a digital video format created by DivX,
Inc. This player can play DivX videos recorded
on DVDs, CDs, or USB storage devices.
Keeping the same terminology as DVD-Video,
individual DivX video files are called “Titles”.
DivX videos will be played in alphabetical
order.
• DivX, DivX Certified, and associated logos
are trademarks of DivX, Inc. and are used
under license.
Displaying external subtitle files
The font sets listed below are available for
external subtitle files. You can see the proper
font set on-screen by setting the Subtitle
Language (in Language settings on page 38)
to match the subtitle file.
This player supports the following language
groups:
• Some external subtitle files may be
displayed incorrectly or not at all.
• For external subtitle files the following
subtitle format filename extensions are
supported (please note that these files are
not shown within the disc navigation
menu): .srt, .sub, .ssa, .smi
• The filename of the movie file has to be
repeated at the beginning of the filename
for the external subtitle file.
Group 1 Albanian (sq), Basque (eu), Catalan
(ca), Danish (da), Dutch (nl),
English (en), Faroese (fo), Finnish
(fi), French (fr), German (de),
Icelandic (is), Irish (ga), Italian (it),
Norwegian (no), Portuguese (pt),
Rhaeto-Romanic (rm), Scottish
(gd), Spanish (es), Swedish (sv)
Group 2
Albanian (sq), Croatian (hr), Czech
(cs), Hungarian (hu), Polish (pl),
Romanian (ro), Slovak (sk),
Slovenian (sl)
Group 3 Bulgarian (bg), Byelorussian (be),
Macedonian (mk), Russian (ru),
Serbian (sr), Ukrainian (uk)
Group 4 Hebrew (iw), Yiddish (ji)
Group 5 Turkish (tr)

01
10
En
• The number of external subtitle files which
can be switched for the same movie file is
limited to a maximum of 10.
DivX video compatibility
• Official DivX® Certified product.
• Plays all versions of DivX® video (including
DivX® 6) with standard playback of DivX®
media files.
• File extensions: .avi and .divx (these must
be used for the player to recognize
DivX video files). Note that all files with the
.avi extension are recognized as MPEG4, but
not all of these are necessarily DivX video
files and therefore may not be playable on
this player.
About Windows Media Video
(WMV)
(DV-410V only)
WMV is an acronym for Windows Media Video
and refers to a video compression technology
developed by Microsoft Corporation. WMV
content can be encoded by using Windows
Media Encoder.
• This player is compatible with WMV9 files
that are encoded by using the Windows
Media Encoder 9 Series, with .wmv as an
extension.
• Compatible with size under 720x480 pixels.
• Advanced Profile is not supported.
• DRM-protected video files will not play in
this player.
JPEG file compatibility
• Compatible formats: Baseline JPEG and
EXIF 2.2* still image files up to a resolution
of 3072 x 2048.
*File format used by digital still cameras.
• Progressive JPEG compatible: No
• File extensions: .jpg (must be used for the
player to recognize JPEG files — do not
use for other file types)
PC-created disc compatibility
Discs recorded using a personal computer
may not be playable in this unit due to the
setting of the application software used to
create the disc. In these particular instances,
check with the software publisher for more
detailed information.
Discs recorded in packet write mode (UDF
format) are not compatible with this player.
Check the DVD-R/-RW or CD-R/-RW software
disc boxes for additional compatibility
information.

02
11
En
English
Chapter 2
Connections
Easy connections
Important
• Before making or changing any connections, switch off the power and disconnect the power
cable from the AC outlet.
• The setup described here is a basic setup that allows you to play discs using just the cables
supplied with the player. In this setup, stereo audio is played through the speakers in your TV.
• This player is equipped with copy protection technology. Do not connect this player to your
TV via a VCR using audio/video cables, as the picture from this player will not appear properly
on your TV. (This player may also not be compatible with some combination TV/VCRs for the
same reason; refer to the manufacturer for more information.)
1 Connect the
VIDEO OUT
and
AUDIO OUT L/R
jacks to a set of A/V inputs
on your TV.
Use the supplied audio/video cable,
connecting the red and white plugs to the
audio outputs and the yellow plug to the video
output. Make sure you match up the left and
right audio outputs with their corresponding
inputs for correct stereo sound.
See below if you want to use a component or
S-Video cable for the video connection.
2 Plug into a power outlet.
Note
• Before unplugging the player from the
power outlet, make sure you first switch it
into standby using either the front panel
STANDBY/ON button, or the remote
control, and wait of the -OFF- message to
disappear from the player’s display.
• For the above reasons, do not plug this
player into a switched power supply found
on some amplifiers and AV receivers.
PR
PB
Y
COMPONENT VIDEO OUT
VIDEO OUT
S- VIDEO OUT
DIGIT AL
AUDIO OUT
AUDIO OUT
HDMI OUT
L
R
CO AXIAL
To audio/video inputs
To power outlet
Yellow
White
Red
TV
DV-410V

02
12
En
Connecting using the S-Video
output
If your TV (or other equipment) has an S-Video
(S1) input, you can use the S-Video output on
this player instead of the standard (composite)
output for a better quality picture.
• Use an S-Video cable (not supplied) to
connect the S-VIDEO OUT to an S-Video
input on your TV (or monitor or AV
receiver).
Line up the small triangle above the jack with
the same mark on the plug before plugging in.
Connecting using the
component video output
You can use the component video output
instead of the standard video out jack to
connect this player to your TV (or other
equipment). This should give you the best
quality picture from the three types of video
output available.
• Use a component video cable (not
supplied) to connect the COMPONENT
VIDEO OUT jacks to a component video
input on your TV, monitor or AV receiver.
Watching progressive scan video
from the component video
outputs
This player can output progressive scan video
from the component video output. Compared
to interlace video, progressive scan video
effectively doubles the scanning rate of the
picture, resulting in a very stable, flicker-free
image.
To set up the player for use with a progressive
scan TV, see Video Output settings on page 37.
When the player is set to output progressive
scan video, the PRGSVE indicator lights in the
front panel display.
PR
PB
Y
COM PONENT VIDEO OUT
VIDEO OUT
S- VIDEO OUT
DIGIT AL
AUDIO OUT
AUDIO OUT
HDMI OUT
L
R
COA XIAL
TV
To S-Video input
P
R
P
B
Y
COMPONENT VIDEO OUT
VIDEO OUT
S- VIDEO OUT
DIGIT AL
AUDIO OUT AUDIO OUT
HDMI OUT
L
R
COAXIAL
TV
To component
video input
DV-410V

02
14
En
Connecting the digital output
This player has coaxial-type digital audio
output for connection to an AV receiver.
Depending on the capabilities of your AV
receiver, you might have to set up this player to
output only digital audio in a compatible
format. See Digital Audio Out settings on
page 36 and refer to the operating instructions
that came with your AV receiver.
• Connect one of the COAXIAL DIGITAL
AUDIO OUT jacks on this player to a digital
input on your AV receiver.
For a coaxial connection, use a coaxial cable
(similar to the supplied video cable) to connect
the COAXIAL DIGITAL AUDIO OUT jack to a
coaxial input on your AV receiver.
Connecting using HDMI
(DV-410V only)
If you have a HDMI equipped monitor or
display, you can connect it to this player using
a commercially available HDMI cable.
The HDMI connector outputs uncompressed
digital video, as well as almost every kind of
digital audio that the player is compatible with,
including DVD-Video, Video CD, CD, WMA,
MP3, MPEG-4 AAC, DivX video and WMV.
• Use an HDMI cable (not supplied) to
connect the HDMI OUT interconnect on
this player to an HDMI interconnect on a
HDMI-compatible display.
The arrow on the cable connector body should
be face up for correct alignment with the
connector on the player.
Note
• This unit has been designed to be
compliant with HDMI (High-Definition
Multimedia Interface). Depending on the
component you have connected, using a
DVI connection may result in unreliable
signal transfers.
• When you change the component
connected to the HDMI output, you will
also need to change the HDMI settings to
match the new component (see HDMI
Out on page 36, HDMI Resolution on
page 37 and HDMI Color on page 37 to do
this). However, the settings for each
component are then stored in memory (for
up to 2 components).
DV-410V
P
R
P
B
Y
COMPONENT VIDEO OUT
VIDEO OUT
S- VIDEO OUT
DIGIT AL
AUDIO OUT
AUDIO OUT
HDMI OUT
L
R
COAXIAL
AV r receive
To coaxial digital
input
P
R
P
B
Y
CO MPO NE NT VIDEO OUT
VIDEO OU T
S-VIDE O O UT
DIGI TAL
AUDI O O UT
AUDI O O UT
HDM I O UT
L
R
CO AXIAL
DV-410V
HDMI-compatible display
To HDMI
interconnect

02
15
En
English
• The HDMI connection is compatible with
44.1 kHz/48 kHz/96 kHz, 16 bit/20 bit/24 bit
2 channel linear PCM signals, as well as
Dolby Digital, DTS and MPEG audio
bitstream.
– Manufactured under license from Dolby
Laboratories. “Dolby”, “Pro Logic”, and the
double-D symbol are trademarks of Dolby
Laboratories.
– Manufactured under license under U.S.
Patent #’s: 5,451,942; 5,956,674; 5,974,380;
5,978,762; 6,487,535 & other U.S. and
worldwide patents issued & pending. DTS
and DTS 2.0 + Digital Out are registered
trademarks and the DTS logos and Symbol
are trademarks of DTS, Inc. © 1996-2007
DTS, Inc. All Rights Reserved.
–Manufactured under license under U.S.
Patent #: 5,451,942 & other U.S. and
worldwide patents issued & pending. DTS
and DTS Digital Out are registered
trademarks and the DTS logos and Symbol
are trademarks of DTS, Inc. © 1996-2007
DTS, Inc. All Rights Reserved.
About HDMI
HDMI (High-Definition Multimedia Interface)
supports both video and audio on a single
digital connection for use with DVD players,
DTV, set-top boxes, and other AV devices.
HDMI was developed to provide the
technologies of High-bandwidth Digital
Content Protection (HDCP) as well as Digital
Visual Interface (DVI) in one specification.
HDCP is used to protect digital content
transmitted and received by DVI-compliant
displays.
HDMI has the capability to support standard,
enhanced, or high-definition video plus
standard to multi-channel surround-sound
audio. HDMI features include uncompressed
digital video, a bandwidth of up to five
gigabytes per second (with HDTV signals), one
connector (instead of several cables and
connectors), and communication between the
AV source and AV devices such as DTVs.
• HDMI, the HDMI Logo and High-Definition
Multimedia Interface are trademarks or
registered trademarks of HDMI Licensing
LLC.
Resetting the output resolution to the
default setting with HDMI connection
Switch the player to standby then, using the
front panel controls, press STANDBY/ON
while pressing to switch the player back to
720x480p.
HDMI
ST ANDBY/ON
DV-410V
STANDBY/ON

03
16
En
Chapter 3
Controls and displays
Front panel
1STANDBY/ON (page 18)
2 Disc tray
3OPEN/CLOSE (page 20)
4 Display
5 TOP MENU (page 22)
6 ENTER & cursor buttons (page 18)
7 MENU (page 22)
8 RETURN (page 22)
9 HOME MENU (page 18)
10 USB port (Type A) (page 32)
11 DVD/USB (page 32)
12 (page 21)
13 (page 21)
14 (page 21)
15 and (page 21)
16 HDMI indicator
Lights when this player is recognized by
another HDMl or DVI/HDCP compatible
component.
OPEN/CLOSE
HDMI
HOME
MENU RETU RN
ENT ER
T OP MENU MENU
USBDVD/USB
ST ANDBY/ON
253 4 6 71
9 8
1012 1116 131415
DV-410V

03
17
En
English
Remote control
1STANDBY/ON (page 18)
2 AUDIO (page 31)
3 SUBTITLE (page 30)
4 Number buttons (page 21)
5 TOP MENU (page 22)
6 ENTER & cursor buttons (page 18)
7 HOME MENU (page 18)
8 / and (pages 21 and 23)
9 PLAY (page 21)
10 PREV (page 21)
11 PAUSE (page 21)
12 SURROUND (page 33)
13 PLAY MODE (page 27)
14 OPEN/CLOSE (page 20)
15 ANGLE (page 31)
16 DVD/USB (page 32)
17 CLEAR (page 29)
18 MENU (page 22)
19 RETURN (page 18)
20 and / (pages 21 and 23)
21 NEXT (page 21)
22 STOP (page 21)
23 DISPLAY (page 31)
24 ZOOM (page 31)
Using the remote control
Keep in mind the following when using the
remote control:
• Make sure that there are no obstacles
between the remote and the remote
sensor on the unit.
• The remote has a range of about 7 m
(23 ft.).
• Remote operation may become unreliable
if strong sunlight or fluorescent light is
shining on the unit’s remote sensor.
• Remote controllers for different devices
can interfere with each other. Avoid using
remotes for other equipment located close
to this unit.
• Replace the batteries when you notice a
fall off in the operating range of the
remote.
STANDBY/ON OPEN/CLOSE
AUDIO SUBTITLE ANGLE
1 2 3
CLEAR
USB
DVD/
45 6
78 9
0
TOP MENU MENU
ENTER
RETURN
PLAY MODESURROUND
ZOOM DISPLAY
PLAY
PREV PAUSE
DVD
STOP NEXT
HOME
MENU
1
23
21
20
19
18
17
16
15
14
2
4
5
6
7
8
10
12
13
3
9
11 22
24

04
18
En
Chapter 4
Getting started
Switching on
After making sure that everything is connected
properly and that the player is plugged in,
press STANDBY/ON on the front panel or
remote control to switch the player on.
Also, switch on your TV and make sure that it
is set to the input you connected the DVD
player to.
FAQ
• My DVD player switches on but there is
nothing displayed on my TV.
Make sure that the TV is set to the correct
video input (not a TV channel). For
example, if you connected this player to
the VIDEO 1 inputs on your TV, switch your
TV to VIDEO 1.
Note
• This player features a screen saver and an
auto power off function. If the player is
stopped and no button is pressed for
around five minutes, the screen saver
starts. If the disc tray is closed but no disc
is playing and no control is pressed for
about 30 minutes, the player automatically
goes into standby.
Using the on-screen displays
For ease of use, this player makes extensive
use of graphical on-screen displays (OSDs).
All the screens are navigated in basically the
same way, using the cursor buttons (///
) to change the highlighted item and
pressing ENTER to select it.
Note
• From here on in this manual, the word
‘select’ generally means use the cursor
buttons to highlight an item on-screen,
then press ENTER.
HDMI
ST ANDBY/ON
DV-410V
STANDBY/ON
Button What it does
HOME MENU Display/exit the on-screen
display.
/// Changes the highlighted menu
item.
ENTER Selects the highlighted menu
item (both ENTER buttons on
the remote work in exactly the
same way).
RETURN Returns to the main menu
without saving changes.
TOP MENU MENU
ENTER
RETURN
HOME
MENU
DV-410V
OPEN/CLOSE
HOME
MENU RETU RN
ENT ER
T OP MENU MENU
USBDVD/USB
ENTER
HOME
MENU RETURN

04
19
En
English
Setting up the player for
your TV
If you have a widescreen (16:9) TV, you should
setup the player so that the picture will be
presented correctly. If you have a conventional
(4:3) TV, you can leave the player on the default
setting and move on to the next section.
1 Press HOME MENU and select ‘Initial
Settings’.
2 Select ‘TV Screen’ from the ‘Video
Output’ settings.
3 If you have a widescreen (16:9) TV,
select ‘16:9 (Wide)’ or ‘16:9 (Compressed)’.
If you have a conventional (4:3) TV, you can
change the setting from 4:3 (Letter Box) to 4:3
(Pan & Scan) if you prefer. See Video Output
settings on page 37 for more details.
4 Press HOME MENU to exit the menu
screen.
Setting the language of this
player’s on-screen displays
This sets the language of the player’s
on-screen displays.
1 Press HOME MENU and select ‘Initial
Settings’.
2 Select ‘OSD Language’ from the
‘Display’ settings.
3 Select a language.
The on-screen language will change according
to your selection.
4 Press HOME MENU to exit the menu
screen.
Initial Settings
Digital Audio Out
Video Output
Language
Display
Options
TV Screen
Component Out
HDMI Resolution
HDMI Color
4:3 (Letter Box)
4:3 (Pan&Scan)
16:9 (Wide)
16:9 (Compressed)
Initial Settings
DV-410V screen
Initial Settings
Digital Audio Out
Video Output
Language
Display
Options
OSD Language
Angle Indicator
Initial Settings
DV-410V screen

04
22
En
DVD-Video and DivX disc menus
Some DivX media files and many DVD-Video
discs feature menus from which you can
select what you want to watch. They may also
give access to additional features, such as
subtitle and audio language selection, or
special features such as slideshows. See the
disc packaging for details.
Sometimes DivX and DVD-Video menus are
displayed automatically when you start
playback; others only appear when you press
MENU or TOP MENU.
Video CD PBC menus
Some Video CDs have menus from which you
can choose what you want to watch. These are
called PBC (Playback Control) menus.
You can play a PBC Video CD without having
to navigate the PBC menu by starting playback
using a number button to select a track, rather
than the PLAY button.
Button What it does
TOP MENU Displays the ‘top menu’ of a
DVD disc — this varies with the
disc.
MENU Displays a DVD disc (or DivX
media files) menu — this varies
with the disc and may be the
same as the ‘top menu’.
/// Moves the cursor around the
screen.
ENTER Selects the current menu
option.
RETURN Returns to the previously
displayed menu screen.
Numbers
(remote only)
Highlights a numbered menu
option (some discs only). Press
ENTER to select.
1 2 3
CLEAR
USB
DVD/
45 6
78 9
0
TOP MENU MENU
ENTER
RETURN
HOME
MENU
Button What it does
RETURN Displays the PBC menu.
Numbers
(remote only)
Use to enter a numbered menu
option. Press ENTER to select.
PREV Displays the previous menu
page (if there is one).
NEXT Displays the next menu page (if
there is one).
1 2 3
CLEAR
USB
DVD/
45 6
7 8 9
0
TOP MENU MENU
ENTER
RETURN
PLAY
PREV PAUSE ST OP NEXT
HOME
MENU

05
23
En
English
Chapter 5
Playing discs
Note
• Many of the functions covered in this
chapter apply to DVD discs, Video CDs,
CDs, DivX video/WMV and MP3/WMA/
MPEG-4 AAC/JPEG discs, although the
exact operation of some varies slightly with
the kind of disc loaded.
• Some DVDs restrict the use of some
functions (random or repeat, for example)
in some or all parts of the disc. This is not
a malfunction.
• When playing Video CDs, some of the
functions are not available during PBC
playback. If you want to use them, start the
disc playing using a number button to
select a track.
Scanning discs
You can fast-scan discs forward or backward
at four different speeds (only one speed for
DivX video/WMV).
1 During playback, press or to
start scanning.
• There is no sound while scanning DVDs,
DivX video/WMV and Video CDs.
2 Press repeatedly to increase the
scanning speed.
• The scanning speed is shown on-screen.
3 To resume normal playback, press
PLAY.
• When scanning a Video CD playing in PBC
mode or a MP3/WMA/MPEG-4 AAC track,
playback automatically resumes at the end
or beginning of the track.
• Depending on the disc, normal playback
may automatically resume when a new
chapter is reached on a DVD disc.
Playing in slow motion
You can play DVD-Videos and DVD-R/-RW at
four different slow motion speeds, forwards
and backwards. Video CDs and DivX video/
WMV can be played at four different forward
slow motion speeds.
1 During playback, press PAUSE.
2 Press and hold / or / until
slow motion playback starts.
• The slow motion speed is shown
on-screen.
• There is no sound during slow motion
playback.
3 Press repeatedly to change the slow
motion speed.
4 To resume normal playback, press
PLAY.
• Depending on the disc, normal playback
may automatically resume when a new
chapter is reached.

05
25
En
English
Browsing Discs with the Disc
Navigator
Use the Disc Navigator to browse through the
contents of a DVD-Video, VR mode DVD-R/-RW
or Video CD disc to find the part you want to
play.
Important
• You can’t use the Disc Navigator with
Video CDs in PBC mode.
1 During playback, press HOME MENU
and select ‘Disc Navigator’ from the
on-screen menu.
2 Select a view option.
The options available depend on the kind of
disc loaded and whether the disc is playing or
not, but include:
•Title — Titles from a DVD-Video disc.
•Chapter — Chapters from the current title
of a DVD-Video disc.
•Track — Tracks from a Video CD disc.
•Time — Thumbnails from a Video CD disc
at 10 minute intervals.
•Original: Title — Original titles from a VR
mode DVD-R/-RW disc.
•Play List: Title — Play List titles from a VR
mode DVD-R/-RW disc.
•Original: Time — Thumbnails from the
Original content at 10 minute intervals.
•Play List: Time — Thumbnails from the
Play List at 10 minute intervals.
The screen shows up to six moving thumbnail
images displayed one after another. To display
the previous/next six thumbnails, press
PREV/NEXT (you don’t have to wait
for all the thumbnails to finish playing to
display the previous/next page).
3 Select the thumbnail image for what
you want to play.
You can use either the cursor buttons (//
/) and ENTER to select a thumbnail, or
the number buttons.
To select using the number buttons, enter a
two-digit number then press ENTER.
Tip
• Another way to find a particular place on a
disc is to use one of the search modes. See
Searching a disc on page 30.
Disc Navigator
Disc Navigator
Title
Chapter
01
04
02
05
03
06
Di Navigator: Titlesc
01- 49: - -

05
26
En
Browsing Files with the Disc
Navigator
The Disc Navigator can be used to play MP3,
WMA, MEPG-4 AAC, DivX video, WMV and
JPEG files.
Use the Disc Navigator to find a particular file
or folder by filename. Note that if there are
other types of files on the same disc, these will
not be displayed in the Disc Navigator.
1 Press HOME MENU and select ‘Disc
Navigator’ from the on-screen menu.
2 Use the cursor buttons (///)
and ENTER to navigate.
Use the cursor up/down buttons (/) to
move up and down the folder/file list.
Use the cursor left button () to return to the
parent folder.
Use ENTER or cursor right () to open a
highlighted folder.
• You can also return to the parent folder by
going to the top of the list to the ‘..’ folder,
then pressing ENTER.
• When a JPEG file is highlighted, a
thumbnail image is displayed on the right.
3 To play the highlighted track or
DivX video/WMV file or display the
highlighted JPEG file, press ENTER.
• When a MP3/WMA/MPEG-4 AAC or
DivX video/WMV file is selected, playback
begins, starting with the selected file, and
continues until the end of the folder.
• When a JPEG file is selected, a slideshow
begins, starting with that file, and
continues to the end of the folder.
Tip
• You can also play a JPEG slideshow while
listening to MP3/WMA/MPEG-4 AAC
playback. Simply select the audio file you
want to listen to followed by the JPEG from
which you want the slideshow to start.
Playback of both the slideshow and the
audio files repeats.
• To play the contents of the whole disc
rather than just the current folder, exit the
Disc Navigator and start playback using
the PLAY button.
00:00/ 00:00 0k pb s
Fol erd 1
Fol er2d
Fol er3d
Fol er4d
File
1
File2
File3
File4
File5
Fol er2d
00:00/ 00:00 0k pb s

06
32
En
Chapter 6
USB playback
Using the USB interface
It is possible to listen to two-channel audio and
watch DivX video/WMV/JPEG files using the
USB interface on the front of this unit. Connect
a USB mass storage device as shown below.
Note
• This includes playback of DivX video/
WMV/MP3/WMA/MPEG-4 AAC/JPEG files
(except files with copy-protection or
restricted playback).
• Compatible USB devices include portable
flash memory (particularly keydrives) and
digital audio players (MP3 players) of
format FAT16/32. It is not possible to
connect this unit to a personal computer
for USB playback.
• Pioneer cannot guarantee compatibility
(operation and/or bus power) with all USB
mass storage devices and assumes no
responsibility for any loss of data that may
occur when connected to this unit.
• With large amounts of data, it may take
longer for the system to read the contents
of a USB device.
• Some USB devices may not be properly
recognized.
• Even when they are in a supported format,
some files may not play or display
depending on the content.
1 With the player switched on, press
DVD/USB.
Make sure your TV is on and set to the correct
video input, and that USB MODE is showing on
the front panel display.
2 Connect your USB device.
The USB terminal is located on the front panel.
• Disc Navigator is automatically displayed.
3 Press ENTER to start playback.
• The method of playback for files saved on a
USB device is the same as for other discs.
For more information, see Basic playback
controls on page 21 and Playing discs on
page 23.
4 Turn off this player and remove the
USB device.
• The next time you turn this player on it will
start up in USB mode. To return to DVD
mode, either press DVD/USB or press
OPEN/CLOSE to open the disc tray.
Important
If a USB ERR message lights in the display, it
may mean that the power requirements of the
USB device are too high for this player, or that
the device is incompatible. Try the following:
• Switch the player off, then on again.
• Reconnecting the USB device with the
player switched off.
• Change the player back to DVD mode
(LOADING will appear in the front panel
display whether a disc is inserted or not) by
pressing DVD/USB, then once again
select USB mode ( USB MODE will appear
in the front panel display).
• Using a dedicated AC adapter (supplied
with the device) for USB power.
If this doesn’t remedy the problem, it is likely
your USB device is incompatible.
OPEN/CLOSE
HOME
MENU RETURN
ENTER
TOP MENU MENU
USBDVD/USB
USB mass
sto age devicer
USB
DV-410V (Type A)

07
33
En
English
Chapter 7
Audio Settings and Video Adjust menus
Audio Settings menu
The Audio Settings menu offers features for
adjusting the way discs sound.
1 Press HOME MENU and select ‘Audio
Settings’ from the on-screen display.
2 Select and change settings using the /
// (cursor) buttons, and ENTER.
Equalizer
• Settings: Rock, Pop, Live, Dance, Techno,
Classic, Soft, Off (default)
The various preset EQ curves are designed to
suit various styles of music.
Note
• 96 kHz linear PCM audio is automatically
downsampled to 48 kHz if the Equalizer is
switched on.
Virtual Surround
• Settings: On, Off (default)
Switch on Virtual Surround to enjoy realistic
surround sound effects from just two
speakers.
Tip
• You can also use the SURROUND button
on the remote control to switch Virtual
Surround on.
Note
• 96 kHz linear PCM audio is automatically
downsampled to 48 kHz if Virtual Surround
is switched on.
• If the player is outputting Dolby Digital,
DTS or MPEG bitstream audio (in other
words, no conversion to PCM), Virtual
Surround has no effect on the audio from
the digital output. See Digital Audio Out
settings on page 36 for how to set up the
digital output formats.
• How good the surround effect is varies
with the disc.
Audio Settings
Audio Settings
Equalizer
Virtual Surround
Audio DRC
Dialog
On
Off

08
40
En
Changing your password
To change your password, confirm your
existing password then enter a new one.
1 Select ‘Password Change’.
2 Use the number buttons to enter your
existing password, then press ENTER.
3 Enter a new password and press
ENTER.
This registers the new password and you will
return to the Options menu screen.
Setting/changing the Parental Lock
1 Select ‘Level Change’.
2 Use number buttons to enter your
password, then press ENTER.
3 Select a new level and press ENTER.
• Press (cursor left) repeatedly to lock
more levels (more discs will require the
password); press (cursor right) to
unlock levels. You can’t lock level 1.
This sets the new level and you will return to
the Options menu screen.
Setting/changing the Country/Area
code
You can find the Country/Area code list on
page 50.
1 Select ‘Country Code’.
2 Use number buttons to enter your
password, then press ENTER.
3 Select a Country/Area code and press
ENTER.
There are two ways you can do this:
• Select by code letter: Use / (cursor up/
down) to change the Country/Area code.
• Select by code number: Press (cursor
right) then use the number buttons to
enter the 4-digit Country/Area code.
The new Country/Area code is set and you will
return to the Options menu screen. Note that
the new Country/Area code doesn’t take effect
until the next disc is loaded (or the current disc
is reloaded).
DTS Downmix
(DV-410V only)
• Default setting: STEREO
If you’ve selected DTS > PCM in DTS Out on
page 36, you can choose the way the signal is
downmixed to PCM audio. STEREO will
downmix the DTS signal to 2-channel stereo,
whereas Lt/Rt will downmix to a 2-channel
signal compatible with Dolby surround matrix
decoders. (This allows you to hear surround
sound if your AV receiver or amplifier has
Dolby Pro Logic capability.)
About DivX
®
VOD content
In order to play DivX VOD (video on demand)
content on this player, you first need to register
the player with the DivX VOD registration
system. You do this by generating a DivX VOD
registration code from the device, which you
will submit to DivX via the DivX Player program
available for your computer.
Important
• DivX VOD content is protected by a DRM
(Digital Rights Management) system. This
restricts playback of content to specific,
registered devices.
Digital Audio Out
Video Output
Language
Display
Options
STEREO
Lt/Rt
Initial Settings
Parental Lock
DTS Downmix
DivX VOD
DV-410V screen

08
41
En
English
• If you load a disc that contains DivX VOD
content not authorized for your player, the
message Authorization Error is displayed
and the content will not play.
• Resetting the player (as described in
Resetting the player on page 44) will not
cause you to lose your registration code.
Displaying your DivX VOD
registration code
1 Press HOME MENU and select ‘Initial
Settings’.
2 Select ‘Options’, then ‘DivX VOD’.
3 Select ‘Display’.
Your 8-digit registration code is displayed.
• Make a note of the code as you will need it
to complete your registration.
Playing DivX
®
VOD content
Some DivX VOD content may only be playable
a fixed number of times. When you load a disc
containing this type of DivX VOD content, the
remaining number of plays is shown
on-screen and you then have the option of
playing the disc (thereby using up one of the
remaining plays), or stopping. If you load a
disc that contains expired DivX VOD content
(for example, content that has zero remaining
plays), the message Rental Expired is
displayed.
If your DivX VOD content allows an unlimited
number of plays, then you may load the disc
into your player and play the content as often
as you like, and no message will be displayed.
About the HDMI audio
output settings
(DV-410V only)
The table below shows how the audio settings
you make in the HDMI Out (page 36) affect the
HDMI output with various types of disc.
Digital Audio Out
Video Output
Language
Display
Options
Parental Lock
DTS Downmix
DivX VOD
Display
Initial Settings
DV-410V screen
Initial Settings
DivX (R) Video On Demand
0 1 2 3 4 5 6 7
Your registration code is:
To learn more visit www.divx.com/vod
Done
Digital Audio Out
Video Output
Language
Display
Options
DV-410V screen
Disc audio format
HDMI Out setting
LPCM
(2CH) Auto
DVD Dolby
Digital1
1. These formats include DVD-RW discs.
2ch
downmix
Dolby
Digital2
2. If the HDMI device you are using is not compatible
with these compressed formats, the signal is output as
linear PCM.
Dolby
Digital
(karaoke)
Left/Right Dolby
Digital2
Linear
PCM1
Left/Right Left/Right
DTS 2ch
downmix
DTS2
MPEG1Left/Right MPEG 2
Audio CD/MP3/
WMA/MPEG-4 AAC
Left/Right Left/Right
DTS CD Left/Right DTS2
Video CD Left/Right Left/Right

09
44
En
Standard TV users
If you have a standard TV, the TV Screen
setting (page 37) of this player should be set to
4:3 (Letter Box) or 4:3 (Pan & Scan), depending
on which you prefer.
Set to 4:3 (Letter Box), widescreen discs are
shown with black bars top and bottom.
Set to 4:3 (Pan & Scan), widescreen discs are
shown with the left and right sides cropped.
Although the picture looks larger, you don’t
actually see the whole picture.
Please note that many widescreen discs
override the player’s settings so that the disc is
shown in letter box format regardless of the
setting.
Note
• Using the 16:9 (Wide) or 16: 9
(Compressed) setting with a standard 4:3
TV, or either of the 4:3 settings with a
widescreen TV, will result in a distorted
picture.
Resetting the player
Use this procedure to reset all the player’s
settings to the factory default.
1 Switch the player into standby.
2 Using the front panel buttons, hold
down the (stop) button and press
STANDBY/ON to switch the player back
on.
All the player’s settings are now reset.
DVD-Video regions
All DVD-Video discs carry a region mark on the
case somewhere that indicates which
region(s) of the world the disc is compatible
with. Your DVD player also has a region mark,
which you can find on the rear panel. Discs
from incompatible regions will not play in this
player. In this case the attention sentence
Incompatible disc region number Can’t play
disc is displayed on screen. Discs marked ALL
will play in any player. The diagram below
shows the various DVD regions of the world.
Selecting languages using
the language code list
Some of the language options (such as ‘DVD
Menu Lang.’ in the Initial Settings) allow you
to set your preferred language from any of the
136 languages listed in the language code list
on page 50.
1 Select ‘Other Language’.
2 Use the / (cursor left/right)
buttons to select either a code letter or a
code number.
3 Use the / (cursor up/down) buttons
to select a code letter or a code number.
See Language code list on page 50 for a
complete list of languages and codes.
1
2
2
5
5
6
3
2
1
4
4
Termékspecifikációk
| Márka: | Pioneer |
| Kategória: | DVD-lejátszó |
| Modell: | DV-310 |
Szüksége van segítségre?
Ha segítségre van szüksége Pioneer DV-310, tegyen fel kérdést alább, és más felhasználók válaszolnak Önnek
Útmutatók DVD-lejátszó Pioneer

25 Augusztus 2024
24 Augusztus 2024
20 Augusztus 2024
2 Augusztus 2024
1 Augusztus 2024
30 Július 2024
29 Július 2024
27 Július 2024
26 Július 2024
26 Július 2024
Útmutatók DVD-lejátszó
- DVD-lejátszó Samsung
- DVD-lejátszó Sony
- DVD-lejátszó Yamaha
- DVD-lejátszó LG
- DVD-lejátszó Grundig
- DVD-lejátszó Marantz
- DVD-lejátszó Philips
- DVD-lejátszó SilverCrest
- DVD-lejátszó Panasonic
- DVD-lejátszó JVC
- DVD-lejátszó AEG
- DVD-lejátszó Sharp
- DVD-lejátszó Harman Kardon
- DVD-lejátszó BMW
- DVD-lejátszó Toshiba
- DVD-lejátszó Oppo
- DVD-lejátszó Hyundai
- DVD-lejátszó Apple
- DVD-lejátszó Medion
- DVD-lejátszó Onkyo
- DVD-lejátszó Technics
- DVD-lejátszó JBL
- DVD-lejátszó Boss
- DVD-lejátszó Thomson
- DVD-lejátszó Aiwa
- DVD-lejátszó Kenwood
- DVD-lejátszó Asus
- DVD-lejátszó Mitsubishi
- DVD-lejátszó Sencor
- DVD-lejátszó GPX
- DVD-lejátszó Supermicro
- DVD-lejátszó Hitachi
- DVD-lejátszó Nevir
- DVD-lejátszó Cambridge
- DVD-lejátszó Alpine
- DVD-lejátszó Nextbase
- DVD-lejátszó Denver
- DVD-lejátszó Bush
- DVD-lejátszó Trevi
- DVD-lejátszó Elta
- DVD-lejátszó Daewoo
- DVD-lejátszó Lenoxx
- DVD-lejátszó Funai
- DVD-lejátszó Gembird
- DVD-lejátszó Denon
- DVD-lejátszó Muse
- DVD-lejátszó Energy Sistem
- DVD-lejátszó OK
- DVD-lejátszó TriStar
- DVD-lejátszó Loewe
- DVD-lejátszó Scott
- DVD-lejátszó Manta
- DVD-lejátszó Blaupunkt
- DVD-lejátszó NAD
- DVD-lejátszó Logik
- DVD-lejátszó AKAI
- DVD-lejátszó Jensen
- DVD-lejátszó Sanyo
- DVD-lejátszó Salora
- DVD-lejátszó DataVideo
- DVD-lejátszó Lenco
- DVD-lejátszó Philco
- DVD-lejátszó Best Buy
- DVD-lejátszó Rotel
- DVD-lejátszó Zenec
- DVD-lejátszó Soundmaster
- DVD-lejátszó Dual
- DVD-lejátszó RCA
- DVD-lejátszó Schaub Lorenz
- DVD-lejátszó Arcam
- DVD-lejátszó Linksys
- DVD-lejátszó Majestic
- DVD-lejátszó Reflexion
- DVD-lejátszó Sogo
- DVD-lejátszó Aiptek
- DVD-lejátszó Airis
- DVD-lejátszó Apex
- DVD-lejátszó Lexibook
- DVD-lejátszó Eminent
- DVD-lejátszó Vestel
- DVD-lejátszó Sunstech
- DVD-lejátszó Sylvania
- DVD-lejátszó Marquant
- DVD-lejátszó Magnum
- DVD-lejátszó Audiosonic
- DVD-lejátszó Proline
- DVD-lejátszó Coby
- DVD-lejátszó Vieta
- DVD-lejátszó Audiovox
- DVD-lejátszó Transcend
- DVD-lejátszó Terris
- DVD-lejátszó Aitro
- DVD-lejátszó Laser
- DVD-lejátszó Alba
- DVD-lejátszó Naxa
- DVD-lejátszó Sherwood
- DVD-lejátszó Mpman
- DVD-lejátszó Targa
- DVD-lejátszó Mx Onda
- DVD-lejátszó Nikkei
- DVD-lejátszó Autovision
- DVD-lejátszó Qmedia
- DVD-lejátszó Difrnce
- DVD-lejátszó Emtec
- DVD-lejátszó Odys
- DVD-lejátszó Soundstream
- DVD-lejátszó Xoro
- DVD-lejátszó Durabase
- DVD-lejátszó Micromaxx
- DVD-lejátszó Woxter
- DVD-lejátszó Opera
- DVD-lejátszó Tesco-Technika
- DVD-lejátszó Hiteker
- DVD-lejátszó Ferguson
- DVD-lejátszó Mustek
- DVD-lejátszó Bluetech
- DVD-lejátszó Audica
- DVD-lejátszó JGC
- DVD-lejátszó Eltax
- DVD-lejátszó Sevic
- DVD-lejátszó EKO
- DVD-lejátszó Magnavox
- DVD-lejátszó AC Ryan
- DVD-lejátszó Planet Audio
- DVD-lejátszó Koda
- DVD-lejátszó Belson
- DVD-lejátszó Yakumo
- DVD-lejátszó Voxx
- DVD-lejátszó Aconatic
Legújabb útmutatók DVD-lejátszó

24 Március 2025

21 Március 2025

14 Január 2025

14 Január 2025

11 Január 2025
11 Január 2025
11 Január 2025

11 Január 2025
11 Január 2025
11 Január 2025