Használati útmutató Kobian CyberPix S-555V
Olvassa el alább 📖 a magyar nyelvű használati útmutatót Kobian CyberPix S-555V (39 oldal) a kamera kategóriában. Ezt az útmutatót 11 ember találta hasznosnak és 2 felhasználó értékelte átlagosan 4.5 csillagra
Oldal 1/39

User’s Manual
Digital Camera

1
Chapter 1 Attention
1-1Safety Precautions………..……………………..………............…...……3
1-2 Before Using Your Camera……..............……………………………...3
1-3 Operation Caution……….......................................…..….....3
1-4 Package Contents………..............................….....……….......4
Chapter 2 Getting to Know Your Camera
2-1 Names of Parts……….......................……........…....…...…......5
2-2 Specifications............................................................….7
2-3 System Requirements……………………………………………………………8
Chapter 3 Controls, Operation, and Display
3-1 LED Indicators………....................….................…......…..….9
3-2 LCD Monitor Display………..................………........……...……….9
3-3 Power Supply.…………………………………..……………………….………..10
3-4 Shutter Button………................................ .......………………11
3-5 Mode Button.......……….…...……...…...…………...…………...……..11
3-6 Function Key…………………………………...…………...……………..…….11
3-7 Set Button……………………………………………………..………….………..11
3-8 Image/Movie Play Button…………………………………………………….12
3-9 Macro Button……………………………………………………………..………..12
Chapter 4 Navigating Modes and Menus
4-1 Caputer Mode...................................... ...............….....13
4-2 Movie Mode......................……………............ ........…….....15
4-3 Playback Mode........................…....…....…....... .....…......17
4-4 Setup Mode.....................…..……….…..………..…..…......…...22
4-5 PC Mode ...............…………..........….………………….………………26
4-6 Mode Selection Entry Mode………………………………………..…….…27
Chapter 5 Preparing Your Camera
5-1 Attaching the Strap…………................. ……..................…..28
5-2 Loading Batteries..............…………...... ……......................28
5-3 Loading and Removing the Memory Card....……………... …….29
Content

2
5-4 Setting Up the OSD Language………............... …….........…30
5-5
Setting Up the Date/Time……………………………………......….…..30
5-6 PC Mode…………………….………................………………………………30
Chapter 6 Driver Installation
6-1 Installing the Camera Driver for PC……………….………...………..32
Chapter 7 Application Installation
7-1 Installing the Application for PC ............. ……..................34
Appendix: PictBridge error types

3
Please read through this manual carefully before using the camera and follow
the instructions to avoid damages caused by improper operation.
1-1 Safety Precautions
●The software CD-ROM packaged with the camera is designed for PC only.
Using a stereo or CD player may damage the CD-ROM.
●This camera is a precision electronic device. Do not attempt to service this
camera yourself, as opening or removing covers may expose you to
dangerous voltage points or other risks.
●Do not expose this camera under direct sunlight to avoid causing a fire.
1-2 Before Using Your Camera
●Take some test shots before you perform the formal recording.
Before taking pictures with this camera in any important occasion (such as
a wedding ceremony or an overseas trip), do test the camera beforehand to
ensure that it functions well. Any additional loss caused by the malfunction
of this product (such as costs of photography or any loss of benefit
generated by the photography) is not the responsibility of our company and
no compensation will be given for it.
●Copyright information
Unless agreed by the right owner, all the pictures taken with this digital
camera cannot be used in violation of copyright law. Moreover, when "No
Photography" restriction is placed on site, one cannot record any live
performance, improvisation or exhibits even for personal purpose. Any
transfer of pictures or memory card with data must be conducted under the
constraints of copyright law.
●Notes on the LCD (Liquid Crystal Display) monitor
Please be extra careful with the liquid if the LCD monitor is damaged; also
please abide the stated procedures, if the followings occur:
1. If the liquid makes contacts with the skin:
Please wipe the skin dry with a cloth and wash thoroughly with water.
2. If the liquid gets in the eye:
Please rinse with water immediately for at least 15 minutes and then
consult a physician to receive treatment as soon as possible.
3. If the liquid is accidentally swallowed:
Please rinse the mouth with water, drink large amount of water and
induce vomiting. And then consult a physician to receive treatment as
soon as possible.
1-3 Operation Caution
This product consists of intricate electrical parts. To ensure the performance
normality, do not drop or hit the camera when taking pictures.
●Avoid using or placing the camera in the following locations:
1. Damp and dusty places.
2. Sealed vehicles, direct sunlight exposure areas, or places with extreme
high temperatures or heat.
3. Violent turbulent environment.
4. Locations full of smoke, oil fumes or steams.
1. Attention
4
5. Locations subject to strong magnetic field.
6. Rainy or snowy environment.
●Do not open the battery cover when the power is on.
●If water has gotten into the camera, turn the power OFF and remove the
batteries immediately.
●How to maintain your camera:
1. If the lens, LCD monitor or viewfinder surface is dirty, please use lens
brush or soft cloth to wipe clean instead of touching the lens with you
fingers.
2. To avoid scratching the lens, LCD monitor or viewfinder surface, do not
use any solid object to hit the camera.
3. Do not use any detergent or volatile solution, which will subject the
camera case and the paint to solving or distortion. Use soft cloth only.
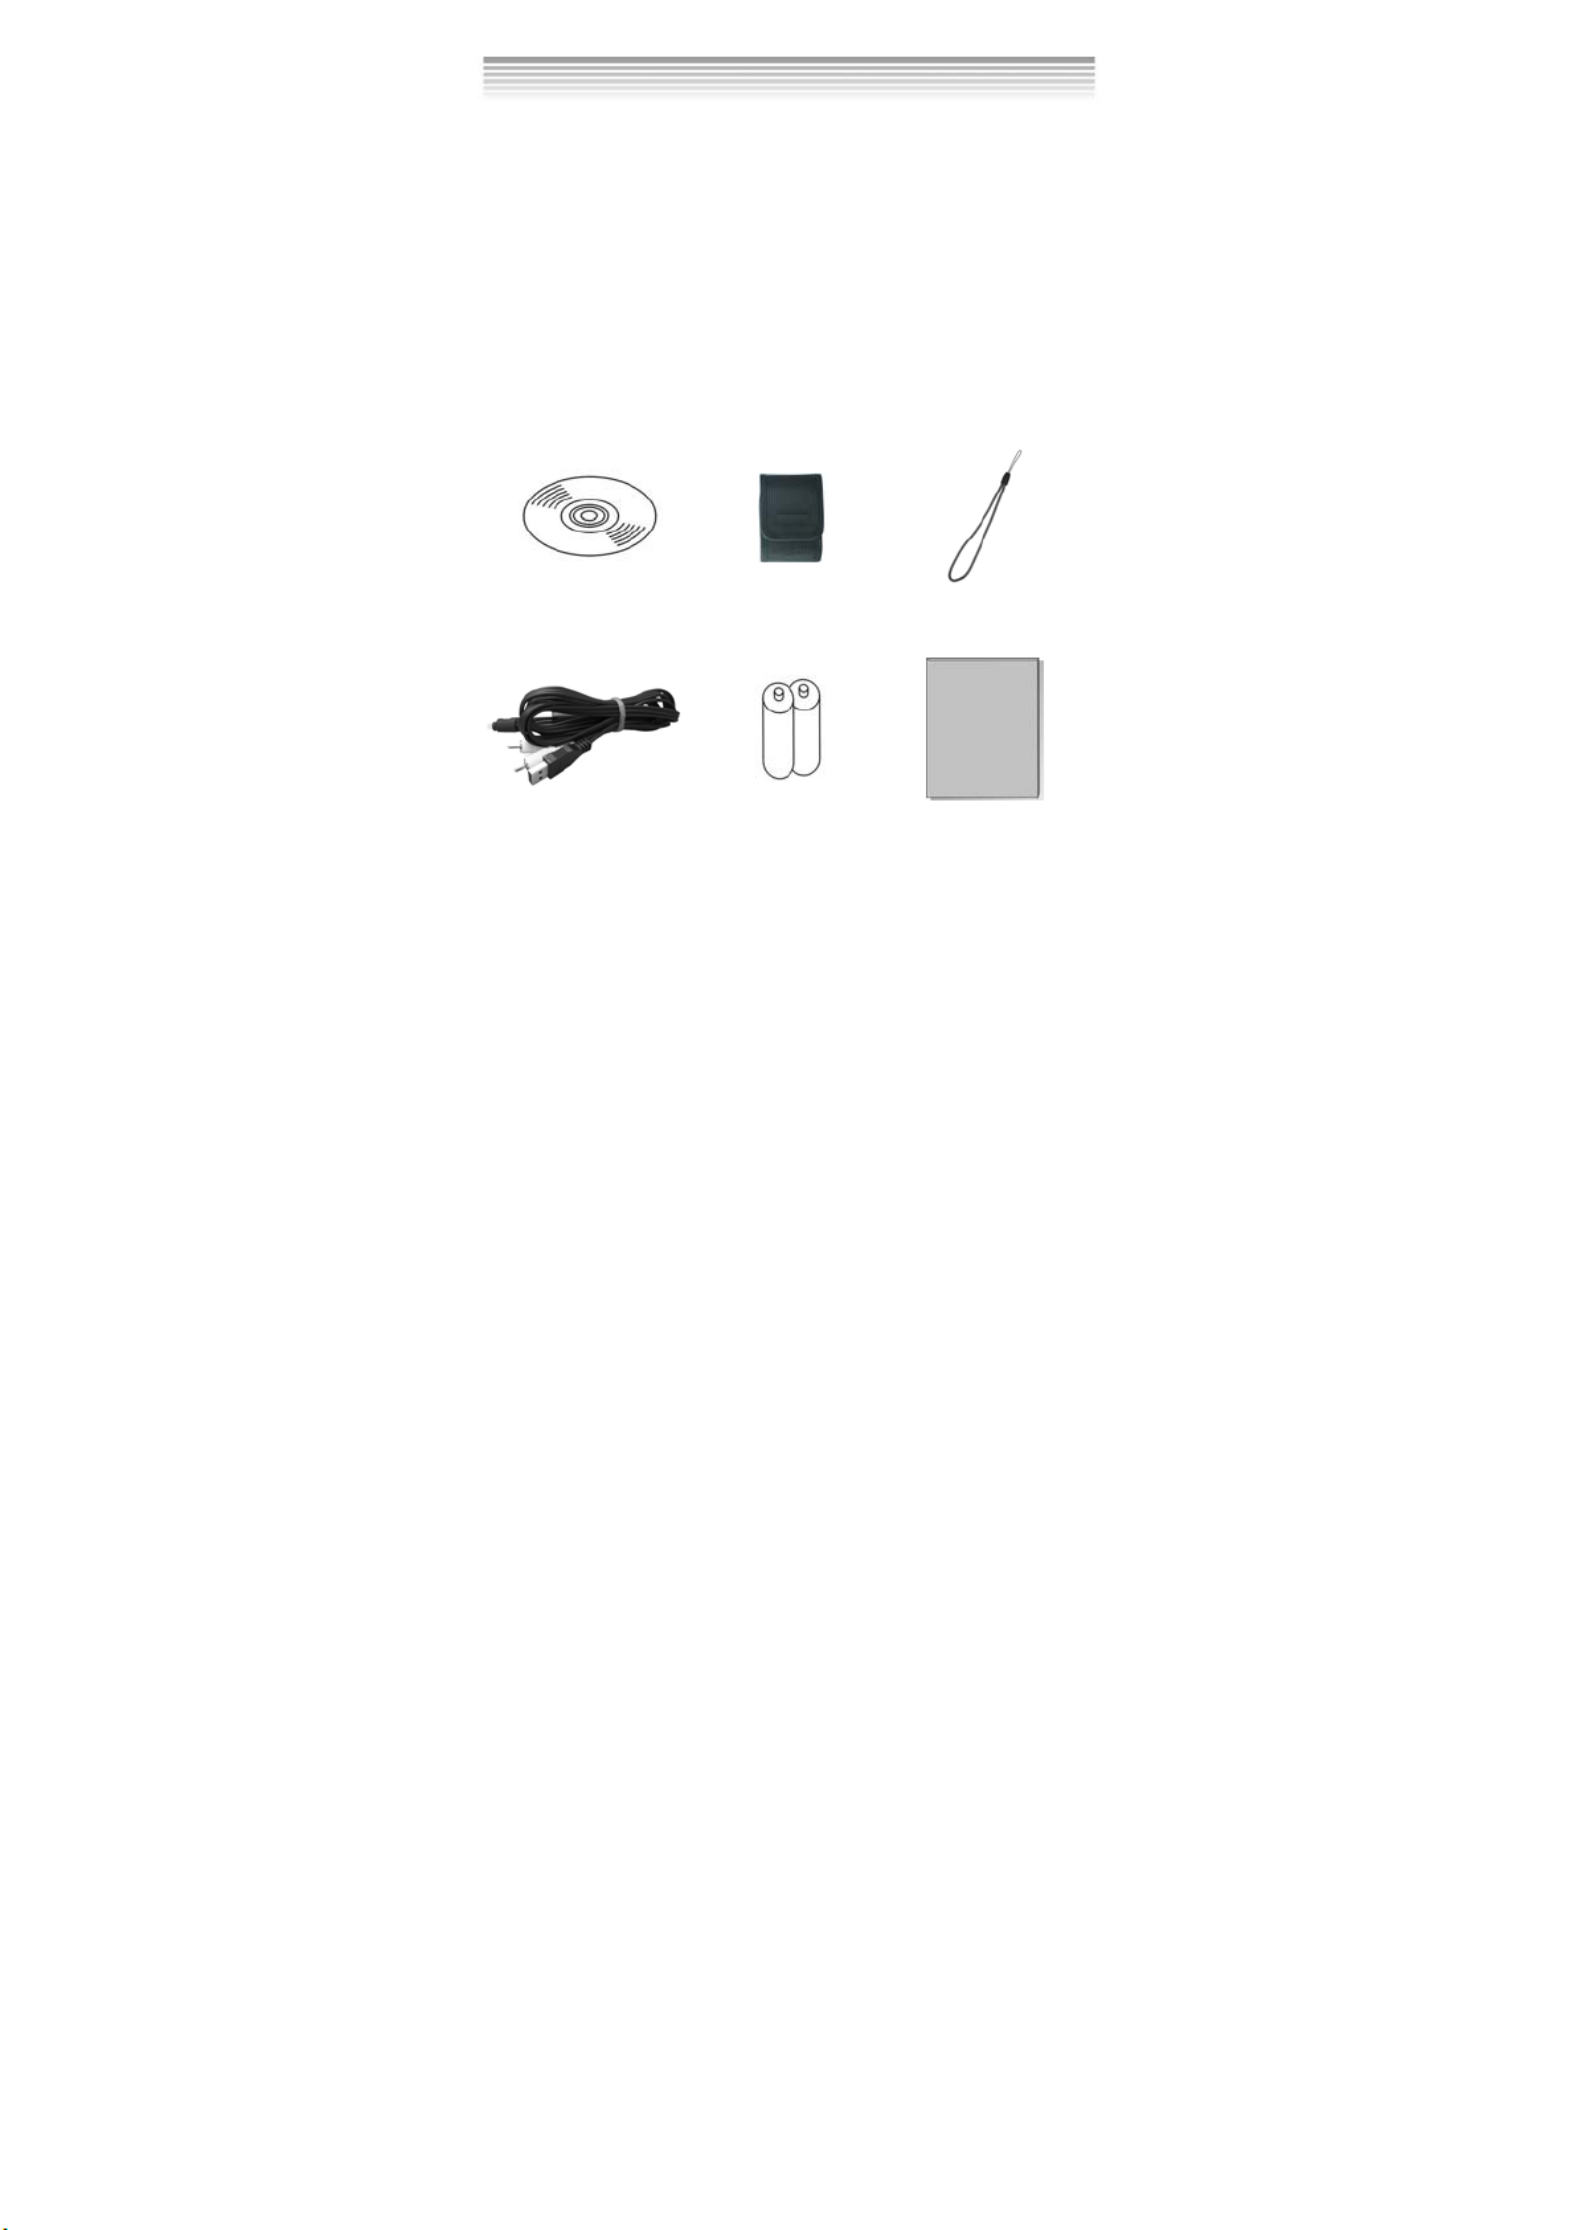
1-4 Package Contents
Please check if the following items are in the package when purchasing this
product.
1. CD-ROM
(incl. Camera Driver) 2. Pouch 3. Wrist Strap
4.USB CABLE 5. Batteries 6. User's Manual
●CD-ROM (incl. Camera Driver)
●Pouch
●Wrist Strap
●2 x AAA Alkaline Batteries
●USB Cable
●User's Manual

5
2-1 Names of Parts
Front View
(1) Shutter
(2) Power Switch
(3) Self-timer LED
(4) Flash Light
(5) Lens
(6) Strap Holder
(7) Battery Cover
(8) Memory Card Slot
(9) Tripod Socket
(10) Microphone
2. Getting to Know Your Camera

6
Rear View
(1) Macro LED
(2) Status LED
(3) Play back Button
(4) Mode Button
(5) Set Button
(6) Function Key
(7) Macro Button
(8) USB Cover
(9) USB Port
(10) LCD Monitor

7
2-2 Specifications
● Lens: ME shutter + Iris. f=8.25mm
● Image Sensor: 5.13 Mega pixels CMOS sensor
● TFT LCD: 2”
● Focus: Fno: 3.0/8.0
● Sensitivity: ISO 100
● White Balance: Auto, Sunny, Tungsten, Fluorescent.
● Shutter Speed: 1/4 sec. ~ 1/2000 sec.
● Storage Medium: 32MB Internal Flash Memory
SD Card Slot (support 8MB~512MB)
● Image File Format: Still Image for JPEG
Motion Image for JPEG
● Image Resolution:
3680 x 2760 (Firmware Interpolation Technology)
2592 x 1944
2048 x 1536
1280 x 960
● Digital Zoom: 1X-4X Digital Zoom
● Focal Range – Standard: 130c m ~ Infinity
● Focal Range – Macro: 17cm ~ 22cm
● Self-timer: 10 sec. delay
● PC-CAM Mode: QVGA (320 x 240) 10~20 fps
VGA (640 x 480) 10~15 fps
● Flash Mode: Auto, Off, Forced
PC Interface: USB (Ver. 1.1)
● AV OUT: USB/AV Cable
● Movie File: QVGA (320 x 240) format and VGA (640 x 480) format.
(32MB internal memory)
Resolution Image quality times
Fine 28sec
640*480 Normal 47sec
Fine 55sec
Video
320*240 Normal 110sec
● Recordable Image Numbers (32MB):
1280x960 2048x1536 2592x1944 3680x2760
Fine 67 28 17 10
32MB Normal 173 72 44 22
● Power Supply: 2 x AAA Alkaline Batteries or supports
USB 5V (PC-CAM Mode)

8
● Dimensions:92 x 58 x27 mm
● Weight: About 95g (batteries excluded)
2-3 System Requirements
When operating the digital camera, we strongly recommend you to use a
better computer system for optimal performance. The minimal system
requirement for digital camera is as follows: (For Macintosh computers, only
removable disk is applicable)
System Requirement
OS Microsoft Windows 98SE/Me/2000/XP
CPU Intel Pentium 166MHz or higher
Memory 32 MB memory or above
CD-ROM 4X or above
HDD Minimum 10MB free disk space on the
hard drive
Others One standard USB 1.1 or USB 2.0 port
System requirement (Macintosh Computer)
OS Mac OS 8.6~9.2, Mac OS X 10.1 or above
CPU PowerPC 601 processor or higher
Memory 64 MB memory or above
HDD Minimum 10MB free disk space on the hard
drive
Others One standard USB 1.1 or USB 2.0 port and
CD-ROM

9
3-1 LED Indicators
The meanings of the LED indicators located on the top of the LCD monitor
are:
Macro LED Standby/Busy
(Green LED) (Red LED)
Macro (Left Green LED)
T
he green LED will be on when the
Macro key on the left hand side of
the camera is switched to Macro
mode.
Busy (Right Red LED)
The red LED will be on when the
camera is recording or when the
batteries for the flash lights are
charging.
3-2 LCD Monitor Display
3. Controls, Operation, and Display
(1) Current working mode
(2) Memory Status
(3) Number of pictures
(4) Remaining battery power
(5) Zoom lever
(6) Flash light status

10
3-3 Power Supply
●To turn on the camera, press the power button.
●To turn off the camera, press the power button.
● Press the power button on the top to turn on/off the camera. When the
power is on, the red indicator will be blinking and the LCD monitor turns
on.
※ This camera has power saving design. If no operation on camera for 60
seconds, the power is turned off to prevent battery wear. Please power on
camera again.
※ The following features will automatically save the configuration before the
camera is turned off unless the "Reset Default" has been selected to restore
its factory anticipated settings.
1. Resolution 2. Image Quality 3.Language 4.White balance
5. EV value 6.Frequency 7.PC MODE

11
3-4 Shutter Button
●
●
●
●●This camera is designed for 2-step shutter function. A "[ ]" mark will appear
in the center of the LCD monitor when the Shutter button is pressed and held
half way down. The camera will beep after the Shutter button is pressed
down fully; then release the Shutter button to take a picture.
3-5 Mode Selection
●
●
●
●● Please press and hold ” ” button for 2 seconds to enter mode
selection menu including “Play Mode” “Setup Mode”
“Movie Mode” “Capture Mode" "PC Mode” .
。
3-6 Function Key
●
●
●
●●You can perform different operations in the different mode by using the
Function Key, e.g. select, go up/down and move.
3-7”SET” Button
●
●
●
●● This key is used for SELECTION/SET UP under selection menu
This key is also flash button under capture mode.

12
3-8 Play Back Button
0002/ 0002
1. Press this button you can change to the Playback Mode (quick view).
Capture Mode → Playback Mode → Capture Mode
Movie Mode → Playback Mode → Movie Mode
2. Press Shutter Key to play the video and Press again to pause the
video play or Press Key to stop the video play.
3-9 Macro Button
●
●
●
●●You can select between Standard and Macro mode under Capture mode
and Movie mode by the switch on left side of the camera. When you have
selected the Macro mode, the green LED will be on at the back of the
camera.
※If you have selected the Macro Mode when using the camera, the flash off
function will be enabled automatically.
Standard
Macro Mode

13
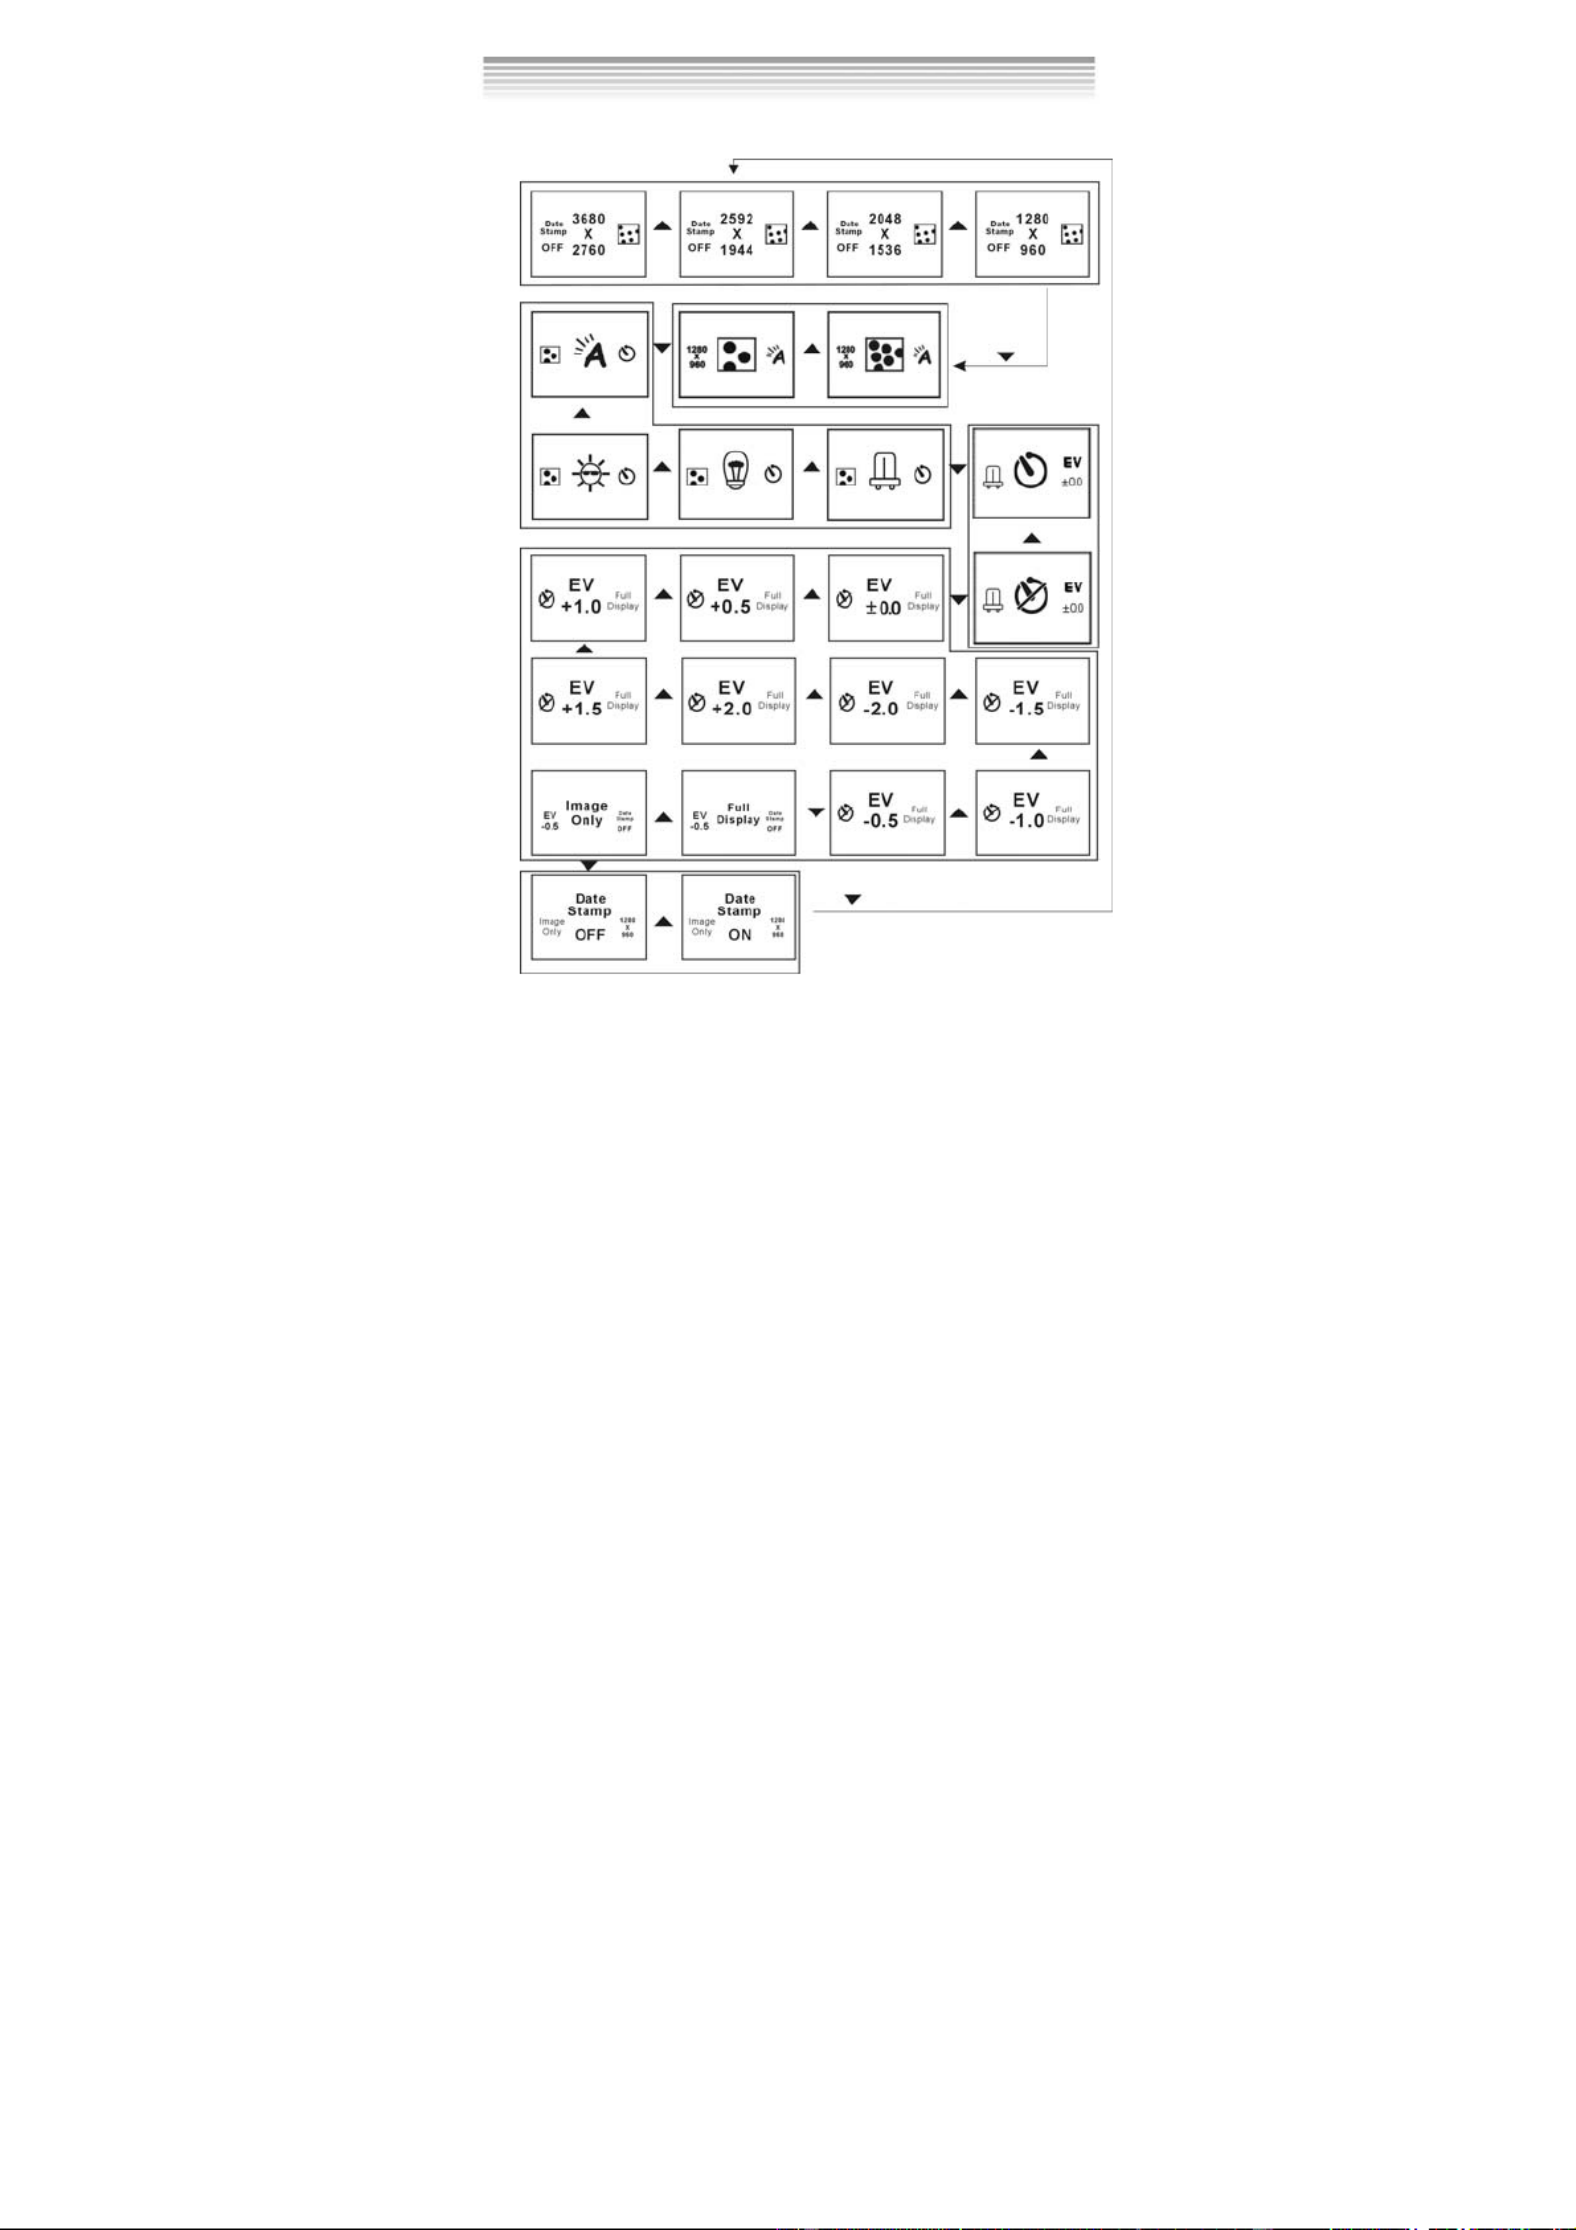
4-1 Capture Mode
This mode is the first one after the camera power is on. You can take your
favorite pictures in this mode.
Operation guidance:
(1) Press and hold the button down half way to select the Shutter
photography location, and a yellow “[ ]" will appear in the center of the
LCD monitor. Select the AE, and press the Shutter button down fully and
release it to complete the recording.
(2) Using button to adjust the digital zoom. The adjustment ratio of the
digital zoom will appear on the left hand side of the LCD monitor, from 1.0
time to 4.0 times.
(3) A Quick Menu will be displayed on the LCD by pressing the MODE button
quickly. Using button, the user can complete some special
configurations which include WB setting, resolution setting, image
quality setting and self-timer setting and so on.
(4) Set Flash light auto or off by pressing the SET button. When the flash light
is charging, the LCD will be turned off.
(5) If the user presses the SHUTTER button when the self-timer is on, the
camera will count down from 10 to 0 and then capture a picture.
(6) The green LED will be on when the Macro key on the left hand side of the
camera is toggled to Macro Mode.
(7) Press the button to enter to play back mode.
(8) Once connected to TV, the LCD power will be off automatically, and then
the images within the camera’s lens will be displayed on TV screen.
(9) Press the MODE button one second the camera will enter to mode
4. Navigation Modes and Menus
(1) Current working mode
(2) Memory Status
(3) Number of pictures
(4) Remaining battery power
(5) Zoom lever
(6) Flash light status
14
selection entry mode
Press the MODE button very quickly to enter the following settings.
Press MODE button again to Exit

15
(1) Movie Mode
(2) Recorded Movie Time (seconds)
(3) Recording
(4) Remaining Battery Power
4-2 Movie Mode
Operation guidance:
(1) Firstly, turn on the power, and then press the MODE button to enter the
mode-select-entry mode. Secondly, use the button to select the symbol
( ) of movie mode and press the SET button to enter.
(2) In this mode, camera will take a video clip by pressing SHUTTER button.
Press the button again, the camera will stop recording.
(3) Once connected to TV, the LCD power will be off automatically, and then
the images within the camera’s lens can be displayed on TV screen.
(4) If press the MODE button quickly, the quick-menu icons will be displayed
on the LCD. Then press the 「 」 button for changing the setting value,
and press the 「 」 button to enter to another quick-menu item. Under the
situation, the user can complete four types of settings which include AWB
setting, resolution setting, image quality setting and EV setting.
(5) Press the MODE button one second to enter to mode-select entry mode.
(6) Press the button to enter to play back mode.

16
Press the MODE button quickly to enter the following settings

17
4-3 Play back mode
In playback mode, the user can review the records including pictures and
movies stored in flash memory before. This mode includes four menu
pages which are DELETE menu page, DPOF menu page, PICTBRIDGE
menu page and AUTOPLAY menu page.
0 0 0 2/ 0 0 0 2
2
1
0 0 0 2/ 0 0 0 2
2
1
3
User Operation Guidance:
(1) Firstly, turn on the power, and then press the MODE button to enter the
mode-select-entry mode. Secondly, use the button to select the
symbol ( ) of play back mode and press the SET button to enter.
You can also press the button enter this mode from capture mode
or movie mode.
(2) When playing back the images or movies, you can review images or
movies one by one. You can switch off the state of the information
display on the images or movies by pressing the MODE button when
playing back images or movies. If you press MODE button once more,
there will be an index of all the images and movies (3*3) displayed, the
user could press the button to choose a small image or movie to
review in full screen by pressing SET button..
(3) When reviewing movie, the user can press the Shutter button to start
or pause the playing, and press the button to stop playing the
movie.
(4) Press SET button to enter to deletion menu page when playing back
(1) Number of pictures
(2) Remaining Battery Power
(3) The symbol of Movie

18
images.
(5) In the menu page, press the 「 」 button to enter to another menu
page.
(6) Press 「 」 button to choose the different menu items. The operation
way is the same as it is in set-up mode.
(7) In the PICTBRIDGE menu page, if the user selected the print one menu
item, an image and some icons will be displayed on the LCD. When the
user press「 」 button or 「 」 button, the number —quantity to print
—in the center of LCD will be add or subtract one. Press button to
enter to next image. If the camera has connected to a printer which
supports the function of PICTBRIDGE, the user can press the SET
button to print the current image immediately.
(8) Use the USB/AV cable to connect camera and printer.
(9) As in PICTBRIDGE menu page, if the user selected the select-one menu
item in DPOF menu page, an image and some icons will be displayed on
the LCD. When the user press 「 」 button or 「 」 button, the number
— —quantity to print displayed on LCD will be add or subtract one.
Press button to enter to next image.
(10) Once connected to TV, the LCD will be off automatically and the picture
on it will be displayed on TV screen.
(11) If you entered the play back mode by pressing the button from
capture mode or movie mode, you will return the previous mode when
you press the button again.
(12) Press the MODE button quickly, the camera system will exit the menu
page, and return to the picture of playing back.
(13) Press the MODE button one second to enter to mode selection entry
mode.
※ If there isn’t any record in the memory, the message of “no photo” will
displayed on the central of LCD
1. Delete Pictures
When playing back picture, the user can press the SET button to enter
DELETE menu page . Then press the SET button again, following pictures will

19
appear.
Press SET to enter sub page
2. Slideshow
3. DPOF (Digital Print Order Format) Settings
●
●
●
●● There are three options when printing images with DPOF: Printing one
image, printing all images and the option of printing the recorded date or
not.
●
●
●
●● DPOF function can only be operated when the printer settings of the
memory card is inserted, and not active with the internal memory of the
camera.
※ If the memory card is not inserted, the DPOF function is disabled even if
there are images stored in the internal memory.
Press the 「 」 button to enter to the DPOF menu page when there is a
Start Auto Play
Termékspecifikációk
| Márka: | Kobian |
| Kategória: | kamera |
| Modell: | CyberPix S-555V |
Szüksége van segítségre?
Ha segítségre van szüksége Kobian CyberPix S-555V, tegyen fel kérdést alább, és más felhasználók válaszolnak Önnek
Útmutatók kamera Kobian

22 Augusztus 2024
22 Augusztus 2024
22 Augusztus 2024
22 Augusztus 2024
Útmutatók kamera
- kamera Samsung
- kamera Sony
- kamera Braun
- kamera National Geographic
- kamera Acer
- kamera Nedis
- kamera Philips
- kamera Reolink
- kamera Olympus
- kamera Oregon Scientific
- kamera SilverCrest
- kamera Panasonic
- kamera Canon
- kamera JVC
- kamera Lenovo
- kamera Casio
- kamera Toshiba
- kamera Ozito
- kamera HP
- kamera BenQ
- kamera TP-Link
- kamera Medion
- kamera Vimar
- kamera Xiaomi
- kamera Fujifilm
- kamera EZVIZ
- kamera Prixton
- kamera Polaroid
- kamera Kyocera
- kamera Technaxx
- kamera GoPro
- kamera Speco Technologies
- kamera Ricoh
- kamera Hikvision
- kamera Epson
- kamera Netgear
- kamera Vtech
- kamera Rollei
- kamera Agfa
- kamera Lamax
- kamera Hitachi
- kamera Kodak
- kamera Ring
- kamera Nikon
- kamera Alpine
- kamera Optoma
- kamera Logitech
- kamera Bresser
- kamera Dahua Technology
- kamera Viewsonic
- kamera Cobra
- kamera Scosche
- kamera Denver
- kamera Minox
- kamera Trevi
- kamera Joy-It
- kamera Daewoo
- kamera Gembird
- kamera GE
- kamera SPC
- kamera Powerfix
- kamera Eufy
- kamera Avaya
- kamera Levenhuk
- kamera Konica Minolta
- kamera Mamiya
- kamera Lorex
- kamera Foscam
- kamera Kogan
- kamera SJCAM
- kamera Imou
- kamera AgfaPhoto
- kamera Sigma
- kamera Pentax
- kamera Velleman
- kamera D-Link
- kamera Blaupunkt
- kamera InfiRay
- kamera Fluke
- kamera Arlo
- kamera Trust
- kamera Konig
- kamera ARRI
- kamera Pyle
- kamera Emerson
- kamera MuxLab
- kamera Lumens
- kamera Sanyo
- kamera DataVideo
- kamera Lenco
- kamera Leica
- kamera Azden
- kamera Vemer
- kamera Burris
- kamera Marshall Electronics
- kamera Getac
- kamera AViPAS
- kamera Creative
- kamera EverFocus
- kamera SereneLife
- kamera Swann
- kamera Anker
- kamera Microtek
- kamera Linksys
- kamera Elmo
- kamera UniView
- kamera Laserliner
- kamera IGET
- kamera Vivitar
- kamera PTZ Optics
- kamera BZBGear
- kamera Argus
- kamera Lexibook
- kamera Bushnell
- kamera Easypix
- kamera Maginon
- kamera AVerMedia
- kamera Celestron
- kamera Yashica
- kamera Flir
- kamera Daitsu
- kamera Nest
- kamera Ansco
- kamera Sygonix
- kamera Intel
- kamera Zenit
- kamera EVE
- kamera Fuji
- kamera Minolta
- kamera Zorki
- kamera RunCam
- kamera SeaLife
- kamera FIMI
- kamera Liiv360
- kamera Watec
- kamera Meade
- kamera Contax
- kamera Sinji
- kamera Traveler
- kamera Exakta
- kamera Digital Watchdog
- kamera ZeissIkon
- kamera Silvergear
- kamera Dorr
- kamera Spypoint
- kamera HOLGA
- kamera Praktica
- kamera Hasselblad
- kamera Moto Mods (Motorola)
- kamera Fantasea Line
- kamera Brinno
- kamera Z CAM
- kamera General
- kamera Ergoguys
- kamera Strex
- kamera General Electric
- kamera Berger & Schröter
- kamera Leitz Focomat IIc
- kamera Syrp
- kamera Cosina
- kamera Hanwha
- kamera Videology
- kamera Pelco
- kamera Videotec
- kamera Cambo
- kamera Kyocera Yashica
- kamera Red Digital Cinema
- kamera Bauhn
- kamera Konica
- kamera Akaso
- kamera Seek Thermal
- kamera Aida
- kamera Ikegami
- kamera Ikelite
- kamera Adeunis
- kamera Hoppstar
- kamera IOptron
- kamera Moultrie
- kamera PatrolEyes
- kamera Camouflage
- kamera HuddleCamHD
- kamera Aplic
- kamera Linhof
- kamera GoXtreme
- kamera KanDao
- kamera Aquapix
Legújabb útmutatók kamera

10 Április 2025
9 Április 2025
3 Április 2025
1 Április 2025
29 Március 2025
29 Március 2025
28 Március 2025
27 Március 2025
27 Március 2025

20 Március 2025