Használati útmutató TechniSat TechniCorder ISIO STC
TechniSat
Digitális dekóderek
TechniCorder ISIO STC
Olvassa el alább 📖 a magyar nyelvű használati útmutatót TechniSat TechniCorder ISIO STC (64 oldal) a Digitális dekóderek kategóriában. Ezt az útmutatót 5 ember találta hasznosnak és 2 felhasználó értékelte átlagosan 4.5 csillagra
Oldal 1/64

DiSEqC 1.2
Quick Start Manual
TechniCorder ISIO STC
Digital Multituner HD Receiver
with Internet Access
With CONAX cardreader and an interface
for recording from two CI/CI+ modules
and a DVR recording function via the optional internal hard drive,
the USB interface or the home network.
For reception of free-to-air and encrypted
(e.g. VIACCESS, CONAX, IRDETO, etc.)
HD satellite channels.

2
Dear Customer,
Congratulations on your decision to purchase the TechniCorder ISIO STC.
The operating manual supplied is intended to help you to utilise the comprehensive functions
of your new digital receiver to the fullest extent. We have kept the operating instructions as
brief as possible and have used terminology that everybody can understand.
The range of functions of your receiver is constantly being expanded by means of software
updates. This means that additional steps in the operation may be added that are not yet
described in this operating manual, or the operation of existing functions may be changed.
For this reason you should occasionally visit the TechniSat homepage to download the lat-
est version of the operating manual.
We wish you many years of viewing pleasure with your TechniCorder ISIO STC!
Your
TechniSat Team

3
TechniSat hereby declares that the TechniCorder ISIO STC device complies with the funda-
mental requirements and any other relevant stipulations of Directive 1999/5/EC. The decla-
ration of conformity can be viewed online at: http://www.technisat.de/konformitaet/
technicorderisiostc.pdf
The unit also bears the CE mark.
This unit is designed for use in all countries of the European Union and in Switzerland,
Norway, Liechtenstein and Iceland. Operation in the 5150 MHz - 5350 MHz frequency range
is only permissible in closed rooms.
HDMI, the HDMI-Logo and High Definition Multimedia Interface are trademarks
or registered trademarks of HDMI Licensing LLC.
This product contains technologies which are protected by copyright, by US patents and by
other rights for the protection of the intellectual property of the Rovi Corporation. Reverse
engineering and disassembly are prohibited.
This item incorporates copy protection technology that is protected by U.S. patents and
other intellectual property rights of Rovi Corporation. Reverse engineering and disassembly
are prohibited.
Manufactured under license from Dolby Laboratories. Dolby and the double-D symbol are
trademarks of Dolby Laboratories.

4
1 Illustrations
Remote control code
On/Stand-by
Sound on/off
Numeric keypad keys
Recording
EPG
Page up
Back
TV/Radio mode
Rewind
Info
Fast forward
Channel +/- Volume +/-
Menu Zoom/Format
Function keys
Stop / DVR
Arrow keys Pause / playback
Options selection
Function selection
Page down
WWW
OK
Sleep Timer
Audio channel
PiP/PaP
HDMI
Teletext
Freeze frame /
Jogshuttle
Timer

5
Front of unit
Rear of unit
LNB 1
input
LNB 2
input
Loop
out
RF in
Audio outputs
analogue/digital
Tuner slot
Mains power
connection
USB
ports
HDMI
output
SCART
socket
Network
port
S/PDIF
out
Hard drive
drawer
OK
Arrow
keysOn/Stand-by Display USB port
SD/MMC
card reader
Smartcard
card reader
socket
CI modules
Einlegen der CONAX Smartcard:
> Push the CONAX Smartcard (gold chip face down and aligned in the direc-
tion of insertion) into the Smartcard reader as far as the stop.
Inserting the CI/CI+ modules:
> Please refer to the CI/CI+ module and card manufacturer’s instructions.
> Insert the Smartcard you want into the relevant CI module.
> Now carefully insert the CI module into the slot.

6
2 Please read this first
Before connecting and using the device, first check that everything has been supplied
and familiarise yourself with the safety instructions.
The delivery includes:
1 digital receiver, 1 Quick Start Manual, 1 CD-ROM,
1 remote control 1 mains cable, batteries (2 x 1.5V microcells),
2.1 Safety advice
For your own protection you should read the safety precautions carefully before using your
new receiver.
The manufacturer accepts no liability for damage caused by inappropriate handling, or by
non-compliance with the safety precautions.
Function-related discharge current may occur with electrical equipment. This
is acceptable and poses no risk, even if it is experienced as a slight tingling.
To prevent these discharge currents, mains operated devices (receivers, TVs etc.)
must always be installed or connected with the power switched off, i.e. devices must
be disconnected from the mains power supply.
- Only operate the receiver in a temperate climate.
- To ensure adequate ventilation, place the receiver on a flat, horizontal surface and
do not place any objects on top of it. There are ventilation slots here to allow heat to
be dissipated from the interior of the unit.
- Never place any burning objects, such as lit candles, on top of the unit.
- Do not expose the receiver to water droplets or water spray, and do not place any
objects filled with liquid, such as vases, on top of it. If water gets into the unit, imme-
diately disconnect the mains plug and inform the service department.
- Do not operate any sources of heat near to the unit which may also heat it up.
- Do not obstruct the ventilation slots.

7
- Never open the receiver housing under any circumstances!! You risk
receiving an electric shock. Any necessary repairs to the receiver should only
be carried out by qualified service personnel.
In the following circumstances you should disconnect the device from the mains
power and consult an expert:
> the power cable or mains plug is damaged
> the unit has been exposed to moisture or liquid has got into it
> there are significant malfunctions
> there is severe external damage.
2.2 Periods of non-use
During a storm or lengthy period of non-use (e.g. holiday), the receiver should be discon-
nected from the mains and the antenna cable removed.
Before you disconnect the receiver from the mains, you should first switch it to standby
mode and wait until the time appears in the display or the red LED light is displayed.
2.3 Important notes on operation
Operation of the digital receiver is simplified through the use of so-called "On Screen
Displays" (OSD). This also means that the number of keys on the remote control unit is
reduced.
All functions are displayed on screen, and can be controlled by means of a few control but-
tons.
Functions that are logically related are combined into a "MENU". The selected function will
be highlighted.
The red, yellow, blue and green function keys are indicated by coloured bars at the bottom
of the screen. In the various menus, these coloured bars represent different functions, which
can be implemented by pressing the appropriately coloured keys (multi-function keys) on the
remote control. The function keys are only activated when a brief description is displayed in
the appropriate field.
The button identifications and terms that appear in the OSD menu are shown in type bold
in this operating manual.
Help: Where available, press the blue function key in the menus to display help text and
press again to close the help window.

8
2.4 Important information on data security
Before handing your receiver over to your supplier for maintenance purposes, we recom-
mend that you remove all storage media or data carriers.
Restoring data is not part of maintenance or repair work. TechniSat accepts no responsibility
for the loss of, or damage to, data during repair work.
2.5 Remote control/Changing the battery
> Open the cover on the battery compartment at the rear of the remote control by press-
ing gently on the point indicated and pushing in the direction of the arrow.
> Insert the supplied batteries, ensuring that the poles are the right way around (indica-
tor visible in battery compartment).
> Close the battery compartment again.
2.6 Disposal advice
The packaging material used for your receiver consists entirely of recyclable materials.
Please sort the components appropriately, and dispose of them in line with your local waste
disposal regulations.
At the end of its useful life span, this receiver may not be disposed of with your regular
household waste. It must be taken to a recycling collection point for electrical and electronic
equipment.
This is indicated by the symbol on the product, the operating manual or the packaging.
The materials used can be re-used in accordance with their labelling.
By ensuring that valuable raw materials in old equipment are re-used, you can make a valu-
able contribution towards protecting our environment.
Please contact your local authority for the location of the nearest recycling point.
Please ensure that dead batteries from the remote control and electronic waste items are
not sent to your regular household refuse site, but are correctly disposed of (either in special
bins for problem waste, or at collection points at specialist dealers).

9
3 Optional Hardware
Your DVB receiver can also be equipped with optional hardware, such as various tuner
modules and an internal 2.5” hard drive.
3.1 Installing the optional internal hard drive
Your DVB receiver can also be equipped with an internal 2.5” hard drive or SSD for DVR
recording functionality:
a. Disconnect the unit from the mains power supply. Please also note section 2.2 (peri-
ods of non-use).
b. Now press the handle of the hard drive drawer together to release the lock and care-
fully remove the drawer from the housing.
c. Insert your 2.5” hard drive or SSD in the drawer with the contact strip pointing towards
the open end of the drawer.
d. Now carefully click in the securing hook of the drawer first on one side of the 2.5” disc
drive and then on the other. If this is not possible with light pressure, remove the hard
drive from the drawer and reposition it. Depending on the disk drive being used, the
underside may need to face upwards to allow it to engage.
e. Now slide the drawer into the unit until you feel slight resistance. Now carefully push
the drawer further in using slight pressure to connect the disk drive with the unit. If it is
not possible to push in the drawer as far as the stop using slight pressure or until the
drawer engages, repeat the procedure starting from section b.) and check that the disk
drive is positioned correctly.

10
f. After successfully installing the tuner module, continue with section 3.2 (Using an
optional tuner module) or section 4 (Connecting the DVB receiver).
3.2 Inserting the optional tuner module
Your DVB receiver can also be equipped with an additional tuner module:
a. Disconnect the unit from the mains power supply. Please also note section 2.2 (peri-
ods of non-use).
b. Press the securing hooks on the protective cover together and remove the cover.
c. Note the printing on the tuner module to ensure that it turns in the correct position and
insert the tuner module with the contact strip facing forwards into the slot which is now
open.
d. Now slide the tuner module into the unit until you feel slight resistance. Now carefully
push the tuner module further in using slight pressure to connect the tuner with the
unit. If it is not possible to push in the tuner module as the stop using slight pressure,
remove the tuner module and start again from section c.).
e. Now screw in the tuner module using the screws provided.
f. After successfully installing the tuner module, continue with section 4 (Connecting the
DVB receiver).

11
3.3 Optional IsiZapper remote control
IsiZapper (item no. 0000/3773) is an optional remote control device which is specially
designed for operation of Isi mode (see section 15).
On/Stand-by
Numeric keypad keys
Teletext
Sound on/off
Channel +/- Volume +/-
Arrow keys OK
Function selection

12
4 Connecting the DVB receiver
a Network connection
b LNB 1 connection to on the DVB receiver.LNB Input 1
(Please note: the LNB must be connected with to LNB Input 1 when operating using
an antenna signal.)
c LNB 2 connection to the on the DVB receiver.LNB Input 2
d HDMI connection from the DVB receiver to the TV.
e Audio output connection to a hi-fi / surround sound system.
f DVB receiver connection to the network/internet.
g Cable connection (digital) and/or the DVB-T antenna connection with the RF IN
antenna input on the DVB receiver.

13
When using an optional DVB-S tuner module for operation with four antenna signals:
h Additional connection for LNB 3 to the on the DVB receiver.LNB Input 3
i Additional connection for LNB 4 to the on the DVB receiver.LNB Input 4
When using an optional DVB-S tuner module for operation with one antenna signal:
h Connection for LNB 1 to the on the DVB receiver.LNB Input 3
j Connection for the to the on the DVB receiver.loop out LNB Input 1 (b)
When using an optional DVB-C/T tuner module:
g Cable connection (digital) and/or the DVB-T antenna connection with the RF IN
antenna input on the DVB receiver.
k Connection for t with the of the DVB-C/T tuner modulehe loop out loop IN (l) .
The following references (a b c etc.) refer to the illustrations commencing on the previous
page onwards.

14
4.1 Mains power connection
The digital receiver should only be connected to the mains power supply once you have fin-
ished making all the connections to the various other components. This will prevent damage
to the digital receiver or other components.
a Once you have made all the other connections in accordance with the following sec-
tions, use the power cable supplied to connect the receiver to mains 230 V/50-60 Hz
power outlet.
4.2 External unit
4.2.1 Operating the receiver with 2-4 DVB-S antenna signals
To be able to use the full scope of DVB-S functions on the digital receiver you should oper-
ate the receiver on up to four separate DVB-S antenna signals/antenna cables that which
are set up identically.
If you have not installed an additional DVB-S tuner module:
b, c LNB inputs 1 2 Connect and on the digital receiver to your external unit using
a suitable coaxial cable.
or if you have installed an additional DVB-S tuner module:
b, c, i, h LNB inputs 1 2 LNB inputs 4 Connect and and and3 with your external
unit using a suitable coaxial cable.
Also see section 8.6 (DVB-S antenna setting) in your operating manual.
4.2.2 Operating with 1 DVB-S antenna signal
In exceptional cases you can also operate the receiver using just one DVB-S antenna sig-
nal. However, in this event the recording and PIP functions are only available to a limited
extent. (see section 8.6.3 in your operating manual).
If you have not installed an additional DVB-S tuner module:
b Connect the of the digital receiver to your external unit using LNB Input 1
a suitable coaxial cable
or if you have installed an additional DVB-S tuner module:
h, j, b Connect the of the digital receiver to your external unit using LNB Input 3
a suitable coaxial cable. Now also connect the output with the loop out LNB
input 1.
Also see section 8.6 (DVB-S antenna setting) in your operating manual.
4.2.3 Operating with DVB-C/T antenna signals
The digital receiver can receive signals to DVB-C or DVB-T standard. Reception in parallel
with DVB-S reception is also possible
If you have not installed an additional DVB-C/T tuner module:
g Connect the RF IN antenna input on the digital receiver to your external unit
using a suitable coaxial cable.
or if you have installed an additional DVB-C/T tuner module:
g, k, l Connect the on the digital receiver to your external unit antenna Input RF IN
using a suitable coaxial cable. Now also connect the output with the loop out
LOOP IN antenna input of the tuner module.

15
Also see section 8.6 (DVB-S antenna setting) in your operating manual.
It is not possible to receive analogue TV via the cable or antenna!
4.2.3.1 Simultaneous operation with DVB-C/T antenna signals
Use the TechniSat DVB C/T switch to receive DVB-T signals, DVB-C and DVB-C cable
channels simultaneously (item no. 0000/3263). This switch automatically switches between
DVB-T reception and reception of DVB-C cable channels, thus preventing potentially con-
flicting frequency influences. For this purpose, connect the switch output as described
in section 4.2.3.
4.2.4 Operating with a rotating system
b LNB For operation with a rotating system, connect the DiSEqC motor (Level 1.2) to
input 1.
4.3 Connecting to a TV
d Connect the receiver (HDMI output) and TV (HDMI input) via an HDMI cable.
If your TV is equipped appropriately, it will automatically switch to the HDMI input when
the digital receiver is switched on.
Alternatively:
Connect the receiver (SCART socket) and TV (SCART socket) using a SCART cable.
If your TV is equipped appropriately, it will automatically switch to the AV and thus to
SAT operation when the digital receiver is switched on. It may be necessary to adjust
the signal type on your TV, see section 8.3.6 in your operating manual.
4.4 Hi-fi / surround sound amplifier
To achieve the best possible sound quality, you can connect your digital receiver to a hi-fi /
surround sound amplifier.
4.4.1 Digital
e If your amplifier is equipped with a suitable electrical or optical input, you should con-
nect the AUDIO OUT DIGITAL socket electrically optically or with the elec-
trical or optical input on your amplifier.
Depending on the signal provided by each broadcaster, sampling rates of 32, 44.1 and
48 kHz are available. In addition, where broadcast, the Dolby Digital signal is also
available on this output.
4.4.2 Analogue
e To do this, use a suitable cable to connect the cinch sockets and Audio R Audio L
on the digital receivers to an input on your hi-fi amplifier.
(e.g. CD or AUX; please note that the phono input is not suitable!)

16
4.5 USB port
The USB port is used for updating the operating software and to transfer data.
You can also use the film, music and image playback functions
(sections 9.18, 9.19 and 9.20 of your operating manual) to access MPEG, MP3 and JPG
files on the USB storage medium.
Your unit is equipped with an internal WLAN which enables wireless integration within your
existing WLAN network. However, if you wish, you can also use an external WLAN don-
gle for this purpose, e.g. the TechniSat USB WLAN adapter (item no. 0000/3633) or the
Technisat ISIO USB WLAN adapter (item no. 0002/3633) into the USB port.
When doing so please also note section 8.5.2 (WLAN settings) in the instruction manual.
It is also possible to use a Bluetooth dongle, for example to connect a Bluetooth audio
receiver with the receiver.
4.6 SD / MMC card reader
The SD card reader is used for updating the operating software and transferring data
(DVR recordings or image, music and video files) to or from the hard disk.
You can also use the image, music and film playback functions (sections 9.18, 9.19
and 9.20 of your operating manual) to access the corresponding files
on the SD / MMC card.
4.7 Network port (RJ45)
f You can use the network port to connect the receiver to your existing network. This
allows you to use the watchmi and internet functions, the UPnP functions, to access
network drives and to use the channel provider's HbbTV applications. You can also
record onto and playback from network drives.
When doing so please also note section 8.5 in your operating manual (Network
Settings).

17
5 Basic operation
Dear Customer
The following section starts by covering basic operation as well as recurrent operating steps
for the TV. This should make it easier to read the instruction manual, since it avoids repeat-
ed description of identical steps at each individual stage.
If a function or setting for the device has to be different from the basic operation, the differ-
ence in operation is described in detail at the relevant point in the instruction manual.
The so-called "On Screen Display" is used on your TV. This simplifies operation of the tele-
vision since the buttons on the remote control can take on different functions. This makes
it possible to reduce the number of buttons.
In this isplay (in short ) the selected functions are highlighted.O S Dn creen OSD
Furthermore, you will see a line at the bottom edge of the screen in which the various but-
tons on the remote control are shown with their current functions.
In this instruction manual the terms shown in the OSD and the buttons to be
pressed are highlighted from other text by the print format shown.
Warning - indicates an important note which you absolutely should observe in order
to avoid problems with the unit or unwanted operation.
-Tip - indicates a note about the function described as well as other functions associat
ed with it and any others to be observed with reference to the respective place in the
instruction manual.
5.1 Switching the unit on/off
> When the receiver is on standby, you can switch it on by pressing the On/Standby
button on the remote control/on the receiver.
> When operating normally you can switch the unit into On/Standby mode by pressing
the On/Standby button.

18
5.2 Calling up the main menu and navigating through the menus /functions
The following example will illustrate how you reach the main menu and call up a submenu.
The objective of the example is to call up the Picture settings
menu.
> Press the button. The main menu appears on the screen.Menu
> Select the menu item by moving the highlight over this item using the Settings
arrow keys.
> Press the button to open the OK Settingsmenu.

19
> Use the up/down arrow keys Picture settingsitem to highlight the .
> Then press the button to open the menu.OK Picture settings
You can also highlight the individual menu items in the same way as you highlight
an item on a submenu to open it and alter the respective settings.
The menu items in some menus have to be highlighted by moving sideways. This
is done by pressing the right/left arrow keys.
By pressing the up/down arrow keys it is possible to move the highlight from line
to line and to move upwards and downwards page by page using the page
up/down buttons.
You will see the so-called menu path in the uppermost line of the menu. This shows
you the menu you are currently in and the path you took to reach this menu. In the
example shown this is . The menu Main menu > Setting > Picture Settings
path is also shown throughout the instruction manual and shows you how you can
reach the respective menu with the settings described.
If the blue function key with Help is displayed on the bottom line on the screen,
a Help page can be displayed by pressing this button, and hidden again by pressing
it again.

20
5.3 Accepting settings / Exiting menus and functions
In some menus and functions the changes made must be accepted manually in order to
save them permanently. If this does not happen, the function or the values that existed
before the change was made will be reset automatically on exiting the menu.
If an Accept field or the green function key with Accept is displayed in the bottom
line of the screen, you can see that the changes made must be saved manually to be
accepted.
> By highlighting using the and confirming with the Accept right/left arrow keys
OK green Accept button or by pressing the function key , the changes are saved
and you move back up to the next menu above.
Alternatively:
> Press the button.Return
A request appears asking whether the changes you made should be applied.
> Use the or and confirm your selection by pressing right/left arrow keys Yes No
the OK button.
Changes will now be saved or discarded according to your selection and you move
back up to the next menu level above.
Alternatively:
> Press the button to leave the menu directly.Menu
Settings that need to be saved manually will be reset in this case..
If the green function key is not displayed on the bottom line of the screen with
Accept, the changes are saved automatically on exiting the menu.
5.4 Changing a setting
You can create settings using the , the , by arrow selection method selection list
entering numbers virtual keyboard and by using the . The unit specifies the method
that can be used to change a highlighted setting. You can see this from the following dis-
played symbols:
- Arrow selection method (section 5.4.1)
Arrows are shown on the left or right edge of the highlight.
- Selection list (section 5.4.2)
The symbol is shown on the right edge of the highlight.
- Entering numbers (section 5.4.3)
- Virtual keyboard(section 5.4.4)
The symbol is shown on the right edge of the highlight.

21
5.4.1 Arrow selection method
> If is shown on the left and on the right next to the set value, you can alter this using
the left/right arrow keys.
5.4.2 Selection list
If is shown on the right next to the set value, the value can be changed using the selection
list.
> Press the button to open the selection list. OK
> Highlight the setting you want using the arrow keys.up/down
By pressing the up/down arrow keys it is possible to move the highlight from line
to line and to move upwards and downwards page by page using the page
up/down buttons.
> Confirm by pressing the button. The selection list closes again and the selected OK
setting is shown in the menu.
22
5.4.3 Entering numbers
> Use the numeric key pad to enter the new setting which you require if a question
mark or a numeric value is displayed.
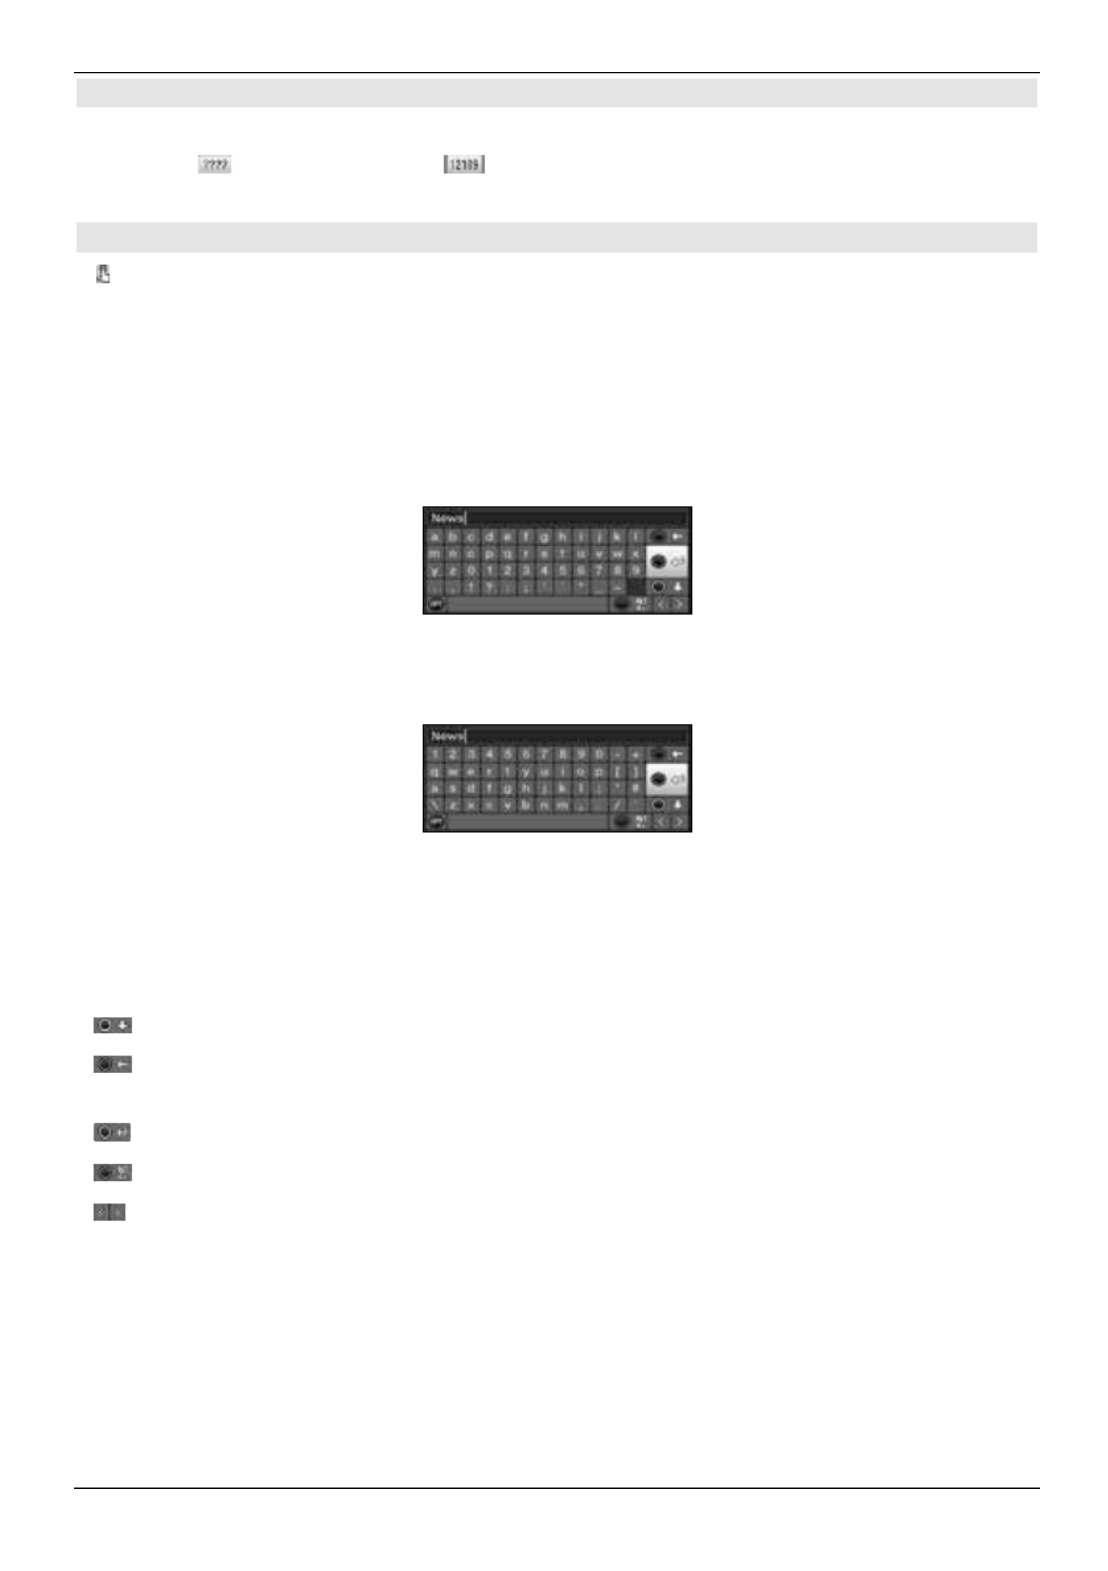
5.4.4 Virtual keyboard
If - is displayed on the right next to the set value, the value is altered using the virtual key
board. You have three different keyboard options when using this data entry method.
You can switch the keyboard layout between the so-called QWERTY keyboard and the
alphabetic keyboard; an SMS keyboard can also be used at any time.
The functionality of the QWERTY keyboard is identical to that of the alphabetic keyboard.
They only differ in the arrangement of the various letters, numbers, characters and symbols.
> Press the button to open the virtual keyboard.OK
The keyboard now appears in the alphabetical form.
> Press the button to toggle between the QWERTY keyboard and the alphabetOption -
ic keyboard.
You can now enter the term you want as follows.
Arrow keys: Move the highlight on the keys of the virtual keyboard.
OK: The highlighted character is added to the end of the term,
or the highlighted function is executed.
/ Yellow function key: The keyboard toggles between upper case/lower case.
/ Red function key: Pressing/holding down deletes the character in front of the
blue highlight/the whole entry.
/ Green function key: The entered term is accepted.
/ Blue function key: The keyboard switches to the alternative characters.
: Moves the blue highlight within the term.

23
The SMS keyboard is operated using the on both the alphabetical and the numeric keys
QWERTY keyboard and can be used at any time. The coloured buttons thus incorporate the
functions described above.
> Press one of the numeric pad keys 0 - 9 and select the various letters, numbers,
characters and symbols.
After first pressing a numeric key pad, the first letter of the corresponding row is
highlighted.
> The highlight then moves one field to the right with every additional press of the same
numeric key.
Press as often as necessary to reach the desired character. This will be added to the
entered term after a short delay.
The various are assigned the following displayed letters, numbers, numeric pad keys
characters and symbols.
0:
1:
2:
3:
4:
5:
6:
7:
8:
9:
Once you have reached the field you want with the highlight, you can then begin
selecting the next character immediately since, in this case, the character is directly
added to the term. If you wish to continue directly selecting a character from the same
numeric pad, you can add the previously highlighted character to the term by press-
ing the right arrow key.
5.5 Options selection
In some menus and operating modes (e.g. TV mode, music/images playback etc.), you have
the option of calling up additional functions and options via the options selection function.
> Press the button in the lower right-hand corner of the screen.Options
In this example we can see the option selection for the channel list.

24
> Every additional press of the button moves the highlight down one line each Options
time.
-Some options are selected directly in this window. Other options for a number of sub
ordinate selection options are located in the
option groups. Highlighting one of these option groups automatically opens
a further window on the left.
> You can use the up/down arrow keys within the options group to highlight one
of the options listed there.
By pressing the up/down arrow keys it is possible to move the highlight from line
to line and to move upwards and downwards page by page using the page
up/down buttons.
> The highlighted option is selected by pressing the button. You then exit the OK
option selection area.
> If you do not want to select an option or wish to leave the option selection area without
making any changes, simply press the button until it is hidden.Option

25
6 Initial installation
After you have read the safety instructions and connected the receiver as described in sec-
tion 4, you can then switch it on as described in section 5.
On initial installation of the receiver, the installation wizard is launched autoAutoInstall -
matically. The installation wizard allows you to make the most important settings for your
digital receiver in the simplest way possible.
Each step of the installation explains which settings can be made.
> In the installation wizard start window, you can cancel the initial installation by pressing
red function button. The receiver then begins to run default pre-programming.
In the subsequent installation steps you can use the OK button to accept the setting
which you have selected and move on to the next installation step.
By pressing the Back button you can go back to the previous installation step. This
enables you to correct any wrong entries at any time.
The initial installation shown here simply serves as an example.
The exact process for the initial installation will depend on the settings you select. Therefore
please follow all instructions displayed on screen carefully.

26
Menu language
> When the installation wizard is launched, the selection window for the operating
language opens first.
> Use the arrow keys to highlight the desired operating (menu) language.
The preferred audio language will be set automatically according to this selection.
You can change this setting at any time as described in section 7.4.1 of the instruction
manual.
> Press the button to accept the setting and access the next stage of the installation OK
wizard.
Country selection
> Use the arrow key to select the country in which the receiver will be operated.
Automatic setting of the local time as well as changing to summer/winter time will take
place based on your selection.
Channels will also be automatically sorted in the installation wizard according to this
setting as well as following a channel search.
> Press the button to accept the selection.OK
Picture format
> Use the right/left arrow keys to set the picture format for the connected TV.

27
-The picture format on the TV will be automatically adjusted according to your selec
tion.
> Press the button to accept the selection.OK
Selecting reception signals
At this point in the installation wizard, you can select the number of antenna cables which
are connected to the receiver and which reception types you would like to use.
> Use the up/down arrow keys to select the reception signal available to which you
wish to connect or which you wish to disconnect.from
DVB-S for digital satellite channels;
DVB-C for digital cable channels;
DVB-T for digital terrestrial channels;
> Press the button to open the selection window, highlight the setting you want with OK
the up/down arrow keys and close the window by pressing the OK button again.
> To move onto the next step of the installation, use the arrow keys to highlight the
Accept OK field and confirm by pressing the button.
Number of antenna signals (DVB-S)
In this section in the installation wizard, select how many DVB-S antenna cables are con-
nected to the receiver.

28
> Use the right/left arrow keys to select whether you have connected1 2 3 4, , or
DVB-S antenna signals.
> Press the button to accept the selection.OK
The setting options are dependent on your tuner configuration. Also see section 3.2
(Using an optional tuner module).
Antenna configuration (DVB-S)
In this step of the installation you can adapt your digital receiver set-up to the configuration
of your antenna (DVB-S).
> If you wish to accept the standard antenna setting, press the button.OK
> If the configuration of your reception equipment does not conform to the default set-
ting, press the Options button.
> Now perform the antenna settings as described in section 8.6 of your operating man-
ual in more detail according to your receiver system, then press the Back button to
return to the antenna configuration overview.
> Then press the to accept the selections.OK button
Antenna configuration (DVB-T)
If you use an active DVB-T antenna that does not have a separate power supply, or you do
not wish to use this, the amplifier for the active antenna can be supplied from your receiver
via the coaxial cable. To do this, set the feed to antenna On.

29
During this step, a channel spectrum is displayed with the channel signal levels. Using this
spectrum, you can align your DVB-T antenna to achieve optimum reception.
If the DVB-T source has been disabled, as described in the step “Selecting recep-
tion signals”, the next available page of the installation wizard will appear instead of
this page.
> Use the up/down arrow keys Antenna supply field to highlight the and open
the selection window by pressing the button.OK
> Switch the antenna feed or by using the to highlight on off up/down arrow keys
the relevant input and confirm with the button.OK
> To move onto the next step of the installation, use the arrow keys to highlight the
Accept OK field and confirm by pressing the button.
The display is dependent on your tuner configuration. Also see section 3.2 (Using an
optional tuner module).
Network configuration
In this step the TV automatically checks the network configuration.
> If you do not want to run the network configuration check, press the button.Info
> If you wish to check or change the network settings, press the Options key.

30
> Use the to select whether you want to configure a LAN or WLAN up/down arrows
network and press the button.OK
> Now perform the network settings as described in section 8.5 of your operating man-
ual.
> Then press the button to accept the settings. The network configuration check Info
will now start again.
Channel search / ISIPRO
You have various options for searching for new channels or updating the channel list.
You can use the ISIPRO channel list function to download a new channel list for your receiv-
er from the satellite or run a channel search.
> To download an up-to-date channel list, use the up/down arrow keys to high
-
light the ISIPRO channel list update line.
> To download an available current channel list, use the up/down arrow keys to
highlight the ISIPRO channel list update line and start the process by pressing
the OK button.
The current channel list will now be downloaded via satellite.
> If, instead of updating the channel list, you wish to perform a channel search via sat-
ellite, or if the DVB-S reception signal has not been configured, use the up/down

31
arrow keys All channels All unencrypted channels to highlight the or
and then start the channel search process by pressing the button.OK
In this search, all selected satellites in the antenna configuration are automatically
scanned for channels. This procedure may take several minutes. Please note all
messages displayed on screen.
After a channel list update or a satellite search is performed, a search is performed
for all other activated reception types. This procedure may also take several minutes.
Please note all messages displayed on screen.
If you skip the channel search/channel list update, the default channel list will be
loaded.
Regional programmes
Some broadcasters transmit channels with varying regional content. On this page you can
define your preferences for these regional programmes. The selected regional programme is
automatically set by switching to the relevant programme provider.
> Use the arrow keys to highlight the programme provider you would like to specify
for your preferred regional channel.
> Press the button to open a window with the regional programming available for OK
this programme provider.
> Use the to select your preferred regional programming.up/down arrow buttons
> Press the button to close the window again.OK
> To accept the selected regional programming, use the arrow keys to highlight the
Accept field.
> Confirming with the button takes you to the next installation step.OK
If you subsequently select another regional programme for a programme provider as
per section 9.4.4 in your operating manual, this will be saved in the same way in
future for this programme provider.

32
Software updates
The digital receiver will now check whether a new version of the software is available for
the receiver. If a new software version is available, you can carry out an automatic software
update.
> If you do not want to wait for a search for new software or a software download, you
can skip this step if you wish by pressing the Info button.
If the search for new software or updates is skipped, your device will run another test
at a set time as per section 18.5.2 in your operating manual and will load the soft-
ware automatically as long as the function (section 18.5.1 in your operating manual)
remains activated and the unit is in standby mode at this time.
> If there is no new TV software available, you can press the button to go to the OK
next step of the installation wizard.
> If, on the other hand, new TV software is found, the automatic software update can
be started by pressing the button.OK
The message .” now appears along with “Updating software, please wait
a progress bar showing the progress of your download.
Two additional progress bars then appear showing the progress of the individual
updating steps.
Then AutoInstall is resumed.
ISIO internet list updates
The receiver contains a pre-programmed ISIO list with web links. This can be updated auto-
matically.

33
> If you do not want to wait for the current ISIO internet list to be downloaded, you can
skip this process by pressing the button.Info
watchmi
In this step you can activate the watchmi service and select the desired channels to be
saved in the and the TV list EPG overview.
The watchmi service is an online service operated by FUNKE Digital TV Guide
GmbH.
> Activate the service using the to select the watchmi right/left arrow keys on
or .off option and then press the OK button
> Select Start Tutorial to view a short introduction.
You will need an internet connection to view the tutorial.
The general terms and conditions for using the service will now be displayed.watchmi

34
> Use the up/down arrow keys to move through the general terms and conditions
page by page.
> Use the right/left arrow keys to make a selection from the following options:
> Cancel: The general terms and conditions are closed and you can now
decide whether you wish to activate or deactivate watchmi.The
pre-selection is set to On.
> Reject: The general terms and conditions are closed and you can now
decide whether you wish to activate or deactivate watchmi.
The pre-selection is set to Off.
> Accept: With this selection you accept the general terms and conditions.
Now the data is updated and, in the next step, you are given the
opportunity to select the desired channels.
The up-to-date data for the channels is then downloaded.watchmi
After the data has been updated, you have the option of selecting the channels and adding
these to your TV list.

35
> Use the up/down arrow keys to move the selection bar over the channels and
select the highlighted channels with the OK button.
The selected channels appear with a check mark next to them.
> Highlight a selected channel again and press the to OK button remove this
channel.
A brief description of the highlighted channel appears on the right hand side.
> Use the yellow function key select all channels. to
> To finally , press the accept your selection green function button.
You can also change these settings later on at any time. You will find these options
in section 12 of your operating manual.
Loading EPG data
Your digital receiver contains an electronic programme information service
( lectronic rogrammeE P Guide). You must first get the receiver to download the EPG data
from the satellite to enable electronic programme guide data to be displayed.
For this reason, the receiver will automatically start downloading the EPG data after the
channel list update or channel search is completed. This process can take up to 30 minutes.
> If you do not wish to wait for the EPG data, you can skip the process by pressing the
Info button.
The EPG data will then be updated automatically or you can update it at any time
manually.

36
-If the EPG update has been skipped, your unit will download the EPG data automati
cally at the time set as per section 15.2 in your operating manual as long as the
automatic EPG update function (section 15.1 in your operating manual) remains acti-
vated and the unit is also in standby mode at this point. You can
also start the update manually at any time (section 15.6 in your operating manual).
Product registration
By registering your product, you will receive further benefits as well as help us to better
design our products and services to your needs.
You will need an internet connection to view the tutorial.
Exiting the installation wizard
Confirm the final message from the installation wizard by pressing the button.OK

37
7 Operating the unit
7.1 Switching on
> Switch the digital receiver on by pressing the button on the receiver On/Standby
or on the remote control.
7.3 Switching off
> Press the button either on the receiver panel or on the remote control On/Standby
to switch the receiver off again.
> The receiver is now in ready mode (stand-by) and (if enabled in section 8.2.4 of your
operating manual) on doing so the time is displayed in the receiver display.
If the time is not displayed, it still needs to be acquired by the receiver. To do this,
switch the receiver on and set it to receive e.g. ZDF for approx. 30 seconds to auto-
matically acquire the time.
7.4 Selecting a channel
7.4.1 Using the channel up/down buttons
> To select a channel, use the on the receiver or the up/down arrow buttons
Channel +/- on the remote control to scroll up or down the channel settings.
7.4.2 Using the numeric keypad
> Use the numeric keypad to enter the number of the desired channel.
For example:
1 for channel slot 1
1, then 4 for channel slot 14
2, then 3, then 4 for channel slot 234
1, then 5, then 6 7 then for channel slot 1567
When entering channel numbers with multiple digits, you have approx. three seconds after
pressing a key to complete the entry.
If you wish to enter a number consisting of only one, two or three digits, you can speed
up the entry procedure by keeping the key depressed a little longer on the last digit.
7.4.3 Using the Navigator (channel list)
> Press the button.OK
The channel list navigator is now displayed. In TV mode only TV channels are shown,
and in radio mode only radio channels are shown.
The channel currently selected is highlighted.

38
> You can view additional data about the current programme by pressing the INFO
button.
7.4.3.1 Selecting the channel
> You can now highlight the channel you want using the up/down arrow keys, the
page up/down numeric keypad keys and the .
> Press the button to select the highlighted channel.OK
7.4.3.2 Selecting a list
To make it easier for you to find channels, your device provides various channel lists. You
can select your (see section 13.1 of your operating manual)Favourites lists
and sort or filter the channels according to various criteria.
> Press the button.OK
The active channel list is now displayed.
> Now use to open the desire channel list .Options selection
7.4.5 Calling up blocked channels
If a channel is selected that is blocked by the parental control function, the message
device PIN will be displayed on the screen.
> Use the numeric keypad to enter the PIN for your device.
The desired channel will be displayed.
or
> Change to an unblocked channel as described in section 7.4.
If global parental control is enabled, the device PIN code will be requested again
when the blocked channel is switched on. To make things easier for you, you only
need enter the PIN code once during each operating phase.
When doing so, always pay careful attention to the information and settings for global
and user-dependent parental control (TechniFamily) in section 16.2 of the instruction
manual.
If the blocked channel involves an encrypted broadcaster, please also refer to section
9.5.3 in your operating manual.

39
7.4.6 Returning to last channel selected
> Press the button on the remote control to return to the last channel selected.Back
> Press the button again to return to the channel you were previously watching.
7.4.7 Switching between TV/radio
> Use the button to switch between TV and radio mode.TV/Radio
The unit switches to the last radio channel listened to.
Alternatively you can also switch between TV and radio operation as described
in sections 7.4 and 10.
7.4.8 Info box
Every time you change channels, an info box appears on the screen for a period as defined
according to section 8.8.1.3 in your operating manual.
You can also call up the info box manually by pressing the button on the remote conInfo -
trol.
This Infobox displays the location and name of the selected channel, the title of the current
programme and the currently active channel list.
The progress bars are coloured yellow according to the amount of transmission time
already expired for the current programme. If the beginning of the progress bar is
coloured red, the transmission started too early, and if the end of the progress bar
is coloured red the current programme has overrun.
Additional programme properties are also displayed:
For example:
for teletext
for 16:9 broadcasts
for encrypted channels
for Dolby Digital broadcasts
for subtitles
for HbbTV
The current time is shown in the right-hand upper corner of the screen.

40
7.5 Receiving encrypted channels
> Insert the Smartcard into the card slot in the integrated card reader. CONAX
(gold-coloured chip facing down, and in the direction of insertion)
or
> Insert a CI / CI+ module into the slot.
> Insert the smartcard into the CI / CI+ module card slot. Ensure that the gold-coloured
chip on the smartcard is facing upwards, in the direction in which the card is inserted.
7.6 Volume control
You have the option of adjusting the volume on your digital receiver. This facilitates opera-
tion of the receiver, as it means you can access all the major functions on a single remote
control, and will only rarely have to resort to using the remote control for the TV.
> To adjust the volume of your TV, press Volume + to increase the volume, and
Volume - to decrease it.
7.6.1 Using mute
> To switch the sound off (mute), press the button - press the key Sound on/off
again to switch the sound back on.
Throughout the time that the volume is switched to mute, the symbol appears at
the upper right of the screen.
7.7 Selecting a different language / Sound option
> Using the feature you can select the language/sound option Options selection
you want via the option.Sound
7.8 Freeze frame
> Press the Freeze frame key to display the current TV picture as a still image.
> Press this key again to return to normal operation.
The sound will continue to be reproduced normally during freeze frame.
7.9 Teletext
Your receiver can display teletext information on channels that broadcast teletext data. This
is displayed by the symbol in the Info box.
> Switch Teletext on by pressing the Teletext button.
7.10 HbbTV
The symbol in the Infobox indicates that the programme provider is offering an HbbTV
application.
> Switch to a channel that is broadcasting HbbTV data.

41
After a few seconds the box appears at the lower right of the screen indicating the
availability of HbbTV content.
> Launch the HbbTV application by pressing the function key.red
Depending on the speed of the Internet connection, there may be slow response
times or short interruptions.
7.11 Subtitles
When switching on a transmission which is broadcast with sub-titles the subtitles symbol
appears in the Info box.
> Using the feature allows you to select subtitles you wish to disOption selection -
play under the item.Subtitles
The unit can display both video text subtitles and DVB subtitles. The display for the
two subtitle types may be different.
Please note that subtitles can only be displayed if the programme provider also actu-
ally broadcasts the corresponding data. If the programme provider only sends subtitle
recognition but no data, subtitles cannot be displayed.
If you would like the receiver to playback programmes automatically with subtitles,
configure your unit as described in section 8.4.2 of your operating manual to auto-
matic subtitle playback.
Please note that DVB subtitles are only available during playback of a DVR recording
if they were either manually or automatically selected at the time of the recording.
8 EPG Overview
5
4
2
3
1
1: Viewing time > indicates when programmes are to be shown.
Timeline > a graphical display of the viewing time in the form of progress bars.
2: Programme name with the respective programme setting within the active pro-
gramme list.
3: Progress bars or the start/stop time of the programme being shown.

42
4: The current date and the current time.
5: Broadcasts of the displayed programme.
> Use the right/left arrow keys to adjust the display time either backwards or for-
wards.
The progress bar will also be moved backwards or forwards along the time bar
according to the display time.
> Use the yellow function key to switch directly to the display of the current or follow-
ing programmes.
> By pressing the up/down arrow keys it is possible to move the highlight from line
to line and to move upwards and downwards page by page by using the page up/
down keys.
> If further information is available on the highlighted programme, you can call this up/
exit it by pressing the button.Info
> Press the button to switch directly to the highlighted channel.OK
9 Timer recordings
Your device has the following timer functions:
1. DVR timer
Use this function to switch your digital receiver on and off, to record the selected programme
onto the selected recording medium while you are out as per section 11.4.1 in your operat-
ing manual.
If the receiver is switched on by the DVR timer, this will be indicated by in l DVR Timer
the display.
2. Video recorder timer
If the video recorder timer is selected, your digital receiver will be switched on and off for
the selected programme, allowing you to record programmes to an external recording unit,
e.g. a video cassette or DVD recorder, while you are out.
If the unit is switched on by the video recorder timer, this will be indicated by l VCR Timer
in the display.
3. Channel switching timer
If your receiver is in normal operating mode, it will switch to the programmed channel slot
at the set time.
4. Alarm
If your receiver is in standby mode, it is switched on when the programmed channel slot is
reached at the set time.
5. Series timer
To make it easier to find programmes, you can search for programme data highlighted in the
EPG using any terms. The series timer function is used to automatically generate ongoing
DVR timer settings for the programmes you find. Timer setting also continues after the EPG
data has been updated. This removes the need for repeated manual programming of timers,
e.g. to record episodes in a TV series.

43
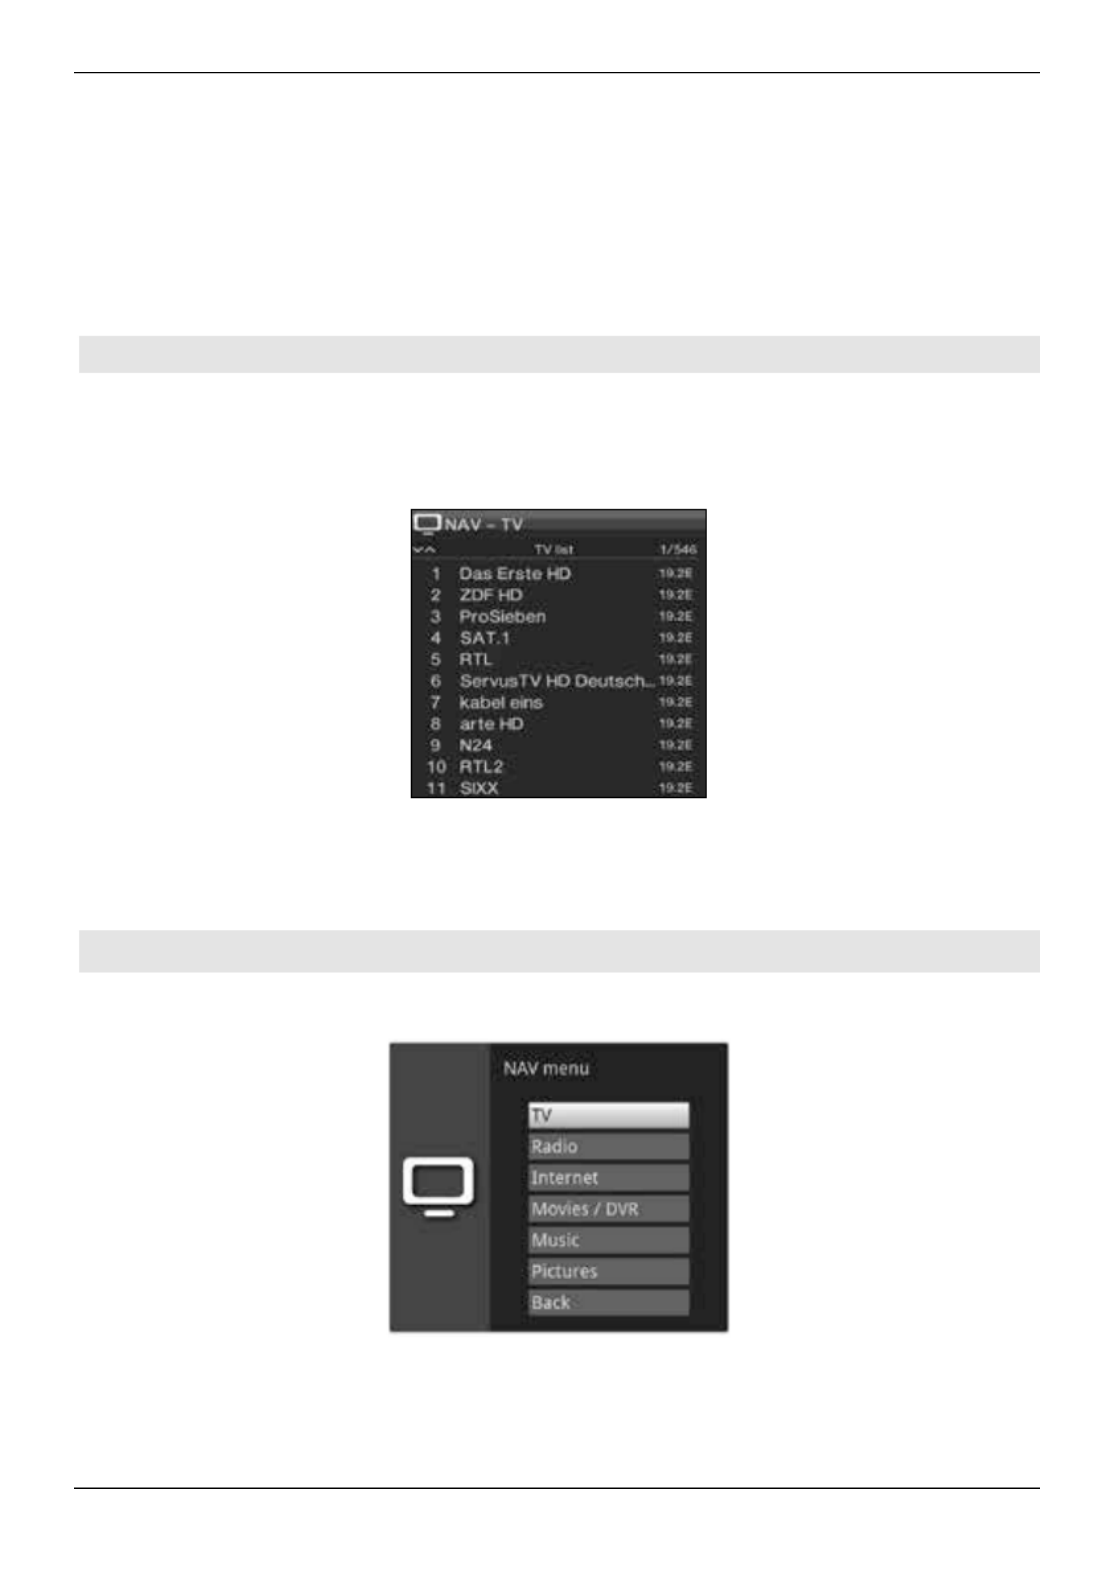
10 Function Selection
> Press the Navigator/Function Selection button to open the Navigation menu
(NAV menu) in order to select the desired function.
> Use the to highlight the function you want to access. up/down arrow buttons
TV: TV mode: playing TV programmes.
Radio: Radio mode: playing radio programmes.
Internet: Internet mode: calls up the web links available in the Internet list.
Films/DVR: Films/DVR Navigator: access available video files stored on a
device connected to the USB port or on an available network drive
or via UPnP.
Music: Music navigator: access available music files stored on a device
connected to the USB port or on an available network drive or via
UPnP.
Images: Image navigator: access available image files stored on the internal
hard drive, on a connected USB device, on a shared network drive
or via UPnP.
> Confirm with to select the highlighted function. OK
When doing so pay careful attention to the information and settings for global and
user-dependent parental control in section 16 of your operating manual.

44
11 Using the Internet list to call up websites
> In normal mode, press the WWW button twice
or
> If a website has already been opened, press the WWW once .
The Internet List Navigator now appears. The web link last called up is highlighted.
> You can now highlight the internet link you want using the up/down arrow keys,
the page up/down keys numeric keypad and the .
> Pressing the button opens the highlighted web link.OK
The time it takes for the selected site to be displayed depends on the selected site
and the bandwidth of your DSL connection.
12 DVR recording
The following recording modes are available for DVR recording:
1. Instant recording
Select this type of recording to immediately record the programme currently being broadcast
at the push of a button.
2. Timer-controlled recording
This function is used to switch your digital receiver on and off to record the selected pro-
gramme onto the recording medium while you are out. The timer can be either manually
programmed or automatically programmed via the EPG function.
3. Timeshift recording
Timeshift recording enables time-shifted TV viewing. You can start to play back a pro-
gramme while it is still recording (= timeshifting).
12.1. Instant recording
> Switch to the channel on which the programme you to record is being broadwant -
cast.
> Press the Record button to record the current programme.
> Press the Pause / playback button to play back the current programme from a partic-
ular point.

45
> To continue playing back the programme from this point, press the Play / Pause but-
ton again.
You are now watching the programme with a time delay to the live broadcast
(Timeshift), while the programme continues to be recorded in the background.
12.2 Timeshift function
The Timeshift function allows you to record and play back at the same time. This enables
"time-shifted" viewing.
Hence you can start watching the beginning of a recording and skip through any sections
already recorded (e.g. advertising slots). The live broadcast of the programme continues to
be recorded at the same time. (see section 10.1.3 in your operating manual).
12.3 Ending manual recording
> First select the recording to be ended by selecting the channel on which the record-
ing is running as described under section 7.4.
> Pressing the button generates a query as to whether the recording should be Stop
saved or discarded.
> Select Save to save the recording, or not to save the recording, or Discard Back
to continue with the recording.
12.4 Ending recording automatically
> After pressing the button, a request is displayed asking what should On/Standby
happen to the recording in progress.
> Select the line with the desired action.
If you have selected , the prompt will now appear as described Cancel recording
in section 10.1.1.2 of your operating manual asking you what should be done with
the recording.
If you selected the programme title or one of the specified times, the receiver will now
record the current programme in full or until the selected time and then switch to
standby. The screen will switch off immediately according to the selection.

46
13 DVR playback
You can access DVR recordings via the DVR Navigator.
13.1 Calling up the DVR Navigator / Starting DVR playback
The DVR Navigator can be called up in the following ways. Dependent upon whether you
are currently in TV or radio mode, a list will appear of the existing TV or radio recordings
stored on the internal hard drive, a connected USB storage device, an inserted SD/MMC
card or an available network drive.
When doing so pay careful attention to the information and settings for global
and user-dependent parental control in section 16.2 of the instruction manual.
The broadcast information can be displayed and hidden by pressing the Info button
repeatedly.
> You can start to play back a recording by highlighting it and confirming with OK.
13.2 When in TV mode
> In TV mode press the Stop / DVR button to switch directly to the DVR Navigator.
or
> Open the programme lists navigator by pressing the button and switch to the OK
DVR Navigator by pressing the Stop/DVR button.
or
> In Function selection, now select the Films/DVR item.
> Now call up the My Recordings folder on your attached recording medium (sec-
tion 11.4.1 in your instruction manual).
13.4 From playback of a running / existing DVR recording
> Press the button to open the DVR Navigator.OK
or
> In Function selection, now select the Films/DVR item.
> Now call up the My Recordings folder on your attached recording medium (sec-
tion 11.4.1 in your instruction manual).

47
13.5 Pause / Freeze frame
> To pause playback of a recording (freeze frame), press the button Pause / Play
during playback.
> Press the button again to resume playback from the same location.Pause / Play
13.6 Fast forward / Rewind
Your DVR has fast forward/rewind functions so you can get to a specific place in a recording.
> Press the Fast forward or Rewind button during playback.
The message “Fast forward uu” or “Rewind tt” appears.
The recording will now play in the specified direction at 4x speed.
> If you press the Fast forward or Rewind button again, the speed will increase to
16x.
The message “Fast forward uuuu” or “Rewind ttt” appears.
> If you press the Fast forward or Rewind button again, the speed will increase to
64x.
The message “Fast forward uuuu” or “Rewind tttt” appears.
> Pressing the Fast forward Fast rewind or button again causes you to jump for-
wards or backwards in 10 minute increments.
> When you get to the place you want in the recording, you can return to normal play-
ing mode by pressing the button.Play / Pause
13.7 Setting tags
> Skip as described above to a location in the recording where you want to add a tag.
> Pressing the button sets a tag at the selected location.Record
13.8 Skipping to tags
During playback you have the option of navigating directly to locations in the recording
where you have set tags.
> In Options selection, use the Tag menu item to select the tag in order to skip to
the desired position in the recording.
13.9 Ending playback
> Press the button to end playback.Stop
Playback will end and your receiver will return to normal mode. In doing so the
receiver "notices" the place in the recording where playback ended. If you start play-
ing this recording again, it will automatically resume at the point where you previously
left off.

48
14 Encryption system
From this menu item you can access the submenus for the connected Smartcards and the
CI-/CI+ modules.
> Call up Main Menu > Encryption System.
> Select one of the inserted CI-/CI+ modules in order to access its sub-menu, where
you can perform the settings.
Please note that the submenu now displayed is provided by the module and may
therefore differ from module to module.
14.1 Encryption system settings
CI dual encryption
CI dual encryption makes it possible to receive two encrypted channels at the same time
using only one CI module and a valid Smartcard.
> Select the CI slot ( or (for automatic recognition) in which CI1 CI2, , CI1 + CI2 auto
the CI module for dual encryption is inserted or switch the function off.
Please also note that, to do this, both channels to be unencrypted must be located
on the same transponder, See also section 9.5.1 in your operating manual.
MHEG autostart
If an MHEG application is available for a transmitter, it can be started automatically.
> To do this, activate the MHEG Autostart item to on.
PIN entry
Here you can save a PIN for the respective CI slot. This PIN is required to support DVR
recordings with parental control restrictions.
Manually initialising the CI/CI+ modules
> Press the function key to initialise the CI/CI+ module manually.green CI Reset

49
15 ISI mode
A wide range of functions and added value options make television with TechniSat an
amazing and complex experience with unlimited possibilities. ISI mode reduces this diver-
sity of available options and is therefore ideal for children or older people who feel unsure
about using the many different possible settings when operating the unit. If this mode is
activated, it will not be possible to accidentally change any settings using the remote control.
ISI mode also provides simplified channel information in extra-large text size on the screen
for persons with poor or impaired vision and integrates a highly legible digital time display
on request.
> Activate ISI mode as described in section 8.8.1.6 in your operating manual.
When ISI mode is active, the following functions are deactivated:
- Automatic updates
- Films / DVR / Music / Images
- Internet / HbbTV
- watchmi
- Mobile apps
- UPnP renderer
- WLAN direct - TechniCast
- EPG / Timer
Access to various menus is also blocked, however it is still possible to access the
menu for the purpose of deactivation.
ISI mode can also be used with the IsiZapper remote control which is optimised for
ISI mode. See also section 3.3 (optional Isi Zapper remote control).
15.1 Switching the unit on/off (ISI mode)
> When the receiver is on standby, you can switch it on by pressing the On/Standby
button on the remote control/on the receiver.
> When operating normally you can switch the unit into On/Standby mode by pressing
the On/Standby button.
15.2 Program selection(ISI mode)
15.2.1 Using the channel up/down buttons
> To select a channel, use the on the receiver or the up/down arrow buttons
Channel +/- on the remote control to scroll up or down the channel settings.
15.2.2 Using the numeric pad keys
> Use the numeric keypad to enter the number of the desired channel.
For example:
50
1 for channel slot 1
1, then 4 for channel slot 14
2, then 3, then 4 for channel slot 234
1, then 5, then 6 7 then for channel slot 1567
When entering channel numbers with multiple digits, you have approx. three seconds after
pressing a key to complete the entry.
If you wish to enter a number consisting of only one, two or three digits, you can speed up
the entry procedure by keeping the key depressed a little longer on the last digit.
15.2.3 Using the Navigator (channel list)
> Press the button.OK
The channel list navigator is now displayed. In TV mode only TV channels are shown, and in
radio mode only radio channels are shown.
The channel currently selected is highlighted.
> You can now highlight the channel you want using the up/down arrow keys, the
page up/down numeric keypad keys and the .
> Press the button to select the highlighted channel.OK
15.3 Switching between TV/radio
> Use the button to call up the 0 NAV menu.
> Now you can use the up/down arrow keys to highlight the desired operating
mode TV or Radio or. Back to exit the menu again.

51
> Press the button to confirm the selection and switch to selected operating mode.OK
The unit switches to the last radio channel set.
15.4 Volume control (ISI mode)
You have the option of adjusting the volume on your digital receiver. This facilitates opera-
tion of the receiver, as it means you can access all the major functions on a single remote
control, and will only rarely have to resort to using the remote control for the TV.
> To adjust the volume of your TV, press Volume + to increase the volume, and
Volume - to decrease it.
During volume adjustment, the currently set volume is displayed at the upper edge of
the screen.
When you switch on the digital receiver, sound will be reproduced at the volume level
last set. During operation of a Bluetooth audio device, please also pay attention to
section 8.4.7 (headphone settings) in your operator manual.
Volume control and the mute button also control the digital audio outputs (not for the
bit stream setting) and switch switch these to mute.
15.4.1 Using mute
> To switch the sound off (mute), press the button - press the key Sound on/off
again to switch the sound back on.
Throughout the time that the volume is switched to mute, the symbol appears at
the upper right of the screen.
During operation of a Bluetooth audio device, e.g. headphones, the volume of the
headphones can be adjusted while switching to mute without deactivating the mute
setting.
15.5 Video text (ISI mode)
Your receiver can display teletext information on channels that broadcast teletext data.
15.5.1 Switching on Teletext
> Switch Teletext on by pressing the Teletext button.
15.5.2 Page selection
> Use the numeric keypad keys 0 to 9 to enter the three-digit page number of the
desired video text page.
Your entry will be displayed in the upper left-hand corner of the screen.

52
As the Teletext pages cannot all be transferred by the broadcaster at the same time,
it may take a few seconds before the page is displayed.
This is the case when the requested page, e.g. using the video text search, cannot be
instantly read into the memory immediately after the channel is changed
15.5.3 Teletext subpages
If teletext subpages are available for a selected Teletext page, an indicator showing that
subpages have already been downloaded appears on the left next to the teletext. As soon
as a new subpage is available, this is automatically displayed.
> Use the button to show a specific subpage.OK
The column on the left side of the screen is enabled Subpages that have already
been acquired are displayed.
> Use the up/down arrow keys to select the subpage you want.
> Exit the subpage display by pressing OK.
15.5.4 Mixed viewing mode
> Press the Teletext key again to enable mixed viewing mode. This means that the
teletext is superimposed on the TV picture.
15.5.5 Exiting Teletext
> Press the Teletext key to return to normal operating mode.

53
16 Software updates via USB interface
In addition to the automatic software updates via the internet and DVB sources, you also
have the option of updating the receiver software via the USB interface or via the SD/MMC
card reader.
To be able to run the software update via the USB interface or the SD/MMC card
reader, you first need to download the current software version from the Technisat
homepage (www.technisat.de).
The update can be performed using a standard USB flash stick and an SD/MMC
card which has been formatted in FAT32 format.
> Now copy the software file with the file extension “ ” onto the stick or the .cpad SD/
MMC card.
> If you only want to run a single update, copy the file, or for several singleupdate
updates, copy the file onto the USB stick or the SD/MMC cardautoupdate .
Please note that the singleupdate and autoupdate files have a file must not
extension! Please also note here that, to do so, your folder settings on your PC must
be set to hide file extensions.
The USB stick or SD/MMC card should not contain multiple cpad software files.
Furthermore, the " " and " " files must not be present autoupdate singleupdate
at the same time.
> Now switch the receiver to stand-by and insert the USB flash stick into the receiver's
USB port or insert the SD/MMC card into the SD /MMC card reader on the receiver.
Now switch on the receiver.
The update process is now displayed in the following steps.
- The message " " will now appearLoading software from data medium
- Then a progress bar appears showing the progress of the software loading
operation.
- Once the software has downloaded to 100%, another progress bar appears,
one showing the progress of the individual update steps and the other showing
the overall progress of the update.
The display shows the progress of the software download and the individual update
steps.
> Once the update is complete, the TV image appears again. You can now switch the
receiver to standby and remove the USB stick or SD/MMC card.
The update should not be interrupted at any point by removing the USB stick or the
SD/MMC card, or by switching off the power supply, as this can cause the receiver
to malfunction.

54
17 Troubleshooting guide
Fault SolutionPossible cause
Remote control does not
work
Incorrect remote control
code has been set
Set the correct remote con-
trol code
(see section 8.2.5)
Batteries are spent Replace the batteries
(see section 3.5)
Various Channels not shown
in channel list
Incorrect channel list
selected
Select a different channel list
(see section 9.4.3.1)
There is sometimes inter-
ference with channels such
as DSF and Tele 5
Interference from cordless
DECT telephones
Increase the distance bet-
ween the base station and
the receiver
Sound OK, no TV picture Radio mode called up and
radio background image is
switched off
Check the setting
(see section 8.8.1 and 9.4.7)
Scart plug not connected
correctly
Connect Scart plug
correctly
Picture not fully visible
or distorted
Picture format not set
correctly
Check picture format
(see section 8.3.1)
Incorrect picture display/
zoom selected
Check picture display -
zoom in menu
(see section 8.3.2)
Check zoom setting
(see section 9.12)
No picture, no sound,
display not on
No mains voltage Check mains adapter and
plug
No picture via HDMI Configured HDMI resolution
not supported by TV
Adjust HDMI resolution
(see section 8.3.3)
for connect to correct device
via Scart cable if necessary
No sound via HDMI,
picture OK
Wrong HDMI sound format
selected
Check HDMI sound format
(see section 8.4.5)
No sound or wrong audio
playing
Dolby Digital active or wrong
audio language
selected
Check setting in menu
(see point 8.4.1 and 8.4.3)
Check Dolby Digital / langu-
age selection
(see section 9.7)

55
Fault SolutionPossible cause
Cannot receive channels
that were previously recei-
ved
Antenna defective or not
correctly adjusted
Check antenna
Channel transferred to a dif-
ferent transponder
Run a search
(see section 17)
Channel no longer being
broadcast
None
Intermittent appearance of
square blocks in the picture.
Device switches to freeze
frame intermittently, no
sound. Screen sometimes
blank with the message
“no signal”.
Heavy rain or snow Remove snow from dish
antenna
Antenna incorrectly adjusted Adjust antenna
Dish too small for your loca-
tion
Use larger antenna
Obstacle between dish and
satellite (e.g. a tree)
Mount dish with clear line
of sight
No picture, no sound,
display on
Short circuit in
LNB feed line
Switch off receiver, short
circuit, switch receiver back
on
Faulty or missing cable
connection
Check all cable connections
(see section 5)
Defective LNB Replace LNB
Incorrect external unit instal-
led at receiver
Correct the settings
(see section 8.6)
Antenna incorrectly adjusted Adjust antenna
Antenna cannot be rotated Motor not compatible with
DiSEqC 1.2
Use a suitable motor
Time not displayed while
in standby mode
Time not acquired approx. 30 seconds Run
ZDF
Standby clock switched off Switch stand-by clock on
(see section 8.2.4)
Text in the Infobox or
EPGplus detailed infor-
mation, for example, can
be hard to read from a
distance
Character size set to "small" Correct the character size
(see section 8.8.1.1)
Termékspecifikációk
| Márka: | TechniSat |
| Kategória: | Digitális dekóderek |
| Modell: | TechniCorder ISIO STC |
Szüksége van segítségre?
Ha segítségre van szüksége TechniSat TechniCorder ISIO STC, tegyen fel kérdést alább, és más felhasználók válaszolnak Önnek
Útmutatók Digitális dekóderek TechniSat

25 Augusztus 2024
23 Augusztus 2024
24 Július 2024
17 Július 2024
14 Július 2024
13 Július 2024
11 Július 2024
Útmutatók Digitális dekóderek
- Digitális dekóderek Philips
- Digitális dekóderek JVC
- Digitális dekóderek Nokia
- Digitális dekóderek Hyundai
- Digitális dekóderek Emos
- Digitális dekóderek Viessmann
- Digitális dekóderek Crestron
- Digitális dekóderek Strong
- Digitális dekóderek Conceptronic
- Digitális dekóderek Thomson
- Digitális dekóderek Fagor
- Digitális dekóderek Hikvision
- Digitális dekóderek Hama
- Digitális dekóderek Synology
- Digitális dekóderek Telefunken
- Digitális dekóderek Amiko
- Digitális dekóderek Dahua Technology
- Digitális dekóderek Denver
- Digitális dekóderek Trevi
- Digitális dekóderek Devolo
- Digitális dekóderek Planet
- Digitális dekóderek Black Box
- Digitális dekóderek Media-Tech
- Digitális dekóderek Blustream
- Digitális dekóderek Monacor
- Digitális dekóderek Manta
- Digitális dekóderek Konig
- Digitális dekóderek Marmitek
- Digitális dekóderek IFM
- Digitális dekóderek DataVideo
- Digitális dekóderek Telestar
- Digitális dekóderek Atlona
- Digitális dekóderek ECG
- Digitális dekóderek Best Buy
- Digitális dekóderek GoClever
- Digitális dekóderek Gefen
- Digitális dekóderek Kathrein
- Digitális dekóderek Axis
- Digitális dekóderek Genius
- Digitális dekóderek Sitecom
- Digitális dekóderek Majestic
- Digitális dekóderek KanexPro
- Digitális dekóderek ADB
- Digitális dekóderek Sunstech
- Digitális dekóderek AVerMedia
- Digitális dekóderek Matrox
- Digitális dekóderek KPN
- Digitális dekóderek Laser
- Digitális dekóderek Humax
- Digitális dekóderek Emtec
- Digitális dekóderek Engel Axil
- Digitális dekóderek Edision
- Digitális dekóderek Xoro
- Digitális dekóderek Formuler
- Digitális dekóderek Dreambox
- Digitális dekóderek Ferguson
- Digitális dekóderek Televés
- Digitális dekóderek Extron
- Digitális dekóderek Infomir
- Digitális dekóderek Teradek
- Digitális dekóderek Telesystem
- Digitális dekóderek Triax
- Digitális dekóderek Hanwha
- Digitális dekóderek Tams Elektronik
- Digitális dekóderek I-CAN
- Digitális dekóderek TELE System
- Digitális dekóderek QFX
- Digitális dekóderek WyreStorm
- Digitális dekóderek Massoth
- Digitális dekóderek Atlantis Land
- Digitális dekóderek C2G
- Digitális dekóderek Golden Media
Legújabb útmutatók Digitális dekóderek
30 Március 2025
29 Március 2025
31 December 2025
31 December 2025

31 December 2025
27 December 2024
26 December 2024
7 December 2024
7 December 2024
7 December 2024