Használati útmutató Keystone KSTAW12BE
Keystone
légkondicionáló
KSTAW12BE
Olvassa el alább 📖 a magyar nyelvű használati útmutatót Keystone KSTAW12BE (4 oldal) a légkondicionáló kategóriában. Ezt az útmutatót 12 ember találta hasznosnak és 6.5 felhasználó értékelte átlagosan 4.8 csillagra
Oldal 1/4
4
INSTALLATION INSTRUCTIONS
Read these instructions completely
and carefully.
IMPORTANT- Save these
instructions for local inspector s use.
IMPORTANT- Observe all
governing codes and ordianaces.
Note to Consumer-Keep these
instructions for futrue reference.
Note to Installer-Be sure to leave these
instructions with the Consumer.
Completion time-Approximately 1 hour.
Skill level-Installatio of this appliance
requires basic mechanical skills.
We recommend that two people install
this product.
Proper installation is the responsibility
of the installer.
Product failure due to improper installation
is not covered under the Warranty.
You MUST use all supplied parts and use
proper installation procedures as described
in these instructions when installing this air
conditioner.
BEFORE YOU BEGIN
Do not, under any circumstances, cut or
remove the third (ground) prong from the
power cord.
CAUTION
Do not change the plug on the power cord
of the air conditioner.
Aluminum house wiring may present special
problems- consult a qualified electircian.
When handling unit, be careful to avoid cuts from
sharp metal edges and aluminum fins on front and
rear coils.
TOOLS YOU WILL NEED
Screwdriver
Level
TOOLS YOU MAY USE
Screwdriver
Pencil
Ruler or tape measure
Scissors or knife
Save Carton and these Installation Instructions
for future reference. The carton is the best way
to store unit during winter, or when not in use.
NOTE:
H
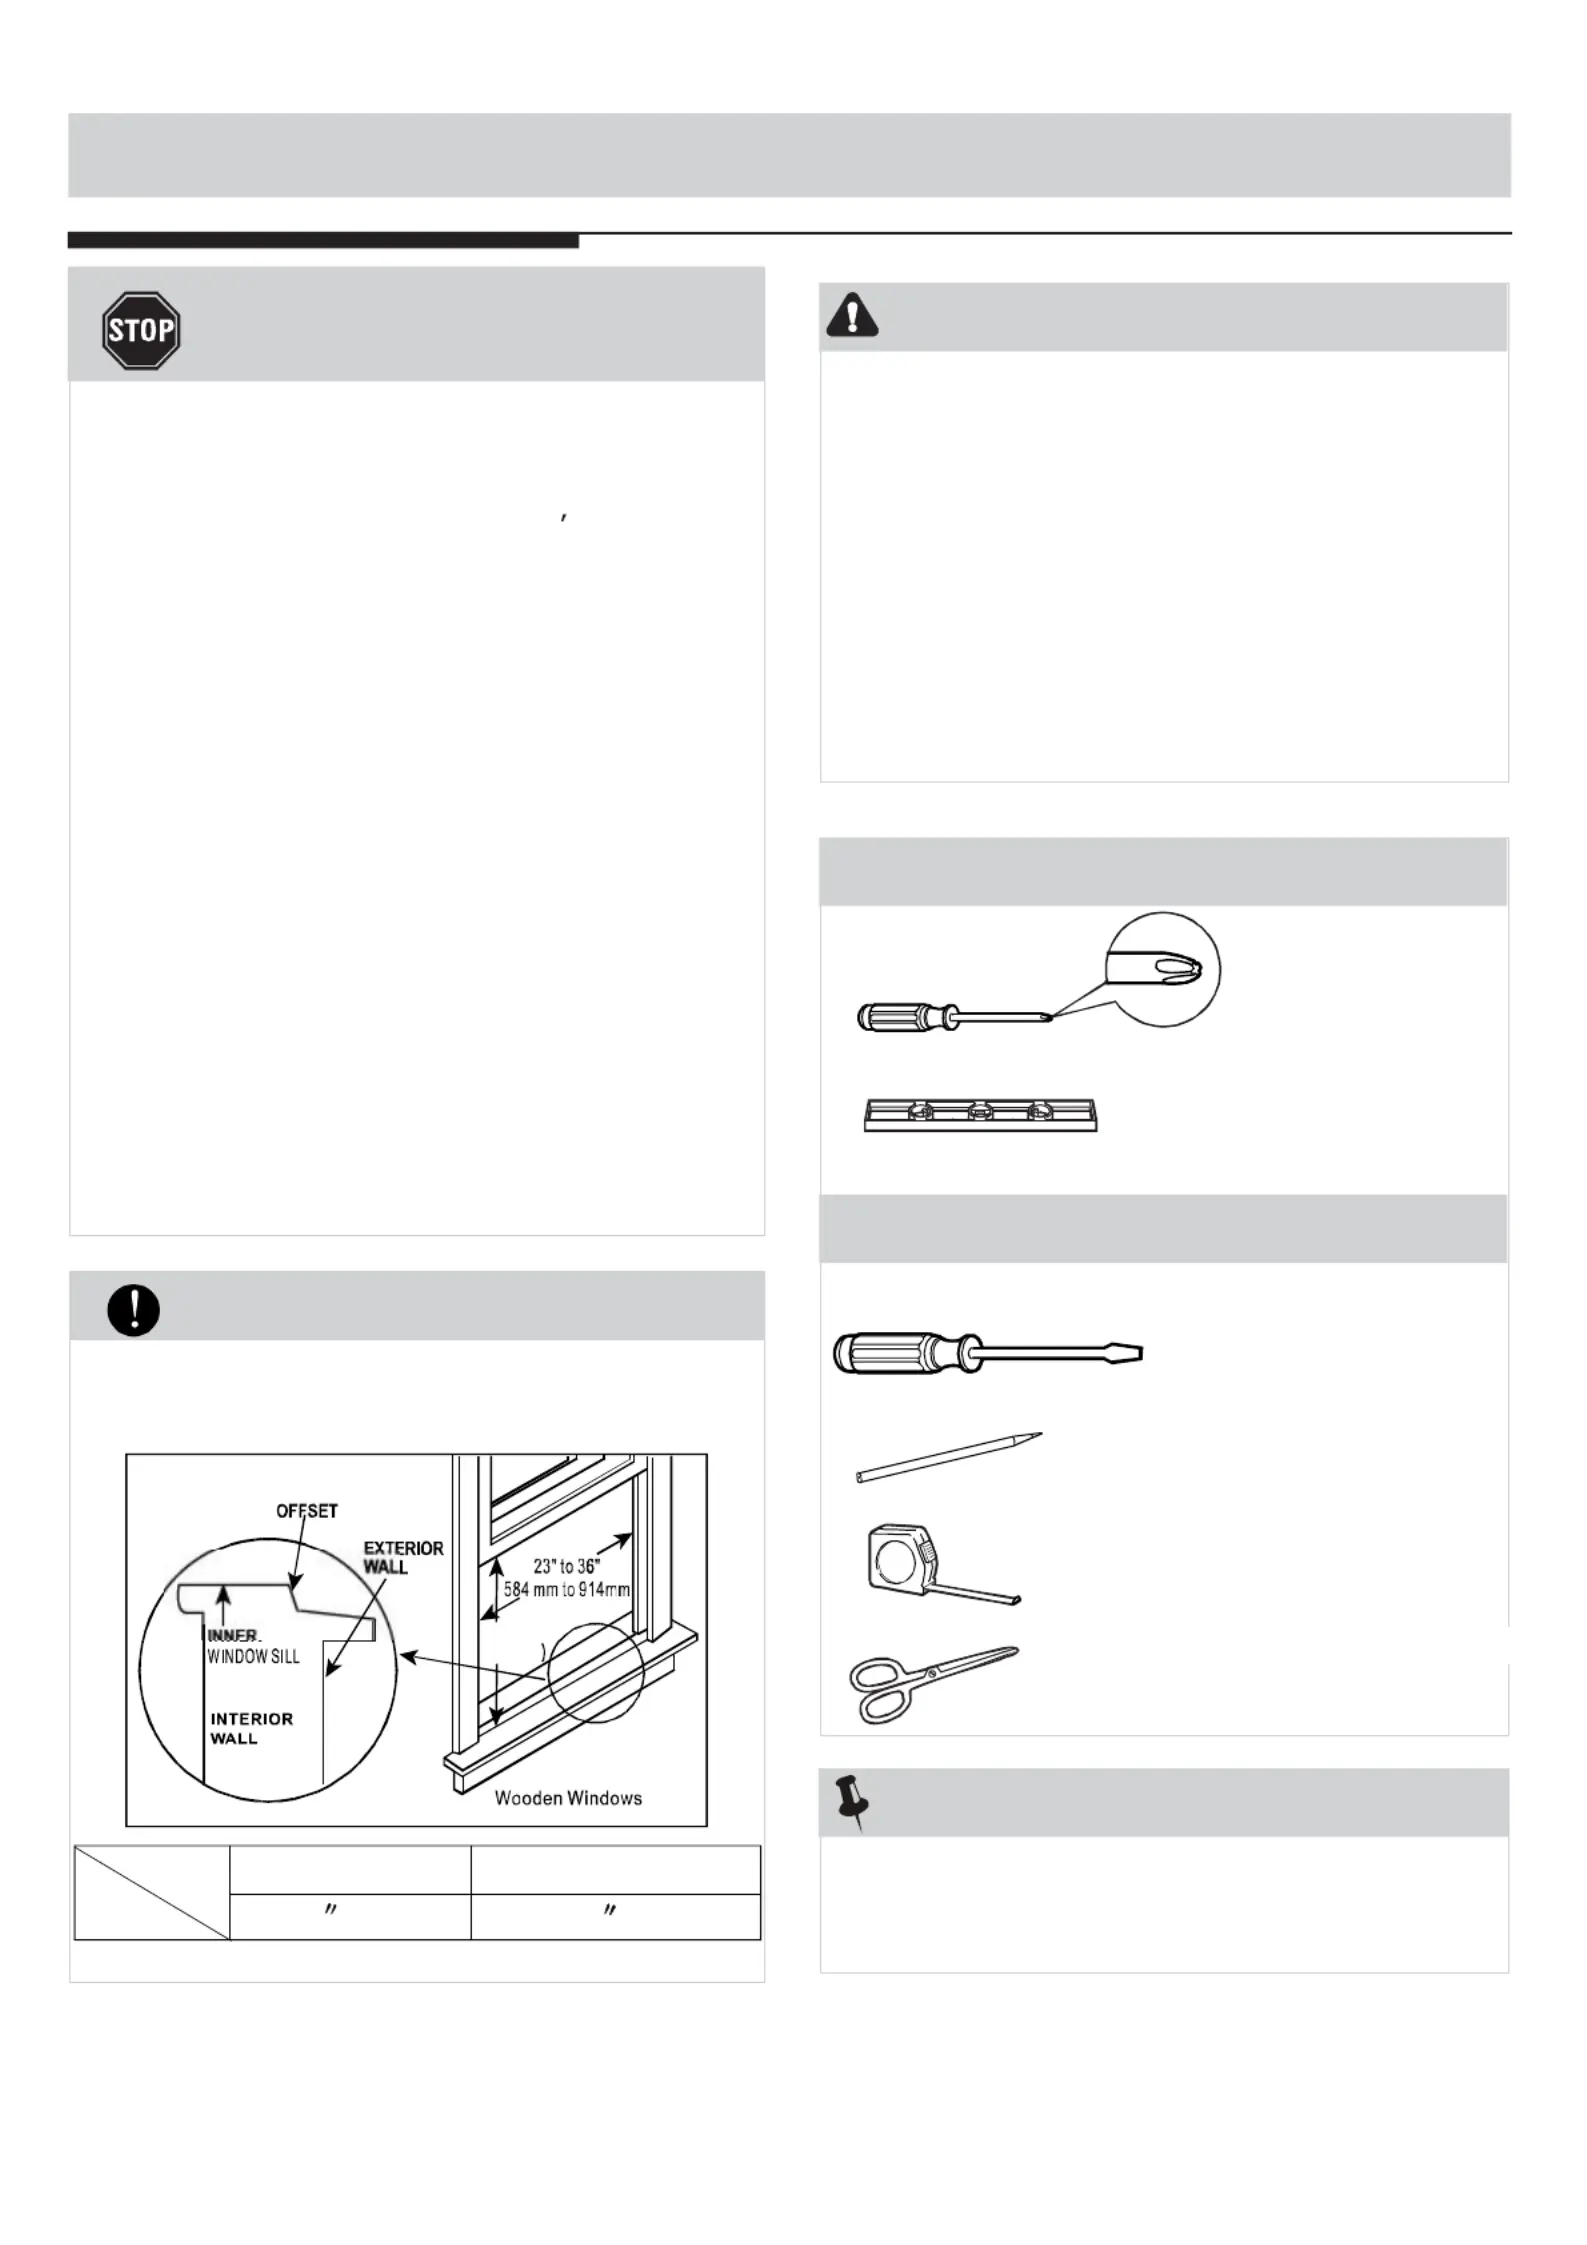
Your air conditioner is designed to install in
standard double hung windows with opening
widths of 23 to 36 inches(584mm to 914mm) .
WINDOW REQUIREMENTS
Model
H
600 0~8000Btu/h
10000~12000Btu/h
14 (356mm) 15-1/2 (394mm)
Table 1
Termékspecifikációk
| Márka: | Keystone |
| Kategória: | légkondicionáló |
| Modell: | KSTAW12BE |
Szüksége van segítségre?
Ha segítségre van szüksége Keystone KSTAW12BE, tegyen fel kérdést alább, és más felhasználók válaszolnak Önnek
Útmutatók légkondicionáló Keystone

12 Január 2025

12 Január 2025

12 Január 2025

12 Január 2025

12 Január 2025

12 Január 2025

12 Január 2025

12 Január 2025

12 Január 2025

12 Január 2025
Útmutatók légkondicionáló
- légkondicionáló DEXP
- légkondicionáló Russell Hobbs
- légkondicionáló Just Fire
- légkondicionáló Candy
- légkondicionáló Livington
- légkondicionáló Polocool
- légkondicionáló Frigor
- légkondicionáló Avalon Bay
- légkondicionáló VOX
- légkondicionáló Equation
- légkondicionáló Guzzanti
- légkondicionáló Bosch
- légkondicionáló Vaillant
- légkondicionáló Klarstein
- légkondicionáló Home Electric
Legújabb útmutatók légkondicionáló

10 Április 2025

10 Április 2025

10 Április 2025

9 Április 2025

9 Április 2025

9 Április 2025

9 Április 2025

9 Április 2025

9 Április 2025

9 Április 2025