Használati útmutató JVC AV-25LX14
Olvassa el alább 📖 a magyar nyelvű használati útmutatót JVC AV-25LX14 (48 oldal) a televízió kategóriában. Ezt az útmutatót 7 ember találta hasznosnak és 2 felhasználó értékelte átlagosan 4.5 csillagra
Oldal 1/48

INSTRUCTIONS
GGT0045-001C-H
AV-29LS24 AV-21CS24
AV-29LX14 AV-21CX14
AV-29VS24 AV-21DX14
AV-29VX54 AV-21LX14
AV-29VX74 AV-21VS24
AV-29WX14 AV-21VX14
AV-29WX24 AV-21VX54
AV-25LS24 AV-21VX74
AV-25LX14 AV-21WS24
AV-25VS24 AV-21WX14
AV-25VX54 AV-21YX14
AV-25VX74
Contents
Knowing your TV’s features ....................................................... 3
Remote control buttons and basic functions .............................. 4
TV buttons and functions ........................................................... 6
Setting up your TV ..................................................................... 7
Basic setting for picture .............................................................. 9
Advanced setting for picture .....................................................11
Original features for picture ...................................................... 12
Basic setting for sound............................................................. 14
Advanced setting for sound ..................................................... 15
Favorite channel and video setting .......................................... 16
Customized setting .................................................................. 17
TV channel presetting .............................................................. 19
Additional preparation .............................................................. 22
Troubleshooting ....................................................................... 23
Specifications .............................................................. Back cover
COLOUR TELEVISION EQUALIZER • CINEMA SURROUND • COMPONENT INPUT
Downloaded from manuals search enginewww.Manualslib.com

2
15 cm
10 cm 10 cm 15 cm
WARNING: TO PREVENT FIRE OR SHOCK HAZARD, DO NOT
EXPOSE THIS APPLIANCE TO RAIN OR MOISTURE.
CAUTION: TO ENSURE PERSONAL SAFETY, OBSERVE THE
FOLLOWING RULES REGARDING THE USE OF THIS TV.
1 Operate only from the power source indicated on the rear of the TV.
2 Avoid damaging the power cord and mains plug. When unplugging the
TV, grasp the mains plug. Do not pull on the power cord.
3 Never block or cover the ventilation openings.
Never install the TV where good ventilation is unattainable.
When installing this TV, leave spaces for ventilation around the TV of
more than the minimum distances as shown.
4 Do not allow objects or liquid into the cabinet openings.
5 In the event of a fault, unplug the unit and call a service technician. Do
not attempt to repair it yourself or remove the rear cover.
6 The surface of the TV screen is easily damaged. Be very careful with it
when handling the TV. Should the TV screen become soiled, wipe it
with a soft dry cloth. Never rub it forcefully. Never use any cleaner or
detergent on it.
7 If you are not going to use this TV for a long period of time, be sure to
disconnect the AC plug from the AC socket.
8 The apparatus shall not be exposed to dripping or splashing and that
no objects filled with liquids, such as vases, shall be placed on the
apparatus.
WARNING: <AV-21WS24/AV-21WX14/AV-21YX14 only>
A REMOVABLE PLASTIC COVER IS FIXED TO THE
TELEVISION’S FRONT AUDIO/VIDEO CONNECTOR. TO
PREVENT THIS COVER FROM BEING ACCIDENTALLY
SWALLOWED BY BABIES OR CHILDREN, REMOVE IT
FROM THE TELEVISION AND STORE IT IN A SAFE
PLACE. IF THE COVER IS SWALLOWED SEEK THE
ADVICE OF A DOCTOR IMMEDIATELY.
Thank you for buying this JVC colour television.
To make sure you understand how to use your new TV, please read this manual thoroughly before you begin.
Downloaded from manuals search enginewww.Manualslib.com
3
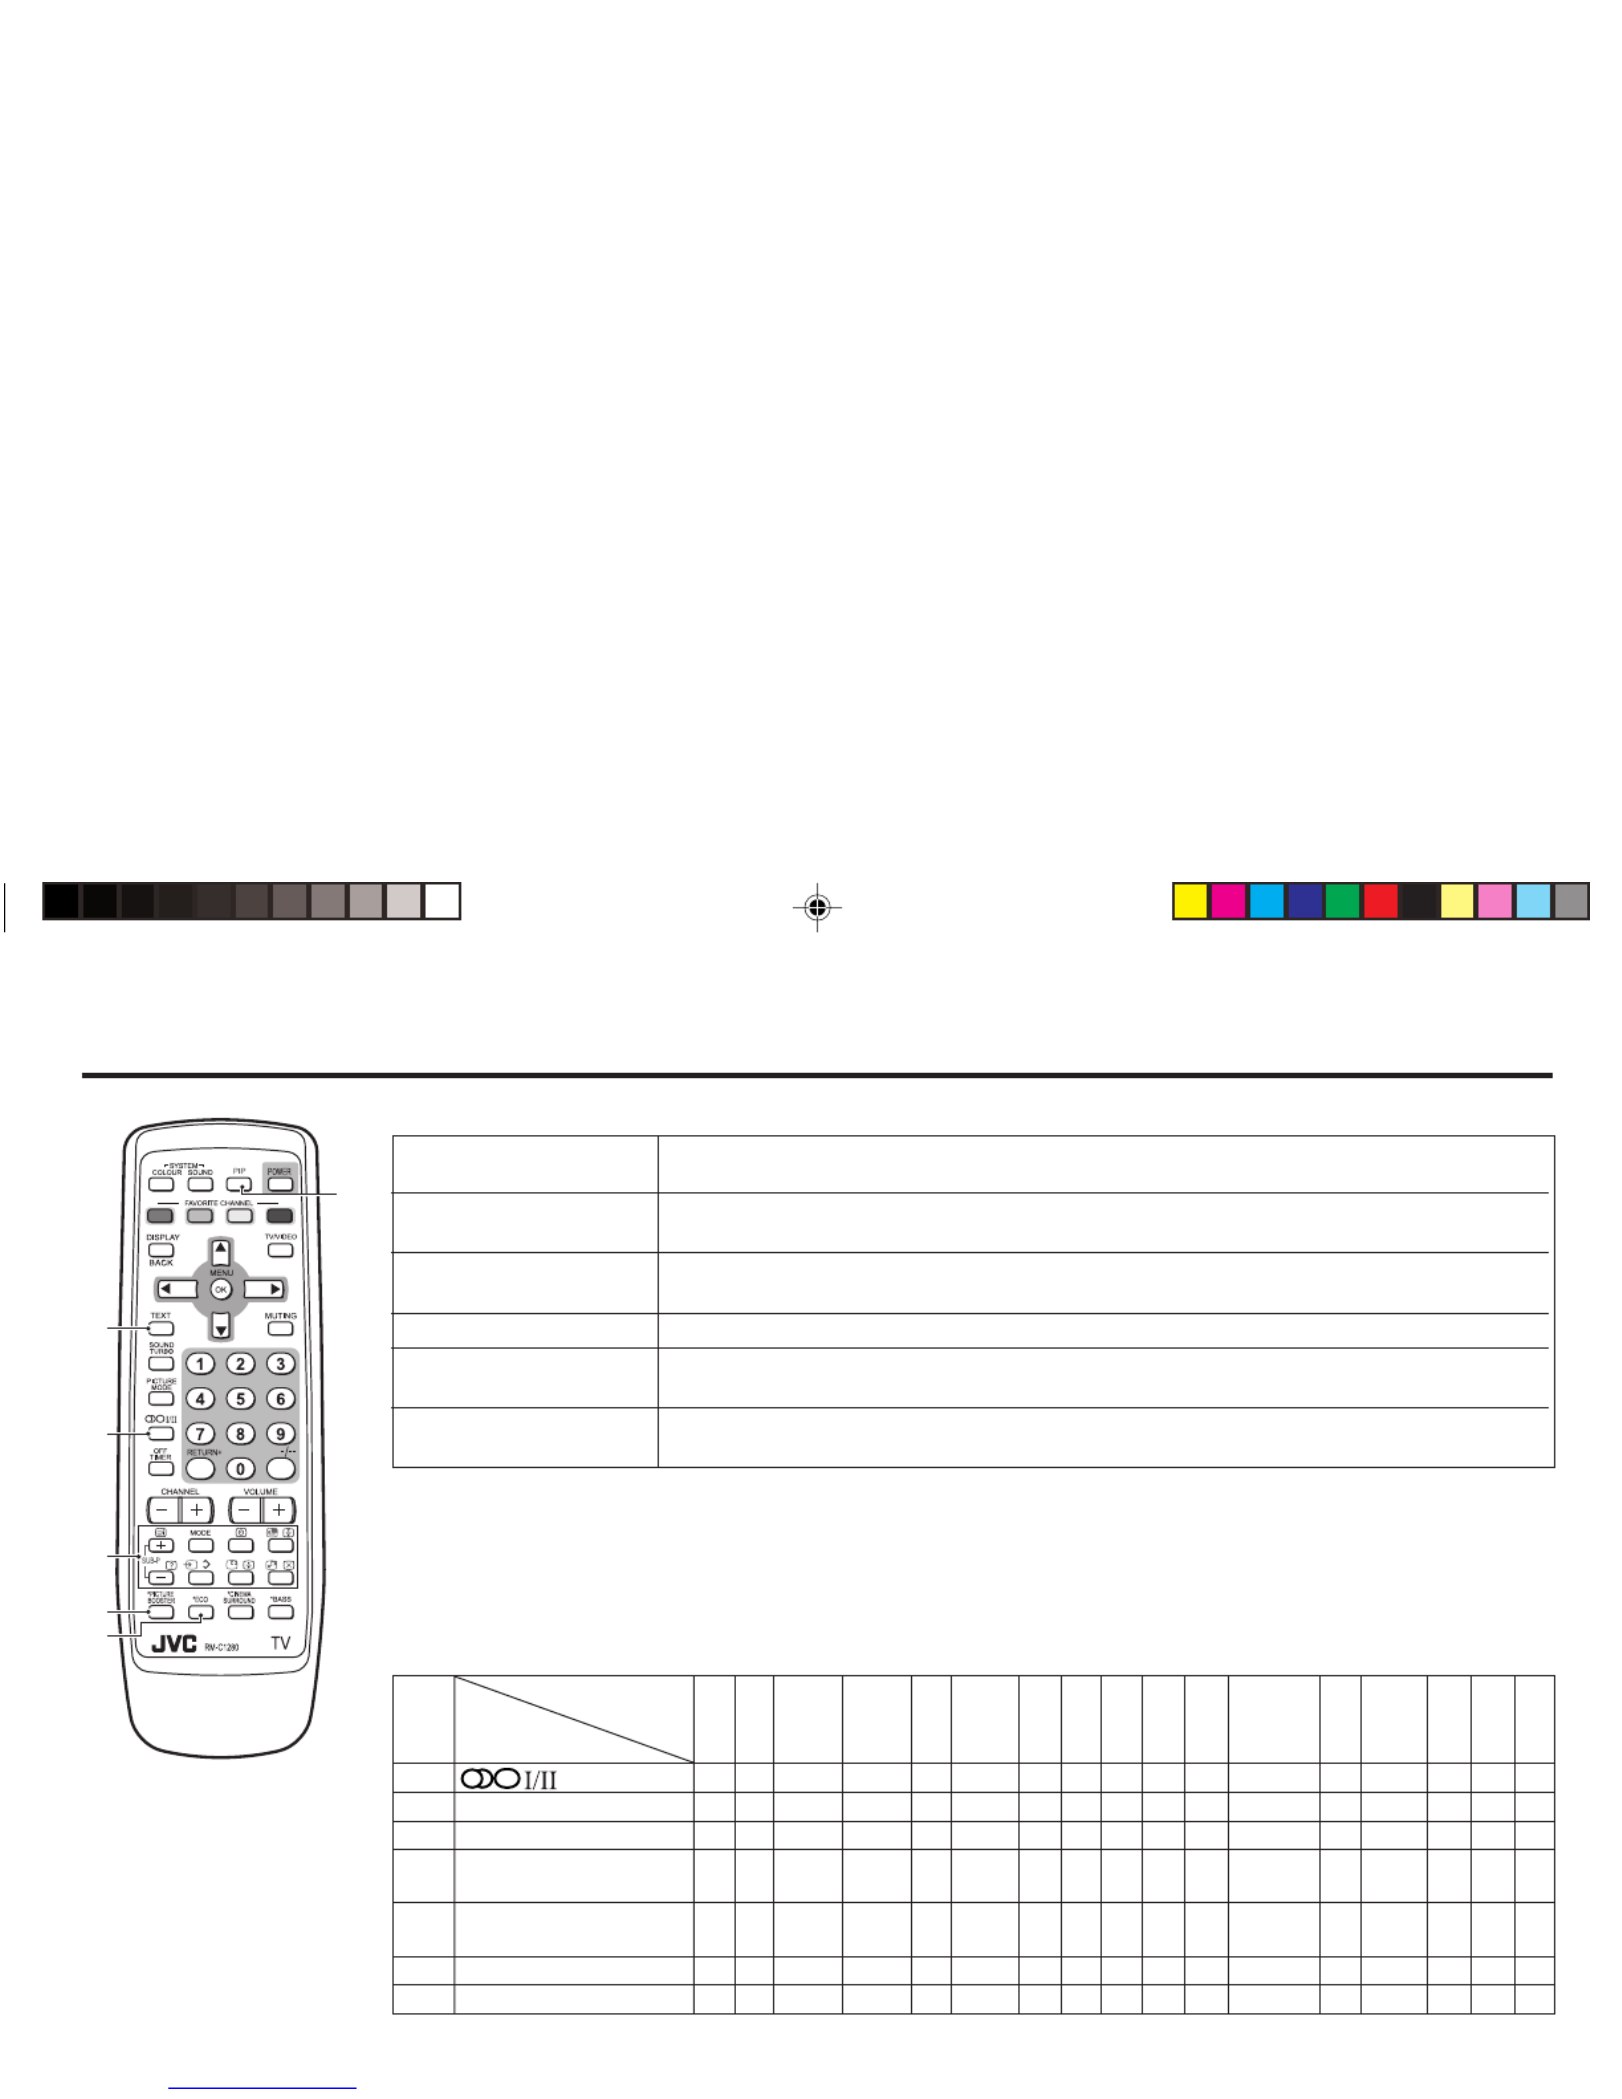
Knowing your TV’s features
5
1
2
4
3
6
Confirm your TV’s functions
Some functions written in this instruction manual may not be available for your TV.
Please see the chart below and check the functions that are equipped for your TV’s model number. The
model number is indicated at the rear of your TV. When you press a button concerned to a function that is
not available for your TV, it does not work and the logo appears on the screen. For a function that is“Ø”
not available for your TV, it is not displayed in the menu.
No.
1(STEREO/I■II)– – – – – – – _ _ _ _ _ – – – – –
2*PICTURE BOOSTER – – – – – – – – – – – – – – – – _
3*ECO – –_ ____–_– – _ _ _ –––
4 6,PIP control buttons
(Green label) – – – – _ _ ––––– – –––_ _
5 6,TELETEXT control
buttons (Black label) – – – – – – _ _ _ _ _ _ _ _ –––
–PICTURE TILT _ _ – – _–_ _ _ – – – _– – – –
–COMPRESS (16:9) _ _ _ _ _ _ _ _ _ _ –_ _ _ – –_
AV-29LX14
AV-29WX14
AV-25LX14
AV-21LX14
AV-21VX14
AV-21WX14
AV-29VX54
AV-25VX54
AV-21VX54
AV-29WX24
AV-29LS24
AV-29VS24
AV-25LS24
AV-21CS24
AV-25VS24
AV-21WS24
AV-21VS24
AV-29VX74
AV-25VX74
AV-21VX74
AV-21CX14
AV-21DX14
AV-21YX14
Model No.
Function
Main features
PIP (Picture in Picture) You can view two different sources (e.g. TV programme and VCR sources) at the same
time.
TELETEXT You can view teletext programmes which are broadcasted by some TV channels. Teletext
programme is an information in text form.
A2/NICAM You can listen to the stereo sound or bilingual sound from TV programme broadcasting by A2
(STEREO / I■II)or NICAM Sound-multiplex system.
FAVORITE CH (Channel) You can register up to four favorite channels for quick recall with one press.
AI ECO TV detects the brightness of your room and automatically adjust the picture brightness to a
suitable level for a better eye care.
AI VOLUME TV adjusts the volume automatically to the same level for all TV channels to avoid sudden
change of the volume when selecting different TV channel.
Downloaded from manuals search enginewww.Manualslib.com

4
Remote control buttons and basic functions
8
2
!
4
1
6
3
7
9
5
No. Press To
1POWER Turn on or off the TV from standby mode.
2MENU/OK Display menu and confirm selected function.
35 ∞ 2 3 / / / Select and adjust menu function.
4CHANNEL -/+ Select the desired channel number.
5VOLUME -/+ Adjust the volume level.
6TV/VIDEO Select TV or video terminal input.
7MUTING Turn off the volume.
Press this button again to resume the volume.
8DISPLAY Display the programme number or video terminal number, stereo/bilingual broadcast system
and PR list (channel list) on the screen.
You can select the channel using the PR list.
1Press the DISPLAY button once to display the PR list.
2Press 5 / ∞ / 2 / 3 buttons to choose a channel, then press the MENU/OK button.
You can confirm the favorite channels in the PR list. The channels set to favorite channels are
indicated with coloured mark.
90~9, -/-- Select the programme number. For two digits programme number, press -/--, then press the
number button.
!RETURN+a) Return to the frequently view channel with one touch.
1Choose the channel you want to register.
2Press and hold RETURN+ button until “ ”RETURN PLUS PROGRAMMED! appears.
To cancel, press and hold RETURN+ button until RETURN PLUS CANCELED! appears.“ ”
b) Return to the previously viewed channel, if you have not set or have cancelled the Return
channel as above.
Downloaded from manuals search enginewww.Manualslib.com

5
Remote control buttons and basic functions (continued)
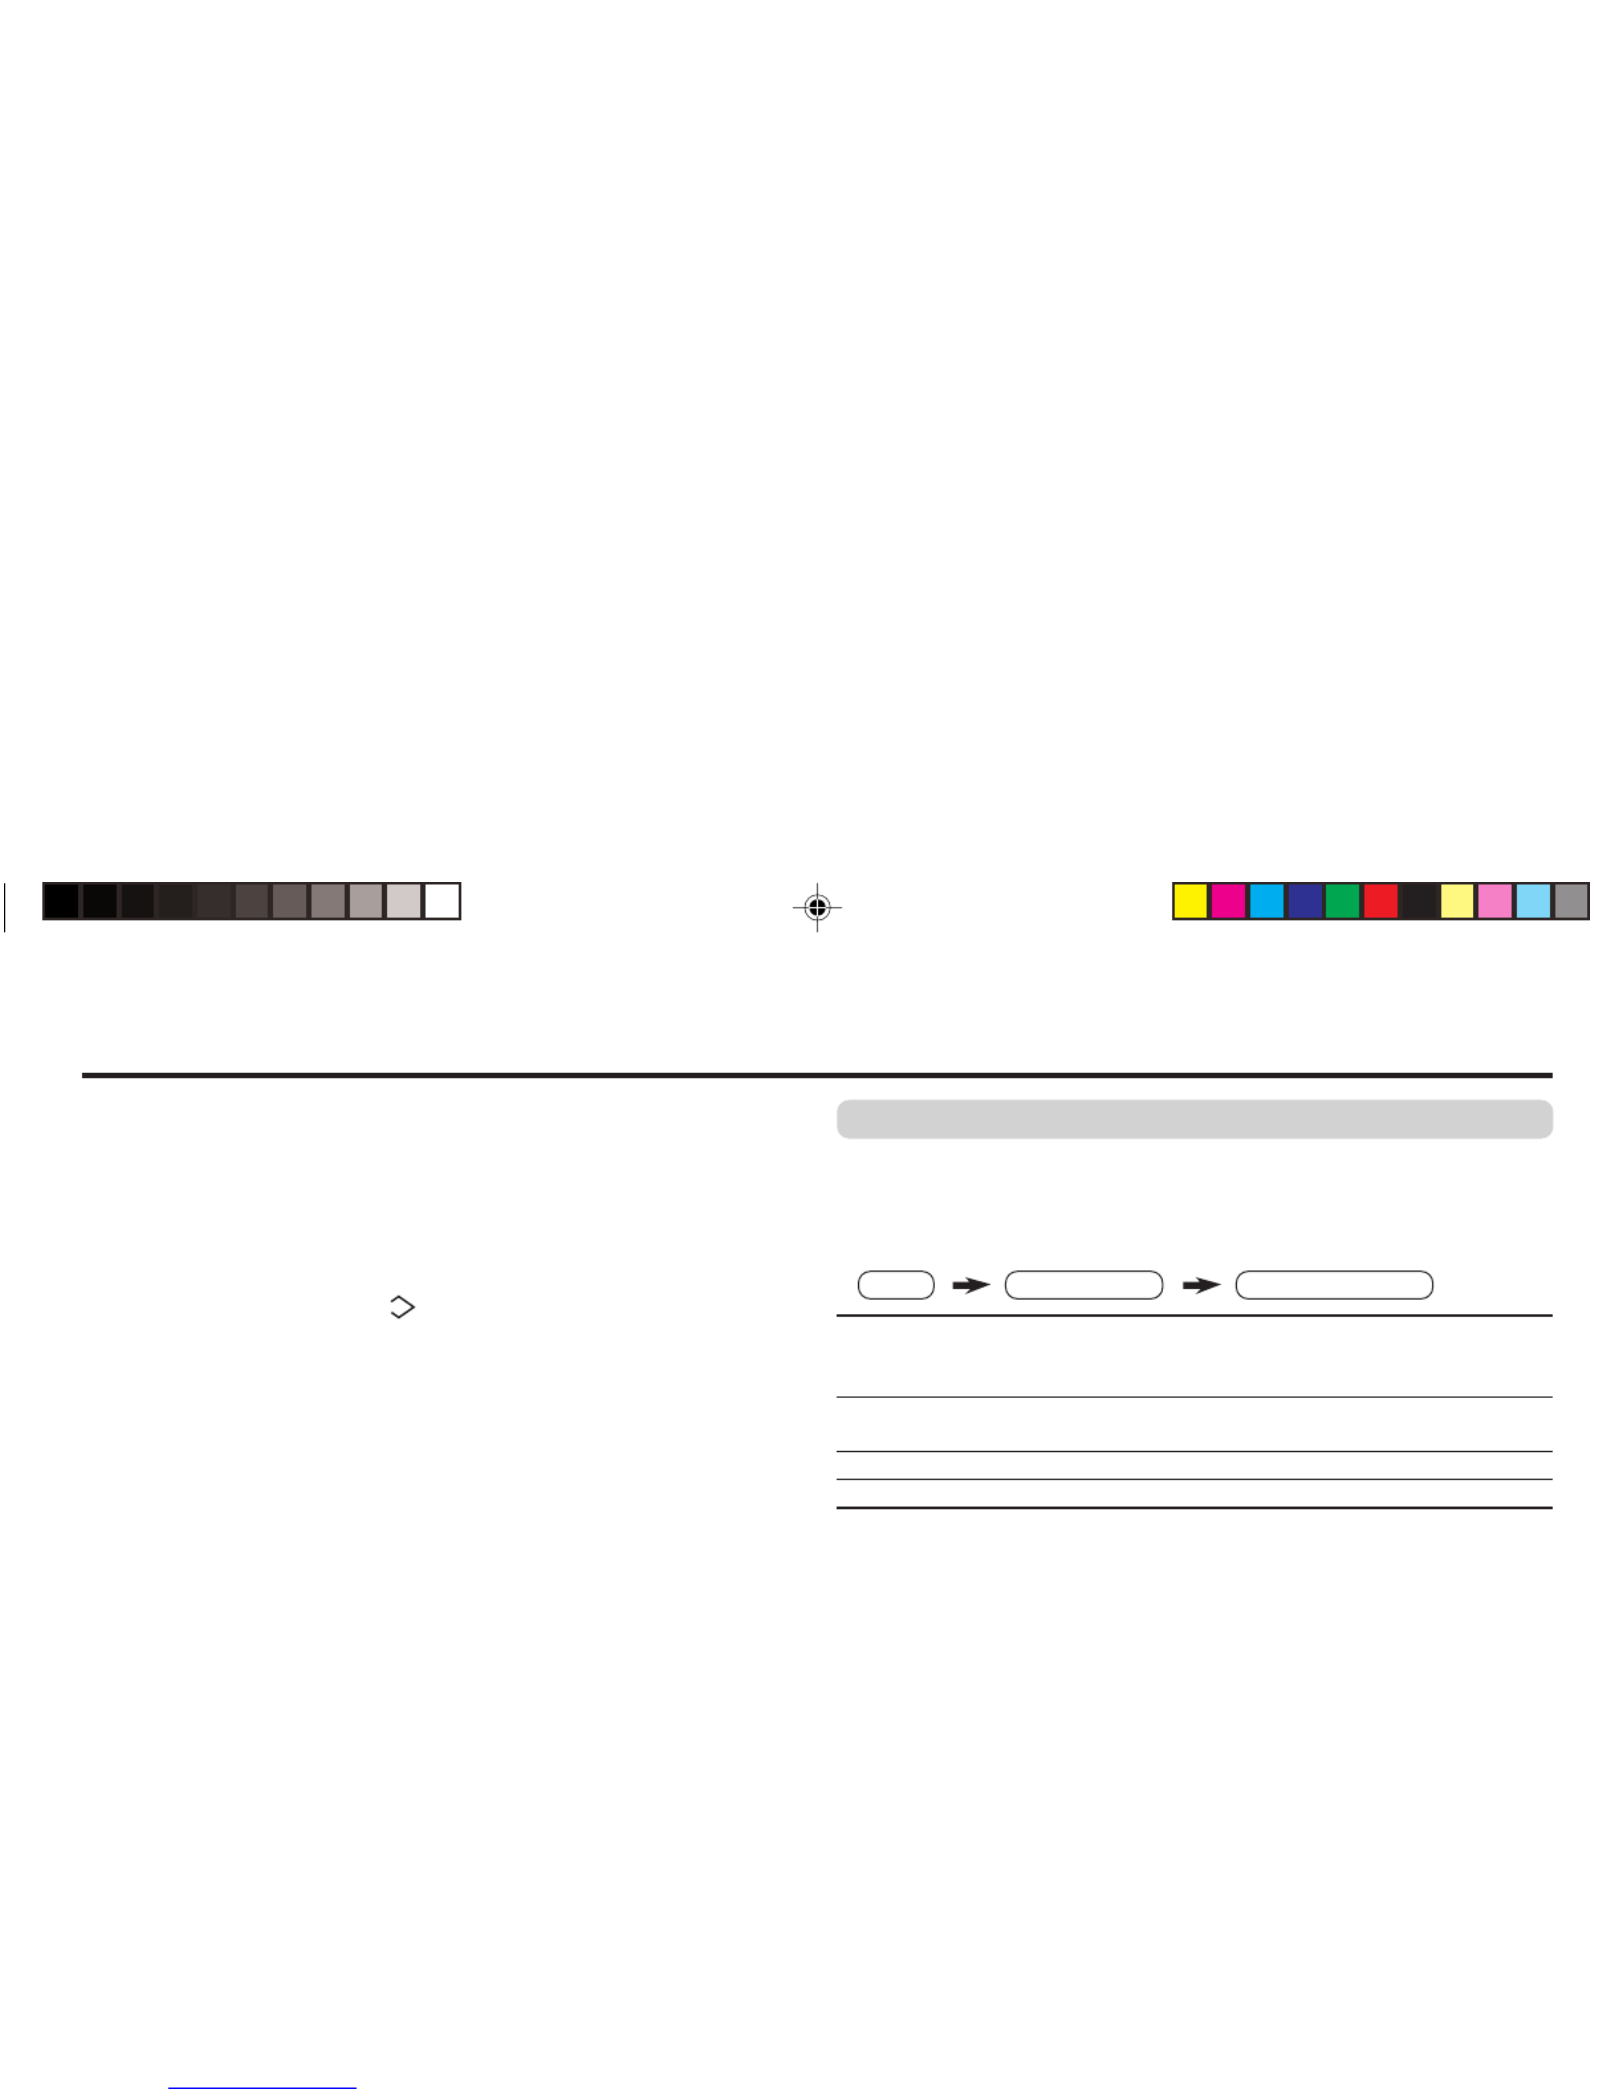
The following chart shows locations of functions in menus. In this manual,
location of a function is described as follows:
Note: Some functions have the 4th menus as the sub-menus.
To
Display the MENU
Display the top
menu
Display the 2nd
menu
Display the 3rd
menu
Return to the
previous menu
Choose the setting
of a function
Adjust the effect
level of a function
Display the sub
menu of a function.
Operation
Press the MENU/OK button 2.
Press 5 ∞/ buttons to choose a3
menu title. Then press MENU/OK
button 2.
Press 5 ∞/ buttons to choose a3
menu title. Then press MENU/OK
button 2.
Press 5 ∞/ buttons to choose a3
menu title. Then press MENU/OK
button 2.
Press the DISPLAY button 8.
Press /5 ∞ buttons 3 to choose
a function. Then press the 2 3/
buttons 3 to change the setting.
Press /5 ∞ buttons 3 to choose
a function. Then press the 2 3/
buttons 3 to adjust the effect
level.
Press the 5 ∞/ buttons 3 to
choose a function. Then press
MENU/OK button to display2
the sub menu.
Note
To exit the MENU,
press the DISPLAY
button 8 or choose
EXIT menu.
Press ∞ button 3 to
display the next page
for more functions.
–
Press the MENU/OK
button 2 to exit from
the menu.
–
Top menu 2nd menu Location 3rd menu Location
MENU INPUT EXT. INPUT P.18 – –
DISPLAY P.18 – –
PICTURE PICTURE MODE P.9 – –
PICTURE SETTING P.10 – –
WHITE BALANCE P.10 – –
PICTURE – VNR P.17
FEATURES
FAVORITE CH SETTING
P.16
VIDEO SETTING P.16
COLOUR SYSTEM P.9
PICTURE BOOSTER P.10
COMPRESS (16:9) P.11
PICTURE TILT P.11
SOUND STEREO/
I
■
II
P.15 – –
AI VOLUME P.15 – –
SOUND MODE P.14 – –
EQUALIZER P.15 – –
BALANCE P.14 – –
SOUND TURBO P.14 – –
CINEMA SURROUND
P.15 – –
FEATURES OFF TIMER P.17 – –
CHILD LOCK P.17 – –
AI ECO SENSOR P.11 – –
PIP – PIP,SUB INPUT,SWAP P.12
INSTALL AUTO PROGRAM P.19 – –
EDIT/MANUAL P.19 DELETE, MOVE, P.19-
MANUAL, INSERT P.20
LANGUAGE P.17 LANGUAGE P.17
BLUE BACK P.11 – –
AUTO SHUTOFF P.18 – –
VIDEO-2 SETTING P.18 – –
AI ECO DISPLAY P.11 – –
TEXT LANGUAGE P.13 TEXT LANGUAGE P.13
EXIT – – – –
How to operate menus and menus locations
MENU Top menu 2nd menu
Top menu 3rd menuMENU 2nd menu
*If you want to
adjust PICTURE
SETTING menu,
you must set
PICTURE MODE
menu to USER.
*If you want to
adjust
EQUALIZER
menu, you must
set SOUND
MODE menu to
USER.
Downloaded from manuals search enginewww.Manualslib.com

6
TV buttons and functions
The illustrations shown below is for AV-29VS24 and AV-21CS24 only, which are used for explanation purpose.
Your TV may not look exactly the same as illustrated.
IN (VIDEO-3)
V R
MENU
OK
L/MONO
CHANNEL
VOLUM E
TV/VIDEO
EXIT
POWER
! 9 8 7 6 5 234 1
Front of the TV
AV-29VS24
Rear of the TV
AV-29VS24
! 9 8 7 6 4
IN (VIDEO-2)
VR
L / MONO
POWER
2 1
OK
CHAN
NEL
VOLUME
MENU
V
L
RR
L/MONO
Y
CB
CR
/
V
V
S
OVER
L
R
/
MONO
OUTPUT
VIDEO-1 COMPONENT
(VIDEO-2)
INPUT
INPUT
%$ # "
V
L
R
V
L
R
/
MONO
OUTPUT
VIDEO-1
INPUT
%# "
AV-21CS24
AV-21CS24
No. Button/terminal Description Page
1L (main power) Press to turn on or turn off the TV s main power.’ –
2POWER lamp Indicate the TV is being turned on or off. –
No colour : TV’s main power is being turned off.
Red : TV’s main power is being turned on.
Note: When you turn off the power switch while TV is in standby
mode, the light of power lamp will be off in 10 -15 seconds.
3ECO sensor –
4Remote control sensor –
5TV/VIDEO Press to select TV or video mode. –
6VOLUME -/+ Press to adjust the volume level. –
7CHANNEL -/+ Press to select the desired channel. –
8MENU Press to display the menu. –
9IN (VIDEO-3) Video and audio input jacks for VIDEO-3 mode. 22
IN (VIDEO-2) Video and audio input jacks for VIDEO-2 mode. 22
!Headphone jack. 22
"Aerial socket. 7
#OUTPUT Video and audio output jacks. (The component video 22
signal cannot be output.)
$COMPONENT Video or component video, and audio input jacks for 22
(VIDEO-2) INPUT VIDEO-2 mode. You can select the input signal by setting
the “VIDEO-2 SETTING” function (see page 18).
%VIDEO-1 INPUT Video or S-VIDEO, and audio input jacks for VIDEO-1 7
mode
How to operate the menus with the TV button
TV button Work as same as the button on the Note
remote control unit
MENU MENU/OK button To display main menu and exit
menu after finish setting.
CHANNEL -/+ ∞ 5/ button To select menu function.
VOLUME -/+ 2 3/ button To adjust the desired function.
Downloaded from manuals search enginewww.Manualslib.com
7
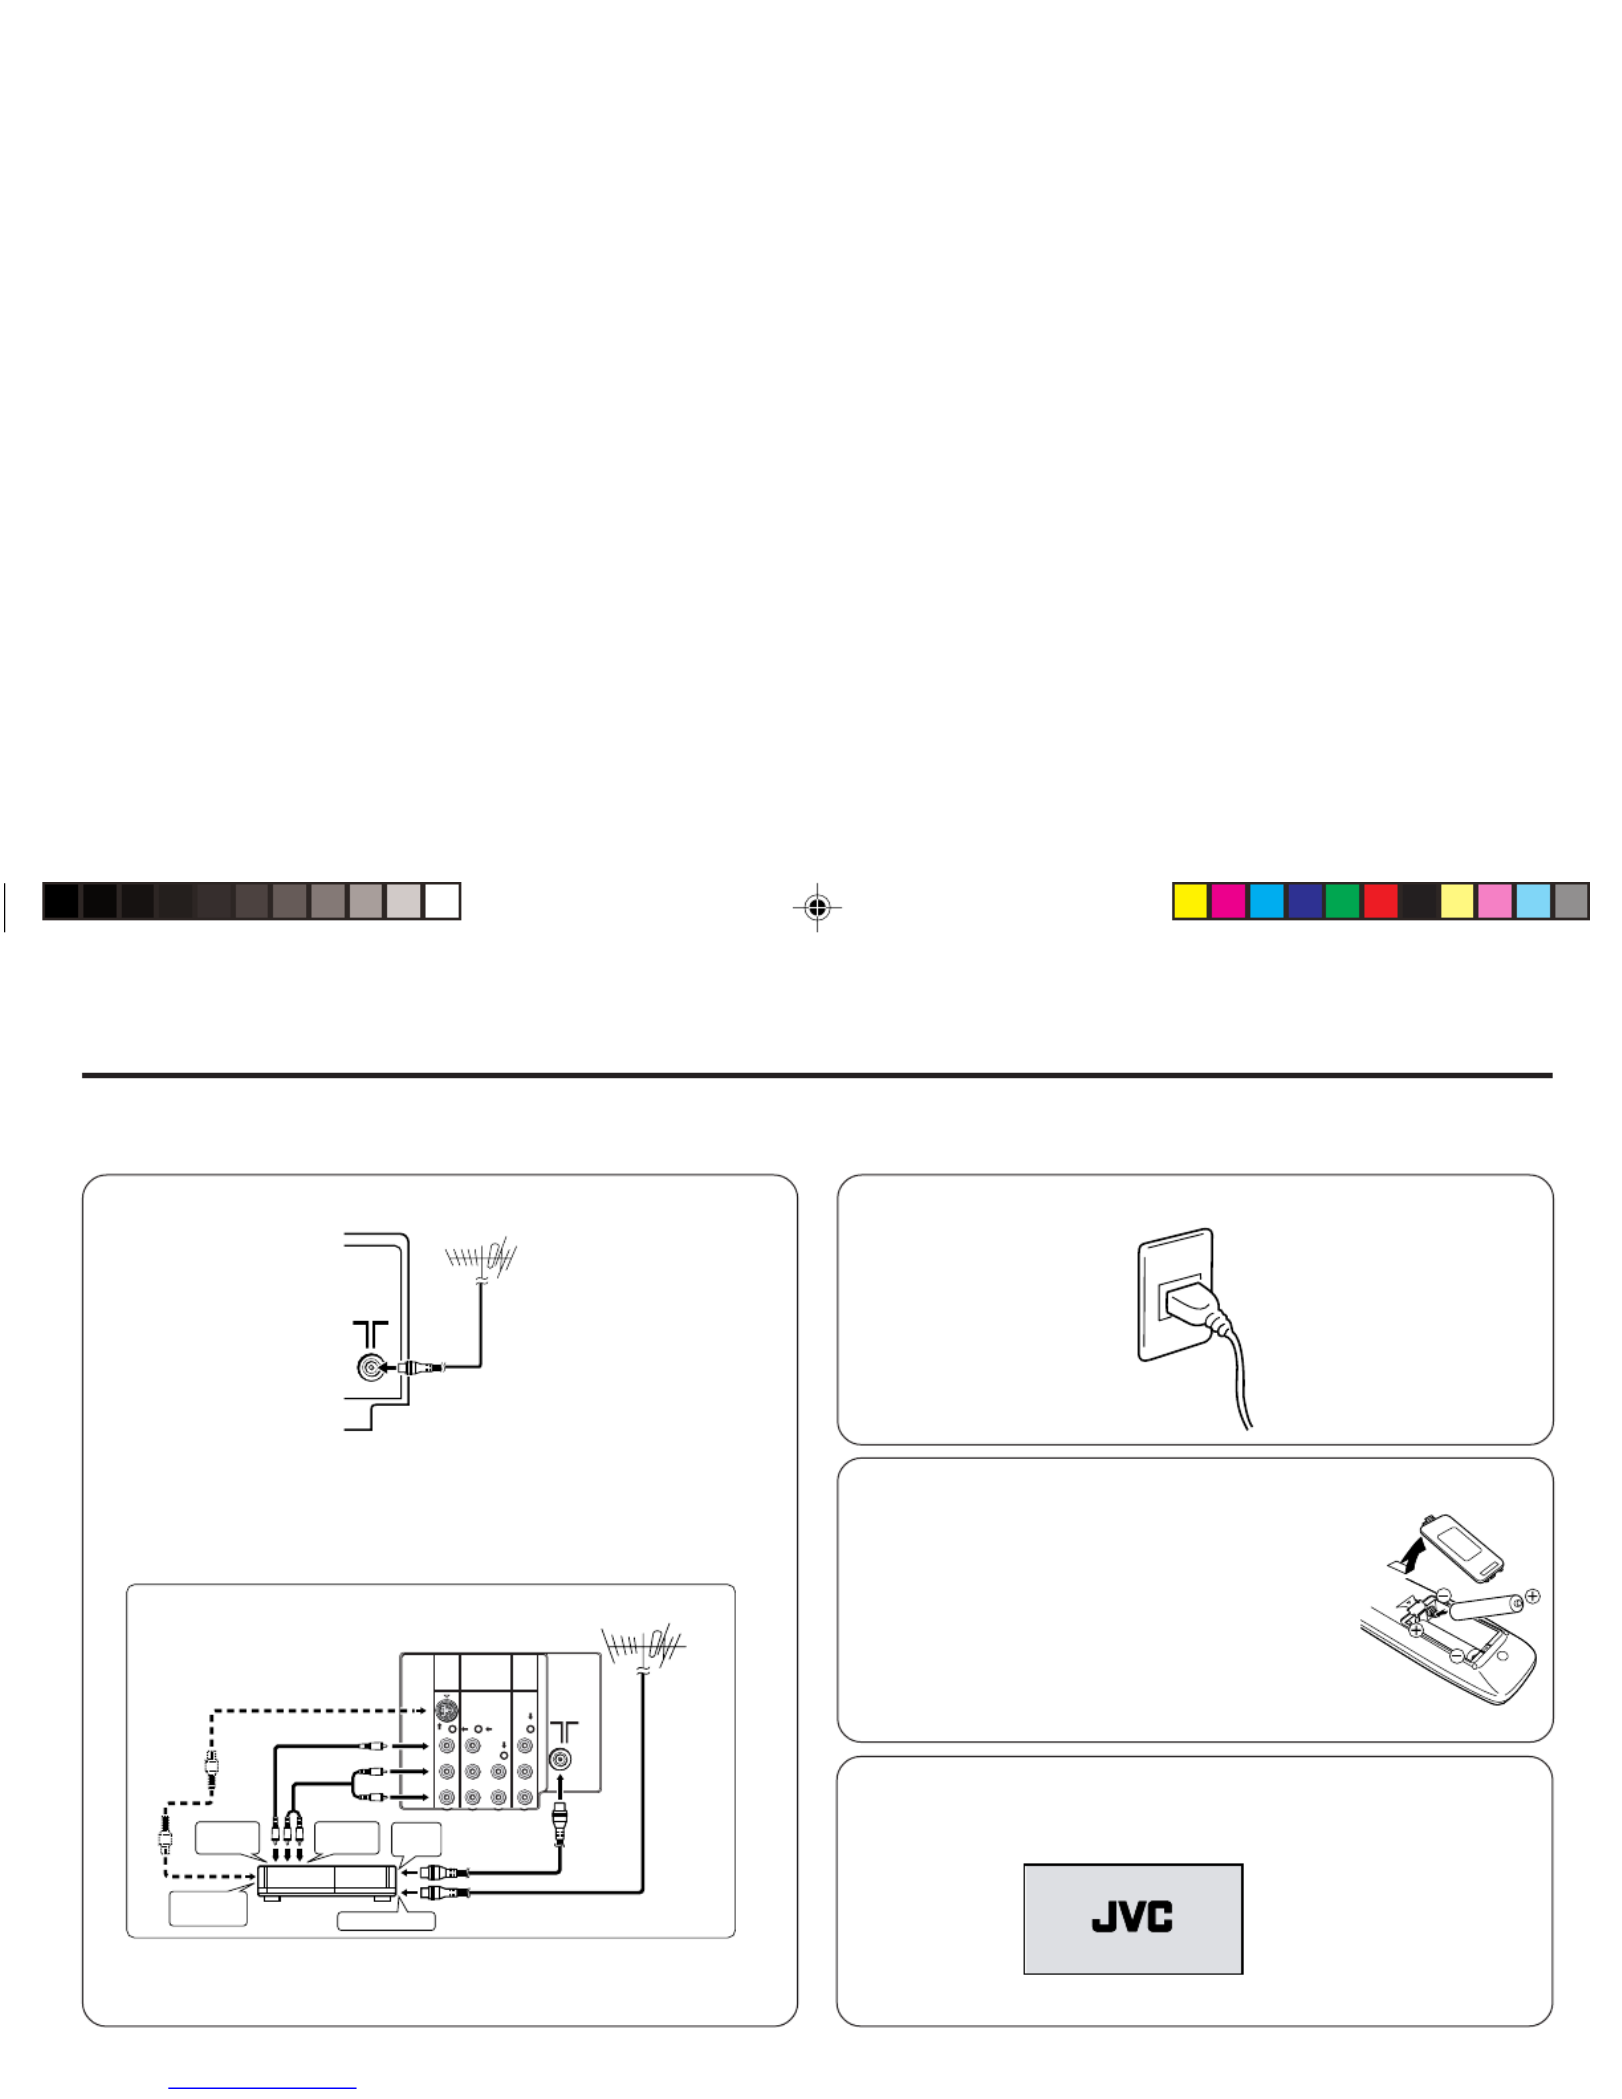
2Connecting the compatible main plug to the AC outlet.
Setting up your TV
CAUTION
•Turn off the equipment including the TV before connecting.
VHF/UHF outdoor aerial
75-ohm coaxial cable (not supplied)
1Connecting the aerial cable.
3Inserting batteries into the remote control.
Insert two batteries by following the + and -
polarities and inserting the end first.-
CAUTION:
Follow the cautions printed on the batteries.
Notes:
•Use AA/R6/UM-3 dry cell batteries.
•If the remote control does not work properly, fit
new batteries. The supplied batteries are for testing,
not regular use.
4Turn on the TV by pressing the main power button.
JVC logo appears on the screen.
V
L
RR
L/
MONO
Y
C
B
C
R
/
V
V
S
OVER
L
R
/
MONO
OUTPUT
VIDEO-1
INPUT
To RF
output
To video
output
To S-video
output To aerial input
To audio
output
COMPONENT
(VIDEO-2)
INPUT
Rear of TV
AV-29VS24
VHF/UHF outdoor aerial
VCR
If you connect a VCR, connect the aerial output jack of your VCR
and the aerial jack on the TV with aerial cable. Then connect the
output jacks of your VCR and the VIDEO-1 input jacks of the TV
with the video cable (or S-VIDEO cable if available) and audio
cables. For details, see the manual of your VCR.
The illustration shown is just a sample. It may not be same as your
TV.
Downloaded from manuals search enginewww.Manualslib.com

8
5Making the initial settings
Set up your TV by pressing any button except POWER button, then operate the TV menu by following the steps as below:
•Press /5 ∞ button to
select your desired
language*, then press
MENU/OK button.
•Press /5 ∞ button to
select your desired
Teletext language
group*. For details,
see page 13.
(For CS24/LS24/
VS24/VX74/WS24/
WX24 series only)
•TV will start searching
for the channels.
To stop AUTO
PROGRAM, press
MENU/OK button.
•Press the red button to
cancel the SETUP TOUR
RESTART function.
If you want to make initial
settings again when the
next time you turn on the
TV, press the MENU/OK
button to activate the
SETUP TOUR RESTART
function.
LANGUAGE
ENGLISH
êìëëäàâ
FRANÇAIS
TEXT LANGUAGE
SETUP TOUR RESTART?
AUTO PROGRAMAUTO PROGRAM
OK
CH 12
22%
GROUP 1–
GROUP 2–
GROUP 3–
GROUP 4–
BACK ■
OK
BACK ■
OK
OK
RESTART
■
NO
EDIT
BACK ■
■
INSERT
OK
MOVE
■
DELETE
■
MANUAL
PR CH/CC
7 CH 09
8 CH 11
9 ■ CH 13
3
10
11
12
13
Setting up your TV (continued)
•To complete the initial
setting, press the
MENU/OK button. To
edit the channel list,
see page 19.
If the JVC logo does not appear, use LANGUAGE, TEXT LANGUAGE, and AUTO PROGRAM functions to make the initial settings.
Those functions are located in the INSTALL menu.
If the JVC logo appears, although you had made the initial settings, press the TV/VIDEO button to exit from initial settings.
* If the TEXT function is available for your TV and the LANGUAGE shown follow as ENGLISH/РУССКИЙ/ / /FRANÇAIS,
you can select the TEXT LANGUAGE group from GROUP-1 to GROUP-4.
If the TEXT function is available for your TV and the LANGUAGE shown follow as ENGLISH/РУССКИЙ/
/MELAYU/INDONESIA,
you can select the TEXT LANGUAGE group from GROUP-1 to GROUP-3.
Downloaded from manuals search enginewww.Manualslib.com

10
Adjusting the picture – USER
You can adjust the desired picture setting when selecting USER
in PICTURE MODE.
1Select the USER in PICTURE MODE under PICTURE menu.
2Select the PICTURE SETTING in PICTURE menu, then adjust
the setting.
CONTRAST 2 : Lower contrast 3 : Higher contrast
BRIGHT 2 : Darker 3 : Brighter
SHARP 2 : Softer 3 : Higher
COLOUR 2 : Lighter 3 : Deeper
TINT* 2 : Reddish 3 : Greenish
*TINT can only be adjusted in NTSC system.
PICTURE BOOSTER
You can improve picture clarity when the picture is unclear due
to the low signal reception.
Press the PICTURE BOOSTER button to select the desired
mode.
HIGH Perform at maximum level.
LOW Perform at minimum level.
OFF Cancel the function
To operate this function with a menu:
Basic setting for picture (continued)
MENU PICTURE menu PICTURE FEATURES menu
PICTURE BOOSTER
WHITE BALANCE
You can change the white balance of the picture to better match
the type of video being viewed.
Select the WHITE BALANCE in the PICTURE menu, then choose
the desired setting.
NORMAL Normal white balance.
COOL Bluish white.
WARM Reddish white.
❇About the basic operations of the menu, please see the How“
to operate menus and menus locations on page 5.”
MENU PICTURE menu WHITE BALANCE
MENU PICTURE menu PICTURE MODE
USER
MENU PICTURE menu PICTURE SETTING
❇
❇
❇
❇
Downloaded from manuals search enginewww.Manualslib.com

11
AI ECO SENSOR (ECO)
You can adjust TV screen contrast according to the brightness of
your room.
Press the ECO button to select the desired mode.
1 Mild contrast (recommended).
2 Even contrast.
OFF Cancel the function.
To operate this function with a menu:
You can display the graphic of AI ECO SENSOR on the screen.
Select the AI ECO DISPLAY in the INSTALL menu, then choose
ON or OFF.
Correcting the Slanting Picture (PICTURE TILT)
You can correct the picture tilt caused by the earth’s magnetic force.
1Select the PICTURE TILT in the PICTURE FEATURES menu
under PICTURE menu, then press MENU/OK button.
The following display appears.
2Press the buttons until the picture become level. Then5 ∞/
press the MENU/OK button.
COMPRESS (16:9)
You can convert a normal picture (4:3 aspect ratio) into a wide
picture (16:9 aspect ratio).
Select the COMPRESS (16:9) in the PICTURE FEATURES menu
under PICTURE menu, then choose ON or OFF.
BLUE BACK
You can set the TV to automatically change to a blue screen and
mute the sound if the signal is weak or absent, or when there is
no input from an antenna.
Select the BLUE BACK in the INSTALL menu, then choose ON or
OFF.
If you wish to continue viewing the poor picture, cancel the BLUE
BACK function.
❇About the basic operations of the menu, please see the “How
to operate menus and menus locations” on page 5.
Advanced setting for picture
MENU FEATURES menu AI ECO SENSOR
MENU PICTURE menu PICTURE FEATURES menu
PICTURE TILT
BACK ■
OK
MENU PICTURE menu PICTURE FEATURES menu
COMPRESS (16:9)
MENU INSTALL menu BLUE BACK
❇
❇❇
❇
PICTURE TILT
MENU INSTALL menu AI ECO DISPLAY
❇
Downloaded from manuals search enginewww.Manualslib.com

12
PIP
You can display a sub picture on the screen.
Press the PIP operation buttons to display and change the sub
picture setting.
PIP Display the sub picture.
To cancel, press the PIP button again.
Notes:
•You can hear the sound from the main picture only.
•Main picture and sub picture will use different input
sources, which are TV and VIDEO mode.
When the same input source are selected, the sub
picture input source will change as follows:
Main picture Sub picture
TV VIDEO-1 = = VIDEO-2 VIDEO-3
VIDEO-1 TV
=
VIDEO-2
=
VIDEO-3
VIDEO-2 TV
=
VIDEO-1
=
VIDEO-3
VIDEO-3 TV
=
VIDEO-1
=
VIDEO-2
SUB-P -/+ Select the desired channel for sub picture.
(Input) Select the input source for the sub picture.
(Swap) Swap between the main picture and sub picture.
(Position) Change the sub picture position.
Each time you press on (Position) button, the sub
picture position will change as follows:
(Freeze) Freeze the sub picture to be still.
To operate this function with a menu:
When VIDEO-2 is set to component, you can t select VIDEO-2 for’
sub picture.
Original features for picture
When VIDEO-2 is set to component, if the input source of main
picture is set to VIDEO-2 with component, PIP button is disabled
and sub picture can t be displayed.’
TELETEXT
You can watch the Teletext broadcast channel with TEXT function.
1Press the TEXT button to select the desired mode as follows:
2Press the CHANNEL -/+ buttons, number buttons or colour
buttons to select other Teletext pages.
3Press TEXT or TV/VIDEO button to return to TV mode.
You can also operate the teletext using the following buttons:
(Hold) Hold a teletext page.
The (Hold) are displayed at the top left of the screen.
To cancel, press (Hold) button again.
(Reveal) Display the hidden text (e.g. answers to a quiz).
To cancel, press (Reveal) button again.
(Size) Enlarge the teletext display.
(Index) Return to the index page instantly.
(Cancel) Watch TV programme while waiting for a teletext page.
When the teletext page is found, a page number
appears at the upper left of the screen.
Press (Cancel) to view the teletext page.
(Sub-page) Operate the (Sub-page) function.
Sub-page numbers are displayed at the left of the
screen.
To cancel sub-page function, press (Sub-page)
button again.
❇About the basic operations of the menu, please see the How“
to operate menus and menus locations on page 5.”
lower right lower left upper left
upper right
MENU FEATURES menu PIP
TV mode TEXT mode MIX mode
❇
Downloaded from manuals search enginewww.Manualslib.com
13
Original features for picture (continued)
Using the List mode
You can store and recall the favorite teletext pages in memory
using the colour buttons.
1In TEXT mode, press the MODE button to enter the List mode.
2Press a colour button, then press the number buttons to enter
the page number.
3Press and hold down the (Store) button.
The page number is blinking white to indicate that they are
stored in memory.
4To store other favorite teletext pages, repeat Step 2 to 3.
To recall the favorite teletext page, press the MODE button, then
press the colour button.
To exit the List mode, press the MODE button again.
When viewing teletext programme, menu operations are not available.
If characters on a teletext programme do not appear properly,
change the TEXT LANGUAGE setting.
TEXT LANGUAGE
You can set the Teletext language group that corresponds to the
programmes.
Select TEXT LANGUAGE in the INSTALL menu, then choose the
desired language group.
GROUP-1 English, German, Swedish / Finnish / Danish /
Hungarian, Italian, French, Spanish / Portuguese,
Turkish
GROUP-2 Polish, German, Estonian, Slovenian, Czech /
Slovakian, Rumanian
GROUP-3 Polish, German, Estonian, Lettish, Russian, Ukrainian
GROUP-4 English, French, Turkish, Arabic, Iranian
Depending on the broadcast, the language set may not display
properly. For details, see in page 8.
❇About the basic operations of the menu, please see the How“
to operate menus and menus locations on page 5.”
MENU INSTALL menu TEXT LANGUAGE
❇
Downloaded from manuals search enginewww.Manualslib.com

14
SOUND SYSTEM
You can select an appropriate sound system when abnormal
sound occurs even when the picture appears normally.
Press the SOUND SYSTEM button to select a setting.
This function is not available in video mode.
For the sound system in each country or region, see the table
below:
Basic setting for sound
B/G I D/K M
Area Country or Region System
Bahrain, Kuwait, Oman, Qatar, United Arab Emirates,
Yemen, etc. B/G
Indonesia, Malaysia, Singapore, Thailand, India, etc.
Asia, Middle China, Vietnam, etc. D/K
East Hong Kong, etc. I
Islamic Republic of Iran, Lebanon, Saudi Arabia, etc. B/G
Philippines, Taiwan, Myanmar, etc. M
Russia, etc. D/K
Europe Czech Republic, Poland, etc. D/K
Germany, Holland, Belgium, etc. B/G
UK, etc. I
Oceania Australia, New Zealand, etc. B/G
Republic of South Africa, etc. I
Africa Nigeria, etc. B/G
Egypt, Morocco, etc. B/G
SOUND MODE
You can choose the desired sound setting.
Select the SOUND MODE in SOUND menu, then choose the
setting.
USER You can change this sound setting as you like.
Select USER and adjust the frequencies in EQUALIZER
(100, 300, 1K, 3K, 8K Hz).
For details, see on page 15.“ ”EQUALIZER
DYNAMIC Emphasize on both vocal sound and music.
MUSIC Emphasize on music effect.
NEWS Emphasize on vocal sound.
BALANCE
You can adjust the volume balance between the left and right
speakers.
Select the BALANCE in SOUND menu, then adjust the setting.
SOUND TURBO
You can set the sound frequency to emphasize the low and high
frequency levels.
Press the SOUND TURBO to select ON or OFF.
To operate this function with a menu:
❇About the basic operations of the menu, please see the How“
to operate menus and menus locations on page 5.”
MENU SOUND menu SOUND MODE
MENU SOUND menu BALANCE
❇
❇
MENU SOUND menu SOUND TURBO
❇
Downloaded from manuals search enginewww.Manualslib.com

15
CINEMA SURROUND
You can enjoy an enhanced sound for wider audience.
Press the CINEMA SURROUND button to select a setting.
OFF Cancel the function.
LOW Listen to sound with less wider audience effect.
HIGH Listen to sound with more wider audience effect.
MONO Listen to mono sound with stereo effect.
To operate this function with a menu:
If slight volume distortion occurs when you select HIGH mode,
change the setting to LOW mode. The CINEMA SURROUND
effect will be less noticeable.
If you use CINEMA SURROUND and SOUND TURBO together,
volume distortion might occurs.
STEREO / I ■II ( )
You can enjoy the stereo and bilingual broadcasted programmes.
Press the button to select the desired mode.
Select stereo sound.
Select monaural sound.
ISelect bilingual I I (sub ).
II Select bilingual II (sub II).
MONO Cancels the Multi Sound function, and the sound
becomes monaural.
This function is not available in video mode.
To operate this function with a menu:
Advanced setting for sound
MENU SOUND menu CINEMA SURROUND
MENU SOUND menu STEREO / I■II
EQUALIZER
You can adjust the sound frequencies when selecting USER
mode in SOUND MODE.
1Select the USER in SOUND MODE under SOUND menu.
2Select the EQUALIZER in SOUND menu.
The following display appears.
3Select and adjust the desired frequencies.
4Press the MENU/OK button to exit the menu.
Adjust high frequency will affect higher pitch sound and vice versa.
AI VOLUME
You can adjust the volume of all the channels and video inputs to
the same level automatically.
Select the AI VOLUME in SOUND menu, then choose ON or OFF.
❇About the basic operations of the menu, please see the How“
to operate menus and menus locations on page 5.”
MENU SOUND menu SOUND MODE USER
MENU SOUND menu EQUALIZER
EQUALIZER
IIIIIIIIIIII
IIIIIIIIIIIIIIIII
IIIIIIIIIIIIIIIIIIIIIII
IIIIIIIIIIIIIIIIIIIIIIIII
IIIIIIIIIIII
100 300 1K 3K 8K Hz
BACK ■
OK
MENU SOUND menu AI VOLUME
❇
❇
❇
❇
❇
Downloaded from manuals search enginewww.Manualslib.com

16
To register the favorite channel
You can register and recall 4 favorite channels by using the
colour buttons (red, green, yellow, blue).
1In TV mode, select a TV channel (PR01-99) you desired to register.
2Press and hold a colour button for 3 seconds or more.
“FAVORITE CHANNEL PROGRAMMED appears on the■”
screen and current channel is registered.
3To register other favorite channels, repeat Step 1 to 2.
To recall the favorite channel, press the colour button.
When the TV is in Text mode, Picture in Picture or menu mode,
favorite channel function is not available.
To adjust favorite channel setting
(FAVORITE CH SETTING)
You can adjust the picture and sound settings for the favorite channels.
1Display the PICTURE menu and select FAVORITE CH
SETTING in PICTURE FEATURES menu.
2Select FAVORITE CHANNEL in FAVORITE CH SETTING
menu, then choose the desired favorite channel.
3Select EFFECT, then press 2 3/ button
to choose ON.
To cancel the settings, choose OFF.
Favorite channel and video setting
MENU PICTURE menu PICTURE FEATURES menu
FAVORITE CH SETTING
FAVORITE CH SETTING FAVORITE CHANNEL
4Select the desired item that you wish to adjust.
5Press the MENU/OK button to exit the menu.
To adjust the video setting (VIDEO SETTING)
You can adjust the picture and sound settings for video inputs.
1Display the PICTURE menu and select VIDEO SETTING in
PICTURE FEATURES menu.
2Select VIDEO STATUS in VIDEO SETTING menu, then
choose the desired video input.
3Select EFFECT, then press 2 3/ button
to choose ON.
To cancel the settings, choose OFF.
4Select the desired item that you wish to adjust.
5Press the MENU/OK button to exit the menu.
❇About the basic operations of the menu, please see the How“
to operate menus and menus locations on page 5.”
MENU PICTURE menu PICTURE FEATURES menu
VIDEO SETTING
VIDEO SETTING VIDEO STATUS
CONTRAST BRIGHT SHARP COLOUR
SOUND MODE (USER, DYNAMIC, MUSIC, NEWS) TINT
❇
❇
❇
❇
CONTRAST BRIGHT SHARP COLOUR
SOUND MODE (USER, DYNAMIC, MUSIC, NEWS) TINT
FAVORITE CH SETTING
FAVORITE CHANNEL
■
PR 01
CONTRAST
BRIGHT
SHARP
COLOUR
TINT
SOUND MODE USER
EFFECT ON
BACK ■
OK
VIDEO SETTING
VIDEO STATUS VIDEO-1
CONTRAST
BRIGHT
SHARP
COLOUR
TINT
SOUND MODE USER
EFFECT ON
BACK ■
■
RESET
OK
Downloaded from manuals search enginewww.Manualslib.com

17
VNR
You can reduce the noise.
Select the VNR in the PICTURE FEATURES menu under
PICTURE menu, then choose a setting of VNR function.
OFF VNR is turned off.
AUTO Effect of VNR is automatically controlled.
MIN Effect of VNR becomes minimum level.
MAX Effect of VNR becomes maximum level.
If you select MAX, the picture becomes softer even if the original
picture is sharp.
LANGUAGE
You can choose your desired on screen display language.
Select the LANGUAGE in the INSTALL menu, then choose a
language.
Customized setting
MENU PICTURE menu PICTURE FEATURES menu
MENU INSTALL menu LANGUAGE
CHILD LOCK
You can disable the front control buttons of the TV.
Select the CHILD LOCK in the FEATURES menu, then choose
ON or OFF.
OFF TIMER
You can set the TV to turn off automatically to standby mode after
a set time.
Press the OFF TIMER button to select a desired period of time.
You can set the period of time
to a maximum of 120 minutes
in 10 minutes step.
To operate this function with a menu:
When the elapsed of time left one minute, GOOD NIGHT!“ ”
appears on the screen.
You can display the OFF TIMER menu again to confirm or
change the remaining time.
❇About the basic operations of the menu, please see the How“
to operate menus and menus locations on page 5.”
MENU FEATURES menu CHILD LOCK
OFF TIMER
0 120
10
BACK ■
OK
MENU FEATURES menu OFF TIMER
❇
❇
❇
❇
VNR
Downloaded from manuals search enginewww.Manualslib.com

18
AUTO SHUTOFF
You can set the TV to turn off automatically when no signal is
received for about 15 minutes or longer after the end of a
broadcast.
Select AUTO SHUTOFF in INSTALL menu, then choose ON or
OFF.
The AUTO SHUTOFF function does not turn off the TV s main’
power.
The AUTO SHUTOFF function is not available in video mode.
VIDEO-2 SETTING
You can set the VIDEO-2 SETTING according to the video signal
output from the external devices connected to the VIDEO-2
terminal.
Select the VIDEO-2 SETTING in INSTALL menu, then choose a
setting.
VIDEO If a normal video signal (composite video signal) is
input.
COMPONENT If a component video signal (Y/C B/CR) is input.
For connecting methods, see Additional Preparation on page 22.“ ”
Customized setting (continued)
MENU INSTALL menu AUTO SHUTOFF
MENU INPUT menu EXT. INPUT
EXT. INPUT (TV/VIDEO)
You can select TV or video terminal input with one touch.
Press the TV/VIDEO button to select an input.
To operate this function with a menu:
DISPLAY
You can display the programme number, video terminal number
and PR list on the screen.
Press the DISPLAY button to select the desired mode:
Choose a TV channel or a VIDEO terminal.
1Press the DISPLAY button to display the PR LIST.
2Select a programme number or video terminal by pressing the
5 ∞/ button to move up/down on the programme number or
press the button to skip for each 7 programme numbers,2 3/
then press MENU/OK button.
To operate this function with a menu:
❇About the basic operations of the menu, please see the How“
to operate menus and menus locations on page 5.”
MENU INPUT menu DISPLAY
❇
❇
❇
MENU INSTALL menu VIDEO-2 SETTING
❇
ON OFF PR LIST
PR LIST
-7
OK
+7
PR CH/CC
AV
1 CH 03
2 CH 05
3 CH 07
4 CH 09
5 CC 04
6 CC 05
Downloaded from manuals search enginewww.Manualslib.com

19
To register the TV channels automatically
You can register the TV channels into the TV s channel list’
automatically.
1Display the INSTALL menu.
2Choose AUTO PROGRAM, then press the MENU/OK button.
AUTO PROGRAM function starts, and the channels received
are registered in the channel list (PR LIST) automatically.
3“SETUP TOUR RESTART?” appears.
To start the SETUP Press the MENU/OK button. Then proceed to
TOUR step 5 of “ ”Setting up your TV on page 8.
To skip the SETUP Press the Red button.
TOUR
4The EDIT menu appears.
To edit the channel Proceed to the Step 3 of “To edit the channel
list list (PR LIST)” on page 20.
If a channel is not Proceed to the Step 3 of To register the TV“
registered channels manually” on this page.
To exit the menu Press the MENU/OK button.
For details of “SETUP TOUR”, see page 8.
To register the TV channels manually
(MANUAL in the EDIT menu)
You can register the TV channels into the TV s channel list manually.’
1Display the INSTALL menu.
TV channel presetting
2Choose EDIT/MANUAL, then press the MENU/OK button.
EDIT menu appears.
3Choose the channel which you want to register.
4Press the blue button to activate the MANUAL function.
The sound system of the channel appears at the right of the
CH/CC number.
5Press the button to choose an appropriate sound system.3
For details, see SOUND SYSTEM on page 14.“ ”
6Press the green or red button to search for the TV channel.
Searching stops when a channel is found and displayed.
7Repeat step 5 until your desired TV channel appears.
If the reception is poor Press the blue or yellow button to fine tune
the TV channel.
If noisy sound is heard Press the 3 button to choose an appropriate
sound system.
8Press the MENU/OK button to exit the menu.
❇About the basic operations of the menu, please see the How“
to operate menus and menus locations on page 5.”
EDIT
BACK ■
■
INSERT
OK
MOVE
■
DELETE
■
MANUAL
PR CH/CC
7 CH 09
8 CH 11
9 ■ CH 13
3
10
11
12
13
MENU INSTALL menu
❇
MENU INSTALL menu
❇
Downloaded from manuals search enginewww.Manualslib.com

20
To add in the new channel
(INSERT in the EDIT menu)
You can add in the new channel in the TV channel list as you like.
You need to find the number for the TV channel. Find the“CH/CC”
“ ”CH/CC number corresponding to the channel number of the TV
channel from the attached sheet CH/CC number list on page 21.“ ”
1Display the INSTALL menu.
2Choose EDIT/MANUAL, then press the MENU/OK button.
EDIT menu appears.
3Choose the PR number for which you will register a new TV
channel. When you add a new TV channel of NTSC-M system,
press the SOUND SYSTEM button to change the sound
system to M. Then proceed to the next step.
4Press the green button, then press buttons to choose5 ∞/
“ ” “ ”CC or CH .
5Press the number button to enter the remaining CH/CC
number.
The TV starts to search the TV channel, and the picture of the
TV channel appears. If the TV finds no TV channel, a noisy
picture appears.
When a TV channel has already been registered in PR99, using
the INSERT function deletes that TV channel.
❇About the basic operations of the menu, please see the How“
to operate menus and menus locations on page 5.”
TV channel presetting (continued)
To edit the channel list (PR LIST)
(MOVE and DELETE in the EDIT menu)
You can edit the TV channel list as you like.
Note: After this operation, other channel’s PR numbers will be
changed.
1Display the INSTALL menu.
2Choose EDIT/MANUAL, then press the MENU/OK button.
EDIT menu appears.
3Choose the channel which you want to change PR number, or
delete.
4Do the following action:
To change the PR Press the 3 button. Then move it to the PR
number (MOVE) number you want to use it for the channel.
Finally press the 2 button.
To delete the Press the yellow button.
channel (DELETE)
5Press the MENU/OK button to exit the menu.
EDIT
BACK ■
■
INSERT
OK
MOVE
■
DELETE
■
MANUAL
PR CH/CC
7 CH 09
8 CH 11
9 ■ CH 13
3
10
11
12
13
MENU INSTALL menu
❇
MENU INSTALL menu
❇
Downloaded from manuals search enginewww.Manualslib.com

21
TV channel presetting (continued)
CH/CC number
When you want to use the INSERT
function on page 20, find the CH/CC
number corresponding to the channel
number of the TV channel from this table.
Channel No. Country
US United States, Philippines, etc..
CCIR Middle East, Southeast Asia,
etc..
OIRT Eastern Europe, Russia,
Vietnam, etc..
AUSTRALIA Australia, etc..
Channel
CH US CCIR OIRT AUSTRALIA
CH 02 US-2 E2 R1 AU-0
CH 03 US-3 E3 AU-1
CH 04 US-4 E4 R2 AU-2
CH 05 US-5 E5 R6 AU-6
CH 06 US-6 E6 R7 AU-7
CH 07 US-7 E7 R8 AU-8
CH 08 US-8 E8 R9 AU-9
CH 09 US-9 E9
CH 10 US-10 E10 R10 AU-10
CH 11 US-11 E11 R11 AU-11
CH 12 US-12 E12 R12
CH 13 US-13
CH 14 US-14, W+29
CH 15 US-15, W+30
CH 16 US-16, W+31
CH 17 US-17, W+32
CH 18 US-18, W+33
CH 19 US-19, W+34
CH 20 US-20, W+35
CH 21 US-21, W+36 E21
CH 22 US-22, W+37 E22
CH 23 US-23, W+38 E23
CH 24 US-24, W+39 E24
CH 25 US-25, W+40 E25
CH 26 US-26, W+41 E26
CH 27 US-27, W+42 E27
CH 28 US-28, W+43 E28
CH 29 US-29, W+44 E29
CH 30 US-30, W+45 E30
CH 31 US-31, W+46 E31
CH 32 US-32, W+47 E32
CH US CCIR OIRT AUSTRALIA
CH 33 US-33, W+48 E33
CH 34 US-34, W+49 E34
CH 35 US-35, W+50 E35
CH 36 US-36, W+51 E36
CH 37 US-37, W+52 E37
CH 38 US-38, W+53 E38
CH 39 US-39, W+54 E39
CH 40 US-40, W+55 E40
CH 41 US-41, W+56 E41
CH 42 US-42, W+57 E42
CH 43 US-43, W+58 E43
CH 44 US-44, W+59 E44
CH 45 US-45, W+60 E45
CH 46 US-46, W+61 E46
CH 47 US-47, W+62 E47
CH 48 US-48, W+63 E48
CH 49 US-49, W+64 E49
CH 50 US-50, W+65 E50
CH 51 US-51, W+66 E51
CH 52 US-52, W+67 E52
CH 53 US-53, W+68 E53
CH 54 US-54, W+69 E54
CH 55 US-55, W+70 E55
CH 56 US-56, W+71 E56
CH 57 US-57, W+72 E57
CH 58 US-58, W+73 E58
CH 59 US-59, W+74 E59
CH 60 US-60, W+75 E60
CH 61 US-61, W+76 E61
CH 62 US-62, W+77 E62
CH 63 US-63, W+78 E63
CH 64 US-64, W+79 E64
CH 65 US-65, W+80 E65
CH 66 US-66, W+81 E66
CH 67 US-67, W+82 E67
CH 68 US-68, W+83 E68
CH 69 US-69, W+84 E69
CC US CCIR OIRT AUSTRALIA
CC 01 S-1 AU-5
CC 02 S-2
CC 03 S-3
CC 04 S-4
CC 05 S-5
CC 06 S-6 AU-5A
CC 07 S-7
CC 08 S-8
CC 09 S-9
CC 10 S-10
CC 11 S-11
CC 12 S-12
CC 13 S-13
CC 14 A S-14
CC 15 B S-15
CC 16 C S-16
CC 17 D S-17
CC US CCIR OIRT AUSTRALIA
CC 18 E S-18
CC 19 F S-19
CC 20 G S-20
CC 21 H S-21
CC 22 I S-22
CC 23 J S-23
CC 24 K S-24
CC 25 L S-25
CC 26 M S-26
CC 27 N S-27
CC 28 O S-28
CC 29 P S-29
CC 30 Q S-30
CC 31 R S-31
CC 32 S S-32
CC 33 T S-33
CC 34 U S-34
CC 35 V S-35
CC 36 W S-36
CC 37 W+1 S-37
CC 38 W+2 S-38
CC 39 W+3 S-39
CC 40 W+4 S-40
CC 41 W+5 S-41
CC 42 W+6
CC 43 W+7
CC 44 W+8
CC 45 W+9
CC 46 W+10
CC 47 W+11
CC 48 W+12
CC 49 W+13
CC 50 W+14
CC 51 W+15
CC 52 W+16
CC 53 W+17
CC 54 W+18
CC 55 W+19
CC 56 W+20
CC 57 W+21
CC 58 W+22
CC 59 W+23
CC 60 W+24
CC 61 W+25
CC 62 W+26
CC 63 W+27
CC 64 W+28
CC 75 X
CC 76 Y R3
CC 77 Z R4 AU-3
CC 78 Z+1 R5
CC 79 Z+2 AU-4
CC 95 A-5
CC 96 A-4
CC 97 A-3
CC 98 A-2
CC 99 A-1
Downloaded from manuals search enginewww.Manualslib.com

22
V
L
R
V
L
R
/
MONO
OUTPUT
VIDEO-1
INPUT
V
L
RR
L/
MONO
Y
C
B
C
R
/
V
V
S
OVER
L
R
/
MONO
OUTPUT
VIDEO-1
INPUT
COMPONENT
(VIDEO-2)
INPUT
The illustrations shown in this section are for AV-29VS24 and
AV-21CS24 only, which are used for explanation purpose. Your
TV may not look exactly the same as illustrated.
Before connecting
• Read the manuals provided with the devices for the proper
connection.
• Turn off all the devices including the TV.
• Note that connecting cables are not supplied.
Connecting to front video input terminal
Additional preparation
Connecting to rear component/video input
terminal and output terminal
IN (VIDEO-2)
VR
L / MONO
IN (VIDEO-3)
V
MENU
OK
OK
MENU
L/MONO R
Front of TV
Headphones
AV-29VS24
AV-21CS24
Camcorder or TV game
When you use VIDEO-1 INPUT, you should choose to connect
S-VIDEO or video input. If S-VIDEO connector and video input
are connected at the same time, no picture displays on the
screen and the message PLEASE DISCONNECT VIDEO-1“
CABLE!” appears. In this case, you should disconnect either
S-VIDEO or video input.
When connecting to COMPONENT (VIDEO-2) input, depending
on the connection, choose the appropriate video input using the
menu (see page 18).
Rear of TV
Rear of TV
AV-29VS24
AV-21CS24
VCR (for playing)
DVD player (composite signals)
VCR (for recording)
DVD player
(component video signals)
VCR (for playing)
VCR (for recording)
Downloaded from manuals search enginewww.Manualslib.com

23
Troubleshooting
If a problem occurs when you are using the TV, check the below
troubleshooting guide before calling for repair.
• Deactivate the BLUE BACK function if it is turned
on.
• Choose the appropriate sound system. Refer to
“ ”SOUND SYSTEM on page 14.
• Check the aerial cable and its connection with the
TV.
• Interference occurs caused by other devices such
as an amplifier, personal computer, or a hair drier.
Move such devices away from your TV.
• Interference occurs caused by signal reflecting
from mountains or building. Try to adjust the
aerial’s direction or use a better directionality
antenna.
• Choose the appropriate colour system. Refer to
“ ”COLOUR SYSTEM on page 9.
• Adjust the COLOUR or BRIGHT setting. Refer to
“ ”Adjusting the picture - USER on page 10.
• Inevitable phenomenon due to the nature of the
picture tube. This is not a malfunction.
• This is due to the condition of the video signal
whereby the image was not recorded properly.
This is not a malfunction.
• Adjust the sound frequency properly. Refer to
“ ”EQUALIZER on page 15.
• TV channel reception is poor. Change the stereo/
bilingual mode to mono sound (see page 15).
• No picture,
no sound
• Snowy picture
• Stripes appear on
the picture
• Double-pictures
(ghosting) occur
• Poor picture
• White and bright still
image look as if it
were coloured
• Top of the image
from software
products or video
tape is distorted
• Poor sound
• Stereo or bilingual
sound is unclear
• The batteries may be exhausted. Replace with
new batteries (see page 7).
• Ensure that you are operating the remote less
than seven meters from the front of your TV.
• Press TV/VIDEO button to return to TV mode and
try operating the menus.
• Deactivate the CHILD LOCK function if it is turned
on (see page 17).
• This may due to the AUTO SHUT OFF function is
activated. Press the POWER button to turn on the
TV.
• This may due to the magnetized device such as a
speaker near to your TV. Keep the device apart
from your TV. Alternately, you can also use the
magnetic-shielded speaker.
• This may due to the earth magnetism. Refer to
“PICTURE TILT” on page 11 to correct the tilt.
• Image required time to stabilize before display.
This is not a malfunction.
• This is due to a sudden change in temperature
and it is not a malfunction. If the crackling sound
is too frequent, request your service technician for
inspection.
• This is due to the static electricity of the picture
tube and it will not harm the human body. This is
not a malfunction.
• Cannot operate the
remote control
• Cannot operate the
menus
• Cannot operate the
front control buttons
• TV is turned off
suddenly
• Colour patches
appear at the corner
of the screen
• Picture is tilted
• Image takes a short
period to be
displayed
• TV may emitted
crackling sound
• Feel a slight electric
shock when
touching the TV
screen
Downloaded from manuals search enginewww.Manualslib.com

VICTOR COMPANY OF JAPAN, LIMITED
© 2004 VICTOR COMPANY OF JAPAN, LIMITED 0504-FLE-JMT
Specifications
TV RF systems
B, G, I, D, K, M
Colour systems
PAL, SECAM, NTSC 3.58 MHz, NTSC 4.43 MHz
Receiving channels
VHF low channel (VL), VHF high channel (VH), UHF channel (U)
Receives cable channels in mid band, super band and hyper band.
External input / output
VIDEO-1: S-video input*, VIDEO input, AUDIO L/R input
VIDEO-2/COMPONENT: VIDEO input, AUDIO L/R input, COMPONENT VIDEO (Y/C B/CR) input (Except for AV-21CS24/
AV-21CX14/AV-21YX14)
VIDEO-3: VIDEO input, AUDIO L/R input (Except for AV-21CS24/AV-21CX14/AV-21YX14)
OUTPUT: VIDEO output, AUDIO L/R output
Headphone jack: Stereo mini jack (3.5 mm diameter)
*Except for AV-29LS24/AV-29LX14/AV-25LS24/AV-25LX14/AV-21CS24/AV-21CX14/AV-21DX14/AV-21LX14/AV-21YX14.
**Sound-multiplex systems
A2 or NICAM (B/G, I, D/K)
**Teletext system
FLOF (Fastext), WST (World Standard Text)
**Language displayed by teletext
Please see the table in the description TEXT LANGUAGE“ ” on page 13.
**Depends on the models, STEREO/I ■II function for the Sound-multiplex systems or Teletext function may not be available. Please
confirm with the chart on page 3.
Design and specifications subject to change without notice.
Downloaded from manuals search enginewww.Manualslib.com

INSTRUCTIONS
GGT0050-001C-H
Contents
Knowing your TV’s features ....................................................... 3
Remote control buttons and basic functions .............................. 4
TV buttons and functions ........................................................... 6
Setting up your TV ..................................................................... 7
Basic setting for picture .............................................................. 9
Advanced setting for picture ..................................................... 11
Original features for picture ...................................................... 12
Basic setting for sound ............................................................. 14
Advanced setting for sound ..................................................... 15
Favorite channel and video setting .......................................... 16
Customized setting .................................................................. 17
TV channel presetting .............................................................. 19
Additional preparation .............................................................. 22
Troubleshooting ....................................................................... 23
Specifications .............................................................. Back cover
EQUALIZER • CINEMA SURROUND • COMPONENT INPUT
5/25/04, 1:33 PM
Downloaded from manuals search enginewww.Manualslib.com

T
RE.
THIS TV.
TV.
ng the
TV of
n. Do
with it
e it
er or
7 If you are not going to use this TV for a long period of time, be sure to
disconnect the AC plug from the AC socket.
8 The apparatus shall not be exposed to dripping or splashing and that
no objects filled with liquids, such as vases, shall be placed on the
apparatus.
WARNING: <AV-2134YE/AV-2134WE/AV-2153WE/AV-2154WE only>
A REMOVABLE PLASTIC COVER IS FIXED TO THE
TELEVISION’S FRONT AUDIO/VIDEO CONNECTOR. TO
PREVENT THIS COVER FROM BEING ACCIDENTALLY
SWALLOWED BY BABIES OR CHILDREN, REMOVE IT
FROM THE TELEVISION AND STORE IT IN A SAFE
PLACE. IF THE COVER IS SWALLOWED SEEK THE
ADVICE OF A DOCTOR IMMEDIATELY.
or buying this JVC colour television.
new TV, please read this manual thoroughly before you begin.
5/25/04, 1:33 PM
Downloaded from manuals search enginewww.Manualslib.com

3
es
ons
his instruction manual may not be available for your TV.
w and check the functions that are equipped for your TV’s model number. The
at the rear of your TV. When you press a button concerned to a function that is
t does not work and the logo appears on the screen. For a function that is“Ø”
t is not displayed in the menu.
_ _ _ –_ _ _ _ – – – – – _
– – – – – – – – – – – – _–
_ _ _ _ _ – – _ _ – – _– –
_ _ _ _ – – – – – – – – – –
_– – – _– – – _ _ – – – _
_ _ _ _ _ _ –_ _ _ _ _ –_
AV-2984VE
AV-2983VE
AV-2584VE
AV-2184VE
AV-2583VE
AV-2183VE
AV-2174VE
AV-2954WE
AV-2953WE
AV-2554LE
AV-2154LE
AV-2553LE
AV-2144LE
AV-25LS24
AV-2154CE
AV-2154WE
AV-2153WE
AV-2934WE
AV-2934LE
AV-2534LE
AV-2134WE
AV-2134YE
AV-29LS24
ou can view two different sources (e.g. TV programme and VCR sources) at the same
me.
ou can view teletext programmes which are broadcasted by some TV channels. Teletext
ogramme is an information in text form.
ou can listen to the stereo sound or bilingual sound from TV programme broadcasting by A2
r NICAM Sound-multiplex system.
ou can register up to four favorite channels for quick recall with one press.
V detects the brightness of your room and automatically adjust the picture brightness to a
uitable level for a better eye care.
V adjusts the volume automatically to the same level for all TV channels to avoid sudden
hange of the volume when selecting different TV channel.
5/25/04, 1:33 PM
Downloaded from manuals search enginewww.Manualslib.com

nd basic functions
e.
tion.
olume.
o terminal number, stereo/bilingual broadcast system
R list.
splay the PR list.
e a channel, then press the MENU/OK button.
the PR list. The channels set to favorite channels are
digits programme number, press -/--, then press the
with one touch.
egister.
until “ ”RETURN PLUS PROGRAMMED! appears.
button until RETURN PLUS CANCELED! appears.“ ”
nel, if you have not set or have cancelled the Return
5/25/04, 1:33 PM
Downloaded from manuals search enginewww.Manualslib.com

No. Button/terminal Description Page
L (main power) Press to turn on or turn off the TV s main power.’ –
POWER lamp Indicate the TV is being turned on or off. –
No colour: TV’s main power is being turned off.
Red : TV’s main power is being turned on.
Note: When you turn off the power switch while TV is in standby
mode, the light of power lamp will be off in 10 -15 seconds.
ECO sensor –
Remote control sensor –
TV/ VIDEO Press to select TV or video mode. –
VOLUME -/+ Press to adjust the volume level. –
CHANNEL -/+ Press to select the desired channel. –
MENU Press to display the menu. –
IN (VIDEO-3) Video and audio input jacks for VIDEO-3 mode. 22
IN (VIDEO-2) Video and audio input jacks for VIDEO-2 mode. 22
Headphone jack. 22
Aerial socket. 7
OUTPUT Video and audio output jacks. (The component video
signal cannot be output.) 22
COMPONENT Video or component video, and audio input jacks for
(VIDEO-2) INPUT VIDEO-2 mode. You can select the input signal by setting
the “VIDEO-2 SETTING” function (see page 18). 22
VIDEO-1 INPUT Video or S-VIDEO, and audio input jacks for VIDEO-1
mode 7
TIMER lamp
Indicate the OFF TIMER function is being turned on or off.
–
No colour: The OFF TIMER function is being turned off.
Orange : The OFF TIMER function is being turned on.
How to operate the menus with the TV button
TV button Work as same as the button on the Note
remote control unit
MENU MENU/OK button To display main menu and exit
menu after finish setting.
CHANNEL -/+ ∞ 5/ button To select menu function.
VOLUME -/+ 2 3/ button To adjust the desired function.
5/25/04, 1:33 PM
Downloaded from manuals search enginewww.Manualslib.com

7
ur VCR
onnect the
he TV
udio
e as your
2Connecting the compatible main plug to the AC outlet.
3Inserting batteries into the remote control.
Insert two batteries by following the + and -
polarities and inserting the end first.-
CAUTION:
Follow the cautions printed on the batteries.
Notes:
•Use AA/R6/UM-3 dry cell batteries.
•It the remote control does not work properly, fit
new batteries. The supplied batteries are for testing,
not regular use.
4Turn on the TV by pressing the main power button.
JVC logo appears on the screen.
erial
ecting.
aerial
plied)
5/25/04, 1:33 PM
Downloaded from manuals search enginewww.Manualslib.com

utton, then operate the TV menu by following the steps as below:
•TV will start searching
for the channels.
To stop AUTO
PROGRAM, press
MENU/OK button.
•Press the red button to
cancel the SETUP TOUR
RESTART function.
If you want to make initial
settings again when the
next time you turn on the
TV, press the MENU/OK
button to activate the
SETUP TOUR RESTART
function.
SETUP TOUR RESTART?
AUTO PROGRAMAUTO PROGRAM
OK
CH 12
22%
OK
RESTART
■
NO
EDIT
BACK ■
■
INSERT
OK
MOVE
■
DELETE
■
MANUAL
PR CH/CC
7 CH 09
8 CH 11
9 ■ CH 13
3
10
11
12
13
.
•To complete the initial
setting, press the
MENU/OK button. To
edit the channel list,
see page 19.
XT LANGUAGE, and AUTO PROGRAM functions to make the initial settings.
tial settings, press the TV/VIDEO button to exit from initial settings.
ed language as follow:
5/25/04, 1:33 PM
Downloaded from manuals search enginewww.Manualslib.com

9
picture is
.
e table
PICTURE MODE
You can choose the desired picture setting with one-touch.
Press the PICTURE MODE button to select a setting.
SOFT Softens contrast and sharpness.
BRIGHT Heightens contrast and sharpness.
STANDARD Standard picture setting.
USER You can change this picture setting as you like.
Select USER and adjust following items in the
PICTURE SETTING menu. (CONTRAST, BRIGHT,
SHARP, COLOUR, TINT*)
*TINT can only be adjusted in NTSC system.
To operate this function with a menu:
To return the USER setting to the default, press the blue button
when the PICTURE SETTING menu appears.
❇About the basic operations of the menu, please see the How“
to operate menus and menus locations on page 5.”
S menu
System
PAL
PAL
PAL
SECAM
NTSC
SECAM
PAL
PAL
PAL
PAL
PAL
PAL
SECAM
MENU PICTURE menu PICTURE MODE
❇
5/25/04, 1:33 PM
Downloaded from manuals search enginewww.Manualslib.com

ng USER
RE menu.
hen adjust
ast
ear due
sired
RES menu
WHITE BALANCE
You can change the white balance of the picture to better match
the type of video being viewed.
Select the WHITE BALANCE in the PICTURE menu, then choose
the desired setting.
NORMAL Normal white balance.
COOL Bluish white.
WARM Reddish white.
❇About the basic operations of the menu, please see the How“
to operate menus and menus locations on page 5.”
MENU PICTURE menu WHITE BALANCE
E
TING
❇
5/25/04, 1:33 PM
Downloaded from manuals search enginewww.Manualslib.com

11
ghtness of
screen.
n choose
E TILT)
netic force.
ES menu
.
2Press the buttons until the picture become level. Then5 ∞/
press the MENU/OK button.
COMPRESS (16:9)
You can convert a normal picture (4:3 aspect ratio) into a wide
picture (16:9 aspect ratio).
Select the COMPRESS (16:9) in the PICTURE FEATURES menu
under PICTURE menu, then choose ON or OFF.
BLUE BACK
You can set the TV to automatically change to a blue screen and
mute the sound if the signal is weak or absent, or when there is
no input from an antenna.
Select the BLUE BACK in the INSTALL menu, then choose ON or
OFF.
If you wish to continue viewing the poor picture, cancel the BLUE
BACK function.
❇About the basic operations of the menu, please see the “How
to operate menus and menus locations” on page 5.
ure
RES menu
MENU PICTURE menu PICTURE FEATURES menu
COMPRESS (16:9)
MENU INSTALL menu BLUE BACK
❇
❇
6/8/04, 4:02 PM
Downloaded from manuals search enginewww.Manualslib.com
Termékspecifikációk
| Márka: | JVC |
| Kategória: | televízió |
| Modell: | AV-25LX14 |
Szüksége van segítségre?
Ha segítségre van szüksége JVC AV-25LX14, tegyen fel kérdést alább, és más felhasználók válaszolnak Önnek
Útmutatók televízió JVC

12 Január 2025
4 Október 2024
2 Október 2024
30 Szeptember 2024
23 Szeptember 2024
22 Szeptember 2024
18 Szeptember 2024
11 Szeptember 2024
1 Szeptember 2024
24 Augusztus 2024
Útmutatók televízió
- televízió Samsung
- televízió Sony
- televízió Yamaha
- televízió Beko
- televízió Fujitsu
- televízió Acer
- televízió Nedis
- televízió LG
- televízió Grundig
- televízió Marantz
- televízió Philips
- televízió Pioneer
- televízió SilverCrest
- televízió Panasonic
- televízió AEG
- televízió Sharp
- televízió Nokia
- televízió Lenovo
- televízió Casio
- televízió Toshiba
- televízió Oppo
- televízió Hyundai
- televízió Hisense
- televízió BenQ
- televízió SunBriteTV
- televízió Siemens
- televízió Medion
- televízió TCL
- televízió Xiaomi
- televízió GoGen
- televízió Insignia
- televízió Infiniton
- televízió Dell
- televízió Strong
- televízió VOX
- televízió Vivax
- televízió Thomson
- televízió Polaroid
- televízió Aiwa
- televízió Orima
- televízió V7
- televízió Clatronic
- televízió PEAQ
- televízió Qilive
- televízió Haier
- televízió Mitsubishi
- televízió Cecotec
- televízió Sencor
- televízió GPX
- televízió Küppersbusch
- televízió Innoliving
- televízió AOC
- televízió Citizen
- televízió Westinghouse
- televízió Hitachi
- televízió Continental Edison
- televízió Telefunken
- televízió Nevir
- televízió Monster
- televízió Roadstar
- televízió Optoma
- televízió CHiQ
- televízió Viewsonic
- televízió Nextbase
- televízió Denver
- televízió Bush
- televízió Trevi
- televízió Albrecht
- televízió Daewoo
- televízió Funai
- televízió Tesla
- televízió Smart Tech
- televízió Muse
- televízió Energy Sistem
- televízió OK
- televízió SVAN
- televízió Loewe
- televízió RevolutionHD
- televízió Polar
- televízió Manhattan
- televízió Kogan
- televízió Horizon
- televízió Intenso
- televízió Furrion
- televízió Teac
- televízió Aspes
- televízió Digihome
- televízió Manta
- televízió Blaupunkt
- televízió Sagem
- televízió Jay-Tech
- televízió Logik
- televízió Finlux
- televízió Peerless-AV
- televízió Abus
- televízió AG Neovo
- televízió Bang & Olufsen
- televízió Iiyama
- televízió AKAI
- televízió TechniSat
- televízió Seiki
- televízió Jensen
- televízió Pyle
- televízió Emerson
- televízió Sanyo
- televízió Kemo
- televízió Salora
- televízió Lenco
- televízió Schneider
- televízió Philco
- televízió ECG
- televízió Uniden
- televízió Technika
- televízió NEC
- televízió Element
- televízió Soundmaster
- televízió Alphatronics
- televízió AYA
- televízió MBM
- televízió Krüger&Matz
- televízió Dual
- televízió Brandt
- televízió Wharfedale
- televízió Allview
- televízió RCA
- televízió OKI
- televízió Orion
- televízió SereneLife
- televízió Schaub Lorenz
- televízió Luxor
- televízió Metz
- televízió ILive
- televízió Graetz
- televízió Tatung
- televízió Packard Bell
- televízió EasyMaxx
- televízió Orava
- televízió Arçelik
- televízió Planar
- televízió Zenith
- televízió Doffler
- televízió QBell Technology
- televízió SYLVOX
- televízió Majestic
- televízió Reflexion
- televízió FFalcon
- televízió Megasat
- televízió Sogo
- televízió United
- televízió Techwood
- televízió Newstar
- televízió Matsui
- televízió Alden
- televízió Aldi
- televízió Airis
- televízió Aristona
- televízió Apex
- televízió Icy Box
- televízió Lexibook
- televízió Palsonic
- televízió Walker
- televízió Saba
- televízió Antarion
- televízió Kernau
- televízió Tevion
- televízió Proscan
- televízió Vestel
- televízió Tucson
- televízió Sunstech
- televízió Nabo
- televízió Sylvania
- televízió Sunny
- televízió Marquant
- televízió Nordmende
- televízió AudioAffairs
- televízió Magnum
- televízió Audiosonic
- televízió Kubo
- televízió Proline
- televízió Coby
- televízió Seg
- televízió Vivo
- televízió Daitsu
- televízió Terris
- televízió Changhong
- televízió Alba
- televízió Naxa
- televízió Star-Light
- televízió Fantec
- televízió Mpman
- televízió Sweex
- televízió Vizio
- televízió Cello
- televízió Mx Onda
- televízió Nikkei
- televízió Hannspree
- televízió DGM
- televízió Yasin
- televízió Humax
- televízió XD Enjoy
- televízió MT Logic
- televízió Superior
- televízió Kunft
- televízió Difrnce
- televízió ITT
- televízió Grunkel
- televízió Avtex
- televízió Inovia
- televízió Odys
- televízió NPG
- televízió Bluesky
- televízió Videocon
- televízió Xoro
- televízió Durabase
- televízió HKC
- televízió Edenwood
- televízió Woxter
- televízió Premier
- televízió Onn
- televízió Teleco
- televízió Opera
- televízió LTC
- televízió JTC
- televízió Zalman
- televízió Ferguson
- televízió Viewpia
- televízió XS4ALL
- televízió JGC
- televízió Online
- televízió Dyon
- televízió DirecTV
- televízió Tele 2
- televízió Telesystem
- televízió EKO
- televízió E-motion
- televízió Mitsai
- televízió Selfsat
- televízió High One
- televízió Tve
- televízió ISymphony
- televízió Pantel
- televízió Magnavox
- televízió ATYME
- televízió HCI
- televízió Inno-Hit
- televízió Lin
- televízió Engel
- televízió Bang Olufsen
- televízió TechLine
- televízió Elements
- televízió Englaon
- televízió Time
- televízió Reflex
- televízió Astar
- televízió Visco
- televízió Tivax
- televízió H&B
- televízió Norcent
- televízió TELE System
- televízió TIM
- televízió Oyster
- televízió Belson
- televízió Vision Plus
- televízió Sbr
- televízió Bauhn
- televízió Voxx
- televízió Rm 2000
- televízió Hoher
- televízió Felson
- televízió Mach Power
- televízió Elbe
- televízió Axing
- televízió CGV
- televízió Séura
- televízió Mitzu
- televízió Caratec
- televízió JTC24
- televízió Coocaa
- televízió Kivi
- televízió Smart Brand
- televízió Voxicon
- televízió Aconatic
- televízió Mitchell & Brown
- televízió FOX Electronics
- televízió Mystery
Legújabb útmutatók televízió

10 Április 2025

10 Április 2025

10 Április 2025

9 Április 2025
9 Április 2025
9 Április 2025
9 Április 2025

9 Április 2025
9 Április 2025
9 Április 2025