Használati útmutató Elektrobock TS10
Olvassa el alább 📖 a magyar nyelvű használati útmutatót Elektrobock TS10 (6 oldal) a Elektromos aljzat kategóriában. Ezt az útmutatót 4 ember találta hasznosnak és 2 felhasználó értékelte átlagosan 4.5 csillagra
Oldal 1/6
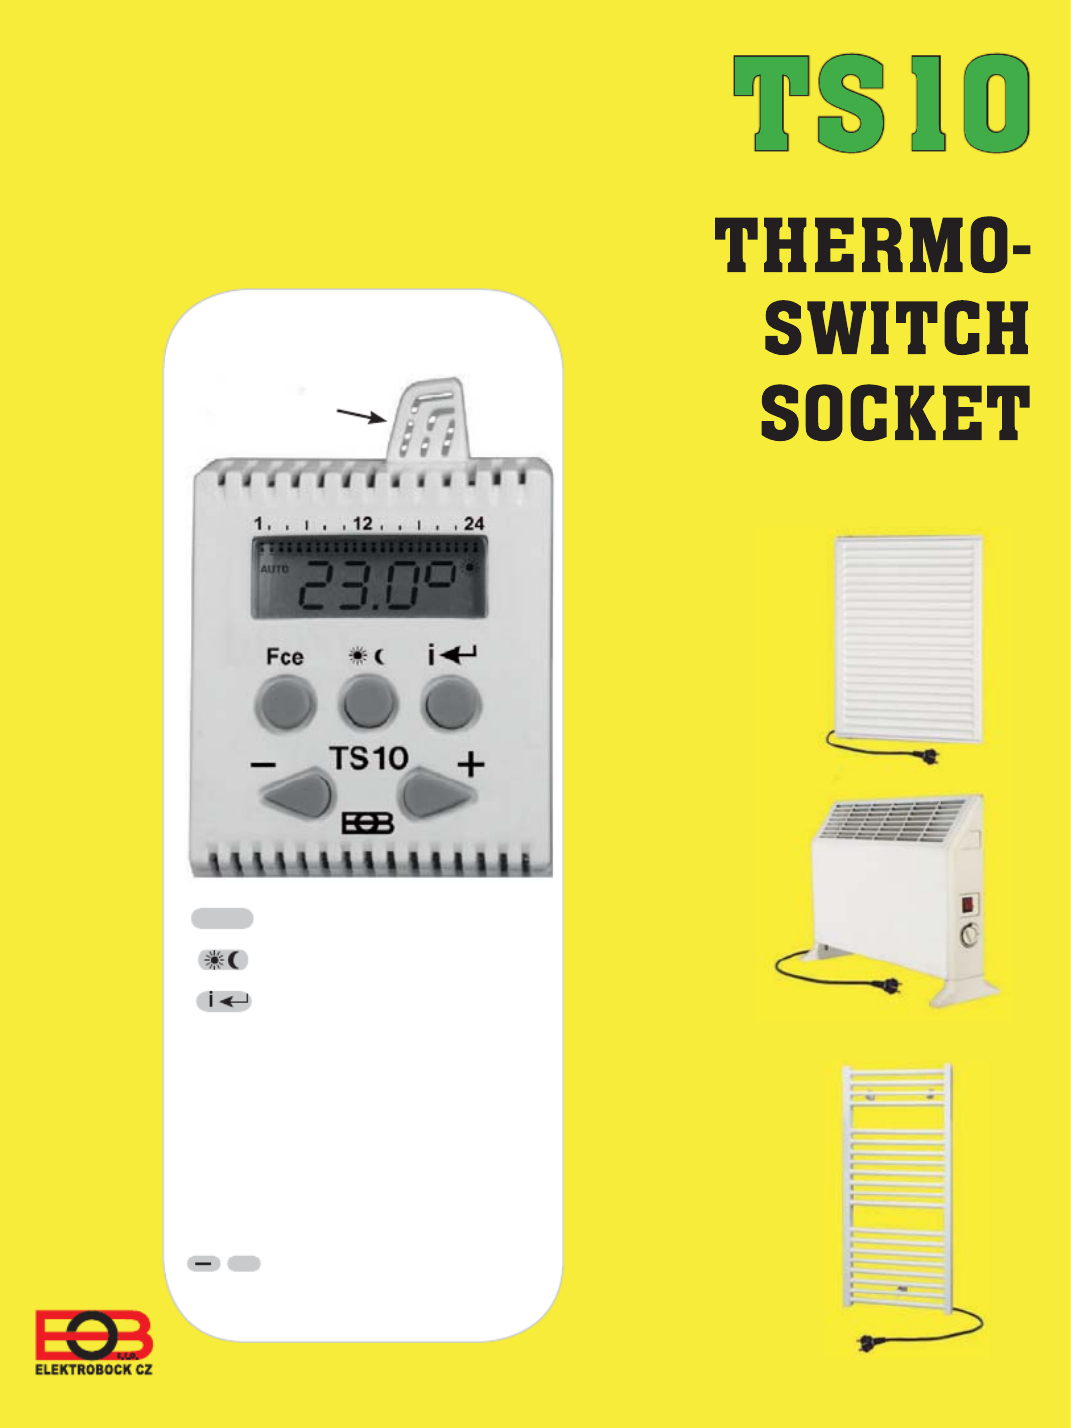
8WLOL]DWLRQH[DPSOHV
Temperature regulation
of connected appliance
MADE IN CZECH REPUBLIC
DESCRIPTION OF
CONTROLS
Fce = selection of functions
= selection of temperatures
= confirmation (ENTER),
information present
temperatur (tE:A), present
time , sum of (CL:O)
operating hours , (SU:MA)
and day (dE:n)
= setting of
temperature,time,
functions
/+
electric
heating
plates
direct
heating
bodies
electric
tubular
radiators
build-in temperature
sensor

DISPLAY DESCRIPTION
OPERATING INSTRUCTIONS
Setting of current day and time - “ CLO “ function
1. Functions of TS10
2. Proceed during programming
indication of set time and
temperature program
indication of
operating mode
indication of temperatures
comfort
economy
indication of required
temperature
After connection in 230V-socket is TS10 immediately ready for use. If sign
dO:bI is flashing on the display, the back-up battery is not fully charged
and it is necessary let the TS10 in 230V-socket to charge for minimal 2
days (full charge take about 4 days). After charging it is possible to remove
TS10 from socket without losing the actual time and you can provide the programming outside
the 230V-socket. (Maximal backup time is 100 hours).
After pushing the button you can select following functions by pushing
Fce
Fce
Fce
/+
/+
/+
/+
/+
: thermo-switch socket works according to program as set.
: serves for manual setting of temperature ( the selection by or by
buttons), the temperature should be constant up to next change of mode.
: setting of present day and time.
: setting of parameters (constants).
: programming mode.
: in this mode is TS10 permanently switched-off .
1. AUTO
2. MANU
3. CLO
4. PAr
5. PROG
6. OFF
Note: If you do not push any button in 2 minutes, TS10 returns into set mode. Longer pushing of
buttons speeds up their functions.
Before the programming itself, it is necessary to set present day, time and parameters (constants),
namely in following way.
Press the button, by pressing select CLO (CLOCK)
function and confirm by . Indication of hours blinks on the display,
use buttons to set required data and confirm by button.
Use the same method for minutes and day (d:1represents Monday,
d:2 Tuesday and d:7Sunday). After the completion of setting, press
button to return.
If we disconnect TS10 from the network 230V, the TS10 comes to stanby mode and
only actual time will be shown on display (the colon symbol will not be flashing) and the
buttos will be functionless. The activation of the buttons you can make by pressing the
button. When the sign dObI will be permanently shown on display, it is not possible
to make any settings on TS10 without connection into 230VAC
If the TS10 is not in 230V-socket the showed temperature is 2 °C lower than real actual temperature.

Parameters serve for setting of temperatures and another functions.
Setting of parameters (constants) - “ PAr “ function
PA:r2 economic temperature (the 17°C temperature is factory - set)
PA:r3 comfort temperature (the 23°C temperature is factory - set)
PA:r9 Firmwareversion/ factory setting restoration
- Press the button, by pressing select Par (Parameters)
and confirm by .
-PA:r2 shows on the display,
Fce
Fce
/+
/+
/+
-PA:r2 shows on the display
- confirm by and with using of buttons set economic
temperature and press button to confirm
-PA:r3 shows on the display
- confirm by and with using of buttons set comfort
temperature and press button to confirm
-PA:r9 shows on the display
- Firmware version for information only
- press button button to return.
Fce
/+
/+
Restoring the default settings:
- Press the button, by pressing select function Par and confirm by
button
- By pressing buttons select PA:r9, confirm by
- Simultaneously press and buttons, it will restore the factory settings!
Note: Use only when necessary, all saved changes will be deleted!
Fce
/+
/+
/+
Programming- “ PROG “ function
- Press the button, by pressing buttons select PROG
(PROGRAMMING) function and confirm by .
- By repeated pressing of buttons select one of following
options:
d:1 Monday
d:2 Tuesday
d:3 Wednesday
d:4 Thursday
d:5 Friday
d:6 Saturday
d:7 Sunday
d1:5 Monday to Friday
d6:7 Saturday to Sunday
d:1:7 all week
Tabel for day selection
- Confirm by , button. The sign 1:U1 shows on display for
setting up of the first time interval
- by pressing buttons set the time of first change (min. step
of 30 min.)
- assign comfort or economic temperature to the setting time by
repeated pressing of button
- Confirm by , display automatically shows symbol 1:U2 (the
second time interval in the first day).
Termékspecifikációk
| Márka: | Elektrobock |
| Kategória: | Elektromos aljzat |
| Modell: | TS10 |
Szüksége van segítségre?
Ha segítségre van szüksége Elektrobock TS10, tegyen fel kérdést alább, és más felhasználók válaszolnak Önnek
Útmutatók Elektromos aljzat Elektrobock

31 December 2025
28 Július 2024
26 Július 2024
24 Július 2024
22 Július 2024
21 Július 2024
Útmutatók Elektromos aljzat
- Elektromos aljzat Ikea
- Elektromos aljzat Nedis
- Elektromos aljzat Philips
- Elektromos aljzat SilverCrest
- Elektromos aljzat Emos
- Elektromos aljzat Vimar
- Elektromos aljzat Digitus
- Elektromos aljzat AVM
- Elektromos aljzat Crestron
- Elektromos aljzat ORNO
- Elektromos aljzat Gigabyte
- Elektromos aljzat Eurolite
- Elektromos aljzat Vivanco
- Elektromos aljzat Asus
- Elektromos aljzat Hama
- Elektromos aljzat Bose
- Elektromos aljzat Biostar
- Elektromos aljzat Asrock
- Elektromos aljzat V-TAC
- Elektromos aljzat Denver
- Elektromos aljzat Fibaro
- Elektromos aljzat Konig & Meyer
- Elektromos aljzat Lenoxx
- Elektromos aljzat Niceboy
- Elektromos aljzat SPC
- Elektromos aljzat Osram
- Elektromos aljzat APC
- Elektromos aljzat CyberPower
- Elektromos aljzat Showtec
- Elektromos aljzat Manhattan
- Elektromos aljzat Kogan
- Elektromos aljzat EQ-3
- Elektromos aljzat Pancontrol
- Elektromos aljzat Easy Home
- Elektromos aljzat Delta
- Elektromos aljzat Busch-Jaeger
- Elektromos aljzat Peerless-AV
- Elektromos aljzat Atlona
- Elektromos aljzat Schneider
- Elektromos aljzat Silverline
- Elektromos aljzat Neutrik
- Elektromos aljzat Kathrein
- Elektromos aljzat Homematic IP
- Elektromos aljzat Panduit
- Elektromos aljzat ECS
- Elektromos aljzat Metz
- Elektromos aljzat PCE
- Elektromos aljzat Schwaiger
- Elektromos aljzat Craftsman
- Elektromos aljzat Savio
- Elektromos aljzat Smartwares
- Elektromos aljzat Kopp
- Elektromos aljzat Hazet
- Elektromos aljzat Belkin
- Elektromos aljzat Kramer
- Elektromos aljzat Brennenstuhl
- Elektromos aljzat Anslut
- Elektromos aljzat KlikaanKlikuit
- Elektromos aljzat Perel
- Elektromos aljzat AV:link
- Elektromos aljzat Hager
- Elektromos aljzat Gamma
- Elektromos aljzat Reer
- Elektromos aljzat Gira
- Elektromos aljzat Jung
- Elektromos aljzat Peerless
- Elektromos aljzat Lanberg
- Elektromos aljzat Monoprice
- Elektromos aljzat SKROSS
- Elektromos aljzat Berker
- Elektromos aljzat Extron
- Elektromos aljzat Ebode
- Elektromos aljzat InterBar
- Elektromos aljzat Legrand
- Elektromos aljzat Phoenix Contact
- Elektromos aljzat Bachmann
- Elektromos aljzat Metz Connect
- Elektromos aljzat Leviton
- Elektromos aljzat DEHN
- Elektromos aljzat Omnilux
- Elektromos aljzat Hoopzi
- Elektromos aljzat Hall Research
- Elektromos aljzat Crydom
- Elektromos aljzat Adam Hall
- Elektromos aljzat 360 Electrical
- Elektromos aljzat PS Audio
- Elektromos aljzat Bearware
- Elektromos aljzat PureLink
- Elektromos aljzat Hoffman
Legújabb útmutatók Elektromos aljzat
5 Április 2025
5 Április 2025
5 Április 2025
5 Április 2025
5 Április 2025
5 Április 2025
5 Április 2025
12 Január 2025
11 Január 2025

11 Január 2025