Használati útmutató D-Link DSL-2888A
Olvassa el alább 📖 a magyar nyelvű használati útmutatót D-Link DSL-2888A (109 oldal) a router kategóriában. Ezt az útmutatót 4 ember találta hasznosnak és 2 felhasználó értékelte átlagosan 4.5 csillagra
Oldal 1/109

Version 1.00 | 05/09/2017
User Manual
DSL-2888A
Wireless AC1600 Dual-Band Gigabit ADSL2+/VDSL2
Modem Router

iD-Link DSL-2888A User Manual
D-Link reserves the right to revise this publication and to make changes in the content hereof without obligation to notify any
person or organization of such revisions or changes.
Manual Revisions
Trademarks
D-Link and the D-Link logo are trademarks or registered trademarks of D-Link Corporation or its subsidiaries in the United States or other countries.
All other company or product names mentioned herein are trademarks or registered trademarks of their respective companies.
Apple®, Apple logo®, Safari®, iPhone®, iPad®, iPod touch® and Macintosh® are trademarks of Apple Inc., registered in the U.S. and other countries.
App StoreSM is a service mark of Apple Inc.
Chrome™ browser, Google Play™ and Android™ are trademarks of Google Inc.
Internet Explorer®, Windows® and the Windows logo are trademarks of the Microsoft group of companies.
Copyright © 2017 by D-Link Corporation, Inc.
All rights reserved. This publication may not be reproduced, in whole or in part, without prior expressed written permission from D-Link Corporation, Inc.
Preface
Revision DescriptionDate
1.00 January 25, 2017 Initial release

iiD-Link DSL-2888A User Manual
Table of Contents
Preface i .................................................................................
Product Overview 1 ..............................................................
Package Contents 1 .........................................................................
System Requirements 2 .................................................................
Introduction 3 ...................................................................................
Features 4 ............................................................................................
Hardware Overview 5 .....................................................................
Back Panel 5 ...............................................................................
Side Panel 6 ................................................................................
LEDs 7 ...........................................................................................
Installation 8 .........................................................................
Before you Begin 8 ...........................................................................
Wireless Installation Considerations 9 ......................................
Manual Setup 10 ...............................................................................
Getting Started 13 ................................................................
Setup Wizard ................................................................................14
Conguration 19 ...................................................................
Home 19 ..............................................................................................
Internet 20 ...................................................................................
IPv4 21 .....................................................................................
IPv6 22 .....................................................................................
DSL 23 ......................................................................................
DSL-2888A 24 .............................................................................
Connected Clients 25 ..............................................................
USB Device 26 ............................................................................
Settings 27 ..........................................................................................
Wizard 27 .....................................................................................
Internet 27 ...................................................................................
ADSL 28 ...................................................................................
VDSL 29 ...................................................................................
Ethernet 30 .............................................................................
USB 31 ......................................................................................
IPv4 Settings 32 ....................................................................
Static IP 32 ........................................................................
Dynamic IP (DHCP) 33 ..................................................
PPPoE............................................................................34
Bridged 35 ........................................................................
IPv6 Settings 36 ....................................................................
Auto Detection 36 .........................................................
Static IPv6 37 ...................................................................
Auto Conguration (SLAAC/DHCPv6) 38 ..............
DSL Prole 39 ........................................................................
Priority 40 ...............................................................................
Wireless 41 ..................................................................................
Multiple SSID 43 ...................................................................
Network 44 ..................................................................................
SharePort 47 ...............................................................................
Create User 48 .......................................................................
Features 49 ..........................................................................................
IPv4/IPv6 Rules 49 ...............................................................
Table of Contents

iiiD-Link DSL-2888A User Manual
Table of Contents
Advanced 50 ...............................................................................
Virtual Server 51 ...................................................................
Website Filter 52 ........................................................................
Static Route 53 ...........................................................................
IPv4 53 .....................................................................................
IPv6 54 .....................................................................................
Dynamic DNS 55 .......................................................................
Port Mapping 56 .......................................................................
Management 57 ................................................................................
Time & Schedule 57 .................................................................
Time 57 ....................................................................................
Parental Control / Schedule 58 .......................................
System Log 59 ............................................................................
System Log 59 .......................................................................
System Log View ............................................................60
Admin 61 .....................................................................................
System ...............................................................................62
Upgrade 63 .................................................................................
Statistics 64 .................................................................................
Connect a Wireless Client to your Router 65 ......................
WPS Button 65 ...................................................................................
Windows® 10 66 ................................................................................
Windows® 8 68 ...................................................................................
WPA/WPA2 68 ............................................................................
Windows® 7 70 ...................................................................................
WPA/WPA2 70 ............................................................................
Windows Vista® ............................................................................ 73
WPA/WPA2 74 ............................................................................
Troubleshooting 76 ..............................................................
Wireless Basics 80 .................................................................
What is Wireless? ......................................................................... 81
Wireless Modes 84 ............................................................................
Networking Basics 85 ...........................................................
Check your IP address 85 ...............................................................
Statically Assign an IP address 86 ...............................................
Wireless Security 87 ............................................................
What is WPA? ...................................................................87
Technical Specications 88 ..................................................
Regulatory Statements 89 ...................................................

2D-Link DSL-2888A User Manual
Section 1 - Product Overview
Network Requirements
• An active account with an Internet Service Provider using one of the
following connection types:
• A VDSL/ADSL connection to a telephone line using the DSL port
• A broadband device connected using the WAN port
• A mobile broadband 3G/4G/LTE connection using a compatible USB
modem. A list of compatible USB dongles is available at www.dlink.com.
• 802.11ac/n/g/b/a wireless or Ethernet port
Web-based Conguration
Utility Requirements
Computer with the following:
• Windows®, Macintosh, or Linux-based operating system
• An installed wired or wireless Ethernet adapter
Browser Requirements:
• Internet Explorer 10 or higher
• EDGE Browser 20 or higher
• Firefox 11 or higher
• Safari 5 or higher
• Chrome 17 or higher
Windows® Users: Make sure you have the latest version of Java installed. Visit
www.java.com to download the latest version.
System Requirements

3D-Link DSL-2888A User Manual
Section 1 - Product Overview
Introduction
The D-Link DSL-2888A Wireless AC1600 Dual-Band Gigabit ADSL2+/VDSL2 Modem Router shares your DSL Internet connection over blazing-fast
Wireless AC of up to 1600 Mbps (Up to 1300 Mbps 5 GHz Wireless AC and up to 300 Mbps 2.4 GHz Wireless N)1, and uses advanced AC beamforming
technology to maximize the speed and range of your wireless signal to signicantly outperform 802.11n and other older, non-beamforming capable
802.11ac devices. It also comes equipped with a Gigabit WAN port, two USB ports, and four Gigabit ports to provide speeds up to 10 times faster
than standard 10/100 ports. Multiple WAN ports provide uninterrupted Internet service thanks to failover protection, allowing you to use the DSL
port to connect to your VDSL/ADSL service, the WAN port to connect to Ethernet based networks, or a supported mobile broadband USB dongle
to connect to the Internet using your mobile provider.
The DSL-2888A supports the latest wireless security features to help prevent unauthorized access, be it from over a wireless network or the Internet.
Support for WPA™ and WPA2™ standards ensure that you will be able to use the best possible encryption regardless of your client devices. In addition,
this router is equipped with a dual-active rewall (SPI and NAT) to prevent potential attacks over the Internet.
The DSL-2888A's SharePort technology lets you take advantage of le sharing. Simply plug in a USB storage drive into a USB port on the back or
side of your DSL-2888A and you can access les, stream videos, view photos, or listen to music on your laptop or mobile devices.
The DSL-2888A Wireless AC1600 Dual-Band Gigabit ADSL2+/VDSL2 Modem Router provides incredible speeds, smart antenna technology, fast
ports, cloud features, and terric security features. It also features an innovative design and easy installation options.
1 Maximum wireless signal rate derived from IEEE Standard 802.11a, 802.11g, 802.11n and 802.11ac specications. Actual data throughput will vary. Network conditions and
environmental factors, including volume of network trac, building materials and construction, and network overhead, lower actual data throughput rate. Environmental
conditions will adversely aect wireless signal range.

4D-Link DSL-2888A User Manual
Section 1 - Product Overview
Features
• Superior Wireless Networking - The DSL-2888A provides Gigabit wireless speeds of up to a combined 1600 Mbps (1300 Mbps
802.11ac 5 GHz, plus 300 Mbps 802.11n 2.4 GHz)1. This capability rivals wired connections, allowing users to participate in real-time
activities online, such as HD video communication, online gaming, and use mobile devices from anywhere in your home while still
oering full 802.11n/g/b backward compatibility.
• Extreme Wired LAN and WAN Networking - With four 10/100/1000 Gigabit Ethernet LAN ports, the DSL-2888A has an enormous
amount of bandwidth to take full advantage of the highest speed broadband connections available.
• Superior Internet Connectivity - With a 10/100/1000 Gigabit Ethernet WAN port, DSL modem supporting up to 100 Mbps
downloads, and USB ports which supports mobile 3G/4G broadband dongles, the DSL-2888A has several options available to
connect you the the Internet.
• IPv6 Support - The DSL-2888A supports IPv6 connectivity.
• Advanced Firewall Features - The web-based user interface displays a number of advanced network management features. Easily
apply content ltering based on MAC address, URL, and/or domain name. Schedule these lters to be active on certain days or for
a duration of hours or minutes.
• Secure Multiple/Concurrent Sessions - The DSL-2888A can pass through VPN sessions. It supports multiple and concurrent IPSec
and PPTP sessions, so users behind the DSL-2888A can securely access corporate networks.
• User-friendly Setup Wizard - Through its easy-to-use web-based user interface, the DSL-2888A lets you quickly congure and
secure your router to your specic settings in minutes.
1 Maximum wireless signal rate derived from IEEE Standard 802.11a, 802.11g, 802.11n and 802.11ac specications. Actual data throughput will vary. Network conditions and
environmental factors, including volume of network trac, building materials and construction, and network overhead, lower actual data throughput rate. Environmental
conditions will adversely aect wireless signal range.
5D-Link DSL-2888A User Manual
Section 1 - Product Overview
Hardware Overview
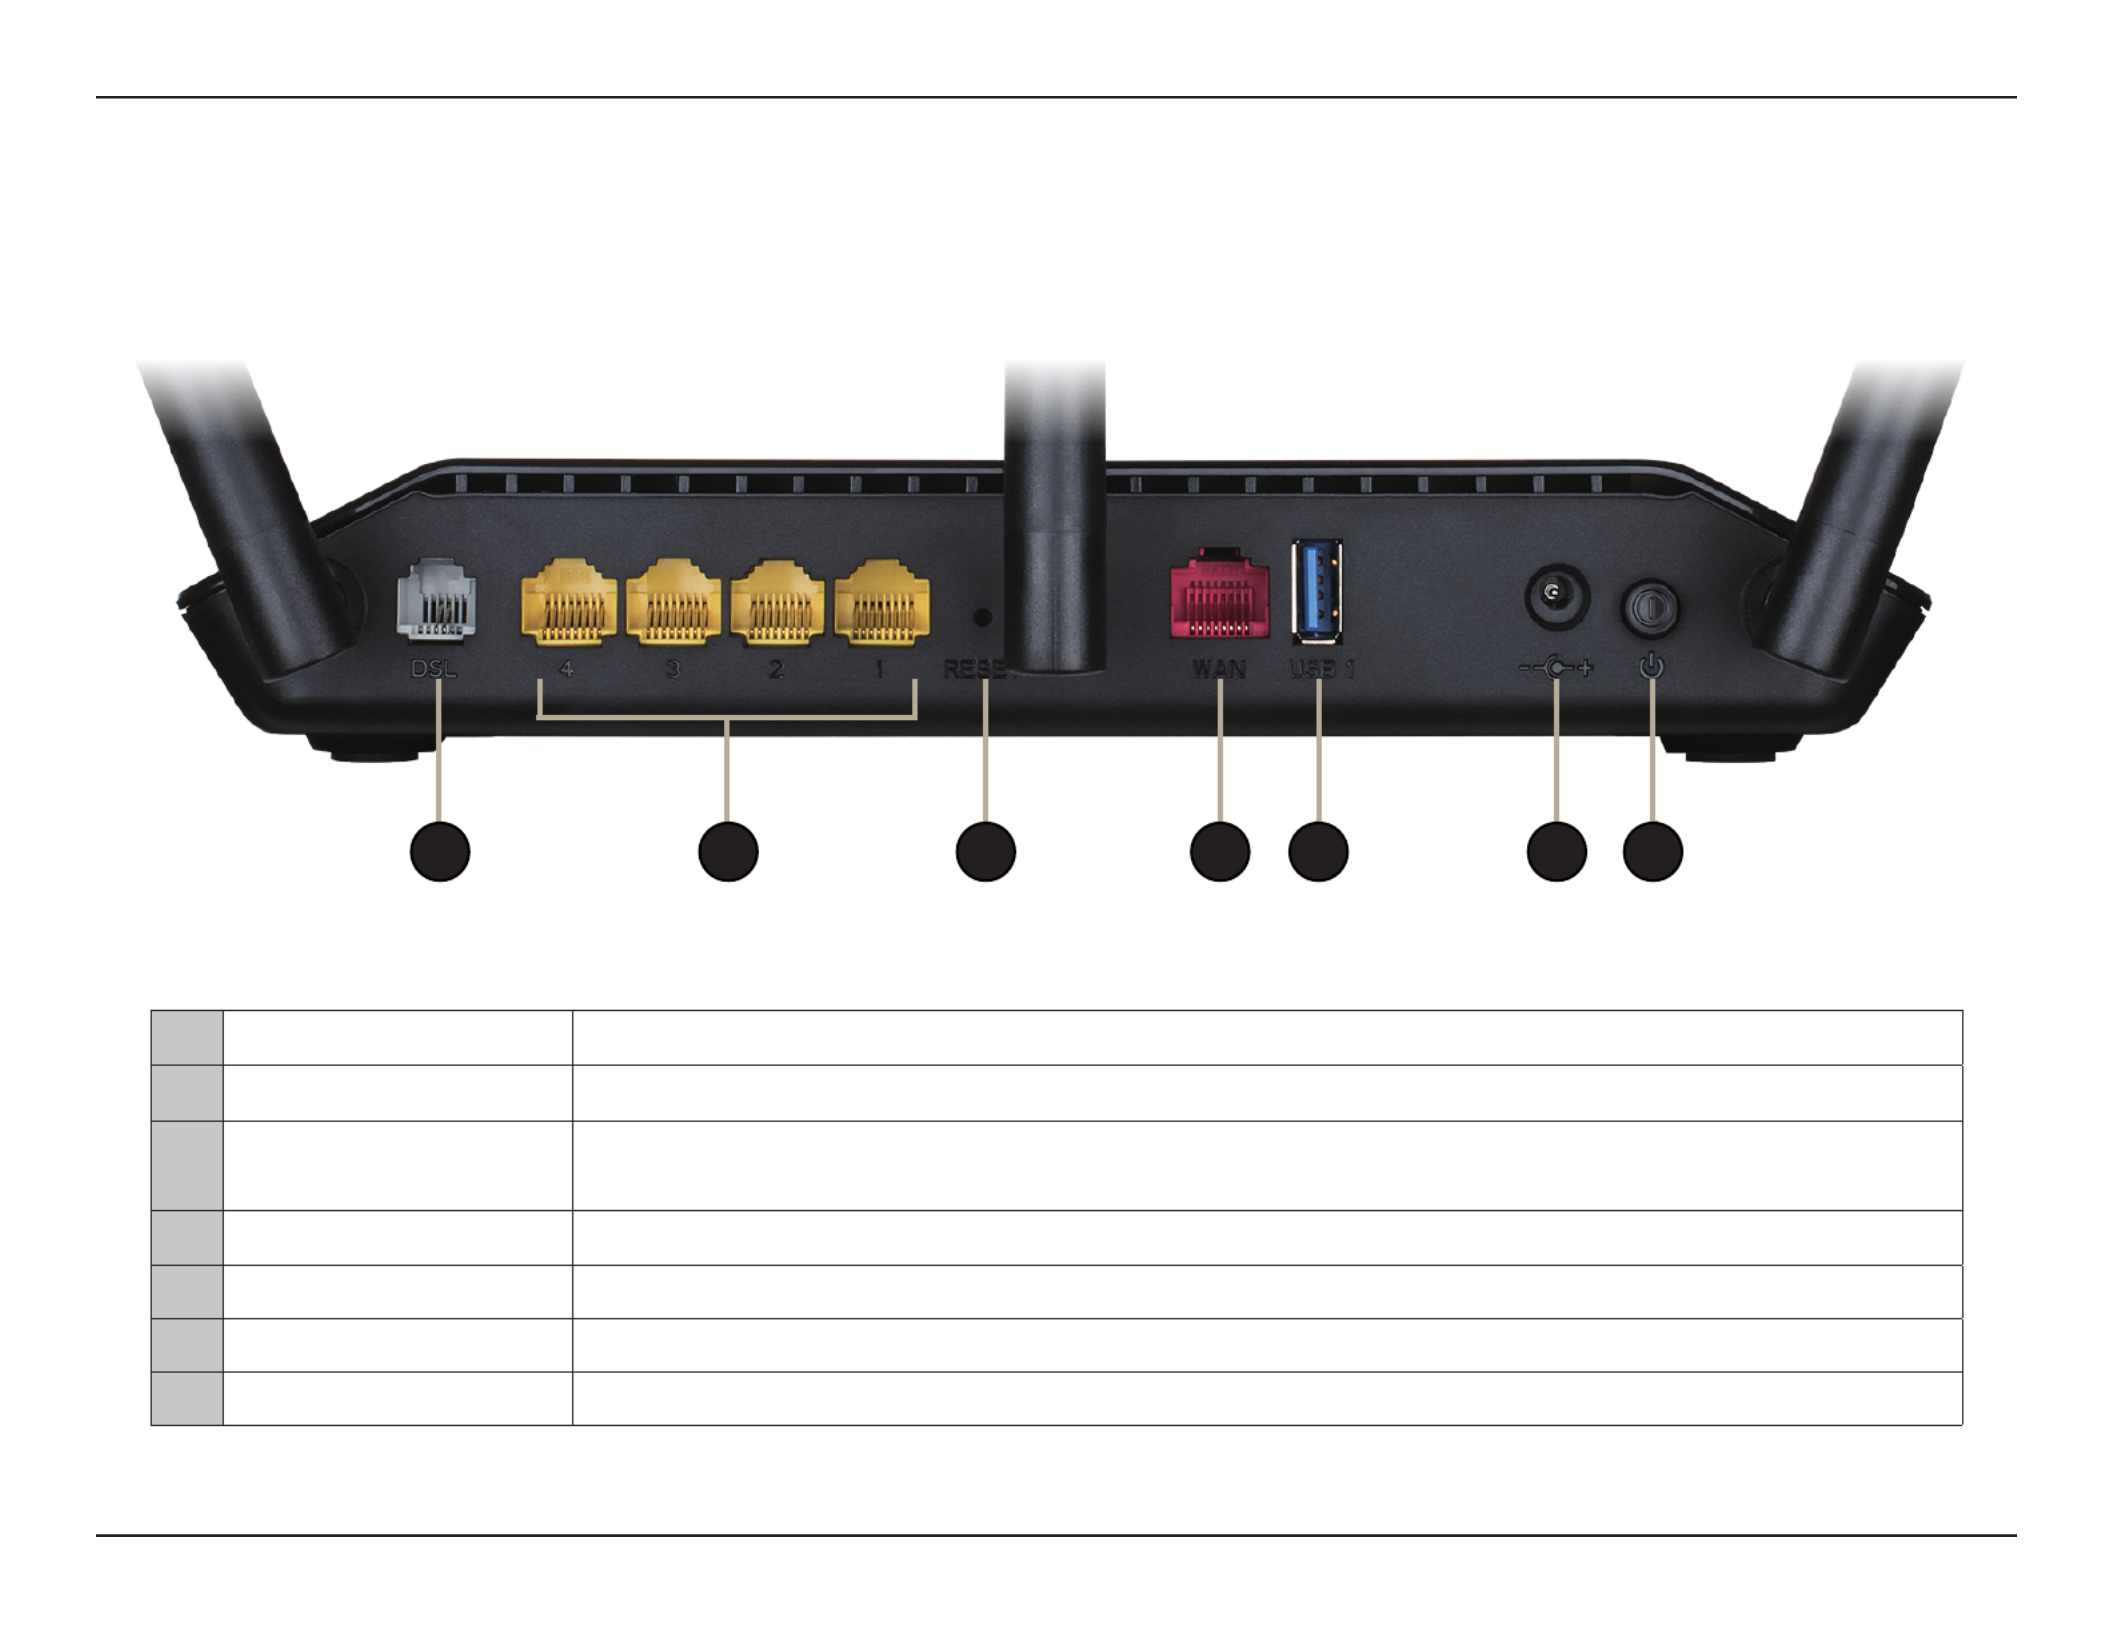
Back Panel
1 3 4 5 62 7
1 DSL Port Connects to an DSL-enabled telephone line and with the supplied microsplitter.
2 Gigabit LAN Ports (1-4) Connects to Ethernet devices such as computers, switches, storage (NAS) devices and game consoles.
3 Reset Button To reset the device to its factory default settings, use a paper clip to press and hold the reset button for
3 seconds.
4 Gigabit WAN Port Connects to Ethernet WAN devices.
5 USB 2.0 Port Connects to USB ash drives to share content or USB mobile dongles for Internet connectivity.
6 Power Connector Connector for the supplied power adapter.
7 Power Button Press the power button to power the DSL-2888A on and o.

7D-Link DSL-2888A User Manual
Section 1 - Product Overview
2 3 8
64 75 91
Hardware Overview
LEDs
1Power
Solid Green A solid green light indicates the device is powered on and working properly.
Solid Red A solid red light indicates that the device is booting or an error has occurred.
Blinking Green A blinking green light indicates that backup mode is active.
Blinking Red A blinking red light indicates that the device is resetting to the factory defaults or
that the rmware is being updated.
2Internet Solid Green A solid green light indicates an Internet connection.
Solid Red A solid red light indicates no Internet connection is available.
3WPS Solid Green A solid green light indicates the WPS process is active.
4Wireless 2.4 Solid Green A solid green light indicates that the 2.4 GHz wireless network is enabled.
5Wireless 5G Solid Green A solid green light indicates that the 5 GHz wireless network is enabled.
6USB Solid Green A solid green light indicates that a USB device is detected on a USB port.
7WAN Solid Green A solid blue light indicates an Ethernet WAN port connection.
Blinking Green A blinking green light indicates Ethernet WAN port activity.
8LAN Ports 1-4 Solid Green A solid green light indicates a device is connected to the respective LAN port.
Blinking Green A blinking green light indicates LAN port activity.
9DSL Solid Green A solid green light indicates a proper connection to a DSL enabled telephone line.
Blinking Green A blinking green light indicates the DSL port is negotiating a connection.

8D-Link DSL-2888A User Manual
Section 2 - Installation
Before you Begin
Installation
This section will walk you through the installation process. Placement of the router is very important for proper operation and best performance.
Note: This installation section is written for users who are setting up their home Internet service with the DSL-2888A Wireless AC1600 Dual-Band
Gigabit ADSL2+/VDSL2 Modem Router for the rst time. If you are replacing an existing DSL modem and/or router, you may need to modify these
steps.
• Placement of the router is very important. Do not place the router in an enclosed area such as a closet, cabinet, attic, or garage.
• Congure the router with the computer that was last connected directly to your Internet connection. Verify that it is connected to the
Internet before connecting additional devices.
• If your ISP provided you with a modem/router combo, you will need to set it to “bridge” mode so the router can work properly. Please
contact your Internet Service Provider (ISP) or refer to the user manual for your modem/router device.
• If connecting to a DSL modem, make sure to have your DSL service information provided by your Internet Service Provider handy.
This information is likely to include your DSL account's username and password. Your ISP may also supply you with additional WAN
conguration settings which might be necessary to establish a connection.
• If you are connecting a considerable amount of networking equipment, it may be a good idea to take the time to label each cable or
take a picture of your existing setup before making any changes.
• If you have DSL and are connecting via PPPoE, make sure you disable or uninstall any PPPoE software such as WinPoET, BroadJump,
or EnterNet 300 from your computer or you will not be able to connect to the Internet.

9D-Link DSL-2888A User Manual
Section 2 - Installation
Wireless Installation Considerations
The D-Link wireless router lets you access your network using a wireless connection from virtually anywhere within the operating range of your
wireless network. Keep in mind that the number, thickness and location of walls, ceilings, or other objects that the wireless signals must pass
through may limit the range. Typical ranges vary depending on the types of materials and background RF (radio frequency) noise in your home or
business. The key to maximizing wireless range is to follow these basic guidelines:
1. Keep the number of walls and ceilings between the D-Link router and other network devices to a minimum - each wall or ceiling
can reduce your adapter’s range from 1 to 30 meters (3 to 90 feet). Position your devices so that the number of walls or ceilings is
minimized.
2. Be aware of the direct line between network devices. A wall that is 0.5 meters (1.5 feet) thick, at a 45-degree angle appears to be
almost 1 meter (3 feet) thick. At a 2-degree angle it looks over 14 meters (42 feet) thick! Position devices so that the signal will
travel straight through a wall or ceiling (instead of at an angle) for better reception.
3. Building materials make a dierence. A solid metal door or aluminum studs may have a negative eect on range. Try to position
access points, wireless routers, and computers so that the signal passes through drywall or open doorways. Materials and objects
such as glass, steel, metal, walls with insulation, water (sh tanks), mirrors, le cabinets, brick, and concrete will degrade your
wireless signal.
4. Keep your product away at least 1 to 2 meters (3 to 6 feet) from electrical devices or appliances that generate RF noise.
5. If you are using 2.4 GHz cordless phones or X-10 (wireless products such as ceiling fans, lights, and home security systems), your
wireless connection may degrade dramatically or drop completely. Make sure your 2.4 GHz phone base is as far away from your
wireless devices as possible. The base transmits a signal even if the phone is not in use.

10D-Link DSL-2888A User Manual
Section 2 - Installation
Manual Setup
Microsplitter
Telephone Outlet
PHONE
DSL-2888A
Phone Cable Microsplitter
1Connect the supplied microsplitter to the telephone outlet. If you are using a telephone handset on the same
outlet, connect it to the PHONE port on the microsplitter.
Connect the phone cable from the DSL port on the microsplitter to the DSL port of the DSL-2888A.
2Caution: To reduce the risk of re, use only No. 26 AWG or larger telecommunication line cord.

11D-Link DSL-2888A User Manual
Section 2 - Installation
4Press the power button and verify that the power LED is lit. Allow one minute for the DSL-2888A to boot
up. After it has powered up, verify that the Power and DSL LEDs are both lit.
3
DSL-2888A
Power Adapter
Plug the power adapter into your modem router and connect to an available power outlet or surge protector.
Caution: Use only the included power adapter with this product.
1Power
2Internet
3WPS
4Wireless 2.4
5Wireless 5G
6USB 1
7WAN
8LAN Ports 1-4
9DSL
12D-Link DSL-2888A User Manual
Section 2 - Installation
Computer
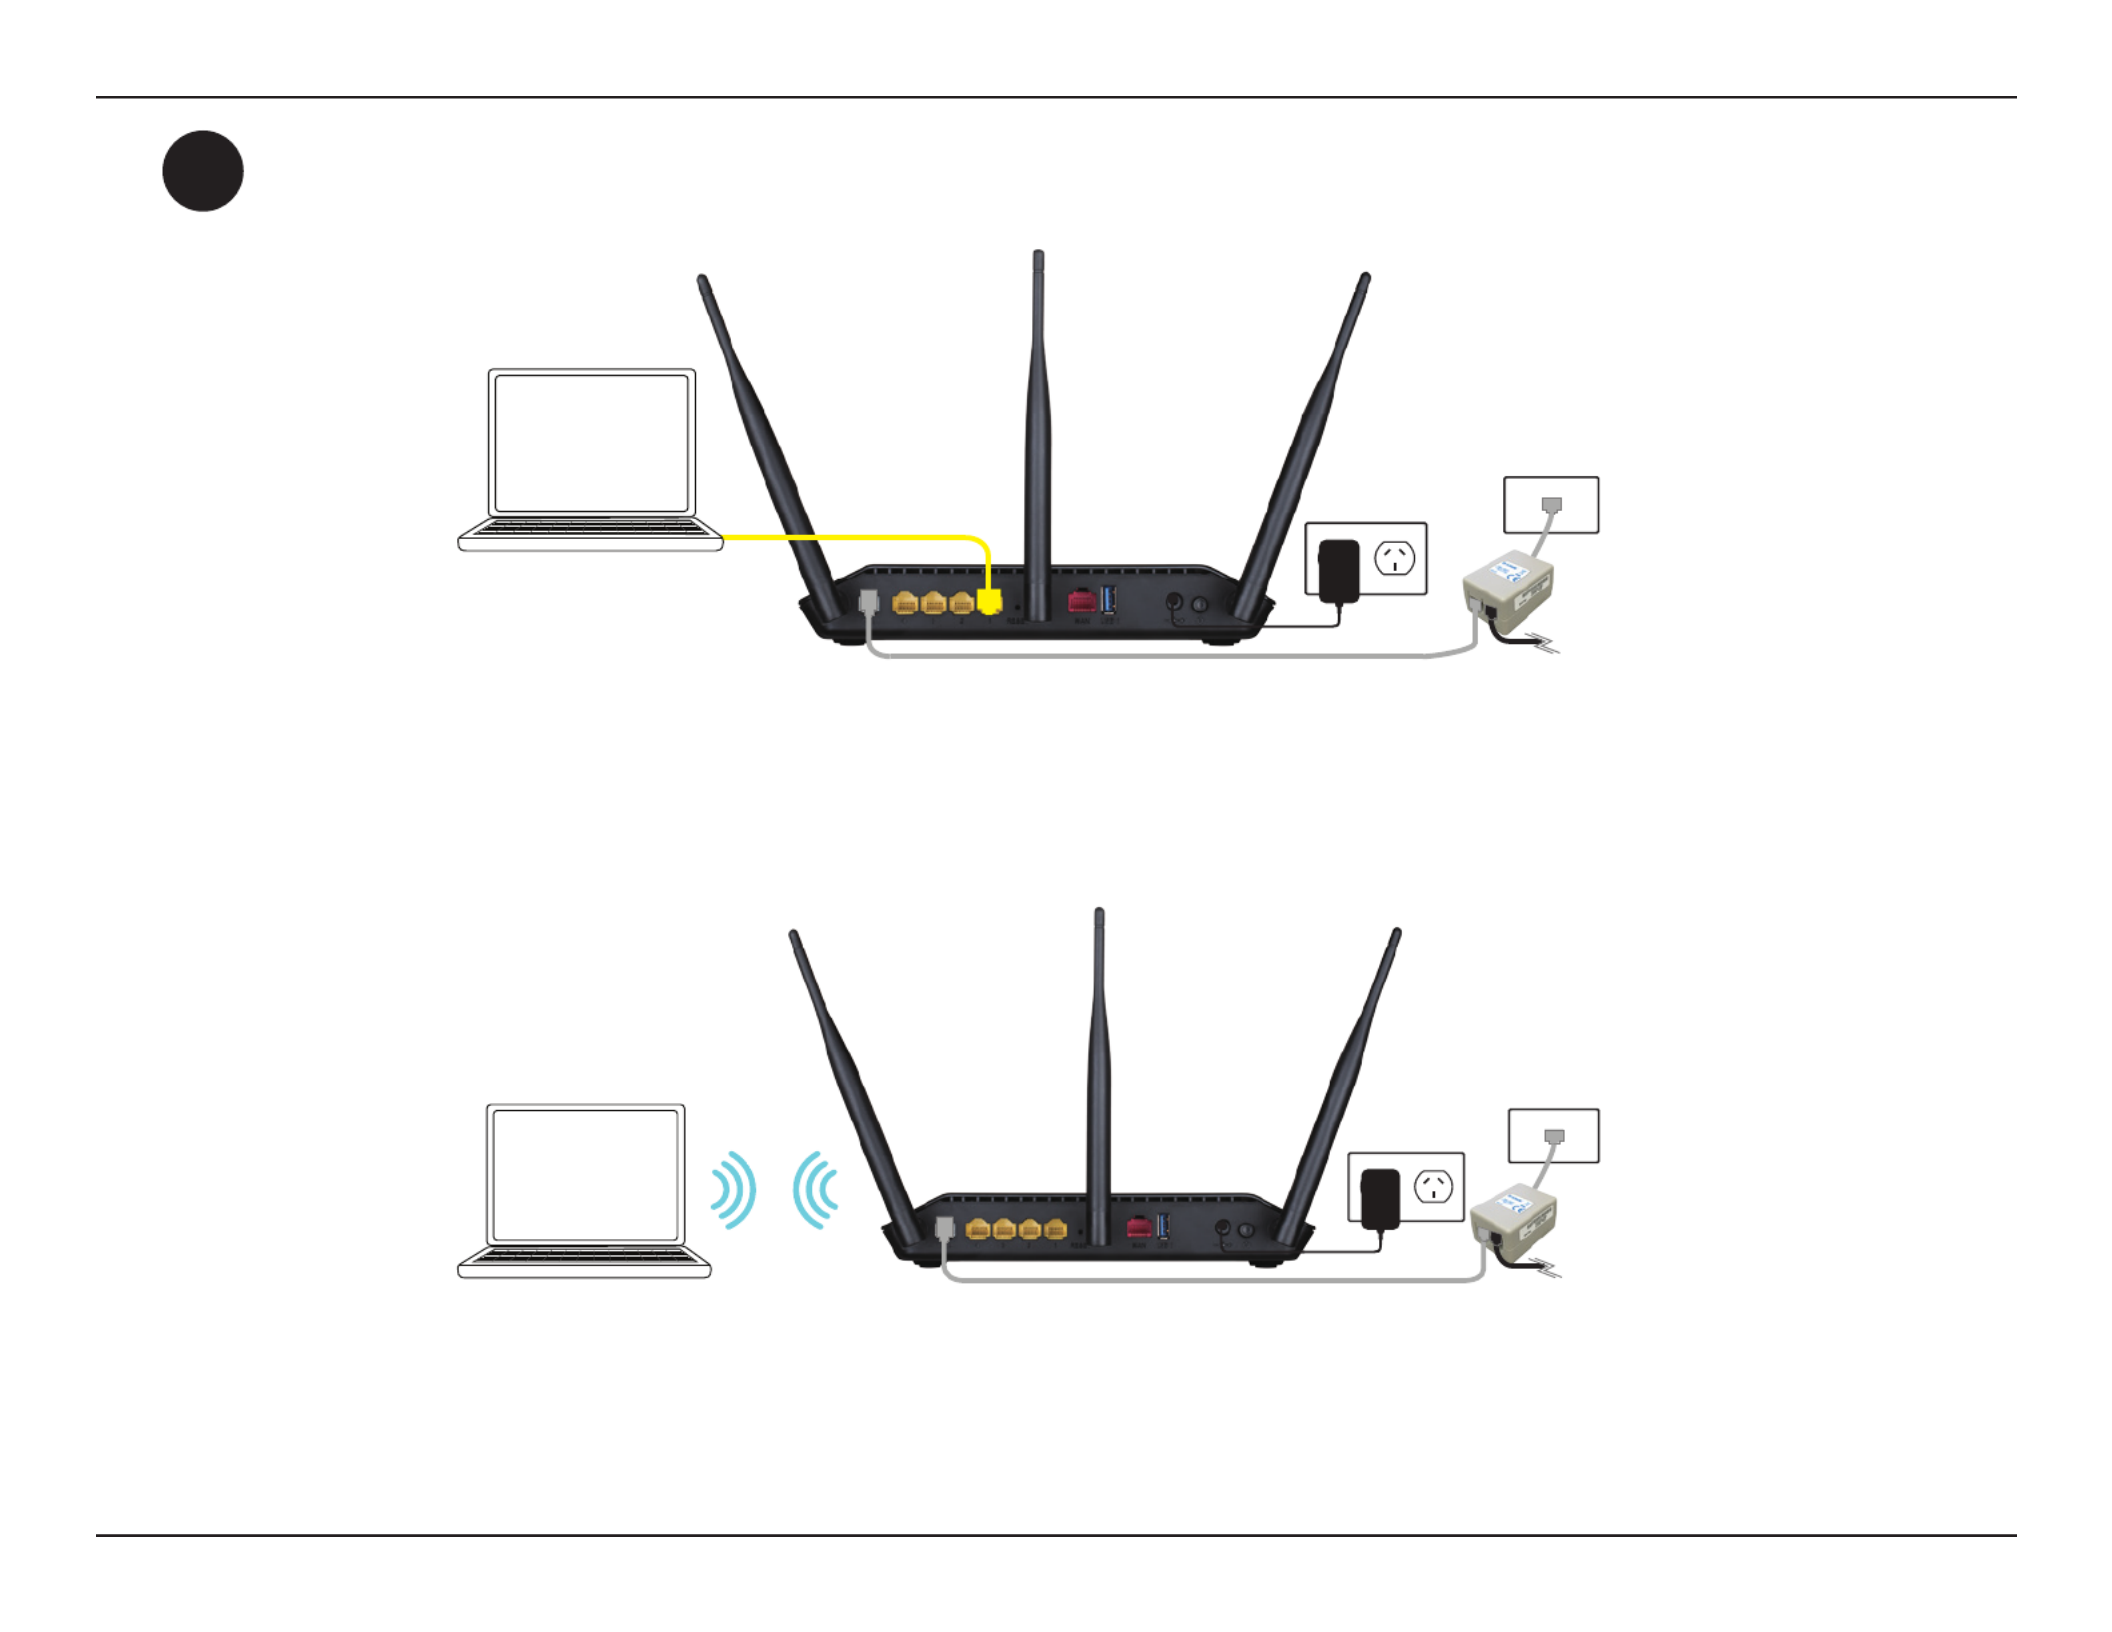
5If you wish to use a wired connection, connect the Ethernet cable from a LAN port of the DSL-2888A to the
Ethernet port on your computer.
If you wish to use a wireless connection, connect to either one of the wireless networks listed on the product
label attached to the bottom of the DSL-2888A from your computer’s wireless utility. Enter the default Wi-Fi
password which is also printed on the product label.
Computer
Ethernet Cable

13D-Link DSL-2888A User Manual
Section 3 - Getting Started
There are two ways you can congure your router to connect to the Internet and connect to your devices:
• D-Link Setup Wizard - This wizard allows you to quickly set up your router. Refer to Setup Wizard on page .14
• Manual Setup - Log into the router and manually congure your router. Refer to Conguration 19on page .
Getting Started

14D-Link DSL-2888A User Manual
Section 3 - Getting Started
Setup Wizard
If this is your first time installing the router, open your web browser and enter
http://192.168.1.1 in the address bar.
Admin Password:
Log In
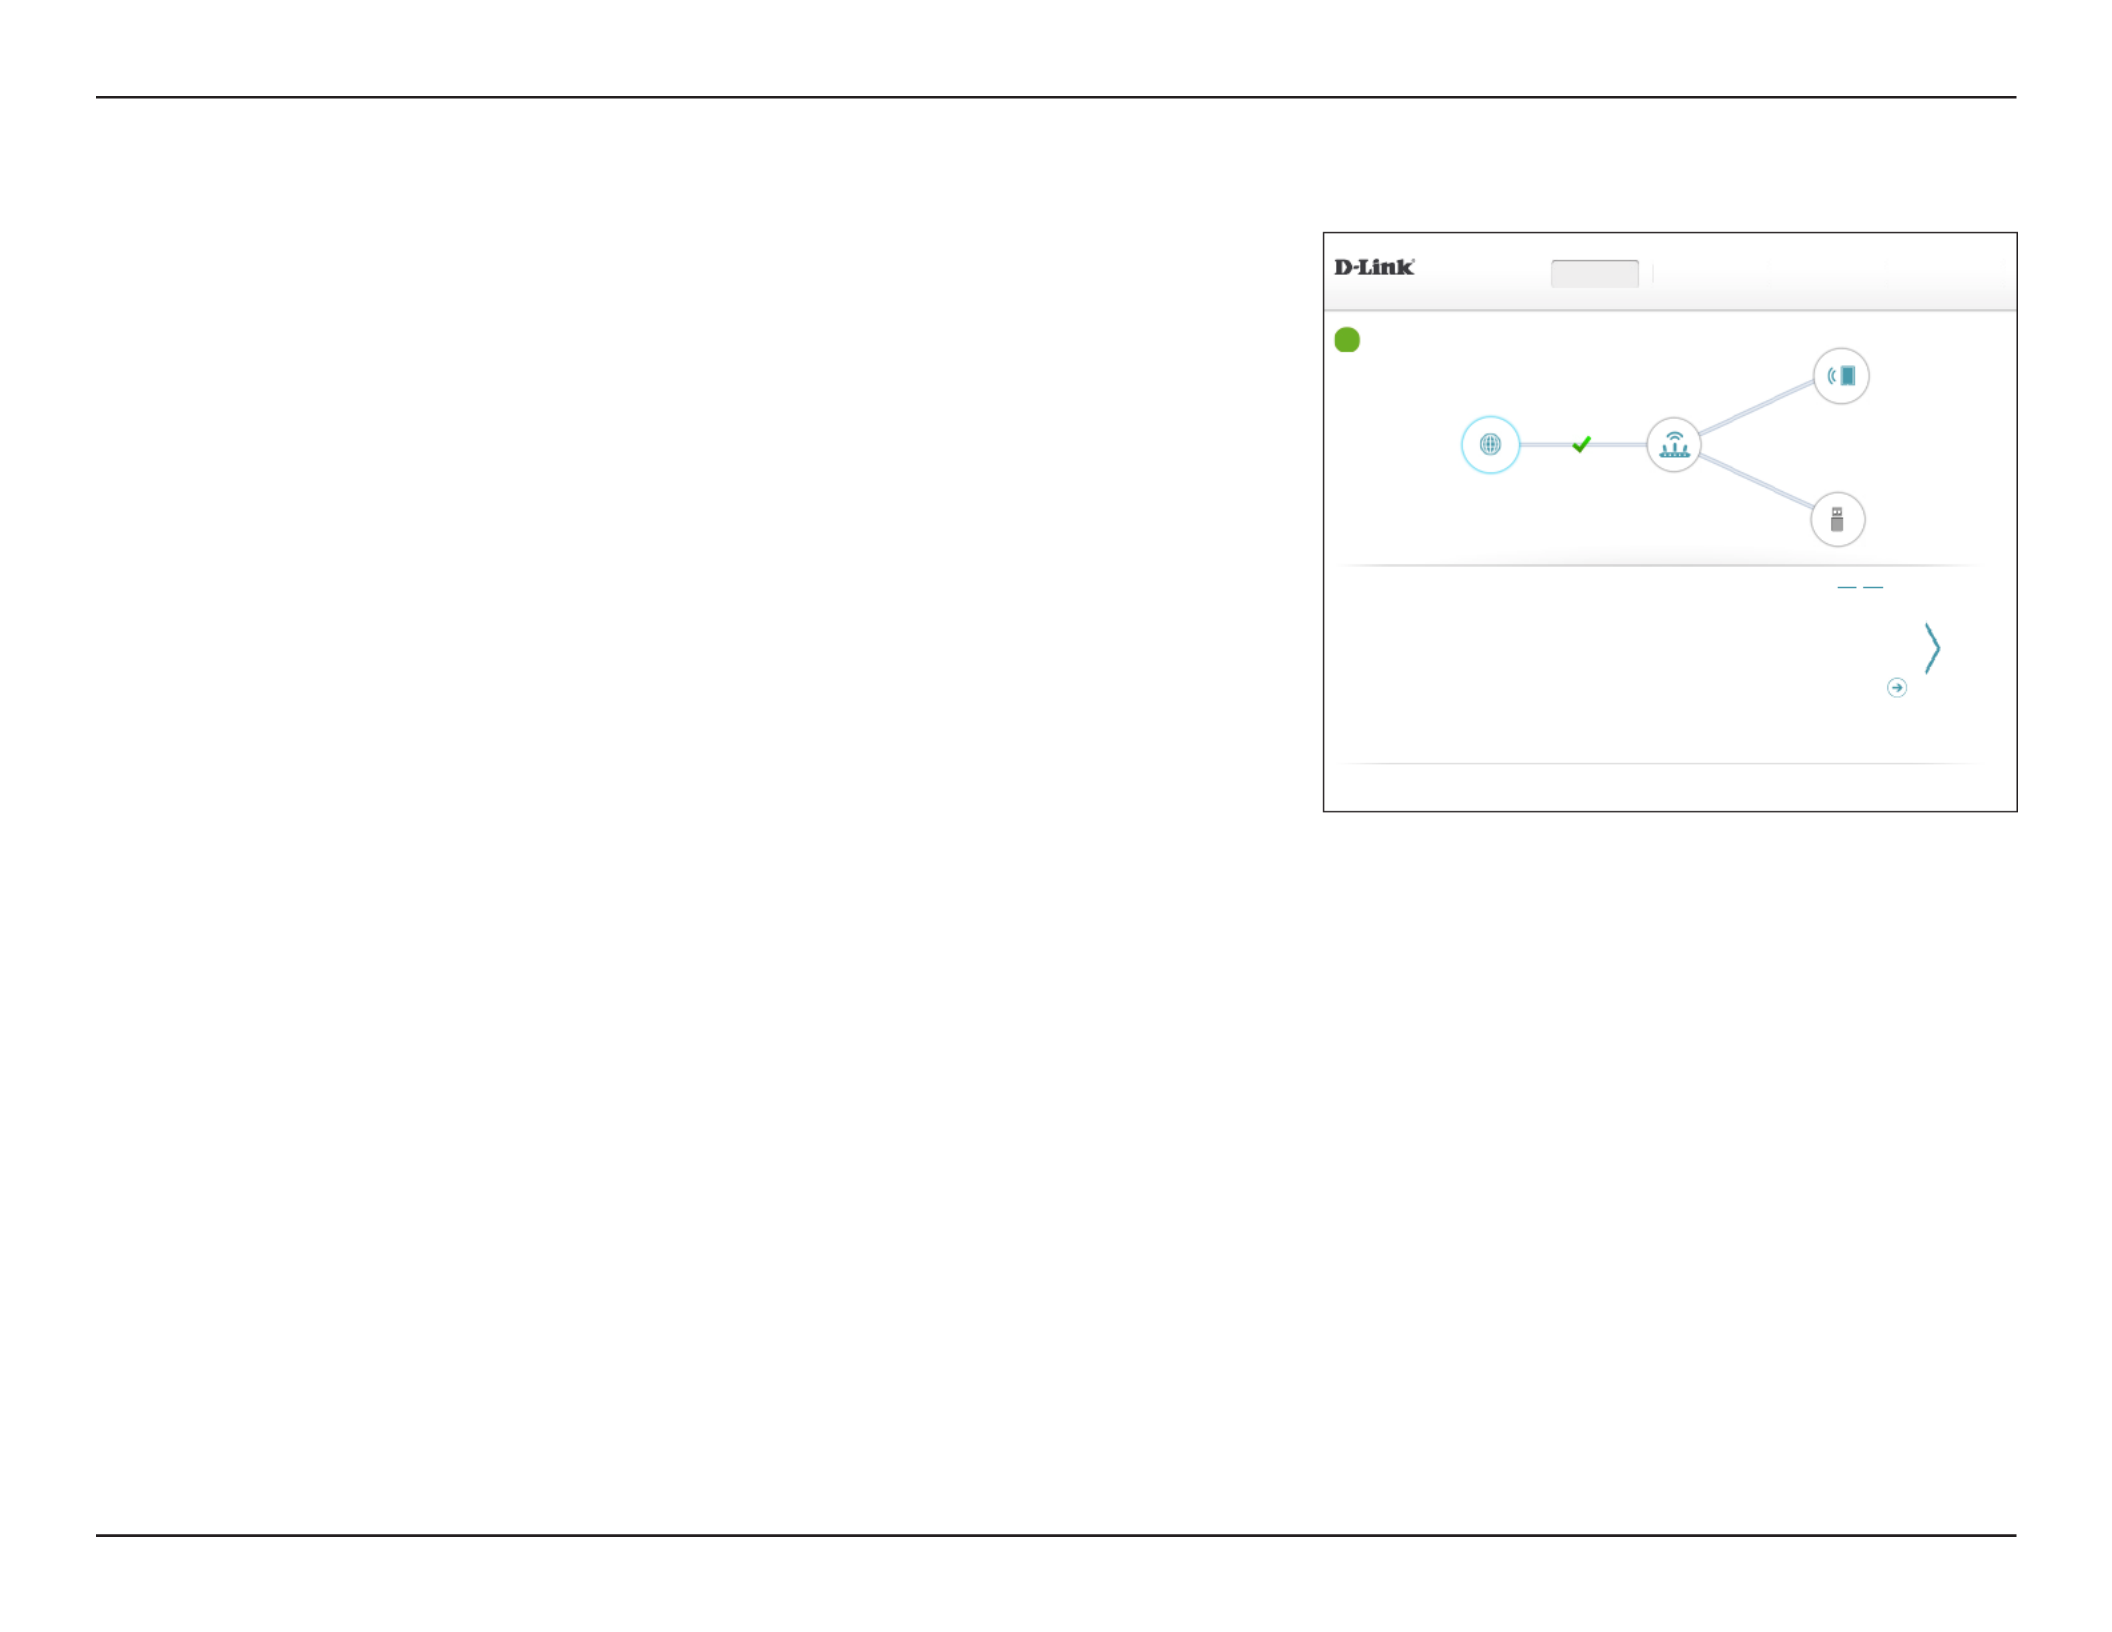
The setup wizard should automatically appear.
The router’s home page will open displaying the current connection status. Click the Click
to Repair button to run the Setup Wizard.
Note: The system will automatically log out after a period of inactivity.
Internet
DSL-2888A HW:V1.0.0 FW:V1.1.43
Settings Features ManagementHome
Internet DSL-2888A
Connected Clients: 1
USB Device
Internet Disconnected
Click on any item in the diagram for more information.
Click to repair
Step 1: Install your device
Step 2: Congure your Network and Wi-Fi Settings
Step 3: Set your router password
Welcome
Internet Wi-Fi ClientDSL-2888A
This wizard will guide you through a step-by-step process to congure your new D-Link
device.
Next
English
⌵
If prompted with a log in screen, click Log In to proceed. No password is enabled by default.
If you are having trouble logging in or experiencing trouble with the conguration utility, try
clearing your browser cache or try using your web browsers 'private browser' or incognito
mode.

15D-Link DSL-2888A User Manual
Section 3 - Getting Started
The wizard is designed to guide you through a step-by-step process to congure your new
D-Link router and connect to the Internet.
Click to continue. Next
Please wait while your router detects your Internet connection type. If the router detects
your Internet connection, you may need to enter your ISP information such as username
and password.
Step 1: Install your device
Step 2: Congure your Network and Wi-Fi Settings
Step 3: Set your router password
Welcome
Internet Wi-Fi ClientDSL-2888A
This wizard will guide you through a step-by-step process to congure your new D-Link
device.
Next
English
⌵
Setup Wizard (continued)
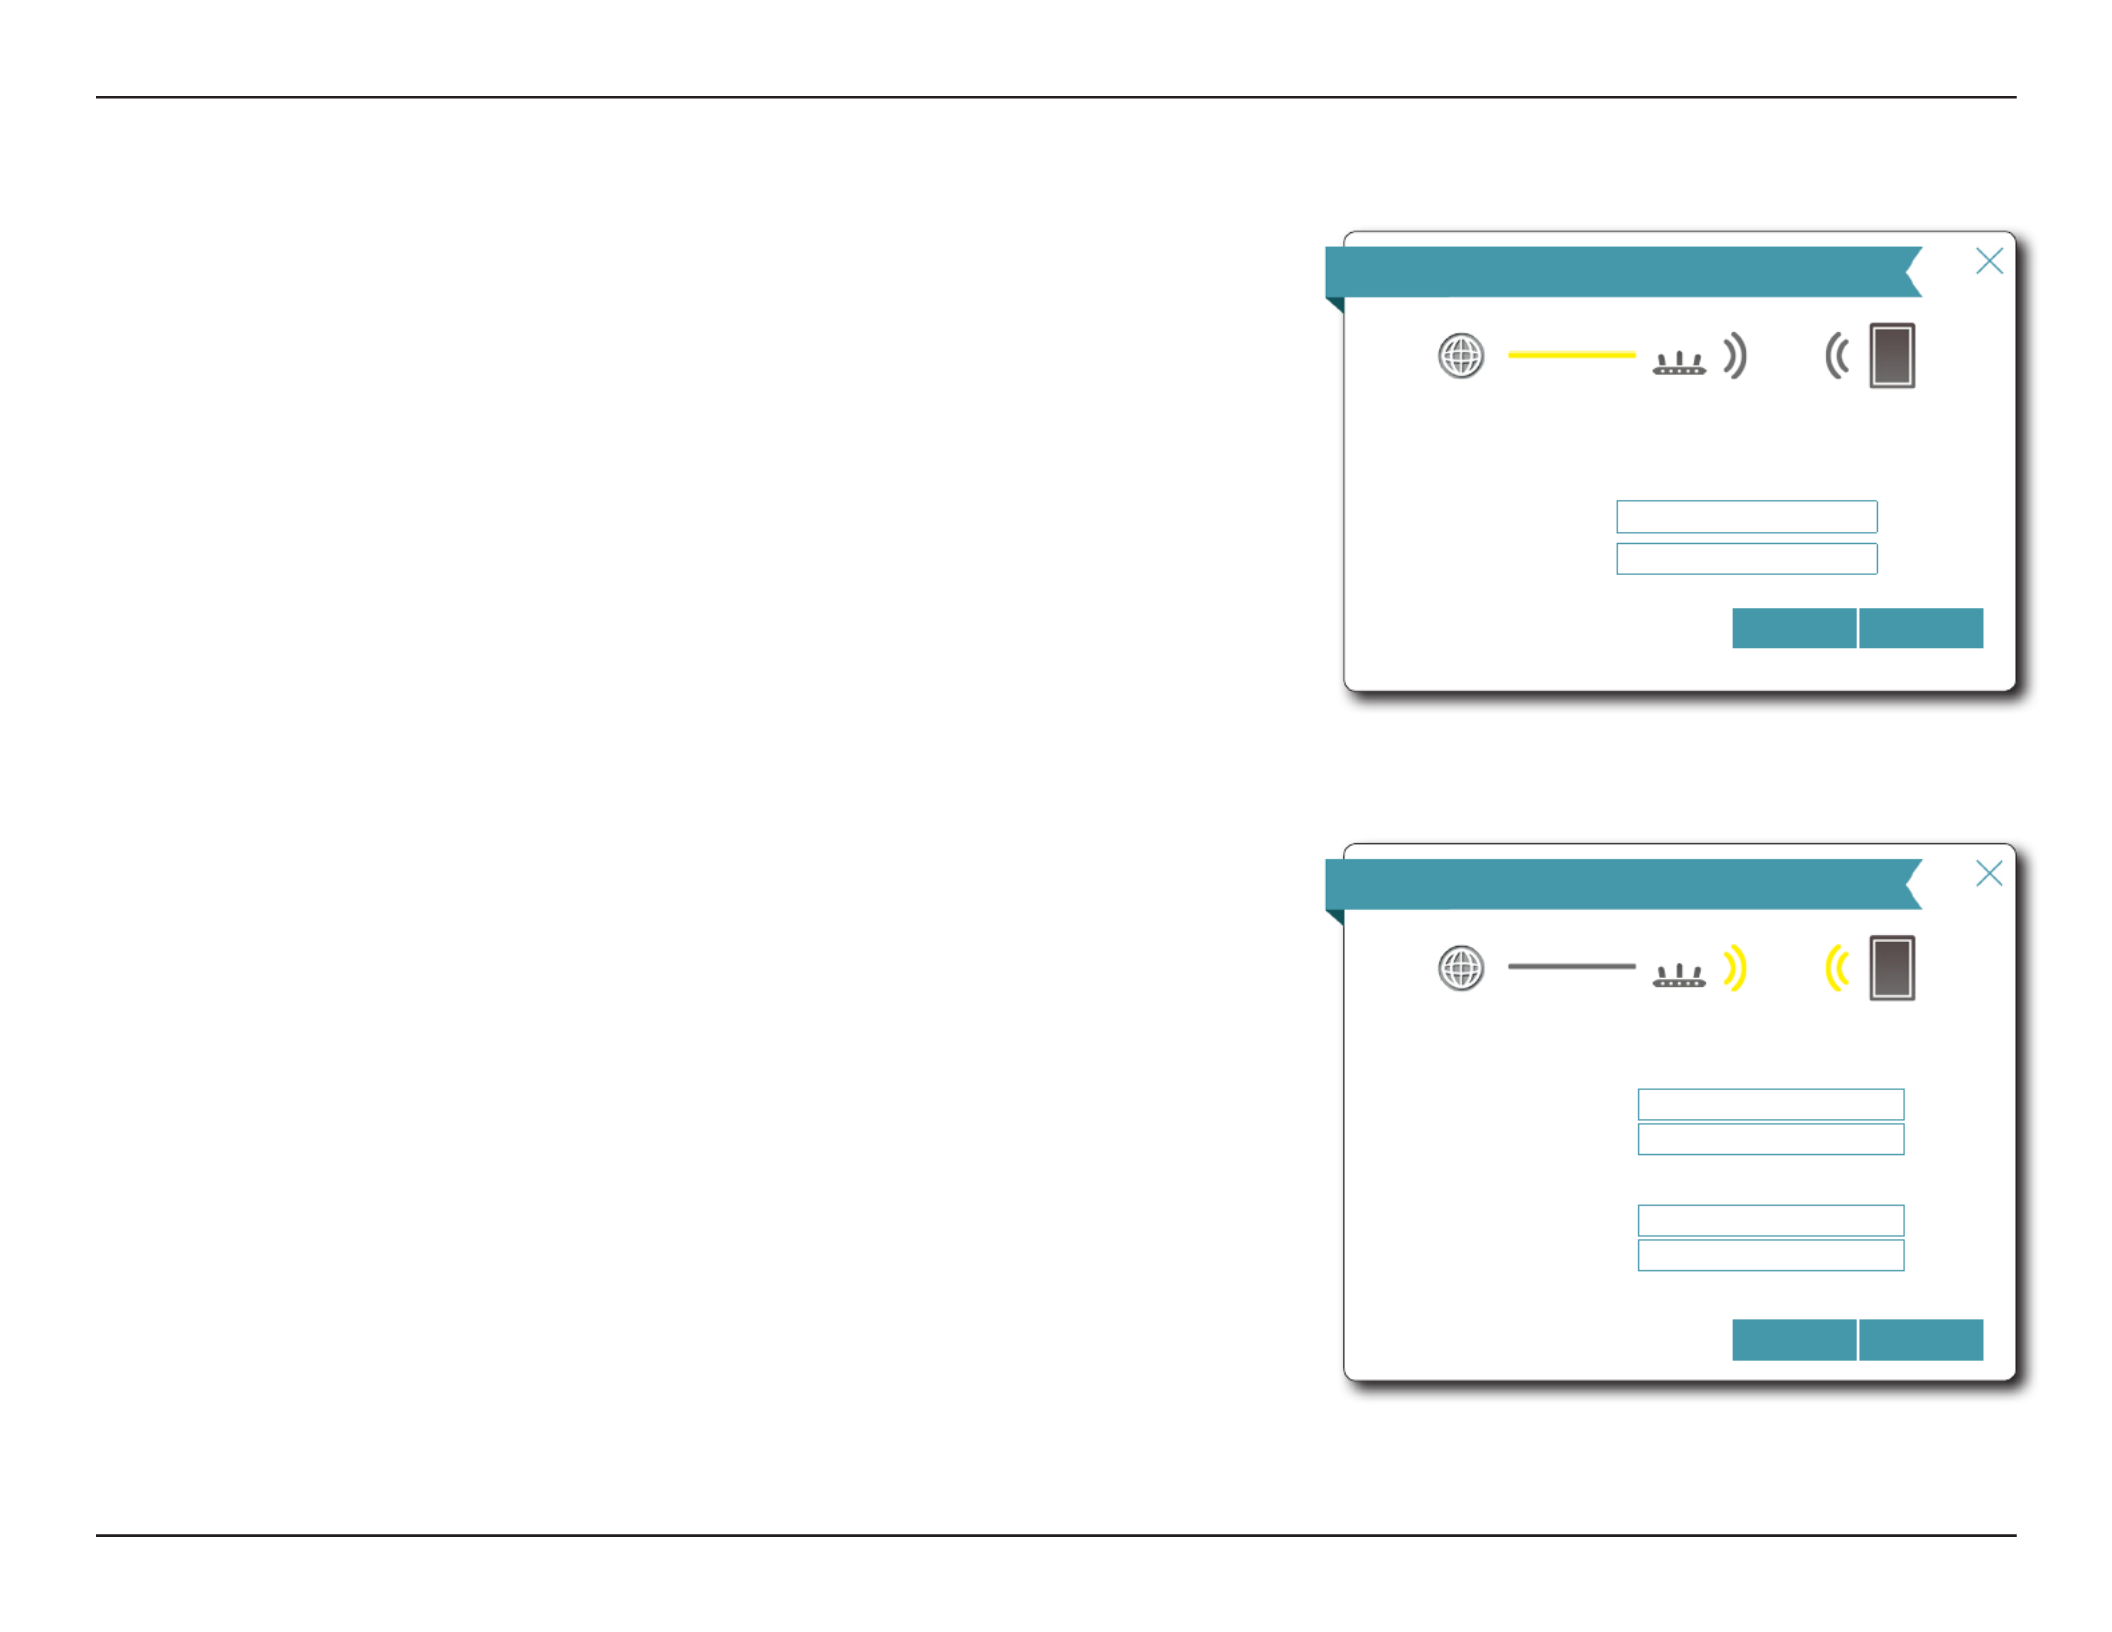
ISP Settings
Internet Wi-Fi ClientDSL-2888A
Select your country and Internet service provider(ISP).
NextBack
WAN Access Type: ADSL
⌵
Country: Australia
⌵
ISP: Not Listed
⌵
Encapsulation LLC
⌵
VPI: 8
VCI: 35
Congure your Internet connection using the drop down menus. Select either ADSL or VDSL
from WAN Access Type. Use the Country ISPand drop down menus to quickly congure
the , and settings. To manually congure these settings, select .VPI VCI Not Listed
Select your ISP's type and click to continue. Encapsulation Next
16D-Link DSL-2888A User Manual
Section 3 - Getting Started
PPPoE
Internet Wi-Fi ClientDSL-2888A
To setup this Internet connection, you will need to have a User Name from your Internet
Service Provider. If you do not have this information, please contact your ISP.
NextBack
Username:
Password:
If the router detected a username and password is required, enter your ISP's PPPoE username
and password and click to continue. Next
Note: Make sure to remove your PPPoE software from your computer. The software is no longer
needed and will not work through a router.
Setup Wizard (continued)
Create a Wi-Fi password (between 8-63 characters). Your wireless clients will need to have
this passphrase or key entered to be able to connect to your wireless network.
Click to continue.Next
Wi-Fi Settings
Internet Wi-Fi ClientDSL-2888A
To setup a Wi-Fi network you will need to give your Wi-Fi network a name(SSID) and
password.
The Wi-Fi Network Name is up to 32 characters. You will need to join your Wi-Fi network
using this Network Name (SSID).
The password must contain at least 8 characters. You will need to join your Wi-Fi network
using this password.
NextBack
2.4GHz Network Name: 2.4_GHz_Wi-Fi_Network
5GHz Network Name: 5_GHz_Wi-Fi_Network
2.4GHz Wi-Fi Password: A_Str0nG_P@ssW0rd!%!
5GHz Wi-Fi Password: A_Str0nG_P@ssW0rd!%!

17D-Link DSL-2888A User Manual
Section 3 - Getting Started
In order to help protect your router from unauthorized users, please enter a new password.
You will be prompted for this password every time you want to use the router’s web
conguration utility. Click to continue.Next
Device Admin Password
Internet Wi-Fi ClientDSL-2888A
By default, your new D-Link device does not have a password congured for administrator
access to the Web-based conguration utility. To secure your new device, please create a
password below.
NextBack
Device Admin Password: AdM!n_P@ssW0rd!
Setup Wizard (continued)
You will be presented with a summary of your settings. Click to nalize the settings Next
or to make changes.Back Summary
Internet Wi-Fi ClientDSL-2888A
Below is a summary of your Wi-Fi security and device password settings. Please make
a note of your settings and click “Next”.
NextBack
WAN Access Type: ADSL
Connection Type: Dynamic IP (PPPoE)
2.4GHz Network Name: 2.4_GHz_Wi-Fi_Network
2.4GHz Wi-Fi Password: A_Str0nG_P@ssW0rd!%!
5GHz Network Name: 5_GHz_Wi-Fi_Network
5GHz Wi-Fi Password: A_Str0nG_P@ssW0rd!%!
Device Admin Password: AdM!n_P@ssW0rd!

18D-Link DSL-2888A User Manual
Section 3 - Getting Started
At the end of the wizard, you will be presented with a nal summary of your settings.
Click to close the wizard. The device will reboot.Finish
Congratulations, your device has been successfully congured!
Congratulations
Finish
Connection Type: Dynamic IP (PPPoE)
Device Admin Password: AdM!n_P@ssW0rd!
2.4GHz Wi-Fi Network Name: 2.4_GHz_Wi-Fi_Network
2.4GHz Wi-Fi Password: A_Str0nG_P@ssW0rd!%!
5GHz Wi-Fi Network Name: 5_GHz_Wi-Fi_Network
5GHz Wi-Fi Password: A_Str0nG_P@ssW0rd!%!
Congratulations, your device has been congured. You can now connect to your Wi-Fi
network by using the new Wi-Fi Network Name and Password you created.
Setup Wizard (continued)

19D-Link DSL-2888A User Manual
Section 4 - Conguration
Conguration
Enter your password. If you previously followed the Setup Wizard (see page 14), please
use the admin password you entered during the wizard. Otherwise, leave the password
blank. Click to proceed.Log In
Note: If you cannot remember your password and cannot log in, press the reset button (see page
5) to restore the router to its default settings.
To access the conguration utility, open a web-browser such as Internet Explorer and enter
http://192.168.1.1 in the address bar.
Home
The Home page displays the current status of the router in the form of an interactive diagram.
There are four main sections: Internet, DSL-2888A, Connected Clients, and USB Device. You
can click each icon to display information about each section at the bottom of the screen.
The menu bar at the top of the page will allow you to quickly navigate to the Settings and
Management functions. You may quickly jump back Home at any time.
Note: The system will automatically log out after a period of inactivity.
Internet
COPYRIGHT © 2016 D-Link
DSL-2888A HW:V1.0.0 FW:V1.1.43
Settings Features ManagementHome
Internet DSL-2888A
Connected Clients: 1
USB Device
Internet Connected
Click on any item in the diagram for more information.
DSL IPv6/ IPv4 /
WAN Interface: PTM0 FF:FF:FF:FF:FF:FFMAC Address:
Cable Status: Connected IP Address: 172.17.5.120
Connection Type: Subnet Mask:Dynamic IP (DHCP) 255.255.255.0
Network Status: Default Gateway:Connected 172.17.5.1
Connection Uptime: Primary DNS Server:1 Day 3 Hour 50 Min 58 Sec 172.17.5.5
Secondary DNS Server: 172.17.5.6
Go to settings

20D-Link DSL-2888A User Manual
Section 4 - Conguration
To bring up more details about your Internet connection, click on the Internet icon. You
may cycle through the WAN interfaces at the bottom of the page by clicking on the arrows
on the left and right sides of the screen. The Internet Connection status at the top of the
diagram will reect the status of the currently selected WAN interface.
If your Internet is disconnected, you can click Click to repair to bring up the Setup Wizard.
Note: The Wizard will only congure the VDSL/ADSL WAN connections. Refer to page 14
for more information.
For each of the WAN interfaces, you can see the connection status, IPv4, and IPv6 information.
Clicking the DSL button will display DSL port information.
Internet
Internet
COPYRIGHT © 2016 D-Link
DSL-2888A HW:V1.0.0 FW:V1.1.43
Settings Features ManagementHome
Internet DSL-2888A
Connected Clients: 1
USB Device
Internet Connected
Click on any item in the diagram for more information.
DSL IPv6/ IPv4 /
WAN Interface: PTM0 FF:FF:FF:FF:FF:FFMAC Address:
Cable Status: Connected IP Address: 172.17.5.120
Connection Type: Subnet Mask:Dynamic IP (DHCP) 255.255.255.0
Network Status: Default Gateway:Connected 172.17.5.1
Connection Uptime: Primary DNS Server:1 Day 3 Hour 50 Min 58 Sec 172.17.5.5
Secondary DNS Server: 172.17.5.6
Go to settings
Internet
COPYRIGHT © 2016 D-Link
DSL-2888A HW:V1.0.0 FW:V1.1.43
Settings Features ManagementHome
Internet DSL-2888A
Connected Clients: 1
USB Device
Internet Disconnected
Click on any item in the diagram for more information.
DSL IPv6/ IPv4 /
Cable Status: Connected MAC Address: FF:FF:FF:FF:FF:FF
Connection Type: Dynamic IP (DHCP) IP Address: 172.17.5.120
Network Status: Subnet Mask:Connected 255.255.255.0
Connection Uptime: Default Gateway:1 Day 3 Hour 50 Min 58 Sec 172.17.5.1
Release IP Address
Primary DNS Server: 172.17.5.5
Secondary DNS Server: 172.17.5.6
Go to settings
Click to repair

21D-Link DSL-2888A User Manual
Section 4 - Conguration
Click the button to see the IPv4 information for each WAN interface. Click the green IPv4
arrows to select dierent interfaces.
WAN Interface: Displays the currently selected interface: Ethernet, DSL, or USB.
Cable Status: Displays the current cable connection status.
Connection Type: Displays the network protocol used to obtain an IP address.
Network Status: Displays the current network connection status.
Connection
Uptime:
Displays the amount of time the connection has been connected.
MAC Address: The WAN interface's MAC address is listed here.
IP Address: The WAN IP address is listed here.
Default Gateway: The default gateway IP address is listed here.
Primary DNS
Server:
Displays the current primary DNS server.
Secondary DNS
Server:
Displays the current secondary DNS server.
Internet
COPYRIGHT © 2016 D-Link
DSL-2888A HW:V1.0.0 FW:V1.1.43
Settings Features ManagementHome
Internet DSL-2888A
Connected Clients: 1
USB Device
Internet Connected
Click on any item in the diagram for more information.
DSL IPv6/ IPv4 /
WAN Interface: PTM0 FF:FF:FF:FF:FF:FFMAC Address:
Cable Status: Connected IP Address: 172.17.5.120
Connection Type: Subnet Mask:Dynamic IP (DHCP) 255.255.255.0
Network Status: Default Gateway:Connected 172.17.5.1
Connection Uptime: Primary DNS Server:1 Day 3 Hour 50 Min 58 Sec 172.17.5.5
Secondary DNS Server: 172.17.5.6
Go to settings
IPv4
22D-Link DSL-2888A User Manual
Section 4 - Conguration
Click the button to see the IPv6 information for each WAN interface. Click the green IPv6
arrows to select dierent interfaces.
IPv6
WAN Interface: Displays the currently selected interface: Ethernet, DSL, or USB.
Connection Type: Displays the network protocol used to obtain an IP address.
Network Status: Displays the current network connection status.
Connection
Uptime:
Displays the amount of time the connection has been connected.
WAN IPv6
Address:
The WAN IPv6 address is listed here.
Default Gateway: The default gateway IP address is listed here.
Primary DNS
Server:
The primary DNS server IP address is listed here.
Secondary DNS
Server:
The secondary DNS server IP address is listed here.
Internet
COPYRIGHT © 2016 D-Link
DSL-2888A HW:V1.0.0 FW:V1.1.43
Settings Features ManagementHome
Internet DSL-2888A
Connected Clients: 1
USB Device
Internet Connected
Click on any item in the diagram for more information.
DSL IPv4 / / IPv6
WAN Interface: WAN IPv6 Address:PTM0 Not Available
Connection Type: Default Gateway:DJC{v6 Not Available
Network Status: Primary DNS Server:Connected Not Available
Connection Uptime: Secondary DNS Server:1 Day 3 Hour 50 Min 58 Sec Not Available
Go to settings

23D-Link DSL-2888A User Manual
Section 4 - Conguration
DSL Phy Version: Displays the DSL Phy version.
Cable Status: Displays the current cable status.
DSL Status: Displays the current negotiation state of the DSL port.
Mode: Displays the current DSL mode.
Link Power State: Displays the current link power state.
SNR Margin (0.1
dB):
The DSL connection's signal to noise ratio is listed here.
Attenuation (0.1
dB):
The DSL connection's attenuation is listed here.
Output Power (0.1
dBm):
The DSL connection's power output is listed here.
Attainable Rate
(Kbps):
The measured maximum attainable rate is listed here.
Rate (Kbps): The negotiated connection speed is listed here.
Internet
COPYRIGHT © 2016 D-Link
DSL-2888A HW:V1.0.0 FW:V1.1.43
Settings Features ManagementHome
Internet DSL-2888A
Connected Clients: 1
USB Device
Internet Connected
Click on any item in the diagram for more information.
DSL / / IPv4 IPv6
DSL Phy Version: G3_01.37.00 UpLink / DownLink
Cable Status: Connected 121 / 175SNR Margin (0.1 dB):
DSL Status: UP 0 / 5Attenuation (0.1 dB):
Mode: G.993.2_Annex_A 131 / 135Output Power (0.1 dBm):
Attainable Rate (Kbps): 135752 / 226704
Rate (Kbps): 100014 / 127998
Go to settings
DSL
Click the button to see the DSL hardware connection information.DSL

24D-Link DSL-2888A User Manual
Section 4 - Conguration
DSL-2888A
Click on the icon to view details about the router and its wireless settings.DSL-2888A
Here you can see the router’s current wireless networks and passwords, as well as the local
area network MAC, IPv4, and IPv6 addresses.
To recongure the network settings, click the link, from the menu Go to settings Settings
at the top of the page, select . Refer to page 44 for more information.Network
To recongure the wireless settings, click the link, from the menu Go to settings Settings
at the top of the page, select . Refer to page 41 for more information.Wireless
COPYRIGHT © 2016 D-Link
Wi-Fi 2.4GHz
Status: Enabled
Wi-Fi Name (SSID): dlink-DSL-2888A
Password: A_Str0nG_P@ssW0rd!%!
DSL-2888A
DSL-2888A HW:V1.0.0 FW:V1.1.43 Settings Features ManagementHome
Internet DSL-2888A
Connected Clients: 1
USB Device
Internet Connected
Click on any item in the diagram for more information.
IPv4 Network
MAC Address: FF:FF:FF:FF:FF:FF
Router IP Address: 192.168.1.1
Subnet Mask: 255.255.255.0
IPv6 Network
Link-Local Address: FF00::FF00:FF00:FF00:FF00
Router IPv6 Address: 2001:B021:23:10::1/64
DHCP-PD: Disabled
Go to settings
Go to settings
Wi-Fi 5GHz
Status: Enabled
Wi-Fi Name (SSID): dlink-DSL-2888A 5Ghz
Password: A_Str0nG_P@ssW0rd!%!
Multiple SSID(2.4GHz)
Multiple SSID(5GHz)
Go to settings

26D-Link DSL-2888A User Manual
Section 4 - Conguration
USB Device
Click on the icon to view details about the currently connected USB device, USB Device
SharePort, and Windows File Sharing.
If you have a USB device connected, you can see its name and how much free space it has.
To congure your SharePort settings, click and refer to page for more Go to settings 47
information.
COPYRIGHT © 2016 D-Link
USB Device
DSL-2888A HW:V1.0.0 FW:V1.1.43
Settings Features ManagementHome
Internet DSL-2888A
Connected Clients: 1
USB Device
Internet Connected
Click on any item in the diagram for more information.
Go to settings
SharePort
Status: Disabled
Windows File Sharing
Status: Disabled
USB Port: Not Available
No USB device detected
COPYRIGHT © 2016 D-Link
Available Space: 13.515 GB
Total Space: 27.03 GB
Go to settings
SharePort
Status: Disabled
Windows File Sharing
Status: Disabled
USB Device
USB Port: Your USB Device
50%

27D-Link DSL-2888A User Manual
Section 4 - Conguration
Settings
Wizard
Internet
In the Settings menu on the bar on the top of the page, click Wizard to open the setup wizard. This is the same wizard that appears when you start
the router for the rst time. Refer to Setup Wizard on page 14 for more information.
The following pages will describe how to manually congure how your DSL-2888A connects
to the Internet. The DSL-2888A supports multiple WAN connection types and WAN failover.
We recommend setting up Internet WAN connections one at a time, the conguration, Save
and conrm the connection works before returning to this section to add additional WAN
connections.
The following conguration pages are divided by WAN Access Type.
WAN Access Type: Select WAN interface to congure. The options are ADSL, VDSL,
Ethernet USB. , or
Select a WAN interface and refer to its conguration page for setup information.
For ADSL, refer to on page 28.ADSL
For VDSL, refer to on page 29.VDSL
For Ethernet, refer to on page 30.Ethernet
For USB, refer to on page 31.USB
DSL-2888A HW:V1.0.0 FW:V1.1.43
Settings >> Internet
SettingsHome Features Management
Internet
Use this section to congure your Internet Connection type. There are several connection types to choose
from Static IP, DHCP, PPPoE, PPTP, L2TP and DS-Lite. If you are unsure of your connection method, please
contact your Internet service provider. Note: If using the PPPoE option, you will need to remove or disable
any PPPoE client software on your computers.
Advanced Settings ...
WAN Access Type: ADSL
⌵
Interface: ATM 0
⌵
Enable Interface: Enabled
Priority Save
DSL Prole
VPI:
VCI:
VLAN Tagged: Enabled
VLAN ID:
VLAN Priority: Disable
⌵
Encapsulation: VC MUX
⌵
ATM QoS: Non Realtime VBR
⌵
Sustainable Cell Rate: undened
Maximum Burst Size: undened
Minimum Cell Rate: undened
ISP SETTINGS

28D-Link DSL-2888A User Manual
Section 4 - Conguration
ADSL is one of the rst home broadband technologies introduced. ADSL uses the DSL port
on your DSL-2888A to connect to the Internet. In order for your DSL-2888A to use ADSL,
you must congure the ADSL Settings, your , and your / .ISP Settings IPv4 IPv6 Settings
WAN Access Type: Select to congure ADSL connection settings.ADSL
Interface: Select the interface from the drop-down menu. ATM0-ATM7 are
available. The default is . ATM0
Enable Interface: Select whether to enable or disable this interface.
ISP Settings
VPI: Enter the Virtual Path Indicator (0 - 255).
VCI: Enter the Virtual Channel Indicator (32 - 65535).
VLAN Tagged: Enable or disable VLAN tagging.
If you enabled VLAN Tagged, the following options are available:
VLAN ID: Enter the VLAN ID. The value should be 0, or 0-4079.
VLAN Priority: Enter the VLAN Priority from the default 0 (lowest) to 7 (highest).
Advanced Settings
Encapsulation: Select the method of encapsulation provided by your ISP. You can
select or .LLC VCMUX
ATM QoS: Select the Quality of Service type from the drop-down menu.
Congure the associated settings
Proceed to on page or on pageIPv4 Settings 32 IPv6 Settings 36.
ADSL
DSL-2888A HW:V1.0.0 FW:V1.1.43
Settings >> Internet
SettingsHome Features Management
Internet
Use this section to congure your Internet Connection type. There are several connection types to choose
from Static IP, DHCP, PPPoE, PPTP, L2TP and DS-Lite. If you are unsure of your connection method, please
contact your Internet service provider. Note: If using the PPPoE option, you will need to remove or disable
any PPPoE client software on your computers.
Advanced Settings ...
WAN Access Type: ADSL
⌵
Interface: ATM 0
⌵
Enable Interface: Enabled
Priority Save
DSL Prole
VPI:
VCI:
VLAN Tagged: Enabled
VLAN ID:
VLAN Priority: Disable
⌵
Encapsulation: VC MUX
⌵
ATM QoS: Non Realtime VBR
⌵
Sustainable Cell Rate: undened
Maximum Burst Size: undened
Minimum Cell Rate: undened
ISP SETTINGS
29D-Link DSL-2888A User Manual
Section 4 - Conguration
VDSL is one of the latest and fastest home broadband technologies. VDSL uses the DSL port
on your DSL-2888A to connect to the Internet. In order for your DSL-2888A to use VDSL, you
must congure the VDSL Settings, your , and your / .ISP Settings IPv4 IPv6 Settings
WAN Access Type: Select to congure ADSL connection settings.VDSL
Interface: Select the interface from the drop-down menu. PTM0-PTM7 are
available. The default is .PTM0
Enable Interface: Select whether to enable or disable this interface.
ISP Settings
VLAN Tagged: Enable or disable VLAN tagging.
If you enabled VLAN Tagged, the following options are available:
VLAN ID: Enter the VLAN ID. The value should be 0, or 0-4079.
VLAN Priority: Enter the VLAN Priority from the default 0 (lowest) to 7 (highest).
Proceed to on page on pageIPv4 Settings 32 or IPv6 Settings 36.
VDSL
DSL-2888A HW:V1.0.0 FW:V1.1.43
Settings >> Internet
SettingsHome Features Management
Internet
Use this section to congure your Internet Connection type. There are several connection types to choose
from Static IP, DHCP, PPPoE, PPTP, L2TP and DS-Lite. If you are unsure of your connection method, please
contact your Internet service provider. Note: If using the PPPoE option, you will need to remove or disable
any PPPoE client software on your computers.
WAN Access Type: VDSL
⌵
Interface: PTM 0
⌵
Enable Interface: Enabled
Priority Save
DSL Prole
VLAN Tagged: Enabled
VLAN ID:
VLAN Priority: Disable
⌵
ISP SETTINGS

30D-Link DSL-2888A User Manual
Section 4 - Conguration
Ethernet
Your DSL-2888A is equipped with a Gigabit Ethernet WAN port which can be used to connect
to the Internet. This port may be used to connect to other Ethernet based networks. In
order for your DSL-2888A to use Ethernet you must congure the Ethernet Settings, VLAN
Settings IPv4 IPv6 Settings, and your / .
WAN Access Type: Select Residential Gateway to configure Ethernet connection
settings.
Interface: Select the interface from the drop-down menu. ETH0-ETH5 are
available. The default is . ETH0
Enable Interface: Select whether to enable or disable this interface.
VLAN Settings
VLAN Tagged: Enable or disable VLAN tagging.
If you enabled VLAN Tagged, the following options are available:
VLAN ID: Enter the VLAN ID. The value should be 0, or 0-4079.
VLAN Priority: Enter the VLAN Priority from the default 0 (lowest) to 7 (highest).
Proceed to on page or on page IPv4 Settings 32 IPv6 Settings 36.
DSL-2888A HW:V1.0.0 FW:V1.1.43
Settings >> Internet
SettingsHome Features Management
Internet
Use this section to congure your Internet Connection type. There are several connection types to choose
from Static IP, DHCP, PPPoE, PPTP, L2TP and DS-Lite. If you are unsure of your connection method, please
contact your Internet service provider. Note: If using the PPPoE option, you will need to remove or disable
any PPPoE client software on your computers.
WAN Access Type: Residential Gateway
⌵
Interface: Eth 0
⌵
Enable Interface: Enabled
Priority Save
DSL Prole
VLAN Tagged: Enabled
VLAN ID:
VLAN Priority: Disable
⌵
ISP SETTINGS
31D-Link DSL-2888A User Manual
Section 4 - Conguration
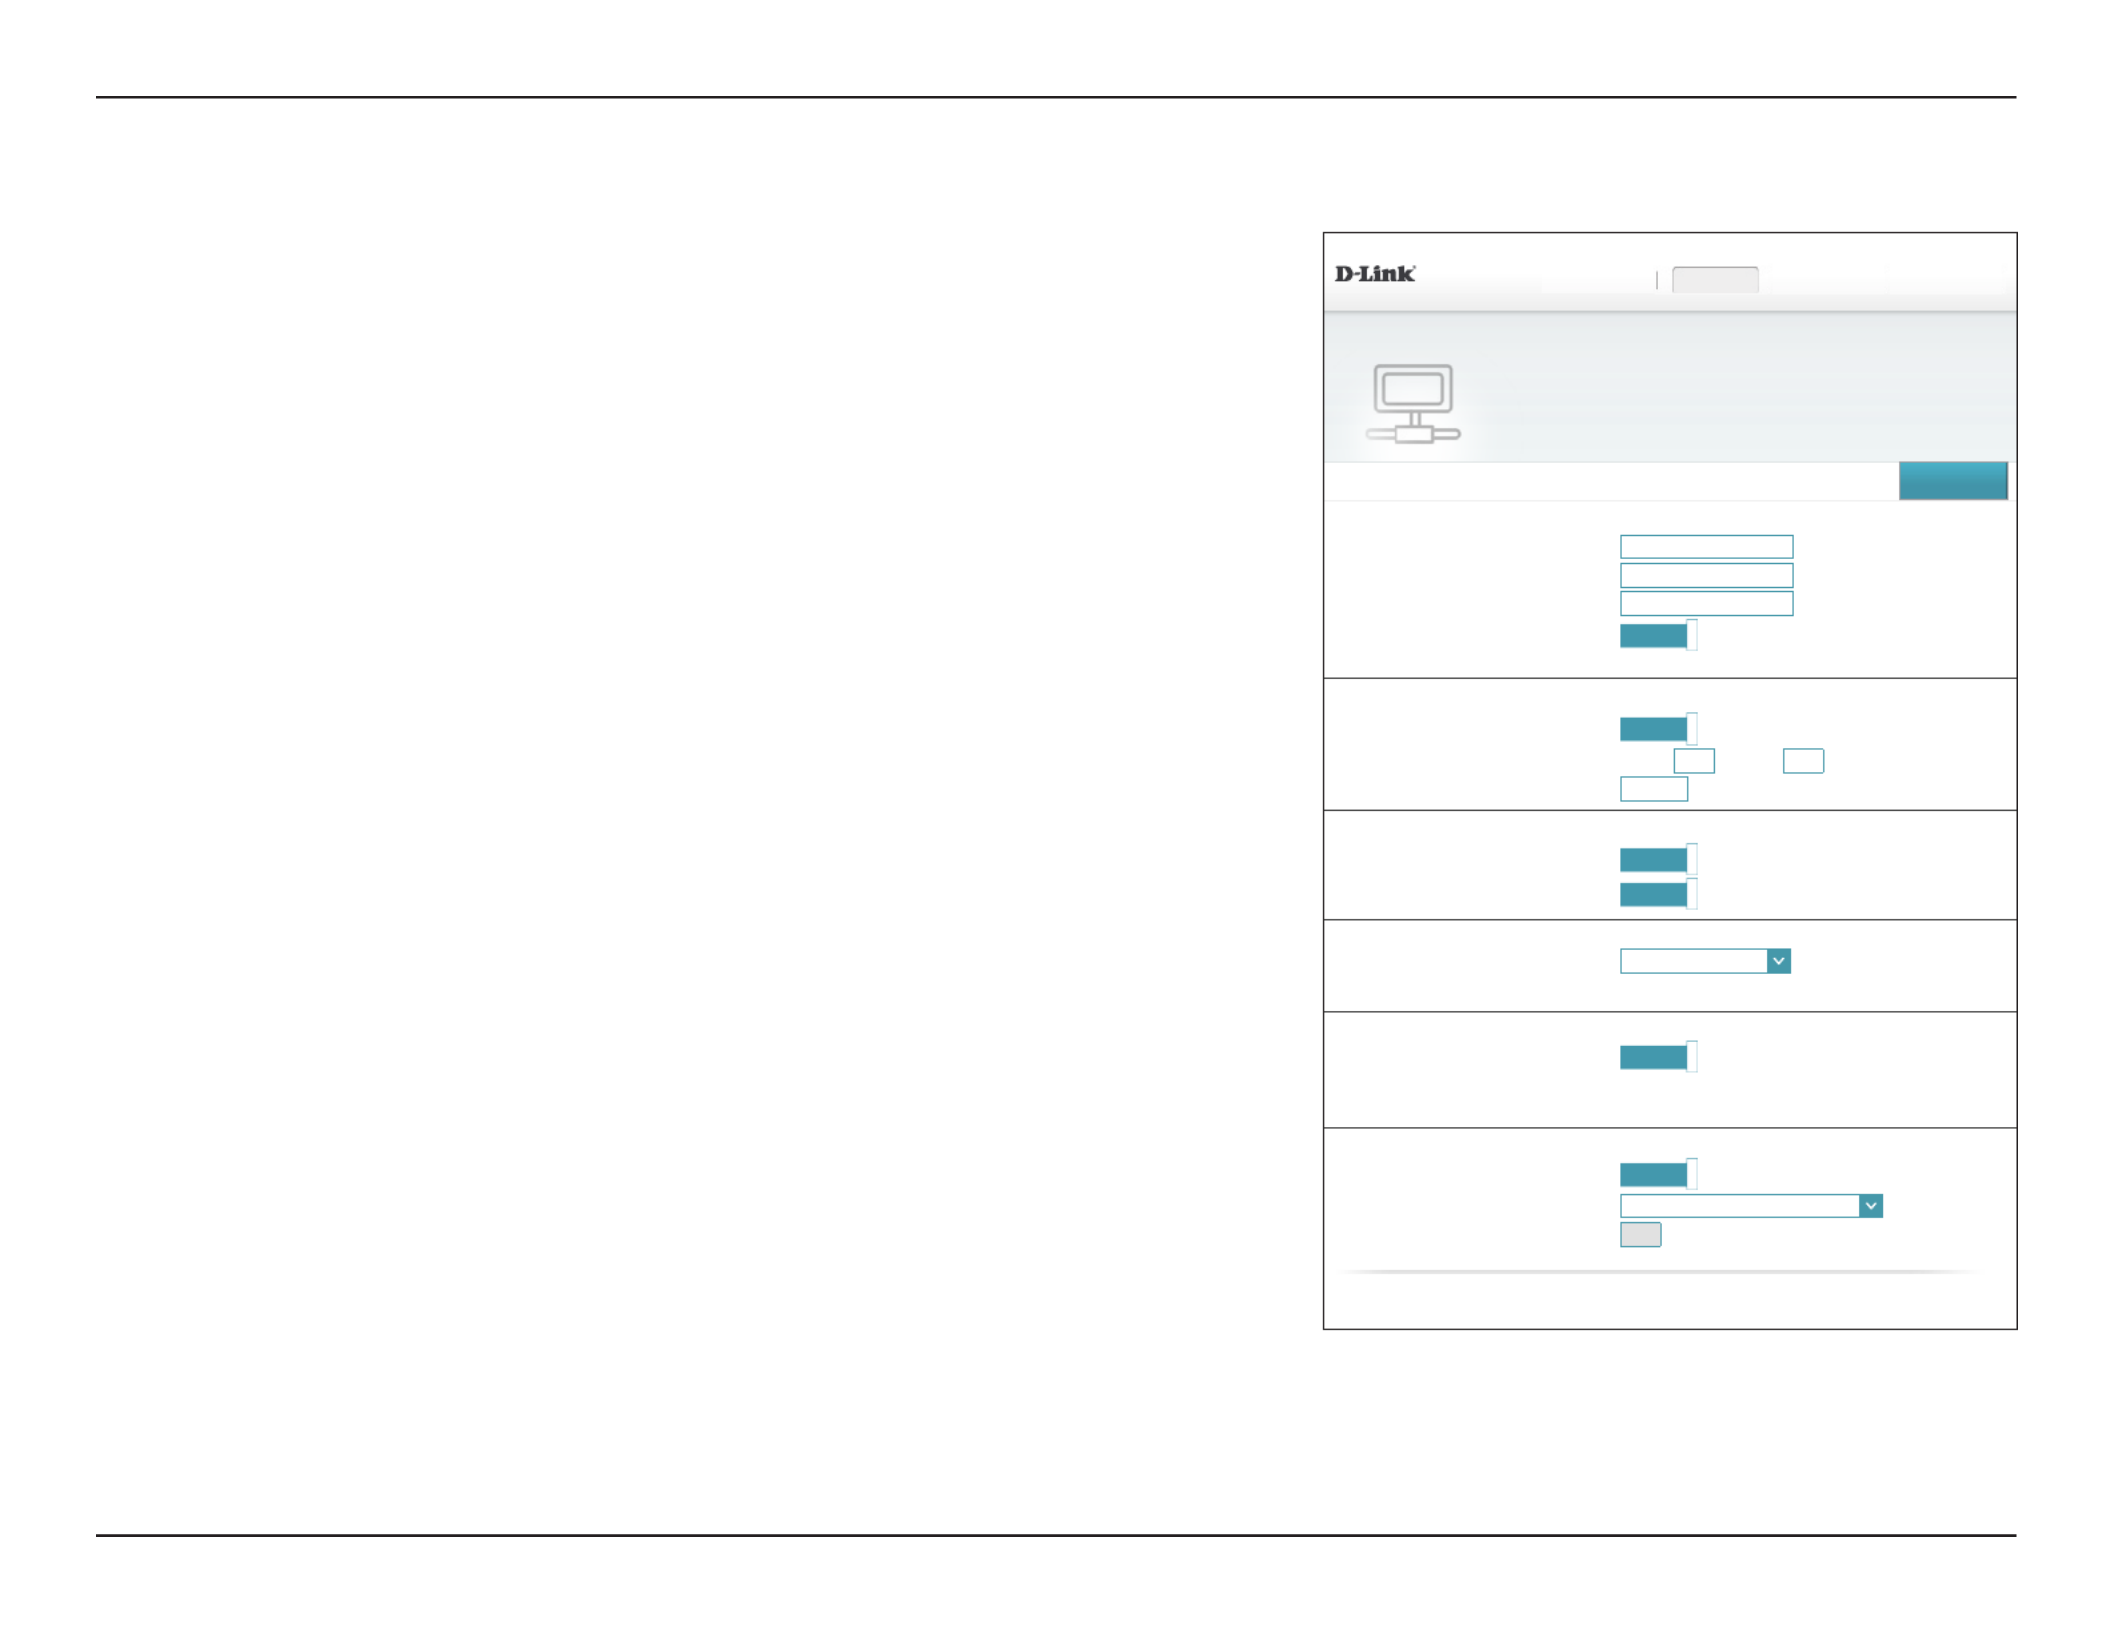
WAN Access Type: Select to congure USB connection settings.USB
Interface: Select the interface from the drop-down menu.
Enable Interface: Select whether to enable or disable this interface.
ISP Settings
Country: Select your country.
ISP: Select your ISP. A number of ISP conguration settings are pre-
programmed into the DSL-2888A for convenience. If you don't see
your ISP or wish to use manual settings, choose Not Listed.
PIN Code: Enter your PIN code.
Dial Number: Enter the Dial Number.
APN: Enter the APN.
Username: Enter your username.
Password: Enter your password.
There is no further conguration. Click when you are done. Save
The DSL-2888A supports USB mobile broadband adapters. You can connect a mobile
broadband adapter and share your cellular network connection with your home network.
For a list of supported adapters, visit www.dlink.com.
This page provides conguration settings for your USB mobile broadband connection.
Refer to your mobile broadband adapter's documentation for setup instructions and ISP
for conguration information. In most cases, the process is plug and play and requires no
further conguration.
DSL-2888A HW:V1.0.0 FW:V1.1.43
Settings >> Internet
SettingsHome Features Management
Internet
Use this section to congure your Internet Connection type. There are several connection types to choose
from Static IP, DHCP, PPPoE, PPTP, L2TP and DS-Lite. If you are unsure of your connection method, please
contact your Internet service provider. Note: If using the PPPoE option, you will need to remove or disable
any PPPoE client software on your computers.
WAN Access Type: USB
⌵
Interface: USB 0
⌵
Enable Interface: Enabled
Priority Save
DSL Prole
Country: New Zealand
⌵
ISP: Not Listed
⌵
PIN Code:
Dial Number:
APN:
Username:
Password:
ISP SETTINGS
COPYRIGHT © 2016 D-Link
USB
32D-Link DSL-2888A User Manual
Section 4 - Conguration
Static IP
Select if your ISP provides you with a specic IP address.Static IP
IPv4 Settings:
My Internet
Connection is:
Select .Static IP
IP Address: Enter the IP address provided by your ISP.
Subnet Mask: Enter the subnet mask provided by your ISP.
Default Gateway: Enter the default gateway address provided by your ISP.
Primary DNS
Server:
Enter the primary DNS server IP address assigned by your ISP. This
address is usually obtained automatically from your ISP.
Advanced Settings
Secondary DNS
Server:
Enter the secondary DNS server IP address assigned by your ISP. This
address is usually obtained automatically from your ISP.
MTU: Maximum Transmission Unit - you may need to change the MTU for
optimal performance with your ISP.
MAC Address
Clone:
The default MAC address is set to the Internet port’s physical interface
MAC address on the router. You can use the drop-down menu to
replace the Internet port’s MAC address with the MAC address of a
connected client.
Enable NAT: Enable or disable Network Address Translation.
Proceed to on page or click when you are done.IPv6 Settings 36 Save
IP Address:
Subnet Mask:
Default Gateway:
Primary DNS Server:
Advanced Settings ...
My Internet Connection is: Static IP
⌵
Secondary DNS Server:
MTU: Auto
⌵
Mac Address Clone: << MAC Address
⌵
Enable NAT: Enabled
IPv4 SETTINGS
IPv4 Settings

33D-Link DSL-2888A User Manual
Section 4 - Conguration
IPv4 SETTINGS
Advanced Settings ...
Host Name:
Primary DNS Server:
Secondary DNS Server:
MTU: Auto
⌵
Mac Address Clone: << MAC Address
⌵
Enable NAT: Enabled
My Internet Connection is: Dynamic IP (DHCP)
⌵
Dynamic IP (DHCP)
Select Dynamic IP (DHCP) to obtain an IP address automatically from your ISP. Select this
option if your ISP does not provide you with a specic IP address.
IPv4 Settings:
My Internet
Connection is:
Select .Dynamic IP (DHCP)
Advanced Settings
Host Name: The host name is optional but may be required by some ISPs. Leave
it blank if you are not sure.
Primary DNS
Server:
Enter the primary DNS server IP address assigned by your ISP. This
address is usually obtained automatically from your ISP.
Secondary DNS
Server:
Enter the secondary DNS server IP address assigned by your ISP. This
address is usually obtained automatically from your ISP.
MTU: Maximum Transmission Unit - you may need to change the MTU for
optimal performance with your ISP.
MAC Address
Clone:
The default MAC address is set to the Internet port’s physical interface
MAC address on the router. You can use the drop-down menu to
replace the Internet port’s MAC address with the MAC address of a
connected client.
Enable NAT: Enable or disable Network Address Translation.
Proceed to on page or click when you are done.IPv6 Settings 36 Save

34D-Link DSL-2888A User Manual
Section 4 - Conguration
My Internet Connection is: PPPoE
⌵
Advanced Settings ...
Username:
Password:
Reconnect Mode: Always On
⌵
IPv4 SETTINGS
Address Mode: Dynamic IP
⌵
Service Name:
Primary DNS Server:
Secondary DNS Server:
MTU: Auto
⌵
Enable NAT: Enabled
Address Mode: Static IP
⌵
IP Address:
Service Name:
Primary DNS Server:
Secondary DNS Server:
MTU: Auto
⌵
Enable NAT: Enabled
PPPoE
Select PPPoE if your ISP provides and requires you to enter a PPPoE username and password
in order to connect to the Internet.
IPv4 Settings:
My Internet
Connection is:
Select .PPPoE
Username: Enter the username provided by your ISP.
Password: Enter the password provided by your ISP.
Reconnect Mode: Select either Always-on On-Demand Manual, , or .
Advanced Settings
Address Mode: Select Static IP if your ISP assigned you an IP address, subnet mask,
gateway, and DNS server addresses. In most cases, select Dynamic IP.
IP Address: Enter the IP address provided by your ISP. only.Static IP
Service Name: Enter the ISP service name (optional).
Primary DNS
Server:
Enter the primary DNS server IP address assigned by your ISP. This
address is usually obtained automatically from your ISP.
Secondary DNS
Server:
Enter the secondary DNS server IP address assigned by your ISP. This
address is usually obtained automatically from your ISP.
MTU: Maximum Transmission Unit - you may need to change the MTU for
optimal performance with your ISP.
Enable NAT: Enable or disable Network Address Translation.
Proceed to on page or click when you are done.IPv6 Settings 36 Save
35D-Link DSL-2888A User Manual
Section 4 - Conguration
My Internet Connection is: Bridge
⌵
LAN Interface: LAN 1
⌵
Advanced Settings ...
MTU: Auto
⌵
IPv4 SETTINGS
Bridged
Select to congure the device as a network bridge.Bridge
IPv4 Settings:
My Internet
Connection is:
Select .Bridged
LAN Interface: Choose the interface to bridge.
Advanced Settings
MTU Maximum Transmission Unit - you may need to change the MTU for
optimal performance with your ISP. Select either or .Auto Manual
Secondary DNS
Server:
Enter the secondary DNS server IP address assigned by your ISP. This
address is usually obtained automatically from your ISP.
Enable NAT: Enable or disable Network Address Translation.
Bridged Mode does not support IPv6 conguration. Click when you are done.Save

36D-Link DSL-2888A User Manual
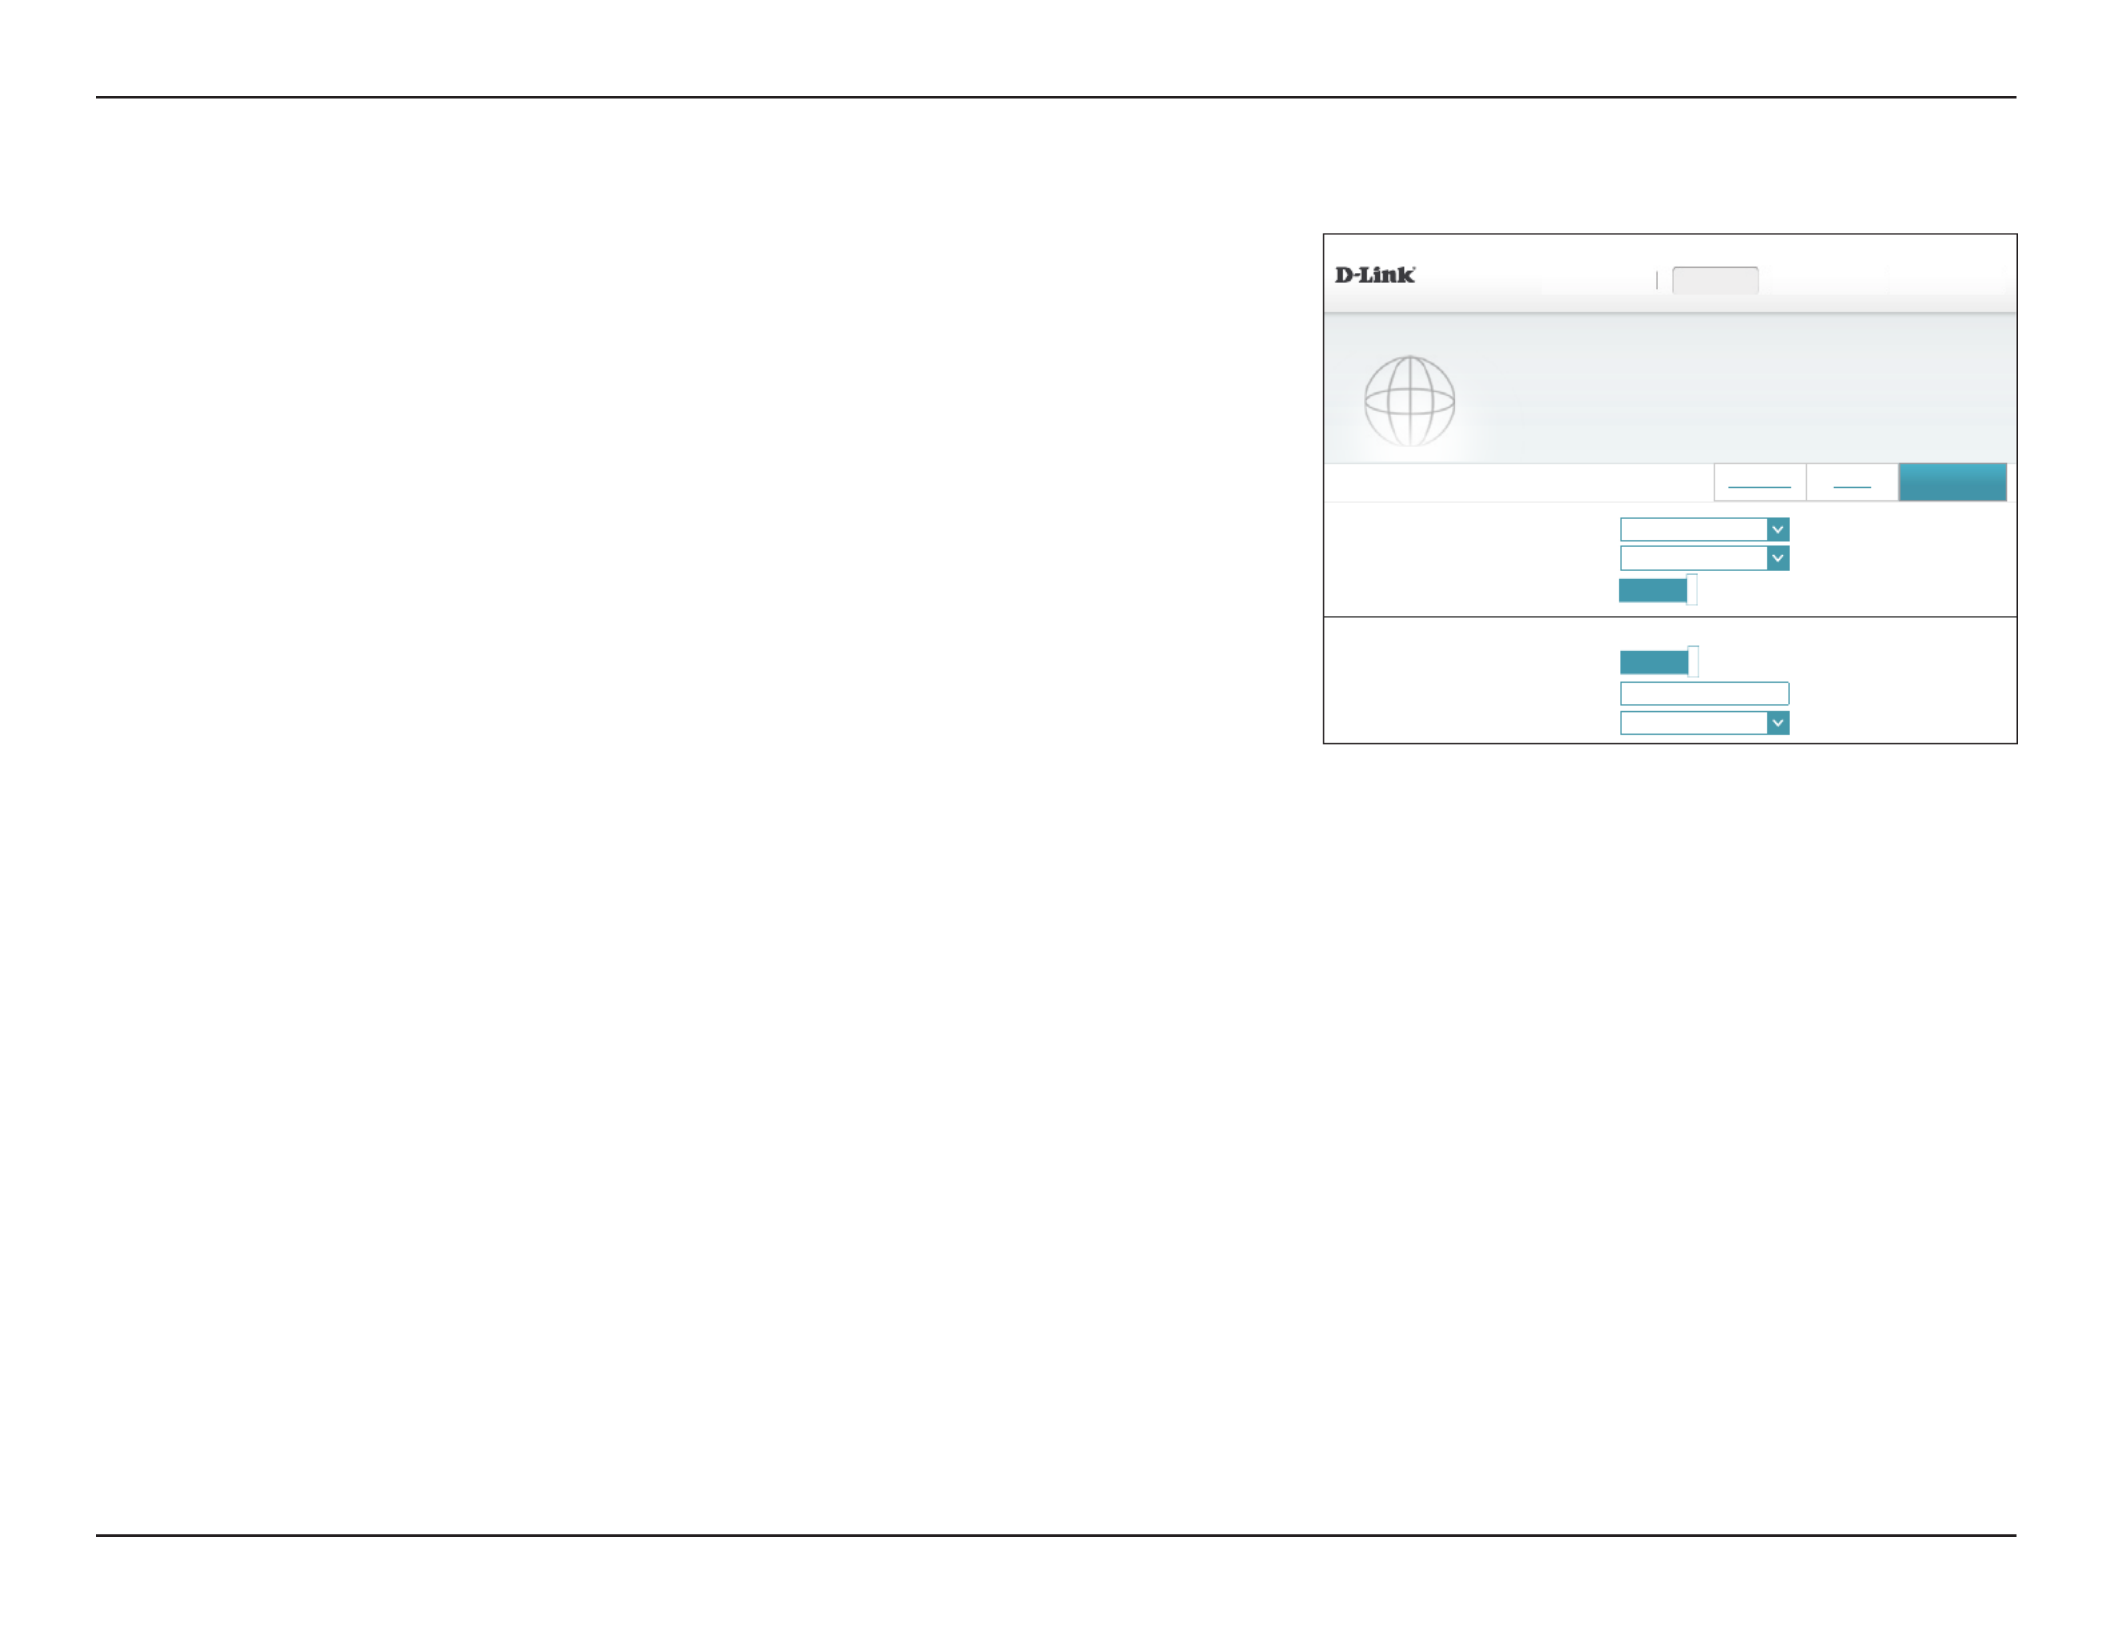
Section 4 - Conguration
IPv6 Settings
Auto Detection
Select Auto Detection to automatically detect the IPv6 connection method used by your
Internet Service Provider (ISP). If Auto Detection fails, you may manually select another IPv6
connection type.
IPv6 Settings:
IPv6PD: Enable or disable IPv6 prex delegation.
My Internet
Connection is:
Select .Auto Detection
DNS Type: Select either Obtain DNS server address automatically Use or
the following DNS address.
If you selected Use the following DNS address, the following options are available:
Primary DNS
Server:
Enter the primary DNS server address.
Secondary DNS
Server:
Enter the secondary DNS server address.
Click when you are done.Save
IPv6PD: Enabled
My Internet Connection is: Auto Detection
⌵
DNS Type: Obtain a DNS server address
⌵
IPv6 SETTINGS
IPv6PD: Enabled
My Internet Connection is: Auto Detection
⌵
DNS Type: Use the following DNS
⌵
Primary DNS Server:
Secondary DNS Server:
IPv6 SETTINGS

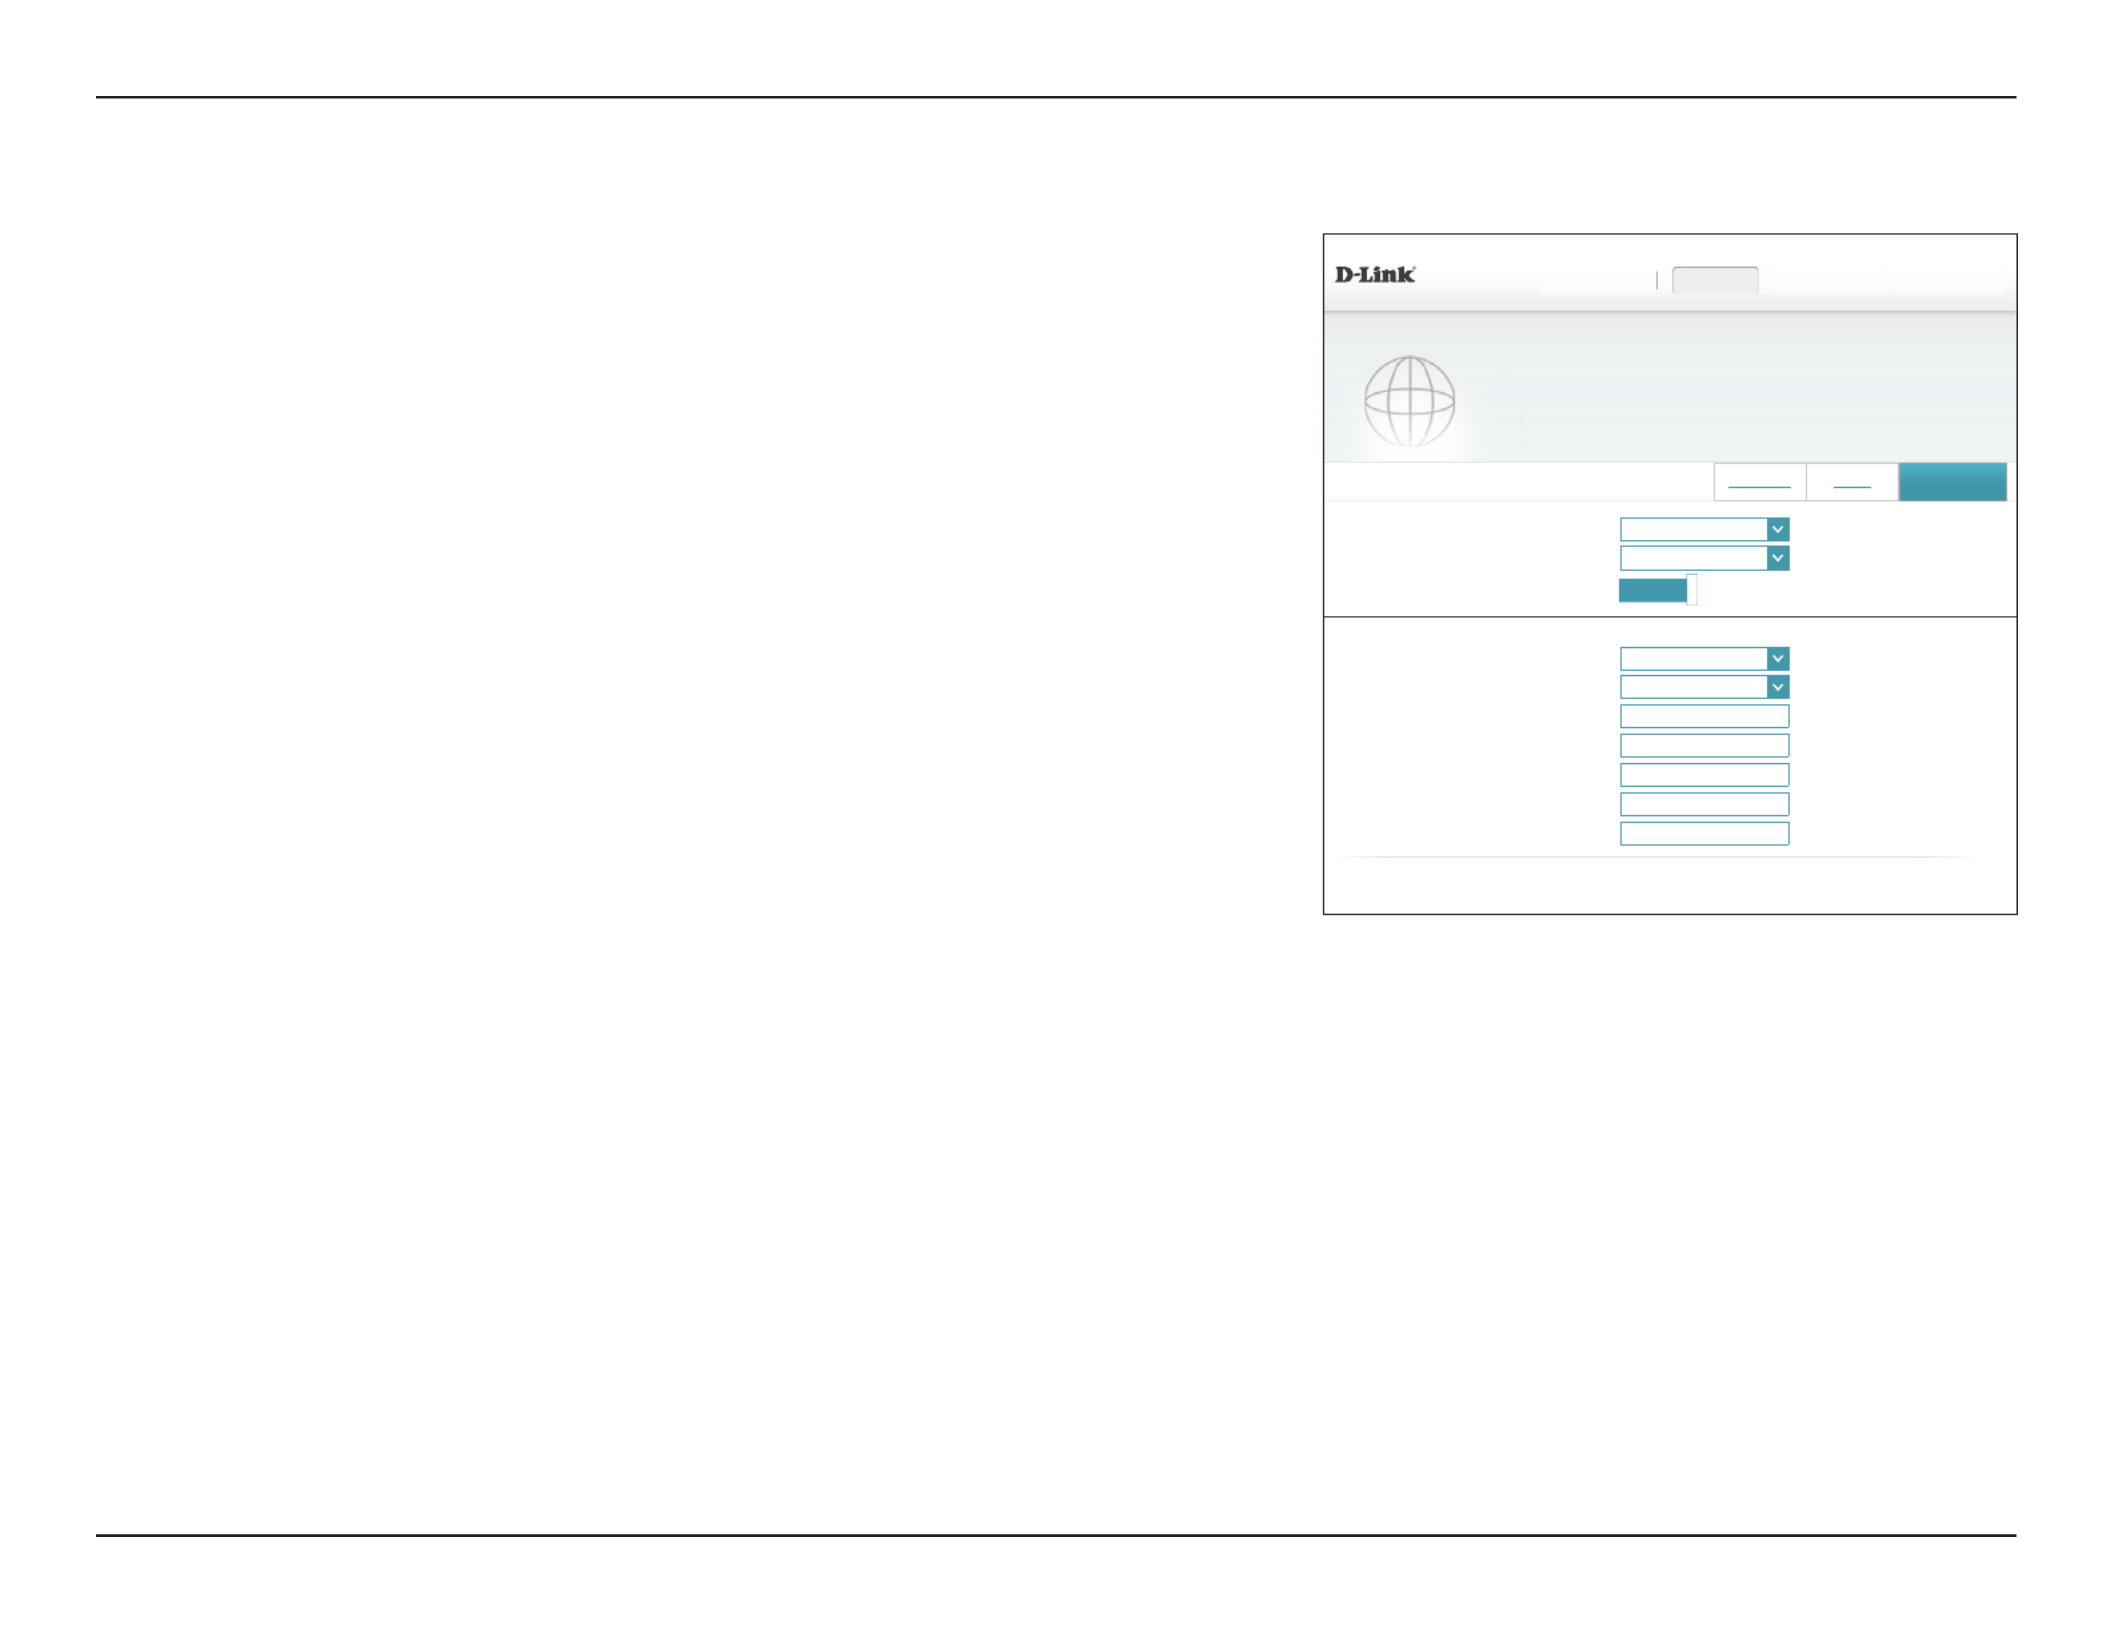
37D-Link DSL-2888A User Manual
Section 4 - Conguration
Static IPv6
Select Static IP if your IPv6 information is provided by your Internet Service Provider (ISP).
IPv6 Settings:
IPv6PD: Enable or disable IPv6 prex delegation.
My Internet
Connection is:
Select .Static IPv6
IPv6 Address: Enter the address supplied by your ISP.
Subnet Prex
Length:
Enter the subnet prex length supplied by your ISP.
Default Gateway: Enter the default gateway for your IPv6 connection.
Primary DNS
Server:
Enter the primary DNS server address.
Secondary DNS
Server:
Enter the secondary DNS server address.
Click when you are done.Save
IPv6PD: Enabled
My Internet Connection is: Static IPv6
⌵
IPv6 Address:
Subnet Prex Length:
Default Gateway:
Primary DNS Server:
Secondary DNS Server:
IPv6 SETTINGS

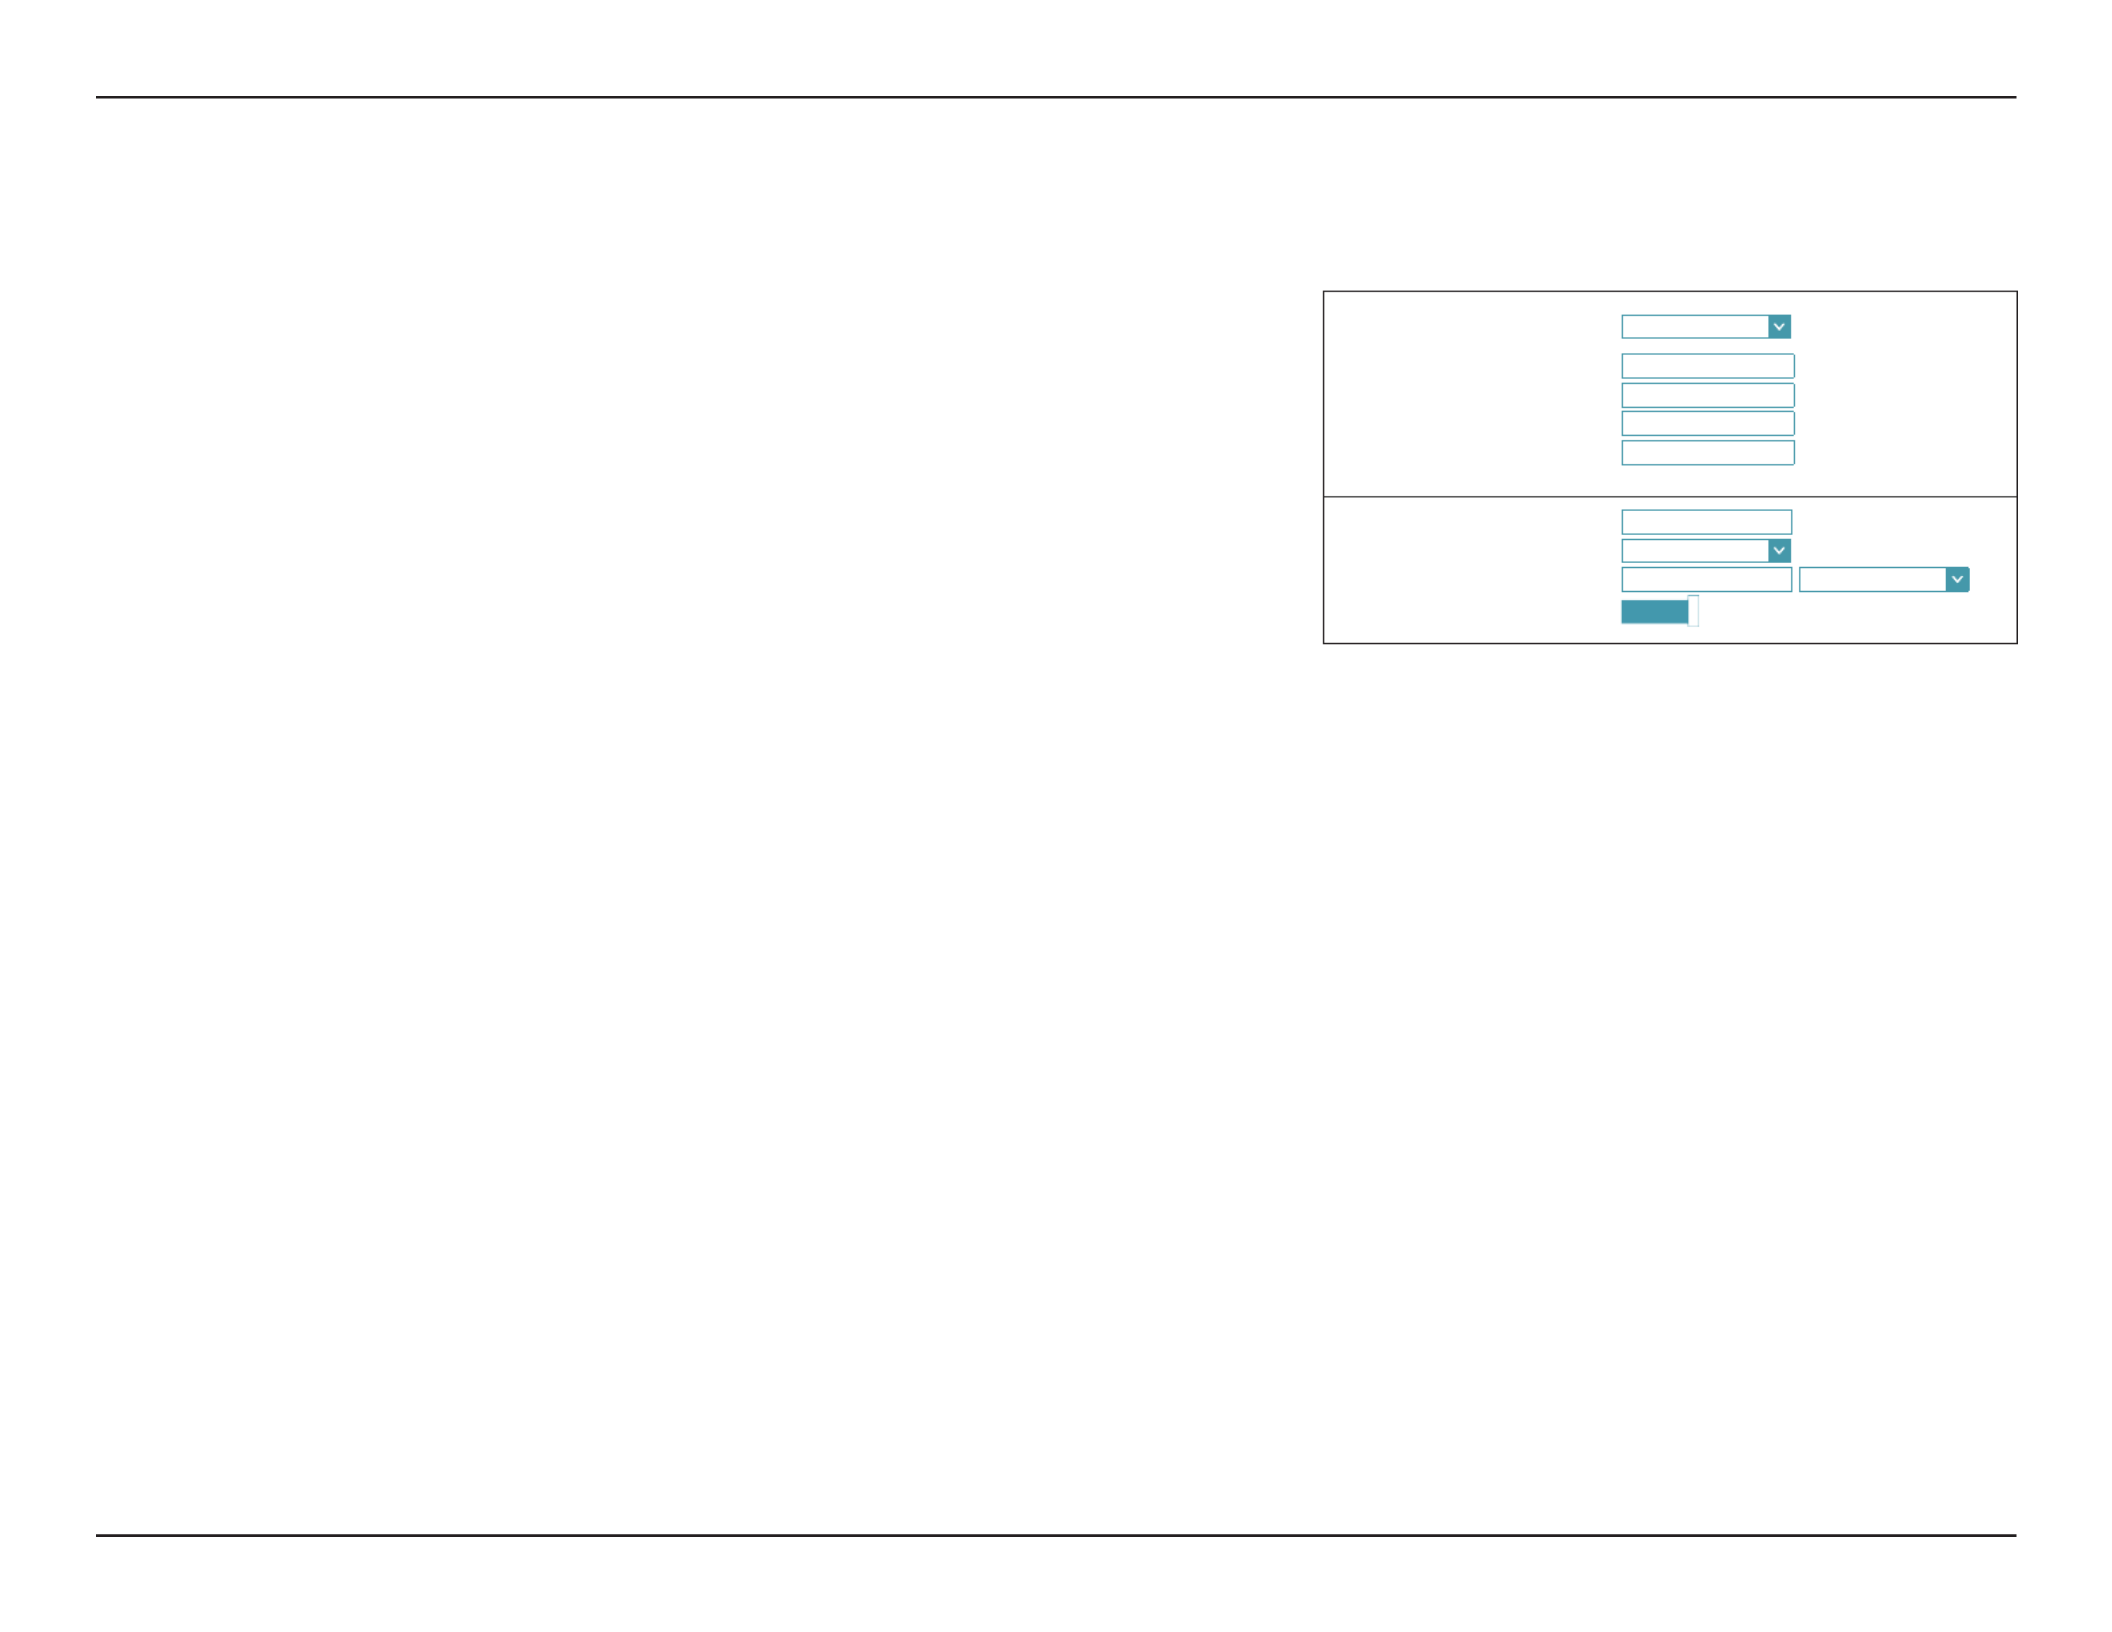
38D-Link DSL-2888A User Manual
Section 4 - Conguration
Auto Conguration (SLAAC/DHCPv6)
Select Auto Conguration if your ISP assigns your IPv6 address when your router requests
one from the ISP’s server. Some ISPs require you to adjust settings on your side before your
router can connect to the IPv6 Internet.
IPv6 Settings:
IPv6PD: Enable or disable IPv6 prex delegation.
My Internet
Connection is:
Select Auto Conguration.
DNS Type: Select either Obtain DNS server address automatically Use or
the following DNS address.
If you selected Use the following DNS address, the following options are available:
Primary DNS
Server:
Enter the primary DNS server address.
Secondary DNS
Server:
Enter the secondary DNS server address.
Click when you are done.Save
DNS Type: Obtain a DNS server address
⌵
IPv6PD: Enabled
My Internet Connection is: Auto Conguration
⌵
IPv6 SETTINGS
DNS Type: Use the following DNS
⌵
Primary DNS Server:
Secondary DNS Server:
IPv6PD: Enabled
My Internet Connection is: Auto Conguration
⌵
IPv6 SETTINGS

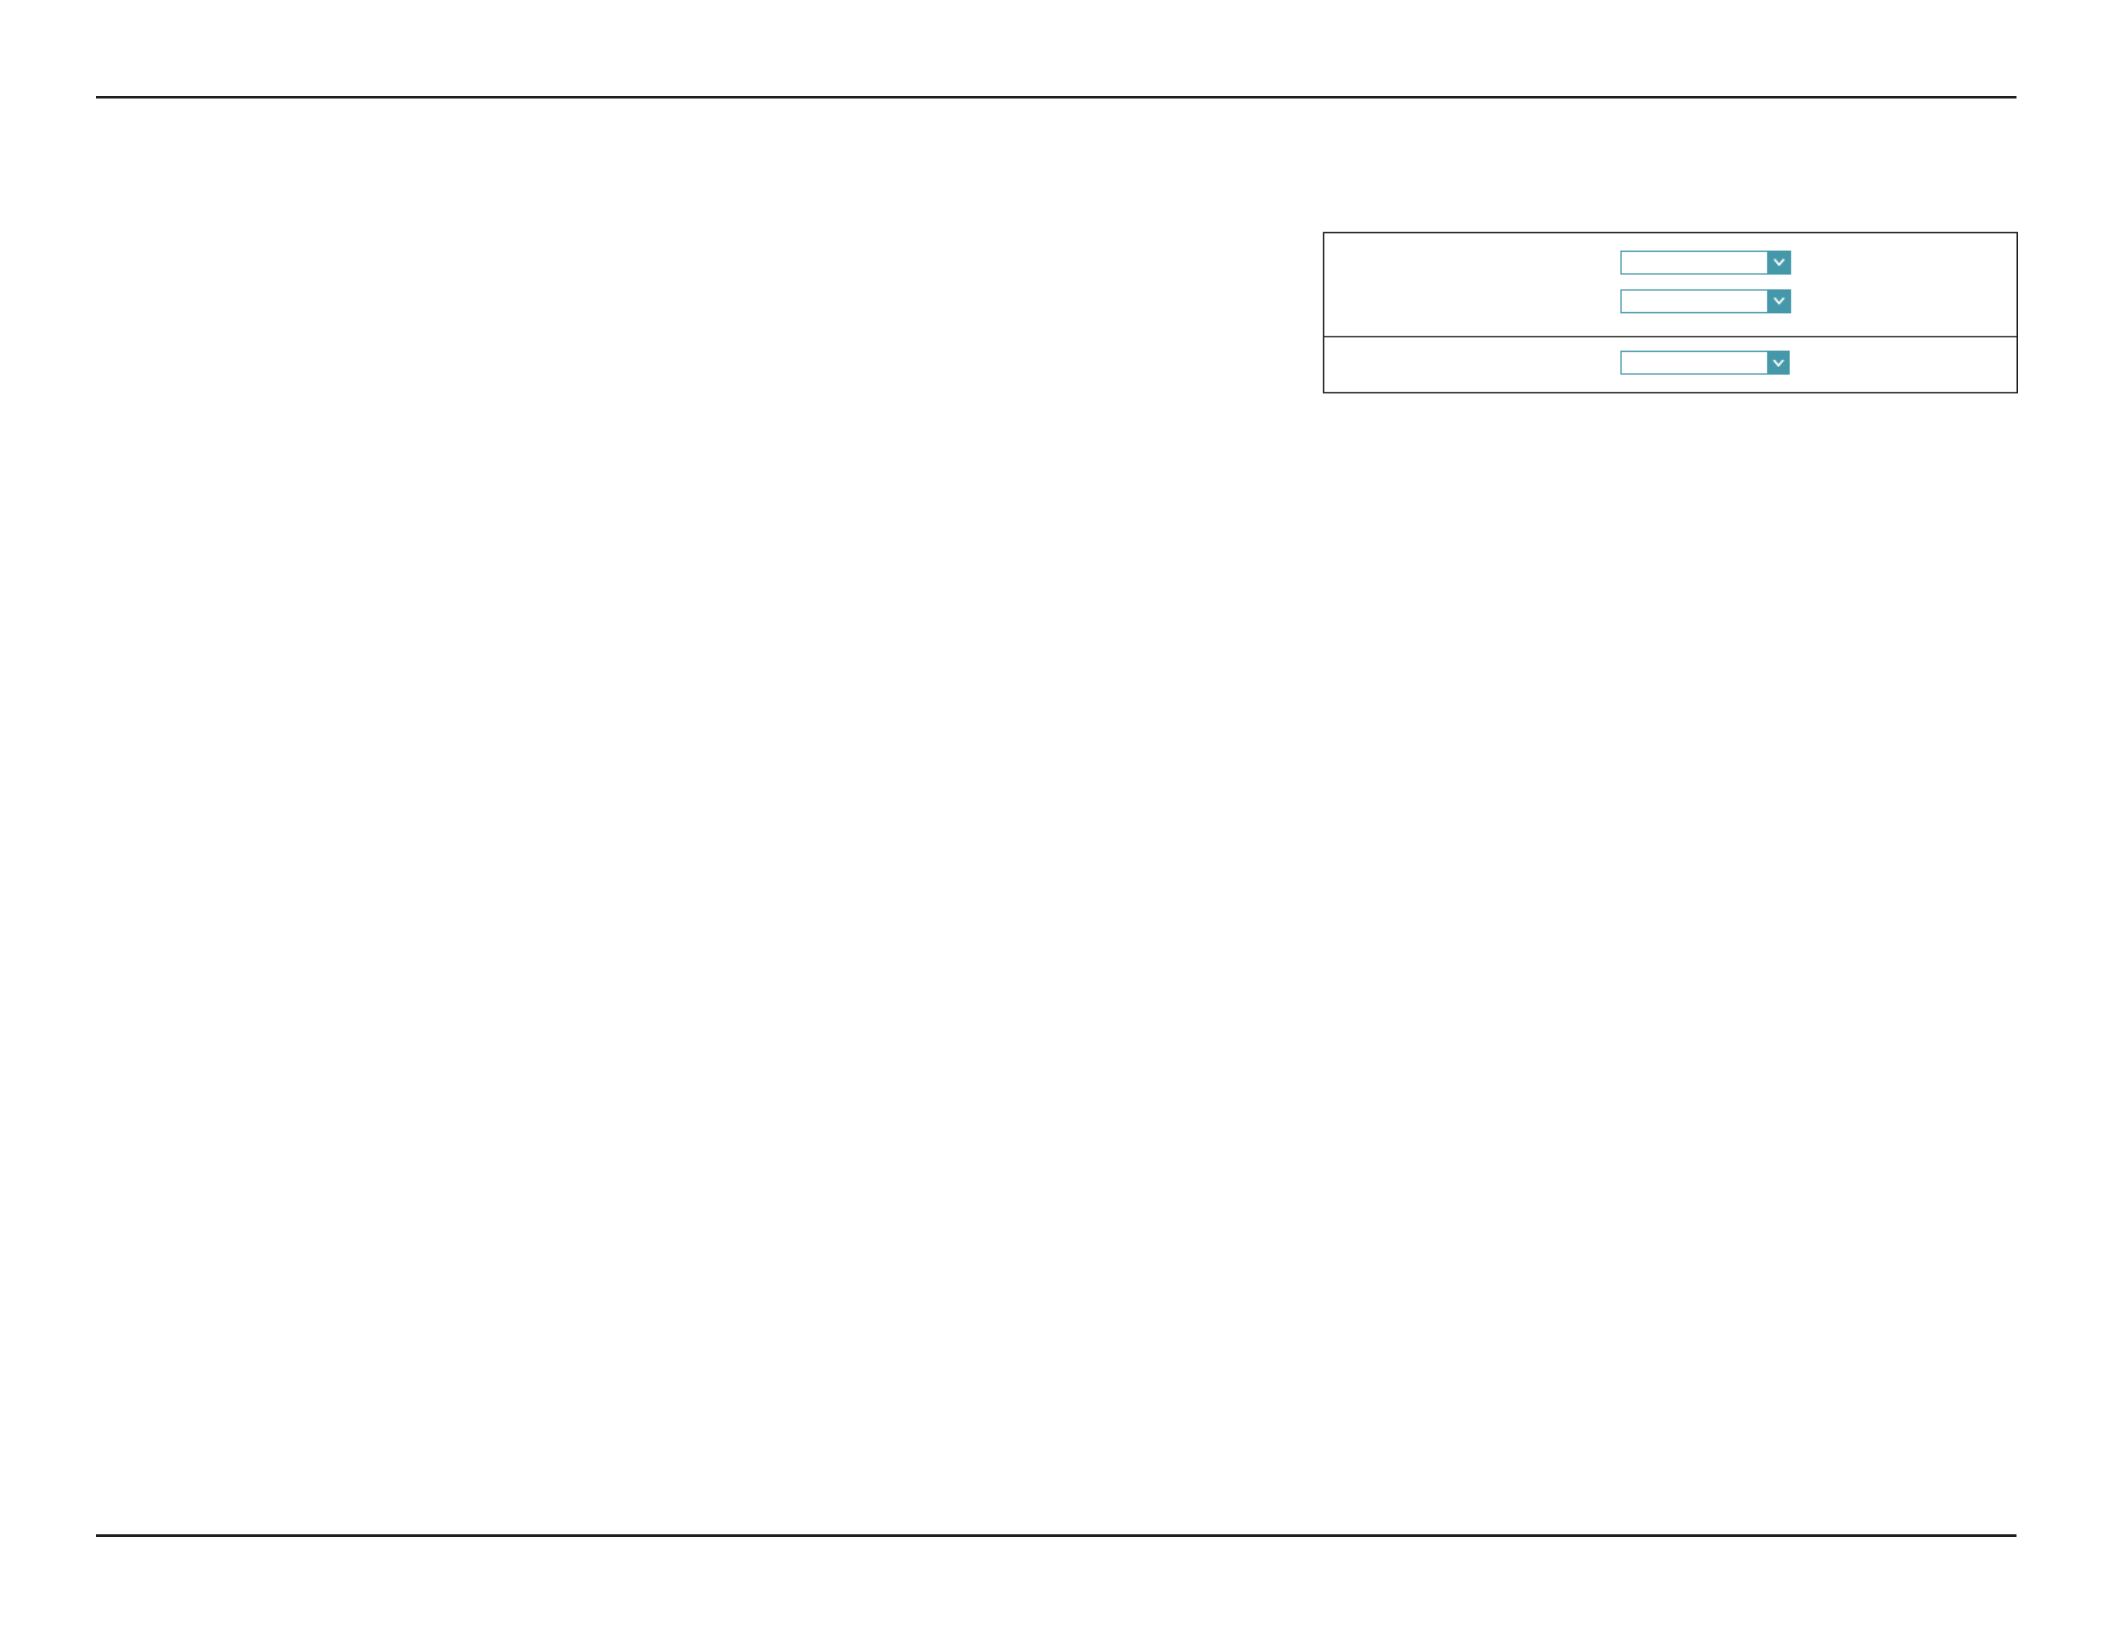
39D-Link DSL-2888A User Manual
Section 4 - Conguration
DSL Prole
DSL Modulation
DSL Modulation
Options:
Select whether to enable or disable each DSL modulation
option. Usually it is best to leave these at their defaults,
unless otherwise instructed by your ISP.
If you enabled , choose the VDSL Prole Options:VDSL Modulation
VDSL Prole
VDSL Prole
Options:
Select the VDSL Proles to enable. It is best to leave these at their
defaults, unless otherwise instructed by your ISP.
Advanced Settings
Bitswap: Select whether to enable Bitswap.
SRA: Select whether to enable SRA.
Click when you are done.Save
On this page you can congure your DSL settings. If you are unsure, you can obtain these
settings from your ISP. DSL-2888A HW:V1.0.0 FW:V1.1.43
Settings >> Internet >>Prole
SettingsHome Features Management
Prole
Congure your xDSL prole.
Internet Save
Priority
DSL Modulation
COPYRIGHT © 2016 D-Link
G.dmt: Enabled G.Lite: Disabled
T1.413: Disabled ADSL2: Enabled
AnnexL: Enabled ADSL2+: Enabled
AnnexM: Enabled VDSL: Enabled
VDSL Prole:
Prole 8A: Enabled Prole 8B: Enabled
Prole 8C: Enabled Prole 8D: Enabled
Prole 12A: Enabled Prole 12B: Enabled
Prole 17A: Enabled Prole 30A: Enabled
Advanced Settings ...
Bitswap: Enabled SRA: Enabled

40D-Link DSL-2888A User Manual
Section 4 - Conguration
Priority
Internet Fail Over
Primary Internet
Connection:
Select the primary Internet connection to use. The options are PTM_/
ATM_, which is the xDSL connection; Eth_0 Eth1 Eth5 and - if enabled,
which are the Ethernet WAN interfaces provided by Residential
Gateway mode; and , which is a USB connected modem.USB0
Secondary
Internet
Connection:
Select the secondary backup, Internet connection to use in the event
the primary Internet connection fails.
Tertitary
Backup Internet
Connection:
Select the third backup, Internet connection to use in the event the
primary and secondary Internet connection fails.
Click when you are done.Save
From this page you may congure your Internet failover priority. In the event that your
primary Internet connection method fails, this device can automatically fall back to using a
secondary or tertiary connection in order to maintain Internet connectivity.
DSL-2888A HW:V1.0.0 FW:V1.1.43
Settings >> Internet >> Priority
SettingsHome Features Management
Priority
Congure your Internet fail over priority. In the event that your primary Internet connection method fails, this
device can automatically fall back to using a secondary or tertiary connection in order to maintain Internet
connectivity. From this page you may congure your Internet failover priority.
Primary Internet Connection PTM0
⌵
Secondary Internet Connection Eth0
⌵
Tertitary Backup Internet Connection Not Available
⌵
Internet Save
DSL Prole
Internet Fail Over
COPYRIGHT © 2016 D-Link

41D-Link DSL-2888A User Manual
Section 4 - Conguration
DSL-2888A HW:V1.0.0 FW:V1.1.43
Settings >> Wireless
SettingsHome
Wireless
Features Management
Use this section to congure the wireless settings for your D-Link Router. Please make sure that any
changes made in this section will need to be updated on your wireless device.
2.4GHz
5GHz
Status: Enabled
Wi-Fi Name (SSID): 2.4_GHz_Wi-Fi_Network
Password: A_Str0nG_P@ssW0rd!%!
Status: Enabled
Wi-Fi Name (SSID): 5_GHz_Wi-Fi_Network
Password: A_Str0nG_P@ssW0rd!%!
Advanced Settings ...
Advanced Settings ...
Multiple SSID Save
802.11 Mode: 802.11b/g/n
⌵
Security Mode: WPA-PSK/WPA2-PSK
⌵
Wi-Fi Channel: Auto
⌵
Transmission Power: High
⌵
Channel Width: 20 MHz
⌵
Visibility Status: Visible
⌵
802.11 Mode: 802.11a/n/ac
⌵
Security Mode: WPA-PSK/WPA2-PSK
⌵
Wi-Fi Channel: Auto
⌵
Transmission Power: High
⌵
Channel Width: 80 MHz
⌵
Visibility Status: Visible
⌵
Wi-Fi Protected Setup
PBC: Trigger PBC
COPYRIGHT © 2016 D-Link
From this page you can congure your wireless network settings.
2.4 GHz
Status: Enable or disable the 2.4 GHz wireless network.
Wi-Fi Name (SSID): Create a name for your wireless network using up to 32 characters.
Password: Create a password to use for wireless security.
Advanced Settings
802.11 Mode : Select the desired wireless networking standards to use. The available
options are 802.11b/g/n, 802.11n/g, 802.11n, 802.11b/g, 802.11g,
or .802.11b
Security Mode: Choose None, WEP, WPA-PSK, WPA2-PSK or WPA-PSK/WPA2-PSK.
Wi-Fi Channel: Select the desired channel for your wireless network to use. The
default and recommended setting is .Auto
Transmission
Power:
Select the desired wireless transmission power. The available options
are , , and . The default is .High Medium Low High
Channel Width: Select Auto 20/40 if you are using both 802.11n and non-802.11n
devices, or select if you want to disable 40 MHz bandwidth 20 MHz
communication. The recommended setting is Auto 20/40.
Visibility Status: The default setting is Visible Invisible. Select if you do not want to
broadcast the SSID of your wireless network.
Note: Invisible Making a network is not a form of security alone.
Wireless

42D-Link DSL-2888A User Manual
Section 4 - Conguration
Wireless (continued)
5 GHz
Status: Enable or disable the 5 GHz wireless network.
Wi-Fi Name (SSID): Create a name for your wireless network using up to 32 characters.
Password: Create a password to use for wireless security.
Advanced Settings
802.11 Mode: Select the desired wireless networking standards to use. The available
options are or .802.11a/n/ac 802.11a
Security Mode: Choose None, WEP, WPA-PSK, WPA2-PSK or WPA-PSK/WPA2-PSK.
Wi-Fi Channel: Select the desired channel for your wireless network to use. The
default and recommended setting is .Auto
Transmission
Power:
Select the desired wireless transmission power. The available options
are , , and . The default is .High Medium Low High
Channel Width: Select Auto 20/40 MHz if you want to disable 80 MHz bandwidth
communication for 5 GHz wireless compatibility.
Visibility Status: The default setting is Visible Invisible. Select if you do not want to
broadcast the SSID of your wireless network.
Note: Invisible Making a network is not a form of security alone.
Wi-Fi Protected Setup
PBC: Press the Trigger PBC button to trigger WPS-PBC mode. This virtual
WPS button replicates the physical WPS button functionality.
Click when you are done.Save
DSL-2888A HW:V1.0.0 FW:V1.1.43
Settings >> Wireless
SettingsHome
Wireless
Features Management
Use this section to congure the wireless settings for your D-Link Router. Please make sure that any
changes made in this section will need to be updated on your wireless device.
2.4GHz
5GHz
Status: Enabled
Wi-Fi Name (SSID): 2.4_GHz_Wi-Fi_Network
Password: A_Str0nG_P@ssW0rd!%!
Status: Enabled
Wi-Fi Name (SSID): 5_GHz_Wi-Fi_Network
Password: A_Str0nG_P@ssW0rd!%!
Advanced Settings ...
Advanced Settings ...
Multiple SSID Save
802.11 Mode: 802.11b/g/n
⌵
Security Mode: WPA-PSK/WPA2-PSK
⌵
Wi-Fi Channel: Auto
⌵
Transmission Power: High
⌵
Channel Width: 20 MHz
⌵
Visibility Status: Visible
⌵
802.11 Mode: 802.11a/n/ac
⌵
Security Mode: WPA-PSK/WPA2-PSK
⌵
Wi-Fi Channel: Auto
⌵
Transmission Power: High
⌵
Channel Width: 80 MHz
⌵
Visibility Status: Visible
⌵
WI-FI PROTECTED SETUP
PBC: Trigger PBC
COPYRIGHT © 2016 D-Link

43D-Link DSL-2888A User Manual
Section 4 - Conguration
Multiple SSID
The multiple service set identier (SSID) feature will allow you to create temporary zones that
can be used by guests to access the Internet. These zones will be separate from your main
wireless network. You may congure dierent zones for the 2.4 GHz and 5 GHz wireless bands.
In the Settings menu on the bar on the top of the page, click Wireless Multiple , then click the
SSID link.
2.4 GHz / 5 GHz
WLAN Interface: Select the SSID.
Status: Enable or disable the selected SSID.
Wi-Fi Name (SSID): Create a name for your wireless network using up to 32 characters.
Password: Create a password to use for wireless security. Wireless clients will
need to enter this password to successfully connect to the SSID.
Click when you are done.Save
DSL-2888A HW:V1.0.0 FW:V1.1.43
Settings >> Wireless >> Multiple SSID
SettingsHome
Multiple SSID
Features Management
Use this section to congure the wireless settings for your D-Link Router. Please make sure that any
changes made in this section will need to be updated on your wireless device.
2.4GHz
5GHz
WLAN Interface: SSID1
⌵
Status: Enabled
Wi-Fi Name (SSID): dlink-2
Password: A_Str0nG_P@ssW0rd!%!
WLAN Interface: SSID1
⌵
Status: Enabled
Wi-Fi Name (SSID): dlink-2
Password: A_Str0nG_P@ssW0rd!%!
Wi-Fi Save
COPYRIGHT © 2016 D-Link

44D-Link DSL-2888A User Manual
Section 4 - Conguration
Network
Network Settings
LAN IP Address: Enter the IP address of the router for this interface. The default IP
address is .192.168.1.1
If you change the IP address, once you click , you will need Save
to enter the new IP address in your browser to get back into the
conguration utility.
Subnet Mask: Enter the subnet mask of this interface. The default subnet mask is
255.255.255.0.
Local Domain
Name:
Enter the domain name (optional).
Enable DNS Relay: Disable for devices on your network to perform DNS lookups directly
with your ISP. If enabled, your computers will use the router as a DNS
server.
Advanced Settings - DHCP Server
Status: Enable or disable the DHCP server.
DHCP IP Address
Range:
Enter the starting and ending IP addresses for the DHCP server’s IP
assignment.
Note: If you statically (manually) assign IP addresses to your computers
or devices, make sure the IP addresses are outside of this range or you
may have an IP conict.
This section will allow you to change the local network settings of the router and to congure
the DHCP settings. In the Settings menu on the bar on the top of the page, click . Network
Click Advanced Settings... to expand the list and see all of the options.
DHCP Server
Advanced Settings
Status: Enabled
DHCP IP Address Range: 192.168.1. 100 to 192.168.1. 254
DHCP Lease Time: 86400 minutes
IPv4 Multicast Streams: Enabled
IPv6 Multicast Streams Enabled
COPYRIGHT © 2016 D-Link
DSL-2888A HW:V1.0.0 FW:V1.1.43
Settings >> Network
SettingsHome
Network
Features Management
Use this section to congure the network settings for your device. You can enter a name for your device in
the management link eld, and use the link to access web UI in a web browser. Recommend to change the
management link if there are more than one D-Link devices within the network.
Network Settings
Advanced Settings ...
LAN IP Address: 192.168.1.1
Subnet Mask: 255.255.255.0
Local Domain Name: localhost
Enable DNS Relay: Enabled
Save
Advanced Settings ...
IPv6 Settings
WAN Interface: Eth0
⌵
My Internet Connection is: Auto Conguration (SLAAC/DHCPv6)
LAN IPv6 ADDRESS SETTINGS
Enable DHCP-PD: Enabled
LAN IPv6 Link-Local Address: fe80::1
ADDRESS AUTOCONFIGURATION SETTINGS
Enable Automatic IPv6 Address Assignment: Enabled
Autoconguration Type: Stateful DHCPv6
⌵
IPv6 Advertisement Lifetime: minutes
45D-Link DSL-2888A User Manual
Section 4 - Conguration
DHCP Lease Time: Enter the length of time for the IP address lease in minutes.
Advanced Settings
IPv4 Multicast
Stream:
Enable to allow IPv4 multicast trac to pass through the router from
the Internet.
IPv6 Multicast
Stream:
Enable to allow IPv6 multicast trac to pass through the router from
the Internet.
IPv6 Settings
WAN Interface: Select the WAN interface to congure the local network IPv6 settings.
My Internet
Connection is:
Your Internet connection's IPv6 connection type is displayed here.
DHCP Server
Advanced Settings
Status: Enabled
DHCP IP Address Range: 192.168.1. 100 to 192.168.1. 254
DHCP Lease Time: 86400 minutes
IPv4 Multicast Streams: Enabled
IPv6 Multicast Streams Enabled
COPYRIGHT © 2016 D-Link
DSL-2888A HW:V1.0.0 FW:V1.1.43
Settings >> Network
SettingsHome
Network
Features Management
Use this section to congure the network settings for your device. You can enter a name for your device in
the management link eld, and use the link to access web UI in a web browser. Recommend to change the
management link if there are more than one D-Link devices within the network.
Network Settings
Advanced Settings ...
LAN IP Address: 192.168.1.1
Subnet Mask: 255.255.255.0
Local Domain Name: localhost
Enable DNS Relay: Enabled
Save
Advanced Settings ...
IPv6 Settings
WAN Interface: Eth0
⌵
My Internet Connection is: Auto Conguration (SLAAC/DHCPv6)
LAN IPv6 ADDRESS SETTINGS
Enable DHCP-PD: Enabled
LAN IPv6 Link-Local Address: fe80::1
ADDRESS AUTOCONFIGURATION SETTINGS
Enable Automatic IPv6 Address Assignment: Enabled
Autoconguration Type: Stateful DHCPv6
⌵
IPv6 Advertisement Lifetime: minutes
Network (continued)

46D-Link DSL-2888A User Manual
Section 4 - Conguration
LAN IPv6 Address Settings
Enable DHCP-PD: Enable or disable IPv6 prex delegation.
If you disabled , enter the LAN IPv6 PD Address:DHCP-PD
LAN IPv6 PD
Address:
Enter the LAN IPv6 PD Address.
LAN IPv6 Link-
Local Address:
Displays the router’s LAN IPv6 link-local address.
Advanced Settings - Address Autoconguration Settings
Enable Automatic
IPv6 Address
Assignment:
Enable or disable the Automatic IPv6 Address Assignment feature.
Autoconguration
Type:
Select SLAAC+RDNSS, SLAAC+Stateless DHCP, Stateful DHCPv6or .
If you selected or SLAAC+RDNSS Stateless DHCP as the Autoconguration Type:
Router
Advertisement
Lifetime:
Enter the router address lifetime (in minutes).
If you selected as the Autoconguration Type:Stateful DHCPv6
IPv6
Advertisement
Lifetime:
Enter the IPv6 address lifetime (in minutes).
Click when you are done.Save
Network (continued)
ADDRESS AUTOCONFIGURATION SETTINGS
Enable Automatic IPv6 Address Assignment: Enabled
Autoconguration Type: SLAAC+RDNSS
⌵
IPv6 Advertisement Lifetime: 10 minutes
ADDRESS AUTOCONFIGURATION SETTINGS
Enable Automatic IPv6 Address Assignment: Enabled
Autoconguration Type: SLAAC+Stateless DHCP
⌵
IPv6 Advertisement Lifetime: 10 minutes
ADDRESS AUTOCONFIGURATION SETTINGS
Enable Automatic IPv6 Address Assignment: Enabled
Autoconguration Type: Stateful DHCPv6
⌵
Router Advertisement Lifetime: minutes

47D-Link DSL-2888A User Manual
Section 4 - Conguration
SharePort
This page will allow you to set up access to les on an external USB device plugged into the
router. You can do this through the local network or from the Internet using either a web
browser or an app on your smartphone or tablet. In the Settings menu on the bar on the
top of the page, click SharePort.
DLNA Media Server
Windows File Sharing (SAMBA)
Web File Access
Status: Enabled
Direct Links: http://shareport.local/
https://shareport.local/
DSL-2888AHW:V1.0.0 FW:V1.1.43
Settings >> Shareport
SettingsHome
SharePort
Features Management
SharePort allows you to share photos, music, movies and les simply by connecting a USB drive to your
router. Access your les locally and remotely using the free mydlink SharePort app for your iOS or Android
devices, or access them on a computer through the SharePort Web Access. The built-in Digital Living
Network Alliance (DLNA) media server allows you to stream multimedia content to any DLNA compliant
devices such as smart TVs and games consoles.
Create User
Status: Enabled
DLNA Media Server: DSL-2888A_DMS
Status: Enabled
Windows File Sharing: Use created accounts
⌵
Save
COPYRIGHT © 2016 D-Link
DLNA Media Server
Status: Enable or disable the DLNA media server function, allowing connected
clients access to media les over the network.
DLNA Media
Server:
Choose a name for your DLNA media server so that it can be found.
Windows File Sharing (SAMBA)
Status: Enable or disable the Windows File Sharing function, allowing
connected clients access to media les over the network.
Windows File
Sharing:
Choose either Allow all users to access (no password) or Require
router’s admin password to specify whether the router’s password
will be required for access.
Web File Access
Web File Access: Enable or disable remote access to les stored on a USB device
plugged into the router through a web browser.
Direct Links: This area will display the HTTP and HTTPS links to connect to your
SharePort drive through a web browser from a device on your
network.
Click when you are done.Save

48D-Link DSL-2888A User Manual
Section 4 - Conguration
Create User
DSL-2888A HW:V1.0.0 FW:V1.1.43
Settings >> Shareport >> Create User
SettingsHome
SharePort
Features Management
SharePort allows you to share photos, music, movies and les simply by connecting a USB drive to your
router. Access your les locally and remotely using the free mydlink SharePort app for your iOS or Android
devices, or access them on a computer through the SharePort Web Access. The built-in Digital Living
Network Alliance (DLNA) media server allows you to stream multimedia content to any DLNA compliant
devices such as smart TVs and games consoles.
SharePort
Create User
User Name Permission Edit DeleteAccess Path
Admin root Read/Write - - - -
Remaining: 9
USB Port: Not Available
Save
COPYRIGHT © 2016 D-Link
The Create User page allows you to manage SharePort user accounts. This page lists active
user accounts, their current permissions, and access paths. Users without accounts are
restricted to guest access which only has access to the “Guest” folder on the media server.
A maximum of ten accounts (including "Admin" can be registered at any given time.
If you wish to remove an account, click on the corresponding trash can icon in the Delete
column. If you wish to edit an account, click on the corresponding pencil icon in the Edit
column. If you wish to create a new account, click the Create User button. If you edit or
create a user, the following options appear:
Create New User
User Name: Enter the desired user name for the new account.
Password: Enter the password which the user will need to enter when logging in.
Permission: Select either or Read Only Read/Write to control whether the user
can edit, add, or delete les on the device.
Folder: Choose the parent folder for the user. Files and folders on a higher
level will be unavailable. Giving a user “root” allows access to all les
on the device. To change the selected folder, click Browse and browse
to the desired folder.
Click OK when you are done. The new user should be added to the
list of user accounts. To save the new list, click . To return to the Save
SharePort page, click SharePort.
Name:
Password:
Permission: Read Only
⌵
Folder: root Browse
Create New User
OK
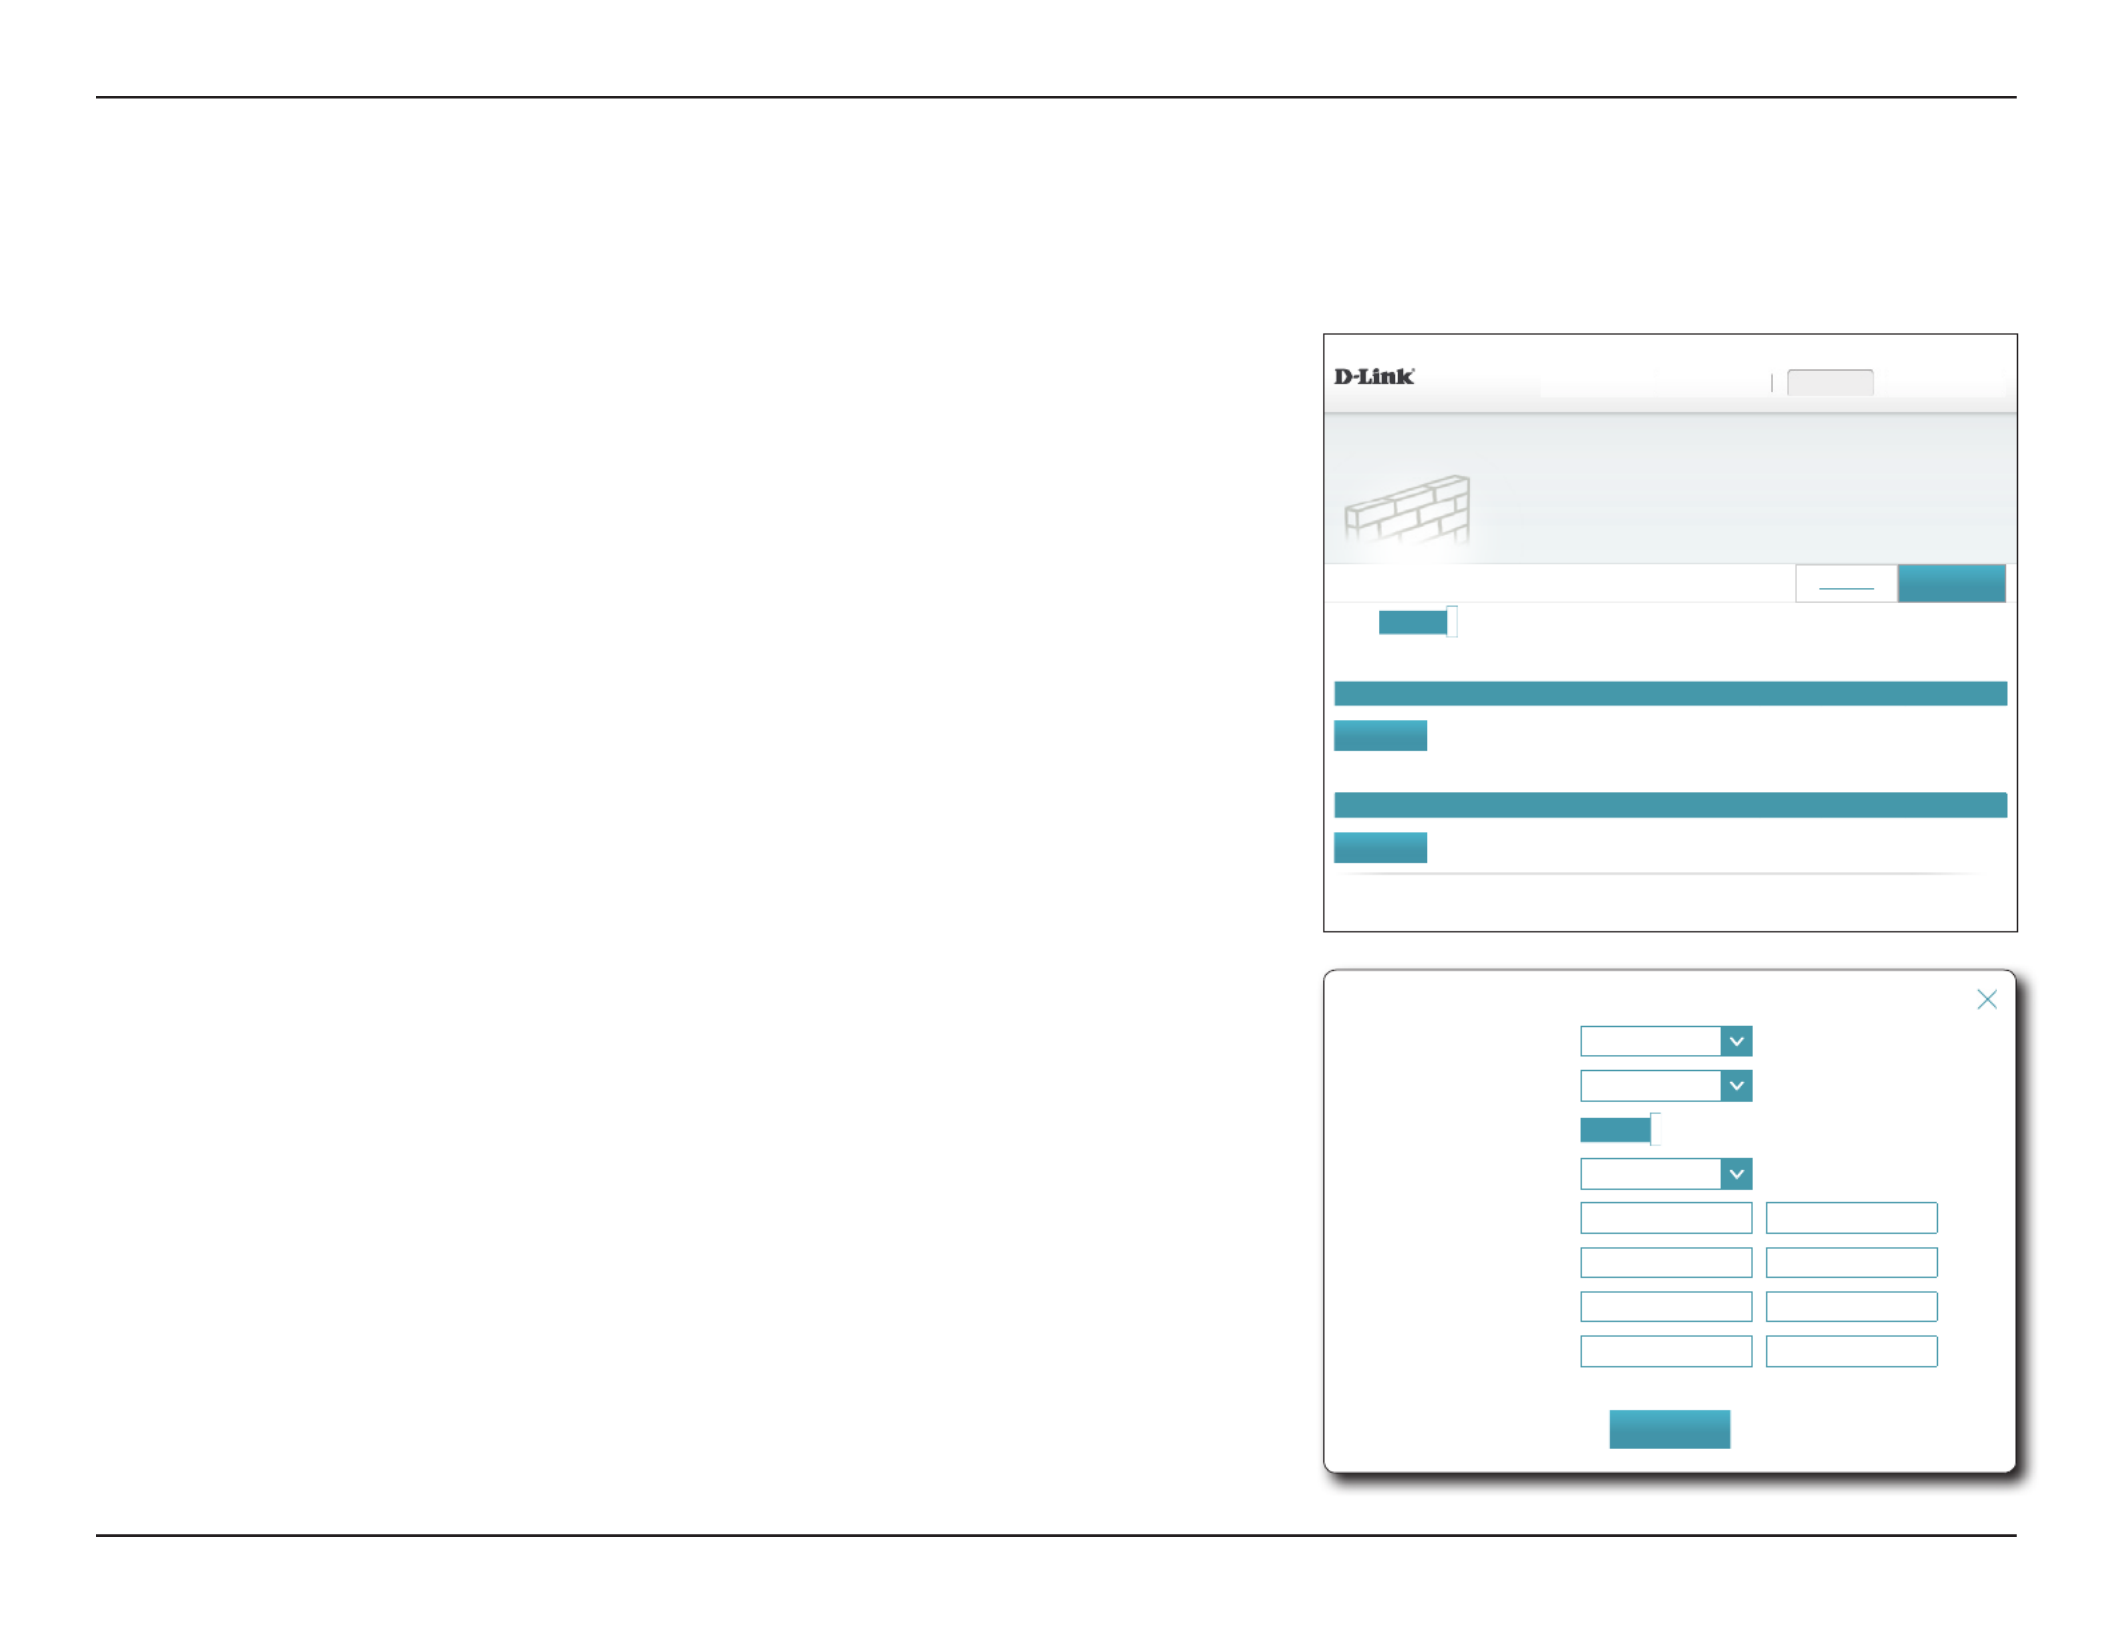
49D-Link DSL-2888A User Manual
Section 4 - Conguration
Features
DSL-2888A HW:V1.0.0 FW:V1.1.43
Features >> Firewall Settings >> IPv4/v6 Rules
Settings FeaturesHome Management
Save
Advanced
Firewall Settings
Your router’s high-performance rewall feature continuously monitors Internet trafc, protecting your network
and connected devices from malicious Internet attacks.
Add Rule
COPYRIGHT © 2016 D-Link
LAN-WAN
Number Enable IP Range/Port Range(Source) IP Range/Port Range(Dest) Protocol Device Name Action
WhiteList
BlackList
Add Rule
Number Enable IP Range/Port Range(Source) IP Range/Port Range(Dest) Protocol Device Name Action
WAN->LAN WhiteList
BlackList
Firewall Enabled
IPv4/IPv6 Rules
The IPv4/IPv6 Rules page contains advanced options that let you set rules to restrict IP trac
across your network or from your network to the Internet. Click the button Enable/Disable
to enable or disable the rewall. Disabling the rewall is not recommended.
Use the drop-down menu to select whether you want to WhiteList to allow only the trac
below or to block the rules your create.BlackList
If you wish to remove a rule, click on the corresponding trash can icon in the Delete column.
If you wish to edit a rule, click on the corresponding pencil icon in the Edit column. If you
wish to create a new rule, click the Add Rule button. Click Save when you are done. If you
edit or create a rule, the following options will appear:
Create New Rule
IP Version: Select either IPv4 or IPv6.
Connection: Select the interface to apply the rewall rule to.
Enable: Enable or disable this rule.
Source IP: Enter the source IP address range that the rule will apply to.
Sourc Port: Enter the source port to apply the rule to.
Dest IP: Enter the destination IP address range that the rule will apply to.
Dest Port: Enter the destination port to apply the rule to.
Click when you are done.Save
IP Version: IPv4
⌵
Connection: -
⌵
Enable: Enabled
Protocol: ALL
⌵
Source IP
Source Port
Dest Port
Dest Port:
Create New Rule
Apply

50D-Link DSL-2888A User Manual
Section 4 - Conguration
Advanced
DSL-2888A HW:V1.0.0 FW:V1.1.43
Features >> Firewall Settings >> Advanced
Settings FeaturesHome Management
Save
Enable DMZ: Enabled
DMZ IP Address: << Computer Name
⌵
Wan Interface: PTM0
⌵
IPv4/v6 Rules
Firewall Settings
Your router’s high-performance rewall feature continuously monitors Internet trafc, protecting your network
and connected devices from malicious Internet attacks.
Advanced Settings ...
PPTP: Enabled
IPSec (VPN): Enabled
RTSP: Enabled
SIP: Enabled
Application Level Gateway (ALG) Conguration
COPYRIGHT © 2016 D-Link
Click Advanced Firewall Settings from the page to congure advanced rewall settings.
Enable DMZ: Enable or disable the Demilitarized Zone (DMZ). Enabling DMZ is not
recommended.
DMZ IP Address: If DMZ is enabled, enter the IP address of the client you wish to expose,
or use the drop-down menu to quickly select it.
Wan Interface: Select an interface from the drop-down menu to apply the DMZ rule
to.
Advanced Settings - Application Level Gateway (ALG) Conguration
PPTP: Allows multiple machines on the LAN to connect to their corporate
network using the PPTP protocol.
IPSec (VPN): Allows multiple VPN clients to connect to their corporate network
using IPSec. Some VPN clients support traversal of IPSec through
NAT. This Application Level Gateway (ALG) may interfere with the
operation of such VPN clients. If you are having trouble connecting
with your corporate network, try turning this ALG o. Please check
with the system administrator of your corporate network whether
your VPN client supports NAT traversal.
RTSP: Allows applications that uses Real Time Streaming Protocol (RTSP)to
receive streaming media from the Internet.
SIP: Allows devices and applications using VoIP (Voice over IP) to
communicate across NAT. Some VoIP applications and devices have
the ability to discover NAT devices and work around them. This ALG
may interfere with the operation of such devices. If you are having
trouble making VoIP calls, try turning this ALG o.
Click when you are done.Save

51D-Link DSL-2888A User Manual
Section 4 - Conguration
Virtual Server
Status Name Local IP Protocol External Port Internal Port Interface Edit Delete
DSL-2888A HW:V1.0.0 FW:V1.1.43
Features >> Virtual Server
Virtual Server
Your router helps share a single IP address assigned by your Internet service provider among several clients
in your home. Virtual servers are preset port mappings for popular services, like a web or e-mail server, that
route trafc to a specied client inside.
Settings FeaturesHome Management
Port Forwarding Save
Remaining: 15
Add Rule
COPYRIGHT © 2016 D-Link
In some cases you may have two applications running on dierent devices which require
the same public port. Virtual server allows you to remap a dierent external port to each
device. To congure the virtual server, click . Virtual Server
If you wish to remove a rule, click on its trash can icon in the Delete column. If you wish
to edit a rule, click on its pencil icon in the Edit column. If you wish to create a new rule,
click the button. Click when you are done. If you edit or create a rule, the Add Rules Save
following options will appear:
Create New User
Name: Enter a name for the rule. Alternatively, select the protocol/Application
from the drop-down menu.
Local IP: Enter the IP address of the computer on your local network that you
want to allow the incoming service to. Alternatively, select the device
from the drop-down menu.
Protocol: Select the protocol of the trac to allow or deny (TCP, , , UDP Both
or ). Other
Protocol Number: If you entered above, enter the protocol number.Other
External Port: Enter the public port you want to open.
Internal Port: Enter the private port you want to open.
Schedule: Select the interface to apply the rule to from the drop-down menu.
Click when you are done.Save
Name: << Application Name
⌵
Local IP: << Computer Name
⌵
Protocol: TCP
⌵
External Port:
Internal Port:
Interface: PTM0
⌵
Create New Rule
Apply

53D-Link DSL-2888A User Manual
Section 4 - Conguration
Static Route
Destination Network:
Mask:
Gateway:
Metric:
Interface: PTM0
⌵
Create New Route
Apply
Status Destination Network Mask Gateway Metric Interface Edit Delete
DSL-2888A HW:V1.0.0 FW:V1.1.43
Features >> Static Routes >> IPv4
Static Routes
Once connected to the Internet, your router automatically builds routing tables that determine where trafc
should be sent. Static routes can override this process, allowing trafc to be directed to a specic client or
location.
Settings FeaturesHome Management
IPv6 Save
Remaining: 15
Add Route
COPYRIGHT © 2016 D-Link
The Static Routes section allows you to dene custom routes to control how data trac is
moved around your network.
In the Features menu on the bar on the top of the page, click .Static Route
To congure IPv6 rules, click and refer to . To return to the main IPv6 IPv4 on page 53
IPv4 static routes page, click .IPv4
If you wish to remove a rule, click on its trash can icon in the Delete column. If you wish
to edit a rule, click on its pencil icon in the Edit column. If you wish to create a new rule,
click the button. Click when you are done. If you edit or create a rule, the Add Rules Save
following options will appear:
Create New Rule
Destination
Network:
Enter the IP address of packets that will take this route.
Mask: Enter the netmask of the route.
Gateway: Enter your next hop gateway to be taken if this route is used.
Metric: The route metric is a value from 1 to 16 that indicates the cost of using
this route. A value 1 is the lowest cost and 15 is the highest cost.
Interface: Select the interface that the IP packet must use to transit out of the
router when this route is used.
Click and when you are done.Apply Save
IPv4

54D-Link DSL-2888A User Manual
Section 4 - Conguration
Status DestNetwork Gateway Metric Interface Edit DeletePrexLen
DSL-2888A HW:V1.0.0 FW:V1.1.43
Features >> Static Routes >> IPv6
Static Routes
Once connected to the Internet, your router automatically builds routing tables that determine where trafc
should be sent. Static routes can override this process, allowing trafc to be directed to a specic client or
location.
Settings FeaturesHome Management
IPv4 Save
Remaining: 24
Add Route
COPYRIGHT © 2016 D-Link
IPv6
To congure IPv6 rules, on the Static Routes page click . To return to the main IPv4 static IPv6
routes page, click .IPv4
If you wish to remove a rule, click on its trash can icon in the Delete column. If you wish
to edit a rule, click on its pencil icon in the Edit column. If you wish to create a new rule,
click the button. Click when you are done. If you edit or create a rule, the Add Rules Save
following options will appear:
Create New Rule
DestNetwork: This is the IP address of the router used to reach the specified
destination.
PrexLen: Enter the IPv6 address prex length of the packets that will take this
route.
Gateway: Enter your next hop gateway to be taken if this route is used.
Metric: Enter the metric value for this rule here.
Interface: Select the interface that the IP packet must use to transit out of the
router when this route is used.
Click and when you are done.Apply Save
DestNetwork:
PrexLen:
Gateway:
Metric:
Interface: Eth0
⌵
Create New Route
Apply

55D-Link DSL-2888A User Manual
Section 4 - Conguration
Status Host Name Interface Edit DeleteServer Address
Remaining: 10
Add Record
COPYRIGHT © 2016 D-Link
DSL-2888A HW:V1.0.0 FW:V1.1.43
Features >> Dynamic DNS
Dynamic DNS
Dynamic Domain Name Service allows your router to associate an easy-to-remember domain name such as
[YourDomainName].com with the regularly changing IP address assigned by your Internet Service provider.
This feature is helpful when running a virtual server.
Settings FeaturesHome Management
Save
Enable Dynamic DNS: Enabled
Dynamic DNS
Most Internet Service Providers (ISPs) assign dynamic (changing) IP addresses. Using a
Dynamic Domain Name Server (DDNS) service provider, people can enter your domain name
in their web browser to connect to your server no matter what your IP address is. Owners
of D-Link routers can use the dlinkdns service. In the Features menu on the bar on the top
of the page, click .Dynamic DNS
Enable Dynamic
DNS:
Enabling dynamic DNS reveals further conguration options.
If you , click Enabled Dynamic DNS Add Record and congure the following options are
available:
Server Address: Enter the address of your DDNS server, or select one from the drop-
down menu.
Host Name: Enter the host name that you registered with your DDNS service
provider.
User Name: Enter your DDNS username.
Password: Enter your DDNS password.
Interface: Select an interface from the drop-down menu to apply the DDNS
rule to.
Click and when you are done.Apply Save
Server Address: dyndns.com dyndns.com
⌵
Host Name:
User Name:
Password:
Interface: PTM0
⌵
Create New Record
Apply

56D-Link DSL-2888A User Manual
Section 4 - Conguration
Port Mapping
Number Name Interface Protocol Start Port End Port Open Start Port Open End Port Edit Delete
DSL-2888A HW:V1.0.0 FW:V1.1.43
Features >> Port Forwarding
Port Mapping
Your router helps share a single IP address assigned by your ISP among several clients in your home. Port
forwarding allows trafc requests from a specied application to be directed to a specied client inside.
Settings FeaturesHome Management
Remaining: 15
Add Rule
COPYRIGHT © 2016 D-Link
Port forwarding allows you to specify a port or range of ports to open for specic devices
on the network. This might be necessary for certain applications to connect through the
router. In the Features menu on the bar on the top of the page, click .Port Mapping
If you wish to remove a rule, click on its trash can icon in the Delete column. If you wish to
edit a rule, click on its pencil icon in the Edit column. If you wish to create a new rule, click
the button. If you edit or create a rule, the following options will appear:Add Rules
Create New Rule
Enable: Enable or disable the rule.
Name: Enter a name for the rule.
Wan Interface: Select the interface to apply the rule to.
Protocol: Select either , , or .TCP UDP TCP/UDP
Start Port: Enter the starting port range to forward to.
End Port: Enter the ending port range to forward to.
Open Start Port: Enter the starting port range to open.
Open End Port: Enter the ending port range to open.
Click when you are done.Apply
Enable: Enabled
Wan Interface: PTM0
⌵
Protocol: TCP
⌵
Name:
Start Port:
End Port:
Open Start Port:
Open End Port:
Create New Record
Apply
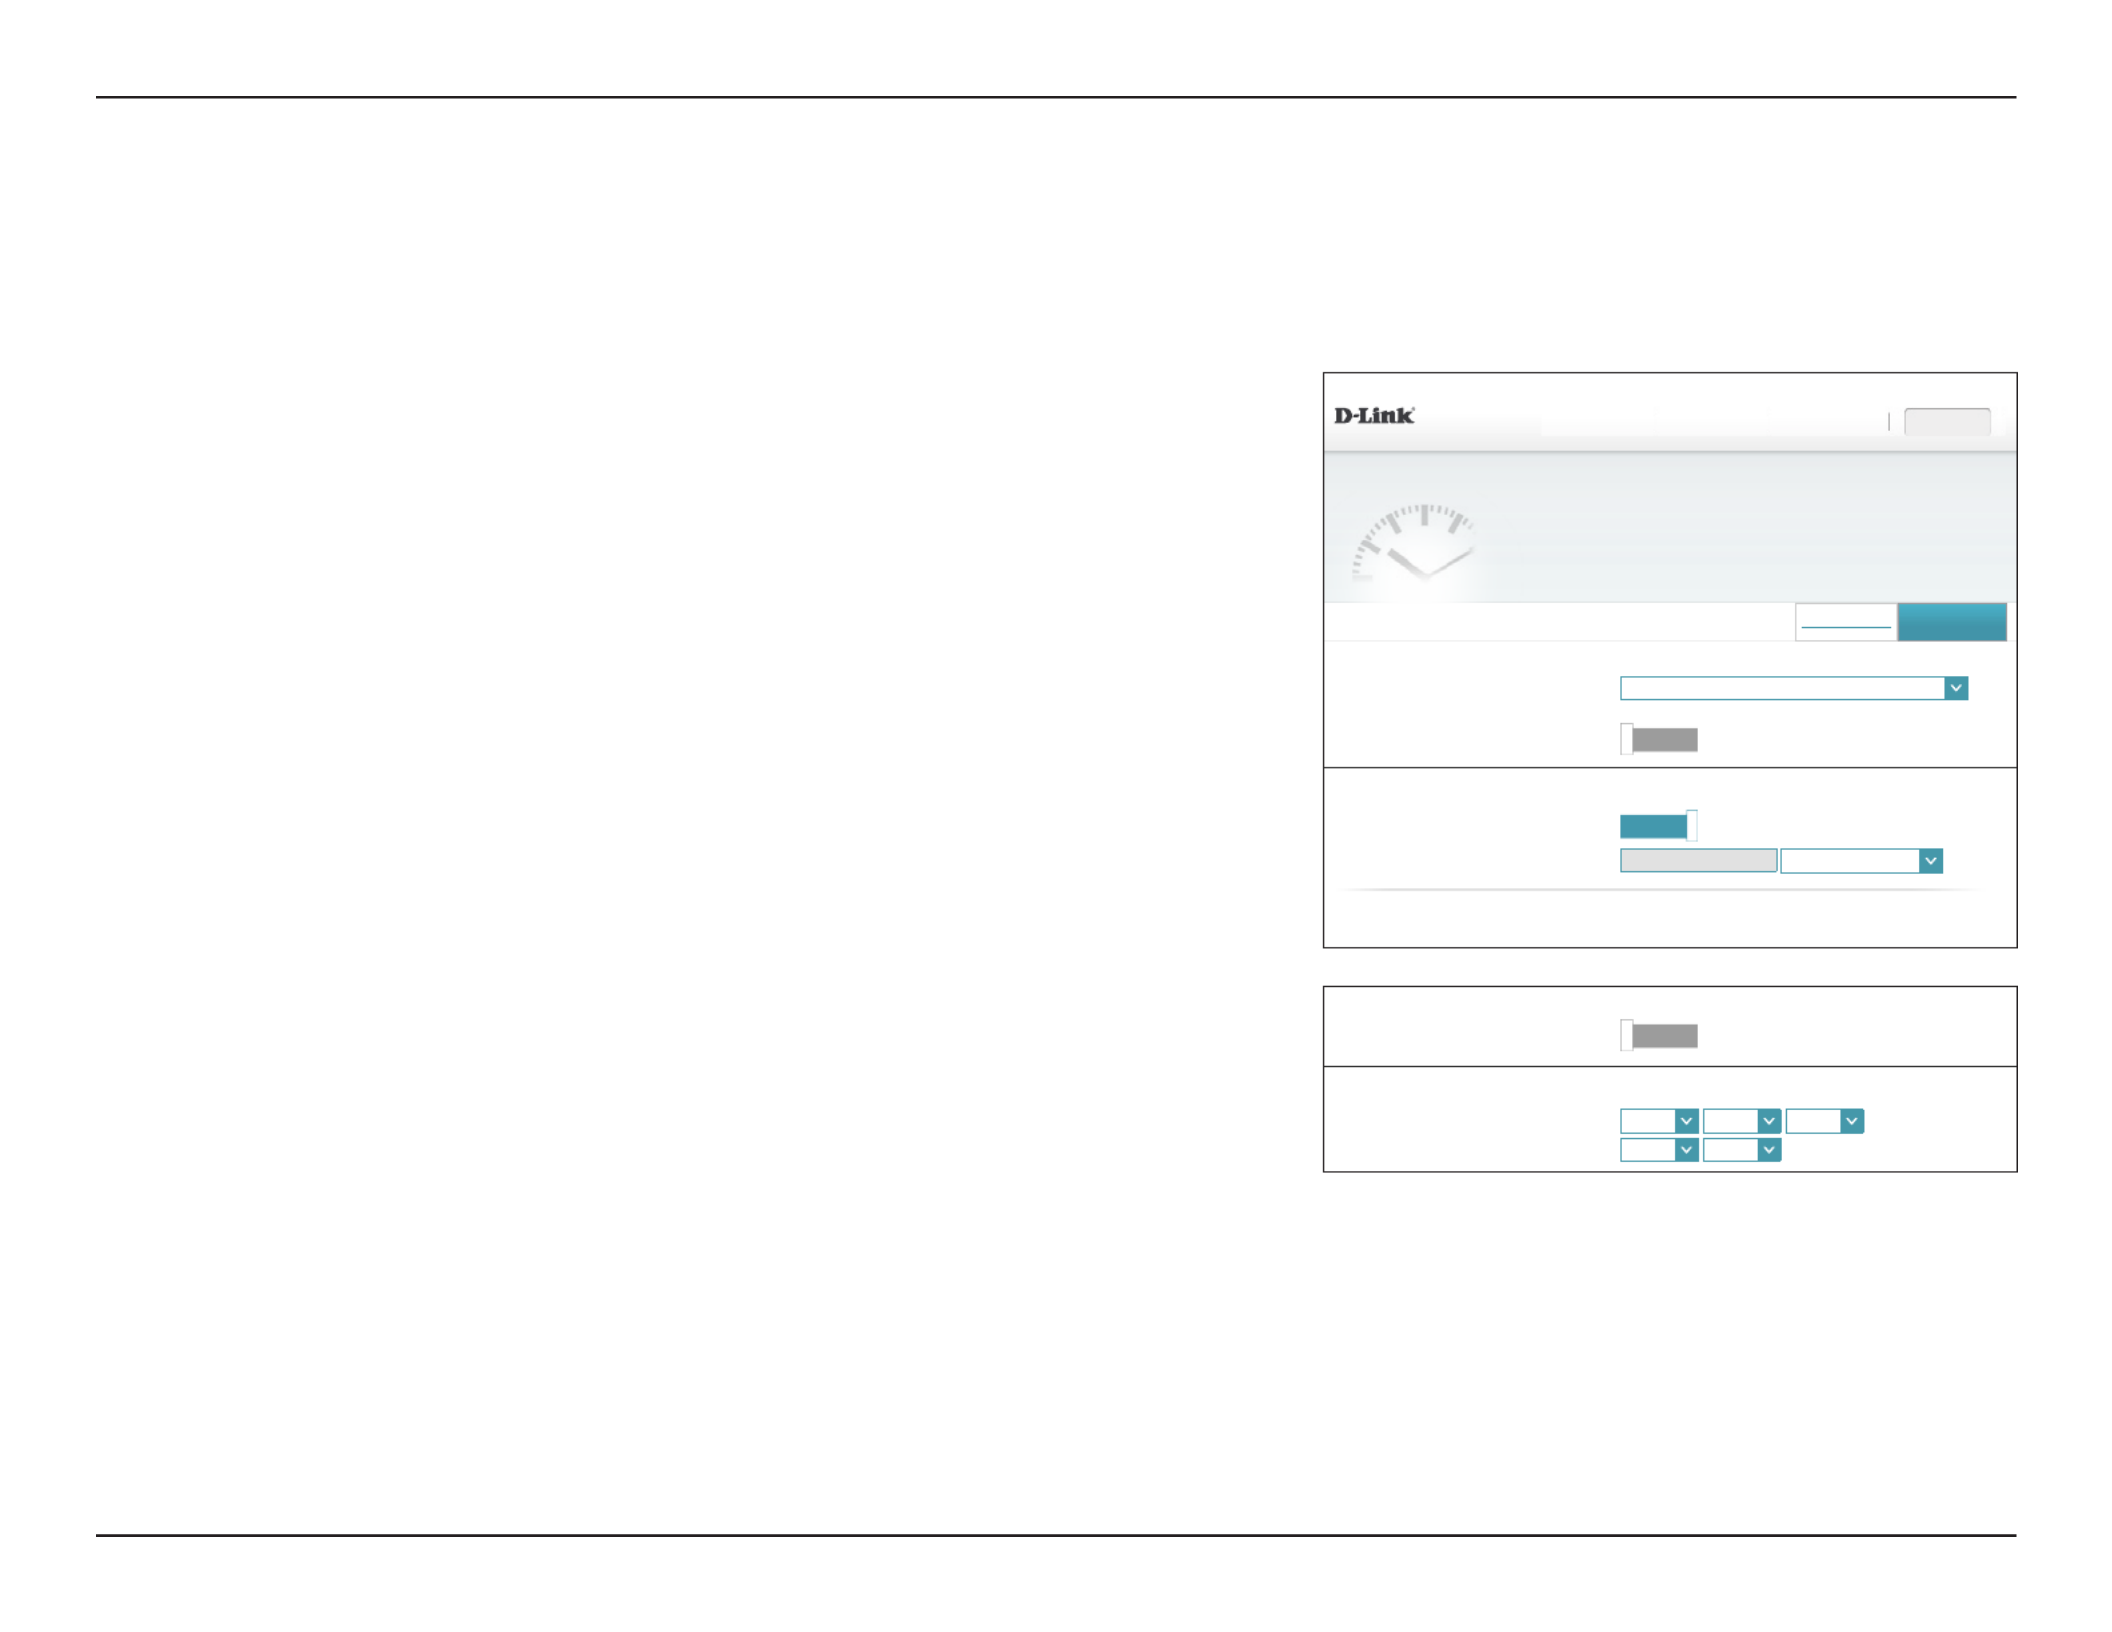
57D-Link DSL-2888A User Manual
Section 4 - Conguration
DSL-2888A HW:V1.0.0 FW:V1.1.43
Time
Your router’s internal clock is used for data logging and schedules for features. The date and time can be
synchronized with a public time server on the Internet, or set manually.
Settings FeaturesHome Management
Management >> System Time Save
Parental Control
Time Zone: (GMT-05:00) Eastern Time (US & Canada)
⌵
Time: 2016/08/07 07:34:06 PM
Enable Daylight Saving: Disabled
Time Conguration
Automatic Time Conguration
Update Time Using an NTP Server: Enabled
NTP Server: D-Link NTP Server D-Link NTP Server
⌵
COPYRIGHT © 2016 D-Link
Automatic Time Conguration
Manual Time Conguration
Update Time Using an NTP Server: Disabled
Date: 2016
⌵
08
⌵
10
⌵
(Year/Month/Day)
Time: 10
⌵
28
⌵
(Hour/Minute)
Management
Time & Schedule
Time
The Time page allows you to congure, update, and maintain the correct time on the internal
system clock. From here you can set the time zone, the Network Time Protocol (NTP) server,
and enable or disable daylight saving time.
In the Management menu on the bar on the top of the page, click Time & Schedule.
To congure and manage your schedules, click Parental Control and refer to Parental
Control / Schedule 58on page .
Time Conguration
Time Zone: Select your time zone from the drop-down menu.
Time: Displays the current date and time of the router.
Daylight Saving: Enable or disable daylight saving time.
Automatic Time Conguration
Update Time
Using an NTP
Server:
Enable or disable to allow an NTP server on the Internet to synchronize
the time and date with your router. If you enable this option, select
an NTP server from the drop-down menu. To congure the router's
time and date manually, disable this option and use the drop-down
menus that appear to input the time and date.
Click when you are done.Save

58D-Link DSL-2888A User Manual
Section 4 - Conguration
Name:
MAC Address:
Week: Sun Mon Thu Fri SatTue Wed
Time: - (hh:mm-hh:mm)
Access to Internet:
Apply
DSL-2888AHW:V1.0.0FW:V1.1.43
Schedule
Some features, such as the rewall and website lters, can be turned on or off based on a schedule. One
common use of schedules is to control access to the Internet by a specied device during specied time
periods.
Settings FeaturesHome Management
Management >> Schedule Save
Time
Name Edit DeleteMAC Address Schedule
Remaining: 10
Add Rule
COPYRIGHT © 2016 D-Link
Parental Control / Schedule
Some router functions can are controlled by can be set according to a pre-congured
schedule. To create, edit, or delete schedules click Parental Control / Schedule, from the
Time page. To return to the Time page, click Time.
If you wish to create a new rule, click the Add Rules button. If you wish to edit a rule, click
on the corresponding pencil icon in the Edit column. If you wish to remove a rule, click on
the corresponding trash can icon in the Delete column. Click when you are done. If Save
you edit or create a rule, the following screen will appear:
Enter the name of your schedule in the eld.Name
Enter the MAC address of the PC you which to apply the rule to.
Select the days of the Week to apply the rule to.
Enter the Time to begin and start the rul.
Select Access to Internet if you wish to enable or disable Internet access for this device.
Click and when you are done.Apply Save

59D-Link DSL-2888A User Manual
Section 4 - Conguration
System Log
System Log
DSL-2888A HW:V1.0.0 FW:V1.1.43
System Log
On-board diagnostics run continually in the background to monitor the health of your router. The results
are recorded in the system log if it is enabled. This info can be used to diagnose common problems or help
Customer Support resolve issues more quickly.
Settings FeaturesHome Management
Management >> System Log Save
COPYRIGHT © 2016 D-Link
SysLog Settings
Enable Logging Enabled
SysLog Level: Critical
⌵
Enable Logging to Syslog Server: Enabled
SysLog 514
System Log View
The router can keep a running log of events. This log can be sent to a Syslog server, or sent
to your email address. In the Management menu on the bar on the top of the page, click
System Log. To view the system log, click System Log View.
SysLog Settings
Enable Logging: Check this box to enable logging.
If Logging is : Enabled
SysLog Level: Select the level of logs to send to the syslog.
Enable Logging to
Syslog Server:
Check this box to send the router logs to a SysLog Server.
If Logging to the Syslog Server is : Enabled
Syslog Server IP
Address:
Enter the IP address and port number of the Syslog server.

60D-Link DSL-2888A User Manual
Section 4 - Conguration
System Log View
DSL-2888A HW:V1.0.0 FW:V1.1.43
System Log
On-board diagnostics run continually in the background to monitor the health of your router. The results
are recorded in the system log if it is enabled. This info can be used to diagnose common problems or help
Customer Support resolve issues more quickly.
Settings FeaturesHome Management
Management >> System Log Save
COPYRIGHT © 2016 D-Link
SysLog Settings
SysLog Level: Emergency
⌵
Manufacturer:Triductor;
ProductClass:Neutral;
SerialNumber:001EE3010203;
IPInterfaceIPAddress:192.168.1.1;
HardwareVersion:V1.0.0;
SoftwareVersion:V1.0.7;
SysLog Clear SysLog RefreshSysLog DownLoad
System Log
The router can keep a running log of events. This log can be sent to a Syslog server, or sent
to your email address. In the Management menu on the bar on the top of the page, click
System Log. To view the system log, click System Log View.
SysLog Settings
SysLog Level: Select the level of logs to display.
SysLog Clear: Click this button to clear the system log.
SysLog
DownLoad:
Click this button to download the system log.
SysLog Refresh: Click this button to refresh the system log.

61D-Link DSL-2888A User Manual
Section 4 - Conguration
DSL-2888A HW:V1.0.0 FW:V1.1.43
Admin
The admin account can change all router settings. To keep your router secure, you should give the admin
account a strong password.
Settings FeaturesHome Management
Management >> Admin Save
Admin Password
Password: *******
System
COPYRIGHT © 2016 D-Link
Admin
This page will allow you to change the administrator (Admin) password and enable remote
management. In the Management menu on the bar on the top of the page, click Admin. To
load, save, reset settings, or reboot the router, click and refer to System Parental Control
/ Schedule on page 58.
Admin Password
Password: Enter a new password for the administrator account. You will need to
enter this password whenever you congure the router using a web
browser.
Click when you are done.Save
Termékspecifikációk
| Márka: | D-Link |
| Kategória: | router |
| Modell: | DSL-2888A |
Szüksége van segítségre?
Ha segítségre van szüksége D-Link DSL-2888A, tegyen fel kérdést alább, és más felhasználók válaszolnak Önnek
Útmutatók router D-Link

6 Január 2025
6 Január 2025
6 Január 2025
3 Január 2025
3 Január 2025
29 December 2024
25 December 2024
15 December 2024
8 December 2024
16 Október 2024
Útmutatók router
- router Samsung
- router Acer
- router Milwaukee
- router Bosch
- router AEG
- router StarTech.com
- router Einhell
- router Nokia
- router HP
- router Makita
- router BenQ
- router Apple
- router Ubiquiti Networks
- router Siemens
- router TP-Link
- router Medion
- router Motorola
- router Vimar
- router LogiLink
- router Alcatel
- router Roland
- router TCL
- router Digitus
- router Zebra
- router Xiaomi
- router TRENDnet
- router Mercusys
- router AVM
- router EZVIZ
- router Dell
- router Lancom
- router Strong
- router Gigabyte
- router Conceptronic
- router Thomson
- router Juniper
- router Kyocera
- router Hikvision
- router Keewifi
- router Vivanco
- router Netgear
- router Huawei
- router Asus
- router Vtech
- router Hama
- router Zoom
- router Renkforce
- router Synology
- router Draytek
- router Iogear
- router Güde
- router Hitachi
- router Mikrotik
- router Toolcraft
- router ZyXEL
- router SPL
- router Dahua Technology
- router Smart-AVI
- router Black & Decker
- router Devolo
- router Planet
- router Tenda
- router BT
- router Black Box
- router MSI
- router Gembird
- router Cisco
- router PowerPlus
- router ATen
- router Google
- router Metabo
- router Bea-fon
- router ZTE
- router Edimax
- router Vodafone
- router ModeCom
- router HiKOKI
- router Foscam
- router Milan
- router Manhattan
- router Kogan
- router Festool
- router EnGenius
- router Sigma
- router Western Digital
- router Media-Tech
- router Blustream
- router Milesight
- router Moxa
- router Sagem
- router Razer
- router Trust
- router Porter-Cable
- router Konig
- router Alfa
- router MuxLab
- router DeWalt
- router AVMATRIX
- router IFM
- router A-NeuVideo
- router Atlona
- router Schneider
- router AJA
- router Lindy
- router Cudy
- router Barco
- router QNAP
- router NEC
- router Silverline
- router Cotech
- router Siig
- router Gefen
- router Kathrein
- router Avenview
- router Lantronix
- router Technicolor
- router FSR
- router Topcom
- router Holzmann
- router Arris
- router Anker
- router I-TEC
- router Keenetic
- router Linksys
- router Teltonika
- router Sitecom
- router Intelix
- router Comprehensive
- router Ocean Matrix
- router Digitalinx
- router Alfatron
- router Belkin
- router RGBlink
- router Kopul
- router KanexPro
- router Key Digital
- router Kramer
- router BZBGear
- router UPC
- router Allnet
- router Allied Telesis
- router Airlive
- router Proximus
- router Skil
- router Eminent
- router Nilox
- router Sonos
- router Patton
- router Techly
- router Totolink
- router KPN
- router Netis
- router Envivo
- router Buffalo
- router Nest
- router LevelOne
- router ICIDU
- router Clas Ohlson
- router AT&T
- router Sweex
- router Aruba
- router Phicomm
- router Kasda
- router Jung
- router Digi
- router Verizon
- router Billion
- router T-Mobile
- router RAVPower
- router Hawking Technologies
- router Nexxt
- router Beafon
- router Kraun
- router LTS
- router Zolid
- router Sagemcom
- router Telstra
- router Eero
- router Advantech
- router Mercku
- router Hercules
- router Xantech
- router Intellinet
- router Arcadyan
- router Digiconnect
- router Ubee
- router SMC
- router Tele 2
- router Peak
- router CradlePoint
- router Davolink
- router Sixnet
- router 7inova
- router AVPro Edge
- router F-Secure
- router Rosewill
- router Digicom
- router Sabrent
- router On Networks
- router PENTAGRAM
- router Leoxsys
- router Readynet
- router OneAccess
- router Accelerated
- router Nexaira
- router Hamlet
- router Approx
- router T-com
- router Amped Wireless
- router Cambium Networks
- router 3Com
- router WyreStorm
- router Ruckus Wireless
- router Dovado
- router Mach Power
- router EXSYS
- router NetComm
- router Comtrend
- router Premiertek
- router GL.iNet
- router Shinybow
- router Edgewater
- router Atlantis Land
- router Lumantek
- router Starlink
- router PulseAudio
- router Predator
- router Evolution
- router Luxul
- router StarIink
- router Silentwind
- router Keezel
- router United Telecom
- router Wisetiger
Legújabb útmutatók router

9 Április 2025

9 Április 2025
9 Április 2025

31 Március 2025
30 Március 2025
30 Március 2025
30 Március 2025
30 Március 2025
30 Március 2025
23 Március 2025