Használati útmutató Clarion NX700
Olvassa el alább 📖 a magyar nyelvű használati útmutatót Clarion NX700 (177 oldal) a autórádió kategóriában. Ezt az útmutatót 4 ember találta hasznosnak és 2 felhasználó értékelte átlagosan 4.5 csillagra
Oldal 1/177

2-DIN MEMORY NAVIGATION & DVD MULTIMEDIA STATION
WITH 7-inch TOUCH PANEL CONTROL
Owner’s manual & Installation manual
NX700

CLARION PRODUCT REGISTRATION INFORMATION
For USA and Canada only
www.clarion.com
Dear Customer:
Congratulations on your purchase of a Clarion mobile electronic product. We are
confident that you’ll enjoy your Clarion experience.
There are many benefits to registering your product. We invite you to visit our website at
www.clarion.com to register your Clarion product.
We have made product registration simple with our easy to use website. The registration
form is short and easy to complete. Once you’re registered, we can keep you informed of
important product information.
Register at www.clarion.com - it’s easy to keep your Clarion product up to date.
INFORMATIONS DE L’ENREGISTREMENT DE PRODUITS CLARION
Pour les Étas Unis et le Canada seulement
www.clarion.com
Cher client:
Nous vous remercions d’avoir acheté ce produit électronique mobile Clarion. Nous sommes
confiants que vous apprécierez votre expérience Clarion.
Il y a beaucoup d’avantage à enregistrer votre produits. Nous vous invitons à visiter notre site
Web www.clarion.com pour enregistrer votre produit Clarion.
Nous avons facilité la tache d’enregistrement de produit simple et facile grâce à notre site Web.
Le formulaire d’enregistrement est court et facile à compléter. Lorsque vous êtes enregistrer,
nous pouvons vous tenir informé des informations important de produits.
Enregistrer à www.clarion.com - c’est facile de mettre à jour votre produit Clarion.
INFORMACIÓN DEL REGISTRO DE PRODUCTO DE CLARION
Para USA y Canada nomas
www.clarion.com
Querido Cliente:
Felicitaciones por su compra de producto electrónico móvil de Clarion. Estamos seguros que
usted gozará de su experiencia con el producto de Clarion.
Hay muchas ventajas al registrar su producto. Le invitamos a que visite nuestro sitio en internet
www.clarion.com para registrar su producto de Clarion.
Hemos hecho el registro de producto fácil en nuestro sitio. La forma de registro es corta y fácil
de completar. Una vez que lo registre, podremos proporcionarle la información de su producto.
Registrese en - es fácil mantener su producto de Clarion actualizado.www.clarion.com

1
NX700
English
Owner’s manual
Thank you for purchasing the Clarion NX700.
• Please read this owner’s manual thoroughly before operating this equipment.
• After reading this manual, be sure to keep it handy for future reference.
• Check the contents of the enclosed warranty card and keep it carefully with this manual.
• The provided disc (CD-ROM manual) cannot be played back on this unit.
Contents
1. FEATURES .................................................................................................................... 2
Expanding Systems........................................................................................................ 2
Playable Discs................................................................................................................ 3
DVD Video Features ...................................................................................................... 3
2. PRECAUTIONS ............................................................................................................. 4
Operation Panel/Generalities ......................................................................................... 5
Cleaning ......................................................................................................................... 5
About the Registered Marks, etc. ................................................................................... 6
3. CONTROLS ................................................................................................................... 6
Functions of Buttons....................................................................................................... 6
Outline of Button and Touchkey Operation .................................................................... 8
Remote Control Unit ..................................................................................................... 13
4. BASIC OPERATIONS.................................................................................................. 14
Turning On and Off the Power ..................................................................................... 14
Adjusting the Volume ................................................................................................... 15
Opening the Operation Panel and Adjusting the Angle ................................................ 15
Turning the Audio OFF................................................................................................. 16
Turning the Monitor OFF .............................................................................................. 17
Displaying the Clock Screen......................................................................................... 17
Setting/Ejecting a Disc ................................................................................................. 17
Connecting/Disconnecting an USB Media Device........................................................ 18
Selecting a Media Source ............................................................................................ 20
2-Zone Function ........................................................................................................... 20
5. SOURCE OPERATIONS ............................................................................................. 21
Radio Operations ......................................................................................................... 21
DVD Video Operations ................................................................................................. 23
Audio CD Operations ................................................................................................... 29
MP3/WMA/AAC Operations ......................................................................................... 30
DivX Operations ........................................................................................................... 33
6. SOURCE OPERATIONS (ACCESSORIES)............ .......... 36..........................................
Satellite Radio Operations............................................................................................ 36
iPod Operations............................................................................................................ 39
USB Memory Operations.............................................................................................. 42
Navigation System Operations..................................................................................... 43
Bluetooth Telephone Operations (Tel mode) ............................................................... 44
AUX Operations ........................................................................................................... 44
7. SYSTEM SETTINGS.................. ........................................................................... ....... 45
Audio Settings .............................................................................................................. 45
General Settings........................................................................................................... 48
Adjusting the Monitor.................................................................................................... 51
8. TROUBLESHOOTING................................................................................................. 52
9. ERROR DISPLAYS...................................................................................................... 54
10. SPECIFICATIONS ....................................................................................................... 56
INSTALLATION AND WIRE CONNECTION MANUAL.................................................... 57
2NX700
English
Owner’s manual
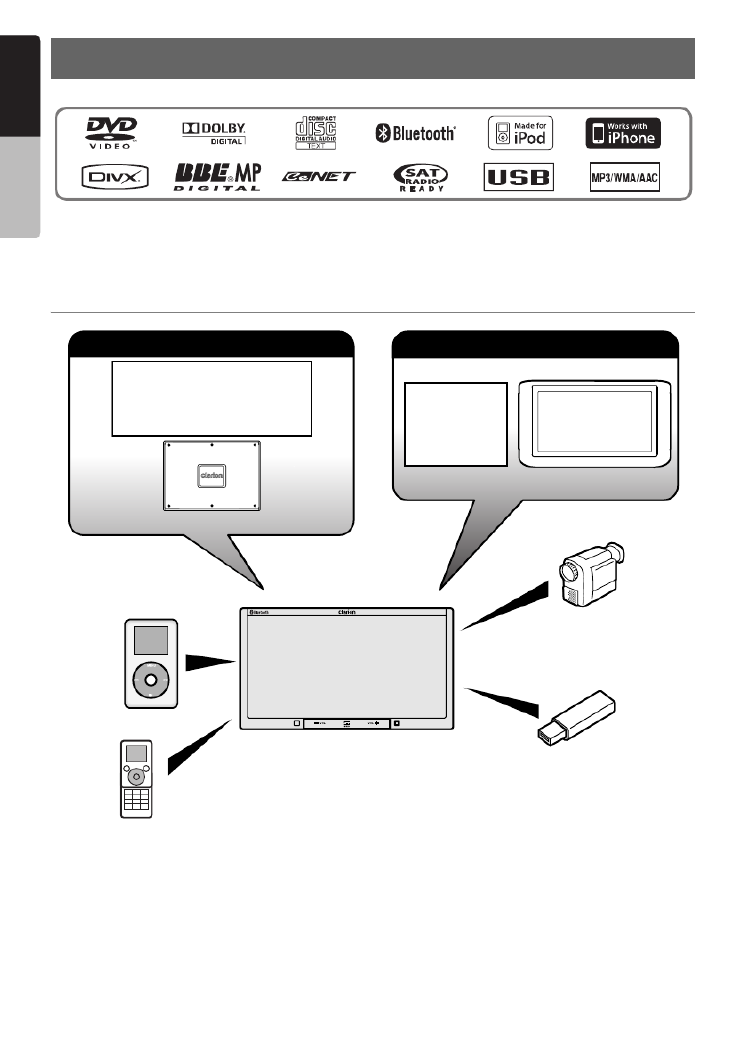
■Built in Bluetooth® hands-free calling
■Compatible with iPod® and iPhone™ via USB
■Sirf III GPS module with 20-channel receiver
Expanding Systems
1. FEATURES
NX700
Expanding audio features
4-Channel Amplifier
Rear Vision
Camera
(CC2011/
CAA185)
Rear Monitor
iPod/iPhone
USB Memory
VTR etc.
Note:
The items listed outside of the frames are the
commercial products generally sold.
Expanding visual features
Sirius Tuner
XM Mini-Tuner
(via Translator Adapter
sold separately)
Bluetooth
Telephone

3
NX700
English
Owner’s manual
Playable Discs
This DVD player can play the following discs:
In addition, the DVD player can play CD-R/RW,
DVD-R/RW, and DVD+R/RW discs on which the
following media files have been recorded:
For detailed information, see the sections entitled
“MP3/WMA/AAC Operations” (page 30) and
“DivX Operations” (page 33).
About CD Extra discs
A CD Extra disc is a disc in which a total of two
sessions have been recorded. The first session is
Audio session and the second session is Data
session.
Your personally-created CDs with more than
second data sessions recorded cannot be played
on this DVD player.
Note:
•When you play a CD Extra disc, only the first
session will be recognized.
About playing a CD-R/RW disc
This player can play CD-R/RW discs previously
recorded in Audio CD format or format with MP3/
WMA/AAC/DivX files.
About playing a DVD-R/RW or
DVD+R/RW disc
This player can play DVD-R/RW and DVD+R/RW
discs previously recorded in DVD video format or
format with MP3/WMA/AAC/DivX files.
Discs that cannot be played back
This player cannot play DVD Audio, DVD-RAM,
Video CDs, Photo CDs, etc.
Note:
•It may not be possible to play back discs recorded
on some CD/DVD drive units. (Cause: disc
characteristics, cracks, dust/dirt, dust/dirt on
player’s lens, etc.)
•If a CD-R/RW, DVD-R/RW, or DVD+R/RW disc
that has not been finalized is played, it will take a
long time to start playing. Also, it may not be
possible to play depending on its recording
conditions.
•You cannot play Super Audio CDs. Playback of the
CD player is not supported even if it is a hybrid
disc.
Note on region numbers of DVD
video discs
The DVD video system assigns a region number
to DVD players and DVD discs by sales area.
The DVD video region number playable in this
system is marked on the disc jacket as shown
below.
DVD Video Features
This unit provides the following functions in
addition to the high image quality and sound
quality of DVD video.
Note:
•The functions described in this section differ
depending on the DVD video disc. Refer to the
instructions provided with the DVD video.
•Some disc functions may operate differently from
described in this manual.
Playable discs
DVD video discs Audio CDs CD TEXT
MP3/WMA/AAC
DivX
Playable media files
ALL
1

4NX700
English
Owner’s manual
Multi-sound function
DVD video can store up to 8 languages for one
film; select the language of your preference.
• The languages stored on the disc are indicated
by the icon shown below.
Multi-angle function
A DVD video that is filmed from multiple angles
allows you to select the angle of choice.
• The number of recorded angles is indicated by
the icon shown below.
Subpicture (subtitles) function
A DVD video can record subtitles for up to 32
languages and you can select the language of
the subtitles you wish to see.
• The number of recorded subtitle languages is
indicated by the icon shown below.
Multi-story function
When a DVD video contains more than one story
for a film, you can select the story you wish to
enjoy. The operation procedures vary with the
disc; observe the instructions for selecting a story
provided during playback.
DVD menu
DVD Menus can be called up during DVD video
playback to perform menu setting.
• Example showing DVD menu
1. When the inside of the car is very cold and the
player is used soon after switching on the
heater, moisture may form on the disc (DVD/
CD) or the optical parts of the player and
proper playback may not be possible. If
moisture forms on the disc (DVD/CD), wipe it
off with a soft cloth. If moisture forms on the
optical parts of the player, do not use the
player for about one hour. The condensation
will disappear naturally allowing normal
operation.
2. Driving on extremely bumpy roads which
cause severe vibration may cause the sound
to skip.
3. This unit uses a precision mechanism. Even
in the event that trouble arises, never open
the case, disassemble the unit, or lubricate
the rotating parts.
4. This equipment has been tested and found to
comply with the limits for a Class B digital
device, pursuant to Part 15 of the FCC Rules.
These limits are designed to provide
reasonable protection against harmful
interference in a residential installation. This
equipment generates, uses, and can radiate
radio frequency energy and, if not installed
and used in accordance with the instructions,
may cause harmful interference to radio
communications. However, there is no
guarantee that interference will not occur in a
particular installation. If this equipment does
cause harmful interference to radio or
television reception, which can be determined
by turning the equipment off and on, the user
is encouraged to consult the dealer or an
experienced radio/TV technician for help.
2. PRECAUTIONS
WARNING
For your safety, the driver should not watch
the DVD video/movie data or operate the
controls while driving. Please note that
watching and operating the DVD video/
movie data while driving are prohibited by
law in some countries. Also, while driving,
keep the volume to a level at which external
sounds can be heard.

5
NX700
English
Owner’s manual
INFORMATION FOR USERS:
CHANGES OR MODIFICATIONS TO THIS
PRODUCT NOT APPROVED BY THE
MANUFACTURER WILL VOID THE
WARRANTY AND WILL VIOLATE FCC
APPROVAL.
Operation Panel/
Generalities
For a longer service life, be sure to read the
following cautions.
• The operation panel will operate properly in a
temperature range of 0 to 60°C.
• Do not allow any liquids on the set from drinks,
umbrellas, etc. Doing so may damage the
internal circuitry.
• Do not disassemble or modify the set in any
way. Doing so may result in damage.
• Do not draw the operation panel out and use it
as a tray. Also, subjecting the operation panel
to shocks may result in breakage, deformation,
or other damage.
• Do not let cigarettes burn the display. Doing so
may damage or deform the cabinet.
• If a problem should occur, have the set
inspected at your store of purchase.
• Do not insert objects or poke in the space
between the operation panel and the main unit
when the panel is tilted.
• Do not place anything on the display when the
panel is tilted.
• The remote control unit may not work if the
remote control sensor is exposed to direct
sunlight.
• In extremely cold weather, the display
movement may slow down and the display may
darken, but this is not a malfunction. The
display will work normally when the
temperature increases.
• Small black and shiny spots inside the
operation panel are normal for LCD products.
• The operation panel may stop temporarily
when it opens or closes, when the engine stops
or when it is cold.
• The touchkeys on the display operate when
slightly touched. Do not press the touchkey
screen with much force.
• Do not push the case surrounding the touchkey
panel with much force. This may cause
malfunctioning of the touchkeys.
Cleaning
• Cleaning the cabinet
Use a soft and dry cloth and gently wipe off the
dirt. For tough dirt, apply some neutral
detergent diluted in water to a soft cloth, wipe
off the dirt gently, then wipe again with a dry
cloth.
Do not use benzene, thinner, car cleaner, etc.,
as these substances may damage the cabinet
or cause the paint to peel. Also, leaving rubber
or plastic products in contact with the cabinet
for long periods of time may cause stains.
• Cleaning the operation panel
The operation panel tends to collect dust, so
wipe it off occasionally with a soft cloth. The
surface is easily scratched, so do not rub it with
hard objects.

6NX700
English
Owner’s manual
About the Registered
Marks, etc.
• This product incorporates copyright protection
technology that is protected by U.S. patents
and other intellectual property rights. Use of
this copyright protection technology must be
authorized by Macrovision, and is intended for
home and other limited viewing uses only
unless otherwise authorized by Macrovision.
Reverse engineering or disassembly is
prohibited.
• Manufactured under license from Dolby
Laboratories.
“Dolby” and the double-D symbol are
trademarks of Dolby Laboratories.
• “DivX”, “DivX Certified”, and associated logos
are trademarks of DivX, Inc., and are used
under license.
• ©2009 SIRIUS XM Radio Inc., SIRIUS, XM and
all related marks and logos are trademarks of
SIRIUS XM Radio Inc. and its subsidiaries.
All other marks, channel names and logos are
the property of their respective owners.
• The Bluetooth word mark and logos are owned
by the Bluetooth SIG, Inc. and any use of such
marks by Clarion Co., Ltd. is under license.
Other trademarks and trade names are those
of their respective owners.
• “Made for iPod” means that an electronic
accessory has been designed to connect
specifically to iPod and has been certified by
the developer to meet Apple performance
standards.
“Works with iPhone” means that an electronic
accessory has been designed to connect
specifically to iPhone and has been certified by
the developer to meet Apple performance
standards.
Apple is not responsible for the operation of
this device or its compliance with safety and
regulatory standards.
iPod is a trademark of Apple Inc., registered in
the U.S. and other countries.
iPhone is a trademark of Apple Inc.
• BBE MP (Minimized Polynomial Non-Linear
Saturation) Process improves digitally
compressed sound, such as MP3, by restoring
and enhancing the harmonics lost through
compression. BBE MP works by regenerating
harmonics from the source material, effectively
recovering warmth, details and nuance.
• Manufactured under license from BBE Sound,
Inc.
• Licensed by BBE Sound, Inc. under one or
more of the following US patents: 5510752,
5736897. BBE and BBE symbol are registered
trademarks of BBE Sound, Inc.
●Operation Panel
●With the operation panel open
Functions of Buttons
Note:
• Be sure to read this section while referring to the
front diagram.
Sensor
• Receiver for the remote control unit (operating
range: 30° in all directions).
[VOL –], [VOL +] buttons
• Use these buttons to increase/decrease the
volume.
3. CONTROLS
NX700
[ ]VOL –
[ ]VOL +
[ ]SRC
Sensor Blink LED/
Reset button
SD memory
card slot

7
NX700
English
Owner’s manual
[SRC] button
• Press this button to display/hide the Source
screen to switch the source mode.
Blink LED
• When the Blink LED function is set to “On” from
the System tab menu on the General screen,
blinks when the ACC power is turned off.
SD memory card slot
• SD memory card function is available in the
Navi mode. For more information about the SD
memory card function, see your User Manual
(for the Navi mode).
Note:
• When you insert the SD memory card stored music
files, they cannot be read in this unit.

8NX700
English
Owner’s manual
Outline of Button and Touchkey Operation
Turning the power on
NX700
System check
The CeNET format utilized on this unit is provided
with a system check function. When the system
check function is performed under the following
conditions, the power is automatically turned off.
Once turn off the engine switch, then restart the
engine again.
• When power is first turned on after initial
installation.
• When an external device is connected or
disconnected.
• When Reset button is pressed.
* In addition to the above conditions, the system
check function can be performed from the System
tab menu on the General screen.
Note:
*1 These images indicate the buttons to press or
keys to touch.
You can change the media sources.
Engine ON
position
*1

9
NX700
English
Owner’s manual
Tuner mode operation
(Source screen)
Switches the radio band.
Preset ch.
Manual tuning
Selects Home/Travel modes.
• Select desired station after
selecting radio band.
Seek tuning
10 NX700
English
Owner’s manual
DVD Video mode operation
(Source screen)
(DVD Video mode screen) * 2
(Options screen)
(Setup screen)
* Screen during DVD Video mode
when automobile moving.
Note:
*2 If you do not touch the screen for about 7 seconds, all the keys on the screen
will disappear. Touch the screen surface to redisplay them.
(DVD top menu) *2

11
NX700
English
Owner’s manual
Adjusting the General settings
(Settings screen)
(General screen)
(System tab screen)(Display tab screen)
(Source or Mode screen)

13
NX700
English
Owner’s manual
Remote Control Unit
❏Names of buttons
❏Inserting the Battery
1. Slide the rear cover in the direction of the
arrow, and remove it.
2. Insert the CR2025 battery bundled with the
remote control unit in the directions shown in
the figure, then close the rear cover.
CAUTION
CAUTION
Danger of explosion if battery is incorrectly
replaced.
Replace only with the same or equivalent
type.
Note:
Using battery improperly can cause it to explode.
Take note of the following points:
• Do not short-circuit, disassemble or heat battery.
• Do not dispose of battery into fire or flames.
• Dispose of spent battery properly.
❏Functions of Remote Control
Unit Buttons
You can use the remote control unit to control the
NX700. When the 2-Zone function is ON, the
controls work upon the Sub zone only.
Note:
• The steering wheel remote control operations work
upon the Main zone even when the 2-Zone
function is ON.
[AUDIO] button
• Press to set the Audio language. (in DVD Video
and DivX modes)
[SUBTITLE] button
• Press to display subtitles. (in DVD Video and
DivX modes)
[ANGLE] button
• Press to switch among the angles when DVD
video discs recorded in multiple angles are
played back.
[TOP MENU] button
• Press to display the DVD top menu stored on
the DVD video disc. Some discs are not
displayed the DVD top menu. (in DVD Video
mode)
[MENU] button
• Press to display the DVD menu stored on the
DVD video disc. (in DVD Video mode)
[ENT] button
• Press to fix the selected menu item on the DVD
menu. (in DVD Video mode)
[E], [e], [T], [t] buttons
• Press to select desired menu item displayed on
the DVD menu. (in DVD Video mode)
Signal transmitter
Operating range: 30° in all directions
[ ]AUDIO
[ ]TOP MENU
[ ]ENT
[ ]SOURCE
[ ]BAND
[ ]6
[ ]SUBTITLE
[ ]ANGLE
[ ]MENU
[ ]E], [e], [T], [t
[ ]–], [+
[ ]RETURN
[ ]R], [F
CR2025 battery
Rear side
Rear cover

14 NX700
English
Owner’s manual
[SOURCE] button
• Press to switch the source modes such as
Tuner mode, DVD mode, etc. (in any mode)
* Only DVD, USB, and AUX modes are selectable
when 2-Zone ON.
• Keep pressing more than 1 second to turn the
2-Zone function ON/OFF. (in any mode)
[RETURN] button
• Press to return to the previous screen while the
DVD menu is being displayed. However, it may
occur that this button operation dose not work
on some discs. (in DVD Video mode)
[BAND] button
• Switches reception bands. (in Tuner, Sirius,
and XM modes; disabled when 2-Zone ON)
• Keep pressing more than 1 second to switch
the Home/Travel modes. (in Tuner mode;
disabled when 2-Zone ON)
• Press to select the next higher folder. (in MP3/
WMA/AAC/DivX and USB memory modes)
[VOL –], [VOL +] buttons
• Decreases or increases the volume. (in any
mode; disabled when 2-Zone ON)
[6] button
• Press to play or pause video and audio media.
(in DVD and USB modes; disabled in USB
mode when 2-Zone ON)
• Keep pressing more than 1 second to stop
video playback. (in DVD Video mode)
[R], [F] buttons
• Press to select the next lower or higher preset
station. (in Tuner, Sirius, and XM modes;
disabled when 2-Zone ON)
• Press to select the next lower or higher chapter
number. (in DVD Video mode)
• Press to select the next lower or higher track.
(in CDDA, MP3/WMA/AAC/DivX, and USB
modes)
• Keep pressing to perform fast backward or fast
forward playback. (in DVD and USB modes)
Note:
• Be sure to read this chapter referring to the chapter
“3. CONTROLS” (page 6).
Turning On and Off the
Power
CAUTION
CAUTION
When the unit is turned on, starting and
stopping the engine with its volume raised to
the maximum level may harm your hearings.
Be careful about adjusting the volume.
Note:
• Start the engine before using this unit.
• Be careful about using this unit for a long time
without running the engine. If you drain the car’s
battery too far, you may not be able to start the
engine and this can reduce the service life of the
battery.
1. Start the engine. The power is supplied to this
unit.
The unit automatically memorizes its last
operation mode and will automatically switch
to display that mode.
2. To turn off the power, turn off the engine
switch.
●About the CT (Clock Time) display
• The displayed clock data is based on the CT
(clock time) data in the Navigation system.
• When the CT data cannot be received, “--:--”
appears in the display.
4. BASIC
OPERATIONS
Engine ON
position

16 NX700
English
Owner’s manual
Adjusting the angle of the operation
panel
The angle of the operation panel can be adjusted
in the range of 0° to 30°
1. Touch the [o (Eject)] key to display the Eject
screen.
2. Repeat touching the [Tilt] key to adjust the
angle of the operation panel. Every touching
the [Tilt] key tilts the operation panel forward
or backward.
The adjusted angle is stored in memory.
Once you adjust the angle of the operation
panel, the operation panel will return to the
adjusted angle even after it is opened/closed.
3. When the adjustment is finished, touch the
[Back] key to return to the previous screen.
Returning the operation panel to the
original angle
1. Touch and hold the [Tilt] key.
The operation panel will move and stop at 30°.
2. Touch and hold the [Tilt] key again.
The operation panel will move and stop at 0°.
Turning the Audio OFF
You can turn off all of the AV features.
1. Press the [SRC] button to display the Source
screen.
2. Touch the [Audio Off] key.
The AV features are turned off.
Note:
• The Audio OFF function does not work in the Tel
mode.
Turning the AV features on
1. Press the [SRC] button to display the Source
screen.
2. Touch the desired Source key.
The AV features are turned on, and the
system enters into the specified mode.

17
NX700
English
Owner’s manual
Turning the Monitor OFF
You can turn off the monitor screen, and change
it to a black screen.
1. Touch the [SET] key to display the Settings
screen.
2. Touch the [Monitor Off] key.
The monitor screen is turned off.
Turning the monitor on
1. Touch the monitor screen.
The monitor screen is turned on, and resumes
the last screen.
• You can also turn on the monitor by
pressing the [SRC] button.
Displaying the Clock
Screen
You can change the screen to display only the
digital clock on a black screen.
1. Touch the clock display on most screens.
The Clock screen is displayed.
2. To return to the current mode screen, touch
the monitor screen.
• Pressing the [SRC] button displays the
Source screen.
Note:
• The Clock screen cannot be displayed while in the
Tel mode.
Setting/Ejecting a Disc
❏Notes on handling discs
Handling
• New discs may have some roughness around
the edges. If such discs are used, the player
may not work or the sound may skip. Use a
ball-point pen or the like to remove any
roughness from the edge of the disc.
• Never stick labels on the surface of the disc or
mark the surface with a pencil or pen.
• Never play a disc with any cellophane tape or
other glue on it or with peeling off marks. If you
try to play such a disc, you may not be able to
get it back out of the DVD player or it may
damage the DVD player.
• Do not use discs that have large scratches, are
misshapen, cracked, etc. Use of such discs
may cause misoperation or damage.
• To remove a disc from its storage case, press
down on the center of the case and lift the disc
out, holding it carefully by the edges.
• Do not use commercially available disc
protection sheets or discs equipped with
stabilizers, etc. These may damage the disc or
cause breakdown of the internal mechanism.
Storage
• Do not expose discs to direct sunlight or any
heat source.
• Do not expose discs to excess humidity or
dust.
• Do not expose discs to direct heat from
heaters.
Cleaning
• To remove fingermarks and dust, use a soft
cloth and wipe in a straight line from the center
of the disc to the circumference.
• Do not use any solvents, such as commercially
available cleaners, anti-static spray, or thinner
to clean discs.
• After using special disc cleaner, let the disc dry
off well before playing it.
On Discs
• Exercise a good precaution when loading a
disc with the panel open.
• Never turn off the power and remove the unit
from the car with a disc loaded.
• Do not use lens cleaning discs. These may
damage the lens of this unit.
• When there seems to be something wrong with
reading discs, please consult your dealer or an
authorized Clarion service center.Ball-point pen
Roughness

18 NX700
English
Owner’s manual
❏Setting a disc
1. Touch the [o (Eject)] key to display the Eject
screen.
2. Touch the [Open/Close] key.
The operation panel will be opened.
3. Insert a disc into the center of the insertion
slot with the label side facing up.
The disc will automatically be drawn into the
DVD player.
After setting a disc
The system will automatically be switched to the
relevant source media mode according to the
disc, and start playing back the disc.
When a DVD video disc is set:
The system is switched to the DVD Video mode.
See “DVD Video Operations” (page 23).
When an Audio CD is set:
The system is switched to the CDDA mode. See
“Audio CD Operations” (page 29).
When a CD/DVD with MP3/WMA/AAC/DivX
files is set:
The system is switched to the MP3/WMA/AAC
mode or DivX mode according to the Playform
setting. See “MP3/WMA/AAC Operations”
(page 30) or “DivX Operations” (page 33).
Note:
• Never insert foreign objects into the disc insertion
slot.
• If the disc is not inserted easily, there may be
another disc in the mechanism or the unit may
require service.
• 8 cm (single play) discs cannot be used.
CAUTION
For your safety, the driver should not insert
or eject a disc while driving.
❏Ejecting a disc
1. Touch the [o (Eject)] key to display the Eject
screen.
2. Touch the [Eject] key to eject the disc.
The operation panel will be opened and the
disc will be ejected.
• If a disc is left in the ejected position for 15
seconds, the disc is automatically reloaded
(Auto reload).
3. Remove the disc carefully.
4. Touch the [Open/Close] key to close the
operation panel.
• The operation panel will close automatically
when leaving it open for a while.
5. Touch the [Back] key.
Note:
• If you force a disc into the insertion slot before auto
reloading, this can damage the disc.
Connecting/Disconnecting
an USB Media Device
This unit has one USB (Universal Serial Bus)
connector which is compatible with USB 1.1 and
USB 2.0.
❏Playable USB media devices
This system can control the following USB media
devices connected to the USB connector.
• Apple iPod
• USB memory
About the Apple iPod
iPods can be connected by using the connection
cable supplied with the iPod you use, but in this
case, you can enjoy its audio sound only. To
enjoy video movies stored in the iPod with video
displaying them on this unit, it is required to use
the special connection cable separately sold.
Note:
• iPhones can also be connected to this system and
“iPod” appearing in this manual should be referred
to as “iPod/iPhone”.
• This system will not operate or may operate
improperly with unsupported versions.
• For detailed information on the playable iPod
models, see our home page: www.clarion.com
• For the other limitations, see “iPod Operations”
(page 39).
About the USB memory
This system can play audio files (MP3/WMA/
AAC) stored in an USB memory which is
recognized as “USB Mass Storage Class
device”. You can use your USB memory as an
audio device by simply copying desired audio
files into it.
Note:
• This system will not operate or may operate
improperly with some USB memory.
• Files protected with any DRM can not be played.
• For the other limitations, see “USB Memory
Operations” (page 42).

19
NX700
English
Owner’s manual
❏Connecting an USB media
device
CAUTION
• For your safety, the driver should not
connect or disconnect an USB media
device.
• Do not start the vehicle’s engine while the
USB media device is connected, since it
may result in loss or damage to data on the
USB media device. Connect the USB media
device to this unit after starting the engine.
1. Turn on the power of your USB media device,
if required.
2. Confirming the orientation of the connectors,
connect the USB media device to the USB
connector of this unit.
• It may take a long time to recognize the
connected device.
After connecting an USB device
The system will automatically be switched to the
relevant source media mode according to the
USB device connected, and start playback.
When an iPod is connected:
The system is switched to the iPod mode. See
“iPod Operations” (page 39).
When an USB memory is connected:
The system is switched to the USB Memory
mode. See “USB Memory Operations” (page 42).
Note:
• Never insert foreign objects into the USB
connector.
• Always insert the USB media device fully into the
connector. Incomplete connections may cause the
device not to be recognized.
❏Disconnecting an USB media
device
1. Confirm that data transfer is not performed on
the USB media device.
For the method to confirm it, see the operation
manual of your USB media device.
2. Remove the USB media device from the USB
connector.
CAUTION
Be sure to disconnect the USB media device
while the vehicle’s engine is running.
Otherwise, it may result in loss or damage to
data on the USB media device. Do not stop
the engine when the USB media device is
connected.
Note:
• When turning on the ACC power with no USB
media device connected, “No Media” may be
displayed on the screen if the USB mode is
selected.

20 NX700
English
Owner’s manual
Selecting a Media Source
Changing the source mode
1. Press the [SRC] button to display the Source
screen.
2. Touch the desired Source key you wish to
change to.
The system is switched to the corresponding
source media mode.
Note:
• The Source keys have no effect in the Tel mode.
Touch the [ ][ key at top left of the Phone Menu
screen to cancel the Tel mode; this will resume the
last operation mode.
Available media sources
*1:These keys are displayed only when the
Sirius tuner and/or XM tuner are connected to
this unit.
*2:The source media mode to be selected differs
depending on the data format of the disc set
in the DVD player. When no disc is set, “No
Disc” will be displayed.
*3:The source media mode to be selected differs
depending on the type of the USB media
device connected. When no USB media
device is connected, “No Media” will be
displayed.
Note:
• When the USB mode is selected, video images
input from the iPod video input terminal will be
output to the rear monitor. This is normal.
2-Zone Function
About the 2-Zone function
The 2-Zone function is a function that assigns
separate source output to the Main zone (this
unit) and Sub zone (the optional rear monitor) by
simultaneously playing two sources in this
system. Therefore, the rear passengers are
allowed to enjoy a different video source from the
source played on the operation panel of this unit.
• The source sounds of the Main zone are output
from the speakers of the vehicle side, and
those of the Sub zone are from the optional
headphone systems.
• Controlling a source assigned to the Sub zone
can be made by using the optional remote
control unit. To control it from this unit, once
assign the same source to the Main zone, then
control it.
• When a media without video images is played
on the Sub zone, a black screen is output to the
rear monitor.
Note:
• When an interrupt of the navigation system arises
during the 2-Zone function is turned on, the sound
of the Main zone is muted, but the sound of the
Sub zone is output normally.
• When it arises during the 2-Zone function is turned
off, the audio signals to the 4ch speakers are
attenuated, and the voice from the navigation
system is output from the front two speakers.
• You cannot operate the 2-Zone function during the
interrupt of the navigation system.
• When the same source is assigned for Main and
Sub zones, operations in a zone are also applied
for another zone.
Source
mode
Corresponding
source media
mode
Refer to
Tuner mode Tuner mode page 21
Sirius mode*1Sirius mode page 36
XM mode*1XM mode page 36
DVD mode*2DVD Video mode page 23
CDDA mode page 29
MP3/WMA/AAC
mode
page 30
DivX mode page 33
USB mode*3iPod mode page 39
USB Memory mode page 42
AUX mode AUX mode page 44
Tel mode Tel mode page 44
Navi mode Navi mode page 43

21
NX700
English
Owner’s manual
Assignable source mode for Main/
Sub zones
●For Main zone
All the source modes can be assigned for the
Front zone.
●For Sub zone
The following source modes can be assigned:
• DVD mode
• USB mode
• AUX mode
Setting the 2-Zone function
• The factory default setting is OFF.
1. Press the [SRC] button to display the Source
screen.
2. Touch the [2-Zone] tab to display the 2-Zone
tab screen.
The source keys for the Sub zone are
displayed.
3. Touch the desired source key you wish to
assign to the Sub zone.
The 2-Zone function is turned on with the
selected source mode assigned to the Sub
zone.
4. Touch the [Back] key to return to the previous
screen.
Note:
•Use the remote control unit to control the source
assigned to the Sub zone. To control it from this
unit, once select the same source mode as
assigned to the Sub zone for the Main zone, and
then control it.
Turning off the 2-Zone function
1. Press the [SRC] button to display the Source
screen.
2. Touch the [2-Zone] tab to display the 2-Zone
tab screen.
3. Touch and hold the [2-Zone Off] key for more
than 1 second.
Radio Operations
Listening to the radio
1. Press the [SRC] button, and touch the [Tuner]
key.
The Tuner mode screen is displayed, and the
system resumes the last status of the Tuner
mode.
2. Touch the [Home Travel] key to select the
Home or Travel mode.
The Home/Travel modes are provided to
manage the preset stations separately in your
home location and in a location during a trip.
3. Touch the [Band] key to select the radio band.
Each time the key is touched, the radio
reception band changes in the following
order:
• In Home mode: FM Home 1 ➜ FM Home 2
➜ ➜ AM Home FM Home 1...
• In Travel mode: FM Travel ➜ AM Travel ➜
FM Travel...
4. Touch the desired Preset key to tune in the
corresponding preset station.
5. SOURCE
OPERATIONS

22 NX700
English
Owner’s manual
Seek tuning
1. Touch the [Band] key to select the desired
band (FM or AM).
2. Touch the [{ (Seek)] or [} (Seek)] key to
automatically seek a station.
• When touching the [{ (Seek)] key, the
station is sought in the direction of higher
frequencies.
• When touching the [} (Seek)] key, the
station is sought in the direction of lower
frequencies.
Manual tuning
There are 2 ways available: Quick tuning and
step tuning.
When it is in the step tuning mode, the frequency
changes one step at a time. In quick tuning mode,
you can quickly tune the desired frequency.
1. Touch the [Band] key to select the desired
band (FM or AM).
2. Tune into a station.
Quick tuning:
Touch and hold the [{ (M-Seek)] or [} (M-
Seek)] key to tune in a station.
Step tuning:
Touch the [{ (M-Seek)] or [} (M-Seek)] key
to manually tune in a station.
Recalling a preset station
There are total of 30 preset positions (6-FM
Home 1, 6-FM Home 2, 6-AM Home, 6-FM
Travel, and 6-AM Travel) to store individual radio
stations in memory.
1. Touch the [Home Travel] key to select the
Home or Travel mode.
2. Touch the [Band] key to select the band.
3. Touch the corresponding Preset key to recall
the stored station.
• Touching and holding the desired Preset
key for more than 2 seconds will store the
current station to the preset memory.
Manual memory
1. Touch the [Home Travel] key to select the
Home or Travel mode.
2. Touch the [Band] key to select the band you
wish to store.
3. Tune in the station you wish to store using the
seek tuning, manual tuning, or preset tuning.
4. Touch and hold the desired Preset key you
wish to store the current station for more than
2 seconds.
Auto Store
The Auto Store is a function for storing up to 6
stations that are automatically tuned in
sequentially. If 6 receivable stations cannot be
received, a previously stored station remains
unoverwritten at the memory position.
• The Auto Store function works only in the
Travel mode.
1. Touch the [Home Travel] key to select the
Travel mode.
2. Touch the [Band] key to select the band.
3. Touch the [Auto Store] key to start scanning
stations.
A beep sounds and the stations with good
reception are stored automatically to the
preset channels.
• “AS” appears during scanning stations. To
stop the scanning, touch the [Auto Store]
key again.

25
NX700
English
Owner’s manual
Setting up the country code
Set up the country number for setting up of the
parental level.
• The factory default setting is “8583” (U.S.A.).
Country code list:
Setting up the parental level
You can change the level of parental lock
(audiovisual restriction).
This function allows cutting scenes that are
unfavorable for children or replacing them
automatically with other scenes prepared in
advance. For example, by replacing scenes of
radical violence or portrayals of sex with safe
scenes, you can make a trouble-free story as if it
were so from the beginning.
• The factory default setting is “8”.
• The contents that the parental level restricts
vary with the country code.
❏Operating a DVD video
Watching a DVD Video
After disc loading, the play mode is automatically
engaged.
• When playback is not started, touch the [p]
key.
• Operations may differ depending on the story
of the disc.
●About the volume adjustment when playing
DVD Video discs
This system has the independent volume data for
playing DVD Video discs. The volume setting
during DVD playback does not affect the volume
of the other modes, and the volume setting in the
other modes does not affect the DVD playback.
●When the DVD menu is displayed
For general DVD Video discs, the DVD menu
may appear.
After the DVD menu is displayed, select an item
in the operations described as follows.
4-1. Touch the []] key of the Country Code item.
4-2. Touch the ten-key (0 to 9) to input a 4-digit
country code (see the following table).
4-3. Touch the [ENT] key.
Country Input code
Canada 6765
United States 8583
American Samoa 6583
Bermuda 6677
Puerto Rico 8082
St. Pierre and Miquelon 8077
Virgin Islands (U.S.) 8673
4-1. Touch the [–] or [+] key of the Parental Level
item.
The Password input screen is displayed.
4-2. Touch the ten-key (0 to 9) to input a 4-digit
password, and touch the [ENT] key.
• The factory default setting of the
password is “0000”.
4-3. Touch the [–] or [+] key to select level “1” to
“8”, or “Off”.
The relationship between DVD video
category codes and parental level are
shown in the following table. Use this table
when setting the parental level.
LEVEL7 NC-17
(NO ONE 17 AND UNDER
ADMITTED)
LEVEL6 R
(RESTRICTED)
LEVEL4 PG-13
(PARENTS STRONGLY
CAUTIONED)
LEVEL3 PG
(PARENTAL GUIDANCE
SUGGESTED)
LEVEL1 G
(GENERAL AUDIENCES)

26 NX700
English
Owner’s manual
Showing the DVD Video mode
screen
The DVD Video mode screen is used to control
the playback mode from the screen.
1. Touch the screen.
The DVD Video mode screen is displayed.
If you do not touch the screen for 7 seconds,
the display will return to the playback screen.
Selecting the screen size
You can change the screen size to suit to the
playback film.
• The factory default setting is “Full Wide”.
1. Touch the screen to display the DVD Video
mode screen.
2. Repeat touching the [ ] key until your S-Size
desired screen size is selected.
•
This key shows the current screen size setting.
[Full Wide]:
The image is expanded so that the rectangle
of the image fits to the screen (16:9). The
aspect ratio of the image may be changed.
[Cinema]:
The image is expanded so that the top and
bottom edges of the image fit to the screen.
Suitable for letterbox-format images. Subtitles
of non-letterboxed images may be cut off in
this mode.
[Normal]:
The image is expanded so that the top and
bottom edges of the image fit to the screen,
and that the aspect ratio of the image
becomes 4:3. The aspect ratio of the image
may be changed.
[Wide]:
The image is expanded so that the left and
right edges of the image fit to the screen. The
top and bottom areas of the image may be cut
off.
3. Touch the [Hide] key to return to the playback
screen.
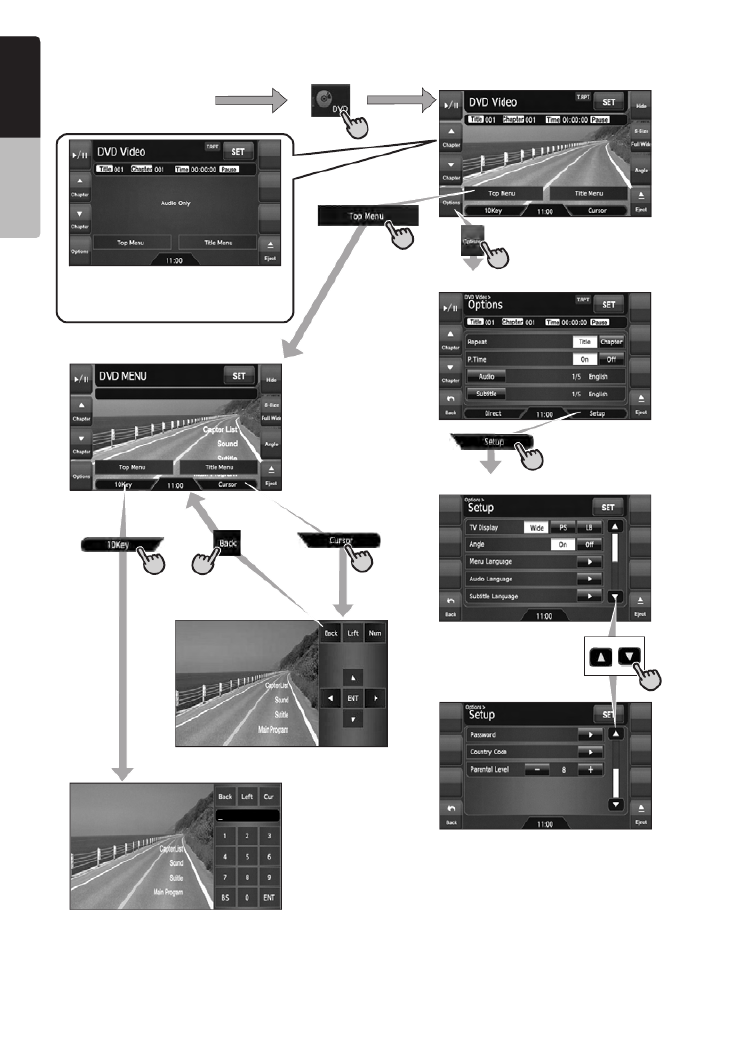
DVD menu operations
●Showing the DVD menu
1. Showing the DVD Video mode screen, touch
the [Top Menu] or [Title Menu] key during
playback.
The DVD menu appears.
• The displayed contents for each key differ
depending on the DVD software.
• An example shown below is the DVD menu
display:
●Operating the DVD menu
You can operate the menu items by displaying
the Key Pad panel.
1. Showing the DVD Video mode screen, touch
the [Cursor] or [10key] key.
The Cursor-Key Pad panel or the Numeric-
Key Pad panel is displayed on the screen.
• Touching the [Num] key or [Cur] key
changes to the each other panel.
2. Select the desired menu item using either the
Cursor-Key or the Nummeric-Key according
to the menu contents.
3. Touch the [ENT] key to specify the selected
menu item.
4. Touch the [Back] key to hide the Key Pad
panel.

27
NX700
English
Owner’s manual
●Switching Key Pad position
When the menu items become difficult to view by
the Key Pad buttons, you can move the Key Pad
panel to the other side of the screen.
Stopping playback
1. Showing the DVD Video mode screen, touch
and hold the [p] key for more than 1
second during playback.
Playback is stopped.
2. To resume playback, touch the [p] key.
Playback resumes from the scene where
playback is stopped.
Pausing playback
1. Showing the DVD Video mode screen, touch
the [p] key during playback.
Playback pauses.
2. To resume playback, touch the [p] key
again.
Playback resumes.
Slow playback
1. Showing the DVD Video mode screen, touch
the [p] key during playback to pause
playback.
2. Touch and hold the [{ (Chapter)] key.
While touching the key, slow playback
continues at 1/3 speed.
Releasing the key resumes the normal
playback.
• Slow playback cannot be performed in the
backward direction. In addition, audio
cannot be reproduced during slow
playback.
Fast forward and fast backward
1. Showing the DVD Video mode screen, touch
and hold the [{ (Chapter)] or [} (Chapter)]
key during playback.
[{ (Chapter)] key: Fast forward
[} (Chapter)] key: Fast backward
The playback speed becomes 4-time faster at
first and then 16-time faster 3 seconds later.
Releasing the key resumes the normal speed
playback.
• No audio is reproduced during fast forward
and fast backward operation.
• The fast forward and fast backward speed
may differ depending on the disc.
Skipping chapters (searching)
“Chapter” means a small segment to divide the
“Title” (film) which is recorded on the disc.
1. Showing the DVD Video mode screen, touch
the [{ (Chapter)] or [} (Chapter)] key during
playback.
Chapters are skipped as many as the times
touching the key, and playback starts.
• Touching the [{ (Chapter)] key starts
playback from the beginning of the next
chapter.
• Touching the [} (Chapter)] key starts
playback from the beginning of the current
chapter.
When touching this key again within about 4
seconds, playback starts from the
beginning of the previous chapter.
Key Pad
Key Pad
Current
location
down
Chapter ChapterChapter
up

28 NX700
English
Owner’s manual
Searching with a chapter/title
number
You can locate the beginning of a scene using
the chapter numbers or title numbers recorded
on the DVD video disc.
• “Chapter” means a small segment to divide the
“Title” (film) which is recorded on the disc.
1. Showing the DVD Video mode screen, touch
the [Options] key.
2. Touch the [Direct] key.
The Key Pad screen appears.
• You can specify the title number by touching
the [Title] key.
3. Input the chapter number that you want to
play back using the [0 9] to [ ] key.
4. Touch the [ENT] key.
Playback starts from the scene of the input
chapter number of the selected title.
• If the input chapter number does not exist or
searching with a chapter number is not
allowed, the screen image will not change.
Repeat playback
This operation plays back the current title or
chapter repeatedly.
1. Showing the DVD Video mode screen, touch
the [Options] key.
2. Touch the [Title] or [Chapter] key of the
Repeat item, then touch the [Back] key.
The “T.RPT” or “C.RPT” will be displayed.
3. Touch the [Back] key to return to the previous
screen.
4. Perform the same operation to turn off the
repeat playback.
Switching among languages
On discs in which two or more audios or audio
languages have been recorded, you can switch
among the audio languages during playback.
1. Showing the DVD Video mode screen, touch
the [Options] key.
2. Touch the [Audio] key during playback.
Each time you touch the key, you can switch
among audio languages.
• Depending on the disc, up to 8 audios may
be recorded. For details, see the mark of the
disc ( : Indicates that 8 audios have
been recorded).
• Depending on the disc, switching may be
completely impossible or impossible on
some scenes.
• It may take time to switch among audios.
• When the power is turned on and the disc is
changed to a new one, the language set as
the factory default is selected. If that
language has not been recorded, the
language is specified on the disc.
3. Touch the [Back] key to return to the previous
screen.
Switching subtitles
On DVD discs in which two or more subtitle
languages have been recorded, you can switch
among the subtitle languages during playback.
1. Showing the DVD Video mode screen, touch
the [Options] key.
2. Touch the [Subtitle] key during playback.
The Subtitle Language screen appears.
3. Touch the Language key you wish to display.
• Depending on the disc, up to 32 kinds of
subtitles may be recorded. For details, see
the mark of the disc ( : Indicates that 8
kinds of subtitles have been recorded).
• To turn off subtitles, select “OFF”.
• Depending on the disc, switching may be
completely impossible or impossible on
some scenes.
• It may take time to switch among subtitles.
4. Touch the [Back] key to return to the previous
screen.
8
8

29
NX700
English
Owner’s manual
Switching angles
On DVD discs in which video images have been
recorded in two or more angles, you can switch
among the angles during playback.
• When the Angle function is set to “On”, the
angle mark will appear on scenes where the
angles can be switched (see page 24).
1. Showing the DVD Video mode screen, touch
the [Angle] key during playback.
Each time you touch the key, you can switch
among angles.
• Depending on the disc, up to 9 angles may
be recorded. For details, see the mark of the
disc ( : Indicates multi-angle).
• Depending on the disc, angles may switch
smoothly or switch with a momentary still
image.
• Depending on the disc, switching may be
completely impossible or impossible on
some scenes.
• It may take time to switch among angles.
• Depending on the disc, scenes recorded in
two or more angles may be played back.
• When the power is turned on and the disc is
changed to a new one, the language set at
the time of factory shipment is selected. If
that language has not been recorded, the
language is specified on the disc.
Displaying/hiding the playback
status
1. Showing the DVD Video mode screen, touch
the [Options] key.
2. Touch the [On] or [Off] key of the P.Time item
during playback.
3. Touch the [Back] key to return to the previous
screen.
Playback status is displayed on the screen.
Audio CD Operations
This system is a CD TEXT compatible model,
and supports the display of the DISC TITLE,
TRACK TITLE, and TRACK ARTIST (or DISK
ARTIST) of the CD TEXT.
Note:
•This unit supports only CD TEXT in English. Also,
some character data may not be reproduced
properly on the display.
❏Selecting the CDDA mode
1. Set an audio CD to the DVD player.
The system will automatically read the disc
data, change to the DVD mode (CDDA
mode), and start playback after a while.
See also “Setting/Ejecting a Disc” (page 17).
●When an audio CD is already set
1. Press the [SRC] button to display the Source
screen.
2. Touch the [DVD] key to select the CDDA
mode.
The system changes to the DVD mode
(CDDA mode), and starts playback from the
previous position.
❏Operating an audio CD
Listening to an audio CD
After disc loading, the play mode is automatically
engaged.
• When playback is not started, touch the [p]
key.
91:00:00 100C 10T
Title number
Chapter number
Playback time
WARNING
•Some CDs may be recorded at a higher
volume level than desired. Increase the
volume gradually from the minimal
setting after playback has started.
•For your safety, the driver should not
operate the controls while driving.

30 NX700
English
Owner’s manual
Pausing playback
1. Touch the [p] key during playback.
Playback pauses.
2. To resume playback, touch the [p] key.
Playback resumes.
Skipping a track (searching)
1. Touch the [{ (Track)] or [} (Track)] key
during playback.
Tracks are skipped, as many as the times the
key is touched, and playback starts.
• Touching the [{ (Track)] key starts
playback from the beginning of the next
track.
• Touching the [} (Track)] key starts
playback from the beginning of the current
track.
When this key is touched again within about
2 seconds, playback starts from the
beginning of the previous track.
Fast forward and fast backward
1. Touch and hold the [{ (Track)] or [} (Track)]
key during playback.
The playback speed becomes 4-time faster
first and then 16-time faster 3 seconds later.
Releasing the key resumes the normal speed
playback.
Other various play functions
1. Touch the [Options] key.
2. Touch the [Track] key of the function you
want to play.
Track repeat playback:
Touch the [Track] key of the Repeat item.
• This operation plays back the current track
repeatedly.
• “T.RPT” is displayed on the screen.
• You can also specify this function by
touching the [Repeat] key on the CDDA
mode screen.
Track random playback:
Touch the [Track] key of the Random item.
• This operation plays back all tracks on the
disc in no particular order.
• “T.RDM” is displayed on the screen.
• You can also specify this function by
touching the [Random] key on the CDDA
mode screen.
3. To cancel the play, touch the [ ] key of Track
the function to cancel.
4. Touch the [Back] key to return to the previous
screen.
Scrolling track titles
When a title or name displayed on the screen is
longer than the text area, you can confirm the
entire text by scrolling it.
1. Displaying the text you wish to scroll, touch
the text area.
The text will scroll once.
MP3/WMA/AAC Operations
This system can playback MP3/WMA/AAC files
recorded on a disc.
❏About the MP3/WMA/AAC files
What is MP3/WMA/AAC?
MP3, WMA, and AAC are the audio file formats
which have penetrated into PC users and
become a standard format.
MP3 is an audio compression method and
classified into audio layer 3 of MPEG standards.
WMA (Windows Media Audio) is an audio
compression method developed by Microsoft
Corporation.
AAC (Advanced Audio Coding) is a newer audio
compression method developed for used with
video compression standards MPEG-2 and
MPEG-4, and has been adopted as the standard
audio format of the iPod and iTunes by Apple Inc.
These features compress the original audio data
to about 10 percent of its initial size with a high
sound quality. This means that about 10 audio
CDs can be recorded on a CD-R/RW disc to
allow a long listening time without having to
change CDs.
31
NX700
English
Owner’s manual
Displaying MP3/WMA/AAC Tag titles
Tag information (track title, artist name, and
album title) can be displayed for an MP3/WMA/
AAC file containing the Tag information.
This system supports the ID3 TAG version 1.x/
2.x and WMA-TAG.
Note:
•Tag information entered with 2-byte characters
may not be displayed properly on the display.
•The ID3 version 2.x tag format is not completely
supported. This system can display information up
to 60 bytes, and ignores the rest.
•Album titles of WMA-TAG may not be displayed
properly.
Precautions on the MP3/WMA/AAC
files
●General precautions
• Files other than MP3/WMA/AAC format cannot
be played. In addition, some files may not be
played because of the encoding settings.
When a file cannot be played, the next file is
played instead.
• Some noise may occur depending on the type
of encoder software used to encode the data.
• You can apply the VBR (Variable Bit Rate)
format when encoding. In this case, the
displayed play time may be slightly different
from the actual play time.
• Files that the DRM (Digital Rights
Management) function is set cannot be played.
●For MP3 files
• Set the Sampling Frequency to:
• MPEG1 Layer3: 32, 44.1, or 48 kHz
• MPEG2 Layer3: 16, 22.05, or 24 kHz
• MPEG2.5 Layer3: 8, 11.025, or 12 kHz
• Set the Bit Rate to:
• MPEG1 Layer3: 32 to 320 kbps (VBR)
• MPEG2 Layer3: 8 to 160 kbps (VBR)
• MPEG2.5 Layer3: 8 to 160 kbps (VBR)
• Add a file extension “.MP3” or “.mp3” using
single byte characters.
●For WMA files
• Set the Sampling Frequency to within ranges
from 22.05 to 44.1 kHz.
• Set the Bit Rate to 48, 64, 80, 96, 128, 160, or
192 kbps.
• Add a file extension “.WMA” or “.wma” using
single byte characters.
●For AAC files
• This system supports only the MPEG4 Audio
files encoded by the iTunes.
• Set the Sampling Frequency to 44.1 or 48 kHz.
• Set the Bit Rate to within ranges from 16 to 320
kbps (VBR).
• Add a file extension “.M4A” or “.m4a” using
single byte characters.
Precautions when preparing a disc
Note:
•For details of the DivX file mentioned below, see
“DivX Operations” (page 33).
●Logical format (File system)
The following writing formats are available when
writing MP3/WMA/AAC/DivX files on a disc:
• For CD-R/RW: ISO9660 level 1/level 2,
Romeo, Joliet, or Apple ISO (without including
expansion format)
• For DVD±R/RW: UDF (Universal Disk Format)
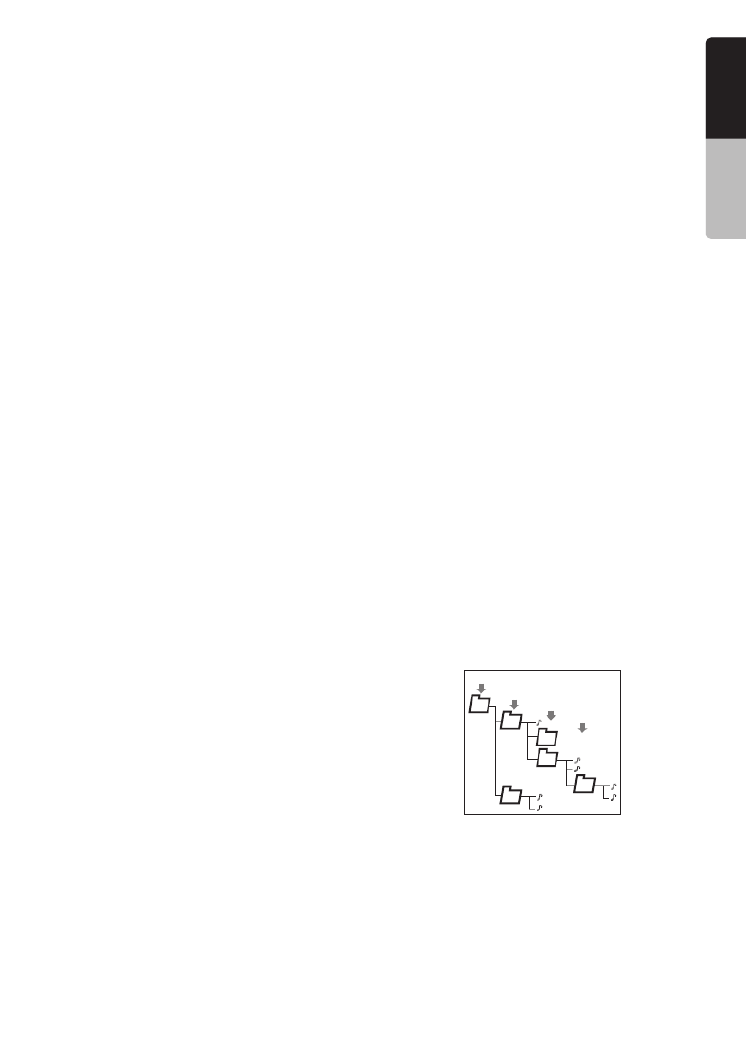
●Folder structure
• The folder hierarchy must be within 8
hierarchical levels. Otherwise, playback will be
impossible.
• You can store the MP3 files, WMA files, and
AAC files together in a disc or folder.
• You can also store the MP3/WMA/AAC files
and DivX files together in a disc or folder. In
such a case, you can select whether the disc is
regarded as an MP3/WMA/AAC disc or as a
DivX disc. See “Setting the Playform of discs
recorded with DivX files” (page 33).
●Number of files or folders
• The maximum allowable number of folders is
255 (including root directory).
• The maximum allowable number of files in a
folder is 255.
●Folder representation in the folder list
• Only folders containing MP3/WMA/AAC files or
DivX files (1 to 4 in illustration) are displayed
on the list. Folders containing no MP3/WMA/
AAC/DivX file are not displayed.
• Folder hierarchy (1 to 4 in illustration) is
ignored, and unified into one level.
• Folders are arranged in the order of the folder
creation.
1
2
1
2
3
4
3
4

32 NX700
English
Owner’s manual
❏Selecting the MP3/WMA/AAC
mode
1. Set a disc which the MP3/WMA/AAC files are
recorded to the DVD player.
The system will automatically read the disc
data, change to the DVD mode (MP3/WMA/
AAC mode), and start playback after a while.
See also “Setting/Ejecting a Disc” (page 17).
Note:
•Note that the system enters to the DivX mode
when setting a disc with DivX files if the Playform
function has been set to “Video” (see page 33).
●When a disc is already set
1. Press the [SRC] button to display the Source
screen.
2. Touch the [DVD] key to select the MP3/WMA/
AAC mode.
The system changes to the DVD mode (MP3/
WMA/AAC mode), and starts playback from
the previous position.
❏Operating MP3/WMA/AAC
playback
Note:
•The same operations listed below are also used in
the USB Memory mode.
Listening to MP3/WMA/AAC files
After disc loading, the play mode is automatically
engaged.
• When playback is not started, touch the [p]
key.
Pausing playback
1. Touch the [p] key during playback.
Playback pauses.
2. To resume playback, touch the [p] key.
Playback resumes.
Skipping a track (searching)
1. Touch the [{ (Track)] or [} (Track)] key
during playback.
Tracks are skipped, as many as the times the
key is touched, and playback starts.
• Touching the [{ (Track)] key starts
playback from the beginning of the next
track.
• Touching the [} (Track)] key starts
playback from the beginning of the current
track.
When this key is touched again within about
2 seconds, playback starts from the
beginning of the previous track.
• These functions perform in the current
folder only.
Fast forward and fast backward
1. Touch and hold the [{ (Track)] or [} (Track)]
key during playback.
The playback speed becomes 4-time faster
first and then 16-time faster 3 seconds later.
Releasing the key resumes the normal speed
playback.
Skipping the current folder
1. Touch the [{ (Folder)] or [} (Folder)] key
during playback.
The tracks of the current folder are skipped
and playback starts from the first track of the
next or previous folder.
Selecting a folder/track from the list
screen
1. Touch the [List] key.
The Folder List screen is displayed.
2. When the desired folder is not displayed,
touch the [{] or [}] key to scroll the list.
3. Touch the desired Folder key.
The Track List screen appears.
4. Touch the [{] or [}] key to scroll the list, and
touch the desired Track key.
The corresponding track is started playback.
5. Touch the [Back] key.
WARNING
•Audio files may be recorded at a higher
volume level than desired. Increase the
volume gradually from the minimal
setting after playback has started.
•For your safety, the driver should not
operate the controls while driving.

33
NX700
English
Owner’s manual
Other various play functions
1. Touch the [Options] key.
2. Touch a touch key of the function you want to
play.
Folder repeat playback:
Touch the [Folder] key of the Repeat item.
• This operation plays back tracks in the
current folder repeatedly.
• “F.RPT” is displayed on the screen.
Track repeat playback:
Touch the [Track] key of the Repeat item.
• This operation plays back the current track
repeatedly.
• “T.RPT” is displayed on the screen.
Folder random playback:
Touch the [Folder] key of the Random item.
• This operation plays the tracks in the
current folder in a random order.
• “F.RDM” is displayed on the screen.
Track random playback:
Touch the [Track] key of the Random item.
• This operation plays back tracks recorded
in the disc in no particular order.
• “T.RDM” is displayed on the screen.
3. To cancel the play, touch the same touch key
of the function to cancel.
4. Touch the [Back] key to return to the previous
screen.
Scrolling track titles
When a title or name displayed on the screen is
longer than the text area, you can confirm the
entire text by scrolling it.
1.
Displaying the text you wish to scroll, touch the
text area.
The text will scroll once.
Setting the Playform of discs
recorded with DivX files
MP3/WMA/AAC files can be stored together with
DivX files in a disc or folder. You can select
whether such discs are regarded as MP3/WMA/
AAC discs or as DivX discs.
1. Touch the [Options] key.
2. Touch the [Audio] or [Video] key of the
Playform item to specify the setting.
[Audio]:
Discs are regarded as MP3/WMA/AAC discs.
[Video]:
Discs are regarded as DivX discs.
3. Touch the [Back] key if required.
Note:
• This setting is disabled when a Mixed Mode
CD, which contains both data track and audio
tracks, is set in the DVD player.
DivX Operations
This system can playback DivX movie files
recorded on a disc.
• Official DivX® Certified product
• Plays all versions of DivX ® video (including
DivX® 6) with standard playback of DivX ®
media files.
❏About the DivX file
What is DivX?
DivX is a popular media technology created by
DivX, Inc. DivX media files contain highly
compressed video with high visual quality that
maintains a relatively small file size. DivX files
can also include advanced media features like
menus, subtitles, and alternate audio tracks.
Many DivX media files are available for download
online, and you can create your own using your
personal content and easy-to-use tools from
DivX.com.
Precautions on the DivX file
• This system can play DivX version 4.x, 5.x, and
6.x files. DivX Ultra is not supported.
• Files other than DivX format (such as the Xvid
files) cannot be played. In addition, some files
may not be played because of the encoding
format. When a file cannot be played, the next
file is played instead.

34 NX700
English
Owner’s manual
• DivX VOD (Video-on Demand files) that have
authorization data can also be played. These
files must be authorized on your PC
beforehand using the DivX Registration Code
displayed on the System tab screen under the
General screen (see page 49).
• Set the Frame Size to 640 × 480 or 320 × 240
pixels.
• Set the Frame Rate to 30 or 15 fps.
• Add a file extension “.AVI”, “.avi”, “.DIVX”, or
“.divx” using single byte characters.
Precautions when preparing a disc
Note:
• The limitations on preparing a disc are same as
those in the MP3/WMA/AAC modes. See
“Precautions when preparing a disc” (page 31).
❏Selecting the DivX mode
1. Set a disc which the DivX files are recorded to
the DVD player.
The system will automatically read the disc
data, change to the DVD mode (DivX mode),
and start playback after a while.
See also “Setting/Ejecting a Disc” (page 17).
Note:
• For your safety, this system has a safety function
which turns off the picture when the car is moving,
so only the audio can be heard. The picture can
only be watched when the car is stopped and the
parking brake is applied.
• If “Audio Only” appears on the screen just after
turning on the ACC power of the car, release the
parking brake while confirming safety, and then
engage the parking brake again.
•
You can store DivX files and the MP3/WMA/AAC files
together in a disc or folder. In such a case, you can
select whether the disc is regarded as a DivX disc or
as an MP3/WMA/AAC disc. See “Setting the Playform
of discs recorded with audio files” (page 36).
●When a disc is already set
1. Press the [SRC] button to display the Source
screen.
2. Touch the [DVD] key to select the DivX mode.
The system changes to the DVD mode (DivX
mode), and starts playback from the previous
position.
❏Operating DivX playback
Note:
• The most operations in the DivX mode are same
as those in the MP3/WMA/AAC modes. See also
“Operating MP3/WMA/AAC playback” (page 32).
• The random plays cannot be specified in the DivX
mode.
Watching DivX movies
After disc loading, the play mode is automatically
engaged.
• When playback is not started, touch the [p]
key.
●To play a file with Authorization data
When a file with Authorization data is played, a
message is displayed on the screen. Confirm the
message displayed, and touch the [Done] or
[Yes] key to play the movie.
WARNING
• Some movie files may be recorded at a
higher volume level than desired.
Increase the volume gradually from the
minimal setting after the movie has
started.
• For your safety, the driver should not
watch the movie or operate the controls
while driving. Please note that watching
and operating the movie while driving are
prohibited by law in some countries.

35
NX700
English
Owner’s manual
Showing the DivX mode screen
The DivX mode screen is used to control the
playback mode from the screen.
1. Touch the screen.
The DivX mode screen is displayed.
If you do not touch the screen for 7 seconds,
the display will return to the playback screen.
• You can hide the DivX mode screen by
touching the [Hide] key.
Selecting the screen size
You can change the screen size to suit to the
playback film.
• The factory default setting is “Full Wide”.
1. Touch the screen to display the DivX mode
screen.
2. Repeat touching the [Full Wide/Cinema/
Normal/Wide] key until your desired screen
size is selected.
•
This key shows the current screen size setting.
[Full Wide]:
The image is expanded so that the rectangle
of the image fits to the screen (16:9). The
aspect ratio of the image may be changed.
[Cinema]:
The image is expanded so that the top and
bottom edges of the image fit to the screen.
Suitable for letterbox-format images. Subtitles
of non-letterboxed images may be cut off in
this mode.
[Normal]:
The image is expanded so that the top and
bottom edges of the image fit to the screen,
and that the aspect ratio of the image
becomes 4:3. The aspect ratio of the image
may be changed.
[Wide]:
The image is expanded so that the left and
right edges of the image fit to the screen. The
top and bottom areas of the image may be cut
off.
3. Touch the [Hide] key to return to the playback
screen.
Searching with a folder/track
number
You can specify a file to play using the folder
number or track number.
1. Showing the DivX mode screen, touch the
[Options] key.
2. Touch the [Direct] key.
The Key Pad screen appears with the folder
number input mode.
3. Input the folder/track number that you want to
play back using the [ ] key.0] to [9
• Touching the [Track] key turns the Key Pad
to the track number input mode.
4. Touch the [ENT] key.
The system starts playback of the file
specified with the input folder/track numbers.
• If the input folder/track number does not
exist or searching with a folder/track
number is not allowed, the screen image will
not change.
Switching Audios
You can switch the audio data if the current DivX
file has two or more audio data.
1. Showing the DivX mode screen, touch the
[Options] key.
2. Touch the [ ] key during playback or Audio
pause.
Each time you touch the key, you can switch
among the audio data.
• The number of audios recorded and their
audio formats may differ depending on the
DivX file.
• Depending on the DivX file, switching may
be impossible.
• It may take time to switch the audio data.
3. Touch the [Back] key.

36 NX700
English
Owner’s manual
Switching Subtitles
You can switch the subtitle language if the
current DivX file has one or more subtitles.
1. Showing the DivX mode screen, touch the
[Options] key.
2. Touch the [Subtitle] key during playback or
pause.
Each time you touch the key, you can switch
among the subtitle language.
• The number of subtitles recorded may differ
depending on the DivX file.
• Depending on the DivX file, switching may
be impossible.
• It may take time to switch the subtitle
language.
3. Touch the [Back] key.
Setting the Playform of discs
recorded with audio files
DivX files can be stored together with MP3/WMA/
AAC files in a disc or folder. You can select
whether such discs are regarded as DivX discs or
as MP3/WMA/AAC discs.
1. Showing the DivX mode screen, touch the
[Options] key.
2. Touch the [ ] key of the Audio] or [Video
Playform item to specify the setting.
[Audio]:
Discs are regarded as MP3/WMA/AAC discs.
[Video]:
Discs are regarded as DivX discs.
3. Touch the [Back] key if required.
Note:
• This setting is disabled when a Mixed Mode CD,
which contains both data track and audio tracks, is
set in the DVD player.
Satellite Radio Operations
This function is available when a Satellite Radio
tuner and Translator adapter are connected.
This unit can control the following satellite radio
tuners via Translator adapter:
• Sirius Tuner
• XM Mini-Tuner
Note:
• When a function differs depending on the
connected tuner, the following notations are used
to distinguish between Sirius and XM:
“Sirius”: for the Sirius tuner
“XM”: for the XM tuner
• Be sure to turn off the ACC power before
connecting/disconnecting the tuner.
❏Selecting the SIRIUS/XM mode
1. Press the [SRC] button, and touch the [Sirius]
or [XM] key.
The system changes to the Sirius or XM
mode.
Note:
• If the [Sirius] or [XM] key is not displayed, check
the connection with the tuner.
• The audio output is muted and other button
operations are not accepted during channel
selection.
6.
SOURCE OPERATIONS
(ACCESSORIES)

37
NX700
English
Owner’s manual
Messages displayed during
reception
The following messages are displayed when the
satellite radio cannot be received normally.
●Sirius:
• When a channel is being tuned in or no signal
is received: “ACQUIRING SIGNAL”
• A channel without a broadcast has been
selected: “INVALID CHANNEL”
• A channel not covered by your contract: “CALL
888-539-SIRIUS TO SUBSCRIBE”
• When the tuner is turned on the first time or
after a reset: “UPDATING CHANNELS”
• When your contract is expired:
“ ”SUBSCRIPTION UPDATED
• When the Sirius antenna is not connected
correctly : “ANTENNA ERROR”
●XM:
• When a channel is being tuned in (no signal is
yet received): “LOADING”
• A channel without a broadcast has been
selected: “CHANNEL NOT AVAILABLE”
• A channel not covered by your contract:
“ ”CHANNEL NOT AUTHORIZED
• When a channel is out of air time: “CHANNEL
OFF AIR”
• When no signal is received: “NO SIGNAL”
• When the XM antenna is not connected
correctly : “CHECK ANTENNA”
Note:
• The messages may vary depending on the XM
tuners connected to this unit.
❏Selecting a band
1. Touch the [Band] key to select a band.
This changes the reception band as follows:
• Sirius: SR1 ➜ SR2 ➜ SR3 ➜ SR1 ...
• XM: XM1 ➜ XM2 ➜ XM3 ➜ XM1 ...
❏Confirming your Radio ID
●Sirius
1. Touch the [Options] key to display the
Options screen.
Your Sirius ID (12-digit number) will be
displayed.
2. To return to the previous screen, touch the
[Back] key.
●XM
1. Touch the [Direct] key to display the Key Pad
screen.
2. Touch the [0] key, then touch the [ENT] key.
Receiving the Channel “0” will display your
Radio ID (8-digit number).
❏Tuning in a station
Only channels that can be received are selected.
Channels without broadcasts and channels not
covered by the contract will be skipped.
1. Touch the [{ (Channel)] or [} (Channel)]
key.
The system will tune to the previous or next
available channel.
• Holding the key continues to seek channels.
❏Selecting a station with the
channel number
1. Touch the [Direct] key to display the Key Pad
screen.
2. Enter the channel number of your desired
station by touching the [0 9] to [ ] keys.
• If you enter a wrong number, you can
cancel it by touching the [BS] key.
• To return to the previous screen, touch the
[Back] key.
3. Touch the [ENT] key.
The radio channel you entered will be tuned.
❏Displaying the channel name
and other information
1. Touch the [Preset Info] key when the Preset
keys are displayed.
The channel name, category name, and other
information are displayed.
• When the information displayed is longer
than 16 characters, touching the text scrolls
the entire text.
2. To return to the Preset Key screen, touch the
[Preset Info] key again.

38 NX700
English
Owner’s manual
❏Recalling a preset station
A total of 18 Sirius stations and 18 XM stations
can be stored (Sirius: 6-SR1, 6-SR2, and 6-SR3;
XM: 6-XM1, 6-XM2, and 6-XM3). This allows you
to store your favorite stations in memory for later
recall.
1. Display the Preset Key screen by touching the
[Preset Info] key.
2. Select the desired band by touching the
[Band] key.
3. Touch the corresponding Preset key to recall
the stored station.
The system will tune to the specified station.
• Touching and holding the desired Preset
key for more than 2 seconds stores the
current station into the preset memory.
❏Manual memory
1. Display the Preset Key screen by touching the
[Preset Info] key.
2. Select the desired band by touching the
[Band] key.
3. Tune to the station you wish to store.
4. Touch and hold the desired Preset key you
wish to store to for more than 2 seconds.
A beep sounds and the current station is
stored into the preset memory.
❏Receiving stations selected by
category
Satellite Radio allows you to select broadcast
channel category (contents).
1. Touch the [Category] key to display the
Category List screen.
2. Touch the desired Category item key to select
the category.
The system will tune in to the lowest available
channel of the specified category.
• Touch the [{] or [}] key to scroll the
category list.
3. Touch the [{ (C-Seek)] or [} (C-Seek)] key
to select a station.
The system will tune to the previous or next
available channel that meets the specified
category.
4. To return to the previous screen, touch the
[Back] key.
Note:
•Touching the [Back] key within 1 second after
selecting the category cancels the category
selection and returns to the channel previously
received.
•If you do not touch the screen for 7 seconds, the
display will return to the previous screen.
❏Category Scan function
In a category scan, broadcast channels in the
same category as the current channel are
selected about every 10 seconds. During
scanning channels are performed, the display
mode cannot be switched.
1. Touch the [Category] key to display the
Category List screen.
2. Touch the desired Category item key to select
the category.
• Touch the [{] or [}] key to scroll the
category list.
3. Touch the [CAT Scan] key.
The system will start the category scan from
the lowest available channel.
4. Touch the [CAT Scan] key again to tune to
the channel currently received.
The category scan will be terminated.
Note:
•When you touch the [Back] key during the
category scan to return to the previous screen, the
category scan will continue.
•The category scan can be also performed by
touching the [CAT Scan] key on the Sirius/XM
mode screen.

39
NX700
English
Owner’s manual
iPod Operations
iPods can be connected by using the connection
cable supplied with the iPod, but in this case, you
can enjoy its audio sound only. To enjoy video
movies stored in the iPod with video displaying
them on this unit, it is required to use the special
connection cable (CCA-723/CCA-748)
separately sold.
Note:
•iPhones can also be connected to this system and
“iPod” appearing in this manual should be referred
to as “iPod/iPhone”.
•This system will not operate or may operate
improperly with unsupported versions.
•For detailed information on the playable iPod
models, see our home page: www.clarion.com
❏Notes on using Apple iPod
• Do not connect an iPod to this unit with a
headphone connected to the iPod.
• When no data is present, the title display will
remain blank.
• Set the iPod’s language setting to English
before connecting your iPod. Some characters
of the other languages may not be displayed
correctly in this system.
●Precautions on battery consumption:
If the iPod is connected to this unit when the
iPod’s internal battery has run down, this function
may not operate correctly. You must connect the
iPod after charging the battery if it has run down.
❏Selecting the iPod mode
1. Connect your iPod to the USB connector.
The system will automatically detect the
connected device, and change to the USB
mode (iPod mode), and start playback after a
while.
See also “Connecting/Disconnecting an USB
Media Device” (page 18).
●When an iPod is already connected
1. Press the [SRC] button to display the Source
screen.
2. Touch the [USB] key to select the iPod mode.
The system changes to the USB mode (iPod
mode), and starts playback from the previous
position.
❏Controlling the iPod
Operation keys
●iPod mode screen
[Music/Videos] key:
Switches the operation mode to the Video mode
or Music mode.
• Enabled in the Simple Control mode.
List keys:
Displays the corresponding list screen to select
track to be played.
[Videos], [Playlists], and [Music] are available.
[Hide] key:
Hides the iPod mode screen to display the
playback picture.
• Displayed only in the Video mode.
[Options] key:
Displays the Options screen. You can specify
play modes and other settings from this screen.
Play mode icons:
Displays status of Repeat, Shuffle play.
: 1-track Repeat
: All Repeat
: Song Shuffle
: Album Shuffle
Pausing playback
1. Touch the [p] key during playback.
Playback pauses.
2. To resume playback, touch the [p] key
again.
Playback resumes.
[Music/Videos] key
Play mode icons
List keys
[Options] key

40 NX700
English
Owner’s manual
Skipping a track (searching)
1. Touch the [{ (Track)] or [} (Track)] key
during playback.
Tracks are skipped, as many as the times the
key is touched, and playback starts.
• Touching the [{ (Track)] key starts
playback from the beginning of the next
track.
• Touching the [} (Track)] key starts
playback from the beginning of the current
track. When this key is kept touching,
playback starts from the beginning of the
previous track.
Fast forward and fast backward
1. Touch and hold the [{ (Track)] or [} (Track)]
key during playback.
The playback speed becomes faster.
Releasing the key resumes the normal speed
playback.
Scrolling track titles
When a title or name displayed on the screen is
longer than the text area, you can confirm the
entire text by scrolling it.
1. Displaying the text you wish to scroll, touch
the text area.
The text will scroll once.
Controlling from the iPod
Setting this function to “On” enables to use the
iPod buttons to control the iPod.
1. Touch the [Options] key.
2. Touch the [On] or [Off] key of the Simple
Control item to specify the setting.
[On]:
Enables the iPod buttons. Only the above
operations can be performed from this
system.
[Off]:
Disables the iPod buttons. All controls are
performed from this system.
3. Touch the [Back] key to return to the previous
screen.
Other various play functions
1. Touch the [Options] key.
2. Touch a touch key of the function you want to
play.
1-track repeat:
Touch the [One] key of the Repeat item.
• This operation plays back the current or
selected track repeatedly.
All repeat:
Touch the [All] key of the Repeat item.
• This operation plays back all the tracks
currently selected repeatedly.
Song shuffle:
Touch the [Song] key of the Shuffle item.
• This operation plays back all the tracks
currently selected in a random order.
Album shuffle:
Touch the [Album] key of the Shuffle item.
• When more than one album is selected, this
operation plays back the albums in no
particular order. Tracks in an album are
played back in the recorded order.
3. To cancel the shuffle play, touch the [Off] key
of the function to cancel.
• The repeat play cannot be canceled.
Normally, it should be set to the All repeat
play.
4. Touch the [ ] key to return to the previous Back
screen.
Note:
•“All repeat” will be selected automatically when
you connect the iPod which is turned off the repeat
function.
❏Selecting tracks to be played
You can specify the tracks to be played by
touching the following list keys:
●[Videos] key
The following category keys are displayed. You
can narrow the listed items by selecting these
categories.
• The category keys displayed may differ
depending on the connected iPod.
[Playlists]:
The list of all the Video Playlists stored in the iPod
is displayed.
[Movies]:
The list of all the Movies stored in the iPod is
displayed.

41
NX700
English
Owner’s manual
[Music Videos]:
You can narrow the Albums to be listed by
specifying the Artist name.
[Rental]:
The list of all the Rental Movies stored in the
iPod, which are downloaded with iTunes Movie
Rentals, is displayed.
[TV Shows]:
You can narrow the Seasons to be listed by
specifying the Program title.
[Video Podcasts]:
You can narrow the Tracks to be listed by
specifying the Video Podcast name.
●[Playlists] key
The list of all the Playlists and Video Playlists
stored in the iPod is displayed.
●[Music] key
The following category keys are displayed. You
can narrow the listed items by selecting these
categories.
• The category keys displayed may differ
depending on the connected iPod.
[Playlists]:
The list of all the Playlists stored in the iPod is
displayed.
[Artists]:
You can narrow the Albums to be listed by
specifying the Artist name.
[Albums]:
The list of all the Albums stored in the iPod is
displayed.
[Songs]:
The list of all the Tracks stored in the iPod is
displayed.
[Genres]:
You can narrow the Artists to be listed by
specifying the Genre name.
[Composers]:
You can narrow the Albums to be listed by
specifying the Composer name.
Selecting tracks to be played from a
list screen
1. Touch the desired Category key from the iPod
mode screen to display the corresponding list
screen.
2. Touch the desired item key on the screen to
specify it.
• Touch the [{] or [}] key to scroll the list.
You can also use the ABC Search function
to scroll the list (see below).
• When a track list of an Album, Playlist, or
Video Playlist is displayed, specifying a
track starts playback of the specified album/
playlist from the specified track.
• When the track list of the Songs is
displayed, specifying a track starts playback
of all the tracks stored in the iPod from the
specified track.
• When the other list screen is displayed,
repeat this operation until you select the
tracks to be played back.
• When video tracks are specified in the
Music mode, only the audio data will be
played back.
3. Touch the [ ] key to return to the previous Back
screen.
●Using the ABC Search function
1. Touch the [ABC Search] key when the list
screen you wish to scroll is displayed.
2. Repeat touching the [A ] [], [ Z], or [0-9] key
to specify the initial character of the list item
you wish to display.
3. Touch the [Search] key.
The list will scroll to display the first item
started from the specified character (or a
following character).

42 NX700
English
Owner’s manual
❏Viewing video data in the iPod
(only for the iPod with video)
When you connect an iPod with video by using
the optional connection cable, you can enjoy the
video data stored in the iPod showing them on
the operation panel of this unit (and the rear
monitor if connected).
1. Play back your desired video tracks.
The system will automatically enter into the
Video mode and the playback starts. The
specified video image is also displayed on the
rear monitor if connected.
• When in the Simple Control mode, touch the
[Music/Videos] key to switch to the Video
mode. To return to the Music mode, touch
the [Music/Videos] key again.
2. Touch the [Hide] key to hide the iPod mode
screen.
The video image will be displayed on this unit.
3. To display the iPod mode screen, touch the
screen.
Note:
•“Audio Only” is displayed when the automobile is
moving.
•Video data may not be played back according to
the status of the iPod.
•The volume setting of video data is relatively lower
than audio data. Be sure to lower the volume
setting before switching to the other mode.
•Do not select the categories with no track
registered from a list screen. The iPod may be
frozen. If the iPod is frozen, reset the iPod by
following the procedure described in the instruction
manual of the iPod.
Selecting the Output Signal
This setting is used to select the audio signal of
video tracks.
1. Touch the [Options] key.
2. Touch the [Digital] or [Analog] key of the
Output Signal item to specify the setting.
[Digital]:
The digital audio data via the USB will be
output. Normally select this setting.
[Analog]:
The analog audio data via the AUX will be
output. Select this setting if your iPod cannot
output digital signals.
3. Touch the [ ] key to return to the previous Back
screen.
Note:
•Make sure to reconnect the iPod after changing
this setting. The key ([Digital] or [Analog])
indicator and output setting will be changed after
reconnecting your iPod.
USB Memory Operations
This system can play audio files (MP3/WMA/
AAC) stored in an USB memory which is
recognized as “USB Mass Storage Class
device”. You can use your USB memory as an
audio device by simply copying desired audio
files into it.
Note:
•This system will not operate or may operate
improperly with some USB memory.
•Files protected with any DRM can not be played.
❏Notes on using USB memories
●General notes
• When no data is present, the message “No
File” will be displayed.
• The USB memory is used with the equalizer
function turned OFF.
●Notes on the MP3/WMA/AAC files
• This system can play the MP3/WMA/AAC files
stored in the USB memory.
• This system cannot play DivX files stored in the
USB memory.
• For AAC files, this system supports only the
MPEG4 Audio files encoded by the iTunes.
• Set the Sampling Frequency to:
For MP3 files:
• MPEG1 Layer3: 32, 44.1, or 48 kHz
• MPEG2 Layer3: 16, 22.05, or 24 kHz
• MPEG2.5 Layer3: 8, 11.025, or 12 kHz
For WMA files: 8 to 48 kHz
For AAC files: 8 to 48 kHz
WARNING
•Some videos may be recorded at a higher
volume level than desired. Increase the
volume gradually from the minimal
setting after the video has started.
•For your safety, the driver should not
watch the video or operate the controls
while driving. Please note that watching
and operating the video while driving are
prohibited by law in some countries.

43
NX700
English
Owner’s manual
• Set the Bit Rate to:
For MP3 files:
• MPEG1 Layer3: 32 to 320 kbps (VBR)
• MPEG2 Layer3: 8 to 160 kbps (VBR)
• MPEG2.5 Layer3: 8 to 160 kbps (VBR)
For WMA files: 32 to 192 kbps (VBR)
For AAC files: 8 to 320 kbps (VBR)
• Add the following file extension using single
byte characters:
For MP3 files: “.MP3” or “.mp3”
For WMA files: “.WMA” or “.wma”
For AAC files: “.M4A” or “.m4a”
Note:
•Some files may not be played on this system even
though they meet all the above mentioned
conditions.
●Notes on the folder structure
• The folder hierarchy must be within 8
hierarchical levels. Otherwise, playback will be
impossible.
• The maximum allowable number of folders is
512 (including root directory and folders with no
MP3/WMA/AAC file).
• The maximum allowable number of files in a
folder is 255.
• You can store the MP3 files, WMA files, and
AAC files together in a folder.
●Notes on the Tag titles
The limitations on the Tag titles are same as
those in the MP3/WMA/AAC modes. See
“Displaying MP3/WMA/AAC Tag titles” (page 31).
●Folder representation in the folder list
The limitations on the folder representation are
same as those in the MP3/WMA/AAC modes.
See “Folder representation in the folder list”
(page 31).
❏Selecting the USB Memory
mode
1. Connect your USB memory to the USB
connector.
The system will automatically detect the
connected device, and change to the USB
mode (USB Memory mode), and start
playback after a while.
See also “Connecting/Disconnecting an USB
Media Device” (page 18).
●When an USB memory is already connected
1. Press the [SRC] button to display the Source
screen.
2. Touch the [USB] key to select the USB
Memory mode.
The system changes to the USB mode (USB
Memory mode), and starts playback from the
previous position.
❏Playing back files in the USB
memory
The operations in the USB Memory mode are
same as those in the MP3/WMA/AAC modes.
See “Operating MP3/WMA/AAC playback”
(page 32) for details.
Note:
•When performing the fast forward or fast backward
function, the playback speed will become 10-time
faster. For the VBR files, it may differ depending on
the file.
Navigation System
Operations
Notes on the Navi functions
• Hereafter in this section, the Navigation system
will be called as “Navi”.
• The following functions are available:
• Showing the Navi display
• Showing the current location screen (The
[Map] key selection available on the Source
screen).
• Navi guidance voice interruption
• When a voice interrupt of the Navi arises during
2-Zone ON, the sound of the Main zone is
muted, and the sound of the Sub zone is output
normally. When it arises during 2-Zone OFF,
the audio signals to the 4ch speakers are
attenuated, and the voice from the navigation
system is output from the front two speakers.
Navi operations
Changes between the Navi display and the
Audio/Visual (hereinafter, referred as “AV”)
display.

44 NX700
English
Owner’s manual
●When in the AV mode
• Touch the [Map] key on the Source screen to
switch to the Navi mode.
• When the image interruption from the Navi
arises, the screen will be changed to the Navi
display. When the interruption is finished, the
screen will return to the previous AV display.
Note:
•Depending on the distance to the next guidance
point and the vehicle’s speed, the image
interruption may continue until the next route
guidance finishes.
●When in the Navi mode
• Touch the [ ] key on the Navigation Menu
screen to switch to the AV mode.
• Touch the key of the currently selected Source
mode on the Source screen to switch to the
relevant AV mode.
Note:
•For more information on the Navi mode, see the
User Manual.
Bluetooth Telephone
Operations (Tel mode)
When the connection with your Bluetooth cellular
phone is established, the following functions are
available on this unit:
• Listening to your telephone calls on the car
speakers.
• Answering to an incoming call.
• Making a call using the Phone Dialer screen.
• Making a call using the Phonebook data in the
selected cellular phone.
• Making a call using the Call Log data of the
dialed/received calls.
• Redialing
Note:
•You need to register your Bluetooth cellular phone
(Pairing) before use.
Telephone operations
You can select the Tel mode from either AV or
Navi mode.
●When in the AV mode
• Touch the [Tel] or [TEL] key on the Source
screen to enter the Tel mode.
●When in the Navi mode
• Touch the [ ] key on the Navigation Menu to
enter the Tel mode.
• Touch the [TEL] key on the Source screen to
enter the Tel mode.
Note:
•For the details, refer to the supplied Bluetooth
telephone operation manual.
AUX Operations
This function is available when a VTR, etc. is
connected to the AUX terminal.
Note:
•For your safety, this system has a safety function
which turns off the picture when the car is moving,
so only the audio can be heard. The picture can
only be watched when the car is stopped and the
parking brake is applied.
Selecting the AUX mode
1. Press the [SRC] button, and touch the [AUX]
key. The system will enter into the AUX mode.
Showing the AUX mode screen
The AUX mode screen is used to adjust settings
concerning the AUX mode.
1. Touch the screen.
The AUX mode screen is displayed.
If you do not touch the screen for 7 seconds,
the display will return to the video screen.
Switching to another AUX mode
1. Showing the AUX mode screen, touch the
[AUX] key.
The system will enter into another AUX mode.
Changing the audio input level
The input audio level of the AUX terminals can be
changed.
• The factory default setting is “High”.
1. Touch the screen to display the AUX mode
screen, then repeat touching the [Sense] key
to select the level.
High: 10 dB
Mid: 4 dB
Low: 0 dB
WARNING
•For your safety, the driver should not
watch the video or operate the controls
while driving. Please note that watching
and operating the video while driving are
prohibited by law in some countries.

45
NX700
English
Owner’s manual
Selecting the screen size
You can change the screen size to suit to the
video image.
• The factory default setting is “Full Wide”.
1. Touch the screen to display the AUX mode
screen.
2. Repeat touching the [ ] key until your S-Size
desired screen size is selected.
• This key shows the current screen size
setting.
[Full Wide]:
The image is expanded so that the rectangle
of the image fits to the screen (16:9). The
aspect ratio of the image may be changed.
[Cinema]:
The image is expanded so that the top and
bottom edges of the image fit to the screen.
[Normal]:
The image is expanded so that the top and
bottom edges of the image fit to the screen,
and that the aspect ratio of the image
becomes 4:3. The aspect ratio of the image
may be changed.
[Wide]:
The image is expanded so that the left and
right edges of the image fit to the screen. The
top and bottom areas of the image may be cut
off.
3. Touch the [Hide] key to return to the video
screen.
Audio Settings
❏Displaying the Audio screen
You can customize the various audio settings of
this unit from the Audio screen.
1. Touch the [SET] key.
The Settings screen appears.
2. Touch the [Audio] key.
The Audio screen appears.
3. Touch the desired Tab key, and perform the
adjustment.
See the following sections for details.
• In the following sections, only the details
regarding adjustments are described,
procedures to select items are skipped.
4. When the adjustment completes, touch the
[Back] key to return to the previous screen.
7.
SYSTEM SETTINGS

46 NX700
English
Owner’s manual
❏Setting the Beat EQ
This system provides 4 types of sound tone
adjustment functions. You can select desired
function and adjust the effect level.
• The factory default setting is “Off”.
Notes:
• The volume will change each time the Beat EQ
function is switched.
• Sufficient effects may not be obtained with some
speaker systems. In such cases, adjust the
volume.
Adjusting the custom tone
●Adjusting the Bass
●Adjusting the Mid
●Adjusting the Treble
❏Adjusting the Balance/Fader
3-1. Touch the [Beat EQ] key to display the Beat
EQ tab screen.
3-2. Touch the [BEQ1 BEQ2 BEQ3], [ ], [ ],
[Custom], or [Off] key to select the function
you wish to apply.
[BEQ1]:
The bass sound area is emphasized.
[BEQ2]:
The mid sound area is reduced, and the
bass and treble sound area are
emphasized.
[BEQ3]:
The mid sound area is lowered, and the
bass and treble sound area are extremely
emphasized.
[Custom]:
You can adjust the sound tone of bass, mid,
and treble areas individually. For details,
see the following section.
[Off]:
No sound effect is applied.
3-3. When you select an item other than
“Custom” and “Off” in step 3-2, adjust the
effect level by touching the [ ] key.–] or [+
Setting range: –3 to +3
• The factory default setting is “0”.
3-1. Touch the [Beat EQ] key to display the Beat
EQ tab screen.
3-2. Touch the [Custom] key.
3-3. Perform the following settings to adjust the
sound tone.
3-4. Touch the [Bass] key.
3-5. Touch the [–] or [+] key of the desired item
to adjust the effect level.
Gain: –7 to +7
• The factory default setting is “0”.
Frequency: 50Hz, 100Hz, 200Hz
• The factory default setting is “100Hz”.
Q: 0.7, 1, 1.4, 2
• The factory default setting is “1”.
3-4. Touch the [Mid] key.
3-5. Touch the [–] or [+] key of the desired item
to adjust the effect level.
Gain: –7 to +7
• The factory default setting is “0”.
Frequency: 500Hz, 1kHz, 2kHz
• The factory default setting is “1kHz”.
Q: 0.7, 1, 1.4, 2
• The factory default setting is “1”.
3-4. Touch the [Treble] key.
3-5. Touch the [–] or [+] key of the desired item
to adjust the effect level.
Gain: –7 to +7
• The factory default setting is “0”.
Frequency: 5 kHz, 10kHz, 15kHz
• The factory default setting is “10kHz”.
Q: 0.7, 1, 1.4, 2
• The factory default setting is “1”.
3-1. Touch the [BAL/FAD] key to display the
BAL/FAD tab screen.
3-2. Touch the [[] or [ ] key of the Balance item ]
to adjust the balance level.
[[]:
Emphasizes the sound from the left
speakers.
[]]:
Emphasizes the sound from the right
speakers.
Adjustment range: left 12 to right 12
• The factory default setting is “0”.

47
NX700
English
Owner’s manual
❏Setting the Sub Woofer
Control
You can adjust the volume output to the Sub
Woofer.
• The factory default setting is “0”.
❏Setting the Sub Woofer Phase
You can reverse the phase of the Sub Woofer
output signal.
• The factory default setting is “Normal”.
❏Adjusting the High Pass Filter
You can adjust the cut-off frequency of the High
Pass Filter for the front/rear speaker output.
• The factory default setting is “Through”.
❏Adjusting the Low Pass Filter
You can adjust the cut-off frequency of the Low
Pass Filter for the subwoofer output.
• The factory default setting is “Through”.
❏Setting the Amp Cancel
When an external amplifier is used, using this
function reduces power noises of the audio lines.
• The factory default setting is “Off”.
❏Setting the BBE MP
This function works only for the sound in the USB
mode, corrects the distorted waveform of the
high-pass area when decoding the digital sound.
• The factory default setting is “Off”.
❏Turning on/off the Magna Bass
EXtend
The Magna Bass Extend does not adjust the low
sound area like the normal sound adjustment
function, but emphasizes the deep bass sound
area to provide you with a dynamic sound.
• The factory default setting is “Off”
3-3. Touch the [{] or [}] key of the Fader item
to adjust the fader level.
[{]:
Emphasizes the sound from the front
speakers.
[}]:
Emphasizes the sound from the rear
speakers.
Adjustment range: front 12 to rear 12
• The factory default setting is “0”.
3-1. Touch the [Others] key to display the Others
tab screen.
3-2. Touch the [–] or [+] key of the Sub Woofer
Ctrl item to adjust the output level.
Setting range: –6 to +6
3-1. Touch the [Others] key to display the Others
tab screen.
3-2. Touch the [Reverse] or [Normal] key of the
Sub Woofer Phase item to select the phase
setting.
3-1. Touch the [Others] key to display the Others
tab screen.
3-2. Touch the [[] or []] key of the High Pass
Filter item to adjust the setting.
Settings: Through, 60Hz, 90Hz, 120Hz
3-1. Touch the [Others] key to display the Others
tab screen.
3-2. Touch the [[] or []] key of the Low Pass
Filter item to adjust the setting.
Settings: Through, 120Hz, 90Hz, 60Hz
3-1. Touch the [Others] key to display the Others
tab screen.
3-2. Touch the [}] key to display the next
screen.
3-3. Touch the [On] or [Off] key of the Amp
Cancel item to turn the Amp Cancel function
on or off.
3-1. Touch the [Others] key to display the Others
tab screen.
3-2. Touch the [}] key to display the next
screen.
3-3. Touch the [[] or []] key of the BBE MP item
to set the correction level.
Settings: Off, Low, Mid, High
3-1. Touch the [Others] key to display the Others
tab screen.
3-2. Touch the [}] key to display the next
screen.
3-3. Touch the [On] or [Off] key of the Magna
Bass EX item to turn the Magna Bass
Extend function on or off.

48 NX700
English
Owner’s manual
❏Setting the Audio
ATTenuation
The audio output can be attenuated when a voice
interrupt of the navigation system arises.
• The factory default setting is “High”.
General Settings
❏Displaying the General screen
You can customize the various settings of this
unit from the General screen.
1. Touch the [SET] key.
The Settings screen appears.
2. Touch the [General] key.
The General screen appears.
3. Touch the desired Tab key, and perform the
adjustment.
See the following sections for details.
• In the following sections, only the details
regarding adjustments are described,
procedures to select items are skipped.
4. When the adjustment completes, touch the
[Back] key to return to the previous screen.
❏Setting Camera Interrupt
When the optional Rear Vision Camera is
connected to this unit, the rear view image is
displayed on the screen when the gear lever is
put in the reverse gear position.
• The factory default setting is “Off”.
❏Setting Camera Warning
The following warning message is displayed
during use of the Rear Vision Camera: “Make
sure of safety around your vehicle”.
• The factory default setting is “On”.
Note:
• This setting is disabled when the Camera Interrupt
feature is set to Off.
❏Setting the AUX input (NTSC/
PAL)
• The factory default setting is “NTSC”.
Note:
• This setting is applied only to the AUX video input.
• If nonstandard video signals are input, the video
image may be disturbed.
• When you set to “Auto”, the video image may be
disturbed temporarily depending on the input video
signal.
3-1. Touch the [Others] key to display the Others
tab screen.
3-2. Touch the [}] key to display the next
screen.
3-3. Touch the [[] or []] key of the Audio ATT
item to set the volume level when a voice
interrupt arises.
Settings: Mute, Low, Mid, High
3-1. Touch the [Display] key to display the
Display tab screen.
3-2. Touch the [NTSC], [PAL], or [Off] key of the
Camera Interrupt item to set to “NTSC”,
“PAL”, or “Off”.
[NTSC]:
Turn on the function with the NTSC video
system.
[PAL]:
Turn on the function with the PAL video
system.
[Off]:
Turn off the function.
3-1. Touch the [Display] key to display the
Display tab screen.
3-2. Touch the [On] or [Off] key of the Camera
Warning item to turn the Camera Warning
function on or off.
3-1. Touch the [Display] key to display the
Display tab screen.
3-2. Touch the [Auto], [NTSC], or [PAL] key of
the AUX input item to set the VTR system.

49
NX700
English
Owner’s manual
❏Setting the Beep
The sound heard when you make operations is
called “beep”. The system can be set so that it
does not produce this beep sound.
• The factory default setting is “On”.
❏Setting the Blink LED
You can set the unit to blink the Blink LED
indication when the ACC power is turned off.
• The factory default setting is “Off”.
❏Confirming the DivX
Registration Code and DivX
URL
When you download a DivX VOD (Video-on-
Demand) file from a web site, entering the
registration code of your playback system may
be required to authorize the file. You can confirm
the registration code of your system and the URL
information by the following operation.
Note:
• The DivX registration code is not displayed when a
disc is set in the DVD player.
❏Performing the System Check
You can perform the system check by the
following operation.
❏Resetting the navigation
system
You can reset the navigation system.
3-1. Touch the [System] key to display the
System tab screen.
3-2. Touch the [On] or [Off] key of the Beep item
to turn the Beep function on or off.
3-1. Touch the [System] key to display the
System tab screen.
3-2. Touch the [On] or [ ] key of the Blink LED Off
item to turn the Blink LED function on or off.
3-1. Touch the [System] key to display the
System tab screen.
3-2. Confirm the displayed information of the
DivX Registration Code and DivX URL
items.
3-1. Touch the [System] key to display the
System tab screen.
3-2. Touch the [}] key to display the next
screen.
3-3. Touch the []] key of the System Check item.
The System Check screen is displayed.
3-4. Touch the [Start system check] key to
perform the system check manually.
The system will be restarted after
performing the system check.
3-1. Touch the [System] key to display the
System tab screen.
3-2. Touch the [}] key to display the next
screen.
3-3. Touch the []] key of the System Check item.
3-4. Touch the [Reset NAVI module.] key to
reset the navigation system.

50 NX700
English
Owner’s manual
❏Setting the anti-theft function
(CATS)
“CATS” is the acronym of “Clarion Anti-Theft
System”. When you set a PIN code (called as
“Personal Code”), a theft is prevented by
disabling the operation of the unit at the theft.
In addition, set the Blink LED function to improve
the effect of the CATS function (see page 49).
Setting your Personal Code
Note:
• Write down your Personal Code in case you forget
it.
Erasing the Personal Code
When the ENTER PERSONAL CODE
screen appears
The Personal Code screen will be displayed
when turning the ACC power on after performing
the following operations:
• The car battery was replaced.
• The backup power was cut off.
• The Reset button was pressed.
Note:
• If you forgot your Personal Code, please consult
your dealer or an authorized Clarion service
center.
1. Enter your Personal Code currently set.
2. When the correct Personal Code is entered,
the unit will restart from the initial startup
screen.
Note:
• When you enter a wrong Personal Code, the
message “Code Incorrect” is displayed and the
Personal Code entry is prohibited for a while. This
prohibited time is changed according to the
number of times of wrong code entry as follows:
• 1 to 6 times: 15 seconds
• 7 times or more: 15 minutes
3-1. Touch the [System] key to display the
System tab screen.
3-2. Touch the [}] key to display the next
screen.
3-3. Touch and hold the blank area just below
the []] key of the System Check item for
more than 2 seconds.
The Personal Code screen appears.
• When a Personal Code is already set, the
Erase Code screen will appear. Retry this
operation after erasing the old Personal
Code.
3-4. Enter your desired 4-digit Personal Code by
touching the [0 9] to [ ] keys, then touch the
[ENT] key.
• Touch the [BS] key when you make a
mistake in entering.
3-5. Enter the same Personal Code again for
confirmation, then touch and hold the [ENT]
key for more than 2 seconds.
The entered Personal Code will be set, and
it will return to the previous screen.
3-1. Touch the [System] key to display the
System tab screen.
3-2. Touch the [}] key to display the next
screen.
3-3. Touch and hold the blank area below the []]
key of the System Check item for more than
2 seconds.
The Erase Code screen appears.
3-4. Enter the Personal Code currently set by
touching the [0 9] to [ ] keys, then touch and
hold the [ENT] key for more than 2 seconds.
The message “Personal Code has been
erased” appears, and it will return to the
previous screen.

51
NX700
English
Owner’s manual
❏Setting the Auto Antenna
When an auto antenna which is extended
automatically is used, you can set so that it is
automatically extended/collapsed according to
the power setting of this unit.
1. Touch the [SET] key to display the Settings
screen.
2. Touch and hold the [Auto] or [Down] key of
the Antenna item for more than 1 second to
set this function.
Auto:
The auto antenna function is turned on.
Down:
The antenna is collapsed.
Adjusting the Monitor
You can customize the various monitor settings
by the following operations.
❏Setting the Screen mode
The system has two screen modes: the Day
mode and Night mode. Each mode has the own
dimmer setting. You can select these modes
temporarily by performing the following
operation.
• The factory default setting is “Auto”.
1. Press the [SRC] button to display the Source
screen.
2. Touch the [Day], [Night], or [Auto] key to set
the Screen mode.
[Day]:
Set the dimmer level temporarily to the Day
mode (brighter).
[Night]:
Set the dimmer level temporarily to the Night
mode (dimmer).
[Auto]:
The dimmer level is changed according to the
status of the car light:
When the car light is off: Day mode
When the car light is on: Night mode
Note:
• When the Night Mode setting of the navigation
system is set to “Automatic”, this setting also
works upon the Color mode of the navigation
system.
❏Adjusting the Dimmer, Bright,
Color, Contrast, and Hue level
Note:
• The Bright, Color, Contrast, and Hue settings can
be adjusted only when a video image is displayed
on the screen, and the car is stopped with applying
the parking brake.
• The Hue setting can be adjusted only when the
NTSC mode is selected.
• The navigation screen has own dimmer setting
separately from the AV screen. The dimmer
adjustment in a mode does not affect each other
screen.
• The Rear Vision Camera image cannot be
adjusted directly. Perform the adjustments when
displaying a video image of the other source.
1. Touch the [SET] key to display the Settings
screen.
2. Touch the [Monitor ADJ] key to display the
Monitor screen.
3. Touch the [Dimmer], [Bright], [Color],
[Contrast], or [Hue] key you wish to adjust,
then touch the [–] or [+] key to adjust the level.
[Dimmer]:
Adjusts the panel brightness when the car
lights are ON or OFF.
[+]: Press to make image brighter.
[–]: Press to make image dimmer.
[Bright]:
Adjusts the brightness of the display.
[+]: Press to make image brighter.
[–]: Press to make image dimmer.
[Color]:
Adjusts the color saturation.
[+]: Press to increase color depth.
[–]: Press to decrease color depth.
[Contrast]:
Adjusts the contrast of the display.
[+]: Press to make contrast higher.
[–]: Press to make contrast lower.
[Hue]:
Adjust the tone of color (red or green is
emphasized).
[+]: Press to increase green.
[–]: Press to increase red.
4. When the adjustment completes, touch the
[Back] key to return to the previous screen.

52 NX700
English
Owner’s manual
If you have a problem with this system, check the following items to resolve it. See also our homepage
(www.clarion.com) for additional information.
General
8. TROUBLESHOOTING
Problem Cause Measure
Power does not turn
on. (No sound is
produced.)
Fuse is blown. Replace with a fuse of the same amperage. If the
fuse blows again, consult your store of purchase.
Incorrect wiring. Consult your store of purchase.
Nothing happens
when buttons are
pressed.
Display is not
accurate.
The microprocessor has
malfunctioned due to
noise, etc.
Turn off the power. Press the Reset button with a
thin rod.
Note:
When the Reset button is pressed, turn off the ACC
power.
• The frequencies of radio stations, setting data,
etc. stored in memory are not cleared even
when the Reset button is pressed.
The remote control
unit does not work.
Direct rays of the sun fall on
the light-receptive part of
the remote control unit.
When direct rays of the sun fall on the light-
receptive part of the remote control unit, it may not
work.
The battery of the remote
control unit is dead or there
is no battery in the remote
control unit.
Check the battery of the remote control unit.
The display is dark. The Dimmer control is too
low.
Adjust the Dimmer properly.
The operating condition is
not good.
The temperature inside the vehicle may be 0°C or
lower. Set to an appropriate temperature (25°C or
so) and check it again.
The headlight of the vehicle
is lit.
The display is made dark at night to prevent the
glare (when the headlight is the vehicle is lit in the
daytime, the display gets dark).
There are red, green
and blue points in
the display.
This is not a failure, but a phenomenon peculiar to
a liquid crystal display (The liquid crystal display is
produced according to technology with very high
precision. Note that, though there are effective
pixels of 99.99% or more, pixel missing or
normally lit pixels account for 0.01%).
Reset button

53
NX700
English
Owner’s manual
DVD Player
Problem Cause Measure
Disc cannot be
loaded.
Another disc is already
loaded.
Eject the disc before loading the new one.
There is a foreign matter
already in place.
Eject the foreign matter forcibly.
Sound skips or is
noisy.
Disc is dirty. Clean the disc with a soft cloth.
Disc is heavily scratched or
warped.
Replace with a disc with no scratches.
MP3/WMA/AAC files are
not encoded properly.
Use MP3/WMA/AAC files encoded properly.
Sound is bad directly
after power is turned
on.
Water droplets may form
on the internal lens when
the car is parked in a humid
place.
Let dry for about 1 hour with the power on.
The image is not
displayed.
The parking brake is not
engaged.
Check that the parking brake is engaged.
Disc cannot be
played with the
display “Parental
Violation” shown.
The view is limited. Release the view limitation or change the parental
level.
See the subsection “Setting up the parental level”
(page 25).
Disc cannot be
played.
File system is not correct. Use ISO9660 level 1/2, Romeo, Joliet, or Apple
ISO file system for CD-R/RW, or UDF for DVD±R/
RW.
The color of the
display is light or a
shade of color is not
good.
The color is not adjusted
adequately.
Check that the Bright, Color, Contrast, and Hue
are adjusted properly.
54 NX700
English
Owner’s manual
USB Devices
If an error occurs, one of the following displays is displayed.
Take the measures described below to solve the problem.
DVD Player
Problem Cause Measure
USB device cannot
be inserted.
The USB device has been
inserted with wrong
direction.
Reversing the connection direction of the USB
device, try it again.
The USB connector is
broken.
Replace with a new USB device.
USB device is not
recognized.
The USB device is
damaged.
Disconnect the USB device and reconnect. If the
device is still not recognized, try replacing with a
different USB device.
Connectors are loose.
No sound heard with
the display “No File”
shown.
No MP3/WMA/AAC file is
stored in the USB device.
Store these files properly in the USB device.
Sound skips or is
noisy.
MP3/WMA/AAC files are
not encoded properly.
Use MP3/WMA/AAC files encoded properly.
The iPod’s video
image is disturbed.
The TV Signal setting of
the iPod is not set correctly.
Set the TV Signal setting (NTSC/PAL) of the iPod
correctly.
9. ERROR DISPLAYS
Display Cause Measure
Error 2 A disc is caught inside the
DVD player and is not
ejected.
This is a failure of DVD player’s mechanism.
Consult your store of purchase.
Error 3 A disc cannot be played
due to scratches, etc.
Replace with a non-scratched, non-warped disc.
Error 6 A disc is loaded upside-
down inside the DVD
player and does not play.
Eject the disc then reload it properly.
No MP3/WMA/AAC/DivX
file is recorded on the disc.
Write these files properly onto a disc.
Parental Violation Parental level error Set the correct Parental level.
Wrong Region Region code error Eject the disc, and replace correct region code
disc.
DRM WMA files protected by
DRM are played.
Perform the operation such as skipping a file.
(Repeat and random playback mode may be
canceled.)
Not Support Files not supported by this
unit are played.

56 NX700
English
Owner’s manual
FM Tuner
Frequency Range: 87.9 MHz to 107.9 MHz
Usable Sensitivity: 9 dBf
50dB Quieting Sensitivity: 15 dBf
Alternate Channel Selectivity: 70 dB
Stereo Separation (1 kHz): 38 dB
Frequency Response (±3 dB): 30 Hz to 15 kHz
AM Tuner
Frequency Range: 530 kHz to 1710 kHz
Usable Sensitivity: 28 dBμV
DVD Player
System:
Digital Versatile Disc System with CDDA
capable
Usable discs:
DVD video disc, Compact disc
Frequency Response:
20 Hz to 20 kHz (CD) (±1 dB)
Signal to Noise Ratio: 100 dB (1 kHz)
Dynamic Range: 100 dB (1 kHz)
Distortion: 0.01%
USB
Specification: USB 2.0 Full Speed
File system: FAT12/16/32, non-VFAT-compliant
Playable audio format:
MP3 (.mp3): MPEG 1/2 Audio Layer-3
WMA (.wma): Ver. 7/8/9.1/9.2
AAC (.m4a): AAC format encoded by iTunes
and iTunes+ only
Maximum number of folders: 512
Maximum number of files: 255 (for a folder)
Maximum folder hierarchy: 8 levels (including Root)
Maximum power supply: 500 mA
Bluetooth
Specification: Bluetooth Ver. 2.0 + EDR
Profile:
HFP (Hands-Free Profile)
DUN (Dial-up Networking Profile)
SPP (Serial Port Profile)
Send/Receive Sensitivity: Class 2
Audio Amplifier
Maximum power output:
200 W (50 W × 4)
Speaker impedance: 4 Ω (4 to 8 Ω allowable)
Input
Audio input sensitivity:
High: 0.65 V (at 2 V output)
Mid: 1.3 V (at 2 V output)
Low: 2.0 V (at 2 V output)
(input impedance 10 kΩ or greater)
Video input:
1.0 ±0.2 Vp-p (input impedance 75 Ω)
Video Output
Video output:
1.0 ±0.2 Vp-p (output impedance 75 Ω)
LCD Monitor
Screen Size: 7-inch wide type
6" Width (152 mm) × 3-5/16" Height (85 mm)
Display method:
Transmission type TN liquid crystal display
Drive method: TFT (thin-film transistor)
active matrix driving
Pixels: 336,960 (1440 × 234)
General
Power source voltage:
14.4 V DC (10.8 to 15.6 V allowable)
Ground: Negative
Current consumption: 3.5 A (1 W)
Auto Antenna Rated Current: 500 mA less
Dimensions of the Main Unit:
7" Width (178 mm) × 3-15/16" Height (100 mm)
× 6-5/16" Depth (160 mm)
Weight of the Main Unit: 2.6 kg
Dimensions of the Remote Control Unit:
1-3/4" Width (43.4 mm) × 1/2" Height (12.5 mm)
× 4-1/2" Depth (112.7 mm)
Weight of the Remote Control Unit:
60 g (including battery)
Note:
• Specifications comply with JEITA Standards.
• Specifications and design are subject to change
without notice for further improvement.
10.SPECIFICATIONS
6-3/4" (171 mm)
7" (178 mm)
2" (25mm)
6-5/16" (160mm)
3-15/16"
100 mm
Power Output:
20 W x 4 Channels RMS [4 Ω @
14.4 V ≤ 1 % THD+N]
Signal to Noise Ratio:
84 dBA (reference: 1 W into 4 Ω)

57
NX700
English
INSTALLATION
MANUAL
1. SAFETY PRECAUTIONS
Symbol Identification
This manual uses symbols and icons to indicate
safety precautions and concerns during the
installation procedure. Be sure to carefully read
and understand each precaution prior to
beginning the installation.
CAUTION
CAUTION
This symbol is intended to alert the user to
the presence of important operating
instructions. Failure to heed the instructions
can result in injury or material damage.
Before Use
Installation Precautions
CAUTION
CAUTION
• Do not install the system in the locations
described below. This may cause a fire,
accident or electrical shock:
A location exposed to rain or dust.
An unstable location, or where the system
may fall.
• Do not install this unit in a place exposed to
direct sunlight, heat or a place where the
vent holes or heat radiation holes are
covered.
• When you install the antenna, mount it in a
place where the elements of the antenna do
not protrude beyond the edge of the front,
back, left and right of the vehicle.
If it comes in contact with pedestrians, it
may cause an accident.
INSTALLATION AND WIRE CONNECTION
MANUAL
WARNING
This symbol is intended to alert the user to
the presence of important operating
instructions. Failure to heed the
instructions may result in severe injury or
death.
WARNING
• Confirm the battery voltage of the vehicle
to be installed. This unit is designed only
for vehicles with DC 12V power supply.
• Disconnect the negative terminal of the
battery before connecting wires,
otherwise an electric shock, injury by
short circuit may occur.
Car battery
WARNING
• When installing the unit to a vehicle with
an airbag system, never install it in a
place where it may affect the operation of
the airbag.
• Do not install this unit in the following
locations:
A location interfering with the driver’s
visual range or operation.
A location where the gear shift or brake
pedal are hindered.
A location where passengers are at risk.
An unstable location, or where the
system may fall.
58 NX700
English
INSTALLATION
MANUAL
Installation Notes
CAUTION
CAUTION
• Use only the supplied parts.
If unspecified parts are used, they may
cause damage.
• Any holes made in the body of the vehicle
should be sealed with a silicon adhesive.
If exhaust fumes or water penetrates into
the vehicle, this may cause an accident.
• Fasten the bolts securely when installing
the unit. If the bolts are loose an accident or
malfunction could occur.
Connection Notes
CAUTION
CAUTION
• Verify wires with a digital multi-meter prior
to making any connections. Many new
vehicles use multiplexed and/or low voltage
circuits that can be damaged if a test light
or logic probe is used.
• Connect cables appropriately. If a wrong
connection is made, this may cause a fire or
accident.
• When passing cables through the body of
the vehicle, use non-conductive grommets.
If the coatings of the cables are worn out by
rubbing, this may cause an accident, fire or
a short circuit.
• After wiring cables, fix them with insulation
tape.
• Be sure to switch off the vehicle when
connecting or disconnecting cords to/from
the unit, otherwise an electric shock, injury
or accident may occur.
2. PACKAGE CONTENTS
1 Main unit
2 Quick Start Guide
3 Installation Manual
4 CD-ROM
• Owner’s manual & Installation Manual
• User Manual - Clarion Mobile Map
• User Manual - Bluetooth Connectivity
5 Power supply cord
6 RCA pin cord
7 Bag for accessories
Flat head screw (M5 × 8 mm)...................... 8
Hexagonal bolt (M5 × 8 mm) ....................... 8
Rubber cap (for RCA pin cord) .................. 14
Lead holder.................................................. 3
Double-sided tape
for fastening GPS antenna .......................... 1
8 Remote control unit
9 Battery
0 Finisher
! Warranty card
@ GPS antenna
# Microphone
Note:
• The provided disc (CD-ROM manual) cannot be
played back on this unit.
WARNING
• Please note the position of pipes, tanks
and electrical wirings before installing
the unit into the vehicle; failure in
avoiding these may cause a fire or
malfunction.
WARNING
• Loom all cables according to the
instruction manual, so as not to hinder
operation.
• Wire the connecting cords/cables away
from high temperature areas. If the
coatings of the cables melt, it could
cause an accident/fire by a short circuit.
Take care when wiring in the engine
compartment.
• When wiring the connecting cables in a
vehicle with an airbag system, never feed
the cables through a place where it may
affect the operation of the airbag.
An airbag not operating correctly in an
emergency may cause increased injury.

59
NX700
English
INSTALLATION
MANUAL
3. GENERAL CAUTIONS
• Do not open the case. There are no user-
serviceable parts inside. If you drop anything
into the unit during installation, consult your
dealer or an authorized Clarion service center.
4. CAUTIONS ON
INSTALLATION
• Prepare all articles necessary for installing the
main unit before starting.
• This model features an operation panel that
slides forward.
On some types of cars, the operation panel
may make contact with the dashboard or
gearshift lever, in which cause it cannot be
installed. Before installing, check that the unit
will not hamper operation of the gearshift lever
or obstruct your view before selecting the
installation location. (Figure 2)
• Install the unit within 30° of the horizontal
plane. (Figure 3)
• If you have to do any modification on the car
body, such as drilling holes, consult your car
dealer beforehand.
• Use the included screws for installation. Using
other screws can cause damage. (Figure 4)
• This unit has a fan motor in the left side of the
main unit so as not to raise the temperature in
the main unit. When the fan motor vent is
covered with cords or mounting bracket, it may
cause a malfunction. Be sure not to cover it
when wiring cords. (Figure 5)
Dashboard
Figure 2
Gearshift lever (check
that it does not touch
the LCD.)
Max. 30°
Figure 3
Chassis
Damage
Max. 3 mm (M4 screw)/
Max. 8 mm (M5 screw)
Chassis
Figure 4
Chassis
Figure 5
Fan motor vent

60 NX700
English
INSTALLATION
MANUAL
5. INSTALLING THE MAIN UNIT
This unit is designed for fixed installation in the
dashboard.
• When installing the main unit in NISSAN
vehicles, use the parts attached to the unit and
follow the instructions in Figure 6.
When installing the main unit in TOYOTA
vehicles, use the parts attached to the vehicle
and follow the instructions in Figure 7.
• Wire as shown in Section 10 (see page 65).
• Reassemble and secure the unit in the
dashboard and set the face panel and center
panel.
Installing the Main Unit in a NISSAN Vehicle
Note:
*1Position the face panel with its wide edge at the bottom. Fit the edge into the groove of the main unit.
Mounting Screw Holes (Side View of the Main Unit)
For NISSAN vehicle For TOYOTA vehicle
Figure 6
6-Spacer (thickness: 1 mm)
6-Flat head screw
(M5 × 8)
(attached to the main unit)
Mounting bracket
(1 pair for the left and right sides)
Finisher (*1)
Main Unit

63
NX700
English
INSTALLATION
MANUAL
8. INSTALLING THE GPS ANTENNA
Note:
• The supplied GPS antenna is for installing inside the vehicle. Do not install it outside the vehicle.
• Install the GPS antenna more than 50 cm away from the main unit, other audio devices such as CD player,
and a radar detector. If it is installed near these devices, GPS reception may be impaired.
• To improve the GPS signal reception, install the GPS antenna horizontally on a flat plane.
• Do not wax or paint the cover of the GPS antenna. This may reduce the performance of the GPS antenna.
• Install the GPS antenna at least 10 cm away from the windshield.
• Wipe off the dirt of the mounting surface before installing the GPS antenna.
• Stick the double-sided tape to the bottom face of the GPS antenna.
• Mount the GPS antenna.
Stick it surely on a flat plane of the passenger-side dashboard where GPS signal interruption is
minimized.
• Wire the GPS antenna cord.
Fasten the cord using the cord holders.
(Shows an example in case of the left-hand traffic.)
WARNING
• Do not install the GPS antenna in a place where it may interfere with the operation of the
airbag or hinder the driver’s visual range.
• Do not use the navigation system with the GPS antenna cord cut off. The power cables in the
cord may be short-circuited.
Double-sided
tape
Bottom face of the GPS antenna
GPS antenna
Cord holder

64 NX700
English
INSTALLATION
MANUAL
9. MICROPHONE ACCESSORY
Note:
• Do not leave the microphone of Bluetooth handsfree in the places with wind passing such as air outlet of the
air conditioner, etc. This may cause a malfunction. In addition, if leave it in the places subjected to direct sun,
high temperature can cause distortion, discoloration which may result in a malfunction.
• External microphone has to be connected at the back of the main unit during installation if necessary.
Microphone
Visor Clip Type A
Visor Clip Type B
MIC Holder
Attach the microphone
with the MIC holder or
visor clip

65
NX700
English
INSTALLATION
MANUAL
10. WIRE CONNECTION
Radio antenna jack
Connect to the AUX audio
input terminal * and the iPod
video input terminal.
* Audio connection is required only
when [Analog] is selected for the
iPod output signal (page 42).
or
iPod/iPhone
Connection cable
(included in your
iPod/iPhone)
Connection cable
(CCA-723/CCA-
748)
iPod with video/iPhone
Refer to the
following page.
Gray
Purple
Gray
Green
Black
Red
White
Red
White
Red
White
Yellow
Yellow
White
Red
Yellow
Right
Left
Right
Left
Right
Left
Right
Left
Rear audio
output terminal
Subwoofer output
terminal (MONO 2ch)
Video output terminal
(2-Zone audio
output terminal)
AUX audio input terminal
Rear Vision Camera
terminal
4-Channel Amplifier
Rear Monitor
Wireless Headphone
VTR etc.
USB terminal
Red
White
Black
GPS antenna
jack
Black
Black iPod video input terminal
Connect to the AUX audio/
video input terminal.
Red
AUX video input terminal
Front audio
output terminal
Yellow
Steering wheel
remote control
terminal
CeNET
terminal
Microphone
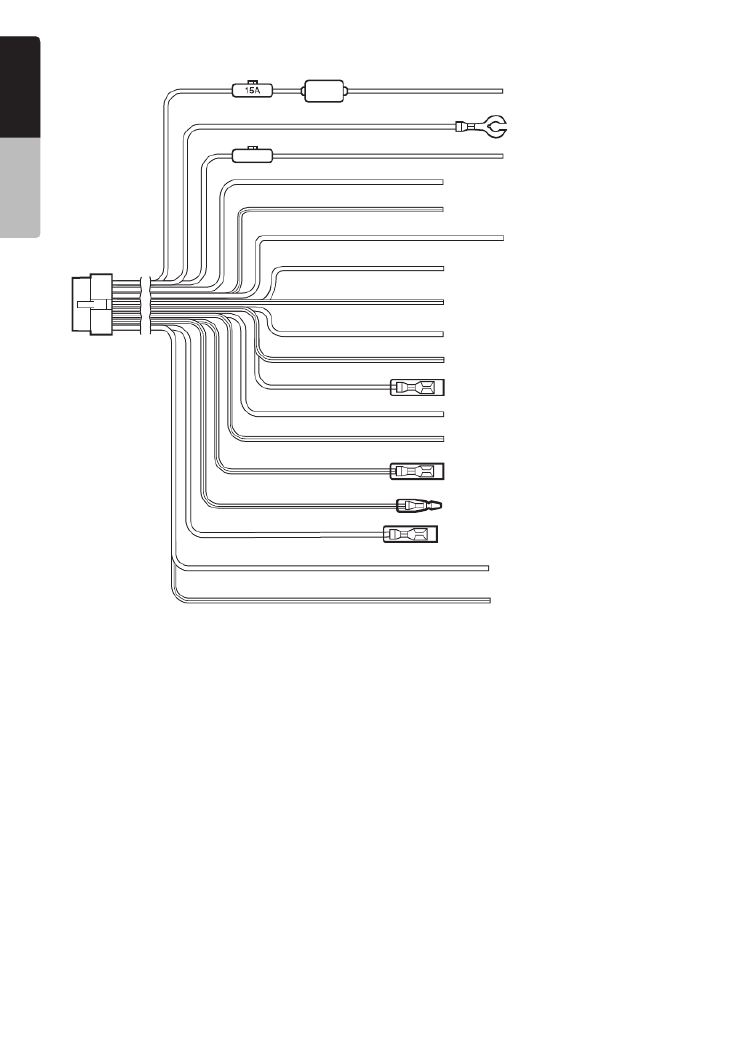
66 NX700
English
INSTALLATION
MANUAL
See next page for how to connect the parking brake cord.
3A
Yellow
Black
+12V main power
Ground
Rear right +
Rear right -
+12V accessory
Front right +
Front right -
Front left +
Front left -
Rear left +
Rear left -
Amplifier turn-on cord
Illumination
Auto antenna
Parking brake cord
Reverse gear cord
Purple
Purple/Black
Red
Gray
Gray/Black
White
White/Black
Green
Green/Black
Blue/White
Orange/White
Blue
Grass-green
Purple/white
Brown No connection
Yellow CeNET bus backup

67
NX700
English
INSTALLATION
MANUAL
●Connecting the parking brake cord
Connect the cord to parking brake lamp ground in the meter panel.
Note:
• Connecting the parking brake cord to lamp ground allows you to watch video images when the parking brake
is engaged.
• When the parking brake cord is not connected, the monitor will not display video images.
• If “Audio Only” appears on the screen just after turning on the ACC power of the car, release the parking
brake while confirming safety, and then engage the parking brake again.
Connecting the Accessories
●Connection to the Rear Vision Camera for vehicle
The Rear Vision Camera for vehicle Camera video input terminal of can be connected to Rear Vision
the RCA pin cord. For detailed information, refer to the instruction sheet or manual for the Rear Vision
Camera.
Note:
• Be sure to connect the reverse gear cord to the vehicle’s relevant terminal.
• Connect the Rear Vision Camera to the RCA pin cord; if not, the screen turns black while the gearshift lever
is in the reverse gear position.
• The power supply box CAA185 (sold separately) is required for connection of the main unit and the Rear
Vision Camera.
●Sirius Tuner and XM Mini-Tuner
Connect these tuners to the CeNET connector via Translator adapter sold separately. For detailed
information, refer to the instruction manual of these tuners.
Parking brake lamp
+ cord to battery
Electro-tap
(sold
separately)
Parking brake
signal cord
Parking brake cord
(Grass-green)
●How to attach the electro-tap
1. Place the Parking brake cord at the stopper,
and fold it back in the direction of the arrow.
2. Pass the Parking brake signal cord through,
and fold it back in the direction of the arrow.
Parking brake
Parking brake
signal cord Parking brake
signal cord
Stopper Parking brake cord
(Grass-green)

2010/1
280-8883-00
QY-5014B
Clarion Co., Ltd.
All Rights Reserved.Copyright © 2010: Clarion Co., Ltd.

User Manual
Bluetooth Connectivity
NX700

Bluetooth Connectivity
Bluetooth Profiles
This system incorporates Bluetooth wireless communications technology.
Devices with Bluetooth capabilities can exchange information over a distance of
about 10 meters (30 feet) without requiring a physical connection.
This system supports Bluetooth profiles as below:
z Hands-free Profile (HFP)
NOTE:
z Not all Bluetooth devices support all profiles. Check the document of a Bluetooth device t
know its Bluetooth capabilities.
z When necessary, you can turn off the Bluetooth radio on this system. (See Section
“Turning On/Off Bluetooth Radio” for more information.)
Connecting a Bluetooth Mobile Phone
Connecting to a Mobile Phone for the First Time
1. Tap the TEL button on the Source screen or tap the on the Navi
menu.
2. Tap Setup Æ Search Phone.
Æ
1
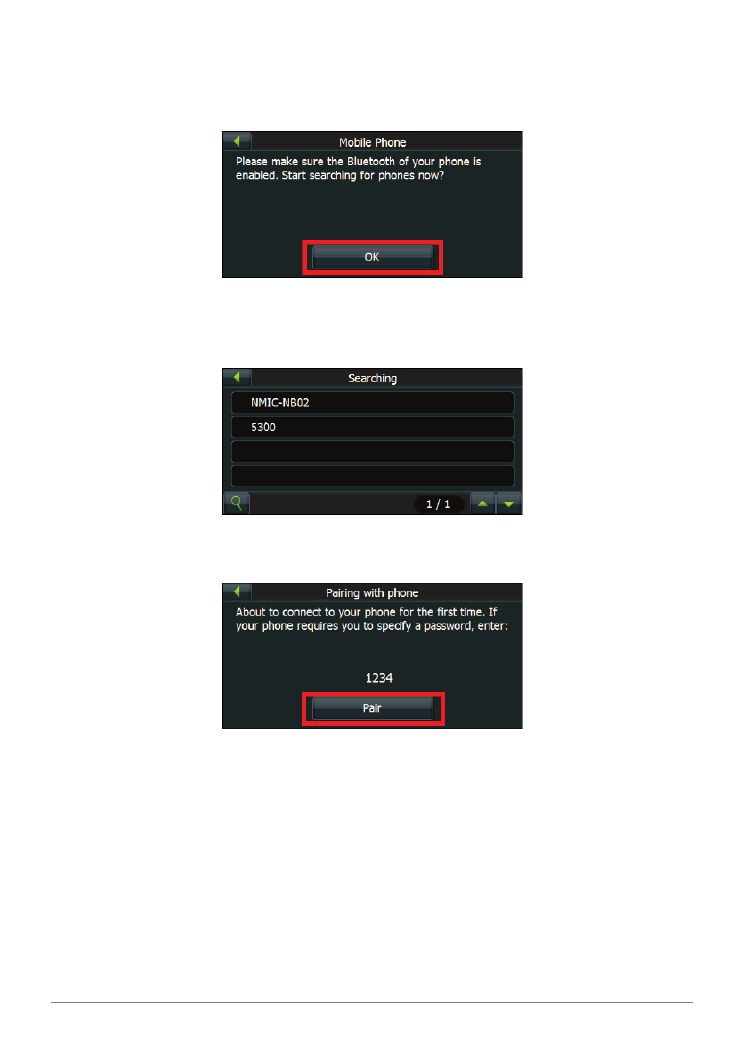
3. Make sure that your Bluetooth mobile phone is in discoverable mode. Tap OK
for the program to search for nearby Bluetooth mobile phones.
4. The screen shows the search result. Tap the mobile phone you want to
connect.
5. Tap Pair to connect this system with the mobile phone.
6. When prompted, enter the passkey 1234 on your mobile phone to establish a
connection. Depending on the mobile phone model, you may need to select
the hands-free service to complete the connection.
7. Tap OK. The Phone Menu screen appears.
2
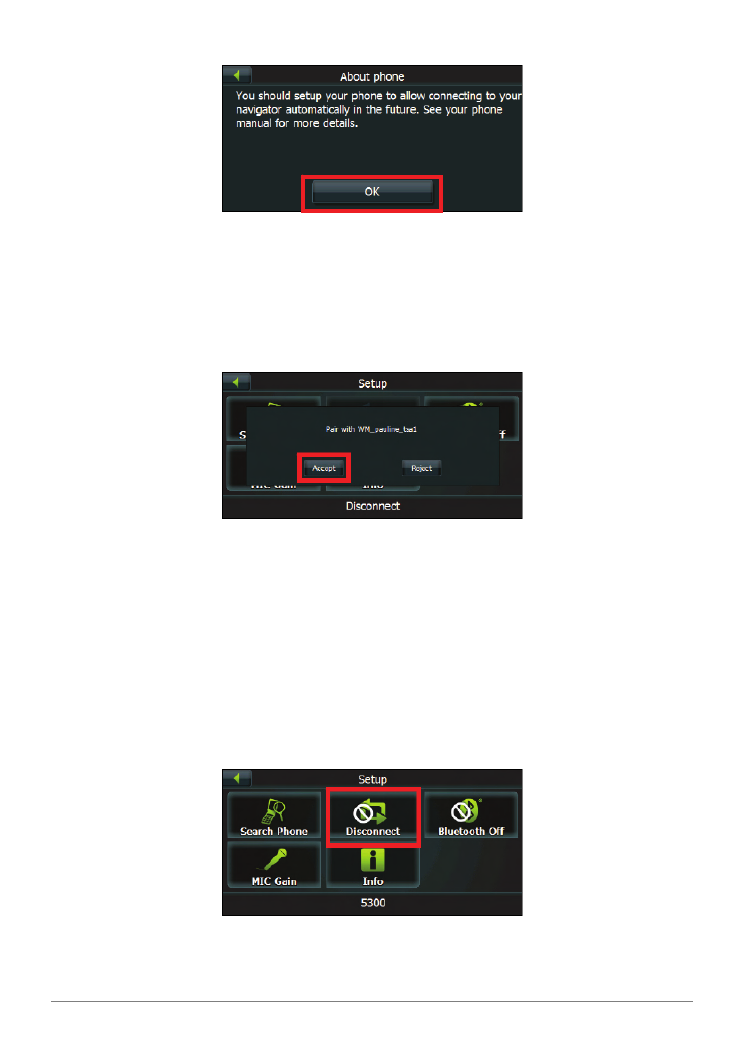
Connecting from a Mobile Phone for the First Time
You will be prompted when a mobile phone wants to connect to the system.
1. Tap Accept on the system to proceed.
2. Enter the same passkey used on the mobile phone and tap Pair on the system to
establish a connection.
Disconnecting and Reconnecting the Mobile Phone
When you pair your mobile phone with this system, a connection is established
between them. The name of the connected device appears at the bottom of the
Setup menu. You can then disconnect or reconnect your mobile phone by tapping
Disconnect or Connect on the Setup menu.
3

Connecting a Paired Mobile Phone
Tap the Connect button on the Phone Menu to connect a paired phone.
Phone Operations
Placing a Call
After pairing with a mobile phone, you can place a call by using the Phonebook,
Call Log and Phone Dialer button on the Phone Menu.
Phone Dialer
1. Tap Phone Dialer on the Phone Menu.
2. Enter the telephone number.
NOTE:
z International calls require a country code to be included in the phone number. On this
system, the country code is separated from the rest of the number sequence by a plus (+)
sign. If you are making an international call, tap on the Dial Pad.
z To delete the last digit entered, tap .
3. Tap .
4
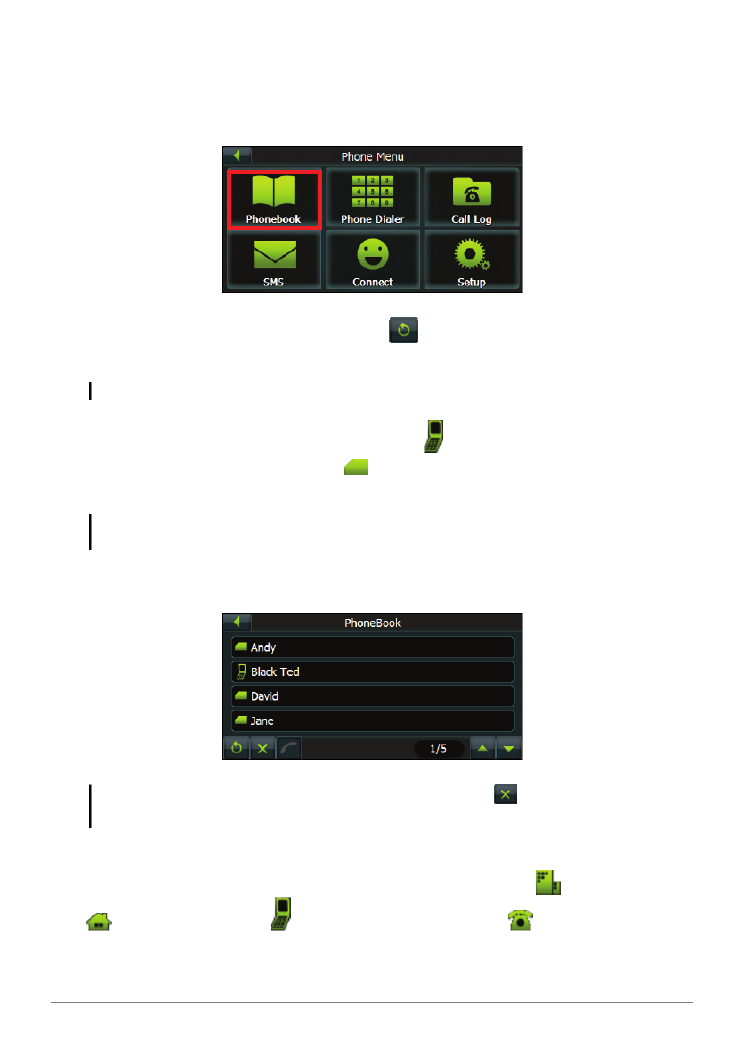
Phone Book
1. Tap Phonebook button on the Phone Menu screen
2. If the contact list does not display, tap to download the contact list from
the mobile phone.
NOTE: Not all mobile phone models support the downloading of such data.
3. The contact list appears on the screen with meaning the contacts saved in
the mobile phone’s memory and meaning the contacts saved in the SIM
card.
NOTE: Not all mobile phone models support the downloading of the data saved in the
phone’s memory or the SIM Card.
Select a contact to place a call.
NOTE: You can clear the downloaded contact list by tapping . Doing so does not delete
the data on the mobile phone.
4. When a contact has more than one phone number, tapping the contact opens the
details screen. Various numbers appear on the screen with meaning work,
meaning home, and meaning mobile phone and meaning fax.
Tap the phone number to place a call.
5

NOTE: If you need to input other numbers during a call, such as an extension number, tap
Phone Dialer on the Phone Menu to open the keypad and tap the digits.
Call Log
1. Tap Call Log on the Phone Menu.
2. The call history appears on the screen with meaning incoming calls and
missed calls and meaning outgoing calls.
3. To call a number in your call history, tap the number.
4. The details of the call display on the screen such as name, number, date, and
time. Depending on your mobile phone model, not all information will be
displayed.
5. Tap .
6

NOTE: If you need to input other numbers during a call, such as an extension number, tap
Phone Dialer on the Phone Menu to open the keypad and tap the digits.
Redialing a Recently Dialed Number
To make a call using a recently dialed number:
1. Do one of the following:
z When in Phonebook, tap .
z When in Call Log, tap .
2. Tap .
7

Receiving a Call
After pairing with a mobile phone, this system will ring and display the incoming
call screen when there is an incoming call.
To receive the call, tap . To reject the call, tap .
Operations during a Call
During a phone call:
z If you need to browse the phonebook or the message, tap and then tap
Phonebook or SMS. You cannot refresh the data.
z If you need to input other numbers, such as an extension number, use the dial
pad and tap the digits.
z Tap to mute your sound so that the other party cannot hear you. To end
the mute mode, tap the same button again.
z Tap to end the call.
Viewing Messages
After pairing with a mobile phone, you can browse sent and received messages.
NOTE: You cannot send messages via this system.
1. Tap SMS on the Phone Menu.
8

2. If the messages do not display, tap to download the messages from the
mobile phone.
NOTE: Not all mobile phone models support the downloading of such data.
3. Select a message to view the full message.
The screen displays the sender, date and the message. Depending on your
mobile phone model, not all information will be displayed.
Æ
NOTE: You can clear the downloaded messages by tapping . Doing so does not delete
the data on the mobile phone.
Using the Shortcuts
Once a Bluetooth connection has been established, a shortcut will be saved. You
can then use the shortcut to reconnect a particular device without searching and
entering the passkey again.
1. Tap the Connect button on the Phone Menu.
9

2. Select the device you want to connect.
3. Tap .
NOTE:
z The shortcuts will be cleared if you shut down the system.
z You can delete a selected shortcut by tapping .
Turning On/Off Bluetooth Radio
Whenever you start the Bluetooth, the Bluetooth radio is turned on.
To turn off Bluetooth radio, tap the Setup button on the Phone Menu and tap
Bluetooth Off. To turn on Bluetooth radio, tap Bluetooth On button.
Æ
10
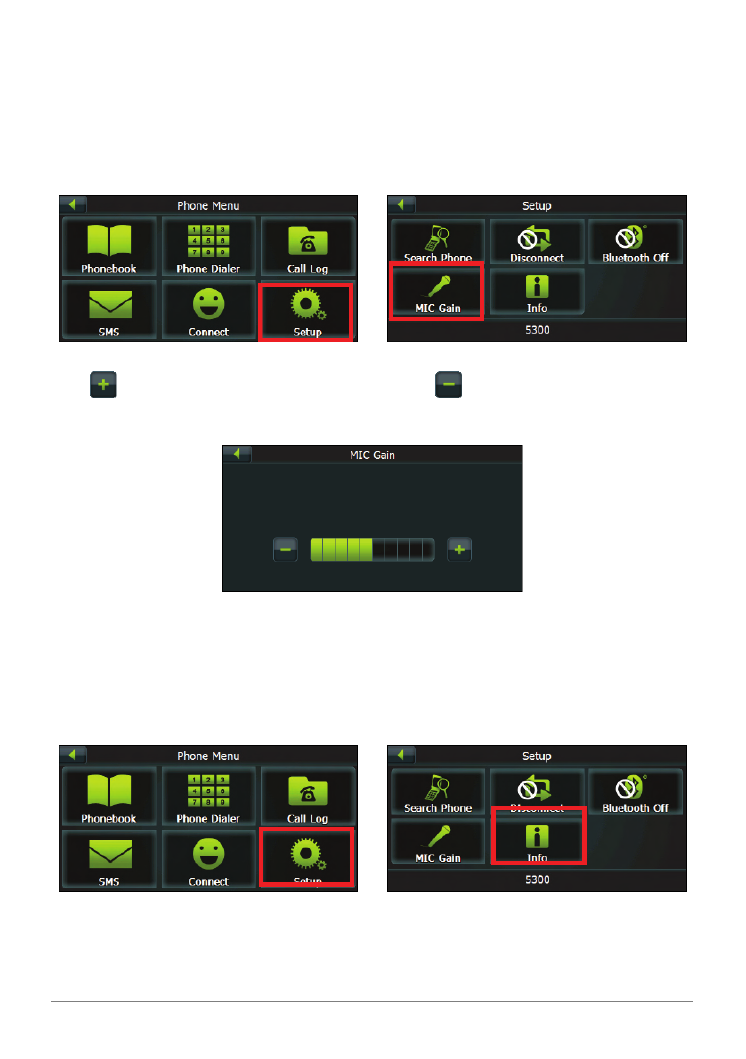
MIC Gain
You can adjust the microphone volume for hands-free calling.
Tap the Setup button on the Phone Menu and tap MIC Gain.
Æ
Tap to increase the microphone volume; tap to decrease the microphone
volume.
Info
To view the application version, address and name of the Bluetooth of the system,
tap the Setup button on the Phone Menu and tap Info.
Æ
11

Regulatory Information
Bluetooth QD ID B016101
Revision: R00
(11/2009)
Trademarks
The Bluetooth word mark and logo are owned by the Bluetooth SIG, Inc. All other
brand and product names are trademarks or registered trademarks of their
respective companies.
Note
The information in this manual is subject to change without notice.
12

Copyright note
The product and the information contained herein is subject to change without prior notific
This manual may not, in whole or in part, be reproduced or transmitted in any form either
mechanically, including photocopying and recording, without the express written consent
© 2009 – Clarion.
Data Source © 2006 Tele Atlas N.V.
All rights reserved.

Thank you for choosing the Clarion NX700 as your in-car navigator. This documen
description of the software.
You can easily discover Clarion Mobile Map while you are using it; however, we still rec
read this manual to understand the screens and the features of Clarion Mobile Map.

2.3 Using the map ......................................................................................................................... 13
2.3.1 Checking the details of a map location ..........................................................................................13
2.3.2 Manipulating the map .........................................................................................
2.3.3 Lane information and Signposts.........................................................................
2.3.4 Status information and hidden controls on the map ...........................................
2.3.5 Using the Cursor (the selected map location) ....................................................
2.4 Clarion Mobile Map concepts ........................................................................
2.4.1 Smart Zoom .......................................................................................................
2.4.2 Position markers.................................................................................................
2.4.2.1 Current GPS position and Lock-on-Road .................................................................
2.4.2.2 Returning to normal navigation ................................................................................
2.4.2.3 Selected location (Cursor) ........................................................................................
2.4.2.4 Original position in the Cursor menu .......................................................................
2.4.3 Daytime and night color profiles .......................................................................
2.4.4 Color scheme in tunnels .....................................................................................
2.4.5 Route calculation and recalculation ....................................................................
2.4.6 Itinerary ..............................................................................................................
2.4.7 Track Logs ..........................................................................................................
2.4.8 Route demonstration ...........................................................................................
2.4.9 POI (Points of Interest) ......................................................................................
2.4.10 Road Safety Cameras ........................................................................................
2.4.10.1 Camera types ..........................................................................................................
2.4.10.2 Camera directions...................................................................................................
2.4.11 Speed limit warning ..........................................................................................
3 Navigating with Clarion Mobile Map ........................................................
3.1 Selecting the destination of a route ................................................................
3.1.1 Selecting the Cursor as the destination ...............................................................
3.1.2 Entering an address or part of an address ...........................................................
3.1.2.1 Entering an address ..................................................................................................
3.1.2.2 Entering an address if house numbering is restarted .................................................
3.1.2.3 Entering an address without knowing the district/suburb .........................................

3.2 Creating a multi-point route (inserting a via point) ............................................................... 43
3.3 Creating a multi-point route (appending a new destination) ................................................. 44
3.4 Editing the route .............................................................................................
3.5 Viewing the entire route on the map (Fit-to-Screen) ......................................
3.6 Watching the simulation of the route ..............................................................
3.7 Enabling Safety Mode ....................................................................................
3.8 Pausing the active route .................................................................................
3.9 Deleting the next via point from the route .....................................................
3.10 Deleting the active route...............................................................................
3.11 Using Track Logs .........................................................................................
3.12 Saving the active route .................................................................................
3.13 Loading a saved route ..................................................................................
4 Reference Guide (Advanced mode) ...........................................................
4.1 Map screen .....................................................................................................
4.1.1 Icons on the map ................................................................................................
4.1.1.1 GPS position quality and Vehicle type indicator ......................................................
4.1.1.2 Status indicator strip .................................................................................................
4.1.1.3 Phone call in progress ...............................................................................................
4.1.1.4 Next two route events (Turn Preview fields) ............................................................
4.1.2 Objects on the map .............................................................................................
4.1.2.1 Streets and roads ......................................................................................................
4.1.2.2 3D object types ........................................................................................................
4.1.2.3 Elements of the active route .....................................................................................
4.1.3 Detour menu ......................................................................................................
4.1.4 Cursor menu ........................................................................................................
4.1.5 Position menu ....................................................................................................
4.1.6 Route Information screen ...................................................................................
4.1.7 Trip Information screen ......................................................................................
4.1.7.1 Trip Computer screen ...............................................................................................
4.1.8 Quick menu ........................................................................................................

4.4.5 Manage POIs .................................................................................................................................. 73
4.4.6 Manage Saved Search Criteria .......................................................................................................74
4.4.7 User Data Management ......................................................................................
4.5 Settings menu .................................................................................................
4.5.1 Map Screen settings ...........................................................................................
4.5.2 Sound settings ....................................................................................................
4.5.3 Route Planning options ......................................................................................
4.5.4 Regional settings .................................................................................................
4.5.5 Navigation settings .............................................................................................
4.5.6 Warning settings .................................................................................................
4.5.7 Menu settings .....................................................................................................
4.5.8 Device settings ....................................................................................................
4.5.9 Track Log settings ...............................................................................................
5 Glossary ......................................................................................................
6 End User License Agreement .....................................................................

screen You do not need this to access the basic navigation functions. Tap and keep
pressing the following buttons to reach extra functions:
x Tap and hold on the Map screen: you can s
maximum zoom level of Smart Zoom.
x Tap and hold any of the butt
you can set or reset the zoom value of the button (2D
x Tap and hold any of the butt
you can set or reset the tilt and zoom values of the but
x Tap and hold on list and menu screens: t
appears.
x Tap and hold any of the , , ,
buttons on the Map screen: you can rotate, tilt
continuously.
x Tap and hold on keyboard screens: you
characters quickly.
x Tap and hold or in long lists:
continuously.
x Tap and hold the buttons in the Quick menu to open s
the function of the button from the Manage menu or th

4. Select whether to start the program in Simple mode or in Advanced mode. Later you can switch
between the two operating modes in Settings.
5. Read and accept the road safety warning.
After this, the Navigation menu appears and you can start using Clarion Mobile Map.
The Navigation menu in Simple mode:
The Navigation menu in Advanced mode:
The typical way of using Clarion Mobile Map is to select a destination, and start nav
select your destination in the following ways (not all of them are available in Simple mode
x Use the selected location on the map (the Cursor) (page 31).
x Enter a full address or a part of an address, for example a street name without a hou
the names of two intersecting streets (page 32).
x Enter an address with ZIP code (page 38). This way you do not need to select the n
and the search for street names might be faster as well.
x Use a coordinate (page 42)
x Use a saved location:
x a Favorite (page 40)
x a POI (page 40)
x the History of previously set destinations and waypoints (page 42)

2.2 Buttons and other controls on the screen
When you are using Clarion Mobile Map, you usually tap buttons on the touch screen.
You only need to confirm selections or changes in Clarion Mobile Map if the application n
needs to perform a major reconfiguration, or you are about to lose some of your d
Otherwise, Clarion Mobile Map saves your selections and applies the new settings with
as soon as you use the controls.
Type Example Description H
Button
Tap it to initiate a function, to
open a new screen, or to set a
parameter.
Icon
Shows status information.
List
When you need to select from
several options, they appear
in a list.
Slider
When a feature has several
different unnamed values,
Clarion Mobile Map shows an
indicator on a gauge that
displays and sets a value from
a range.

2.2.1 Using keyboards
You only need to enter letters or numbers in Clarion Mobile Map when you cannot avoid
with your fingertips on the full-screen keyboards and you can switch between various k
for example ABC, QWERTY, or numerical.
Task Details
Switching to another keyboard layout,
for example from an English
QWERTY keyboard to a Greek
keyboard
Tap , and select from
keyboard types.
Clarion Mobile Map remembers your last k
offers it the next time you need to enter data.
Correcting your entry on the keyboard
Tap to remove the unneeded character
Tap and hold the button to delete the entire inp
Entering a space, for example
between a first name and a family
name or in multi-word street names Tap .
Entering lowercase or capital letters
Tap to cycle through entering low
capitals or all capitals.
Entering symbols
Tap to switch to a keyboard offering sy
Finalising the keyboard entry
Tap .
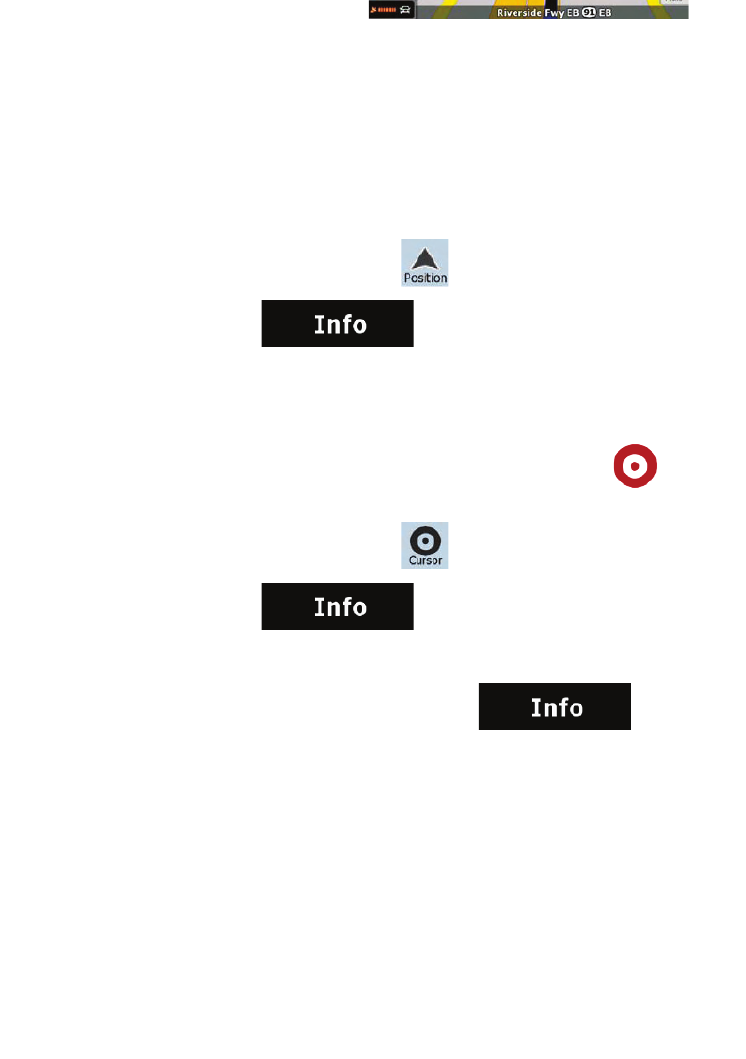
For further information about the map screen, see page 51.
2.3.1 Checking the details of a map location
x If you are interested in the details of your current position during navigation:
1. Check the bottom line of the map. It shows the current street and house num
information.
2. For further details, tap to open the Position menu.
3. Tap . The address, the coordinate and the list of nearb
displayed.
x You can check the details of any other location by selecting it on the map:
1. Tap the map anywhere to open the map control buttons.
2. Tap the desired location on the map. The Cursor ( ) appears ther
location is displayed at the bottom of the map.
3. For further details, tap to open the Cursor menu.
4. Tap . The address, the coordinate and the list of nearb
displayed.
x It is even easier if you select the desired point in the Find menu. Then the Cursor m
automatically. You only need to tap the button.

Viewing modes
, ,
Gives you the following map perspectives in Clarion Mobile
Map:
x classic top-down view (2D),
always faces North
x top-down view (2D), the top of
in the current driving direction
x perspective view (3D) the top
points in the current driving dire
The icon always shows the mode the b
you are in 3D mode, you can see the
need to tap it to switch to 2D mode.
Smart Zoom
Clarion Mobile Map can automatically
the map and give you the optimal view:
x When you are approaching a
Map zooms in and raises the v
easily recognize your maneuver
x If the next turn is at a distance
zooms out and lowers the view
the road in front of you.
Tap this button once to enable Smart
Tap&hold the button to set the zoom l
Returning to normal
navigation (back to
the GPS position
with automatic map
rotation)
Tap this button to move the map back
position. If the map has been rota
rotation is also re-enabled.
Zoom preset
buttons (available in
Advanced mode
only)
Tap one of the preset buttons to set
predefined value. Smart Zoom is disa
are available in 2D mode.
Tap&hold any of the buttons to set
zoom level, or to reset it to its original v

available on the following screens:
x Plan on Map screen: When you have an active route,
you can display it in its full leng
x Track Information screen: A
displayed in its full length on the
End Call
This button is displayed only during a
button to hang up.
Repeat Voice
Instruction Tap this button to repeat the current vo
distance is updated to always describe th
2.3.3 Lane information and Signposts
When navigating on multilane roads, it is important to take the appropriate lane in or
recommended route. If lane information is available in the map data, Clarion Mobile
lanes and their directions using small arrows either at the bottom or at the top of the map
these arrows can be modified in Map Screen settings). Arrows in yellow represent the lan
take.
Where there is additional information available, signposts substitute arrows. Signp
displayed at the top of the map. The color and style of the signposts are similar to the rea
see above road or by the roadside. They show the available destinations and the number
lane leads to.
All signposts look similar when cruising (when there is no recommended route). When na
only that signpost is displayed in vivid colors that points to the lane(s) to be taken; all oth
out.

Track log recording is disabled.
The Bluetooth radio is switched off.
The Bluetooth radio is turned on, but no telephone is connected.
There is an error in the Bluetooth connection.
Clarion Mobile Map is connected to a telephone as a handsfree set via Blu
A phone call is in progress over the Bluetooth connection.
The following information can be seen in the three data fields shown on the map screen.
open the Trip Information screen where you can select which values to be shown in these t
When there is no active route, these fields show the following information: current spee
the current time of day.
Icon Type More information
Compass Shows the direction of your heading bo
automatically rotated (3D) and when the
North (2D).
Speed information There are speed values that can be shown
x Current speed
x Speed limit on the current road
Time information There are time values that can be shown:
x Current GPS time
x Time remaining to reach the destin
x Time remaining to reach the next
Termékspecifikációk
| Márka: | Clarion |
| Kategória: | autórádió |
| Modell: | NX700 |
Szüksége van segítségre?
Ha segítségre van szüksége Clarion NX700, tegyen fel kérdést alább, és más felhasználók válaszolnak Önnek
Útmutatók autórádió Clarion

12 Január 2025
12 Január 2025
17 Augusztus 2024
16 Augusztus 2024
14 Augusztus 2024
14 Augusztus 2024
14 Augusztus 2024
14 Augusztus 2024
14 Augusztus 2024
13 Augusztus 2024
Útmutatók autórádió
- autórádió Sony
- autórádió Nedis
- autórádió LG
- autórádió Grundig
- autórádió Philips
- autórádió Pioneer
- autórádió SilverCrest
- autórádió Panasonic
- autórádió JVC
- autórádió Opel
- autórádió AEG
- autórádió Volvo
- autórádió Harman Kardon
- autórádió Hyundai
- autórádió Mercedes-Benz
- autórádió Hifonics
- autórádió Medion
- autórádió JBL
- autórádió VDO
- autórádió Ford
- autórádió Boss
- autórádió Fiat
- autórádió Conceptronic
- autórádió Technaxx
- autórádió Aiwa
- autórádió Skoda
- autórádió Kenwood
- autórádió Clatronic
- autórádió Renkforce
- autórádió Sencor
- autórádió Xblitz
- autórádió Telefunken
- autórádió Alpine
- autórádió Roadstar
- autórádió Smart
- autórádió Parrot
- autórádió Cobra
- autórádió Nextbase
- autórádió Crunch
- autórádió Denver
- autórádió Trevi
- autórádió Elta
- autórádió Ground Zero
- autórádió Audio-Technica
- autórádió Daewoo
- autórádió Muse
- autórádió SPC
- autórádió Auna
- autórádió Mac Audio
- autórádió Overmax
- autórádió Mini
- autórádió Ultimate
- autórádió Scott
- autórádió McIntosh
- autórádió Manta
- autórádió Blaupunkt
- autórádió Deaf Bonce
- autórádió Magnat
- autórádió AKAI
- autórádió Jensen
- autórádió Pyle
- autórádió Sanyo
- autórádió Telestar
- autórádió Lenco
- autórádió Stinger
- autórádió ECG
- autórádió Hertz
- autórádió Zenec
- autórádió Rockford Fosgate
- autórádió Krüger&Matz
- autórádió Dual
- autórádió Orion
- autórádió Varta
- autórádió Kicker
- autórádió Focal
- autórádió MB Quart
- autórádió OneConcept
- autórádió Xomax
- autórádió Orava
- autórádió Emphaser
- autórádió Majestic
- autórádió REVO
- autórádió Audison
- autórádió Tevion
- autórádió Caliber
- autórádió Brigmton
- autórádió Maginon
- autórádió Marquant
- autórádió Audiosonic
- autórádió Vieta
- autórádió Pure
- autórádió Audiovox
- autórádió Tokai
- autórádió Clas Ohlson
- autórádió Naxa
- autórádió Boston Acoustics
- autórádió Adcom
- autórádió Autovision
- autórádió Lanzar
- autórádió MT Logic
- autórádió Kunft
- autórádió Shuttle
- autórádió Fusion
- autórádió Norauto
- autórádió Axton
- autórádió Soundstream
- autórádió DLS
- autórádió VDO Dayton
- autórádió Macrom
- autórádió Becker
- autórádió Watssound
- autórádió Tamashi
- autórádió Scion
- autórádió Sendai
- autórádió Phonocar
- autórádió US Blaster
- autórádió Eltax
- autórádió RTO
- autórádió Sevic
- autórádió Cartronix
- autórádió Spectron
- autórádió Mtx Audio
- autórádió Dension
- autórádió Multilaser
- autórádió Raveland
- autórádió ESX
- autórádió RetroSound
- autórádió Lark
- autórádió Planet Audio
- autórádió VW
- autórádió Rodek
- autórádió Toxic
- autórádió Eclipse
- autórádió Voxx
- autórádió SoundMAX
- autórádió Impulse
- autórádió Twister
- autórádió Mystery
Legújabb útmutatók autórádió

10 Április 2025

6 Április 2025

30 Március 2025

28 Március 2025

21 Március 2025
21 Március 2025
16 Január 2025

16 Január 2025
16 Január 2025
16 Január 2025