Használati útmutató Rotel RSX-1067
Olvassa el alább 📖 a magyar nyelvű használati útmutatót Rotel RSX-1067 (115 oldal) a Vevő kategóriában. Ezt az útmutatót 14 ember találta hasznosnak és 2 felhasználó értékelte átlagosan 4.5 csillagra
Oldal 1/115

Synology NAS User's Guide
Based on DSM 4.3
Document ID
Syno_UsersGuide_ 20130906NAS_

2
Table of Contents
Chapter 1: Introduction
Chapter 2: Get Started with Synology DiskStation Manager
Install Synology NAS and DSM ............................................................................................................................................. 8
Log into Synology DiskStation Manager .............................................................................................................................. 8
DiskStation Manager Appearance ........................................................................................................................................ 9
Manage DSM with the Main Menu 11.....................................................................................................................................
Manage Personal Options ................................................................................................................................................... 12
Chapter 3: Modify System Settings
Change DSM Settings .......................................................................................................................................................... 14
Change Network Settings .................................................................................................................................................... 16
Modify Regional Options ...................................................................................................................................................... 18
Use Energy Saving Features 19..............................................................................................................................................
Chapter 4: Manage Storage Space
Volumes and Disk Groups ................................................................................................................................................... 21
Repair Volumes or Disk Groups 23.........................................................................................................................................
Change RAID Type ............................................................................................................................................................... 23
Expand Volumes or Disk Groups ........................................................................................................................................ 24
Data Scrubbing ...................................................................................................................................................................... 25
SSD TRIM .............................................................................................................................................................................. 25
iSCSI Targets and LUNs ...................................................................................................................................................... 25
Manage Hard Disks .............................................................................................................................................................. 27
SSD Cache 27............................................................................................................................................................................
Hot Spare ............................................................................................................................................................................... 28
Manage External Disks ........................................................................................................................................................ 28
Chapter 5: Manage Storage Space (for RS10613xs+)
Overview 29................................................................................................................................................................................
Manage RAID Groups .......................................................................................................................................................... 29
Change RAID Types ............................................................................................................................................................. 31
Repair RAID Groups ............................................................................................................................................................. 31
Expand RAID Groups ........................................................................................................................................................... 31
Data Scrubbing ...................................................................................................................................................................... 31
Manage Volumes .................................................................................................................................................................. 32
Repair Degraded Volumes 32..................................................................................................................................................
SSD TRIM .............................................................................................................................................................................. 33
Manage iSCSI LUNs............................................................................................................................................................. 33
Manage iSCSI Targets ......................................................................................................................................................... 34
Manage Hard Disks .............................................................................................................................................................. 34
Hot Spare ............................................................................................................................................................................... 34
Storage Overview .................................................................................................................................................................. 34

3Table of Contents
SSD Cache 35............................................................................................................................................................................
Manage External Disks ........................................................................................................................................................ 35
Chapter 6: Access your Synology NAS from the Internet
Use the EZ-Internet Wizard ................................................................................................................................................. 36
Set Up Port Forwarding Rules for Router .......................................................................................................................... 37
Register DDNS for the Synology NAS ............................................................................................................................... 38
Access DSM Services via QuickConnect .......................................................................................................................... 39
Set up VPN Connection ....................................................................................................................................................... 40
Chapter 7: Enhance Internet Security
Prevent Unauthorized Connection with Firewall ............................................................................................................... 41
Control the Outgoing Traffic of Services ............................................................................................................................ 42
Prevent Attacks over the Internet 43.......................................................................................................................................
Automatically Block Suspicious Login Attempts ............................................................................................................... 44
Chapter 8: Set Up File Sharing
Enable File Sharing Protocols for All Platforms ................................................................................................................ 45
Join Synology NAS to Directory Service ............................................................................................................................ 46
Host LDAP Service with Directory Server 47.........................................................................................................................
Manage Users and Groups.................................................................................................................................................. 48
Set Up Shared Folders ......................................................................................................................................................... 50
Define Windows ACL Privileges for Shared Folder .......................................................................................................... 53
Index Shared Folder Contents ............................................................................................................................................ 53
Chapter 9: Access Files from Anywhere
Access Files within the Local Network ............................................................................................................................... 54
Access Files via FTP ............................................................................................................................................................ 56
Access Files via WebDAV ................................................................................................................................................... 57
Sync Files via Cloud Station ................................................................................................................................................ 58
Access Files via File Station ................................................................................................................................................ 59
Chapter 10: Back Up Data
Back Up Computer Data ...................................................................................................................................................... 62
Back up Data on Synology NAS or iSCSI LUN 64................................................................................................................
Sync Shared Folder Contents between Synology NAS ................................................................................................... 66
Back up Synology NAS Data with Time Backup 66..............................................................................................................
Back up Data on USB Device or SD Card......................................................................................................................... 67
Back up Data to Amazon Glacier ........................................................................................................................................ 67
Chapter 11: Host Websites, Email Server, and Print Server
Use Web Station to Host Websites 68....................................................................................................................................
Host Mail Server .................................................................................................................................................................... 69
Install Mail Station to Enable Webmail Service 70................................................................................................................
Set Synology NAS as Print Server ..................................................................................................................................... 71
Chapter 12: Discover Various Applications with Package Center
What Package Center Offers 72..............................................................................................................................................
Install or Buy Packages ........................................................................................................................................................ 72

4Table of Contents
Chapter 13: Share Photos, Videos, and Blogs with Photo Station
Install Station Photo .............................................................................................................................................................. 73
Enable Personal Photo Station ........................................................................................................................................... 74
Photo Station Features ......................................................................................................................................................... 74
Chapter 14: Play Music with Audio Station
Install Station Audio .............................................................................................................................................................. 76
Manage Audio Station Settings ........................................................................................................................................... 77
Audio Station Features ......................................................................................................................................................... 77
Chapter 15: Organize Videos and Record TV Programs with Video Station
Install Video Station .............................................................................................................................................................. 79
Before You Start .................................................................................................................................................................... 80
Video Station Features ......................................................................................................................................................... 80
Chapter 16: Download Files with Download Station
Install Download Station ....................................................................................................................................................... 82
Download Station Features 83.................................................................................................................................................
Chapter 17: Safeguard Your Environment with Surveillance Station
Install Surveillance Station ................................................................................................................................................... 86
Manage Surveillance Station Settings 86...............................................................................................................................
Watch Live View .................................................................................................................................................................... 88
Work with Timeline ................................................................................................................................................................ 90
Chapter 18: Provide Nonstop Service with Synology High Availability
Understand Synology High Availability .............................................................................................................................. 91
Install Synology High Availability 92........................................................................................................................................
System Requirements .......................................................................................................................................................... 92
Create a Availability Cluster -High ....................................................................................................................................... 93
More Information ................................................................................................................................................................... 93
Chapter 19: Create a Domain Name Server with DNS Server
Install DNS Server 94................................................................................................................................................................
Before You Start .................................................................................................................................................................... 94
DNS Server Features ........................................................................................................................................................... 95
Chapter 20: Manage Media Server and iTunes Service
Install DLNA Media Server 96..................................................................................................................................................
Manage DLNA Media Server 97..............................................................................................................................................
Install iTunes Server ............................................................................................................................................................. 97
Manage iTunes Server ......................................................................................................................................................... 98
Chapter 21: Perform Advanced Management Tasks
Check System Information ................................................................................................................................................... 99
View System Logs 101..............................................................................................................................................................
Monitor System Resources ................................................................................................................................................ 102
Manage Bluetooth Devices ................................................................................................................................................ 103
Automate Tasks 103..................................................................................................................................................................
Update DSM 103........................................................................................................................................................................

5Table of Contents
Receive Event Notifications ............................................................................................................................................... 104
Access Applications with Independent Login .................................................................................................................. 105
Index Multimedia Files for Applications ............................................................................................................................ 105
Reset Admin Password ...................................................................................................................................................... 106
Restore Synology NAS to Factory Defaults 106....................................................................................................................
Reinstall Synology NAS ..................................................................................................................................................... 107
Enable SNMP Service ........................................................................................................................................................ 107
Enable Terminal Services .................................................................................................................................................. 107
Chapter 22: Communicate with Mobile Devices
Manage DSM Settings with DSM mobile ......................................................................................................................... 108
Use iOS, Android, and Windows Apps 108............................................................................................................................
Use Other Mobile Devices ................................................................................................................................................. 109

6
Cha pt e r
1
Chapter 1: Introduction
Congratulations on your purchase of Synology functional Network -NAS. Synology NAS is a multi -Attached
Storage server, serving -as a file sharing center within your Intranet. Moreover, it is specially designed for a
variety of purpose , allowing you to perform the following tasks with the web based Synologys - DiskStation
Manager : (DSM)
Store and Share Files over the Internet
Windows users, Mac users, and Linux users can easily share files within the Intranet or through the Internet.
Unicode language support makes sharing files in different languages from Synology NAS simple.
Manage Files with Web-Based File Station
One of Synology iskStation Manager’s applications, File Station, can make it possible for users to manage their D
files on Synology NAS easily through a web interface. You can also access the files stored on Synology NAS with
a mobile device.
Transfer Files via FTP
Synology NAS provides FTP service with bandwidth restriction and anonymous login. To transfer data safely,
FTP over SSL/TLS and uninvited IP auto block are also available.-
Sync Files with Cloud Station
Cloud Station is a file sharing service that allows your Synology NAS to become a file sync center to sync files
between multiple client computers. With the Cloud Station application installed on your computers, you can
simply drop your office file to a folder on your office computer, and then open the same file automatically synced
to your laptop.
Share Storage Capacity as iSCSI LUNs
You can designate portion of your Synology NAS volume space to be an iSCSI LUN, which will allow the iSCSI
initiator to access the space like a local disk.
Back Up Files on Computer and Server
Synology NAS provides various backup solutions to back up computer data to Synology , back up NAS
Synology data NAS or iSCSI LUN to an external hard drive, another Synology compatible server, -NAS, an rsync
Amazon S3 server, HiDrive backup server, etc.
Enjoy Entertainment Content on the Server
Download Station allows you to download files from the Internet through BT, FTP, HTTP, eMule and NZB to
Synology NAS. The Media Server and iTunes support allows computers or DMA devices within LAN to playback
multimedia files on Synology NAS 1
With the USBCopy or SDCopy function, you can press the Copy button on your Synology NAS to instantly copy
files from a camera or SD card to Synology .NAS
.
2
---------
1 For recommended peripheral models, including hard drive, USB printer, DMA, and UPS, please visit
www.synology.com.
2 USBCopy or SDCopy is supported on specific models only. Visit www.synology.com . for more information

Synology NAS User's Guide
Based on DSM 4.3
7Chapter 1: Introduction
Organize Videos with Video Station
Video Station allows you to organize your collection of movies, TV shows, and home videos into a media platform
on which you can watch and play video clips, live stream and record digital TV programs with a USB DTV dongle
plugged into your Synology NAS, view and edit video metadata whose information is retrieved automatically from
the Internet. ou can also stream videos to your iPhone or iPad for playback. Y
Share Photos, Videos, and Blogs with Photo Station
Photo Station gives you the freedom to share photos and videos over the Internet without complicated upload
steps. Album control ensures the content is shared with the right persons. Visitors can leave comments for your
photos. Furthermore, a brand new blogging system is integrated for you to easily share your life and thoughts
over the Internet.
Enjoy Music Anytime and Anywhere
Audio Station allows you to listen to music stored on the Synology , from a connected iPod, or even stream NAS
Internet Radio stations. In addition, you can stream music from the Synology NAS with a web browser over the
Internet.
Host Websites
The Virtual Host feature allows you to host up to 30 websites using Web Station, with PHP and MySQL
supported.
Record Videos with IP Cameras
Surveillance Station allows you to manage, view, and record videos from multiple IP cameras over the network.
By accessing the web based management interface of Surveillance Station, you can watch the real time image - -
the camera is monitoring, and record videos continuously, in motion detection mode, or in alarm recording mode.- -
Discover More Apps with Package Center
Package Center brings intuitiveness and convenience for users to easily install and update a variety of
applications (which are packed into packages). Just browse all available applications and select the ones that
best suit your needs. All can be done with just a few clicks.
Print Server
USB or network printers connected to your Synology NAS can be shared by client computers over the local area
network. AirPrint support allows you to print to the printer from an iOS device, Google Cloud Print support while
allows you to print to the printer when you are using Google products and services.
1
Provide Centralized Authentication with RADIUS Server
Remote Authentication Dial In User Service (RADIUS) is a network protocol that provid- es centralized
authentication, authorization, and accounting for wired or wireless network access. If your network switch or
wireless router supports RADIUS for authentication, you can set up RADIUS Server and use Synology NAS local
system accounts, AD domain accounts or LDAP service accounts to access your home wireless network.
Online Resources
If you cannot find what you need here, please see DSM Help or take a look at Synology's online resources
below.
Knowledge Base: www.synology.com/support
Forum: forum.synology.com
Download Center: www.synology.com/support/download.php
Technical Support: www.synology.com/support/support_form.php
---------
1 For recommended peripheral models, including hard drive, USB printer, DMA, and UPS, please visit www.synology.com.

8
Cha pt e r
2
Chapter 2: Get Started with Synology DiskStation
Manager
This chapter explains how to log in to Synology based management UI, NAS’ -web Synology DiskStation
Manager (DSM), customize your own desktop, manage its taskbar and widgets, and use the Main Menu to
access DSM settings and applications. For more detailed instructions, please see DSM Help.
Install and DSM Synology NAS
For more information about setting up Synology NAS and installing DSM, see the Quick Installation Guide for
your Synology NAS model available at Synology’ . s Download Center
Log into Synology DiskStation Manager
You can log into DSM with a web browser using either of the following methods:
To log in with Web Assistant:
1 Make sure your computer is connected to the same network as the Synology NAS and can access the Internet.
2 Open a web browser on your computer and go to find.synology.com.
3 Web Assistant will find your Synology NAS within the local network. Click Connect to go to the login screen.
To log in with the server name or IP address:
1 Make sure your computer is connected to the same network as your Synology NAS.
2 Open a web browser on your computer, enter any of the following in the address field, and then press Enter on
your keyboard:
http://Synology_Server_IP:5000
http://Synology_Server_Name:5000/ http://Synology_Server_Name.local:5000/ (or on a Mac)
Synology_Server_Name should be replaced with the name you set up for Synology NAS during the setup
process. If you choose One-step Setup during the setup process, the Synology_Server_Name will be
DiskStation CubeStation USBStation, , , or RackStation.
3 Enter your user name and password, and click . The default password for Login admin is empty. If you want to
save your login information and log in automatically next time, tick Remember me before logging in.
Note: To ensure your connection to DSM runs smoothly, please use the following browsers.
Chrome
Firefox
5 Safari: .0 or later
8 Internet Explorer: .0 or later

Synology NAS User's Guide
Based on DSM 4.3
9Chapter 2: Get Started with Synology DiskStation Manager
DiskStation Manager Appearance
When you log in to Synology DiskStation Manager (DSM), you can see the desktop, taskbar and widgets.
Desktop and Shortcuts
The desktop is where your application windows are displayed. You can also create desktop shortcuts to
frequently used applications.
To create a desktop shortcut to an application:
Drag its thumbnail from the to the desktop.Main Menu
To remove a desktop shortcut to an application:
Right-click the shortcut and choose Remove shortcut.
To open Synology-designed or third-party applications (available at Package Center) in a new browser
window:
Right-click the applications' Main Menu thumbnail or desktop shortcut and choose Open in New Window.
Note: You can also customize your desktop background color or wallpaper with the Desktop " " function. See Desktop
for more information.
Taskbar
The taskbar at the top of the desktop contains the following functions:
1 The Show Desktop button: Click to clear your application windows and reveal the desktop. Click again to
bring the windows back to the desktop. For more information about application windows, see "Open
Application Windows".

Synology NAS User's Guide
Based on DSM 4.3
10 Chapter 2: Get Started with Synology DiskStation Manager
2 The Main Menu button: Click to reveal the Manage DSM with the Main Menu for more Main Menu. See " "
information.
3 The icons of open applications:
Click the icon of an application to show or hide its window on the desktop.
-Right click the icon and choose from the shortcut menu to manage the application window (Maximize,
Minimize, Restore Close, ) or its taskbar icon (Pin to Taskbar, Unpin from Taskbar).
4 The Notifications button (with an exclamation mark): Click to check the logs of important events.
Clear All: Click to remove all events and hide the Notification . button
Show All: Click to see all notifications in another window.
(Number) unread: If there are more than 30 unread notifications, (Number) unread will appear instead of
Show All to notify you of how many notifications have not been read. Click to see all notifications in another
window.
Note: s For more information about system log, see "View System Log ".
5 The Options menu: Click to manage your user account settings or leave DSM.
Options: Click to manage personal options for your DSM users. See Manage Pe“ rsonal Options”.
: eLogout Click to xit your current account and return to login screen.
6 The Search icon: Click to enter keywords to quickly find a list of relevant applications and in the search field
DSM Help articles.
7 The Pilot View button: Click to have an instant preview of all open applications and hover your mouse over
the application windows for quick navigation.
Note: Pilot View is not supported by Internet Explorer.
Widgets
The widgets at the bottom-right corner of the desktop contain the system information of your Synology NAS.
To open/close the widget panel:
Click the upward/downward triangle to reveal/close the panel.
You can choose any four of the following subject to be displayed on the widget panel. More information can be
acquired by clicking the icon at the top left corner of each corresponding subject panel.-
S are Current C sonnection : ee a list of users who currently accessing Synology NAS resources.
File Change Log: View the file change log records of Synology NAS services.
No active logs: Appears when none of the logs (Samba, Web , , F e DAV FTP il Station) is enabled.
No logs available: Appears when any one of the logs (Samba, W F ebDAV, , FTP ile Station) is enabled.
Recent Logs: View the log records of Synology NAS services.
Resource Monitor: Monitor the CPU usage, memory usage, and network flow.
Scheduled Backup: View the status of your backup tasks.
VStorage: iew the volume usage and disk status of your Synology NAS.
System Health: Obtain an overall status of your Synology NAS and all connected devices (if any). You will be
advised to take corrective action when system error occurs.

Synology NAS User's Guide
Based on DSM 4.3
11 Chapter 2: Get Started with Synology DiskStation Manager
Manage DSM with the Main Menu
The Main Menu is where you can find all the applications and settings provided by Synology DiskStation
Manager.
Restart and Shutdown
Click Restart or Shutdown -at the bottom right corner of the to restart Synology or turn it off, Main Menu NAS
just like using any other operating systems.
Reorder Main Menu’s Thumbnails
Open Main Menu and drag any thumbnail to any position you want.
Open Application Windows
In addition to the Control Panel, the Main Menu contains the thumbnails of all the other DSM applications. With
DSM’s multitasking ability, now you can open multiple application windows at the same time.
To open an application window:
Click any thumbnail of an application from the application window on the desktop and the Main Menu to open the
application icon on the taskbar.
Note: You can also open application windows through desktop shortcuts. See "Desktop and Shortcuts" for more
information.
Synology NAS User's Guide
Based on DSM 4.3
12 Chapter 2: Get Started with Synology DiskStation Manager
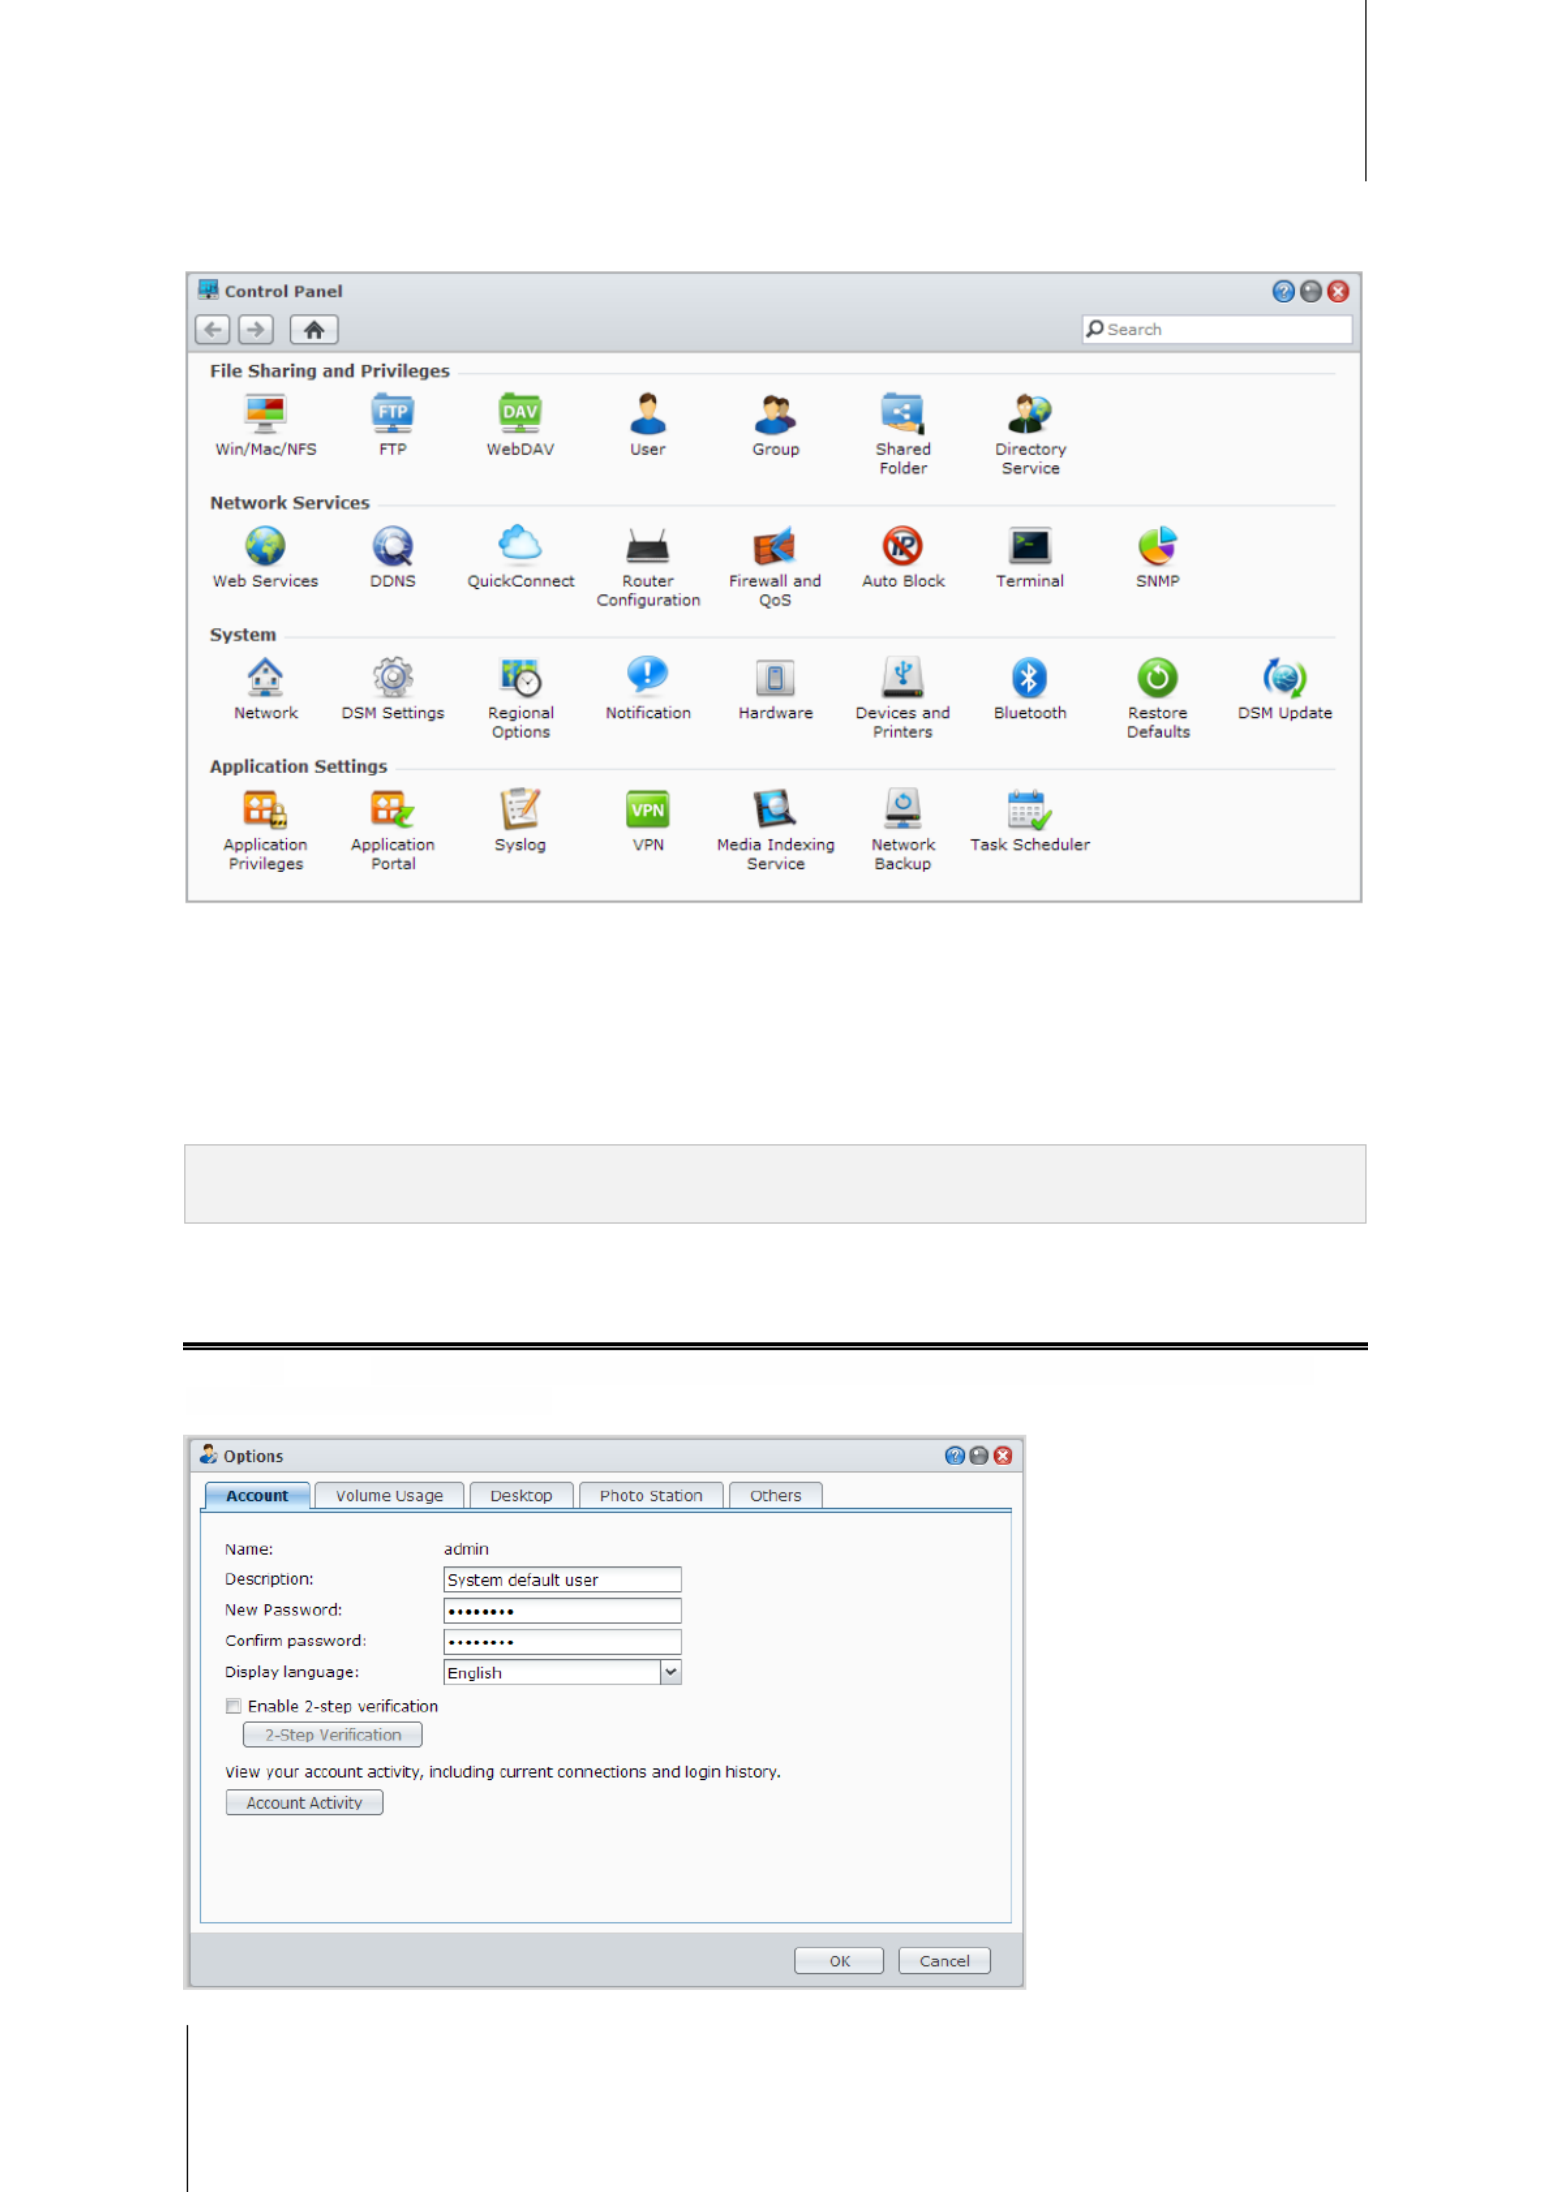
Use the Control Panel
Choose Control Panel Main Menufrom the to see the thumbnails of DSM settings.
The DSM settings on the Control Panel are grouped into the following categories:
File Sharing and Privileges: Set up file sharing for Win/Mac/NFS, as well as application privileges for
different user accounts.
Network Services: Manage and edit the settings for network services and Internet connection.
System: Edit the basic settings on your Synology NAS.
Application Settings: Manage Synology designed applications.-
Note: Control Panel is accessible only to users belonging to the administrators group. See "Create Groups" for
more information.
Manage Personal Options
Click t he Options menu (with a figure icon) at the top right corner of your DSM desktop to manage your user -
account settings or log out of DSM.

Synology NAS User's Guide
Based on DSM 4.3
13 Chapter 2: Get Started with Synology DiskStation Manager
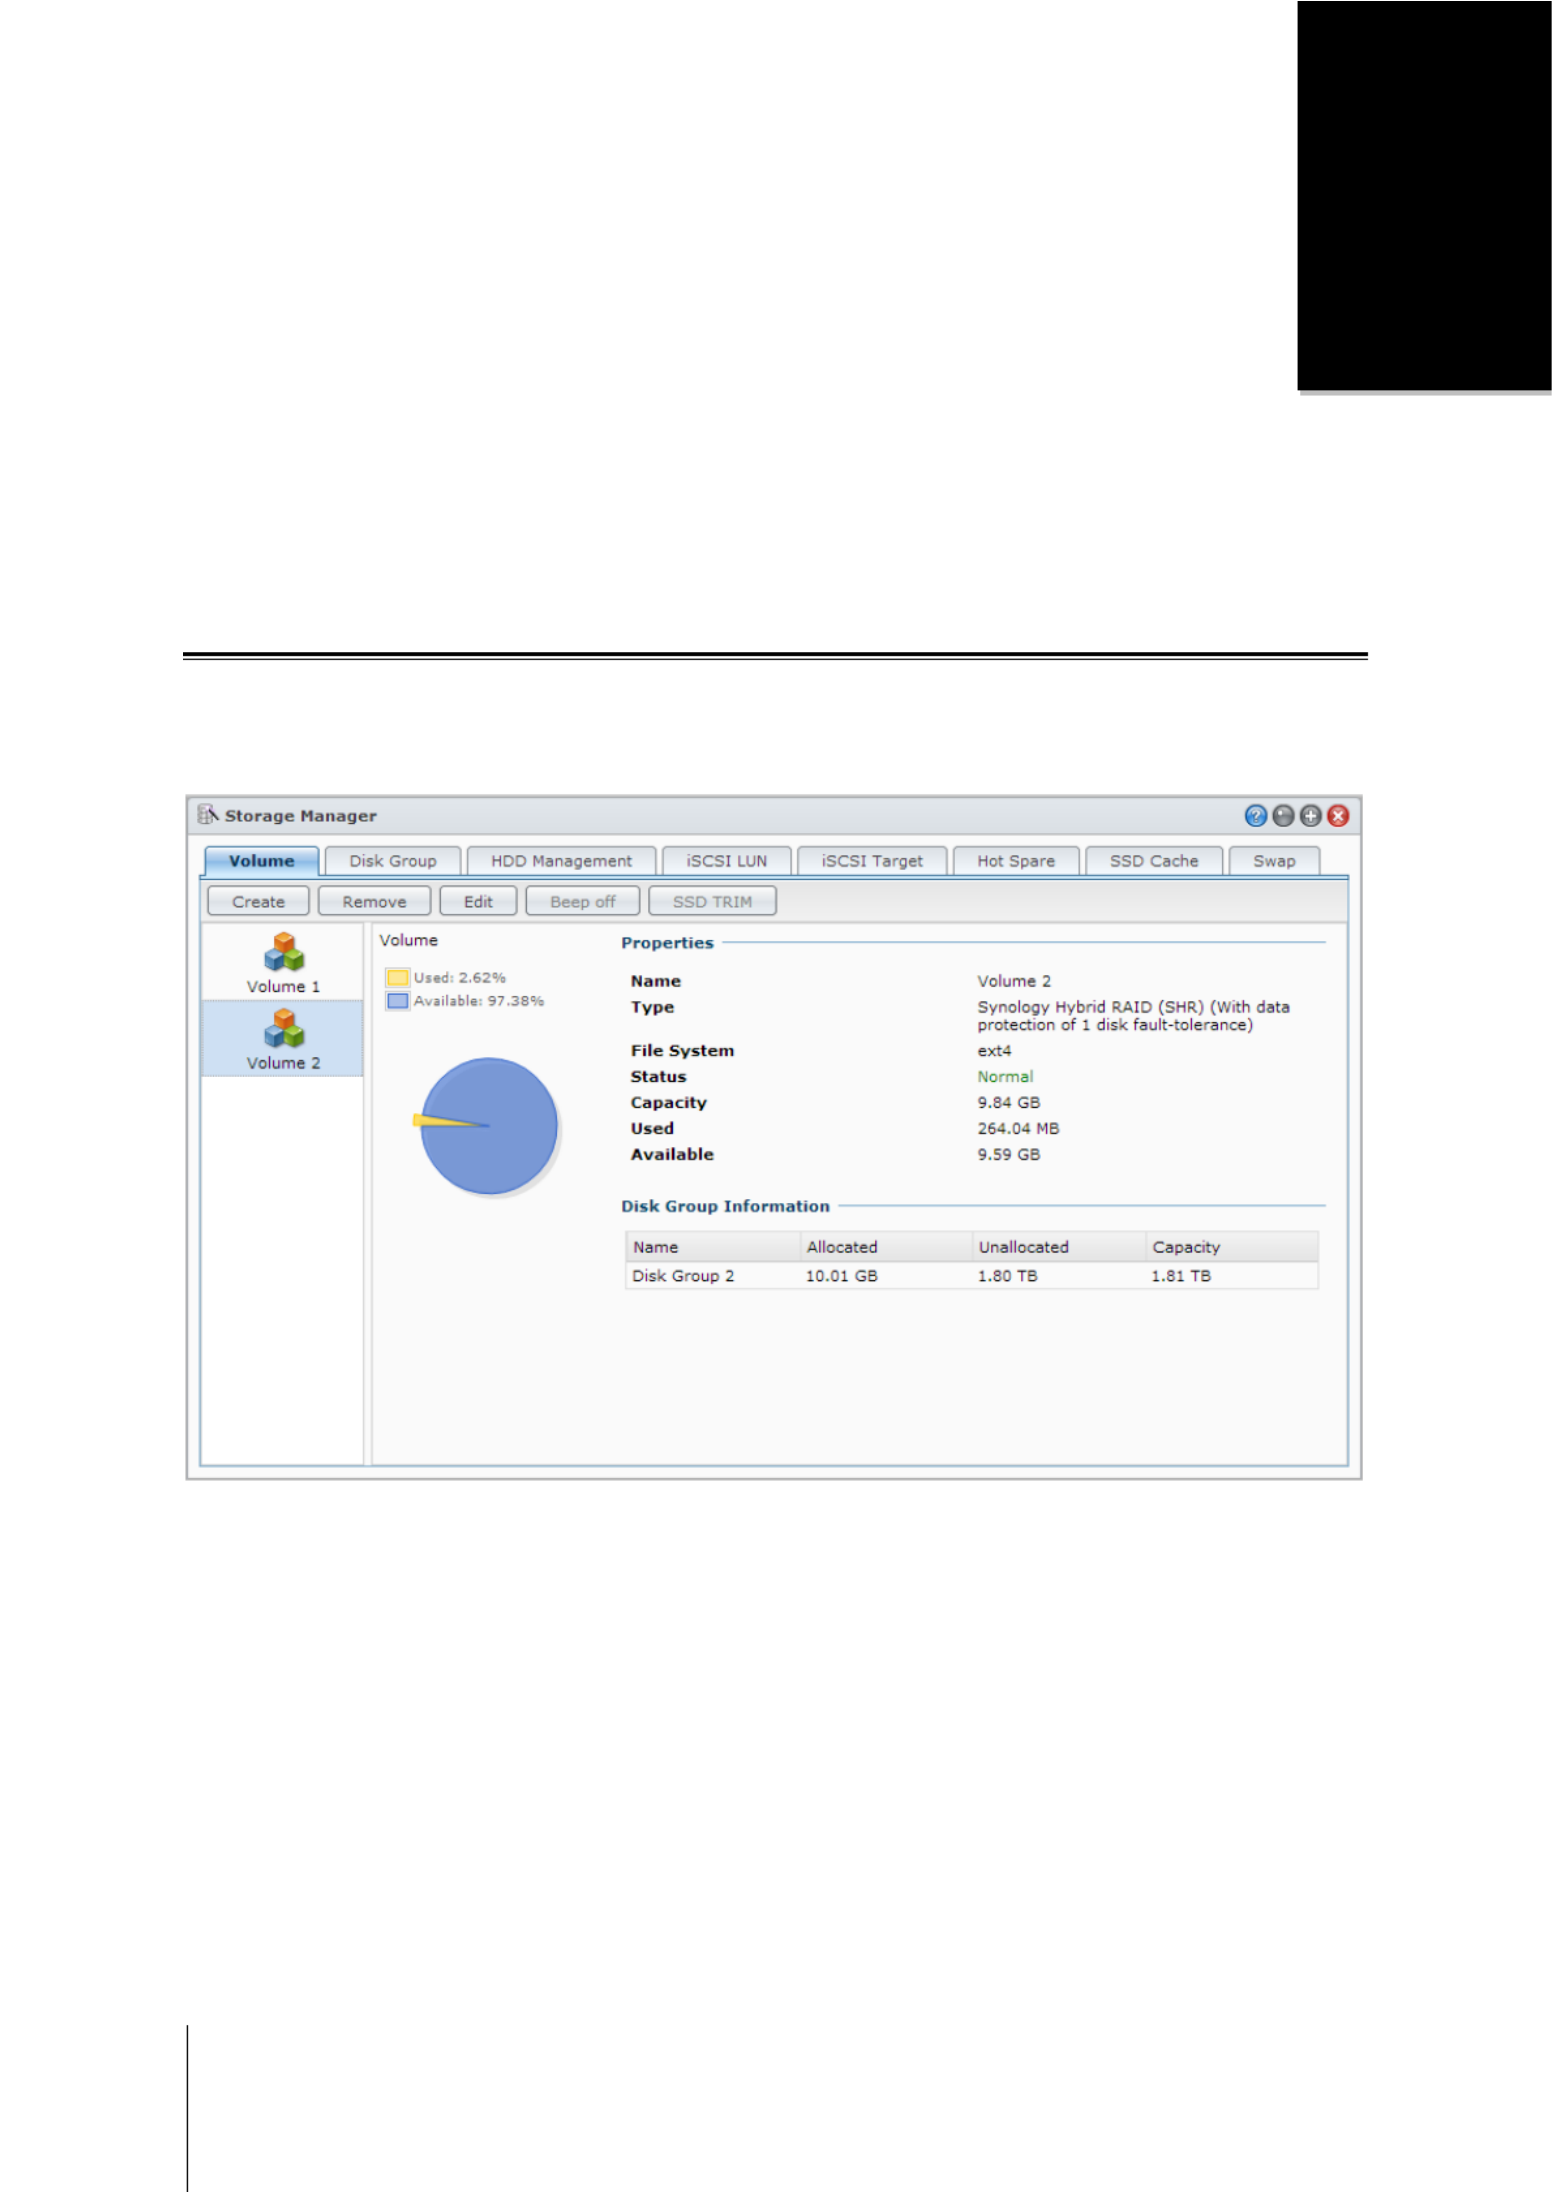
Account
Under Account, you can edit your account settings, enable 2 step verification, and view recent login activity of -
your DSM account.
Limitations:
The user description is case sensitive and can be 0 to 64 displayable Unicode characters.
The password is case sensitive and should be 0 to 127 displayable characters, including letters, numbers, signs,
and space.
2- Step Verification
2-step verification provides improved security for your DSM account. If 2 step verification is enabled, you will -
need to enter your password in addition to a one time verification code when logging into DSM. Verification codes -
are obtained from authenticator apps installed on your mobile device. Therefore, if someone wants to access
your account, he will not only need your username and password, but also your mobile device.
Requirements:
2- - -step verification requires a mobile device and an authenticator app which supports the Time based One Time
Password (TOTP) protocol. Authenticator apps include Google Authenticator (Android/iPhone/BlackBerry) or
Authenticator (Windows Phone).
Account Activity
Account activity displays recent login activity of your DSM account, such as the time your account was accessed
or from what IP address.
Volume Usage
Under Volume Usage, you can view your quota on all Synology NAS volumes set by DSM administrators, as
well as the amount of capacity you have used on each volume.
Desktop
Under Desktop, you can customize the appearance of your desktop by changing the background and text color
of the desktop, or uploading images to be used as the desktop wallpaper.
Photo Station
This tab is viewable only when users belonging to the administrators group enable Personal Photo Station
service in Photo Stat Synology NAS provides theion. home/photo folder for you to store photos and videos that
you want to share. The system will create index thumbnails of the photos and videos automatically, and then
people can view photo albums via a web browser. Enable Personal Photo Station See " " for more information.
Others
Under Others, you can customize other personal options. For more information about personal options, please
see DSM Help

14
Cha pt e r
3
Chapter 3: Modify System Settings
After you have connected to Synology DiskStation Manager (DSM) and learned how to access its functions and
customize its appearance, belonging to the users administrators group can begin to modify basic settings.
This chapter explains the basics of modifying network settings, display languages, time, and energy saving
features. For more detailed instructions, please see DSM Help.
Change DSM Settings
DSM provides options to change the style of the login screen, customize the ports used for HTTP service,
enhance the security of browsing sessions, configure ports for sharing files with Internet services, and validate
the identity of a server and the administrator with a certificate.
Go to Main Menu > > Control Panel DSM Settings to change the following DSM settings. For more detailed
instructions, please see DSM Help.
Login Style
The Login Style tab provides options to change the layout of the DSM login screen, allowing you to choose from
a variety of templates or background image s or upload custom logo s.

Synology NAS User's Guide
Based on DSM 4.3
16 Chapter 3: Modify System Settings
Change Network Settings
Go to Main Menu > Control Panel > Network to modify the following network settings of your Synology NAS.
For more detailed instructions, please see DSM Help.
General
The General tab provides options to edit the name and default gateway of the Synology NAS, as well as
configure domain name server or proxy server settings.
Network Interface
The Network Interface tab provides options to connect your Synology NAS to the network via he following t
network interfaces.
LAN
If your Synology NAS is connected to a local area network, you can click LAN or LAN [number] (for Synology
NAS with multiple LAN ports) on the left side to configure network interf settings, such as choosing whether to ace
automatically obtain network configurations with DHCP or to manually set the IP address of the Synology NAS.
Bond
For Synology NAS with multiple LAN ports, you can combine multiple LAN interfaces into the Bond [number]
interface with Link Aggregation1. You can configure this interface as you would with any LAN interface.
Term Explanation
Link Aggregation: For Synology NAS with multiple LAN ports, you can set your Synology NAS to connect
multiple LAN cables to the network at the same time, or assign it with two IP addresses under different subnets.
With Link Aggregation enabled, trunking network bandwidth of aggregated LAN interfaces for (combining
multiplied connection speed) and network fault tolerances (maintaining network connection when any of the
aggregated LAN interfaces is unavailable) are supported.
---------
1 Link Aggregation is only supported on Synology NAS LAN ports. with multiple

Synology NAS User's Guide
Based on DSM 4.3
17 Chapter 3: Modify System Settings
Wireless1
Click Wireless on the left sid to connect the Synology to a wireless network.e NAS Wireless network is available
only when a wireless dongle is plugged into the USB port of your Synology NAS.
IPv6 Setup
When you are configuring the LAN or Wireless Network interface, click the button to change the IPv6 Setup
IPv6 settings.
Synology NAS supports IPv4/IPv6 dual stack scheme. This means that both IPv4 and IPv6 can work
simultaneously on Synology NAS. The default setting for IPv6 is Auto.2
PPPoE
Click the PPPoE on the left side f your is connecting to a DSL or cable modem, and your Internet i Synology NAS
Service Provider (ISP) uses PPPoE (Point to Point Protocol over Ethernet).
Hotspot3
For certain models, or if a wireless dongle
4
Tunnel
is connected to the USB port of your Synology NAS, you can enable
hotspot on your Synology NAS to turn it into a wireless access point that can share its wireless connection with
computers or mobile devices within the range of the Wi-Fi network.
Tunnel is a technique that encapsulates IPv6 packets within IPv4 packets, allowing isolated IPv6 host or network
to be compatible with IPv4 network backbone.
Click the Tunnel tab to allow your to gain Internet access via IPv6 under the IPv4 environment.Synology NAS
---------
1 Wireless network is supported on specific models only.
2 - . IPv6 service is only supported on 08 series models or later (excluding 108j, 109j)
3 Hotspot is supported on specific models only.
4 For a complete list of supported wireless dongles, visit www.synology.com.

Synology NAS User's Guide
Based on DSM 4.3
18 Chapter 3: Modify System Settings
Modify Regional Options
Go to Main Menu > > Control Panel Regional Options to configure the following regional options. For more
detailed instructions, please see DSM Help.
Set Up Time
Click the Time tab to set up the system time settings of the Synology . You can check the current time, NAS
manually set the server's date and time, or automatically set the time using a network time server.
Language
Click the Language tab to set the language for Synology DiskStation Manager, notifications, and specify the
codepage for Unicode filename conversion.
Display Language: Choose your preferred display language, or have it the same as your default browser
setting.
Notification Language: Set your preferred language for email and instant messaging notifications from
Synology NAS.
Codepage: Synology NAS uses Unicode to avoid file inaccessibility from computers using different languages.
But for the following devices or applications to use Synology NAS services without problem, you need to
choose the appropriate codepage for them:
Computers without Unicode support
Applications that convert non Unicode strings to Unicode, such as FTP service, UPnP support, music -
metadata indexing
NTP Service
Click the NTP Service tab to have your Synology NAS serve as a network time server to synchronize time
between different network devices and the Synology NAS over network.
Note: The NTP service is required for Surveillance Station and Synology High Availability. Therefore, if you have
Surveillance Station installed and run on your NAS, the service cannot be disabled while the package is Synology
running.

Synology NAS User's Guide
Based on DSM 4.3
19 Chapter 3: Modify System Settings
Use Energy Saving Features
Go to Main Menu > > Control Panel Hardware to manage the following energy saving features provided by
DSM. For more detailed instructions, please see DSM Help.
General
Click the General tab to modify power recovery Wake on LAN (WOL), 1
Restart automatically after a power failure: If the system shuts down due to unexpected power failure, the
power recovery function allows the system to boot up automatically once power has been restored.
, or fan speed settings.
Enable Wake on LAN: Enable Wake on LAN for the specified network interface.
Fan Speed Mode: Modify the fan speed according to your environment and preferences.
More Information
About Wake on LAN: After Wake on LAN is enabled for your Synology NAS, you can turn on Synology NAS
over the local area network or the Internet by using a WOL (Wake on LAN) application. Activate the function by
entering the IP address (or DDNS hostname) and MAC address of Synology NAS.
Wake on LAN works only after Synology NAS is shut down properly by pressing the Power button or selecting
Shutdown from DSM's Main Menu, and its power cord is plugged into a working power outlet.
Note: You can also perform Wake on LAN for supported Synology NAS with Synology Assistant (available at
Synology’s Download Center) H. See the elp of Synology Assistant for more information.
Beep Control
Click the Beep Control tab to have Synology NAS play beep sounds under certain circumstances.
---------
1 Wake on LAN is supported on specific models only. Visit www.synology.com for more information.

Synology NAS User's Guide
Based on DSM 4.3
20 Chapter 3: Modify System Settings
UPS
Under the tab, you can UPS modify -UPS related settings. UPS (Uninterruptible Power Supply) is a backup power
device that allows the Synology NAS to continue operating for a short time if power failure occurs. This function
helps prevent data loss by giving the Synology enough time to save data and unmount volumes before NAS
losing power and shutting off. Synology supports connecting to local or SNMP UPS dNAS evices.
Power Schedule
Click the Power Schedule tab to start up or shut down automatically at a specified time.
HDD Hibernation
Click the HDD Hibernation tab to manage disk hibernation for all internal or external disks on your Synology
NAS.
When a disk enters HDD hibernation mode, it will stop spinning and become inactive, which not only saves
energy but also extends the disk's lifespan.
21
Cha pt e r
4
Chapter 4: Manage Storage Space
Before taking advantage of the various features of your Synology , you need to set up NAS at least one storage
space. This chapter explains how Storage Manager can help you manage storage spaces, such as volumes,
Disk Groups, iSCSI Targets, view the status of hard drives. or iSCSI LUNs, as well as For more detailed
instructions, please see DSM Help.
Volumes and Disk Groups
Volumes are the basic storage space your Synology . Before you start storing s on NAS or serving any data, you
will need to create at least one volume. With DSM’s Storage Manager, volumes can be created with various
options, such as different RAID types or customized capacity allocation. For detailed instructions, please see
DSM Help.
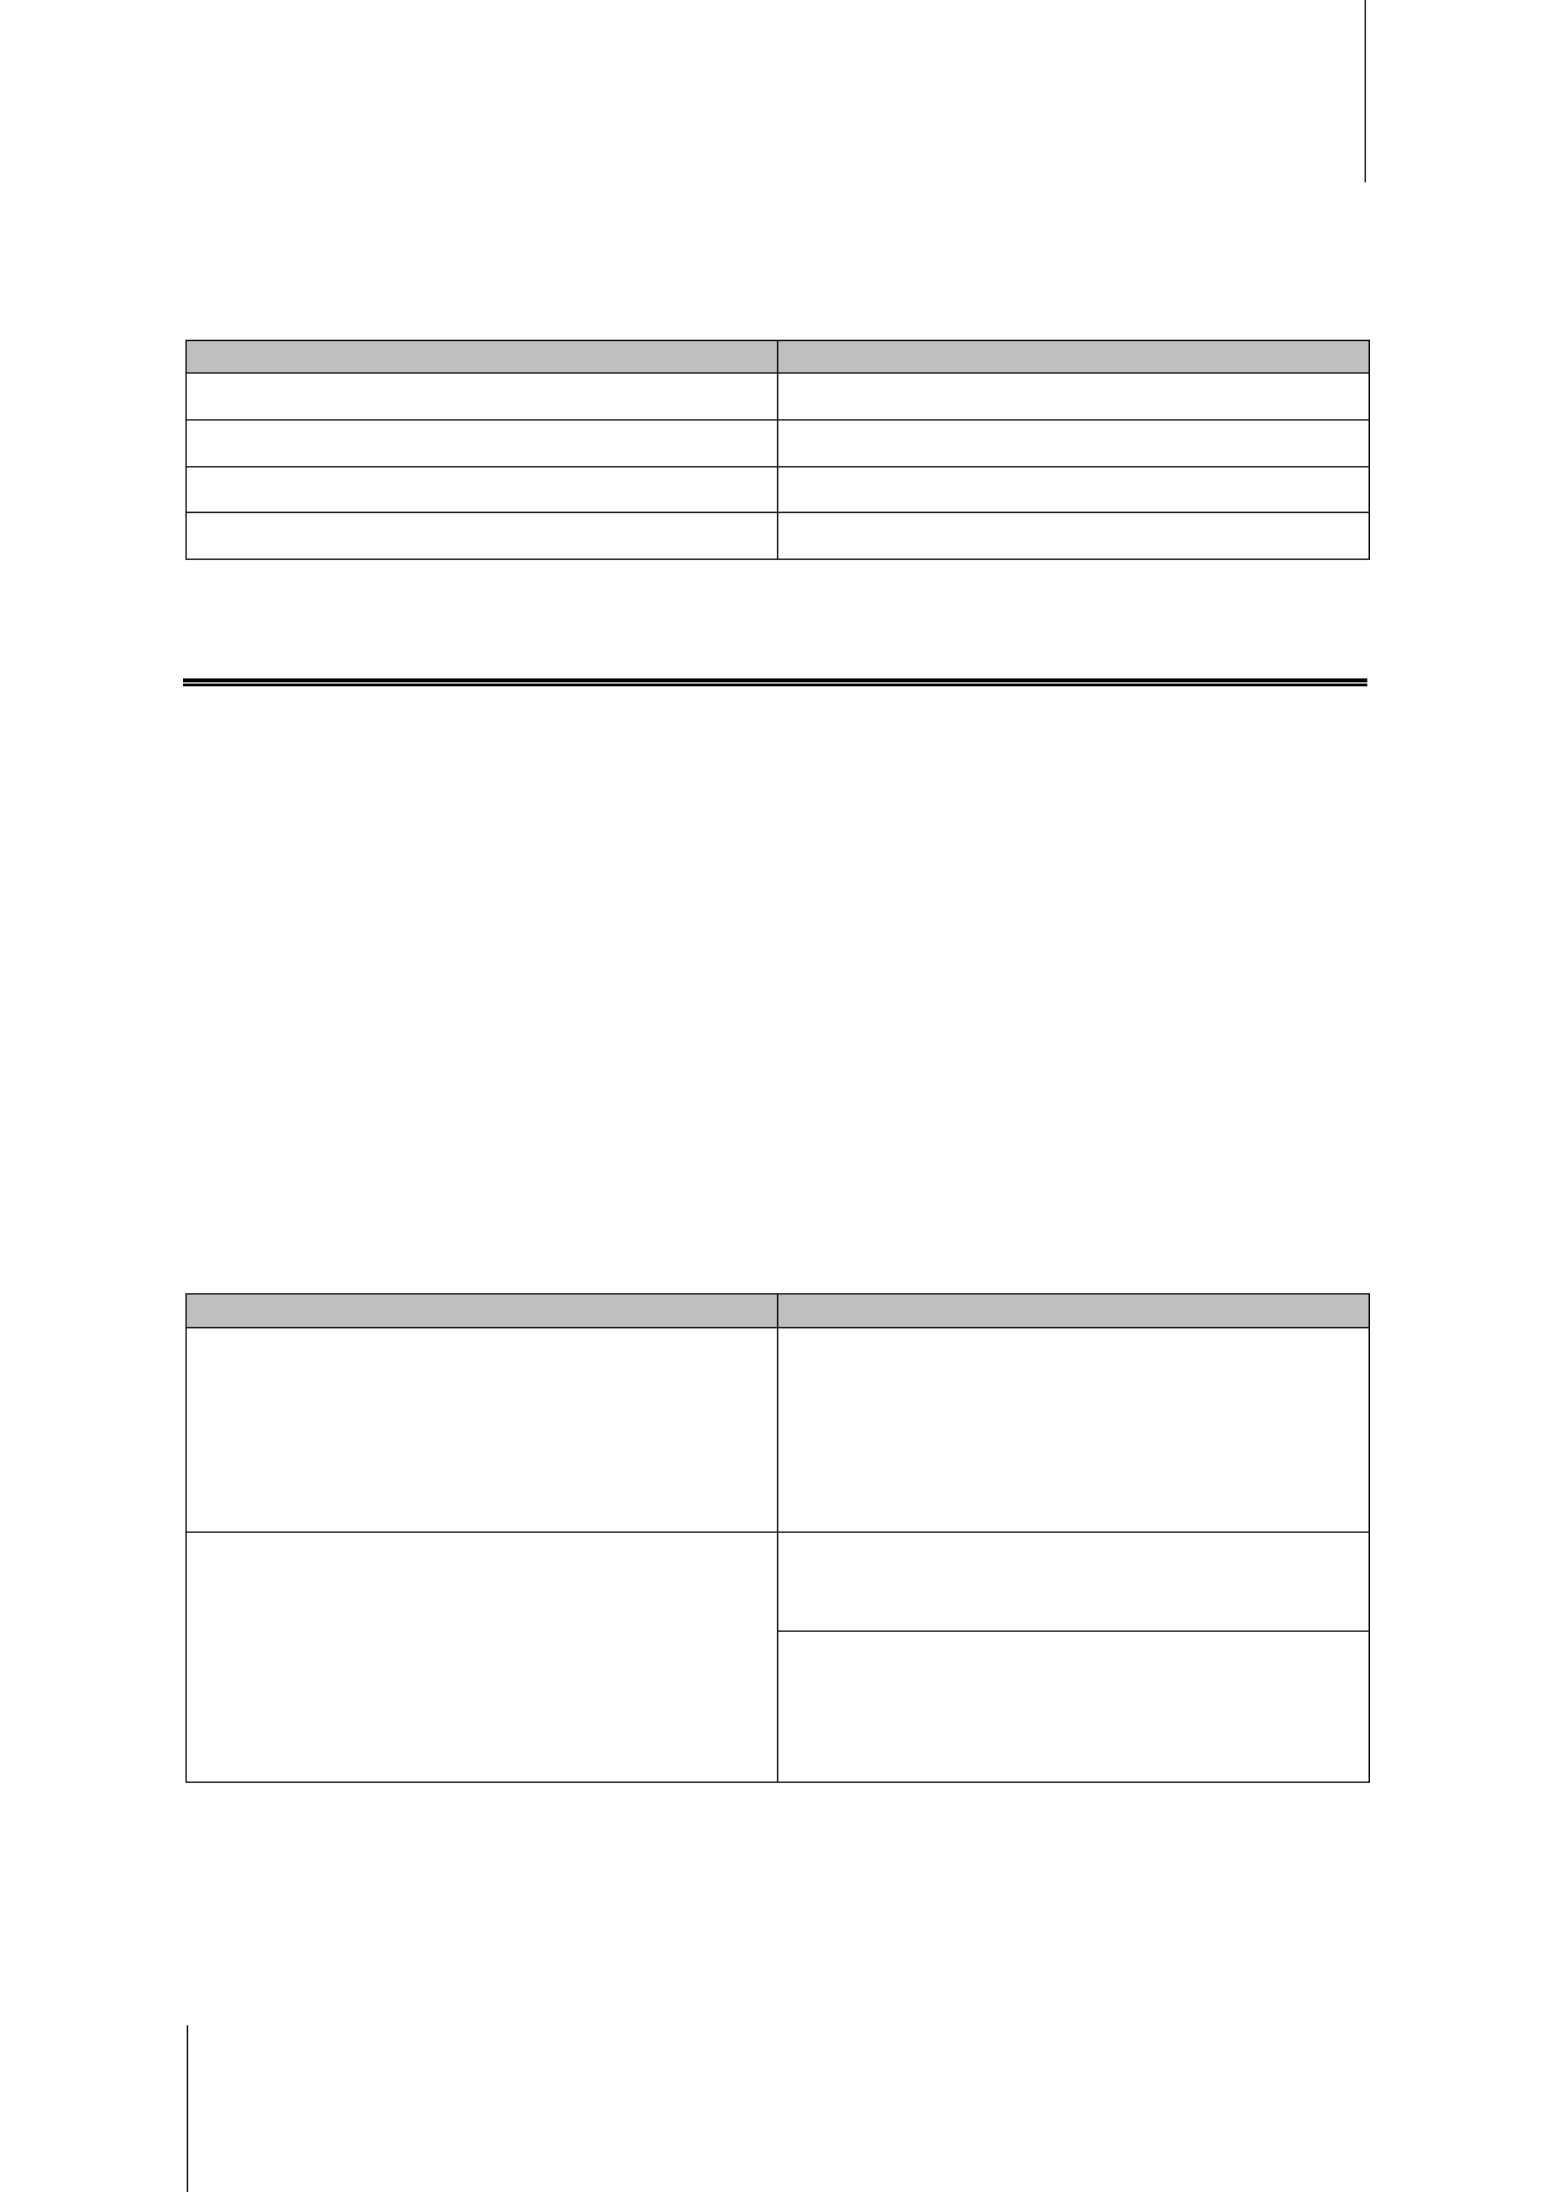
Create Volumes
To create a volume, go to Main Menu > Storage Manager > Volume and click Create. This action launches a
setup wizard which helps create a volume based on your individual needs.

Synology NAS User's Guide
Based on DSM 4.3
22 Chapter 4: Manage Storage Space
Quick or Custom Volumes
When creating a new volume, the following options are available:
Method Features
Quick
Creates a SHR (Synology Hybrid RAID) volume.n
Automatically optimizes volume capacity and performance based on member hard disks.
Recommended for saving time and simplifying storage management.
Custom
Supports different RAID types.
Supports creating single or multiple volumes on Disk Groups.
Provides options to allocate specific amounts of capacity for each volume (only when creating
multiple volumes on RAID)
Recommended for users who want to precisely control storage management on your Synology
NAS.
Single or Multiple Volumes on RAID
When creating a custom volume, the following options are available:
O ption Feature
Single Volume on RAID
Uses all of the available capacity of the selected disks to create a single volume.
Provides better speed and performance.
Supports different RAID types.
Multiple Volumes on
RAID
Allows you to create multiple volumes on a Disk Group.
Supports allocating specific amounts of capacity to each volume.
Provides greater storage management flexibility.
Supports different RAID types.
RAID Types
Depending on your model and number of installed hard disks, the below RAID types can be implemented when
creating custom volumes or Disk Groups.
RAID Type HDD #
Allowed
Failed HDD # Description Capacity
SHR1
1
0 A Synology Hybrid RAID s volume optimize
storage capacity and performance when
combining hard drives of different sizes. SHR
volumes consisting of two or three hard disks
provide 1 disk fault tolerance, while SHR volumes -
consisting of four or more hard disks can provide
1- - or 2 disk fault tolerance.
1 x (HDD size)
2 - 3 1
Optimized by the
system
≧ 4 1 - 2
Basic 1 0
A Basic volume is created with one hard drive as
an independent unit. When creating a Basic
volume, you can select only one hard drive at a
time.
1 x (HDD size)
JBOD ≧2 0 JBOD is a collection of hard drives. Sum of all HDD
sizes
RAID 0 ≧2 0
Combining multiple disks to build a storage space,
RAID 0 offers Striping, a process of dividing data
into blocks and spreading the data blocks across
several hard drives, but without safety measures.
(HDD #) x
(Smallest HDD
size)
---------
1 RAID types except for Basic are supported on specific models only. Visit www.synology.com . for more information

Synology NAS User's Guide
Based on DSM 4.3
23 Chapter 4: Manage Storage Space
RAID Type HDD # Allowed
Failed HDD # Description Capacity
RAID 1 - 4 2 (HDD #) - 1
The system will write identical data to each hard
drive at the same time, so data integrity is
protected when at least one disk is normal.
Smallest HDD
size
RAID 5 ≧3 1
This configuration includes a backup option. It
uses parity mode to store redundant data on
space equal to the size of one disk for later data
recovery.
(HDD # – 1) x
(Smallest HDD
size)
RAID 5+Spare ≧4 2
A RAID 5+Spare storage space requires at least
four drives, one of which will act as a hot spare
drive to rebuild the failed drive of the volume
automatically.
(HDD # – 2) x
(Smallest HDD
size)
RAID 6 ≧4 2
RAID 6 provides extra data protection. It uses
parity mode to store redundant data on space
equal to the size of two disks for later data
recovery.
(HDD # – 2) x
(Smallest HDD
size)
RAID 10
≧4
(even
number)
1 HDD within
each RAID 1
group
RAID 10 RAID 0 has the performance of and data
protection level of combines two RAID 1. RAID 10
hard drives into a RAID 1 group, and combines all
the groups with RAID 0.
(HDD # / 2) x
(Smallest HDD
size)
Create s Disk Group
As stated above, creating Disk Groups provides more flexibility when managing storage spaces. Disk Groups can
be created within the volume creation setup wizard, or you can go to Main Menu > Storage Manager > Disk
Group and click Create.
Repair Volumes or Disk Groups
The repair function is available for RAID 1, , , RAID 10 RAID 5 RAID 5+Spare, RAID 6, and SHR volumes or Disk
Groups. Depending on your RAID types, hen on of the hard drives in the volume Disk Group failsw e or , it will be
in the degraded mode. You can repair the volume or Disk Group by replacing the crashed disk(s) to keep the
data on the volume Disk Groupor protected. For more detailed instructions, please see DSM Help.
Change RAID Type
The RAID types of existing volumes and Disk Groups can be changed without losing existing data, allowing you
to easily and economically manage storage capacity. For example, you can create a RAID 1 volume on your
Synology NAS, and later change to RAID 5 if you install more hard disks.
The sections below provide basic information regarding changing RAID types. For more detailed instructions,
please see DSM Help.
Supported T s RAID ype
RAID types can be changed as follows.
RAID Type Can be changed to...
Basic RAID 1, RAID 5, RAID 5+Spare
RAID 1 RAID 5, RAID 5+Spare
RAID 5 RAID 5+Spare, RAID 6
Add mirror disk to RAID 1 RAID 1
Synology NAS User's Guide
Based on DSM 4.3
24 Chapter 4: Manage Storage Space
Hard Disk Requirements
In order to change the RAID type of a volume or Disk Group, there must be a sufficient number of available hard
disks installed in your Synology NAS. Please see below for the minimum number of hard disks required for each
RAID type.
RAID Type Minimum Hard Disks
RAID 1 2 or 4
RAID 5 3
RAID 5+Spare 4
RAID 6 4
Expand Volumes or Disk Groups
The storage capacity of volumes or Disk Groups can be gradually expanded by installing more or larger hard
disks. This feature allows you to expand the capacity of your volume or Disk Group according to your budget and
with no need to worry about losing any existing data.
The sections below provide basic information regarding expanding volumes and Disk Groups. For more detailed
instructions, please see DSM Help.
Expand a Volume by Changing Volume Size
When creating multiple volumes on RAID, specified amounts of Disk Group storage capacity can be allocated to
each volume. If you want to change the amount of allocated storage capacity for a volume, please select the
volume and click Edit.
Expand a Volume or Disk Group by Replacing Hard Disks
For SHR, RAID 1, RAID 5, RAID 5+Spare, or RAID 6, the storage capacity of volumes and Disk Groups can be
expanded by replacing smaller hard disks with larger ones. When expanding storage capacity with this method,
please be careful to replace each hard disk one one. After replacing one hard disk, the volume or Disk Group -by-
must be repaired before the next hard disk is replaced. For more detailed instructions, please see DSM Help.
Please see the following table to see which hard disk should be replaced first.
RAID Type Minimum Hard Disk Size
RAID 5 and RAID 6
When replacing hard disks of RAID 5 or RAID 6 volumes or
Disk Groups, the smallest hard disk should always be
replaced first. The storage capacity of RAID 5 volumes is
(number of hard disks 1) x (smallest hard disk size), and –
RAID 6 is (number of hard disks 2) x (smallest hard disk –
size). Therefore, the smallest hard disk should always be
replaced first in order to maximize hard disk usage.
SHR (Synology Hybrid RAID)
If the capacity of all member hard disks is equal, then you
should replace at least two hard disks. Otherwise, the
capacity of your volume will not expand.
If the capacity of member hard disks is different, then the
new, replacement hard disks should be equal to or larger
than the largest existing hard disk. In addition, you should
replace smaller member hard disks first in order to optimize
capacity usage.

Synology NAS User's Guide
Based on DSM 4.3
25 Chapter 4: Manage Storage Space
Expand a Volume or Disk Group by Adding Disks
For SHR, JBOD, RAID 5, RAID 5+Spare, and RAID 6, the storage capacity of volumes and Disk Groups can be
expanded by adding more hard disks if there are empty hard drive bays in your Synology NAS For more detailed .
instructions, please see DSM Help.
Please see the ollowing table regarding the minimum size of new hard disks.f
RAID Type Minimum Hard Disk Size
SHR
The capacity of the hard disk you wish to add must be equal
to or larger than the largest hard disk in the volume or Disk
Group. For example, if your volume is composed of three
hard disks 2 TB, 1.5 TB, and 1 TB respectively then the – –
capacity of the new hard disk must be at least 2 TB.
RAID 5, RAID 5+Spare, or RAID 6
The capacity of the hard disk you wish to add must be equal
to or larger than the smallest hard disk in the volume or Disk
Group. For example, if your volume is composed of three
hard disks 2 TB, 1.5 TB, and 1 TB respectively then the – –
capacity of the new hard disk must be at least 1 TB.
Data Scrubbing
Data scrubbing is a data maintenance function that inspects volumes or Disk Groups and repairs any detected
data inconsistencies. This function can be used with volumes or Disk Groups that implement SHR (comprised of
three or more disks), RAID 5, or RAID 6.
We recommend regularly performing data scrubbing in order to maintain data consistency and avoid losing any
critical data in the event of disk failure. For detailed instructions, please see DSM Help.
SSD TRIM
If a volume consists entirely of SSDs (Solid State Drives), we recommend enabling SSD TRIM. This feature
optimizes the read and write performance of volumes created on SSDs, increasing efficiency as well as
extending the lifetime of your SSDs.
Before trying to set up SSD TRIM, please see for detailed instructions and more limitations. DSM Help
Note:
SSD TRIM is only available on certain Synology NAS models and RAID types.
Some SSD models are not able to perform SSD TRIM on RAID 5 and RAID 6 volumes. Please refer to the
compatibility list at www.synology.com.
iSCSI s Target and LUNs
iSCSI (Internet Small Computer System Interface) is a type of storage area networking (SAN) service that
provides access to consolidated, block level data storage. The main use of iSCSI is to facilitate data transfers
over intranets, allowing users to manage storage over long distances.
The sections below provide basic information regarding iSCSI Targets and LUNs. For more detailed instructions,
please see DS HelpM .

Synology NAS User's Guide
Based on DSM 4.3
27 Chapter 4: Manage Storage Space
Clone iSCSI LUNs
LUN Clone1
Go to Main Menu > Storage Manager and click the ake a writable copy of an iSCSI LUN or an Clone button to m
iSCSI LUN snapshot
allows you to create near-instantaneous virtual copies of a LUN. It means much higher productivity
and less complex deployment during system wide operations. LUN Clone also consumes only a fraction of -
storage at the time of creation.
Take iSCSI LUN Snapshots
LUN Snapshot1 allows you to create up to 256 snapshots per LUN using point time technology without having - -in
any impact to system performance. It is efficient for your valuable storage space and also increases the level of
protection, letting you easily recover valuable data.
Go to Main Menu > Storage Manager and click the Snapshot button to take iSCSI LUN snapshots.
Manage Hard Disks
The HDD Management tab allows you to monitor the status of the hard disks installed in your Synology NAS,
providing options to manage and analyze hard disk performance and health. To see this tab, go to Main Menu >
Storage Manager and click HDD Management. For more detailed instructions, please see DSM Help.
Enabling Write Cache Support
Enabling write cache support enhances the performance of your Synology NAS. Only certain hard disk models
support this feature. To ensure data protection while using write cache support, usage of a UPS device is
strongly recommended. We also suggest the system be shut down properly every time after use. Disabling write
cache will reduce the chances of data loss caused by abnormal power outages, but system performance will
decline.
Running S.M.A.R.T. Tests
Disk S.M.A.R.T. t s est examine and report the status of your hard disk, alerting you to possible disk failures. We
recommended promptly changing your disk if any errors are detected. S.M.A.R.T. tests can also be scheduled to
run automatically by creating tasks.
Checking Disk Info
The Disk Info section displays a hard disk's model name, serial number, firmware version, and total size.
SSD Cache
SSD cache2
Please refer to your Synology server Quick Installation Guide for information regarding SSD installation. For more
detailed information regarding SSD management, please see DSM Help or
drives can be installed and mounted in a RAID 0 configuration to boost the read speed of a volume,
including iSCSI LUN (Regular Files) on a volume, or iSCSI LUN (Block-Level) on your Synology server. You can
mount, check SSD compatibility, and view related information by going to Main Menu > Storage Manager >
SSD Cache.
Synology SSD Cache White Paper.
---------
1 LUN Clone and Snapshot are only available on specific models.
2 SSD cache is supported on specific models only. Visit www.synology.com for more information

Synology NAS User's Guide
Based on DSM 4.3
28 Chapter 4: Manage Storage Space
Hot Spare
Hot spare1
The RAID type of the volume/Disk Group/iSCSI LUN must be one with data protection (i.e. RAID 1, RAID 5,
RAID 6, RAID 10).
disks are standby hard disks that can repair a degraded volume/Disk Group/iSCSI LUN by
automatically replacing a failed disk. Hot spare disks can be globally assigned to protect any volume/Disk
Group/iSCSI LUN within your Synology NAS, as long as the volume/Disk Group/iSCSI LUN matches the
following criteria:
The hot spare disk size must be equal to or larger than the size of the smallest disk in the volume/Disk
Group/iSCSI LUN.
Managing Hot Spares
Go to Storage Manager > Hot Spare > Manage to assign and manage hot spare disks. For more detailed
information, please see DSM Help.
Manage External Disks
External USB or eSATA disks can be attached to the USB or eSATA port of your Synology NAS for backup or file
sharing purposes.2
Go to Main Menu > > Control Panel Devices and Printers > External Devices to manage attached external
disks . or setup printers The External Devices tab provides options to view device information, change formats,
or eject the device. The tab provides options to setup USB or network printers. For more detailed Printer
instructions, please see DSM Help.
---------
1 The hot spare feature is available on specific models only.
2 eSATA is supported on specific models only. Visit www.synology.com for more information.

Synology NAS User's Guide
Based on DSM 4.3
30 Chapter 5: Manage Storage Space (for RS10613xs+)
RAID Group Types
Your Synology NAS supports the following RAID Groups : types
RAID Group for olume or iSCSI LUNS Vingle -(Block Level)
Allocates all available capacity to a single volume or iSCSI LUN (Block-Level).
Provides better performance but less storage management flexibility.
Allows creation of multiple iSCSI LUNs (Regular File) on volumes.
Supports a maximum of one RAID Array.
RAID Group for olumes or iSCSI LUNsM Vultiple -(Block Level)
Supports creating multiple volumes or iSCSI LUNs Level) on a RAID Group -(Block .
Provides better storage management flexibility.
Allows creation of multiple iSCSI LUNs (Regular File) on volumes.
Supports combining multiple RAID Arrays under a RAID Group (when configured as RAID 5 or RAID 6).
RAID Types
Depending on the number of available hard disks, you can create RAID Groups using several different RAID
types. Different RAID types provide different levels of performance, data protection, and storage features.
Synology NAS supports the following RAID types:
RAID Type HDD # Allowed
Failed HDD # Description Capacity
Basic 1 0 Creates a storage space with one hard disk. 1 x (HDD size)
JBOD 2-12 0 Combines multiple hard disks into a single, large
storage space.
Sum of all HDD
sizes
RAID 0 2- 0 12
RAID 0 offers Striping, a process of dividing data
into blocks and spreading the data blocks across
several hard drives, but without safety measures.
(HDD #) x
(Smallest HDD
size)
RAID 1 - 4 2 (HDD #) - 1
W rites a mirrored copy of data to each hard drive,
providing data redundancy and as long protection
as one hard operating normaldisk is ly.
Smallest HDD
size
RAID 5 3-12 per
RAID Array
1 HDD within
each RAID
Array
S tripes both data and parity information across all
member disks data redundancy. If one , providing
hard disk fails, the system may be rebuilt using
parity data from other member hard disks
Supports combining multiple RAID Arrays when
created on a RAID Group for Multiple Volumes or
iSCSI LUNs (Block- Level)
Total capacity of
combined RAID
Arrays.
RAID Array
capacity = (HDD
# Capacity - (1) x
of smallest HDD).
RAID 6 4-12 per
RAID Array
2 HDD within
each RAID
Array
RAID 6 provides extra data protection. It uses
parity mode to store redundant data on space
equal to the size of two disks for later data
recovery.
Supports combining multiple RAID Arrays when
created on a RAID Group for Multiple Volumes or
iSCSI LUNs (Block- Level)
Total capacity of
combined RAID
Arrays.
RAID Array
capacity = (HDD
# Capacity - 2 () x
of smallest HDD)
RAID 10
4-12 per
RAID Array
(even
number)
1 HDD within
each RAID 1
group
Provides the performance of RAID 0 and data
protection level of combines two RAID 1. RAID 10
hard drives into a RAID 1 group, and combines all
the groups with RAID 0.
(HDD # / 2) x
(Smallest HDD
size)

Synology NAS User's Guide
Based on DSM 4.3
32 Chapter 5: Manage Storage Space (for RS10613xs+)
Manage Volumes
Volumes are basic storage spaces on which you can create shared folders, iSCSI LUNs (regular file), save data,
or install packages. Before creating a volume on your Synology NAS, please create at least one RAID Group.
Create Volumes
To create a volume, please go to Main Menu > Storage Manager > Volume, and click Create. For more
detailed instructions, please see DSM Help.
Volume Types
Depending on the underlying RAID Group type, you may create the following types of volumes:
Volume on RAID Group for olume or iSCSI LUNS Vingle - (Block Level)
Allocates all storage capacity on a RAI Group to a single volume. Provides better performance but less D
management flexibility.
Allows creation of multiple iSCSI LUNs (Regular File) on volumes.
Volume on RAID Group for M V - ultiple olumes or iSCSI LUNs (Block Level)
Allocates a designated portion of the storage capacity on a RAID Group to create a volume. Provides better
management flexibility, allowing you to expand volume size or create additional volumes as needed.
Allows creation of multiple iSCSI LUNs (Regular File) on volumes.
Edit Volumes
If you want to change the description of a volume or edit the amount of allocated storage capacity, please go to
Main Menu > Storage Manager > Volume, select the desired volume, and click Edit.
Repair Degraded Volumes
If a volume status reads Degraded, please go to Main Menu > Storage Manager > RAID Group, and follow the
instructions displayed under the RAID Group status. Please refer to DSM Help for more information.

Synology NAS User's Guide
Based on DSM 4.3
33 Chapter 5: Manage Storage Space (for RS10613xs+)
SSD TRIM
If a volume consists entirely of SSDs (Solid State Drives), we recommend enabling SSD TRIM. This feature
optimizes the read and write performance of volumes created on SSDs, increasing efficiency as well as
extending the lifetime of your SSDs.
Before trying to set up SSD TRIM, please see for detailed instructions and more limitations. DSM Help
Note:
SSD TRIM is only available on certain Synology NAS models and RAID types.
Some SSD models are not able to perform SSD TRIM on RAID 5 and RAID 6 volumes. Please refer to the
compatibility list at www.synology.com.
Manage iSCSI LUNs
iSCSI is an Internet Protocol based storage networking standard for linking data storage facilities. iSCSI
facilitates data transfer over local area networks (LANs), wide area networks (WANs), or the Internet. By mapping
iSCSI Targets and iSCSI LUNs, client servers can access space on storage server a as if it were a local disk.
iSCSI LUN Types
Synology NAS currently supports the following types of iSCSI LUNs:
: iSCSI LUN (Regular Files) This type of iSCSI LUN is created by designating a portion of a volume. It may be
later expanded as needed. This type of iSCSI LUN provides flexibility of dynamic capacity management with
Thin Provisioning.
iSCSI LUN (Block-Level): This type of iSCSI LUN is created on a RAID Group and provides flexibility of
dynamic capacity management in addition to optimized access performance. You can expand this type of
iSCSI LUN later using unallocated space on the RAID Group.
Create, Edit, or Remove iSCSI LUNs
You can manage iSCSI LUNs by going to Main Menu > Storage Manager > iSCSI LUN. For detailed
instructions regarding how to create, modify, or remove iSCSI LUNs, please refer to DSM Help.

Synology NAS User's Guide
Based on DSM 4.3
34 Chapter 5: Manage Storage Space (for RS10613xs+)
Manage iSCSI Targets
By mapping iSCSI Targets and iSCSI LUNs, client servers can access space on a storage server as if it were a
local disk. In reality, all data transferred to the disk are actually transferred over the network to the storage server.
C , Edit, or Remove iSCSI Targets reate
You can manage iSCSI Targets by going to Main Menu > Storage Manager > iSCSI Target. For detailed
instructions regarding how to create, modify, remove, or register iSNS server information, please refer to DSM
Help.
Manage Hard Disks
HDD Management section of Storage Manager allows you to monitor the status of hard disks installed on your
Synology NAS, providing options to manage and analyze hard disk performance and health. To see this section,
please go to Main Menu > Storage Manager HDD Management > .
Enable Write Cache Support
Depending on the model, write cache support can be enabled in order to enhance the performance of your
Synology NAS. Disabling write cache will reduce the chances of data loss caused by abnorm al power outages,
but system performance will decline. To modify write cache support settings please , go to Main Menu > Storage
Manager > HDD Management.
We recommend using a UPS to ensure data protection when write cache support is enabled. In addition, t he
system should be shut down properly every time after use.
S.M.A.R.T. Test
S.M.A.R.T. test examines and reports the status of your hard disks, alerting you to possible disk failures. If you
want to a run S.M.A.R.T. test, go to Main Menu > Storage Manager > HDD Management. For more information
regarding S.M.A.R.T. tests, please refer to DSM Help.
Hot Spare
Hot Spare disks are standby hard disks that can repair a degraded RAID Group by automatically replacing a
failed disk. Hot spare disks need not be assigned to a specific RAID Group, but may be globally assigned to
repair any RAID Group within your Synology NAS. Before assigning hot spare disks, please see the following
requirements:
The RAID type of the volume/Disk Group/iSCSI LUN must be one with data protection (i.e. RAID 1, RAID 5,
RAID 6, RAID 10).
The hot spare disk size must be equal to or larger than the size of the smallest disk in the volume/Disk
Group/iSCSI LUN.
Manage Hot Spares
You can assign, remove, or manage Hot Spare disks by going to Main Menu > Storage Manager > Hot Spare.
Please refer to for information regarding Hot Spare manDSM Help agement.
Storage Overview
Storage Overview shows the status of installed hard disks, cable connections, and hardware status lights. You
can view Storage Overview by going to Main Menu > Storage Manager > Storage Overview. Please refer to
DSM Help for a detailed explanation of this section.

Synology NAS User's Guide
Based on DSM 4.3
35 Chapter 5: Manage Storage Space (for RS10613xs+)
SSD Cache
SSD cache drives can be installed and mounted in a RAID 0 configuration to boost the read speed of a volume,
including iSCSI LUN (Regular Files) on a volume, or iSCSI LUN (Block-Level) on your Synology server. You can
mount, check SSD compatibility, and view related information by going to Main Menu > Storage Manager >
SSD Cache.
Please refer to your Synology server Quick Installation Guide for information regarding SSD installation.
Additionally, refer to DSM Help for information regarding SSD management.
Manage External Disks
External USB or eSATA disks can be attached to the USB or eSATA port of your Synology RackStation for
backup or file sharing purposes.1
Go to Main Menu > Control Panel > Devices and Printers External Devices > to manage attached external
disks or setup printers. The External Devices tab provides options to view device information, change formats,
or eject the device. The tab provides options to setup USB or network printers. For more detailed Printer
instructions, please see DSM Help.
---------
1 eSATA is supported on specific models only. Visit www.synology.com for more information.
36
Cha pt e r
6
Chapter 6: Access your Synology NAS from the
Internet
You can connect to your Synology NAS over the Internet, allowing its services to be accessible from anywhere
and anytime.
This chapter explains the basics regarding using the Synology EZ-Internet wizard, advanced port forwarding
functions, and DDNS hostname registration to connect your Synology NAS to the Internet For more detailed .
instructions, please see DSM Help.
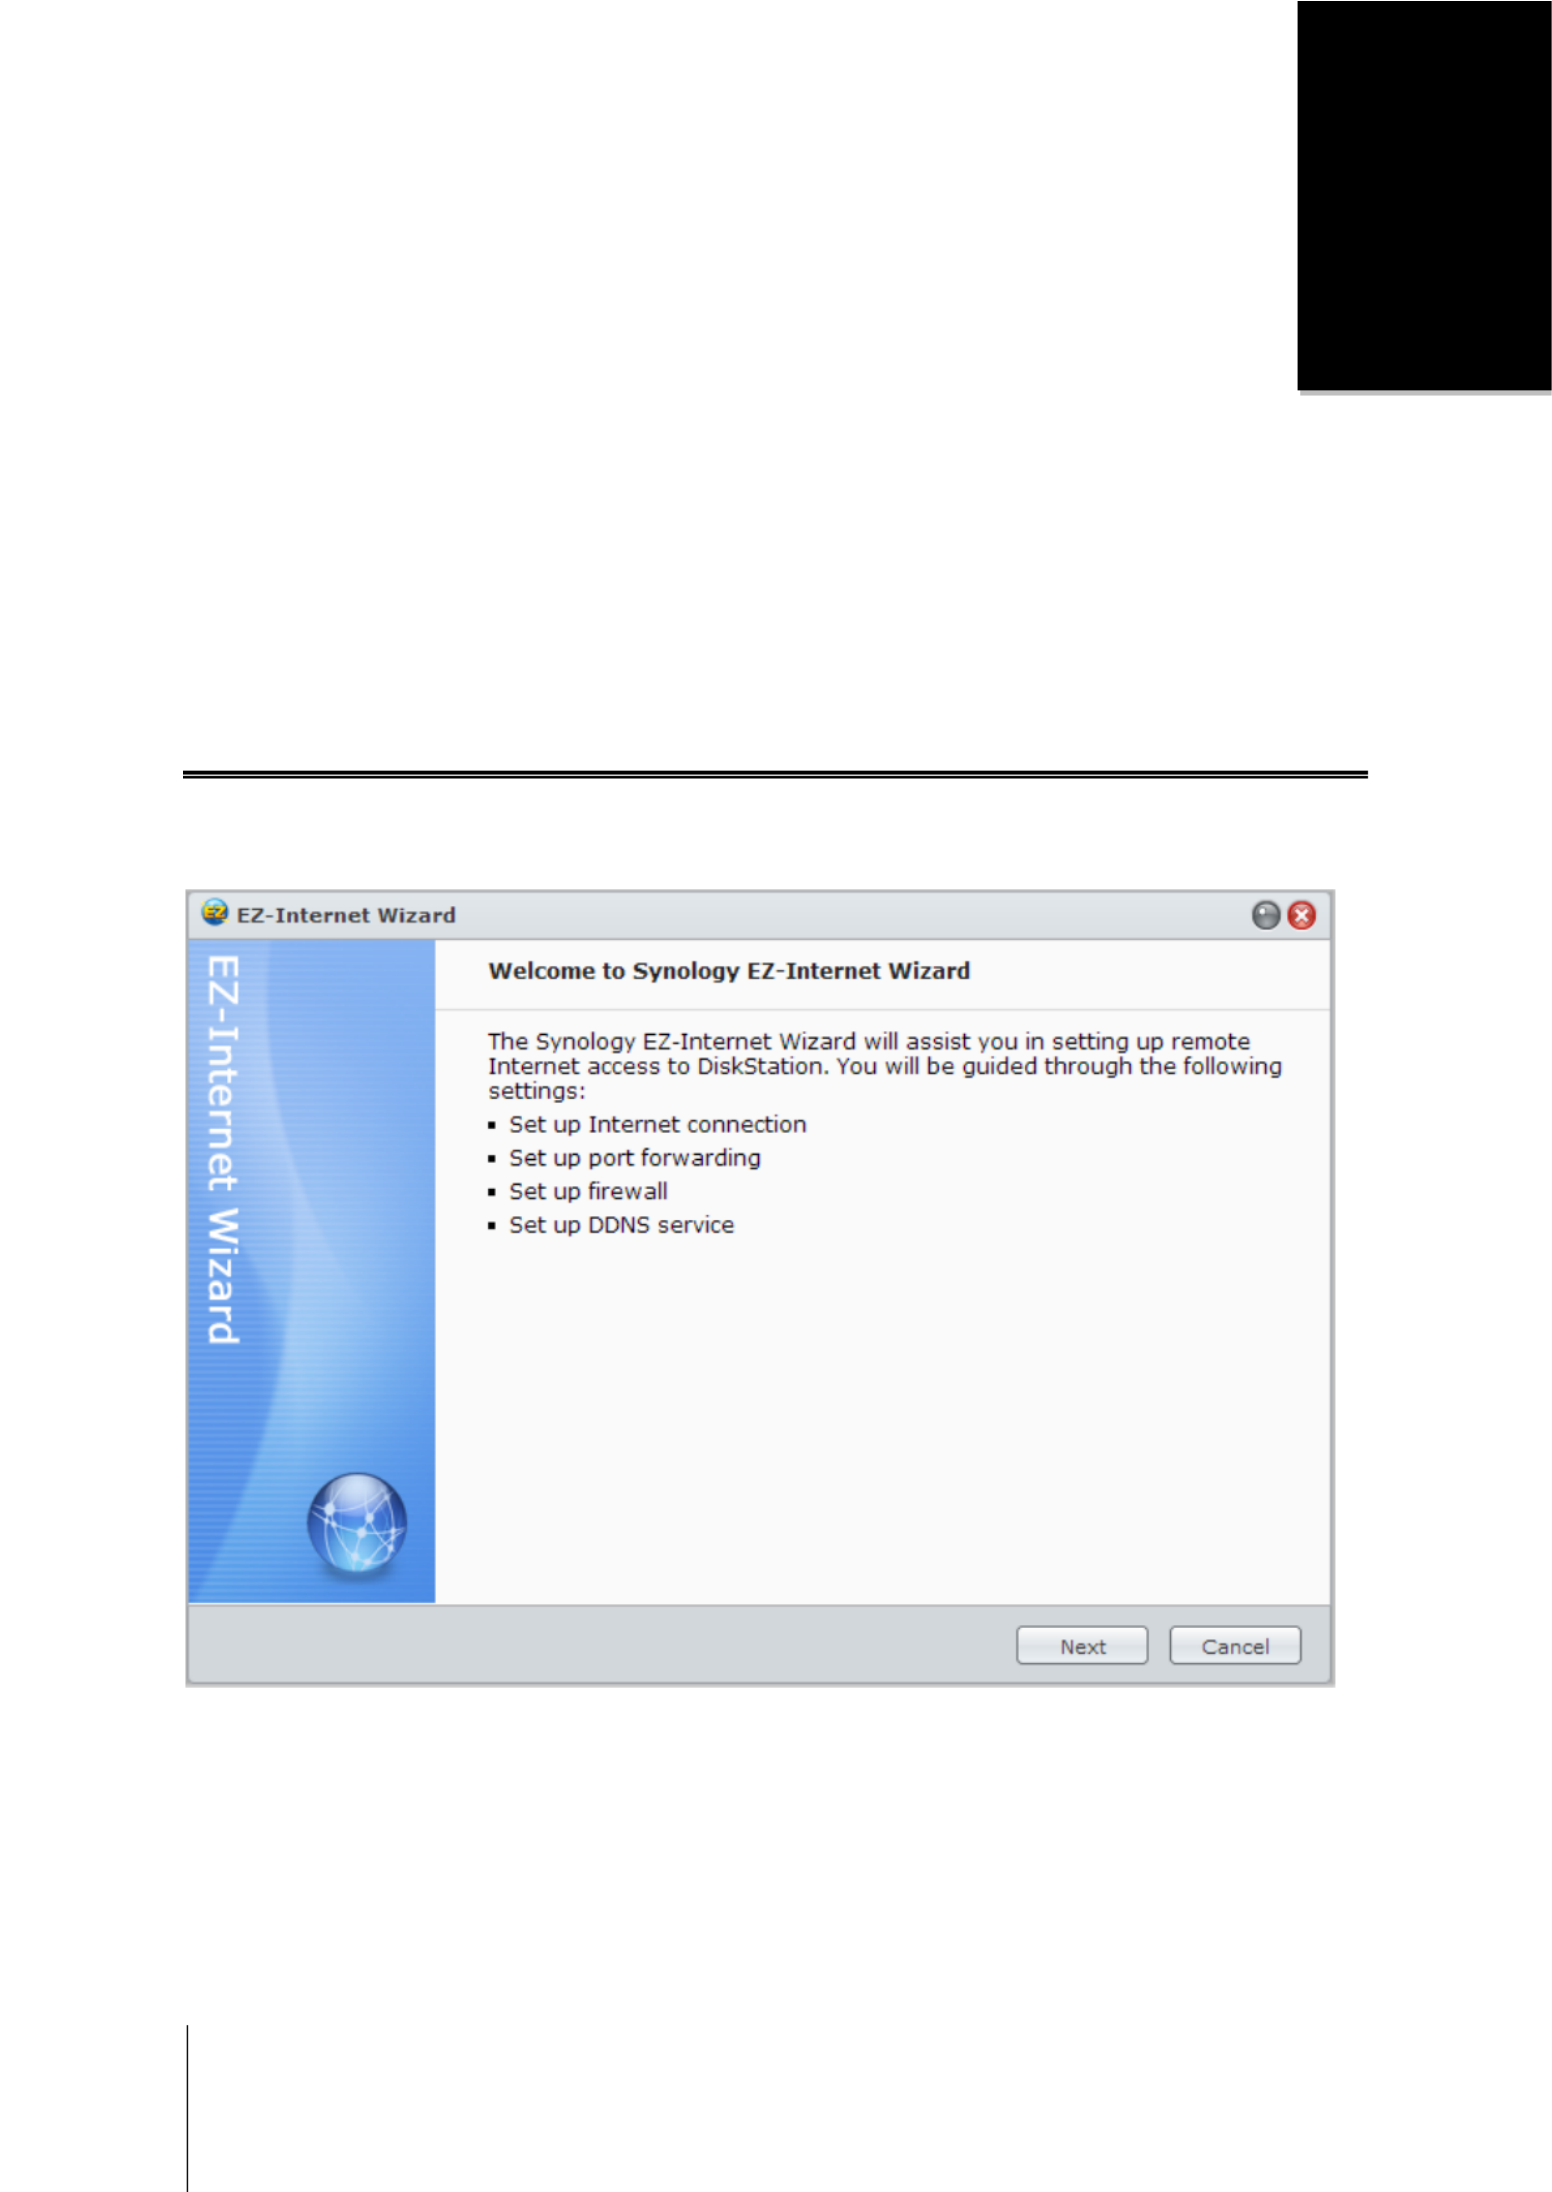
Use the EZ-Internet Wizard
The EZ-Internet Wizard can set up access via the Internet with an easy use wizard, without going through the -to-
complicated firewall settings, PPPoE setup, DDNS registration, and router port forwarding configuration. Go to
Main Menu > EZ-Internet and follow the wizard to complete the setup.
Synology NAS User's Guide
Based on DSM 4.3
37 Chapter 6: Access your Synology NAS from the Internet
Set Up Port Forwarding Rules for Router
If your Synology , you can set up port forwarding rules for the router to allow your NAS is within the local network
Synology NAS to be accessible over the Internet.
Note: y Before you start, make sure you have manually assigned a static IP address for your Synolog NAS. See
" Network Interface" for more information.
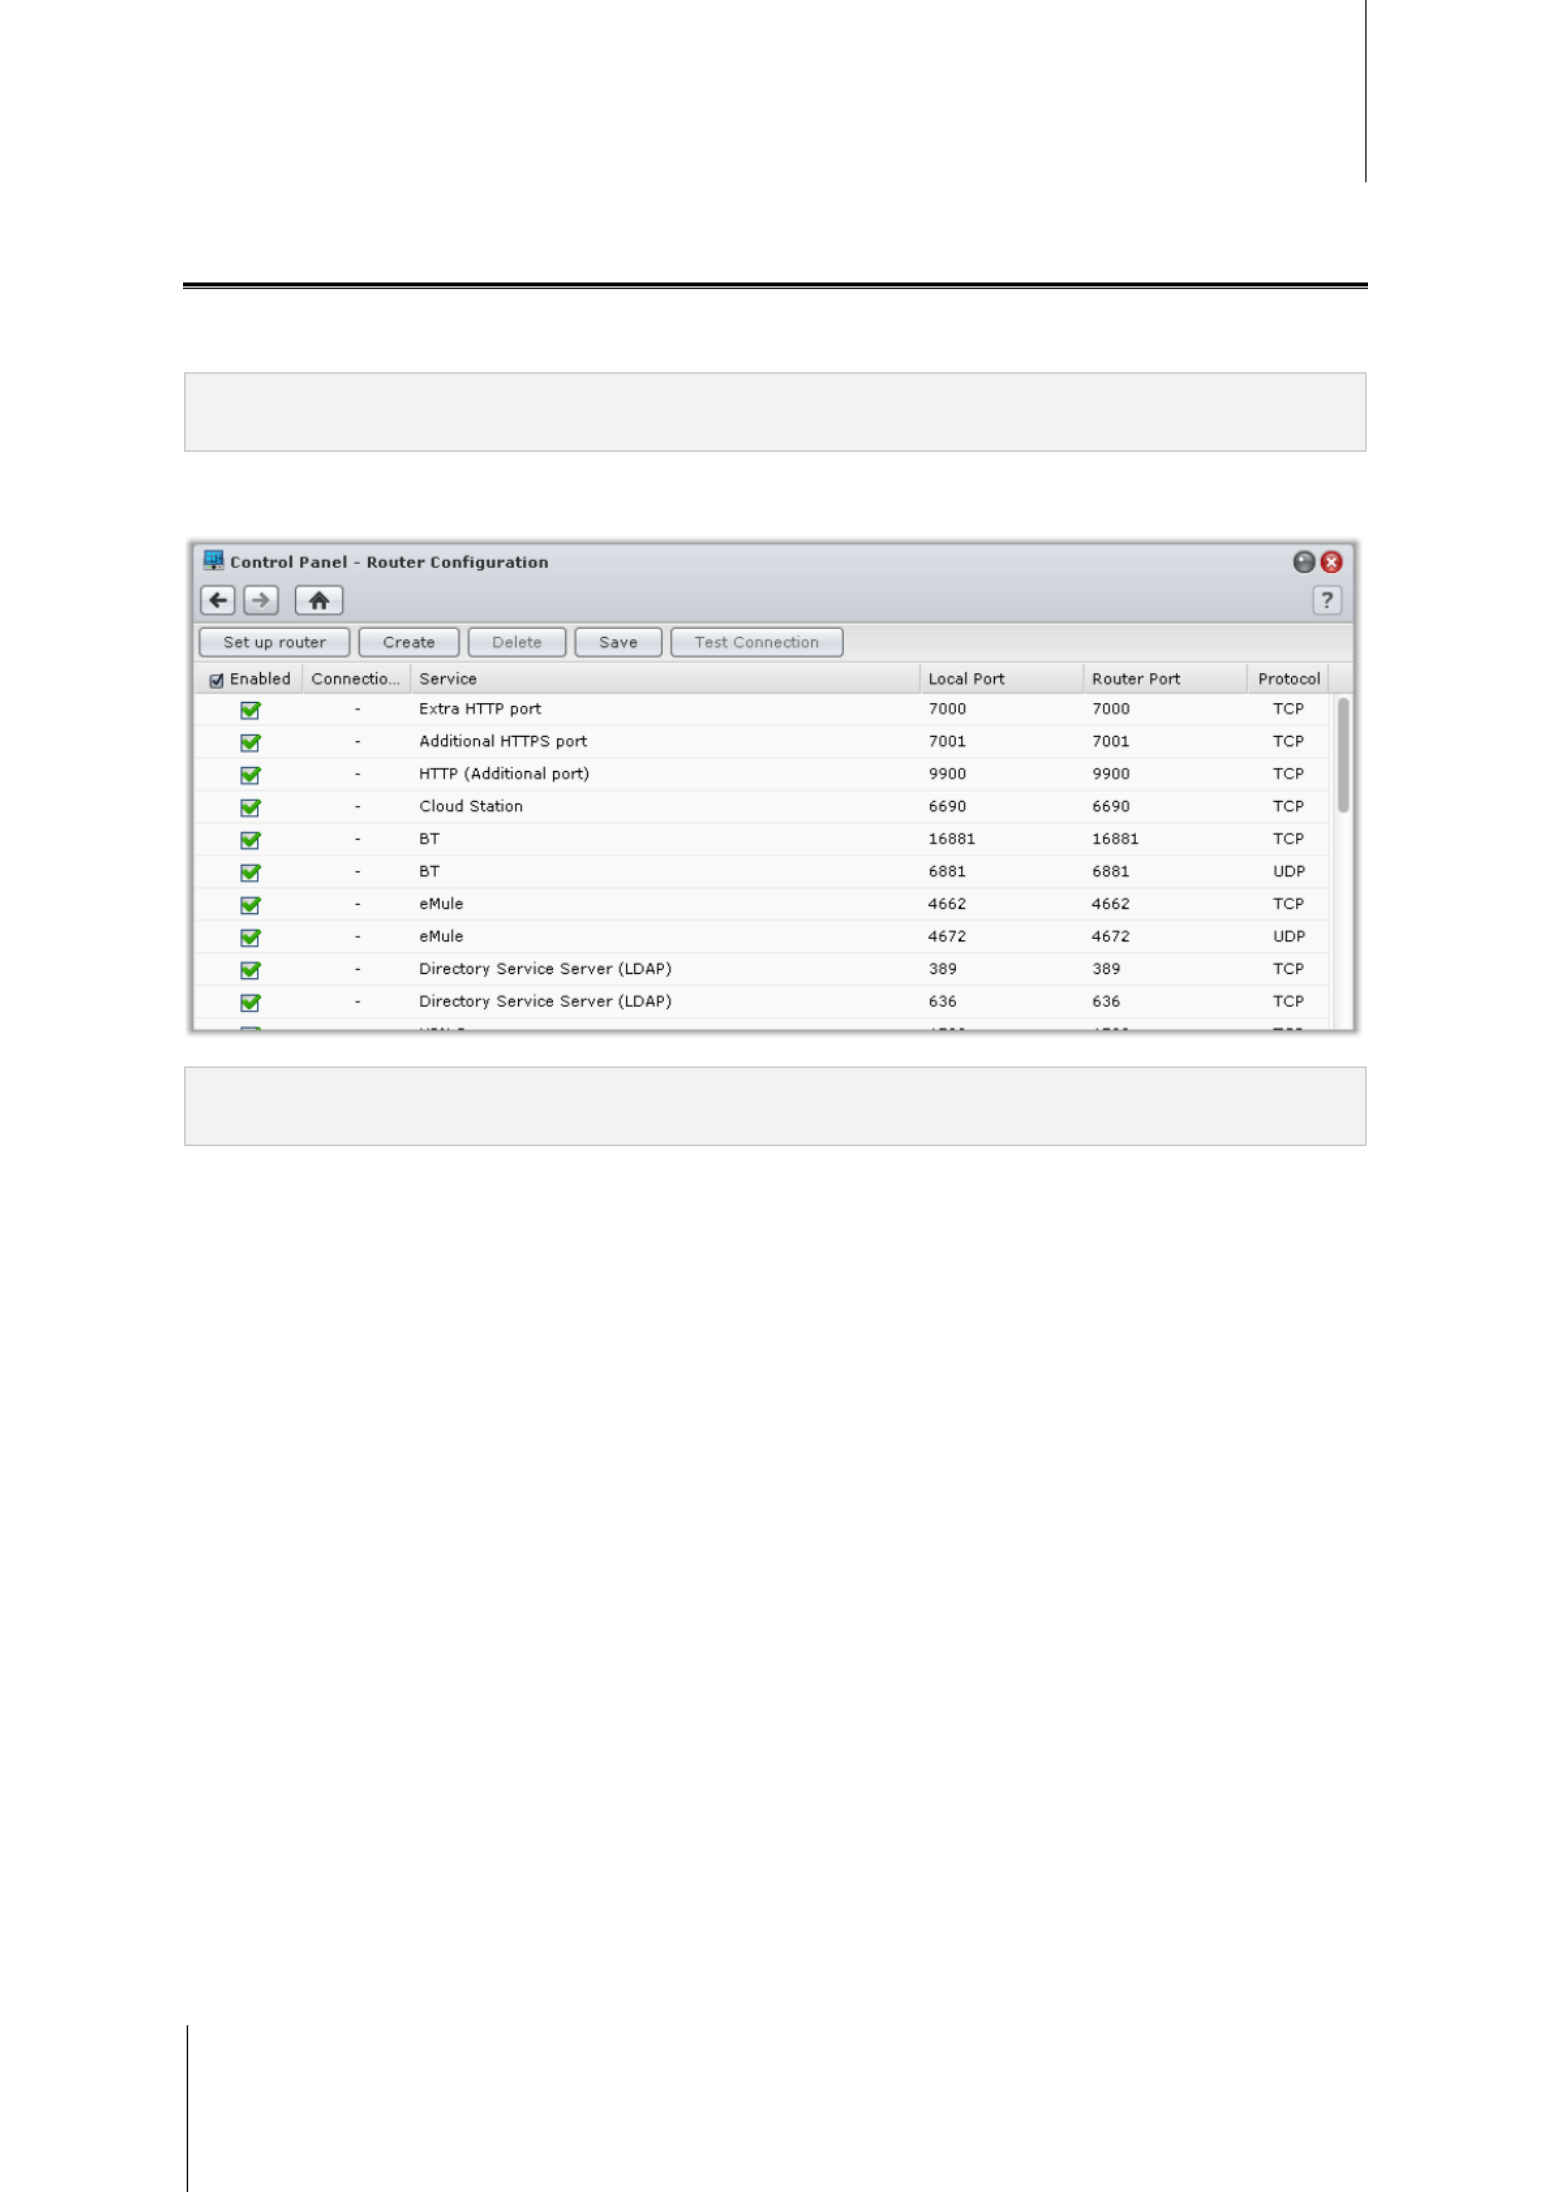
Go to Main Menu > > Control Panel Router Configuration to set up your router and port forwarding rules. For
more detailed instructions, please see . DSM Help
Note: To configure port forwarding rules and assign static IP address, you must have the administrative permission
to the router.
Set up Router
Before adding port forwarding rules with DSM, you need to set up the Synology NAS connection to the router. To
begin, please click the Set up router button.
Add Port Forwarding Rules
Add port forwarding rules to specify the destination ports of your Synology NAS that will receive packages from
specific router ports. Click Create to start creating port forwarding rules.
Termékspecifikációk
| Márka: | Rotel |
| Kategória: | Vevő |
| Modell: | RSX-1067 |
Szüksége van segítségre?
Ha segítségre van szüksége Rotel RSX-1067, tegyen fel kérdést alább, és más felhasználók válaszolnak Önnek
Útmutatók Vevő Rotel

16 Október 2024
27 Szeptember 2024
5 Szeptember 2024
4 Szeptember 2024
2 Szeptember 2024
2 Szeptember 2024
28 Augusztus 2024
25 Augusztus 2024
25 Augusztus 2024
22 Augusztus 2024
Útmutatók Vevő
- Vevő Phoenix Gold
- Vevő Grace Design
- Vevő Sony
- Vevő August
- Vevő Yamaha
- Vevő Nedis
- Vevő Marantz
- Vevő Philips
- Vevő Pioneer
- Vevő SilverCrest
- Vevő Garmin
- Vevő RCF
- Vevő Bosch
- Vevő Panasonic
- Vevő JVC
- Vevő StarTech.com
- Vevő Sharp
- Vevő Harman Kardon
- Vevő Nokia
- Vevő HQ
- Vevő Saramonic
- Vevő Emos
- Vevő Hifonics
- Vevő Onkyo
- Vevő Motorola
- Vevő Geemarc
- Vevő Vimar
- Vevő LogiLink
- Vevő Technics
- Vevő Roland
- Vevő JBL
- Vevő DAP-Audio
- Vevő GoGen
- Vevő AVM
- Vevő Futaba
- Vevő Insignia
- Vevő Martin Logan
- Vevő Boss
- Vevő Crestron
- Vevő Strong
- Vevő Cyrus
- Vevő VOX
- Vevő Tripp Lite
- Vevő MEE Audio
- Vevő Thomson
- Vevő Klipsch
- Vevő Hegel
- Vevő Reely
- Vevő Aiwa
- Vevő Speco Technologies
- Vevő Kenwood
- Vevő Rega
- Vevő Vivanco
- Vevő Asus
- Vevő Jabra
- Vevő Hama
- Vevő ELAC
- Vevő Zoom
- Vevő Renkforce
- Vevő Sencor
- Vevő Focusrite
- Vevő Polsen
- Vevő Bose
- Vevő Raymarine
- Vevő Mercury
- Vevő Blackstar
- Vevő Telefunken
- Vevő Sennheiser
- Vevő Tangent
- Vevő Cambridge
- Vevő Kanto
- Vevő Alpine
- Vevő Optoma
- Vevő Ibanez
- Vevő Omnitronic
- Vevő Logitech
- Vevő Amiko
- Vevő SPL
- Vevő Bresser
- Vevő Pro-Ject
- Vevő Smart
- Vevő TOA
- Vevő Dahua Technology
- Vevő SVS
- Vevő Scosche
- Vevő Hilti
- Vevő Crunch
- Vevő Denver
- Vevő Smart-AVI
- Vevő Naim
- Vevő Bush
- Vevő Power Dynamics
- Vevő Dynacord
- Vevő Trevi
- Vevő Devolo
- Vevő Memphis Audio
- Vevő DiO
- Vevő The T.amp
- Vevő DJI
- Vevő Ground Zero
- Vevő Audio-Technica
- Vevő Amazon
- Vevő Konig & Meyer
- Vevő Godox
- Vevő Cisco
- Vevő Denon
- Vevő ATen
- Vevő Electro-Voice
- Vevő JL Audio
- Vevő BOYA
- Vevő Hartke
- Vevő Auna
- Vevő Mac Audio
- Vevő Behringer
- Vevő Nexa
- Vevő Mooer
- Vevő REL Acoustics
- Vevő Chamberlain
- Vevő Chord
- Vevő Lotronic
- Vevő Bogen
- Vevő Terratec
- Vevő Shure
- Vevő Renegade
- Vevő PreSonus
- Vevő Revel
- Vevő Manhattan
- Vevő Plantronics
- Vevő Peavey
- Vevő Kogan
- Vevő Alecto
- Vevő Fontastic
- Vevő Marshall
- Vevő Velleman
- Vevő Universal Audio
- Vevő AEA
- Vevő Morel
- Vevő Russound
- Vevő Teac
- Vevő Clarion
- Vevő Blustream
- Vevő Metra
- Vevő Monacor
- Vevő MXL
- Vevő S.M.S.L
- Vevő Anthem
- Vevő McIntosh
- Vevő LD Systems
- Vevő Proel
- Vevő Jamo
- Vevő Blaupunkt
- Vevő Deaf Bonce
- Vevő NAD
- Vevő Conrad
- Vevő Thomann
- Vevő Datapath
- Vevő Sagem
- Vevő IRiver
- Vevő Samson
- Vevő Cayin
- Vevő Mackie
- Vevő Vonyx
- Vevő Alto
- Vevő Delta Dore
- Vevő Vivotek
- Vevő Infinity
- Vevő Magnat
- Vevő Bang & Olufsen
- Vevő Trust
- Vevő AKAI
- Vevő Konig
- Vevő Marmitek
- Vevő TechniSat
- Vevő Fenton
- Vevő Line 6
- Vevő Jensen
- Vevő Meliconi
- Vevő Pyle
- Vevő MuxLab
- Vevő Audioengine
- Vevő AVMATRIX
- Vevő Kemo
- Vevő Rolls
- Vevő Salora
- Vevő IFM
- Vevő Musical Fidelity
- Vevő DataVideo
- Vevő Telestar
- Vevő A-NeuVideo
- Vevő Stinger
- Vevő Atlona
- Vevő Lindy
- Vevő Audizio
- Vevő Audiotec Fischer
- Vevő Fender
- Vevő Hertz
- Vevő Bowers & Wilkins
- Vevő FBT
- Vevő Audiolab
- Vevő Atlas Sound
- Vevő AKG
- Vevő Marshall Electronics
- Vevő Ashly
- Vevő AudioControl
- Vevő Monitor Audio
- Vevő Audac
- Vevő Technical Pro
- Vevő Siig
- Vevő Yorkville
- Vevő Rockford Fosgate
- Vevő Krüger&Matz
- Vevő Salus
- Vevő Dual
- Vevő ICOM
- Vevő Gefen
- Vevő Inateck
- Vevő Warm Audio
- Vevő Wharfedale
- Vevő Kathrein
- Vevő Homematic IP
- Vevő Canton
- Vevő Yaesu
- Vevő Panduit
- Vevő HQ Power
- Vevő Vocopro
- Vevő Axis
- Vevő Optex
- Vevő Medeli
- Vevő Palmer
- Vevő Imperial
- Vevő Kicker
- Vevő FSR
- Vevő DBX
- Vevő Sangean
- Vevő Camille Bauer
- Vevő Valueline
- Vevő SureCall
- Vevő Definitive Technology
- Vevő Focal
- Vevő MB Quart
- Vevő Genie
- Vevő Legamaster
- Vevő Lectrosonics
- Vevő Hughes & Kettner
- Vevő IFi Audio
- Vevő Audix
- Vevő Vivolink
- Vevő Arcam
- Vevő FiiO
- Vevő Intelix
- Vevő Comprehensive
- Vevő Orava
- Vevő Alfatron
- Vevő Astro
- Vevő Match
- Vevő Thorens
- Vevő Majestic
- Vevő Smartwares
- Vevő Teufel
- Vevő Sogo
- Vevő Classé
- Vevő Vincent
- Vevő NuPrime
- Vevő Reloop
- Vevő CSL
- Vevő Artsound
- Vevő KanexPro
- Vevő Rupert Neve Designs
- Vevő Kramer
- Vevő Ram Audio
- Vevő ART
- Vevő BZBGear
- Vevő Ampeg
- Vevő Amplicom
- Vevő American Audio
- Vevő Hirschmann
- Vevő Audison
- Vevő Palsonic
- Vevő Caliber
- Vevő Exibel
- Vevő Vision
- Vevő Summit Audio
- Vevő Musway
- Vevő Brigmton
- Vevő Sunstech
- Vevő Elektrobock
- Vevő Avalon
- Vevő Sonance
- Vevő Oculus VR
- Vevő Redline
- Vevő Marquant
- Vevő Matrox
- Vevő Steren
- Vevő Polk
- Vevő Sandberg
- Vevő Galaxy Audio
- Vevő Denson
- Vevő Pyle Pro
- Vevő Roksan
- Vevő Valcom
- Vevő Goobay
- Vevő Hager
- Vevő Maxview
- Vevő Rocketfish
- Vevő Naxa
- Vevő Sherwood
- Vevő QTX
- Vevő Zgemma
- Vevő RDL
- Vevő Zehnder
- Vevő Mx Onda
- Vevő Fredenstein
- Vevő Metronic
- Vevő Harper
- Vevő TV STAR
- Vevő QSC
- Vevő Lanzar
- Vevő Simrad
- Vevő Humax
- Vevő Vaddio
- Vevő Gira
- Vevő Jung
- Vevő Golden Age Project
- Vevő Apart
- Vevő Pinnacle
- Vevő Eventide
- Vevő Audio Pro
- Vevő Radial Engineering
- Vevő Homecast
- Vevő Graupner
- Vevő Bluesound
- Vevő Integra
- Vevő Revox
- Vevő Engel Axil
- Vevő Comica
- Vevő Fusion
- Vevő Audient
- Vevő PAC
- Vevő Skytec
- Vevő Luxman
- Vevő JETI
- Vevő Linn
- Vevő Monoprice
- Vevő Ibiza Sound
- Vevő Exposure
- Vevő Axton
- Vevő Fostex
- Vevő MIPRO
- Vevő Solid State Logic
- Vevő Edision
- Vevő Neets
- Vevő NAV-TV
- Vevő HiFi ROSE
- Vevő OSD Audio
- Vevő Mark Levinson
- Vevő RME
- Vevő Black Lion Audio
- Vevő Soundstream
- Vevő Xoro
- Vevő DLS
- Vevő Adastra
- Vevő Block
- Vevő PSB
- Vevő Aeon Labs
- Vevő Citronic
- Vevő Formuler
- Vevő Lindell Audio
- Vevő LTC
- Vevő JB Systems
- Vevő Dreambox
- Vevő Zalman
- Vevő James
- Vevő HUMANTECHNIK
- Vevő PSSO
- Vevő Crest Audio
- Vevő Primare
- Vevő Sonifex
- Vevő Xantech
- Vevő Ferguson
- Vevő Wet Sounds
- Vevő Televés
- Vevő Manley
- Vevő Extron
- Vevő HEOS
- Vevő Madison
- Vevő Ebode
- Vevő Phonocar
- Vevő Xtrend
- Vevő Scansonic
- Vevő Helix
- Vevő Winegard
- Vevő Laney
- Vevő Devialet
- Vevő ETON
- Vevő Xsarius
- Vevő EA
- Vevő DirecTV
- Vevő Octagon
- Vevő GOgroove
- Vevő Crown
- Vevő SRS
- Vevő Avantree
- Vevő LYYT
- Vevő Antelope Audio
- Vevő CE Labs
- Vevő Pharos
- Vevő Accell
- Vevő Jolida
- Vevő Inovonics
- Vevő Ecler
- Vevő Viscount
- Vevő Ashdown Engineering
- Vevő Triax
- Vevő Synq
- Vevő Mtx Audio
- Vevő Aquatic AV
- Vevő Parasound
- Vevő DB Technologies
- Vevő Roswell
- Vevő Velodyne
- Vevő Epcom
- Vevő Sunfire
- Vevő Selfsat
- Vevő Skytronic
- Vevő CYP
- Vevő Topp Pro
- Vevő Whistler
- Vevő Astell&Kern
- Vevő Karma
- Vevő TV One
- Vevő Dimavery
- Vevő AMS Neve
- Vevő Powersoft
- Vevő LinksPoint
- Vevő Esoteric
- Vevő Markbass
- Vevő IMG Stage Line
- Vevő Wireless Solution
- Vevő Leviton
- Vevő Aurel
- Vevő ESX
- Vevő NUVO
- Vevő Phoenix Audio
- Vevő AVPro Edge
- Vevő Comtek
- Vevő Fishman
- Vevő RetroSound
- Vevő Pyramid
- Vevő LEA
- Vevő Sound Ordnance
- Vevő Canyon
- Vevő FiveO
- Vevő Planet Audio
- Vevő Phonic
- Vevő Koda
- Vevő Hotone
- Vevő Trace Elliot
- Vevő Bang Olufsen
- Vevő JTS
- Vevő AER
- Vevő Dynavox
- Vevő Modelcraft
- Vevő Klark Teknik
- Vevő Simaudio
- Vevő TIC
- Vevő Niles
- Vevő Knoll
- Vevő Creek
- Vevő Mobile Crossing
- Vevő DAP
- Vevő Krell
- Vevő GigaBlue
- Vevő ANKARO
- Vevő Bugera
- Vevő CAD Audio
- Vevő Cabasse
- Vevő Triangle
- Vevő Lab Gruppen
- Vevő Wavtech
- Vevő AmpliVox
- Vevő Audiofrog
- Vevő CyberData Systems
- Vevő WyreStorm
- Vevő Williams Sound
- Vevő Lyngdorf
- Vevő SoundTube
- Vevő WesAudio
- Vevő AudioSource
- Vevő Stewart
- Vevő Leema
- Vevő Apantac
- Vevő Axing
- Vevő Seco-Larm
- Vevő Mosconi
- Vevő Crest
- Vevő TechLogix Networx
- Vevő Audibax
- Vevő Meridian
- Vevő Quad
- Vevő BC Acoustique
- Vevő Gold Note
- Vevő IOTAVX
- Vevő Fosi Audio
- Vevő Shinybow
- Vevő Rexing
- Vevő Shanling
- Vevő Inter-M
- Vevő Sinus Live
- Vevő Soundtrack
- Vevő Canor
- Vevő C2G
- Vevő Unison Research
- Vevő Cerwin-Vega
- Vevő Universal Remote Control
- Vevő BMB
- Vevő Advance
- Vevő Cloud
- Vevő Lumantek
- Vevő Taga Harmony
- Vevő PTN-electronics
- Vevő VMV
- Vevő Black Hydra
- Vevő Bellari
- Vevő GlobalSat
- Vevő Aplic
- Vevő PureLink
- Vevő FoneStar
- Vevő Henry Engineering
- Vevő Glemm
- Vevő ButtKicker
- Vevő Atoll
- Vevő Benchmark
- Vevő Streacom
Legújabb útmutatók Vevő

9 Április 2025
9 Április 2025
5 Április 2025
5 Április 2025
2 Április 2025
2 Április 2025
2 Április 2025

31 Március 2025
31 Március 2025
30 Március 2025