Használati útmutató RCA RCR815
Olvassa el alább 📖 a magyar nyelvű használati útmutatót RCA RCR815 (25 oldal) a vezérlő kategóriában. Ezt az útmutatót 10 ember találta hasznosnak és 2 felhasználó értékelte átlagosan 4.5 csillagra
Oldal 1/25

universal
Consolidates up to 8-remotes
· Advanced DVD functionality
· Advanced DVR functionality
· Special Home Theater keys and expanded code
library for advanced home theater and HDTV control
· 2 Bonus AUX keys lets you add 2 additional
components
Customize your remote keys to match the remote
you are replacing
Programmable MACROs let you combine a series
of commands in a single keypress!
Combine jusqu’à 8 télécommandes
· Fonctions DVD avancées
· Fonctions DVR avancées
· Touches Cinéma au foyer spéciales et liste de
codes étendue pour une commande audio et HDTV
avancée
· 2 touches AUX en prime permettent de commander
2 autres appareils (aussi 1 touche AUX en prime
permet de commander un autre appareil)
Personnalisez les touches de la télécommande en
fonction de la télécommande que vous remplacez
Des MACROS programmables permettent de
combiner une série de commandes sous une
seule touche
Puede consolidar hasta 8 unidades de
control remoto
· Funcionalidad Avanzada de DVD
· Funcionalidad Avanzada de DVR
· Teclas Especiales para Teatro Casero y biblioteca con
expansión de claves para controles avanzados de
audio y HDTV
· 2 Teclas Auxiliares (AUX) extras que le permiten
controlar dos componentes adicionales (también una
tecla auxiliar “AUX” extra que le permite controlar un
componente adicional).
Programe según sus necesidades las teclas de
control remoto para combinar los controles
que usted está reemplazando con MACROs
Programables, y que le permiten combinar una
serie de mandos en una sola tecla.
See back for most popular brands.
Liste compléte au verso.
Para obtener una lista más
extensa, vea el reverso.
Learning Remote
RCR815
Multi-Brand Use
Utilisation multimarque
Funciona con muchas marcas
remote
U N I V E R S A L
DVD
TV
VCR
DVR
AUDIO
SAT/
CAB
AUX
AUX
RCR815ƒ.indd 1
RCR815ƒ.indd 1
RCR815ƒ.indd 1
RCR815ƒ.indd 1RCR815ƒ.indd 1 3/4/05 11:35:05 AM
3/4/05 11:35:05 AM
3/4/05 11:35:05 AM
3/4/05 11:35:05 AM3/4/05 11:35:05 AM
2 3
Battery Installation and Information
Your universal remote requires two AA Alkaline batteries (batteries may or may not be included,
depending on model). To install the batteries:
Congratulations on your purchase of this advanced universal remote, which has the capacity to control
multiple components. You can program your RCA brand universal remote to operate most models of
most brands of infrared, remote-controlled components manufactured after 1990.
(See the enclosed Code Lists for a complete list of brands.)
Your universal remote is already programmed to operate most RCA, GE and PROSCAN
branded TVs, VCRs, DVD players and satellite receivers. Just press the corresponding key– key for DVD
a DVD player; key for a television; TV SAT·CBL for a satellite receiver or a cable box; etc.
Table of Contents
Universal Remote
! TIP:
Your universal remote control saves battery power by automatically turning off if any key is pressed
for more than 60 seconds.
Battery Saver
Backlight illumination (available on select models only) enables you to see
the remote control keys better in the dark. Backlight illumination is toggled
on or off with successive keypresses of the key. When toggled on, the LIGHT
backlighting remains on as long as keys are being pressed. The backlighting
turns off six seconds after the last keypress. Once the backlight time has
expired, any keypress reactivates backlighting. If the backlight illumination is
on, and the key is pressed, the backlight turns off. LIGHT
Backlighting
Illuminated ON·OFF Key
Double Off Function
The ON·OFF key powers components on and off. It also lights up to serve
as an indicator light, providing feedback for various functions. When a valid
key is pressed, the illuminated ON·OFF key remains lit as long as the key is
pressed and turns off when the key is released. The ON·OFF key also blinks in
Programming mode or in Menu mode to provide feedback.
The Double Off function transmits a sequence of POWER OFF commands to turn off all RCA
components. This feature is specific to RCA products and does not work with other brands. To activate
this feature, press the illuminated key twice within a two-second window. At the second ON·OFF
keypress, all RCA components turn off.
Product Diagram. . . . . . . . . . . . . . . . . . . . . . . . . . . . . . . . . . . . . . . . . . . . . . . . . . . . . . . . . . . . . . . . . . . . . . . . . . . 2
Introduction. . . . . . . . . . . . . . . . . . . . . . . . . . . . . . . . . . . . . . . . . . . . . . . . . . . . . . . . . . . . . . . . . . . . . . . . . . . . . . . 3
Battery Installation and Information . . . . . . . . . . . . . . . . . . . . . . . . . . . . . . . . . . . . . . . . . . . . . . . . . . . . . . . . . . 3
Battery Saver . . . . . . . . . . . . . . . . . . . . . . . . . . . . . . . . . . . . . . . . . . . . . . . . . . . . . . . . . . . . . . . . . . . . . . . . . . . . . . 3
Backlighting . . . . . . . . . . . . . . . . . . . . . . . . . . . . . . . . . . . . . . . . . . . . . . . . . . . . . . . . . . . . . . . . . . . . . . . . . . . . . . . 3
Illuminated Key. . . . . . . . . . . . . . . . . . . . . . . . . . . . . . . . . . . . . . . . . . . . . . . . . . . . . . . . . . . . . .ON·OFF . . . . . . 3
Double Off Function. . . . . . . . . . . . . . . . . . . . . . . . . . . . . . . . . . . . . . . . . . . . . . . . . . . . . . . . . . . . . . . . . . . . . . . . 3
Programming the Remote . . . . . . . . . . . . . . . . . . . . . . . . . . . . . . . . . . . . . . . . . . . . . . . . . . . . . . . . . . . . . . . . . . . 4
Programming Methods . . . . . . . . . . . . . . . . . . . . . . . . . . . . . . . . . . . . . . . . . . . . . . . . . . . . . . . . . . . . . . . . . . . . . 4
Brand Code Search and Entry . . . . . . . . . . . . . . . . . . . . . . . . . . . . . . . . . . . . . . . . . . . . . . . . . . . . . . . . . . 4
Direct Code Entry. . . . . . . . . . . . . . . . . . . . . . . . . . . . . . . . . . . . . . . . . . . . . . . . . . . . . . . . . . . . . . . . . . . . . 5
Programming the AUX DVR·AUX or Key . . . . . . . . . . . . . . . . . . . . . . . . . . . . . . . . . . . . . . . . . . . . . . . . 6
Manual Code Search and Entry . . . . . . . . . . . . . . . . . . . . . . . . . . . . . . . . . . . . . . . . . . . . . . . . . . . . . . . . . 6
Testing the Code for Maximum Functionality. . . . . . . . . . . . . . . . . . . . . . . . . . . . . . . . . . . . . . . . . . . . . 7
Auto Code Search and Entry . . . . . . . . . . . . . . . . . . . . . . . . . . . . . . . . . . . . . . . . . . . . . . . . . . . . . . . . . . . 7
Code Retrieval. . . . . . . . . . . . . . . . . . . . . . . . . . . . . . . . . . . . . . . . . . . . . . . . . . . . . . . . . . . . . . . . . . . . . . . . . . . . . 8
Using the Remote to Control Your Components . . . . . . . . . . . . . . . . . . . . . . . . . . . . . . . . . . . . . . . . . . . . . . . . 8
Volume Punch Through . . . . . . . . . . . . . . . . . . . . . . . . . . . . . . . . . . . . . . . . . . . . . . . . . . . . . . . . . . . . . . . . . . . . . 9
Advanced Volume Punch Through. . . . . . . . . . . . . . . . . . . . . . . . . . . . . . . . . . . . . . . . . . . . . . . . . . . . . . 9
Transport Key Punch Through . . . . . . . . . . . . . . . . . . . . . . . . . . . . . . . . . . . . . . . . . . . . . . . . . . . . . . . . . . . . . . . 9
Sleep Timer . . . . . . . . . . . . . . . . . . . . . . . . . . . . . . . . . . . . . . . . . . . . . . . . . . . . . . . . . . . . . . . . . . . . . . . . . . . . . . . 9
Programming the Sleep Timer . . . . . . . . . . . . . . . . . . . . . . . . . . . . . . . . . . . . . . . . . . . . . . . . . . . . . . . . . . 9
Learning . . . . . . . . . . . . . . . . . . . . . . . . . . . . . . . . . . . . . . . . . . . . . . . . . . . . . . . . . . . . . . . . . . . . . . . . . . . . . . . . . 10
Learning Tips . . . . . . . . . . . . . . . . . . . . . . . . . . . . . . . . . . . . . . . . . . . . . . . . . . . . . . . . . . . . . . . . . . . . . . . 10
Code Learning . . . . . . . . . . . . . . . . . . . . . . . . . . . . . . . . . . . . . . . . . . . . . . . . . . . . . . . . . . . . . . . . . . . . . . 10
Learning Commands . . . . . . . . . . . . . . . . . . . . . . . . . . . . . . . . . . . . . . . . . . . . . . . . . . . . . . . . . . . . . . . . . 11
Master Clear . . . . . . . . . . . . . . . . . . . . . . . . . . . . . . . . . . . . . . . . . . . . . . . . . . . . . . . . . . . . . . . . . . . . . . . . 11
Macro Operations . . . . . . . . . . . . . . . . . . . . . . . . . . . . . . . . . . . . . . . . . . . . . . . . . . . . . . . . . . . . . . . . . . . . . . . . . 12
Program a Macro . . . . . . . . . . . . . . . . . . . . . . . . . . . . . . . . . . . . . . . . . . . . . . . . . . . . . . . . . . . . . . . . . . . . 12
Execute a Macro . . . . . . . . . . . . . . . . . . . . . . . . . . . . . . . . . . . . . . . . . . . . . . . . . . . . . . . . . . . . . . . . . . . . . 13
Delete a Macro . . . . . . . . . . . . . . . . . . . . . . . . . . . . . . . . . . . . . . . . . . . . . . . . . . . . . . . . . . . . . . . . . . . . . . 13
Troubleshooting. . . . . . . . . . . . . . . . . . . . . . . . . . . . . . . . . . . . . . . . . . . . . . . . . . . . . . . . . . . . . . . . . . . . . . . . . . . 14
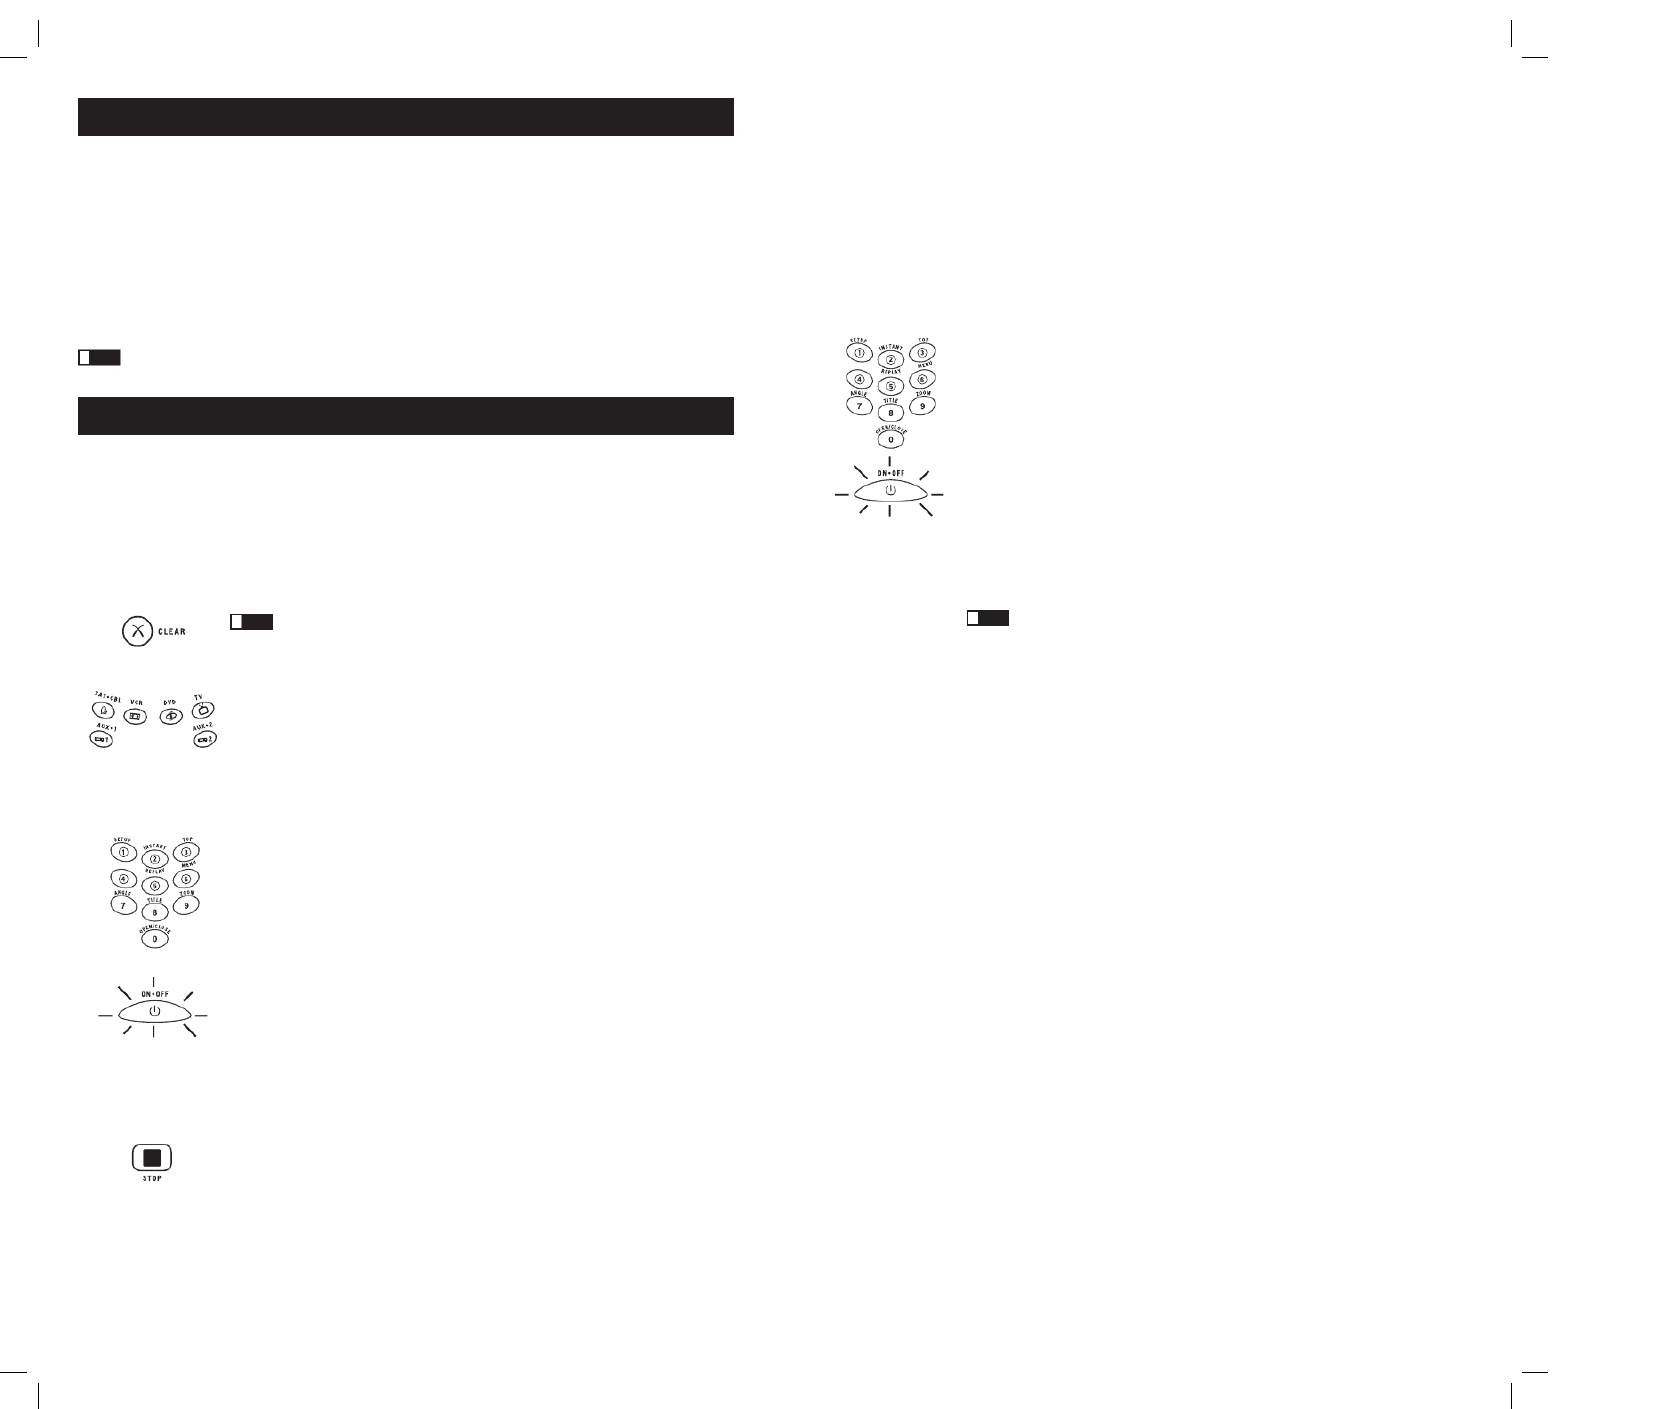
1. Remove the battery compartment cover.
2. Insert the batteries, matching the batteries to the (+) and (-) marks inside the
battery compartment.
3. Press and push the battery cover back into place.
Note: Reprogramming may be required after batteries are replaced.
Actual model may vary from picture shown.
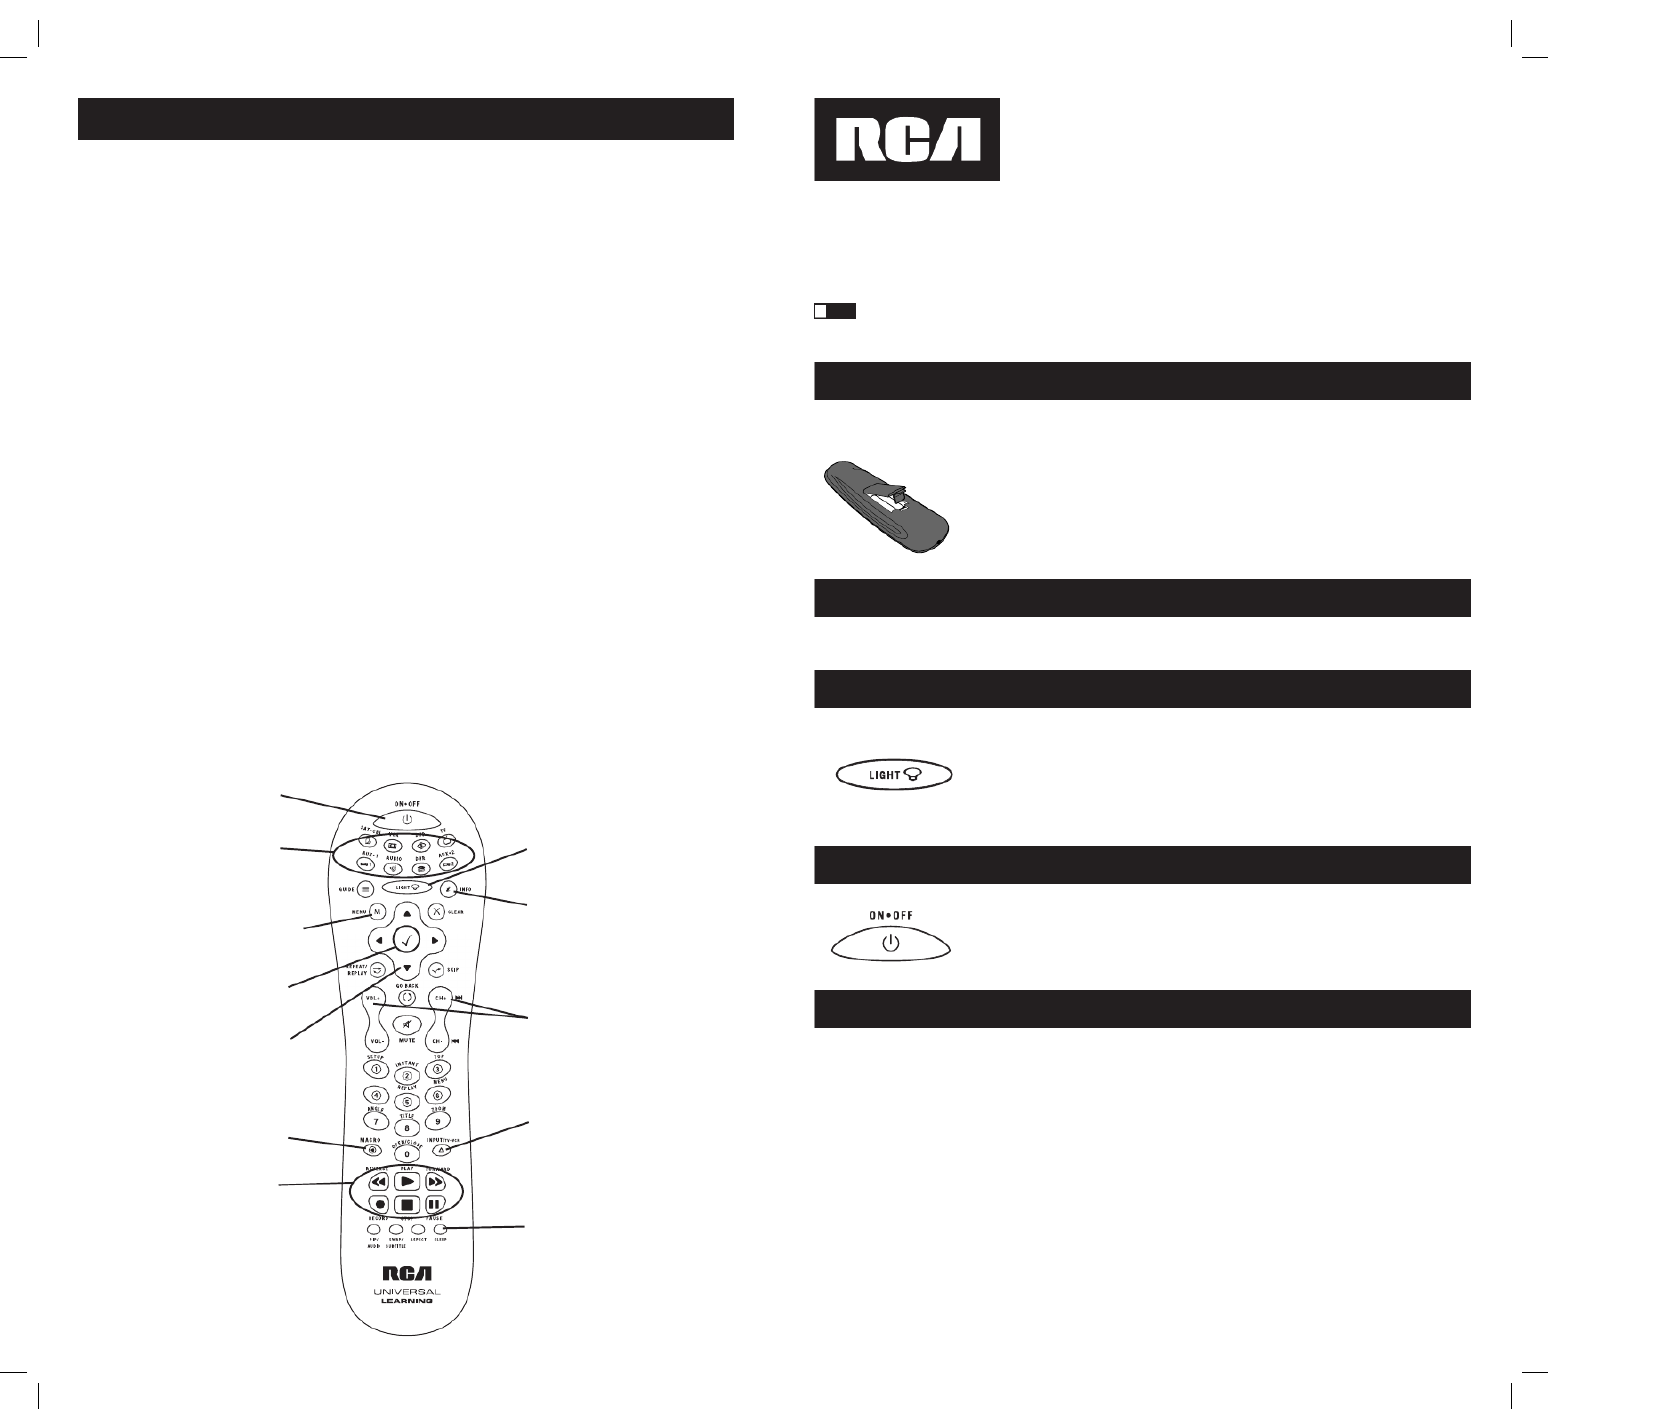
Component Keys (SAT·CBL,
VCR, DVD, TV, AUX·1, AUDIO,
DVR, AUX·2)
LIGHT Key – Turns backlighting
on/off (select models only).
Illuminated ON·OFF Key –
Serves as an indicator light to
provide feedback.
Transport Keys – REVERSE,
PLAY, FORWARD, RECORD,
STOP PAUSE and Keys
CH VOL and keys have dual
functions. They act as navigation
keys (UP, DN, RT, LT ARROW
keys) in menu systems.
NAVIGATION Keys navigate
through menus for DVDs, satellite
receivers and some TVs.
SELECT/OK Key – Selects your
menu choices.
Dedicated MENU Key for DVD
disc menus, satellite receivers and
some TVs.
SLEEP Key - Allows you to
set a time to turn off your TV
automatically.
INPUT Key – Toggles through all
the video sources connected to
your TV, when the remote is in TV
mode. When the remote is in VCR
mode, it toggles between VCR
and TV input.
INFO key – Displays information
pertaining to the component you
are currently controlling.
MACRO Key Plus Digit Keys
1-6 – Enable you to store and
execute Macros.
RCR815ƒ.indd 2-3
RCR815ƒ.indd 2-3
RCR815ƒ.indd 2-3
RCR815ƒ.indd 2-3RCR815ƒ.indd 2-3 3/4/05 11:35:07 AM
3/4/05 11:35:07 AM
3/4/05 11:35:07 AM
3/4/05 11:35:07 AM3/4/05 11:35:07 AM
4 5
Programming the Remote
Your universal remote can operate a variety of brands of components. You need to program the remote
with the codes that match the components (See Code Lists enclosed). These codes enable the remote to
communicate with your components. Each brand and each component has its own “language,” and, by
programming the correct codes into your remote, you tell the remote to “speak the same language” as
your components.
In order to control combo units, like TV/VCRs, TV/DVDs or TV/VCR/DVDs, use the combo codes
in the Code List to program the individual corresponding component keys. Once programmed
successfully, the TV key controls the TV functions on your unit, and the key controls the DVD or VCR
DVD or VCR functions, respectively. The codes in the combo section should be tried first, using Direct
Code Entry on the and or TV DVD VCR keys. If this is unsuccessful, use Manual or Auto Code Search
to program the remote to control your combo unit.
Throughout the programming of each key, keep the remote pointed at the IR sensor of the
component you are currently programming the remote to control.
! TIP:
Programming Methods
Brand Code Search and Entry
If your brand is listed in the Brand Code List (See Code Lists enclosed), you may be able to program
your universal remote by searching through only the Code Lists for that specific manufacturer. Brand
Code Search and Entry can be the quickest method to program your remote. If your brand is not listed
in the Brand Code List, use one of the other programming methods.
NOTE: Brand Code Search and Entry is supported for TV, VCR, DVD and SAT/CBL brands. You cannot use the Brand
Code Search method for AUDIO, DVR and HDTV.
Follow these instructions to program your remote using the Brand Code Search and Entry method.
To exit without saving at any point in the Brand Code Search, press and
release the CLEAR key.
1. Manually turn on the component you want the remote to control.
2. Locate the Brand Codes in the Code Lists.
3. Press and hold the component key you wish to program. The illuminated
ON·OFF key turns on and remains on.
4. While holding the component key down, press and hold the ON·OFF key.
The illuminated turns off. ON·OFF key
5. After holding both keys down for three seconds, the illuminated ON·OFF
key turns back on.
6. Release both keys. The illuminated remains on. ON·OFF key
7. Refer to the Brand Codes. Press and release the appropriate brand code key
(Numbers 0-9), using the number keys. The illuminated ON·OFF key
blinks once.
Note: If you do not press a valid Brand Code Search key, the illuminated ON·OFF key blinks
four times and turns off. The last programmed code under that component key is retained.
8. Press and release the key repeatedly until your component turns ON·OFF
off. Each time you press the ON·OFF key, the illuminated ON·OFF key
blinks, and the next code is sent. The Brand Code Search begins with the
first code in the chosen brand list for that component and cycles through
all the codes for that brand. If your component turns off, you have found
the correct code. (If it cycles through and the illuminated ON·OFF key
blinks four times and turns off, all codes in the chosen brand list have been
searched and another programming method should be tried. The Brand
Code Search mode is exited.)
9. Once you have found the correct code, save that code by pressing and
releasing the key. The illuminated key turns off. STOP ON·OFF You must
press the STOP key to save the code or the correct code will not be stored!
10. To confirm that the component key is programmed with the correct code
for maximum functionality, test the component. Attempt to control a variety
of the component’s functions with the remote. If some of the features
of your component do not work, program the remote with a different
programming method.
! TIP:
Direct Code Entry
To program your universal remote to control your components using the Direct Code Entry Method,
follow the steps below.
1. Manually turn on the component you want the remote to control.
2. Locate the listing of four-digit codes for your component’s brand in the
enclosed Code Lists. If your brand isn’t listed, use one of the Code Search
methods to program the remote control.
3. Press and hold the component key you wish to program. The illuminated
ON·OFF key turns on and remains on. If you release the component key
any time during the Direct Code Entry procedure, the illuminated ON·OFF
key blinks four times, and the process is exited. The last programmed code
under the component key is retained.
4. While holding down the component key, use the number keys (0-9) to
enter the four-digit code from the Code Lists that corresponds to your
component’s brand. After you press the first number, the illuminated
ON·OFF key turns off.
5. After the fourth number is entered, the illuminated turns on. ON·OFF key
Release the component key. If the illuminated turns off, you ON·OFF key
have entered a valid code and have followed the correct procedure for
Direct Code Entry.
If you enter a code number that is not in the Code Lists or you do not follow
all of the steps for Direct Code Entry, the illuminated ON·OFF key blinks
four times when the component key is released. This is an indication that a
programming error has occurred. Repeat the Direct Code Entry process from
step 3 or try the next code listed.
Throughout the programming of each key, keep the remote pointed at
the IR sensor of the component you are currently programming the remote
to control.
6. To confirm that the component key is programmed with the correct code for
maximum functionality, test the component. Attempt to control a variety of
the component’s functions with the remote. If some of the features of your
components do not work, program the remote with a different code in the
list until you find the code that allows the remote to control the majority of
your component’s functions. Different codes can provide different levels
of functionality.
7. Enter the code for future reference in the box provided in the Code Retrieval
section of this manual. (See page 8)
! TIP:
RCR815ƒ.indd 4-5
RCR815ƒ.indd 4-5
RCR815ƒ.indd 4-5
RCR815ƒ.indd 4-5RCR815ƒ.indd 4-5 3/4/05 11:35:08 AM
3/4/05 11:35:08 AM
3/4/05 11:35:08 AM
3/4/05 11:35:08 AM3/4/05 11:35:08 AM
Termékspecifikációk
| Márka: | RCA |
| Kategória: | vezérlő |
| Modell: | RCR815 |
Szüksége van segítségre?
Ha segítségre van szüksége RCA RCR815, tegyen fel kérdést alább, és más felhasználók válaszolnak Önnek
Útmutatók vezérlő RCA

13 Szeptember 2024
5 Augusztus 2024
1 Augusztus 2024
29 Július 2024
28 Július 2024
27 Július 2024
26 Július 2024
23 Július 2024
22 Július 2024
19 Július 2024
Útmutatók vezérlő
- vezérlő Samsung
- vezérlő Sony
- vezérlő Yamaha
- vezérlő Nedis
- vezérlő Philips
- vezérlő Pioneer
- vezérlő Garmin
- vezérlő Canon
- vezérlő StarTech.com
- vezérlő HyperX
- vezérlő Sven
- vezérlő HP
- vezérlő Saramonic
- vezérlő SBS
- vezérlő JBL
- vezérlő Hunter
- vezérlő Zebra
- vezérlő Dell
- vezérlő Boss
- vezérlő Crestron
- vezérlő Tripp Lite
- vezérlő Allen & Heath
- vezérlő Thomson
- vezérlő Esperanza
- vezérlő Juniper
- vezérlő Reely
- vezérlő Hikvision
- vezérlő Eurolite
- vezérlő Vivanco
- vezérlő Microsoft
- vezérlő Asus
- vezérlő Rain Bird
- vezérlő Hama
- vezérlő Zoom
- vezérlő Korg
- vezérlő Mitsubishi
- vezérlő Gossen Metrawatt
- vezérlő Synology
- vezérlő Hori
- vezérlő Polsen
- vezérlő Supermicro
- vezérlő Genesis
- vezérlő Bose
- vezérlő Thrustmaster
- vezérlő BeamZ
- vezérlő Tangent
- vezérlő COLBOR
- vezérlő Logitech
- vezérlő SPL
- vezérlő TOA
- vezérlő Parrot
- vezérlő American DJ
- vezérlő Scosche
- vezérlő Smart-AVI
- vezérlő DJI
- vezérlő Amazon
- vezérlő MSI
- vezérlő Gembird
- vezérlő Cisco
- vezérlő Denon
- vezérlő ATen
- vezérlő Niceboy
- vezérlő Speed-Link
- vezérlő Steelplay
- vezérlő Behringer
- vezérlő Bogen
- vezérlő Showtec
- vezérlő Carel
- vezérlő Chauvet
- vezérlő DreamGEAR
- vezérlő PreSonus
- vezérlő Steelseries
- vezérlő Manhattan
- vezérlő Spektrum
- vezérlő Plantronics
- vezérlő Honeywell
- vezérlő Broan
- vezérlő Marshall
- vezérlő Velleman
- vezérlő Russound
- vezérlő Media-Tech
- vezérlő Monacor
- vezérlő Zephyr
- vezérlő One For All
- vezérlő IK Multimedia
- vezérlő ION
- vezérlő Manta
- vezérlő Apricorn
- vezérlő Datapath
- vezérlő Razer
- vezérlő Mackie
- vezérlő Infinity
- vezérlő Trust
- vezérlő AKAI
- vezérlő Konig
- vezérlő Pyle
- vezérlő MuxLab
- vezérlő Lumens
- vezérlő Rolls
- vezérlő IFM
- vezérlő DataVideo
- vezérlő Dangerous Music
- vezérlő Atlona
- vezérlő Schneider
- vezérlő Lindy
- vezérlő NACON
- vezérlő Danfoss
- vezérlő Areca
- vezérlő Steca
- vezérlő Atlas Sound
- vezérlő Marshall Electronics
- vezérlő Cameo
- vezérlő Audac
- vezérlő Siig
- vezérlő Novation
- vezérlő Gefen
- vezérlő Homematic IP
- vezérlő HQ Power
- vezérlő Somfy
- vezérlő AViPAS
- vezérlő Nintendo
- vezérlő Magnus
- vezérlő Thermaltake
- vezérlő Kicker
- vezérlő DBX
- vezérlő Genius
- vezérlő Adj
- vezérlő Numark
- vezérlő IVT
- vezérlő Clarity
- vezérlő Tascam
- vezérlő Alfatron
- vezérlő Astro
- vezérlő Savio
- vezérlő 8BitDo
- vezérlő Belkin
- vezérlő RGBlink
- vezérlő PTZ Optics
- vezérlő KanexPro
- vezérlő Kramer
- vezérlő BZBGear
- vezérlő Manfrotto
- vezérlő AMX
- vezérlő American Audio
- vezérlő Draper
- vezérlő Thermador
- vezérlő SilverStone
- vezérlő Targus
- vezérlő Jumbo
- vezérlő Sonance
- vezérlő Da-Lite
- vezérlő Ednet
- vezérlő Perel
- vezérlő Bigben Interactive
- vezérlő GeoVision
- vezérlő Valcom
- vezérlő Bigben
- vezérlő Naxa
- vezérlő Carat
- vezérlő Intel
- vezérlő Sherwood
- vezérlő Sweex
- vezérlő Vizio
- vezérlő Vakoss
- vezérlő Metronic
- vezérlő Aruba
- vezérlő Natec
- vezérlő Ikan
- vezérlő T'nB
- vezérlő Tracer
- vezérlő ESI
- vezérlő Schaudt
- vezérlő GVM
- vezérlő Irritrol
- vezérlő Vaddio
- vezérlő Jung
- vezérlő Apart
- vezérlő Saitek
- vezérlő Turtle Beach
- vezérlő Radial Engineering
- vezérlő Fusion
- vezérlő Xtreme
- vezérlő IHome
- vezérlő Senal
- vezérlő Krom
- vezérlő Monoprice
- vezérlő Fostex
- vezérlő ASTRO Gaming
- vezérlő OSD Audio
- vezérlő AirTurn
- vezérlő Adaptec
- vezérlő Big Ben
- vezérlő Contour Design
- vezérlő Sonifex
- vezérlő Xantech
- vezérlő Ganz
- vezérlő Movistar
- vezérlő Konix
- vezérlő Auray
- vezérlő Logic3
- vezérlő GOgroove
- vezérlő Morningstar
- vezérlő Kanlux
- vezérlő HID Identity
- vezérlő LYYT
- vezérlő Venom
- vezérlő PDP
- vezérlő Inovonics
- vezérlő Gioteck
- vezérlő MOZA
- vezérlő Robitronic
- vezérlő Icon
- vezérlő Premier Mounts
- vezérlő Aquatic AV
- vezérlő Tru Components
- vezérlő Elite Screens
- vezérlő KONFTEL
- vezérlő PowerA
- vezérlő LSI
- vezérlő Phoenix Contact
- vezérlő Softube
- vezérlő SmartAVI
- vezérlő RiotPWR
- vezérlő Highpoint
- vezérlő Leviton
- vezérlő EtiamPro
- vezérlő PCE Instruments
- vezérlő SecurityMan
- vezérlő Ltech
- vezérlő Canyon
- vezérlő Hotone
- vezérlő IPEGA
- vezérlő Dadson
- vezérlő Niles
- vezérlő Rachio
- vezérlő Ledxon
- vezérlő Blizzard Lighting
- vezérlő Trenton Systems
- vezérlő Heath Zenith
- vezérlő Gamesir
- vezérlő Lab Gruppen
- vezérlő Heritage Audio
- vezérlő CTA Digital
- vezérlő Re.corder
- vezérlő Snakebyte
- vezérlő Nyko
- vezérlő EXSYS
- vezérlő Amer
- vezérlő ALC
- vezérlő Kanex
- vezérlő Audibax
- vezérlő Mitzu
- vezérlő CoolerMaster
- vezérlő Dragonshock
- vezérlő Atlantis Land
- vezérlő Universal Remote Control
- vezérlő LumenRadio
- vezérlő Circle
- vezérlő Victrix
- vezérlő Axor
- vezérlő HuddleCamHD
- vezérlő Balam Rush
- vezérlő Visual Productions
Legújabb útmutatók vezérlő

2 Április 2025
30 Március 2025
30 Március 2025
30 Március 2025
30 Március 2025
30 Március 2025
28 Március 2025
27 Március 2025
27 Március 2025
14 Január 2025