Használati útmutató Jensen CMN86
Olvassa el alább 📖 a magyar nyelvű használati útmutatót Jensen CMN86 (140 oldal) a Vevő kategóriában. Ezt az útmutatót 8 ember találta hasznosnak és 2 felhasználó értékelte átlagosan 4.5 csillagra
Oldal 1/140

Navigation
Operating Instructions

2
Navigation
This page intentionally left blank.

3
Jensen Navigation
WARNINGS AND PRECAUTIONS
WARNING! Please read and follow the following safety precautions.
Failure to follow the instructions below may increase your risk of collision and
personal injury.
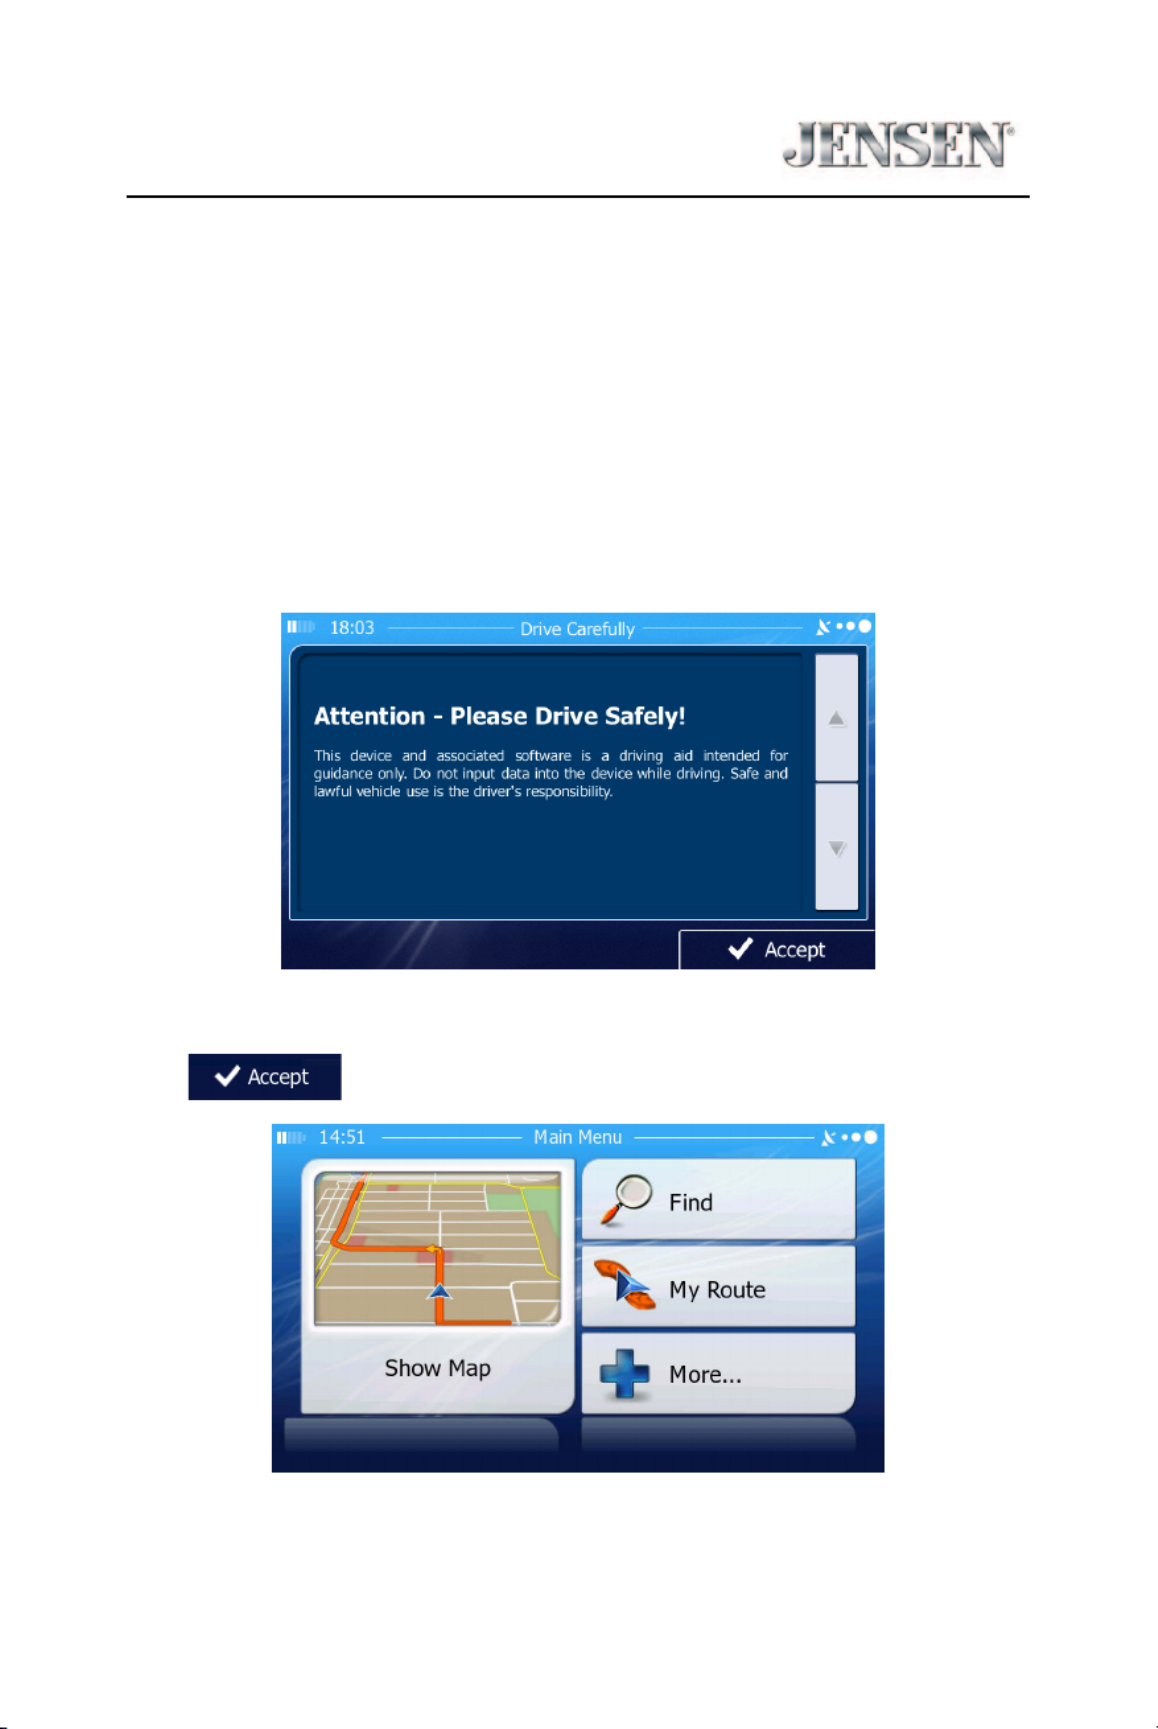
The Attention - Please Drive Safely! Screen is displayed each time the iGO primo
software is turned ON as a reminder to make use of the system’s navigational aids
in a safe manner.
Before using the software, read this entire manual. Make sure that you are familiar
with the system’s features and know how to operate the system. Proper use of the
iGO primo software includes the following guidelines:
The iGO primo software is not a substitute for your personal judgment. The route
suggestions should never supersede any local trac regulation or your personal
judgment and /or knowledge of safe driving practices. Prior to completing any
maneuvers suggested by your iGO primo software (for example, a U-turn or a left
turn), verify that you can legally and safely complete the maneuver. Do not follow
route suggestions if they direct you to perform an unsafe or illegal maneuver,
would place you in an unsafe situation, or would route you into an area that you
consider unsafe.
Glance at the screen only when necessary and safe to do so. Let the computer
voice guide you. If prolonged viewing is necessary, pull o the road to a
safe location.
Do not use the iGO primo software to locate emergency services (such as police,
re stations, hospitals, and clinics). The database may not include all emergency
service providers. Use your own best judgment and ask for directions in
these situations.
If the vehicle is in motion, only a passenger should program the iGO primo soft-
ware. The driver should not program the system unless the vehicle is parked in a
safe location.
The iGO primo software’s map database provides information on suggested routes
without regard to factors that may aect your driving experience or the time re-
quired to arrive at your destination. For example, the system does not reect road
detours, closures or construction, some road characteristics (e.g., road surface,
slope or grade, weight or height restrictions, etc.), temporary trac congestion,
weather conditions, and similar factors.

4
Navigation
iGO primo software provides turn-by-turn visual and voice assistance to direct you
to your selected destination. The software quickly calculates step-by-step
directions to any destination available on the included navigation map.
The iGO primo software uses Global Positioning System (GPS) satellites, and a
digital roadway map database to calculate and display travel directions. The sys-
tem’s GPS antenna receives signals from a constellation of 24 satellites orbiting the
earth and uses the strongest signals to determine your position to within meters.
Vehicle Position
The iGO primo software’s computer considers vehicle speed and heading changes,
together with longitude and latitude information, to accurately determine vehicle
heading and position on a digital map.
Signals from GPS satellites are used to determine the vehicle location. Three
(good) or four (best) satellites must be received to accurately determine location.
The GPS reception status is indicated by the GPS symbol on the map.
Map and Information Database
The map database used by your iGO primo software was created using
high-resolution aerial and land based data collection.
Car navigation maps are frequently updated. While the database was judged to
be as accurate as possible at the time of its release, a map database can never be
100% accurate. Road information that is maintained in the map databases, such as
turn restrictions or road names may change over time.
iGO primo mapping is supported by the mapping manufacturer. iGO oers
periodic updates for data such as roads, new addresses, and other navigational
information that will keep your navigation system up to date and provide the best
possible experience. For updates and add-on options, please visit their website at
www.naviextras.com. A free program called “toolbox” can be downloaded from
this site so you can create a copy of your map as a backup, as well as assist in easily
checking for updates and optional features that are available. We
recommend that you back up your map because If your map becomes damaged
or erased, or if the card is lost without being backed up, you will need to purchase
a new map package.
To report incorrect information, missing addresses, or other map data, click on
“REPORT A MAP ERROR” under the SUPPORT section of www.naviextras.com.
Errors will be veried and corrected in a future map update.
We recommend that you check your map with this system now and every six
months to insure you always have the most up-to-date operating system
and maps.

5
Jensen Navigation
SAFETY INFORMATION
User Agreement
When the unit is rst turned on, you will see the following message, warning you
to operate your navigation system appropriately:
You must agree to the above notice before using the navigation software.
Tap to proceed to the Navigation Menu.

6
Navigation
Driver Safety Rules
The following safety rules must be followed to prevent accidents that can result in
injury or death to yourself or others:
•The driver should operate the device only when the vehicle is stopped. Only
a vehicle passenger should operate the device while the vehicle is moving.
When driving, the need to view the display is minimal. Voice prompts will
guide you to your destinations.
•It is your responsibility to comply with all trac laws.
•The navigation software is designed to assist you in the process of reaching
your destination. It is not a substitute for attentiveness and good judgement.
•It is your responsibility to disregard any unsafe, hazardous, or illegal route
suggestions.
•The device does not include, analyze, process, consider, or reect any of the
following:
a. Legal restrictions (such as vehicular type, weight, height, width, load
and speed restrictions);
b. Road slope or grade, bridge height, width, weight, or other limits;
c. Population density;
d. Neighborhood quality or safety;
e. Availability or proximity of law enforcement, emergency rescue,
medical, or other assistance;
f. Construction work zones or hazards;
g. Road or lane closures;
h. Road, trac, or trac facilities’ safety or condition;
i. Weather conditions;
j. Pavement characteristics or conditions;
k. Special events;
l. Trac congestion.
•While every attempt is made to ensure that the database is accurate,
roadways, points of interest, and business and service locations may change
over time.
•Do not use the unit to navigate to a police station, hospital, etc. in an
emergency. Call 911 for assistance.
•Laws in some states prohibit wearing stereo headphones or may prohibit use
or placement of a navigation device while operating a motor vehicle. Please
contact your state’s Department of Motor Vehicles for information.

7
Jensen Navigation
WARNINGS AND PRECAUTIONS 3 .............................................
Vehicle Position 4 .......................................................
Map Information and Database 4 . . . . . . . . . . . . . . . . . . . . . . . . . . . . . . . . . . . . . . . .
SAFETY INFORMATION 5 .....................................................
User Agreement 5 .......................................................
Driver Safety Rules 6 ....................................................
CONTENTS ..................................................................7
QUICK START GUIDE. . . . . . . . . . . . . . . . . . . . . . . . . . . . . . . . . . . . . . . . . . . . . . . . . . . . . . . . . 9
INTRODUCTION ............................................................12
Key Features ..........................................................12
Specications .........................................................12
About GPS and GNSS ..................................................13
Acquiring a Satellite Signal . . . . . . . . . . . . . . . . . . . . . . . . . . . . . . . . . . . . . . . . . . . .14
GETTING STARTED .........................................................15
Accessing the Navigation Software . . . . . . . . . . . . . . . . . . . . . . . . . . . . . . . . . . . .15
Adjusting the Navigation Voice Volume . . . . . . . . . . . . . . . . . . . . . . . . . . . . . . . .15
INITIAL SETUP ..............................................................16
Free Latest Map Guarantee ............................................17
NAVIGATION MENU ........................................................18
BUTTONS AND OTHER CONTROLS ON THE SCREEN . . . . . . . . . . . . . . . . . . . . . . . . . .19
Using Keyboards ......................................................21
Beyond Single Screen Tap .............................................22
MAP SCREEN ...............................................................23
Navigating on the Map ................................................23
Position Markers ......................................................26
Objects on the Map ...................................................27
Manipulating the Map .................................................32
Quick Menu ...........................................................35
Where Am I? ..........................................................39
NAVIGATING ...............................................................41
SELECTING THE DESTINATION OF A ROUTE . . . . . . . . . . . . . . . . . . . . . . . . . . . . . . . . . .41
Entering an Address or Part of an Address . . . . . . . . . . . . . . . . . . . . . . . . . . . . . .41
Selecting the Destination from the Places of Interest . . . . . . . . . . . . . . . . . . .64
Selecting a Map Location as the Destination . . . . . . . . . . . . . . . . . . . . . . . . . . .80
Selecting the Destination from Your Favorites . . . . . . . . . . . . . . . . . . . . . . . . . .81
Selecting One of the Most Likely Destinations (Smart History) . . . . . . . . . .83
Selecting a Recent Destination from the History . . . . . . . . . . . . . . . . . . . . . . . .85
Entering the Coordinates of the Destination . . . . . . . . . . . . . . . . . . . . . . . . . . . .87
Building a Route from the List of Destinations (Create Route) . . . . . . . . . . .89
VIEWING THE ENTIRE ROUTE ON THE MAP . . . . . . . . . . . . . . . . . . . . . . . . . . . . . . . . . .91
CHECKING ROUTE PARAMETERS ............................................92

8
Navigation
MODIFYING THE ROUTE ....................................................93
Selecting a New Destination When Already Having a Route . . . . . . . . . . . . .93
Setting a New Starting Position for the Route . . . . . . . . . . . . . . . . . . . . . . . . . .94
Editing the List of Destinations (Edit Route) . . . . . . . . . . . . . . . . . . . . . . . . . . . .96
Pausing the Active Route ..............................................97
Canceling the Active Route ............................................97
Checking Route Alternatives When Planning the Route . . . . . . . . . . . . . . . . .98
Checking Route Alternatives for an Existing Route . . . . . . . . . . . . . . . . . . . . . .99
Changing the Vehicle Used In Route Planning 101 . . . . . . . . . . . . . . . . . . . . . . . .
Changing the Road Types Used In Route Planning 102 . . . . . . . . . . . . . . . . . . . .
SAVING A LOCATION AS A FAVORITE DESTINATION 103 . . . . . . . . . . . . . . . . . . . . . . . .
SAVING A LOCATION AS AN ALERT POINT 104 . . . . . . . . . . . . . . . . . . . . . . . . . . . . . . . . .
EDITING AN ALERT POINT 105 ................................................
WATCHING THE SIMULATION OF THE ROUTE 106 . . . . . . . . . . . . . . . . . . . . . . . . . . . . . .
REFERENCE GUIDE 109 .......................................................
CONCEPTS 109 ...............................................................
Smart Zoom 109 ........................................................
Daytime and Night Color Themes 109 . . . . . . . . . . . . . . . . . . . . . . . . . . . . . . . . . . . .
Route Calculation and Recalculation 110 . . . . . . . . . . . . . . . . . . . . . . . . . . . . . . . . .
Green Routing 113 ......................................................
Road Safety Cameras and Other Proximity Alert Points 114 . . . . . . . . . . . . . . .
Speed Limit Warning ................................................ 114
GPS Position Quality Indicators 115 . . . . . . . . . . . . . . . . . . . . . . . . . . . . . . . . . . . . . .
Stored Trac Information In Route Planning 115 . . . . . . . . . . . . . . . . . . . . . . . . .
‘MORE’ MENU 116 ............................................................
SETTINGS MENU 118 .........................................................
Sound and Warnings ................................................ 120
Customize Quick Menu 123 ..............................................
Trac Settings 123 ......................................................
Route Settings 124 ......................................................
Green Routing Settings 127 ..............................................
Map Settings 128 ........................................................
Visual Guidance Settings 130 ............................................
Display Settings 131 .....................................................
Regional Settings 131 ...................................................
Trip Monitor Settings 132 ................................................
GLOSSARY 133 ...............................................................
END USER LICENSE AGREEMENT 135 ..........................................
9
Jensen Navigation
QUICK START GUIDE
Follow these six easy steps and you are on your way.
NOTE: Before operating your iGO Primo software, please carefully read and follow
the instructions provided in the “Warnings and Precautions” section of this
manual.
Step 1 - Access the navigation function:
You can access the navigation function by pressing the front panel NAV button.
Step 2 - Start Up:
After the iGO primo software starts, you will see the reminder warning to use your
iGO primo software safely and lawfully.
Step 3 - Access the Main Menu:
Press access the Navigation Menu:

10
Navigation
Step 4 - Select a Destination:
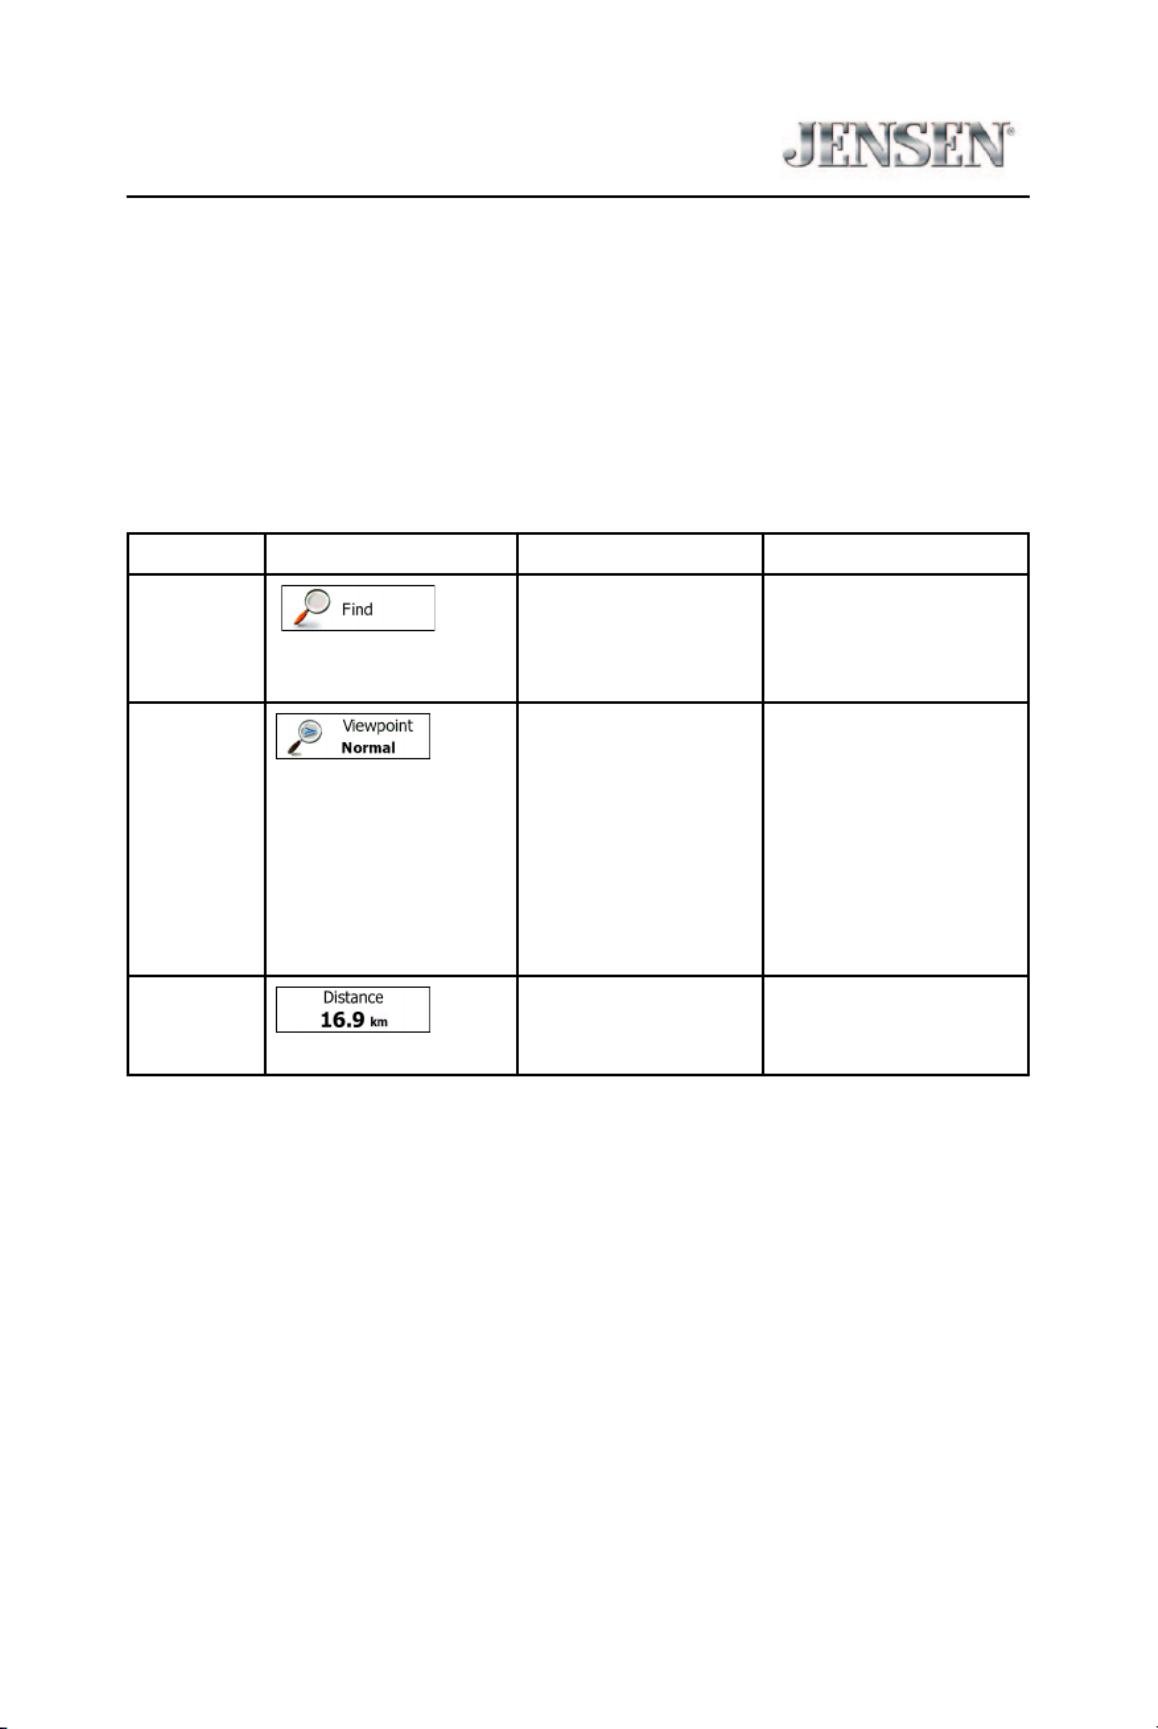
You have many ways to select a destination. Select by touching screen:
•Tap to select your destination by entering an address or selecting
a place of interest, a location on the map or one of your Favorite destinations.
You can also look up your recent destinations from the Smart History, enter a
coordinate or use the location saved in a photo.
•Tap to display the route parameters and the route in its full
length on the map. You can also perform route-related actions such as editing
or canceling your route, setting a start point for the route, picking route
alternatives, avoiding parts of the route, simulating navigation or adding the
destination to your Favorites.
•Tap to customize the way the navigation software works, simulate
demo routes, or to run some additional applications.
•Tap to start navigating on the map. The button itself is a miniature
live map that shows your current position, the recommended route and the
surrounding map area. Tap the button to enlarge the map to the full screen.
Step 5 - Map/Guide Along Route
Proceed to the highlighted route and drive while the iGO primo software provides
guidance to your destination.

11
Jensen Navigation
Step 6 - Arriving at Your Destination
When you are near your destination, the destination is indicated by a
checkered ag symbol .
Refer to the rest of this manual to become more familiar with the many options
available on your iGO primo software.

12
Navigation
INTRODUCTION
We hope that you enjoy using your new navigation system. This manual is
designed to help you get the most out of your system.
This navigation system leads you straight to your destination. You can navigate
and plan your route with an easy-to-use and intuitive interface, plan your trip
to suit your personal preferences and interests, and nd and save (bookmark)
interesting destinations before you begin your trip.
Key Features
•English, French and Spanish Voice
•Tele Atlas Map Data
•11 Million Points of Interest
•4GB SD Card with Continental US, Alaska, Hawaii, and Puerto Rico
•Latest Map Guarantee (Limited time only - Must be used within 90 days of
initial activation)
•Compatible with multimedia receiverJensen
Specifications
•SiRF Prima Processor
•Processor Speed 600MHz
•NAND Flash 256MB
•GPS Receiver - SiRF

13
Jensen Navigation
About GPS and GNSS
The unit uses a vehicle Global Positioning System (GPS)-based navigation device
which uses digital map data to guide you from your selected location A to
location B, using location information obtained from a Global Navigation Satellite
System (GNSS).
A GNSS consists of a set of satellites that transmit high-frequency radio signals
containing time, direction, and distance data that can be picked up by a receiver,
allowing users to pinpoint their precise locations anywhere around the globe.
Navigation Satellite Receivers (GPS devices) use this transmitted information to
calculate an exact location on the Earth. Every point on Earth can be identied
by latitude and longitude. The receiver uses the information sent by at least three
satellites and determines the coordinates of the receiving device.
By comparing the time the signals were transmitted from the satellites and the
time they were recorded, the receiver calculates how far away each satellite is.
The distance of the receiver from three or more satellites reects its position
on the surface of the planet. Using these distance measurements, the receiver
might also be able to calculate speed, bearing, trip time, distance to destination,
altitude, etc. The GPS position may be displayed as a point on a digital map (at
least three satellites’ signals must be received) and as the GPS device moves the
corresponding trace is displayed as well.
Please keep in mind that although the radio signals of navigation satellites will
pass through clouds, glass, plastic, and other lightweight materials, satellite-
navigation receivers will not work underground or in some enclosed spaces.

14
Navigation
Acquiring a Satellite Signal
The initial GPS location lock is best established when your vehicle is parked. If
the device is in motion, the signal can take longer to initially connect. Once the
initial coordinates are established, the software will follow you as you move and
navigate.
Drive your vehicle to an open area where the GPS signal can be clearly received
and park the vehicle. If the device is in motion, the signal can take longer to
initially connect.
If you cannot acquire the signal, drive to another location. If the signal is still
unobtainable, check your antenna installation.
Once a GPS signal has been established, verify that the information display clock
time (time displayed on the radio) matches the navigation system clock. With an
established GPS signal, the software will follow you as you move and navigate.
The GPS reception quality icon shows the current accuracy of the position
information.
Icon Description
iGO primo has no connection to the GPS receiver: GPS
navigation is not possible.
Devices with a built-in GPS receiver are permanently
connected. On such devices, the icon does not appear in
normal circumstances.
iGO primo is connected to the GPS receiver, but the
signal is too weak and the receiver cannot determine the
GPS position.
GPS navigation is not possible.
Only a few satellites are received. Position information is
available, but elevation (altitude) cannot be calculated.
GPS navigation is possible, but the position error may be
signicant.
Altitude information is available, the position is a 3D
position.
GPS navigation is possible.

15
Jensen Navigation
GETTING STARTED
iGO primo is optimized for in-car use. There is no need to use a stylus. You can use
it easily by tapping the screen buttons and the map with your ngertips.
Accessing the Navigation Software
Press the MENU button and touch the Navigation icon to access navigation mode.
Adjusting the Navigation Voice Volume
While the Navigation is on and a route has been programmed, the Navigation will
speak commands. While the Navigation is speaking, adjust the volume by turning
the radio volume knob. The Navigation volume will remain at this level and when
done speaking will return to the previous source (ie, radio) at the volume level set
for that source.
The main volume must be set above zero in order to hear the spoken directions.
If the radio is muted, the Bluetooth (if equipped) engaged in a call, or the volume
knob has been turned to zero, the navigation will not be heard but your visual
directions will continue.
Selecting / Listening to a Source while Navigating
While navigating, other sources may be selected and listened to such as AM-FM
Tuner, CD, etc. To listen to another source while navigating, press the SRC button
and then select a source from the Source Menu. Navigation voice prompts will be
heard automatically, although the navigation map cannot be seen. To view the
navigation screen, but continue to listen to the selected source, press the NAV/
WIDE button.

16
Navigation
INITIAL SETUP
When using the navigation software for the rst time, an initial setup process
starts automatically. Do as follows:
1. Select the written language of the application interface. Later you can change
it in Regional settings.
2. Read the End User License Agreement. Tap to continue.
3. The Conguration Wizard starts. Tap to continue.
4. Select the language and speaker used for voice guidance messages. Later you
can change it in Sound and Warnings settings.

17
Jensen Navigation
5. If needed, modify the time format and unit settings. Later you can change
them in Regional settings.
6. If needed, modify the default route planning options. Later you can change
them in Route settings.
7. The initial setup is now complete. The Conguration Wizard can be restarted
later from the Settings menu.
After the initial setup, the Navigation Menu appears and you can start using
iGO primo.
Free Latest Map Guarantee
Visit www.naviextras.com to register your map. (Limited time only - Must be used
within 90 days of initial activation).
NOTE: Map MUST be run in your navigation device one time before attempting
registration. Follow the instructions on-line.

18
Navigation
NAVIGATION MENU
You can reach all parts of iGO primo from the Navigation Menu.
You have the following options:
• Tap to select your destination by entering an address or selecting
a place of interest, a location on the map or one of your Favorite destinations.
You can also look up your recent destinations from the Smart History, enter a
coordinate or use the location saved in a photo.
• Tap to display the route parameters and the route in its full
length on the map. You can also perform route-related actions such as editing
or canceling your route, setting a start point for the route, picking route
alternatives, avoiding parts of the route, simulating navigation or adding the
destination to your Favorites.
• Tap to customize the way the navigation software works, simulate
demo routes, or to run some additional applications.
• Tap to start navigating on the map. The button itself is a miniature
live map that shows your current position, the recommended route and the
surrounding map area. Tap the button to enlarge the map to the full screen.
19
Jensen Navigation
BUTTONS AND OTHER CONTROLS ON THE
SCREEN
When you are using iGO primo, you usually tap buttons on the touch screen.
You only need to conrm selections or changes if the application needs to restart,
it needs to perform a major reconguration, or you are about to lose some of your
data or settings. Otherwise, iGO primo saves your selections and applies the new
settings without conrmation as soon as you use the controls.
Type Example Description How to Use It
Button Tap it to initiate a
function, to open
a new screen, or to
set a parameter.
Tap it once.
Button
with value
Some buttons
display the current
value of a eld or
setting. Tap the
button to change
the value. After the
change, the new
value is shown on
the button.
Tap it once.
Icon Shows status
information.
Some icons also
function as a button.
Tap them once.

20
Navigation
List When you need to
select from several
options, they
appear in a list.
Grab the list
anywhere and slide
your nger up or
down. Depending
on the speed of the
sliding, the list will
scroll fast or slow,
only a bit or until the
end.
Alternatively, move
between pages with
the and
buttons and tap the
value that you want.
Radio
button
When there are only
a few choices, radio
buttons may be
used instead of lists.
Only one value can
be selected.
Tap one of the
buttons to select a
new value.
Switch When there are
only two choices, a
checkmark shows
whether the feature
is enabled.
Tap it to turn the
switch on or o.
Slider When a feature can
be set to dierent
values in a range,
iGO primo shows
an indicator on a
gauge that displays
and sets the value
•Drag the handle to
move the slider to
its new position.
•Tap the slider
where you want the
handle to appear;
the thumb jumps
there.
Virtual
keyboard
Alphabetic and
alphanumeric
keyboards to enter
text and numbers.
Each key is a touch
screen button.

21
Jensen Navigation
Using Keyboards
You only need to enter letters or numbers when you cannot avoid it. You can type
with your ngertips on the full-screen keyboards and you can switch between
various keyboard layouts, for example English, Greek or numerical.
Task Instruction
Switching to another keyboard layout,
for example from an English keyboard
to a Greek keyboard.
Tap the button and
select the new keyboard layout from
the list.
Correcting your entry on the keyboard. Tap to remove the unneeded
character(s). Tap and hold the button
to delete several characters or the
entire input string.
Entering a space, for example between
a rst name and a family name or in
multi-word street names.
Tap the button at the bottom
center of the screen.
Entering numbers and symbols. Tap to switch to a keyboard
oering numeric and symbol
characters.
Finalizing the keyboard entry
(accepting the suggested search
result).
Tap .
Finalizing the keyboard entry
(opening the list of search results). Tap .
Finalizing the keyboard entry
(saving your input). Tap .
Canceling the keyboard entry
(returning to the previous screen). Tap .

22
Navigation
Beyond Single Screen Tap
You usually need to tap the screen only once. However, some useful features can
be accessed with combined touch screen tapping. Those are the following:
Action Details
Tapping and holding the
screen.
Tap and keep pressing the following buttons to reach
extra functions:
•Tap and hold on list and menu
screens: the Map screen appears.
•Tap and hold any of the , , , ,
, and buttons on the Map screen: you can
rotate, tilt or scale the map continuously.
•Tap and hold on keyboard screens: you can
delete several characters quickly.
•Tap and hold or in long lists: you can scroll
pages continuously.
Gestures (drag & drop). You need to drag and drop the screen only in cases
like:
•Moving the handle on a slider.
•Scrolling the list: grab the list anywhere and slide
your nger up or down. Depending on the speed
of the sliding, the list will scroll fast or slow, only a
bit or until the end.
•Moving the map in map browsing mode: grab the
map, and move it in the desired direction.

24
Navigation
When GPS position is available, the Vehimarker is displayed in full color, now
showing your current position.
There are screen buttons and data elds on the screen to help you navigate.
During navigation, the screen shows route information.
By default, only one data eld is displayed in the bottom right corner. Tap this eld
to see all route data elds.
Tap any of the data elds to suppress others and display only the selected one.
The data elds are dierent when you are navigating an active route and when
you have no specied destination (the orange line is not displayed).

25
Jensen Navigation
Default data elds when cruising without a destination (tap and hold any of the
elds to change its value):
Field Description
Shows your current speed given by the GPS receiver.
Shows the speed limit of the current road if the map contains
it.
Shows the current time corrected with time zone oset.
The accurate time comes from the GPS satellites, and the
time zone information comes from the map or it can be set
manually in Regional settings. (The current time is always
displayed in the top left corner of menu screens.)
Default data elds when navigating a route (tap and hold any of the elds to
change its value):
Field Description
Shows the distance you need to travel on the route before
reaching your nal destination.
Shows the time needed to reach the nal destination of
the route based on information available for the remaining
segments of the route. Historical trac data or trac
patterns are also taken into account whenever such
information exists..
Shows the estimated arrival time at the nal destination
of the route based on information available for the
remaining segments of the route. Historical trac data or
trac patterns are also taken into account whenever such
infromation exists.

26
Navigation
Position Markers
Vehimarker and Lock-on-Road
When your GPS position is available, iGO primo marks your current position with
the Vehimarker. By default, this marker is a red arrow, but you can change this icon
in Settings.
The exact location of the Vehimarker depends on the vehicle type used for route
calculation. The vehicle type can be selected in Route settings.
• If you choose pedestrian: The Vehimarker is at your exact GPS position. The
direction of the icon shows your current heading.
• If you choose any of the vehicles: The Vehimarker may not show your exact
GPS position and heading. If roads are near, it is aligned to the nearest road
to suppress GPS position errors, and the direction of the icon is aligned to the
direction of the road.
Selected Map Location (Cursor) and Selected Map Object
You can mark a map location in the following ways:
• Tap the map when navigating,
• Tap the map when you are asked to conrm the destination at the end of a
search, or
• Tap the map in Find on Map.
When a map location is selected, the Cursor appears at the selected point on the
map.
The Cursor is displayed with a radiating red dot ( ) to make it visible at all
zoom levels.
The location of the Cursor can be used as the destination of the route, a new alert
point, you can search for Places around it, or you can save this location as one of
your Favorite destinations.
You can also select some of the objects on the map. If you tap the map at the icon
of a Place of Interest or an alert point, the object will be selected (you see a red
circling border around the object), and you can get information about this object
or use it as a route point.
27
Jensen Navigation
Objects On the Map
Streets and Roads
iGO primo shows the streets in a way that is similar to how the paper road maps
show them. Their width and colors correspond to their importance: you can easily
tell a freeway from a small street.
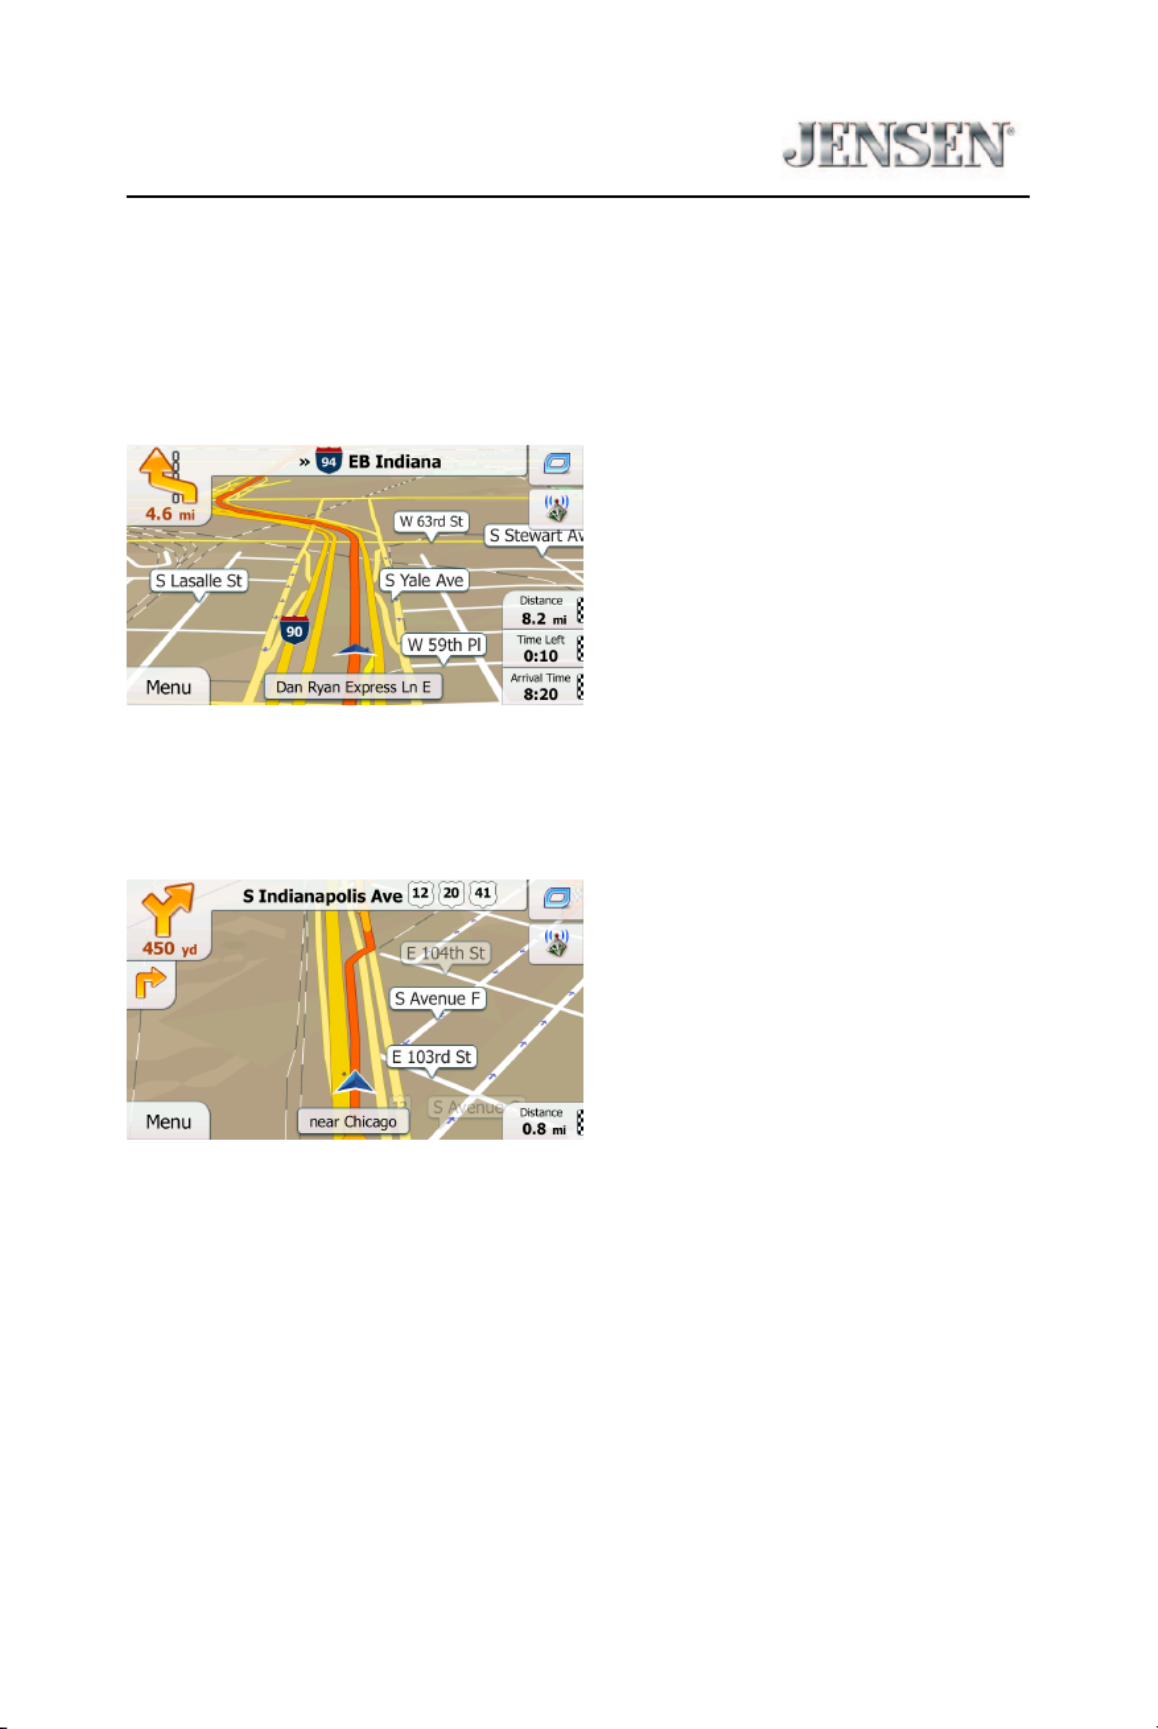
Turn Preview and Next Street
When navigating a route, the top section of the Map screen shows information
about the next route event (maneuver) and the next street or the next city/town.
There is a eld in the top left corner that displays the next maneuver. Both the
type of the event (turn, trac circle, exiting freeway, etc.) and its distance from the
current position are displayed.
A smaller icon shows the type of the second next maneuver if it is near the rst
one. Otherwise, only the next maneuver is displayed.

28
Navigation
Most of these icons are very intuitive. The following table lists some of the
frequently shown route events. The same symbols are used in both elds:
Icon Description
Turn left.
Turn right.
Turn back.
Bear right.
Turn sharp left.
Keep left.
Continue straight in the intersection.
Go left on the trac circle, 3rd exit (next maneuver).
Enter trac circle (second next maneuver).
Enter freeway.
Exit freeway.
Board ferry.

29
Jensen Navigation
Leave ferry.
Approaching a waypoint.
Approaching the destination.
Lane Information and Signposts
When navigating on multilane roads, it is important to take the appropriate lane in
order to follow the recommended route. If lane information is available in the map
data, iGO primo displays the lanes and their directions using small arrows at the
bottom of the map. Highlighted arrows represent the lanes you need to take.
Where additional information is available, signposts substitute arrows. Signposts
are displayed at the top of the map. The color and style of the signposts are
similar to the real ones you can see above road or by the roadside. They show the
available destinations and the number of the road the lane leads to.
All signposts look similar when cruising (when there is no recommended route).
When navigating a route, only the signpost that points to the lane(s) to be taken is
displayed in vivid colors; all others are darker.

33
Jensen Navigation
Action Button(s) Description
Moving the map
with drag & drop.
No buttons You can move the map in any
direction: tap and hold the map,
and move your nger towards the
direction you want to move the map.
Zooming in and
out ,
Changes how much of the map is
displayed on the screen.
iGO primo uses high-quality vector
maps that let you examine the map
at various zoom levels, always with
optimized content. It always displays
street names and other text with the
same font size, never upside-down,
and you only see the streets and
objects that you need.
Map scaling has a limit in 3D map
view mode. If you zoom out further,
the map switches to 2D view mode.
Tap the button once to modify the
view in large steps, or tap and hold
the button to modify it continuously
and smoothly.
Tilting up and
down ,
Changes the vertical view angle of
the map in 3D mode.
Tap the button once to modify the
view in large steps, or tap and hold
the button to modify it continuously
and smoothly.
Rotating left and
right ,
Changes the horizontal view angle
of the map.
Tap the button once to modify the
view in large steps, or tap and hold
the button to modify it continuously
and smoothly.
2D or 3D view
,
Tap this button to switch between
the 3D perspective and 2D top-
down map view modes.
Termékspecifikációk
| Márka: | Jensen |
| Kategória: | Vevő |
| Modell: | CMN86 |
Szüksége van segítségre?
Ha segítségre van szüksége Jensen CMN86, tegyen fel kérdést alább, és más felhasználók válaszolnak Önnek
Útmutatók Vevő Jensen

11 Január 2025
8 Január 2025
11 December 2024
2 Október 2024
12 Szeptember 2024
7 Szeptember 2024
7 Szeptember 2024
2 Szeptember 2024
30 Augusztus 2024
26 Augusztus 2024
Útmutatók Vevő
- Vevő Phoenix Gold
- Vevő Grace Design
- Vevő Sony
- Vevő August
- Vevő Yamaha
- Vevő Nedis
- Vevő Marantz
- Vevő Philips
- Vevő Pioneer
- Vevő SilverCrest
- Vevő Garmin
- Vevő RCF
- Vevő Bosch
- Vevő Panasonic
- Vevő JVC
- Vevő StarTech.com
- Vevő Sharp
- Vevő Harman Kardon
- Vevő Nokia
- Vevő HQ
- Vevő Saramonic
- Vevő Emos
- Vevő Hifonics
- Vevő Onkyo
- Vevő Motorola
- Vevő Geemarc
- Vevő Vimar
- Vevő LogiLink
- Vevő Technics
- Vevő Roland
- Vevő JBL
- Vevő DAP-Audio
- Vevő GoGen
- Vevő AVM
- Vevő Futaba
- Vevő Insignia
- Vevő Martin Logan
- Vevő Boss
- Vevő Crestron
- Vevő Strong
- Vevő Cyrus
- Vevő VOX
- Vevő Tripp Lite
- Vevő MEE Audio
- Vevő Thomson
- Vevő Klipsch
- Vevő Hegel
- Vevő Reely
- Vevő Aiwa
- Vevő Speco Technologies
- Vevő Kenwood
- Vevő Rega
- Vevő Vivanco
- Vevő Asus
- Vevő Jabra
- Vevő Hama
- Vevő ELAC
- Vevő Zoom
- Vevő Renkforce
- Vevő Sencor
- Vevő Focusrite
- Vevő Polsen
- Vevő Bose
- Vevő Raymarine
- Vevő Mercury
- Vevő Blackstar
- Vevő Telefunken
- Vevő Sennheiser
- Vevő Tangent
- Vevő Cambridge
- Vevő Kanto
- Vevő Alpine
- Vevő Optoma
- Vevő Ibanez
- Vevő Omnitronic
- Vevő Logitech
- Vevő Amiko
- Vevő SPL
- Vevő Bresser
- Vevő Pro-Ject
- Vevő Smart
- Vevő TOA
- Vevő Dahua Technology
- Vevő SVS
- Vevő Scosche
- Vevő Hilti
- Vevő Crunch
- Vevő Denver
- Vevő Smart-AVI
- Vevő Naim
- Vevő Bush
- Vevő Power Dynamics
- Vevő Dynacord
- Vevő Trevi
- Vevő Devolo
- Vevő Memphis Audio
- Vevő DiO
- Vevő The T.amp
- Vevő DJI
- Vevő Ground Zero
- Vevő Audio-Technica
- Vevő Amazon
- Vevő Konig & Meyer
- Vevő Godox
- Vevő Cisco
- Vevő Denon
- Vevő ATen
- Vevő Electro-Voice
- Vevő JL Audio
- Vevő BOYA
- Vevő Hartke
- Vevő Auna
- Vevő Mac Audio
- Vevő Behringer
- Vevő Nexa
- Vevő Mooer
- Vevő REL Acoustics
- Vevő Chamberlain
- Vevő Chord
- Vevő Lotronic
- Vevő Bogen
- Vevő Terratec
- Vevő Shure
- Vevő Renegade
- Vevő PreSonus
- Vevő Revel
- Vevő Manhattan
- Vevő Plantronics
- Vevő Peavey
- Vevő Kogan
- Vevő Alecto
- Vevő Fontastic
- Vevő Marshall
- Vevő Velleman
- Vevő Universal Audio
- Vevő AEA
- Vevő Morel
- Vevő Russound
- Vevő Teac
- Vevő Clarion
- Vevő Blustream
- Vevő Metra
- Vevő Monacor
- Vevő MXL
- Vevő S.M.S.L
- Vevő Anthem
- Vevő McIntosh
- Vevő LD Systems
- Vevő Proel
- Vevő Jamo
- Vevő Blaupunkt
- Vevő Deaf Bonce
- Vevő NAD
- Vevő Conrad
- Vevő Thomann
- Vevő Datapath
- Vevő Sagem
- Vevő IRiver
- Vevő Samson
- Vevő Cayin
- Vevő Mackie
- Vevő Vonyx
- Vevő Alto
- Vevő Delta Dore
- Vevő Vivotek
- Vevő Infinity
- Vevő Magnat
- Vevő Bang & Olufsen
- Vevő Trust
- Vevő AKAI
- Vevő Konig
- Vevő Marmitek
- Vevő TechniSat
- Vevő Fenton
- Vevő Line 6
- Vevő Meliconi
- Vevő Pyle
- Vevő MuxLab
- Vevő Audioengine
- Vevő AVMATRIX
- Vevő Kemo
- Vevő Rolls
- Vevő Salora
- Vevő IFM
- Vevő Musical Fidelity
- Vevő DataVideo
- Vevő Telestar
- Vevő A-NeuVideo
- Vevő Stinger
- Vevő Atlona
- Vevő Lindy
- Vevő Audizio
- Vevő Audiotec Fischer
- Vevő Fender
- Vevő Rotel
- Vevő Hertz
- Vevő Bowers & Wilkins
- Vevő FBT
- Vevő Audiolab
- Vevő Atlas Sound
- Vevő AKG
- Vevő Marshall Electronics
- Vevő Ashly
- Vevő AudioControl
- Vevő Monitor Audio
- Vevő Audac
- Vevő Technical Pro
- Vevő Siig
- Vevő Yorkville
- Vevő Rockford Fosgate
- Vevő Krüger&Matz
- Vevő Salus
- Vevő Dual
- Vevő ICOM
- Vevő Gefen
- Vevő Inateck
- Vevő Warm Audio
- Vevő Wharfedale
- Vevő Kathrein
- Vevő Homematic IP
- Vevő Canton
- Vevő Yaesu
- Vevő Panduit
- Vevő HQ Power
- Vevő Vocopro
- Vevő Axis
- Vevő Optex
- Vevő Medeli
- Vevő Palmer
- Vevő Imperial
- Vevő Kicker
- Vevő FSR
- Vevő DBX
- Vevő Sangean
- Vevő Camille Bauer
- Vevő Valueline
- Vevő SureCall
- Vevő Definitive Technology
- Vevő Focal
- Vevő MB Quart
- Vevő Genie
- Vevő Legamaster
- Vevő Lectrosonics
- Vevő Hughes & Kettner
- Vevő IFi Audio
- Vevő Audix
- Vevő Vivolink
- Vevő Arcam
- Vevő FiiO
- Vevő Intelix
- Vevő Comprehensive
- Vevő Orava
- Vevő Alfatron
- Vevő Astro
- Vevő Match
- Vevő Thorens
- Vevő Majestic
- Vevő Smartwares
- Vevő Teufel
- Vevő Sogo
- Vevő Classé
- Vevő Vincent
- Vevő NuPrime
- Vevő Reloop
- Vevő CSL
- Vevő Artsound
- Vevő KanexPro
- Vevő Rupert Neve Designs
- Vevő Kramer
- Vevő Ram Audio
- Vevő ART
- Vevő BZBGear
- Vevő Ampeg
- Vevő Amplicom
- Vevő American Audio
- Vevő Hirschmann
- Vevő Audison
- Vevő Palsonic
- Vevő Caliber
- Vevő Exibel
- Vevő Vision
- Vevő Summit Audio
- Vevő Musway
- Vevő Brigmton
- Vevő Sunstech
- Vevő Elektrobock
- Vevő Avalon
- Vevő Sonance
- Vevő Oculus VR
- Vevő Redline
- Vevő Marquant
- Vevő Matrox
- Vevő Steren
- Vevő Polk
- Vevő Sandberg
- Vevő Galaxy Audio
- Vevő Denson
- Vevő Pyle Pro
- Vevő Roksan
- Vevő Valcom
- Vevő Goobay
- Vevő Hager
- Vevő Maxview
- Vevő Rocketfish
- Vevő Naxa
- Vevő Sherwood
- Vevő QTX
- Vevő Zgemma
- Vevő RDL
- Vevő Zehnder
- Vevő Mx Onda
- Vevő Fredenstein
- Vevő Metronic
- Vevő Harper
- Vevő TV STAR
- Vevő QSC
- Vevő Lanzar
- Vevő Simrad
- Vevő Humax
- Vevő Vaddio
- Vevő Gira
- Vevő Jung
- Vevő Golden Age Project
- Vevő Apart
- Vevő Pinnacle
- Vevő Eventide
- Vevő Audio Pro
- Vevő Radial Engineering
- Vevő Homecast
- Vevő Graupner
- Vevő Bluesound
- Vevő Integra
- Vevő Revox
- Vevő Engel Axil
- Vevő Comica
- Vevő Fusion
- Vevő Audient
- Vevő PAC
- Vevő Skytec
- Vevő Luxman
- Vevő JETI
- Vevő Linn
- Vevő Monoprice
- Vevő Ibiza Sound
- Vevő Exposure
- Vevő Axton
- Vevő Fostex
- Vevő MIPRO
- Vevő Solid State Logic
- Vevő Edision
- Vevő Neets
- Vevő NAV-TV
- Vevő HiFi ROSE
- Vevő OSD Audio
- Vevő Mark Levinson
- Vevő RME
- Vevő Black Lion Audio
- Vevő Soundstream
- Vevő Xoro
- Vevő DLS
- Vevő Adastra
- Vevő Block
- Vevő PSB
- Vevő Aeon Labs
- Vevő Citronic
- Vevő Formuler
- Vevő Lindell Audio
- Vevő LTC
- Vevő JB Systems
- Vevő Dreambox
- Vevő Zalman
- Vevő James
- Vevő HUMANTECHNIK
- Vevő PSSO
- Vevő Crest Audio
- Vevő Primare
- Vevő Sonifex
- Vevő Xantech
- Vevő Ferguson
- Vevő Wet Sounds
- Vevő Televés
- Vevő Manley
- Vevő Extron
- Vevő HEOS
- Vevő Madison
- Vevő Ebode
- Vevő Phonocar
- Vevő Xtrend
- Vevő Scansonic
- Vevő Helix
- Vevő Winegard
- Vevő Laney
- Vevő Devialet
- Vevő ETON
- Vevő Xsarius
- Vevő EA
- Vevő DirecTV
- Vevő Octagon
- Vevő GOgroove
- Vevő Crown
- Vevő SRS
- Vevő Avantree
- Vevő LYYT
- Vevő Antelope Audio
- Vevő CE Labs
- Vevő Pharos
- Vevő Accell
- Vevő Jolida
- Vevő Inovonics
- Vevő Ecler
- Vevő Viscount
- Vevő Ashdown Engineering
- Vevő Triax
- Vevő Synq
- Vevő Mtx Audio
- Vevő Aquatic AV
- Vevő Parasound
- Vevő DB Technologies
- Vevő Roswell
- Vevő Velodyne
- Vevő Epcom
- Vevő Sunfire
- Vevő Selfsat
- Vevő Skytronic
- Vevő CYP
- Vevő Topp Pro
- Vevő Whistler
- Vevő Astell&Kern
- Vevő Karma
- Vevő TV One
- Vevő Dimavery
- Vevő AMS Neve
- Vevő Powersoft
- Vevő LinksPoint
- Vevő Esoteric
- Vevő Markbass
- Vevő IMG Stage Line
- Vevő Wireless Solution
- Vevő Leviton
- Vevő Aurel
- Vevő ESX
- Vevő NUVO
- Vevő Phoenix Audio
- Vevő AVPro Edge
- Vevő Comtek
- Vevő Fishman
- Vevő RetroSound
- Vevő Pyramid
- Vevő LEA
- Vevő Sound Ordnance
- Vevő Canyon
- Vevő FiveO
- Vevő Planet Audio
- Vevő Phonic
- Vevő Koda
- Vevő Hotone
- Vevő Trace Elliot
- Vevő Bang Olufsen
- Vevő JTS
- Vevő AER
- Vevő Dynavox
- Vevő Modelcraft
- Vevő Klark Teknik
- Vevő Simaudio
- Vevő TIC
- Vevő Niles
- Vevő Knoll
- Vevő Creek
- Vevő Mobile Crossing
- Vevő DAP
- Vevő Krell
- Vevő GigaBlue
- Vevő ANKARO
- Vevő Bugera
- Vevő CAD Audio
- Vevő Cabasse
- Vevő Triangle
- Vevő Lab Gruppen
- Vevő Wavtech
- Vevő AmpliVox
- Vevő Audiofrog
- Vevő CyberData Systems
- Vevő WyreStorm
- Vevő Williams Sound
- Vevő Lyngdorf
- Vevő SoundTube
- Vevő WesAudio
- Vevő AudioSource
- Vevő Stewart
- Vevő Leema
- Vevő Apantac
- Vevő Axing
- Vevő Seco-Larm
- Vevő Mosconi
- Vevő Crest
- Vevő TechLogix Networx
- Vevő Audibax
- Vevő Meridian
- Vevő Quad
- Vevő BC Acoustique
- Vevő Gold Note
- Vevő IOTAVX
- Vevő Fosi Audio
- Vevő Shinybow
- Vevő Rexing
- Vevő Shanling
- Vevő Inter-M
- Vevő Sinus Live
- Vevő Soundtrack
- Vevő Canor
- Vevő C2G
- Vevő Unison Research
- Vevő Cerwin-Vega
- Vevő Universal Remote Control
- Vevő BMB
- Vevő Advance
- Vevő Cloud
- Vevő Lumantek
- Vevő Taga Harmony
- Vevő PTN-electronics
- Vevő VMV
- Vevő Black Hydra
- Vevő Bellari
- Vevő GlobalSat
- Vevő Aplic
- Vevő PureLink
- Vevő FoneStar
- Vevő Henry Engineering
- Vevő Glemm
- Vevő ButtKicker
- Vevő Atoll
- Vevő Benchmark
- Vevő Streacom
Legújabb útmutatók Vevő

9 Április 2025
9 Április 2025
5 Április 2025
5 Április 2025
2 Április 2025
2 Április 2025
2 Április 2025

31 Március 2025
31 Március 2025
30 Március 2025