Használati útmutató Hitachi LP-WU9100B
Olvassa el alább 📖 a magyar nyelvű használati útmutatót Hitachi LP-WU9100B (32 oldal) a Beamer kategóriában. Ezt az útmutatót 2 ember találta hasznosnak és 2 felhasználó értékelte átlagosan 4.5 csillagra
Oldal 1/32

User's Manual
DLP® Projector
LP-WU9100B
Thank you for purchasing this product.
Read this manual before you use your projector.
Keep the manual for future reference.
ENGLISH
FRANÇAIS
DEUTSCH
ESPAÑOL
PORTUGUÊS
ㆶ։ѣᮽ
㑷儊ѣᮽ
뼑霢꽩
ɊɍɋɋɄɂɃ


English-3
INDEX
Warning, Notices, and Safety Instructions 4
Notice 4
Contents of package 4
Do not open 4
About Electro-Magnetic Interference 4
Description pertaining to FCC Rules Part 15 4
Disposal of Old Equipment and Batteries Only for
European Union and countries with recycling systems 5
Sunlight Warning 5
Never look into the projector light source directly 5
Keep any object away from concentrated projection light beam
5
Electric shock 5
Do not overload outlets/extension cords 6
Cleaning 6
Dampness, smoke, steam, dust, high temperature and direct
exposure to sunlight 6
Ventilation 6
Intrusion of foreign objects 6
&RROLQJÀXLG
Carrying the projector 6
Install the projector on an even and stable surface 7
Servicing 7
Replacing parts 7
Power cord 7
Notices you should read prior to the installation of the
projector 8
Installation environment for the projector 8
&RQ¿JXUDWLRQVIRUSURMHFWRURSHUDWLRQDWKLJKDOWLWXGHV
Protect the projector with care 8
Keep obstacles away from the projector's ventilation
inlets and outlets 8
Positioning Precautions 9
Take frequent breaks to rest your eyes 10
Caution for 3D 10
LASER WARNING 11
CLASS 3R LASER PRODUCT 11
Laser Parameters 11
Product labels 12
Location of laser aperture 14
Interlock switches 14
Projector parts and functions 15
Front view 15
LED indicator 15
Rear view 16
Control panel 16
Ports 17
Bottom view 18
Effective range of remote control signal 19
Installing batteries in the remote control 19
Installation of the projector 20
1. Installing the projector towards the screen 20
2. Removing the mount cap on the projector 20
3.
Selecting the correct input voltage depending
on your area 20
4. Connecting the power cord to the projector 20
5.
Connecting the projector to your PC and
VZLWFKLQJWR³ʜ´WRWXUQRQWKHSRZHU
20
6. Starting up the projector 21
7. Adjusting the projector's angle, Lens Shift,
Zoom, Lens Centering, and Focus 21
8. Correcting the distortion 22
9. Turning off the projector 23
Throw distance 24
Modes of installation 24
Front/Desktop 24
Front/Ceiling 25
Rear/Desktop 25
Rear/Ceiling 25
Rear with a Mirror 25
Horizontal and vertical lens shift 26
Moving the lens vertically 26
Moving the lens horizontally 26
Connecting the projector to other devices 27
HDMI / DVI connection 27
12V OUTPUT connection 27
RGB connection 28
HDBaseT / LAN connection 28
SDI connection 29
Turning on the projector 29
Changing OSD language 29
Adjusting screen position 30
Front/Ceiling 30
Rear/Desktop 30
Rear/Ceiling 31
Adjusting the projector lens 31
Warranty and after-service 31
English-4
English-4
Warning, Notices, and Safety Instructions
Warning, Notices, and Safety Instructions
Notice
This product is intended for the adults who have the ability to operate this machine.
Write down your projector model number and serial number to keep the information for maintenance
purposes in the future. If the projector is lost or stolen, the information could also be used for the
police report.
Model number:
Serial number:
Contents of package
&KHFNWKHIROORZLQJDFFHVVRULHVWKDWFRPHZLWKWKHSURMHFWRU,I\RX¿QGDQ\PLVVLQJDFFHVVRU\
contact your dealer immediately.
1. AC Power Cord 4. AA battery (x2) 7. RS232 cable(cross)
2. Wired Remote Cable 5.
CD-ROM (User's Manual)
8. RGB cable
3. Remote control 6. Printed Manual 9. Mount cap
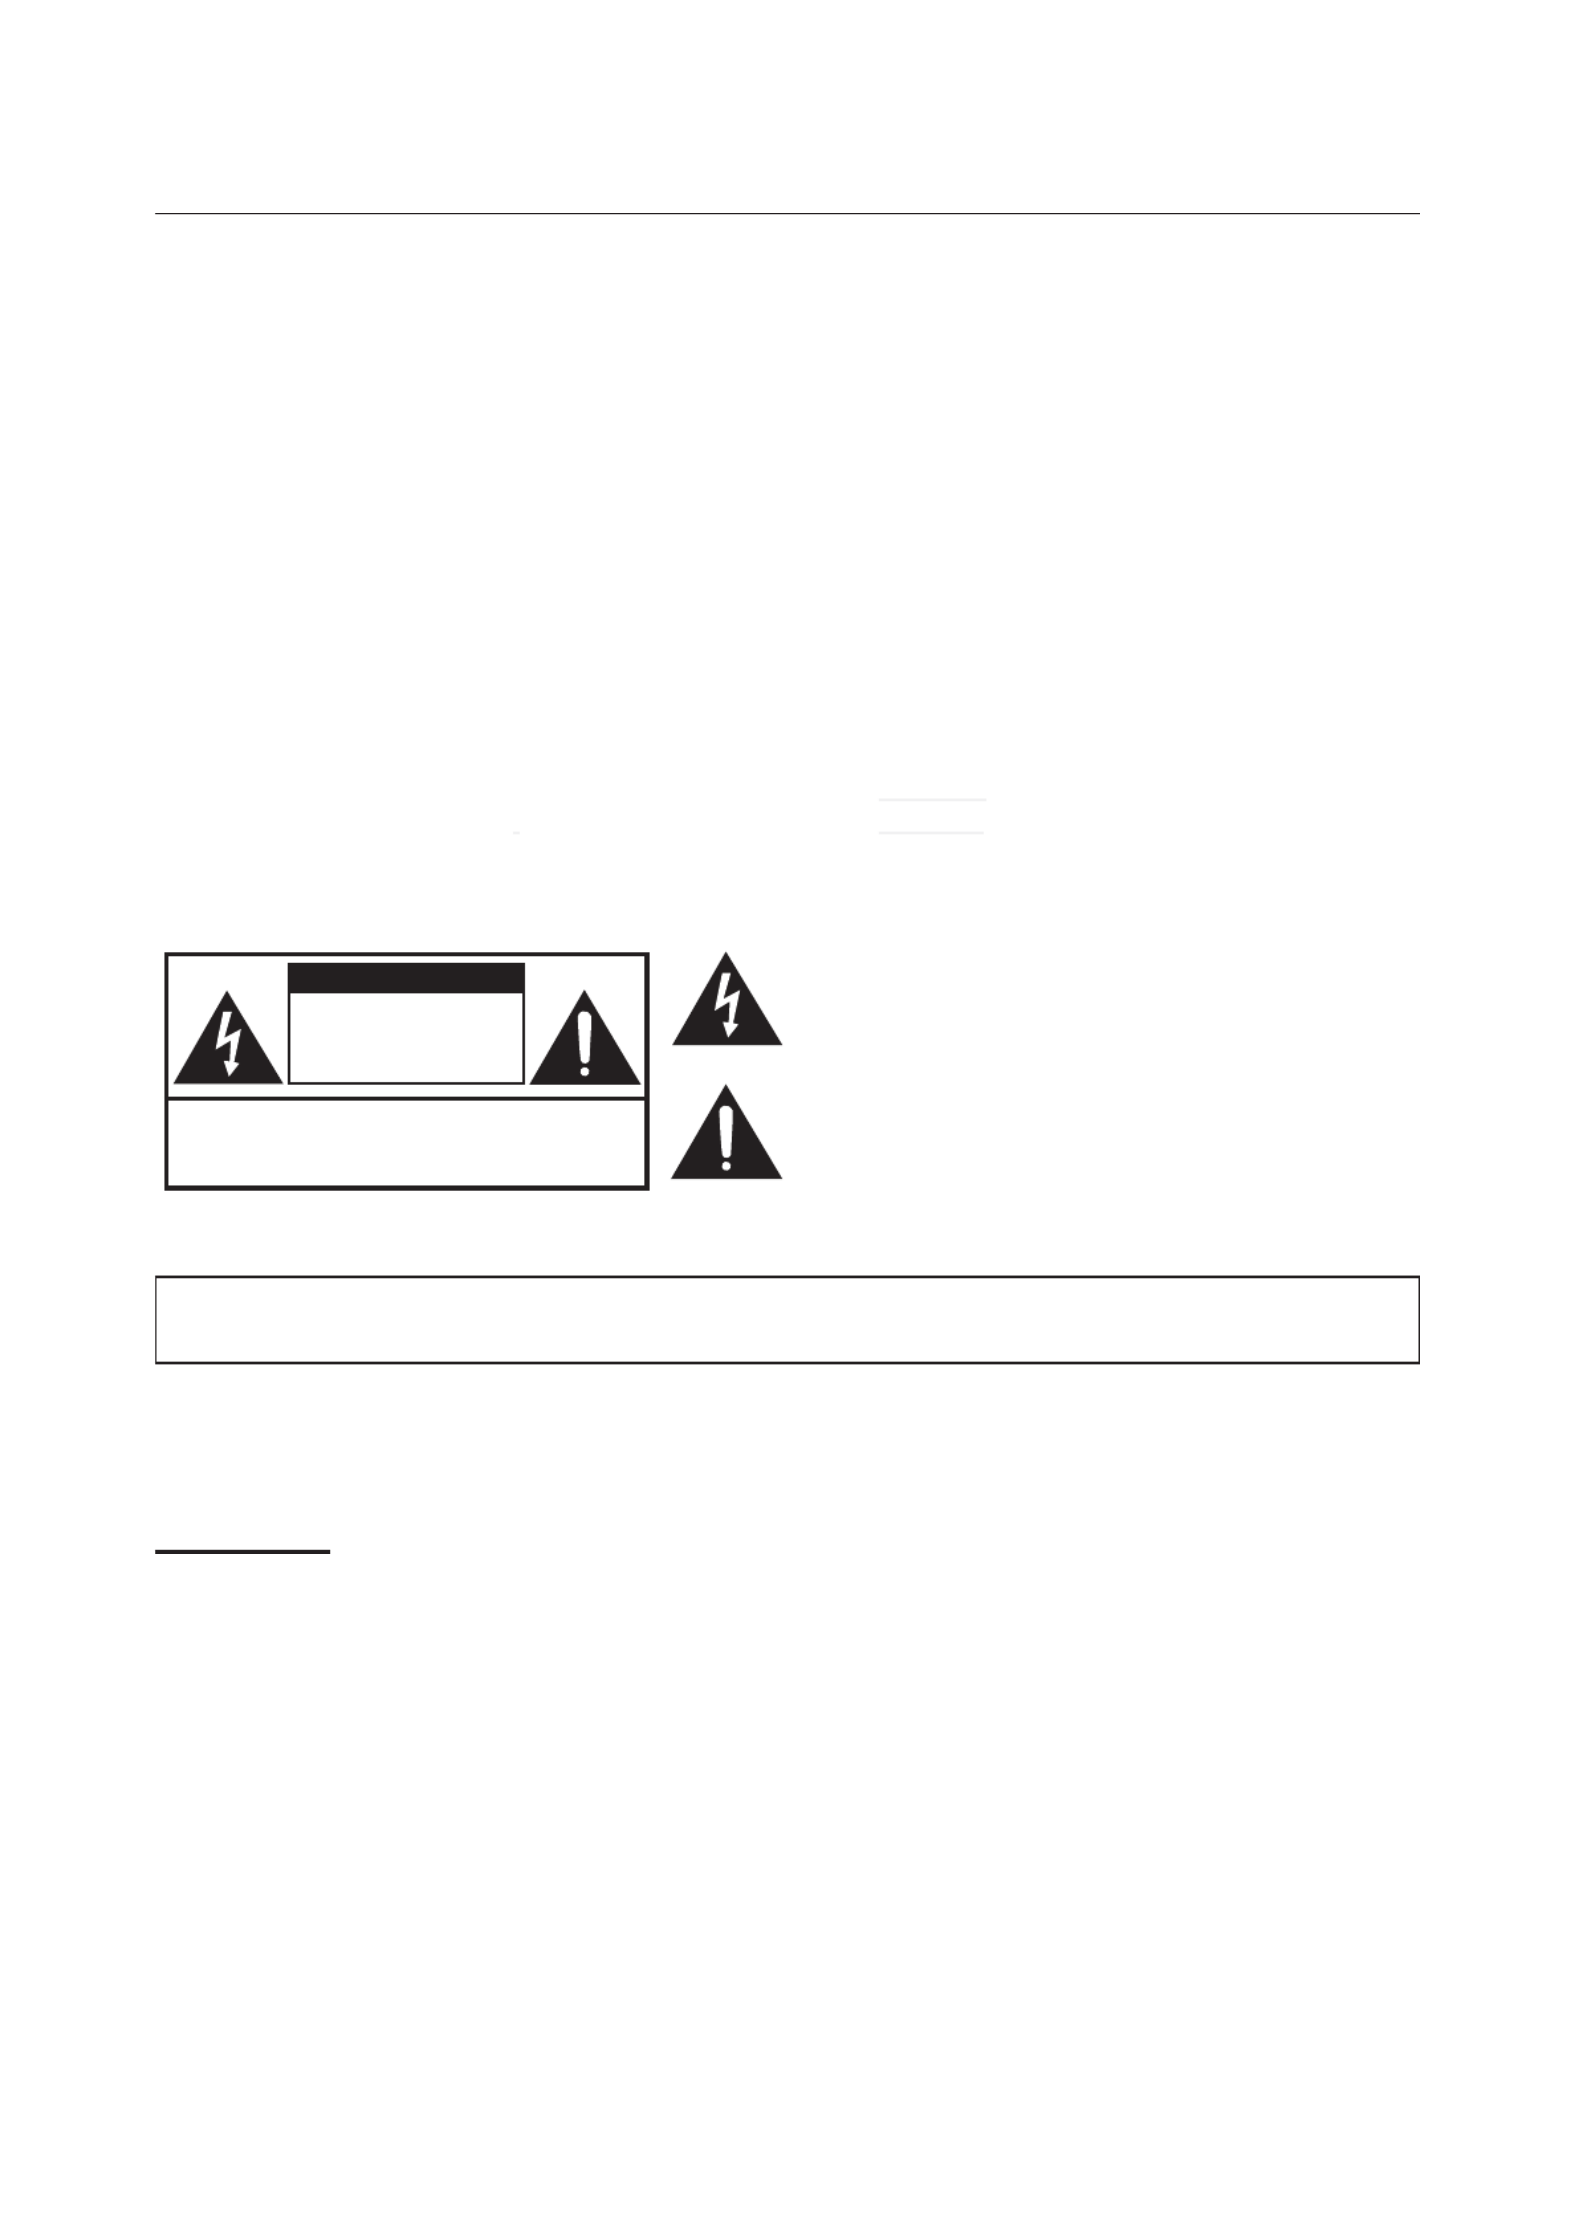
Do not open
CAUTION
RISK OF ELECTRIC SHOCK
DO NOT OPEN
The lightning flash with an arrowhead within a triangle
is intended to tell the user that inside this product
may cause risk of electrical shock to persons.
The exclamation point within a triangle is intended to tell
the user that important operating and/or servicing instructions
are included in the technical documentation for this equipment.
CAUTION / TO REDUCE THE RISK OF ELECTRIC SHOCK
DO NOT REMOVE COVER(OR BACK)
NO USER-SERVICEABLE PARTS INSIDE
REFER SERVICING TO QUALIFIED SERVICE PERSONNEL
About Electro-Magnetic Interference
This is a Class A product. In a domestic environment this product may cause radio interference in
which case the user may be required to take adequate measures.
This product may cause interference if used in residential areas. Such use must be avoided unless
the user takes special measures to reduce electromagnetic emissions to prevent interference to the
reception of radio and television broadcasts.
In Canada
CAN ICES-3(A) / NMB-3(A)
Description pertaining to FCC Rules Part 15
This device complies with part 15 of the FCC Rules. Operation is subject to the following two
conditions: (1) This device may not cause harmful interference, and (2) this device must accept any
interference received, including interference that may cause undesired operation.
This equipment has been tested and found to comply with the limits for a Class A digital device,
pursuant to Part 15 of the FCC Rules. These limits are designed to provide reasonable protection
against harmful interference when the equipment is operated in a commercial environment.
English-5
English-5
Warning, Notices, and Safety Instructions
This equipment generates, uses, and can radiate radio frequency energy and, if not installed and used
in accordance with the instruction manual, may cause harmful interference to radio communications.
Operation of this equipment in a residential area is likely to cause harmful interference in which case
the user will be required to correct the interference at his own expense.
CAUTION:
&KDQJHVRUPRGL¿FDWLRQVQRWH[SUHVVO\DSSURYHGE\WKHPDQXIDFWXUHUYRLGWKHXVHU¶VDXWKRULW\WR
operate the equipment.
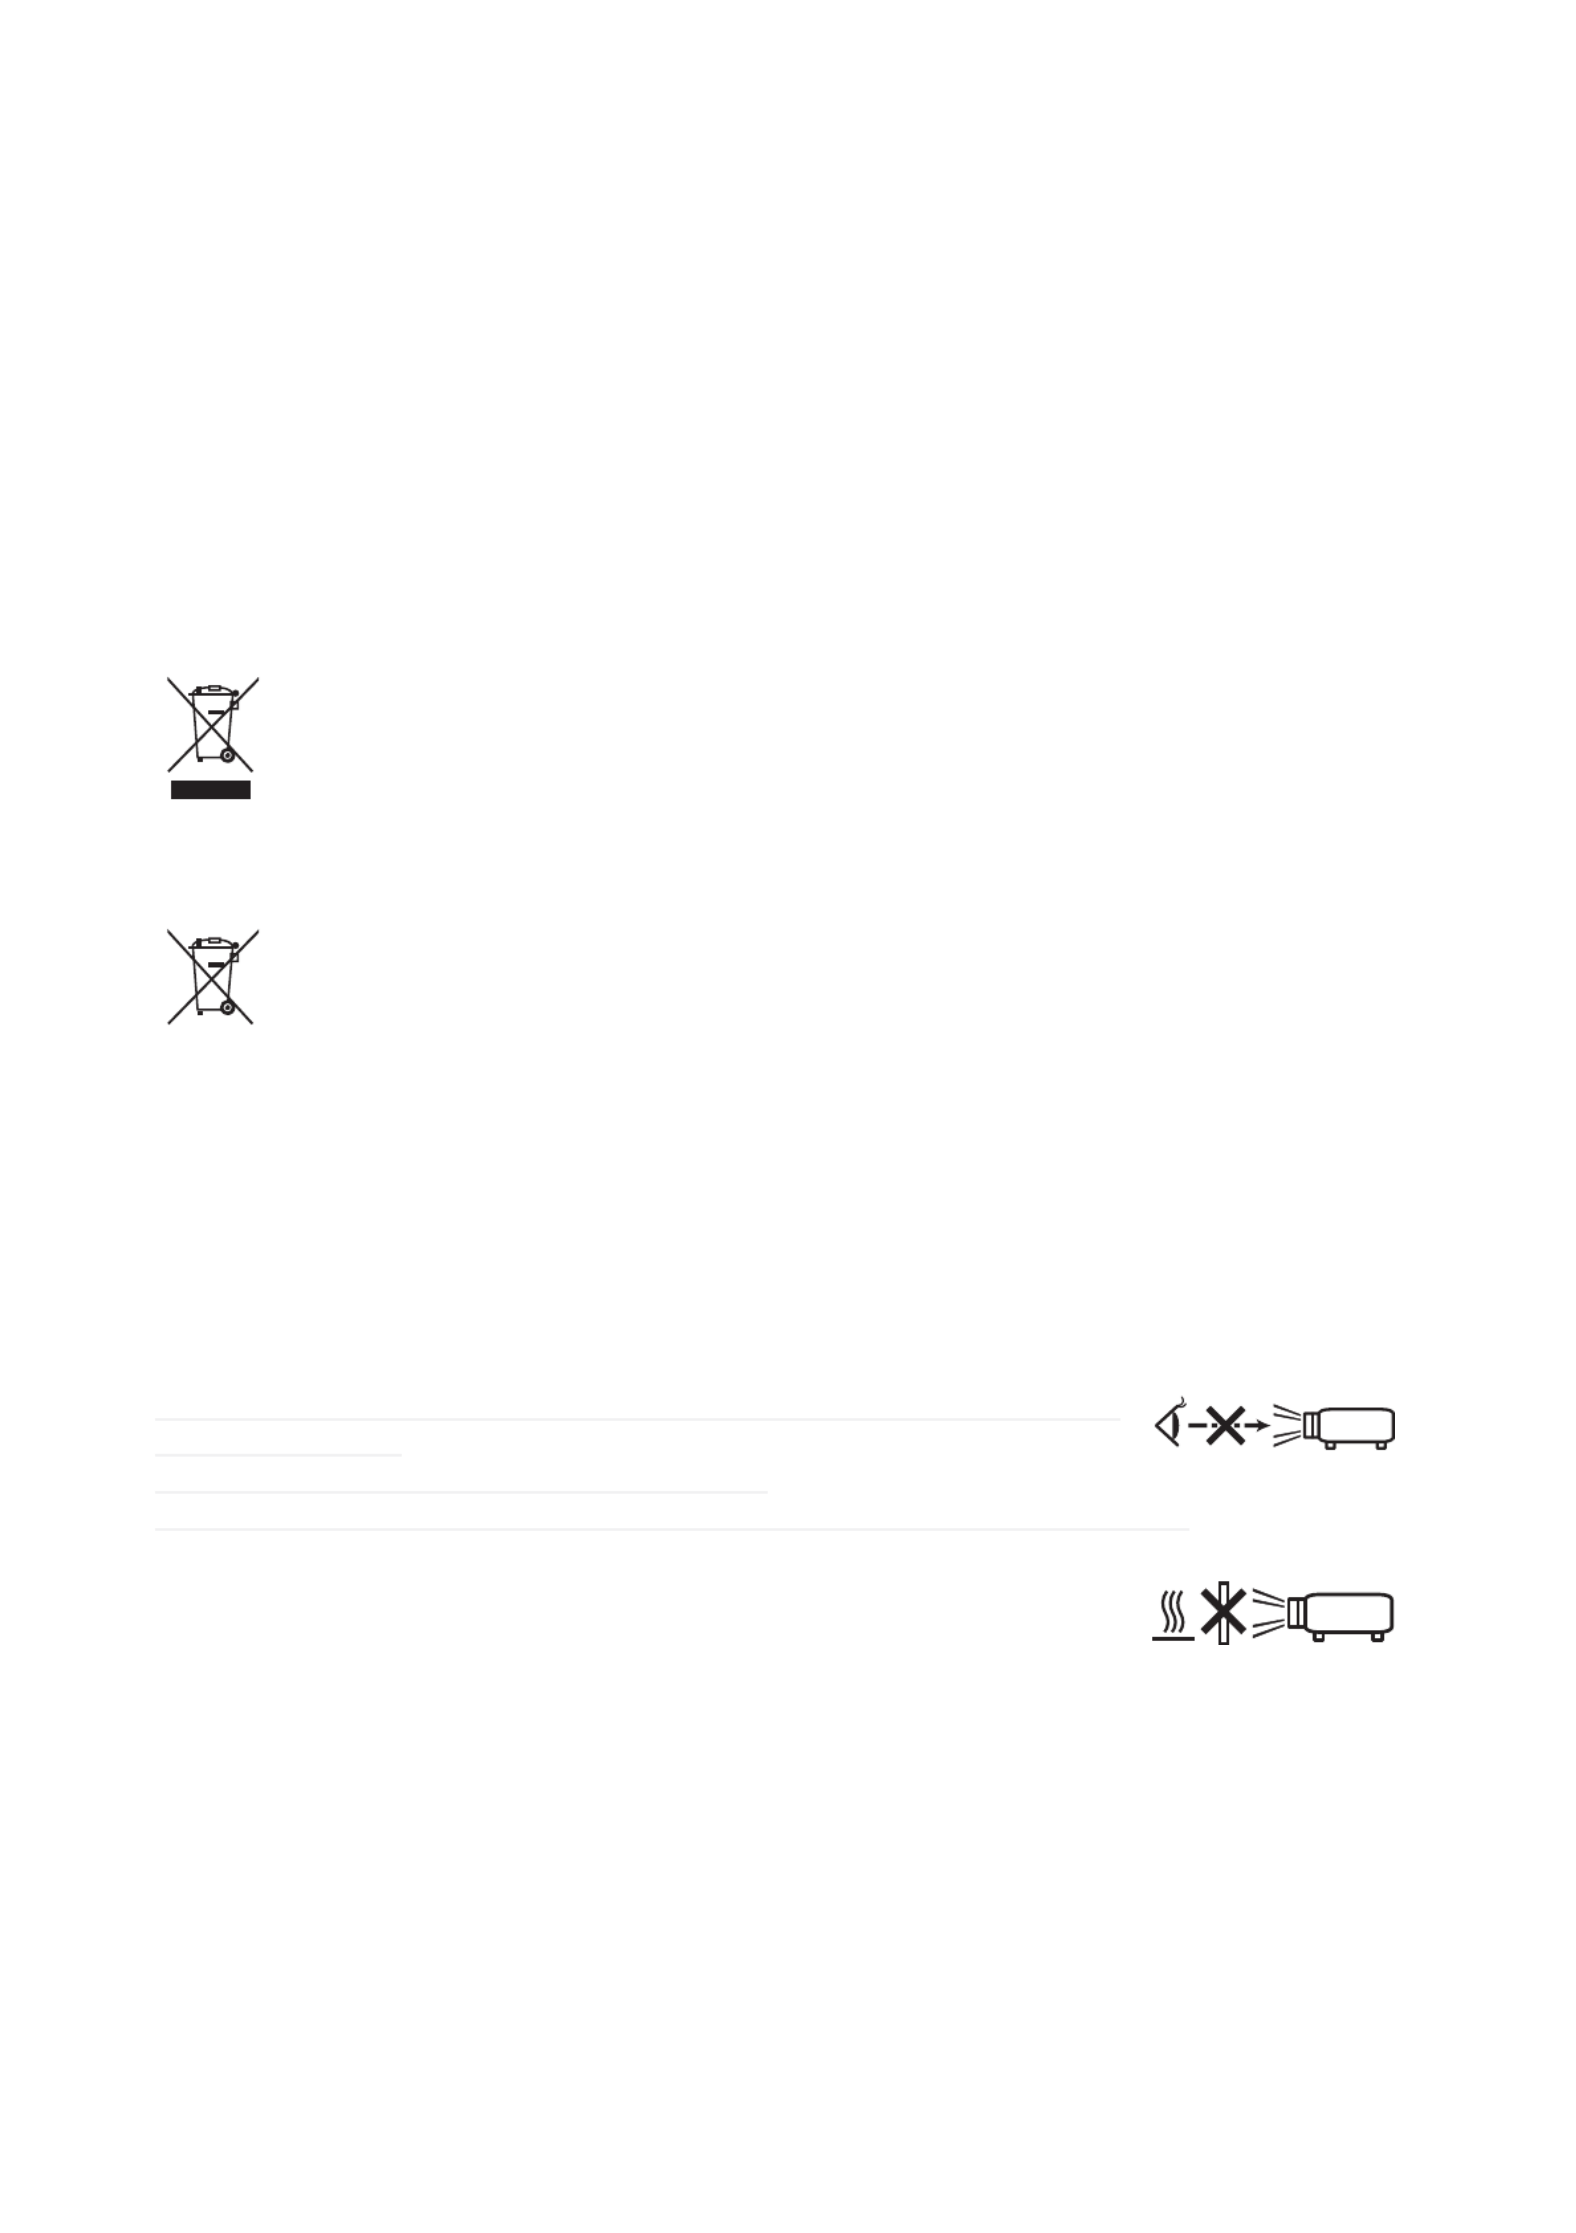
Disposal of Old Equipment and Batteries Only for European Union and
countries with recycling systems
The above mark is in compliance with the Waste Electrical and Electronic Equipment
Directive 2012/19/EU (WEEE). The mark indicates the requirement NOT to dispose the
equipment including any spent or discarded batteries as unsorted municipal waste, but use
the return and collection systems available. If the batteries or accumulators included with this
equipment display the chemical symbol Hg, Cd, or Pb, then it means that the battery has a
heavy metal content of more than 0.0005% Mercury, or more than 0.002% Cadmium or more
than 0.004% Lead.
Note for the battery symbol (bottom symbol): This symbol might be used in combination
with a chemical symbol. In this case it complies with the requirement set by the Directive for
the chemical involved.
Sunlight Warning
Do not use this projector in direct sunlight.
Sunlight may cause serious damage to the digital mirror device (DMD ™) at the back of the projector
lens.
Never look into the projector light source directly
When turning on the projector, make sure that the projection light does not get
into someone's eye.
Never look into the projector light source directly.
As with any bright source, do not stare into the direct beam, RG2 IEC 62471-5:2015
Keep any object away from concentrated projection
light beam
%ORFNLQJWKHEHDPE\VRPHWKLQJFDXVHVKLJKWHPSHUDWXUHDQGFRXOGUHVXOWLQ¿UHRUVPRNH
Electric shock
Do not turn on the projector during thunderstorm, and unplug it from the outlet. This will prevent the
projector from being damaged by sudden electrical surges due to the thunderbolt.
RG2

English-7
English-7
Warning, Notices, and Safety Instructions
Install the projector on an even and stable surface
Do not put the projector on unstable cart, tripod, table and so forth to prevent it from falling, being
damaged, or causing injuries.
Servicing
,I\RXKDYHDSUREOHPZLWKWKHSURMHFWRUFRQWDFW\RXUORFDOGHDOHURUTXDOL¿HGVHUYLFHSHUVRQQHO'R
not repair the projector by yourself so that you cannot be exposed to high voltage or other potential
hazards.
No servicing is allowed except by authorized personnel.
If you experience any of the following situation, unplug your projector from the outlet and contact a
TXDOL¿HGVHUYLFHSHUVRQQHOIRUDVVLVWDQFH
Damaged power cord or power plug.
If a foreign object has fallen into the projector or if you have spilled water or other liquid into the
projector.
If the projector has been dropped accidentally or damaged.
If you experience noticeably poor performance or malfunction of the projector despite having
followed instructions for normal operation.
Replacing parts
If any part of the projector is damaged, be sure to ask the service personnel to repair or replace with
the genuine parts and perform safety inspections to ensure that the projector operates normally. Using
QRQFHUWL¿HGSDUWVFDQQRWJXDUDQWHHWKHUHOLDELOLW\RIWKHSURMHFWRUDQGPD\UHVXOWLQGDPDJHVWRWKH
SURMHFWRURUKD]DUGVVXFKDV¿UHRUHOHFWULFVKRFN
No maintenance is allowed by users. Do not open the cabinet.
No parts inside are repairable by users.
Power cord
Do not place the projector where the cord can be stepped on. This may result in fraying or damage
to the power cord, especially at the plug and the point of connection between the power cord and the
projector.
,QFRPSOHWHSRZHUFRUGFRQQHFWLRQZLOOFDXVHVSDUNVRU¿UH
8VHWKHSRZHUFRUGEXQGOHGZLWKWKHSURMHFWRURUWKHW\SHRISRZHUFRUGVSHFL¿HGIRUWKHSURMHFWRUUHIHU
to the rating descriptions printed on the power cord). If you are not sure of the power available at the
UHJLRQ\RXDUHLQFRQVXOW\RXUORFDOSRZHUFRPSDQ\8VLQJDZURQJSRZHUFRUGKDVDSRWHQWLDORI¿UH
hazards due to current overload.
Depending on the country and region you are in, the voltage and type of socket of the outlet may be
GLIIHUHQWIURPWKHSURMHFWRU,I\RXDUHXQDEOHWR¿WWKHSRZHUSOXJLQWRWKHRXWOHWFRQWDFW\RXUORFDO
GHDOHU'RQRWUHPRYHWKHH[WUDSLQRQWKHSRZHUSOXJWRIRUFLEO\¿WLWWRWKHVRFNHWDWWKHULVNRI\RXU
own safety.
Connect the ground terminal for the AC inlet of this unit to the ground terminal of the building using
DQDSSURSULDWHSRZHUFRUGEXQGOHGRWKHUZLVHLWFRXOGFDXVH¿UHRUHOHFWULFVKRFN
Install the projector where you can access the power outlet easily.

English-8
English-8
Warning, Notices, and Safety Instructions
Notices you should read prior to the installation of the projector
Installation environment for the projector
Do not install the projector at place with excessive dampness, dust or smoke. If installation in such
environment is unavoidable, be sure to clean the interior of the projector routinely to prolong the
SURMHFWRUVOLIHF\FOH7KHSURMHFWRUVLQWHULRUVKRXOGEHFOHDQHGRQO\E\TXDOL¿HGVHUYLFHSHUVRQQHO
dispatched by your local dealer so do not clean the inside of the projector by yourself.
If other light source is directly projected onto the projector screen, the color of the picture from the
projector will appear to be pale and the picture quality will be lower. In addition, your eyes would be
more prone to fatigue. Therefore, it is recommended that the projector be installed in places without
direct exposure to sunlight or other strong light source.
The ideal operating temperature range : 0°C ~ 45°C (32°F ~ 113°F)
The ideal storage temperature range : -10°C~ 60°C (14°F ~ 140°F)
&RQ¿JXUDWLRQVIRUSURMHFWRURSHUDWLRQDWKLJKDOWLWXGHV
When operating the projector at higher altitudes, be sure to set the fan mode manually to “HIGH-1”,
“HIGH-2”, or “HIGH-3”. Otherwise, it could shorten the life of the optical system in the projector.
+LJKDOWLWXGHLVGH¿QHGDVSODFHVDWPHWHUVIHHWKLJKRUKLJKHU
For details, see User's Manual - Operating Guide.
Protect the projector with care
:KHQSODFLQJWKHSURMHFWRUDWDKLJKSRVLWLRQEHVXUHWRVHFXUHWKHSURMHFWRU¿UPO\VRWKDWLWZRXOG
not fall and cause injuries. Take care to protect the projector's lens from collision, abrasion or other
damages. Be sure to close the lens cover or cover the projector with a dust cover if you need to store
the projector or if it will not be used for a long time.
Keep obstacles away from the projector's ventilation inlets and outlets
3D\DWWHQWLRQWRWKHGLUHFWLRQRIDLUÀRZDWWKHGHVLJQDWHGVSRWRILQVWDOODWLRQ'RQRWOHWWKHKRWDLU
UHOHDVHGIURPWKHRXWOHWÀRZEDFNWRWKHLQOHWEHFDXVHLWZLOOSUHYHQWSURSHUFRROLQJDQGOHDGWR
damage of the projector's internal structure.
In the event of high temperature due to malfunctioning of the internal cooling fan caused by clogging at the
ventilation inlets and outlets, the projector will activate its automatic protection mode and shutdown. When
this happens, it does not necessarily mean that the equipment is malfunctioning. Unplug the power cord
from the outlet and wait approximately 15 minutes before operating the projector again (remember to remove
the objects that have caused poor ventilation so that the projector will not go into the protection mode again).
Description: Temperature inside the projector is automatically adjusted by cooling fans. Therefore, it does
not mean that a problem has occurred in the projector even if you hear the sound of cooling fan and its
operating speed change.
English-9
English-9
Warning, Notices, and Safety Instructions
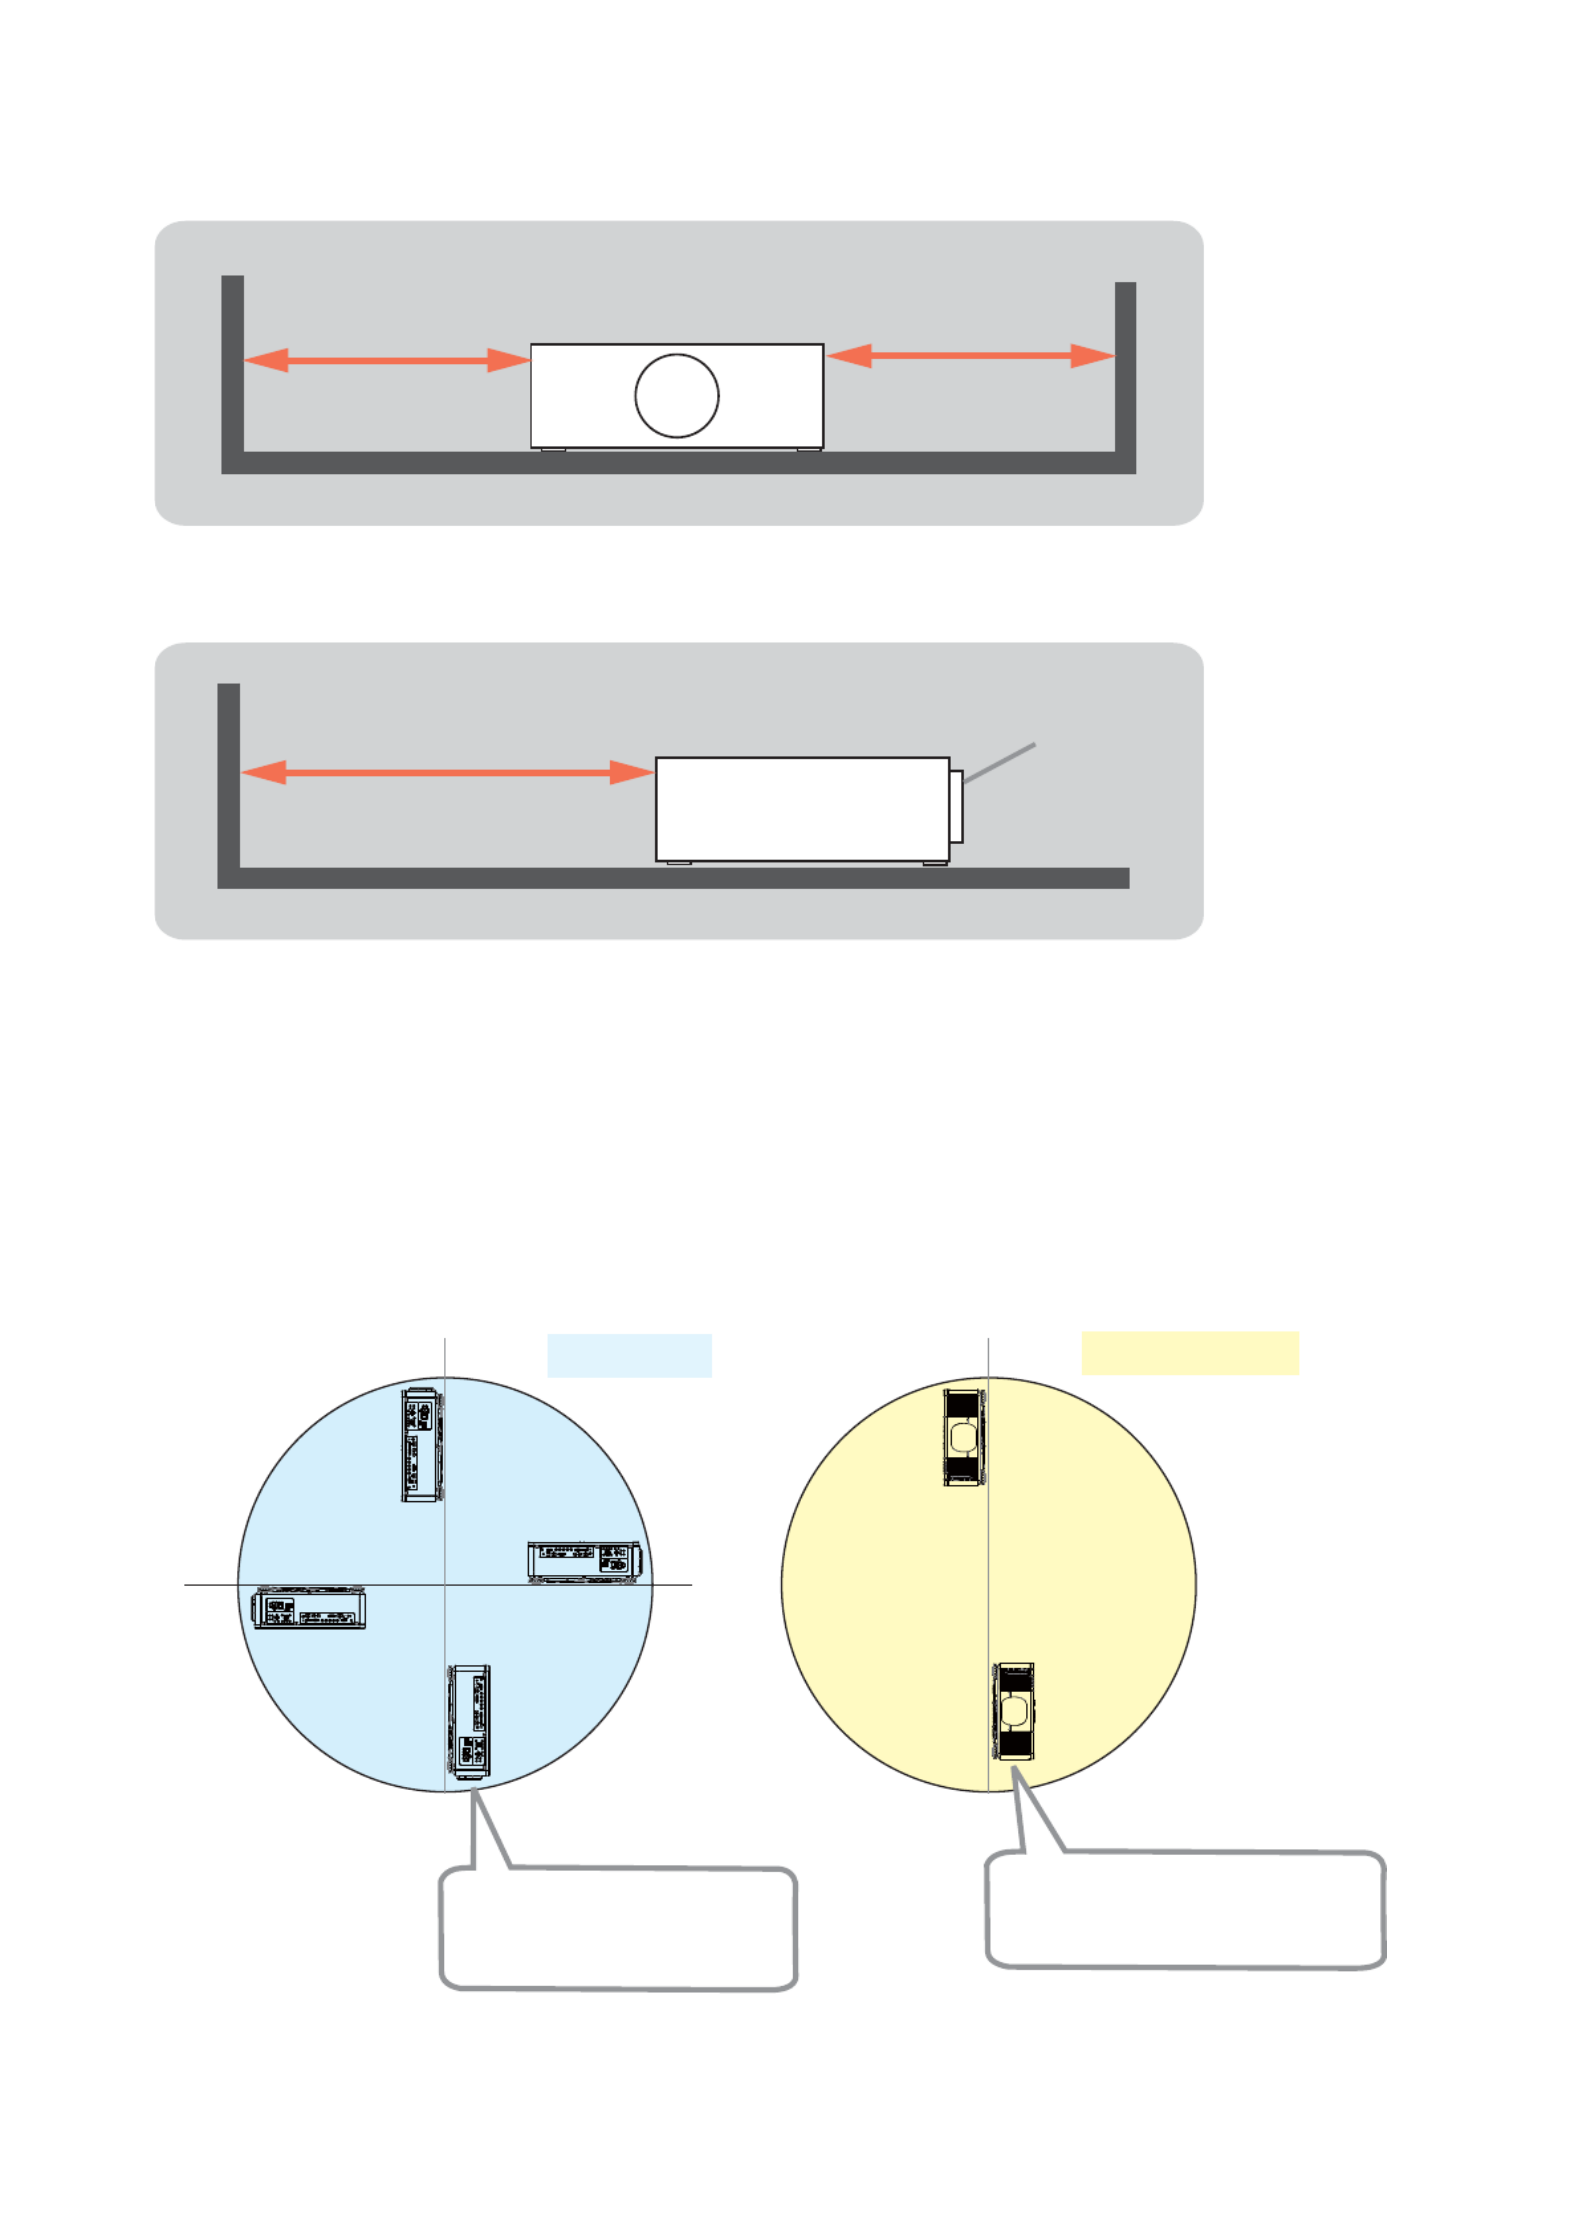
Positioning Precautions
Although this projector can be installed in 360° range (including Portrait), life of optical parts will be
shorten in the following situation:
1. If the projector is installed with the lens facing downward.
2. If the projector is installed with the IO ports side facing upward at the Portrait situation.
90°
0°
180°
When there are the obstacles on both sides of the projector.
When there are the obstacles behind the projector.
30cm or greater 30cm or greater
50cm or greater Lens
Installing the projector with
the lens facing downward
is not recommended.
Installing the projector with the
IO ports side facing upward is
not recommended.
Portrait position
Tilt position

English-10
English-10
Warning, Notices, and Safety Instructions
Take frequent breaks to rest your eyes
Viewing the projected screen for a long time could strain your eyes. Be sure to rest your eyes
adequately.
Caution for 3D
Do not let children view in 3D when they are not accompanied by adults.
Refrain from 3D viewing for children under the age of six due to the possibility of vision
impairment. Be sure to check the health of children viewing in 3D because they may not express
that they are feeling unwell.
When viewing in 3D, be sure that you are at an appropriate distance from the front of the screen.
It is recommended to keep a distance of at least three times of the screen height.
Check that the settings are correct and the 3D effect is correctly applied. If the image is inversed
and images seen by the right and the left eye are swapped, the 3D effect is not working and it may
cause eyestrain or make you feel unwell.
Viewing in 3D is not appropriate for the following people because it may make their medical
conditions worse.
People with a history of photosensitive epilepsy
People with heart disease
Pregnant women
People with serious illness
People with a history of epileptic seizures
It is recommended to stop viewing in 3D if any of the following conditions occur.
When you feel unwell, tired, sleep-deprived, fatigued, or drunken.
The 3D image seems doubled or not clear.
Some people may feel like they are moving by themselves and get a symptom like "sea sickness"
when they view in 3D that rotates, rolls, or shakes.
Be sure to take a rest at regular intervals to avoid eyestrain when viewing in 3D for a long time.

English-11
English-11
Warning, Notices, and Safety Instructions
LASER WARNING
This symbol indicates that there is a potential hazard of eye exposure to
laser radiation unless the instructions are strictly followed.
CLASS 3R LASER PRODUCT
This Laser Product is designated as Class 3R during all procedures of operation.
LASER LIGHT - AVOID DIRECT EYE EXPOSURE.
'RQRWSRLQWODVHURUDOORZODVHUOLJKWWREHGLUHFWHGRUUHÀHFWHGWRZDUGRWKHUSHRSOHRU
UHÀHFWLYHREMHFWV
Direct or scattered light can be hazardous to eyes and skin.
There is a potential hazard of eye exposure to laser radiation if the described
instructions are not followed.
Caution – Use of controls, adjustments, or performance of procedures other than those
VSHFL¿HGKHUHLQPD\UHVXOWLQKD]DUGRXVUDGLDWLRQH[SRVXUH
Laser Parameters
Wavelength
Mode of operation
Pulse width
Pulse repetition rate
Maximum laser energy
Total internal power
Apparent light source size
Divergence
450nm - 460nm (Blue)
Pulsed, due to frame rate
0.5ms
240Hz
0.253mJ
>100W
>10mm (When the lens is stopping.)
>100 Milliradian

English-12
English-12
Warning, Notices, and Safety Instructions
Product labels
The position of the labels is shown in the drawing below.
Manufacturer’s ID
Serial No.
Hazard Warning for Aperture,
Certification Statement
and Explanation
PO WER
STATUS
LIGHT
TEMP.
AVOID EY E CONTACT TO THE LIGH T
LP-WU9100B
LAN
IN OUT
SDI
COMPUT ER IN 2
REMOTE
CONTROL HDB as eT HDMI 1 DVI-D HDMI 2
CONTROL V H B/Cb/Pb G/Y R/Cr/Pr COMPUT ER IN 1
EXITMENU
LENS
SHIFT
INPUT ASPECT B LANK
LENS
CENT ERING
AUT O
FOCUS Z OOM
12V OUTPUT
(OPTION)

English-14
English-14
Warning, Notices, and Safety Instructions
Location of laser aperture
The following is the laser aperture location. Be careful not to see the light directly.
Laser aperture
Interlock switches
This projector has interlock switches to prevent the laser light leakage.
cThe switch will power off the system when the top cover is opened.
dThe switch will power off the system when the lens is removed or not installed correctly.

English-15
Projector parts and functions
English-15
Projector parts and functions
Front view
POWER
Shows the power status.
Lights in red when the projector is in standby state.
Blinks when the projector is warming up or cooling down.
Lights in green when the projector is ON.
STATUS
Shows the system error status.
LIGHT
Shows the light source status.
TEMP.
Shows the thermal error message.
LED Indicator
Lens
Remote sensor
Adjustable foot
Adjust the height and angle of the
projector with the adjustable foot.
Note: Shorten the adjustable
feet completely when
transporting the
projector.
Ventilation inlet
The internal cooling fan draws cool
air from the ventilation inlet into the
projector.
Ventilation inlet
The internal cooling fan draws
cool air from the ventilation
inlet into the projector.
POWER
STATUS
LIGHT
TEMP.
LED indicator

English-16
Projector parts and functions
English-16
Rear view
Voltage Selector
(115V by default)
Adjustable foot
Remote sensor Power inlet
Control panel
Ports
Power switch
ۄ
-> on
ż!RII
Ventilation outlet
STANDBY/ON
Starts up or shuts down the projector.
INPUT
Switches input signal source.
AUTO
Adjusts the signal synchronization automatically.
ASPECT
Adjusts the aspect ratio. )RUGHWDLOVVHH8VHU¶V0DQXDO2SHUDWLQJ
Guide.
LENS CENTERING
Sets the lens to the center and calibrates the parameter of lens shift
for focusing and zooming.
BLANK
Displays the blank image.
MENU
Displays or hides the menu.
Ÿź
ź
Ÿ
BUTTONS
6FUROOVFRQ¿JXUHVRUDGMXVWVLWHPVRQWKHPHQXRUVZLWFKHVSLFWXUHV
ENTER
Applies the changed settings.
EXIT
Exits the menu or returns to previous OSD layer.
LENS SHIFT
Adjusts the projected image position.
FOCUS
Adjusts the focus of a projected image.
ZOOM
Zooms in or zooms out the projected image.
Control panel

English-18
Projector parts and functions
English-18
Bottom view
Screw hole for Mounting bracket
Used to mount the projector to its designated
mounting bracket using 6 M4x16 screws.
Adjustable foot
Adjusts the height and angle of the projector.
Note: Shorten the adjustable feet completely when
transporting the projector.

English-19
Projector parts and functions
English-19
Effective range of remote control signal
The illustration below shows effective range of remote control signal. (When new batteries are used.)
0°
0°
m
Note: Do not put the remote control at places with high temperature or humidity as it could cause the remote control to
malfunction.
Note: If the effective range of remote control signal reception decreases or if the remote control stops working, replace
the batteries.
1RWH,IWKHUHPRWHVHQVRULVH[SRVHGWRÀXRUHVFHQWODPSRUVWURQJVXQOLJKWWKHUHPRWHFRQWUROPD\QRWRSHUDWHQRUPDOO\
Installing batteries in the remote control
Note: Always handle the batteries with care and use them only as directed.
,PSURSHUXVHPD\UHVXOWLQEDWWHU\H[SORVLRQFUDFNLQJRUOHDNDJHZKLFKFRXOGUHVXOWLQ¿UHLQMXU\DQGRU
pollution of the surrounding.
Note: Keep a battery away from children and pets.
Note: Do not recharge, short circuit, solder or disassemble a battery.
Note: Be sure to insert the batteries in the right direction according to the polarity.
Note: Do not mix new battery with used ones. Otherwise, it would shorten the life of new batteries or cause leakage.
Note: Use AA batteies as instructed; do not insert different types of batteries into the remote control.
Note: If you will not use the remote control for long periods of time, be sure to remove the batteries to prevent leakage,
which could damage the remote control.
Note: The liquid contents in the batteries is harmful to the skin; do not touch the leakage with your bare hands directly.
When installing new batteries, be sure to clean up the leakage thoroughly.
Note: Refer to the regulations enforced by your local government on the disposal of used batteries; improper disposal
could damage the environment.
1.
2. Align and insert the two AA batteries according to their plus
and minus terminals as indicated in the remote control.
(Use the appropriate AA carbon-zinc or alkaline batteries
(non-rechargeable) in accordance with laws and regulations.)
3. Put the battery cover back to the former state.
Remove the battery cover.
(approx.)

English-20
Installation of the Projector
English-20
Installation of the projector
1. Installing the projector towards the screen
Screen
2. Removing the mount cap on the projector
3. Selecting the correct input voltage depending on your area
Select 200-240V
Select 100-130V
4. Connecting the power cord to the projector
Be sure that the power cord is not damaged and already connected to the power outlet properly.
Connect the female side of the power cord
to power input socket of projector.
Secure the power plug by locking
the plug holder clamp.
5.
&RQQHFWLQJWKHSURMHFWRUWR\RXU3&DQGVZLWFKLQJWR³ʜ´WRWXUQRQWKHSRZHU
POWER indicator turns to red, which means the projector is in standby mode.
12V OUTPUT
(OPTION)
Desktop or laptop
computer

English-21
Installation of the Projector
English-21
6. Starting up the projector
Make sure that the POWER indicator is lighting in steady red. Press the button on the projector or
the ON button on the remote control. The projector will be turned on and the POWER indicator will
begin blinking in green. When the power is completely on, the POWER indicator will stop blinking
and the light will become steady green. The LIGHT indicator will also become steady green.
7.
Adjusting the projector's angle, Lens Shift, Zoom, Lens Centering, and Focus
a. Use the adjustable feet to change the angle of the projector in order to achieve the most suitable
angle for projection on the screen.
b. Adjust the lens by horizontal and vertical lens shift, and adjust Zoom and Focus of lens.
Method 1: Using the Keypad on the projector.
Method 2: Using the button on the remote control.
Press the SHIFT button on the remote control to access Lens
Shift. Use the ŸźŻŹ buttons to adjust the horizontal or
vertical position of the lens. Press FOCUS, ZOOM button
then use the ŻŹ buttons to adjust the focus and zoom.
The Lens shift, Zoom or Focus dialog will appear when you press the buttons of SHIFT, ZOOM or
FOCUS. Generally, better image can be got when the lens is set to the center.
Note : While the lens is moving to the center, the OSD will disappear and an hourglass icon will
appear on the screen. CENTERING may take some time till the lens reaches to the center.
* Perform CENTERING before the projector is turned off.
* The adjustable range of LENS SHIFT varies depending on which lens is mounted on the projector.
Therefore, LENS SHIFT adjustment may not reach the end of the indicator in the dialog. This is not a
malfunction.
(continued on next page)
LENS
SHIFT
FOCUS ZOOM
SHIFT

English-22
Installation of the Projector
English-22
Note for adjusting the lens shift
1. Adjust the lens shift / zoom / focus 30 minutes after turning on the projector.
2. Slight changes in the image position and/or focus may occur within 30 minutes after turning on the
projector. If the room temperature and humidity have changed after adjusting the lens shift / zoom / focus,
readjust as necessary.
3.
In anticipation of the changes after installation, set up the image size including the margin from the screen edge.
:KHQDGMXVWLQJWKHOHQVVKLIWYHUWLFDOO\¿QLVKDGMXVWLQJOHQVVKLIWE\PRYLQJWKHSURMHFWHGVFUHHQXSZDUG
,I\RX¿QLVKDGMXVWLQJWKHOHQVVKLIWE\PRYLQJWKHSURMHFWHGVFUHHQGRZQZDUGWKHSURMHFWHGVFUHHQPD\
be misaligned slightly downward over time.
8. Correcting the distortion
Press MENU on the remote control or Keypad. You can use KEYSTONE or PERFECT FIT on
OSD to correct the distortion of a projected screen.
($6<0(18ĺ.(<6721(RU3(5)(&7),7
$'9$1&('0(18ĺ6(783ĺ
*(20(75<&255(&7,21ĺ.(<6721(RU
PERFECT FIT
KEYSTONE
Adjusts the vertical and horizontal keystone.
Note: When the horizontal lens shift is not set to the center, this function may not work correctly.
PERFECT FIT
Adjusts each of the screen corner and side to correct the distortion. For details, see User's Manual -
Operating Guide.
WARPING
Projects an image on several types of screen.
Note: Press EXIT to exit, or wait several seconds until the OSD menu automatically disappears.
Note: When the zoom adjustment is set to the TELE (telephoto focus), this function may be excessive. This function
should be used when the zoom adjustment is set to the full WIDE (wide-angle focus).
:KHQWKHKRUL]RQWDOOHQVVKLIWLVQRWVHWWRWKHFHQWHUWKLVIXQFWLRQPD\QRWZRUNFRUUHFWO\
6HOHFW5(7851LQWKHGLDORJZLWKWKHŸźEXWWRQVDQGSUHVVWKHŻRU(17(5EXWWRQWRUHWXUQWRWKH
GEOMETRY CORRECTION menu.

English-24
Installation of the Projector
English-24
Throw distance
Throw Distance (TD) = Screen Width (W) x Throw Ratio (TR)
Throw Distance(TD)
Screen Width(W)
Coupled with the available projection lenses, the projector offers the following throw ratios:
FL-920 (0.38 : 1 100-350inch)
SL-902 (1.1~1.7 : 1 50-600inch)
SD-903 (1.6~2.4 : 1 50-600inch)
ML-904 (2.4~3.6 : 1 50-600inch)
LL-905 (3.5~5.6 : 1 50-600inch)
UL-906 (5.5~8.8 : 1 50-600inch)
Note:
Projection lenses are optional accessories.
Contact your local dealer to get the
projection lens that is most appropriate
for your use.
Modes of installation
Install the projector in an environment with less than 45°C (113°F). The projector should be kept
distance from sources of heat and / or ventilation openings of air conditioner.
The projector should be kept away from devices that emit electromagnetic energy, such as motors
or transformers. Common devices that emit electromagnetic energy include slideshow system,
VSHDNHUVSRZHUDPSOL¿HUVDQGHOHYDWRUV
If the projector is going to be mounted on the ceiling, be sure to use the ceiling installation
components which safety is assured. For details, contact your local dealer.
Front/Desktop
Advantage: Easy to install, move, adjust, and
operate.
'LVDGYDQWDJH2FFXSLHVÀRRUVSDFHDQGOLPLWV
seating capacity.
Lotus

English-25
Installation of the Projector
English-25
Front/Ceiling
Refer to " Page 30 : Front/Ceiling "
$GYDQWDJH'RHVQRWRFFXS\ÀRRUVSDFHDQGQRW
draw attention to it.
Eliminates the possibility that
someone would accidentally move
the projector.
Disadvantage: Stricter installation requirements
and conditions; care should be
taken during the installation to
ensure the projector has been
securely mounted. Operation of the
projector becomes inconvenient
without a remote control.
Lotus
Lo
t
tu
s
Rear/Desktop
Refer to " Page 30 : Rear/Desktop "
Advantage: The projector is completely hidden
and can be easily operated. This
setup usually offers better reduction
of ambient noise.
Disadvantage: Requires additional room and
installation relatively higher costs
for installation.
Lotus
Rear/Ceiling
Refer to " Page 31 : Rear/ceiling "
Advantage: The projector is completely hidden.
This setup usually offers better
reduction of ambient noise.
Disadvantage: Requires additional room for
installation. Stricter installation
requirements and conditions;
care should be taken during the
installation to ensure the projector
has been securely mounted.
Operation of the projector
becomes inconvenient without a
remote control.
Rear with a Mirror
If you want to have a rear projection setup with
limited space to the rear of the projector, you can
XVHDPLUURUWRUHÀHFWWKHOLJKWSDWK
However, both the projector and the mirror have
to be precisely located. If you are considering
such installation, contact your dealer for
assistance.
Advantage: The projector is completely hidden.
This setup usually offers better
reduction of ambient noise.
Disadvantage: Requires additional room
and relatively higher costs for
installation.
Screen
Mirror

English-26
Installation of the Projector
English-26
Horizontal and vertical lens shift
In addition to using the adjustable feet to adjust projection angle, you can also use the Lens Shift
function to adjust the projected picture.
Moving the lens vertically
The distance of vertical lens shift is +60% or -22% of the screen height in both directions. For
instance, if you are using a 2.15m × 1.35m(100") screen, you will be able to move the picture up to
81cm upwards or up to 29.7cm downwards.
7KLVLOOXVWUDWLRQVKRZVQRUPDOYHUWLFDOOHQVVKLIWZLWKRXWXVLQJVSHFLDOVSHFL¿FDWLRQOHQVRUSURMHFWRU
Note: Make sure that the center of the lens is vertical to the center of the screen.
The above-described value is for SD-903 lens.
Moving the lens horizontally
The distance of horizontal lens shift is 10% of the screen width in both directions. For instance, if you
are using a 2.15m × 1.35m(100") screen, you will be able to move the picture to the right or the left up
to 21.5cm.
7KLVLOOXVWUDWLRQVKRZVQRUPDOKRUL]RQWDOOHQVVKLIWZLWKRXWXVLQJVSHFLDOVSHFL¿FDWLRQOHQVRUSURMHFWRU
Note: When the lens is in the neutral position (i.e. without horizontal or vertical shift), the center of the projection should
be aligned with the center of the screen.
The above-described value is for SD-903 lens.
Range of vertical lens
shift adjustment
Range of vertical lens
shift adjustment
H: Range of Horizontal lens shift adjustment
H H

English-27
Installation of the Projector
English-27
Connecting the projector to other devices
HDMI / DVI connection
Signals from picture source offer the best projection picture quality when using HDMI/DVI.
Therefore, try to use input devices with HDMI/DVI output as the source of picture.
LAN
IN OUT
SDI
COMPUTER IN 2
REMOTE
CONTROL HDBaseT HDMI 1 DVI-D HDMI 2
CONTROL V H B/Cb/Pb G/Y R/Cr/Pr COMPUTER IN 1 12V OUTPUT
(OPTION)
LAN
IN OUT
SDI
COMPUTER IN 2
REMOTE
CONTROL HDBaseT HDMI 1 DVI-D HDMI 2
CONTROL V H B/Cb/Pb G/Y R/Cr/Pr COMPUTER IN 1
DVI Input source
(BD/HD-DVT/DVD player, HD set-top-box,
gaming consoles and so forth)
12V OUTPUT
(OPTION)
12V OUTPUT connection
Power terminal only for an optional lens. Use this port when you need power supply for the optional
lens. Do not connect other device to this port. Put the cover when it is not used. Refer to the manual of
the optional lens for details.
12V OUTPUT
(OPTION)
HDMI input source (BD/HD-DVD/DVD player,
HD set-top-box, gaming consoles and so forth)
Optional lens

English-28
Installation of the Projector
English-28
RGB connection
Connect PC or other devices with RGB output to the COMPUTER IN1 input.
12V OUTPUT
(OPTION)
Connect RGB (R/B/G/H/V) or component (YPbPr) source to COMPUTER IN2 inputs.
12V OUTPUT
(OPTION)
HDBaseT / LAN connection
HDBaseT is a technology to transmit image signal using a LAN cable.
LAN Connection - When this connector to be the LAN (RJ-45) function only, connect it to computer
or Hub. Enter the correct IP Address or the computer host name which is the same as the projector's
host name. Then you can control the projector by remote through the Internet.
Video Signal - When this connector to be the video signal input, connect it to a device with HDBaseT
RXWSXWVXFKDVKLJKGH¿QLWLRQ79VRXUFH%OXUD\3OD\HUHWF
Use a LAN cable of up to 100m long. If the cable is longer than that, the image may be deteriorated
and a failure of LAN transmission may occur.
LAN
IN OUT
SDI
COMPUTER IN 2
REMOTE
CONTROL HDBaseT HDMI 1 DVI-D HDMI 2
CONTROL V H B/Cb/Pb G/Y R/Cr/Pr COMPUTER IN 1
LAN - PC or Hub
Video - Device with HDBaseT output (such as high-definition TV source, Blu-ray Player....etc).
12V OUTPUT
(OPTION)
Desktop or laptop
computer
Desktop or laptop
computer
Termékspecifikációk
| Márka: | Hitachi |
| Kategória: | Beamer |
| Modell: | LP-WU9100B |
Szüksége van segítségre?
Ha segítségre van szüksége Hitachi LP-WU9100B, tegyen fel kérdést alább, és más felhasználók válaszolnak Önnek
Útmutatók Beamer Hitachi

12 Január 2025
14 Október 2024
22 Szeptember 2024
20 Szeptember 2024
16 Szeptember 2024
27 Augusztus 2024
25 Augusztus 2024
24 Augusztus 2024
17 Augusztus 2024
16 Augusztus 2024
Útmutatók Beamer
- Beamer Samsung
- Beamer Sony
- Beamer Yamaha
- Beamer Acer
- Beamer LG
- Beamer Marantz
- Beamer Philips
- Beamer Panasonic
- Beamer Canon
- Beamer JVC
- Beamer Sharp
- Beamer Lenovo
- Beamer Casio
- Beamer Toshiba
- Beamer HP
- Beamer Hisense
- Beamer BenQ
- Beamer Medion
- Beamer Xiaomi
- Beamer Dell
- Beamer Klarstein
- Beamer Prixton
- Beamer Polaroid
- Beamer Technaxx
- Beamer Ricoh
- Beamer Eurolite
- Beamer Epson
- Beamer Asus
- Beamer Hama
- Beamer Renkforce
- Beamer Mitsubishi
- Beamer GPX
- Beamer Kodak
- Beamer Optoma
- Beamer Smart
- Beamer Dahua Technology
- Beamer Viewsonic
- Beamer Livoo
- Beamer Smart Tech
- Beamer XGIMI
- Beamer OK
- Beamer Auna
- Beamer Nebula
- Beamer ZTE
- Beamer Showtec
- Beamer Futurelight
- Beamer Overmax
- Beamer Kogan
- Beamer D-Link
- Beamer ION
- Beamer Blaupunkt
- Beamer 3M
- Beamer Pyle
- Beamer Sanyo
- Beamer Steinel
- Beamer Salora
- Beamer Lenco
- Beamer Maxell
- Beamer Leica
- Beamer Barco
- Beamer NEC
- Beamer Cameo
- Beamer Krüger&Matz
- Beamer RCA
- Beamer OKI
- Beamer Adj
- Beamer Anker
- Beamer Microtek
- Beamer Celexon
- Beamer Vivitek
- Beamer EasyMaxx
- Beamer Elmo
- Beamer Planar
- Beamer Smartwares
- Beamer Speaka
- Beamer Vogel's
- Beamer Acco
- Beamer Aiptek
- Beamer ASK Proxima
- Beamer Reflecta
- Beamer Yaber
- Beamer Da-Lite
- Beamer Steren
- Beamer Eiki
- Beamer Derksen
- Beamer InFocus
- Beamer Bauer
- Beamer Naxa
- Beamer Emtec
- Beamer Celly
- Beamer Promethean
- Beamer Odys
- Beamer Stairville
- Beamer Laserworld
- Beamer Ibm
- Beamer La Vague
- Beamer Tzumi
- Beamer EKO
- Beamer MicroVision
- Beamer Elite Screens
- Beamer Fun Generation
- Beamer Christie
- Beamer PLUS
- Beamer Varytec
- Beamer AOpen
- Beamer Ultimea
- Beamer Dracast
- Beamer Dukane
- Beamer Dream Vision
- Beamer Knoll
- Beamer DTS
- Beamer Touchjet
- Beamer Boxlight
- Beamer AAXA Technologies
- Beamer Miroir
- Beamer Vankyo
- Beamer Mimio
- Beamer AWOL Vision
- Beamer Atlantis Land
- Beamer KickAss
- Beamer VAVA
- Beamer Beghelli
- Beamer Panamorph
- Beamer Mirabella Genio
Legújabb útmutatók Beamer

10 Április 2025
10 Április 2025
10 Április 2025

9 Április 2025
9 Április 2025

2 Április 2025

15 Január 2025

14 Január 2025
13 Január 2025
12 Január 2025