Használati útmutató Brother DCP-9010CN
Olvassa el alább 📖 a magyar nyelvű használati útmutatót Brother DCP-9010CN (215 oldal) a nyomtató kategóriában. Ezt az útmutatót 4 ember találta hasznosnak és 2 felhasználó értékelte átlagosan 4.5 csillagra
Oldal 1/215

SOFTWARE
USER’S GUIDE
DCP-9010CN
MFC-9120CN
MFC-9320CW
Not all models are available in all
countries.
Version A
UK

i
Trademarks
The Brother logo is a registered trademark of Brother Industries, Ltd.
Brother is a registered trademark of Brother Industries, Ltd.
Microsoft, Windows, Windows Server, Outlook and Internet Explorer are registered trademarks of Microsoft
Corporation in the United States and/or other countries.
Windows Vista is either a registered trademark or a trademark of Microsoft Corporation in the United States
and other countries.
Apple, Macintosh, Safari and TrueType are trademarks of Apple Inc., registered in the United States and
other countries.
Adobe, Flash, Illustrator, PageMaker, Photoshop, PostScript and PostScript 3 are either registered
trademarks or trademarks of Adobe Systems Incorporated in the United States and/or other countries.
Corel, CorelDRAW, WordPerfect and Paint Shop Pro are trademarks or registered trademarks of Corel
Corporation and/or its subsidiaries in Canada, the United States and/or other countries.
Nuance, the Nuance logo, PaperPort and ScanSoft are trademarks or registered trademarks of Nuance
Communications, Inc. or its affiliates in the United States and/or other countries.
Any trade names and product names of companies appearing on Brother products, related
documents and any other materials are all trademarks or registered trademarks of those respective
companies.
Compilation and Publication
Under the supervision of Brother Industries, Ltd., this manual has been compiled and published, covering the
latest product descriptions and specifications.
The contents of this manual and the specifications of this product are subject to change without notice.
Brother reserves the right to make changes without notice in the specifications and materials contained
herein and shall not be responsible for any damages (including consequential) caused by reliance on the
materials presented, including but not limited to typographical and other errors relating to the publication.
Copyright and License
©2011 Brother Industries, Ltd.
This product includes software developed by the following vendors:
©1983-1998 PACIFIC SOFTWORKS, INC.
©2011 Devicescape Software, Inc.
This product includes the "KASAGO TCP/IP" software developed by ZUKEN ELMIC, Inc.

ii
Table of Contents
Section I Windows®
1 Printing 2
Using the Brother printer driver..................................................................................................................2
Printing a document...................................................................................................................................3
Duplex printing...........................................................................................................................................4
Guidelines for printing on both sides of the paper ...............................................................................4
Manual duplex printing ........................................................................................................................4
Simultaneous scanning, printing and faxing ..............................................................................................5
Printer operation keys................................................................................................................................6
Job Cancel...........................................................................................................................................6
Secure Key ..........................................................................................................................................6
Printer Emulation Support ...................................................................................................................7
Printing the Internal Font List...............................................................................................................8
Printing the Print Configuration List .....................................................................................................8
Test Print .............................................................................................................................................8
Output Colour ......................................................................................................................................9
Restoring default printer settings.........................................................................................................9
Status Monitor..........................................................................................................................................10
Monitoring the machine’s status ........................................................................................................11
Printer driver settings...............................................................................................................................12
Features in the Windows® printer driver..................................................................................................13
Basic tab ..................................................................................................................................................14
Paper Size .........................................................................................................................................14
Orientation .........................................................................................................................................15
Copies ...............................................................................................................................................15
Media Type........................................................................................................................................15
Print Quality .......................................................................................................................................16
Colour/Mono ......................................................................................................................................16
Settings Dialog ..................................................................................................................................17
Multiple Page.....................................................................................................................................19
Manual Duplex / Booklet....................................................................................................................19
Paper Source.....................................................................................................................................20
Advanced tab...........................................................................................................................................21
Scaling...............................................................................................................................................21
Reverse Print.....................................................................................................................................21
Use Watermark..................................................................................................................................22
Watermark Settings ...........................................................................................................................22
Header-Footer Print...........................................................................................................................24
Toner Save Mode ..............................................................................................................................24
Secure Print.......................................................................................................................................24
Administrator .....................................................................................................................................25
User Authentication (MFC-9320CW only) .........................................................................................26
Other Print Options............................................................................................................................26
Colour Calibration..............................................................................................................................26
Improve Print Output .........................................................................................................................27
Tray Settings tab......................................................................................................................................28

iv
4 Remote Setup (MFC-9120CN and MFC-9320CW only) 83
Remote Setup..........................................................................................................................................83
5 Brother PC-FAX Software (MFC-9120CN and MFC-9320CW only) 85
PC-FAX sending......................................................................................................................................85
Setting up user information................................................................................................................85
Sending setup....................................................................................................................................86
Setting up a cover page.....................................................................................................................87
Entering cover page information........................................................................................................88
Sending a file as a PC-FAX using the Facsimile style user interface................................................89
Sending a file as a PC-FAX using the Simple style user interface ....................................................90
Address Book ..........................................................................................................................................92
Brother Address Book .......................................................................................................................93
Setting up a member in the Address Book ........................................................................................93
Speed Dial setup ...............................................................................................................................94
Setting up a group for broadcasting ..................................................................................................95
Editing member information...............................................................................................................95
Deleting a member or group..............................................................................................................95
Exporting the Address Book..............................................................................................................96
Importing to the Address Book ..........................................................................................................97
PC-FAX receiving ....................................................................................................................................99
Enabling PC-FAX Receiving software on your machine .................................................................100
Running the PC-FAX Receiving software on your PC.....................................................................100
Setting up your PC ..........................................................................................................................101
Configuring the Network PC-FAX Receiving Settings .....................................................................102
Viewing new PC-FAX messages.....................................................................................................103
6 Firewall settings (For Network users) 104
Before using the Brother software .........................................................................................................104
Windows® XP SP2 or greater..........................................................................................................104
Windows Vista®...............................................................................................................................106
Windows®7 users ...........................................................................................................................108

v
Section II Apple Macintosh
7 Printing and Faxing 114
Printer operation key..............................................................................................................................114
Job Cancel.......................................................................................................................................114
Secure Key .....................................................................................................................................114
Printer Emulation Support ...............................................................................................................115
Printing the Internal Font List...........................................................................................................116
Printing the Print Configuration List .................................................................................................116
Test Print .........................................................................................................................................116
Output Colour ..................................................................................................................................117
Restoring default printer settings.....................................................................................................117
Status Monitor........................................................................................................................................118
Updating the machine’s status ........................................................................................................118
Hiding or showing the window .........................................................................................................118
Quitting the window .........................................................................................................................118
Web Based Management (Network Connection Only)....................................................................119
Features in the printer driver (Macintosh)..............................................................................................120
Choosing page setup options ..........................................................................................................120
Choosing printing options ................................................................................................................121
Cover Page (Mac OS X 10.4.x or greater) ......................................................................................122
Paper Feed......................................................................................................................................122
Layout..............................................................................................................................................123
Secure Print.....................................................................................................................................124
Print Settings ...................................................................................................................................125
Removing the Printer driver for Macintosh ............................................................................................130
Using the BR-Script3 Driver (PostScript® 3™ language emulation printer driver) ................................131
Features in the BR-Script 3 (PostScript® 3™ language emulation) printer driver .................................137
Choosing page setup options ..........................................................................................................137
Choosing printing options ................................................................................................................138
Cover Page (Mac OS X 10.4.x or greater) ......................................................................................139
Layout..............................................................................................................................................139
Secure Print (Mac OS X 10.5.x to 10.6.x) .......................................................................................141
Printer Features...............................................................................................................................141
Sending a fax (MFC-9120CN and MFC-9320CW only).........................................................................148
Macintosh ........................................................................................................................................148
Drag a vCard from the Mac OS X Address Book application (Mac OS X 10.3.9 to 10.4.x) ............151
Using Mac OS X 10.5.x to 10.6.x Addresses panel.........................................................................152
8 Scanning 154
Scanning from a Macintosh ...................................................................................................................154
Scanning an image into your Macintosh..........................................................................................155
Pre-Scanning an image ...................................................................................................................155
Settings in the Scanner window ......................................................................................................156
Using Presto! PageManager..................................................................................................................159
Features ..........................................................................................................................................159
System requirements for Presto! PageManager .............................................................................159
NewSoft Technical Support .............................................................................................................159

vi
9 ControlCenter2 162
Using ControlCenter2 ............................................................................................................................162
Turning the AutoLoad feature off.....................................................................................................163
SCAN.....................................................................................................................................................164
File types .........................................................................................................................................165
Document Size ................................................................................................................................165
Image (example: Apple Preview).....................................................................................................165
OCR (word processing application).................................................................................................167
E-mail ..............................................................................................................................................168
File...................................................................................................................................................169
CUSTOM SCAN ....................................................................................................................................170
File types .........................................................................................................................................171
Document Size ................................................................................................................................171
User-defined button .........................................................................................................................171
Scan to Image .................................................................................................................................172
Scan to OCR ...................................................................................................................................173
Scan to E-mail .................................................................................................................................174
Scan to File......................................................................................................................................175
COPY / PC-FAX (PC-FAX is on MFC-9120CN and MFC-9320CW only) .............................................176
DEVICE SETTINGS ..............................................................................................................................178
Remote Setup (MFC-9120CN and MFC-9320CW only) .................................................................178
Quick-Dial (MFC-9120CN and MFC-9320CW only)........................................................................179
Status Monitor .................................................................................................................................179
10 Remote Setup 180
Remote Setup (MFC-9120CN and MFC-9320CW only)........................................................................180

vii
Section III Using The Scan key
11 Scanning (For USB cable users) 183
Using the Scan key................................................................................................................................183
Scan to USB (MFC-9320CW only) ..................................................................................................183
Scan to E-mail .................................................................................................................................186
Scan to Image .................................................................................................................................187
Scan to OCR ...................................................................................................................................188
Scan to File......................................................................................................................................189
12 Network Scanning 190
Before using Network Scanning ............................................................................................................190
Network licence ...............................................................................................................................190
Configuring Network Scanning (For Windows®) .............................................................................191
Configuring Network Scanning (For Macintosh)..............................................................................194
Using the Scan key................................................................................................................................195
Scan to E-mail .................................................................................................................................195
Scan to Image .................................................................................................................................196
Scan to OCR ...................................................................................................................................197
Scan to File......................................................................................................................................198
Scan to FTP (MFC-9120CN and MFC-9320CW only) ....................................................................199
Scan to Network (MFC-9120CN and MFC-9320CW only) ..............................................................202
How to set a new default for the file size (For Scan to FTP and Network) ......................................205
A Index 206

Section I
Windows®
I
Printing 2
Scanning 37
ControlCenter3 58
Remote Setup (MFC-9120CN and MFC-9320CW only) 83
Brother PC-FAX Software
(MFC-9120CN and MFC-9320CW only) 85
Firewall settings (For Network users) 104

2
1
1
Note
• The screens in this section are from Windows® XP. Screens on your PC may vary depending on your
operating system.
• If your PC is protected by a firewall, and is unable to print, you may need to configure the firewall settings
to allow communication through port number 137. (See Firewall settings (For Network users)
on page 104.)
Using the Brother printer driver 1
A printer driver is software that translates data from the format used by a PC into the format needed by a
particular printer, using a printer command language or page description language.
The printer drivers are on the CD-ROM we have supplied. Install the drivers by following the Quick Setup
Guide. The latest printer driver can also be downloaded from the Brother Solutions Center at:
http://solutions.brother.com
Windows® Printing
The dedicated printer drivers for Microsoft® Windows® 2000 Professional/XP/XP Professional x64 Edition/
Windows Vista®/Windows® 7/Windows Server® 2003 1/Windows Server® 2008 1/Windows Server® 2008
R2 1 are available on the CD-ROM supplied with your Brother device. You can install them easily into your
Windows® system using our installer program. The drivers support our unique compression mode to enhance
printing speed in Windows® applications, and allows you to set various printer settings, including economy
printing mode and custom paper size.
1Windows Server
® 2003 and Windows Server
® 2008/Windows Server
® 2008 R2 are available for network printing only.
Printing 1

Printing
3
1
Printing a document 1
When the machine receives data from your computer, it begins printing by picking up paper from the paper
tray. The paper tray can feed many types of paper and envelopes. (See the User’s Guide for information
about the Paper Tray and Recommended paper.)
aFrom your application, choose the Print command.
If any other printer drivers are installed on your computer, choose Brother MFC-XXXX or
DCP-XXXX Printer* as your printer driver from the Print or Print Settings menu in your software
application, and then click OK to begin printing.
*(Where XXXX is your model name. If you are using a LAN cable to connect your machine then LAN will
be in the printer driver name.)
Note
(Macintosh) See Features in the printer driver (Macintosh) on page 120.
bYour computer sends the data to the machine.
cWhen the machine finishes printing all the data, the LCD shows the machine status.
Note
You can choose the paper size and orientation in your application software.
If your application software does not support your custom paper size, choose the next largest paper size.
Then adjust the print area by changing the right and left margins in your application software.

Printing
4
1
Duplex printing 1
The supplied printer driver supports duplex printing.
Guidelines for printing on both sides of the paper 1
If the paper is thin, it may wrinkle.
If paper is curled, turn over the stack, straighten it and then put it back in the paper tray or the Manual Feed
Slot.
If the paper is not feeding properly, it may be curled. Remove the paper, straighten it and turn over the
stack.
When you use the manual duplex function, it is possible that there may be paper jams or poor print quality.
If there is a paper jam, see Paper jams in the User’s Guide. If you have a print quality problem, see
Improving the print quality in the User’s Guide.
Manual duplex printing 1
The machine prints all the even-numbered pages on one side of the paper first. Then, the Windows ® driver
instructs you (with a pop-up message) to reinsert the paper. Before reinserting the paper, straighten it well,
or you may get a paper jam. Very thin or thick paper is not recommended.

Printing
5
1
Simultaneous scanning, printing and faxing 1
Your machine can print from your computer while sending or receiving a fax in memory, or while scanning a
document into the computer. Fax sending will not be stopped during PC printing. However, when the machine
is copying or receiving a fax on paper, it pauses the PC printing operation, and then continues printing when
copying or fax receiving has finished.

Printing
6
1
Printer operation keys 1
Job Cancel 1
To cancel the current print job, press Job Cancel. You can clear the data that is left in the printer memory by
pressing Job Cancel. To cancel multiple print jobs, hold down this key until the LCD shows
Job Cancel (All).
Secure Key 1
Secured data is password protected. Only those people who know the password will be able to print the
secured data. The machine will not print secure data until the password is entered. After the document is
printed, the data will be cleared from the memory. To use this function, you need to set your password in the
printer driver dialog box. If you turn the power switch Off, the secured data saved in memory will be cleared.
aPress Secure.
Note
If the LCD displays No Data Stored, there is no secured data in the memory.
bPress a or b to choose the user name. Press OK. The LCD displays the secured jobs list for that name.
cPress a or b to choose the job. Press OK. Enter your four-digit password and press OK.
dTo print the data, press a or b to choose Print, press OK and then enter the number of copies you want.
Press OK.
The machine prints the data.
To delete the secured data, press a or b to choose Delete. Press OK.

Printing
7
1
Printer Emulation Support 1
Your machine will receive print commands in a printer job language or emulation. Different operating systems
and applications will send the print commands in different languages. Your machine can receive print
commands in a variety of emulations and has an automatic emulation selection feature. When the machine
receives data from the computer, it automatically chooses the emulation mode. The default setting is Auto.
Your machine has the following emulation modes. You can change the setting by using the control panel or
a web browser.
HP LaserJet Mode
The HP LaserJet mode (or HP mode) is the emulation mode in which this printer supports the PCL6
language of a Hewlett-Packard LaserJet laser printer. Many applications support this type of laser printer.
Using this mode will allow your printer to run at its best with those applications.
BR-Script 3 Mode
BR-Script is an original Brother page description language and a PostScript ® language emulation
interpreter. This printer supports PostScript®3™. The BR-Script interpreter of this printer allows you to
control text and graphics on the page.
For technical information about PostScript® commands, see the following manuals:
• Adobe Systems Incorporated. PostScript® Language Reference, 3rd edition. Addison-Wesley
Professional, 1999. ISBN: 0-201-37922-8
• Adobe Systems Incorporated. PostScript® Language Program Design. Addison-Wesley Professional,
1988. ISBN: 0-201-14396-8
• Adobe Systems Incorporated. PostScript® Language Tutorial and Cookbook. Addison-Wesley
Professional, 1985. ISBN: 0-201-10179-3
Setting the Emulation mode 1
a(MFC-9120CN and MFC-9320CW) Press Menu, 4 1, .
(DCP-9010CN) Press Menu, 3 1, .
bPress a or b to choose Auto, HP LaserJet BR-Script 3 or . Press OK.
cPress Stop/Exit.
Note
We recommend that you set the emulation setting with your application software or network server. If the
setting does not work properly, choose the required emulation mode manually using the control panel
buttons of the machine.

Printing
8
1
Printing the Internal Font List 1
You can print a list of the machine’s internal (or resident) fonts to see how each font looks before you choose
it.
a(MFC-9120CN and MFC-9320CW) Press Menu, 4 2 1, , .
(DCP-9010CN) Press Menu, 3 2 1, , .
bPress a or b to choose 1.HP LaserJet or 2.BR-Script 3. Press OK.
cPress Mono Start or Colour Start. The machine prints the list.
dPress Stop/Exit.
Printing the Print Configuration List 1
You can print a list of current printer settings.
a(MFC-9120CN and MFC-9320CW) Press Menu, 4 2 2, , .
(DCP-9010CN) Press Menu, 3 2 2, , .
bPress Mono Start or Colour Start. The machine prints the settings.
cPress Stop/Exit.
Test Print 1
If you are having problems with print quality, you can do a test print.
a(MFC-9120CN and MFC-9320CW) Press Menu, 4 2 3, , .
(DCP-9010CN) Press Menu, 3 2 3, , .
bPress Mono Start or Colour Start.
cPress Stop/Exit.
Note
If the problem appears on the printout, see Improving the print quality in the User’s Guide.

Printing
9
1
Output Colour 1
If the driver does not have colour settings, you can choose the colour settings.
a(MFC-9120CN and MFC-9320CW) Press Menu, 4 3, .
(DCP-9010CN) Press Menu, 3 3, .
bPress a or b to choose Auto, Color or B&W.
Note
For more information about the colour settings, see on page 16.Colour/Mono
cPress OK.
dPress Stop/Exit.
Restoring default printer settings 1
You can return the machine’s printer settings to the factory settings.
a(MFC-9120CN and MFC-9320CW) Press Menu, 4 4, .
(DCP-9010CN) Press Menu, 3 4, .
bTo restore the default settings, press 1 to choose 1.Reset.
To exit without making a change, press 2 to choose 2.Exit.
cPress Stop/Exit.
Printing
10
1
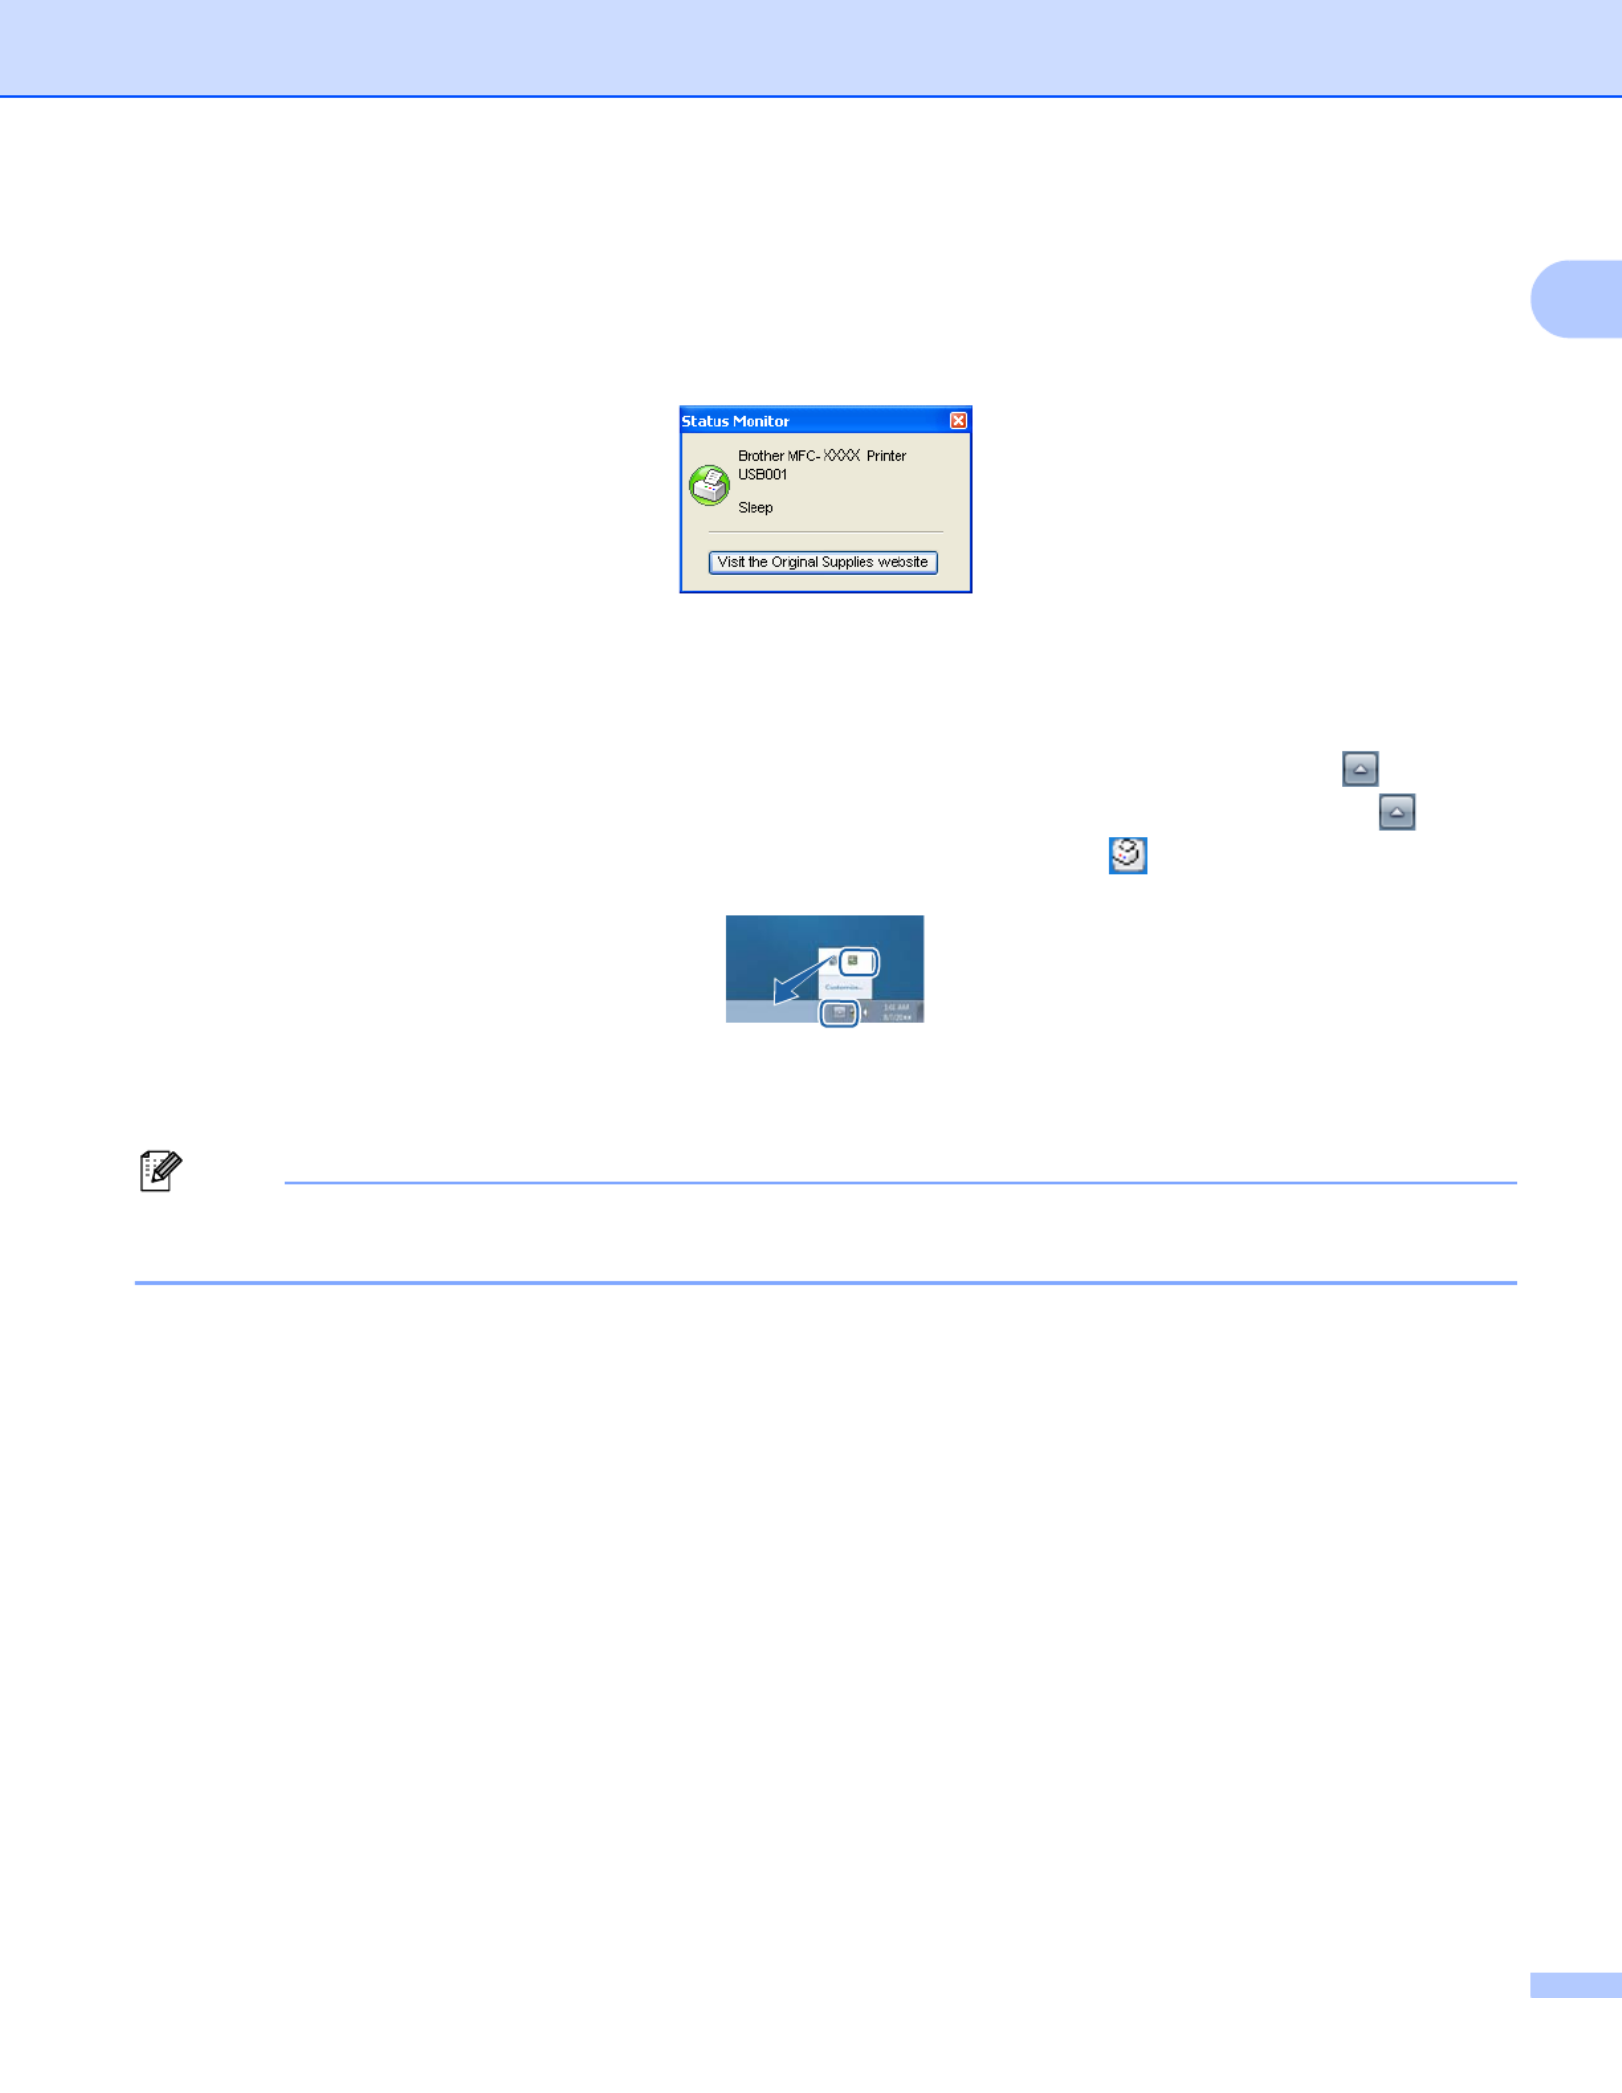
Status Monitor 1
The Status Monitor utility is a configurable software tool for monitoring the status of one or more devices,
allowing you to get immediate notification of error messages such as paper empty or paper jam.
You can check the device status at anytime by double-clicking the icon in the tasktray or by choosing
Status Monitor located in Start/All Programs/Brother/MFC-XXXX (or DCP-XXXX) on your PC.
(For Windows®7)
If you have selected Enable Status Monitor on startup during installation, you will find the button or
Status Monitor Status Monitor icon on the taskbar.To show the icon on your taskbar, click the button.
The Status Monitor icon will appear in the small window. Then drag the icon to the taskbar.
There is also a link to the Brother Original Supplies website. Click Visit the Original Supplies website
button for more information on Brother original supplies.
Note
For more information about using the Status Monitor software, right-click the Status Monitor icon and
choose Help.

Printing
11
1
Monitoring the machine’s status 1
The Status Monitor icon will change colour depending on the machine status.
A green icon indicates the normal stand-by condition.
A yellow icon indicates a warning.
A red icon indicates a printing error has occurred.
There are two locations where you can display the Status Monitor on your PC - in the tasktray or on the
desktop.

Printing
12
1
Printer driver settings 1
Note
(Macintosh) See Printing and Faxing on page 114.
You can change the following printer settings when you print from your computer.
Paper Size
Orientation
Copies
Media Type
Print Quality
Colour / Mono
Multiple Page
Manual Duplex / Booklet 1
Paper Source
Scaling
Reverse Print
Use Watermark 1
Header-Footer Print 1
Toner Save Mode
Secure Print
Administrator 1
User Authentication 1 2
Colour Calibration 1
Improve Print Output
1These settings are not available with the BR Script printer driver for Windows
®.
2MFC-9320CW only

Printing
13
1
Features in the Windows® printer driver 1
For more information, see the text in the printer driver.Help
Note
• The screens in this section are from Windows® XP. The screens on your PC will vary depending on your
operating system.
• You can access the Printing Preferences dialog box by clicking Printing Preferences... in the General
tab of the Printer Properties dialog box.

Printing
14
1
Basic tab 1
You can also change Page Layout settings by clicking the illustration on the left side of the Basic tab.
aChoose the Paper Size, , Orientation Copies, , Media Type Print Quality and Colour / Mono (1).
bChoose the Multiple Page and Manual Duplex / Booklet (2).
cChoose the (3).Paper Source
dConfirm your current settings in the window (4).
eClick OK to apply your chosen settings.
To return to the default settings, click Default, then OK.
Paper Size 1
From the drop-down box choose the Paper Size you are using.
(1)
(2)
(3)
(4)

Printing
15
1
Orientation 1
Orientation selects the position of how your document will be printed (Portrait or Landscape).
Copies 1
The copies selection sets the number of copies that will be printed.
Collate
With the Collate check box selected, one complete copy of your document will be printed and then
repeated for the number of copies you selected. If the Collate check box is not selected, then each page
will be printed for all the copies selected before the next page of the document is printed.
Media Type 1
You can use the following types of media in your printer. For the best print quality, select the type of media
that you wish to use.
Note
• When using ordinary plain paper (60 to 105 g/m2, 16 to 28 lb) choose Plain Paper. When using heavier
weight paper or rough paper choose Thick Paper or Thicker Paper. For bond paper, choose
Bond Paper.
• When you use envelopes, choose Envelopes. If the toner is not fixed to the envelope correctly when
Envelopes has been selected, choose Env. Thick. If the envelope is crumpled when Envelopes has
been selected, choose Env. Thin. For more information, see the User’s Guide.
Portrait (Vertical) Landscape (Horizontal)
Plain Paper Thin Paper Thick Paper Thicker Paper Bond Paper Envelopes
Env. Thick Env. Thin Recycled Paper Label

Printing
16
1
Print Quality 1
You can choose the following print quality settings.
Normal (600 x 600 dpi)
600 ×600 dpi. Recommended for ordinary printing. Good print quality with reasonable print speeds.
Fine (2400 dpi class)
2400 dpi class. The finest print mode. Use this mode to print precise images such as photographs. Since
the print data is much larger than in normal mode, processing time / data transfer time and printing time
will be longer.
Note
The print speed will change depending on what print quality setting you choose. Higher print quality takes
longer to print, while lower print quality takes less time to print.
Colour/Mono 1
You can change the Colour/Mono settings as follows:
Auto
The printer checks the content of your documents for colour. If colour is detected, it prints in colour. If no
colour content is detected, it prints in monochrome.
Colour
When your document contains colour and you want to print it in colour, select this mode.
Mono
Select this mode if your document has only black and greyscale text and/or objects. If your document
contains colour, selecting Mono mode prints your document in 256 levels of grey.
Note
If the Cyan, Magenta or Yellow toner reaches the end of its life, choosing Mono will allow you to keep
printing as long as the Black toner does not reach the end of its life.
Printing
17
1
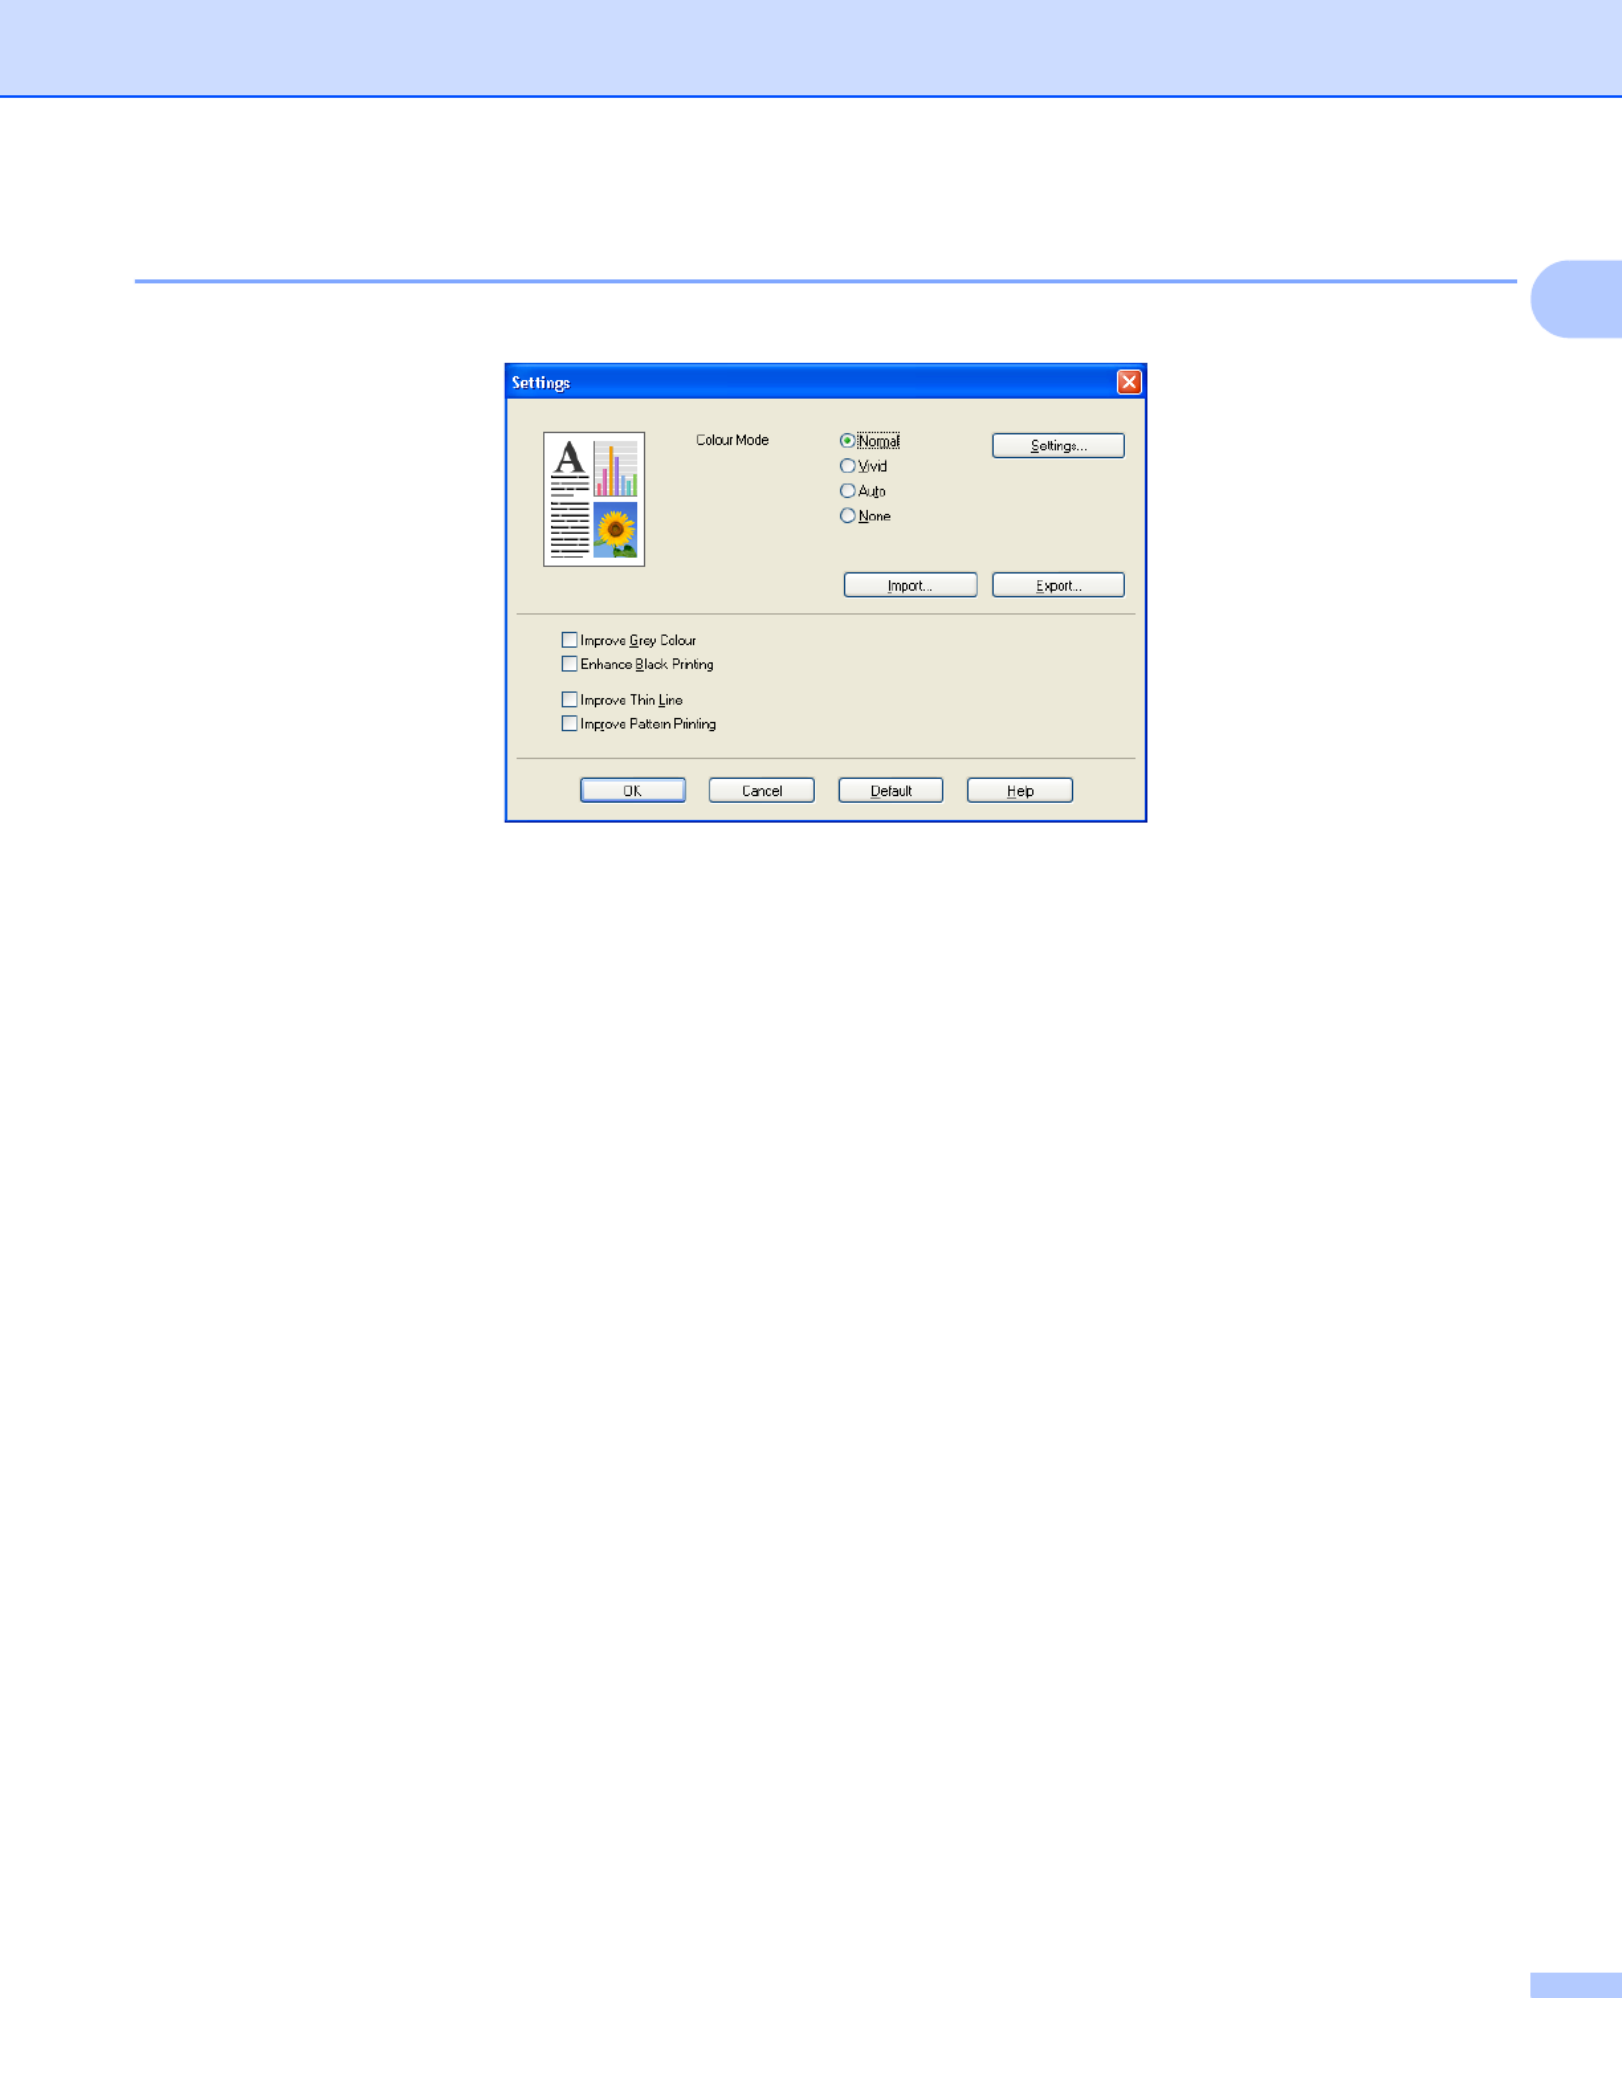
Settings Dialog 1
You can change the following setting by clicking Settings from the Basic tab.
Colour Mode
The following options are available in Colour Matching mode:
•Normal
This is the default colour mode.
•Vivid
The colour of all elements are adjusted to become a more vivid colour.
•Auto
The printer driver automatically selects the Colour Mode type.
•None
If you want to apply the colour management settings of your application, choose this setting. The printer
driver will not adjust the colour.
Import
You can adjust the print configuration of a particular image by clicking Settings. When you have finished
adjusting the image parameters, such as brightness and contrast, you can import those settings as a print
configuration file. Use the Export function to create a print configuration file from the current settings.
Export
You can adjust the print configuration of a particular image by clicking Settings. When you have finished
adjusting the image parameters, such as brightness and contrast, you can export those settings as a print
configuration file. Use the Import function to load a previously exported configuration file.
Improve Grey Colour
You can improve the image quality of a shaded area.
Enhance Black Printing
If a black graphic cannot be printed correctly, choose this setting.
Printing
18
1
Improve Thin Line
You can improve the image quality of thin lines.
Improve Pattern Printing
Select this option if printed fills and patterns are different from the patterns and fills you see on your
computer.
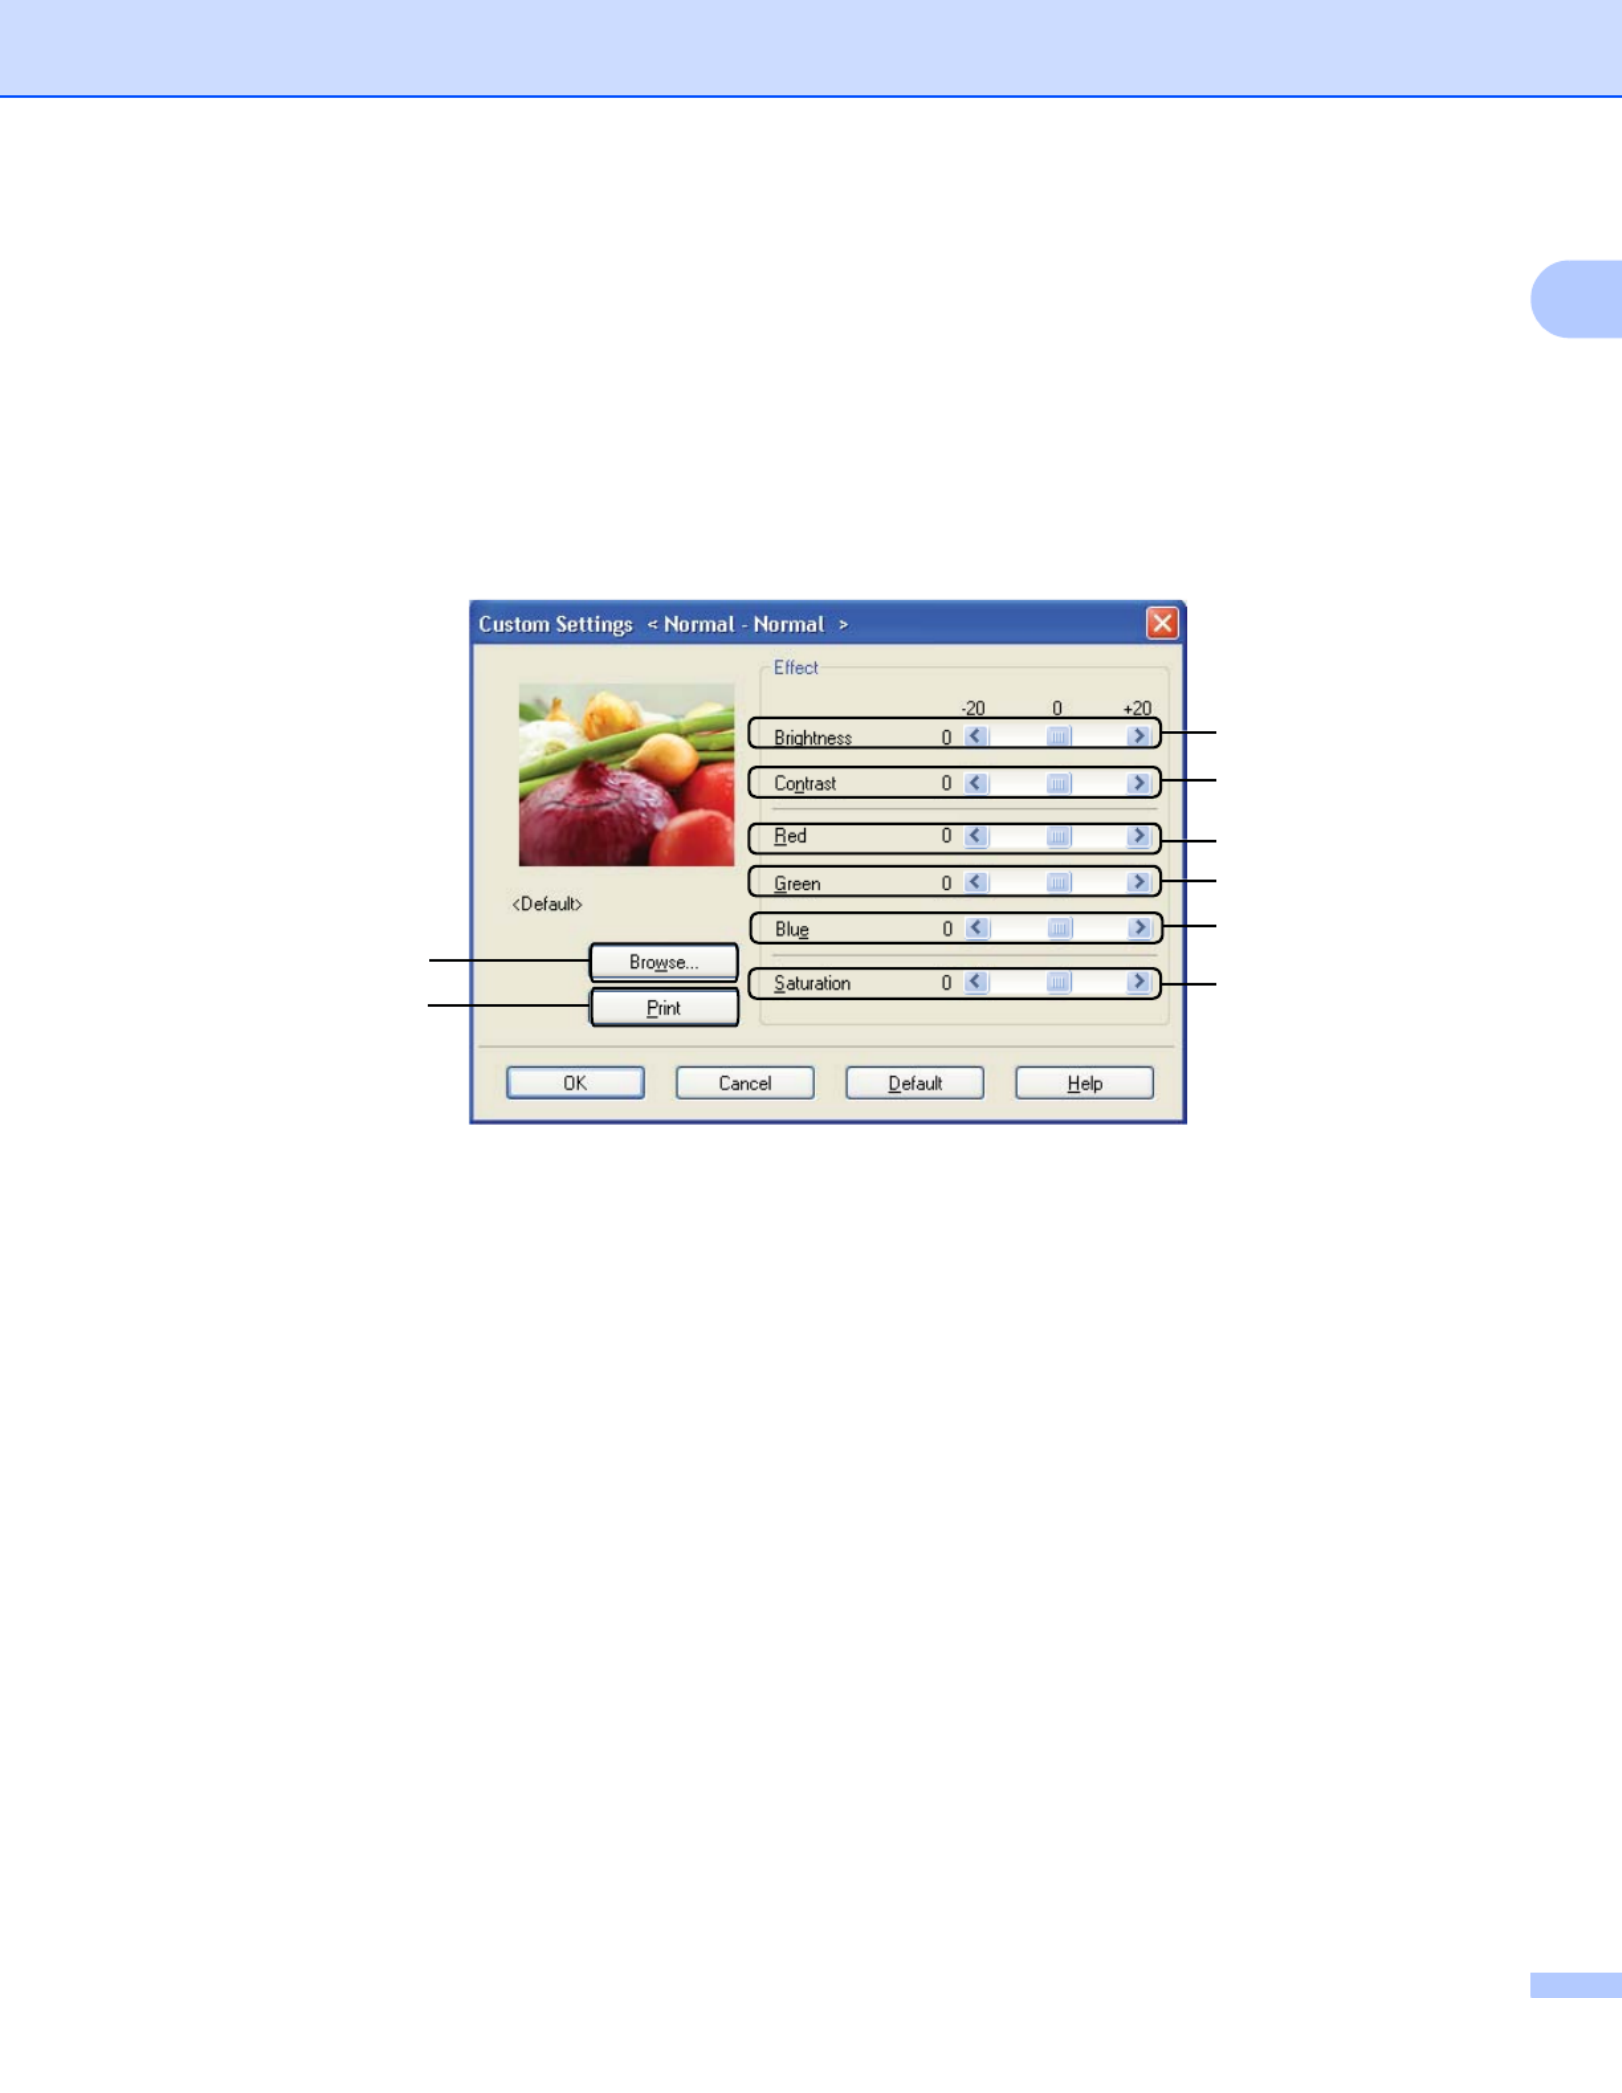
Settings
If you want to change the colour settings such as brightness, contrast, intensity or saturation, click the
Settings button to access more advanced settings.
•Brightness (1)
Moving the scroll bar to the right makes your image lighter and moving the scroll bar left makes your
image darker.
•Contrast (2)
Darker sections are darker while lighter sections will be lighter as you increase the contrast.
•Red (3)
Increase the intensity of Red in the image.
•Green (4)
Increase the intensity of Green in the image.
•Blue (5)
Increase the intensity of Blue in the image.
•Saturation (6)
Increase the saturation when you wish to print a more vivid image or decrease the saturation you want
to print a less vivid image.
•Browse (7)
By clicking the Browse button, you can change the image shown in the preview window. The file must
be a bitmap file.
•Print (8)
You can print the image shown in the preview by clicking the Print button.
(1)
(2)
(4)
(3)
(5)
(6)
(7)
(8)

Printing
19
1
Multiple Page 1
The Multiple Page selection can reduce the image size of a page allowing multiple pages to be printed on
one sheet of paper or enlarging the image size for printing one page on multiple sheets of paper.
Page Order
When N in 1 option is selected, the page order can be selected from the drop-down list.
Border Line
When printing multiple pages on one sheet with the Multiple Page feature you can choose to have a solid
border, dash border or no border around each page on the sheet.
Manual Duplex / Booklet 1
When you want to print a booklet or do manual duplex printing, use this function.
None
Disable duplex printing.
Manual Duplex
In this mode, the printer prints all the even numbered pages first. Then the printer driver will stop and show
the instructions required to re-install the paper. When you click OK the odd numbered pages will be printed
(see Manual duplex printing on page 4).
If you choose Manual Duplex and click Duplex Settings, you can change the following settings.
•Duplex Type
There are six types of duplex binding directions available for each orientation.
•Binding Offset
If you check the Binding Offset option, you can also specify the offset for binding in inches or
millimeters.
Booklet
Booklet Printing lets you print a document as a booklet. For example: If you want to print a 4 pages file as
a booklet, the machine will automatically print page 4 and page 1 on the same side of the paper first and
then page 2 and page 3 on the other side of the paper. To make the booklet, fold the printed pages down
the middle.
If you choose Booklet and click Duplex Settings, you can change the following settings.
•Duplex Type
There are two types of duplex binding directions available for each orientation.
•Binding Offset
If you check the Binding Offset option, you can also specify the offset for binding in inches or
millimeters.

Printing
20
1
Paper Source 1
You can choose Auto Select, Tray1 or Manual and specify separate trays for printing the first page and for
printing from the second page onwards.
Note
The printer automatically turns on the Manual Feed mode when you put paper in the manual feed slot even
if another setting is selected.

Printing
21
1
Advanced tab 1
Change the tab settings by clicking one of the following icons:
Scaling (1)
Reverse Print (2)
Use Watermark (3)
Header-Footer Print (4)
Toner Save Mode (5)
Secure Print (6)
Administrator (7)
User Authentication (8) (MFC-9320CW only)
Other Print Options (9)
Scaling 1
You can change the print image scaling.
Reverse Print 1
Check Reverse Print to reverse the data from up to down.
(1)
(4)
(2)
(3)
(6)
(5)
(7)
(8)
(9)
Printing
22
1
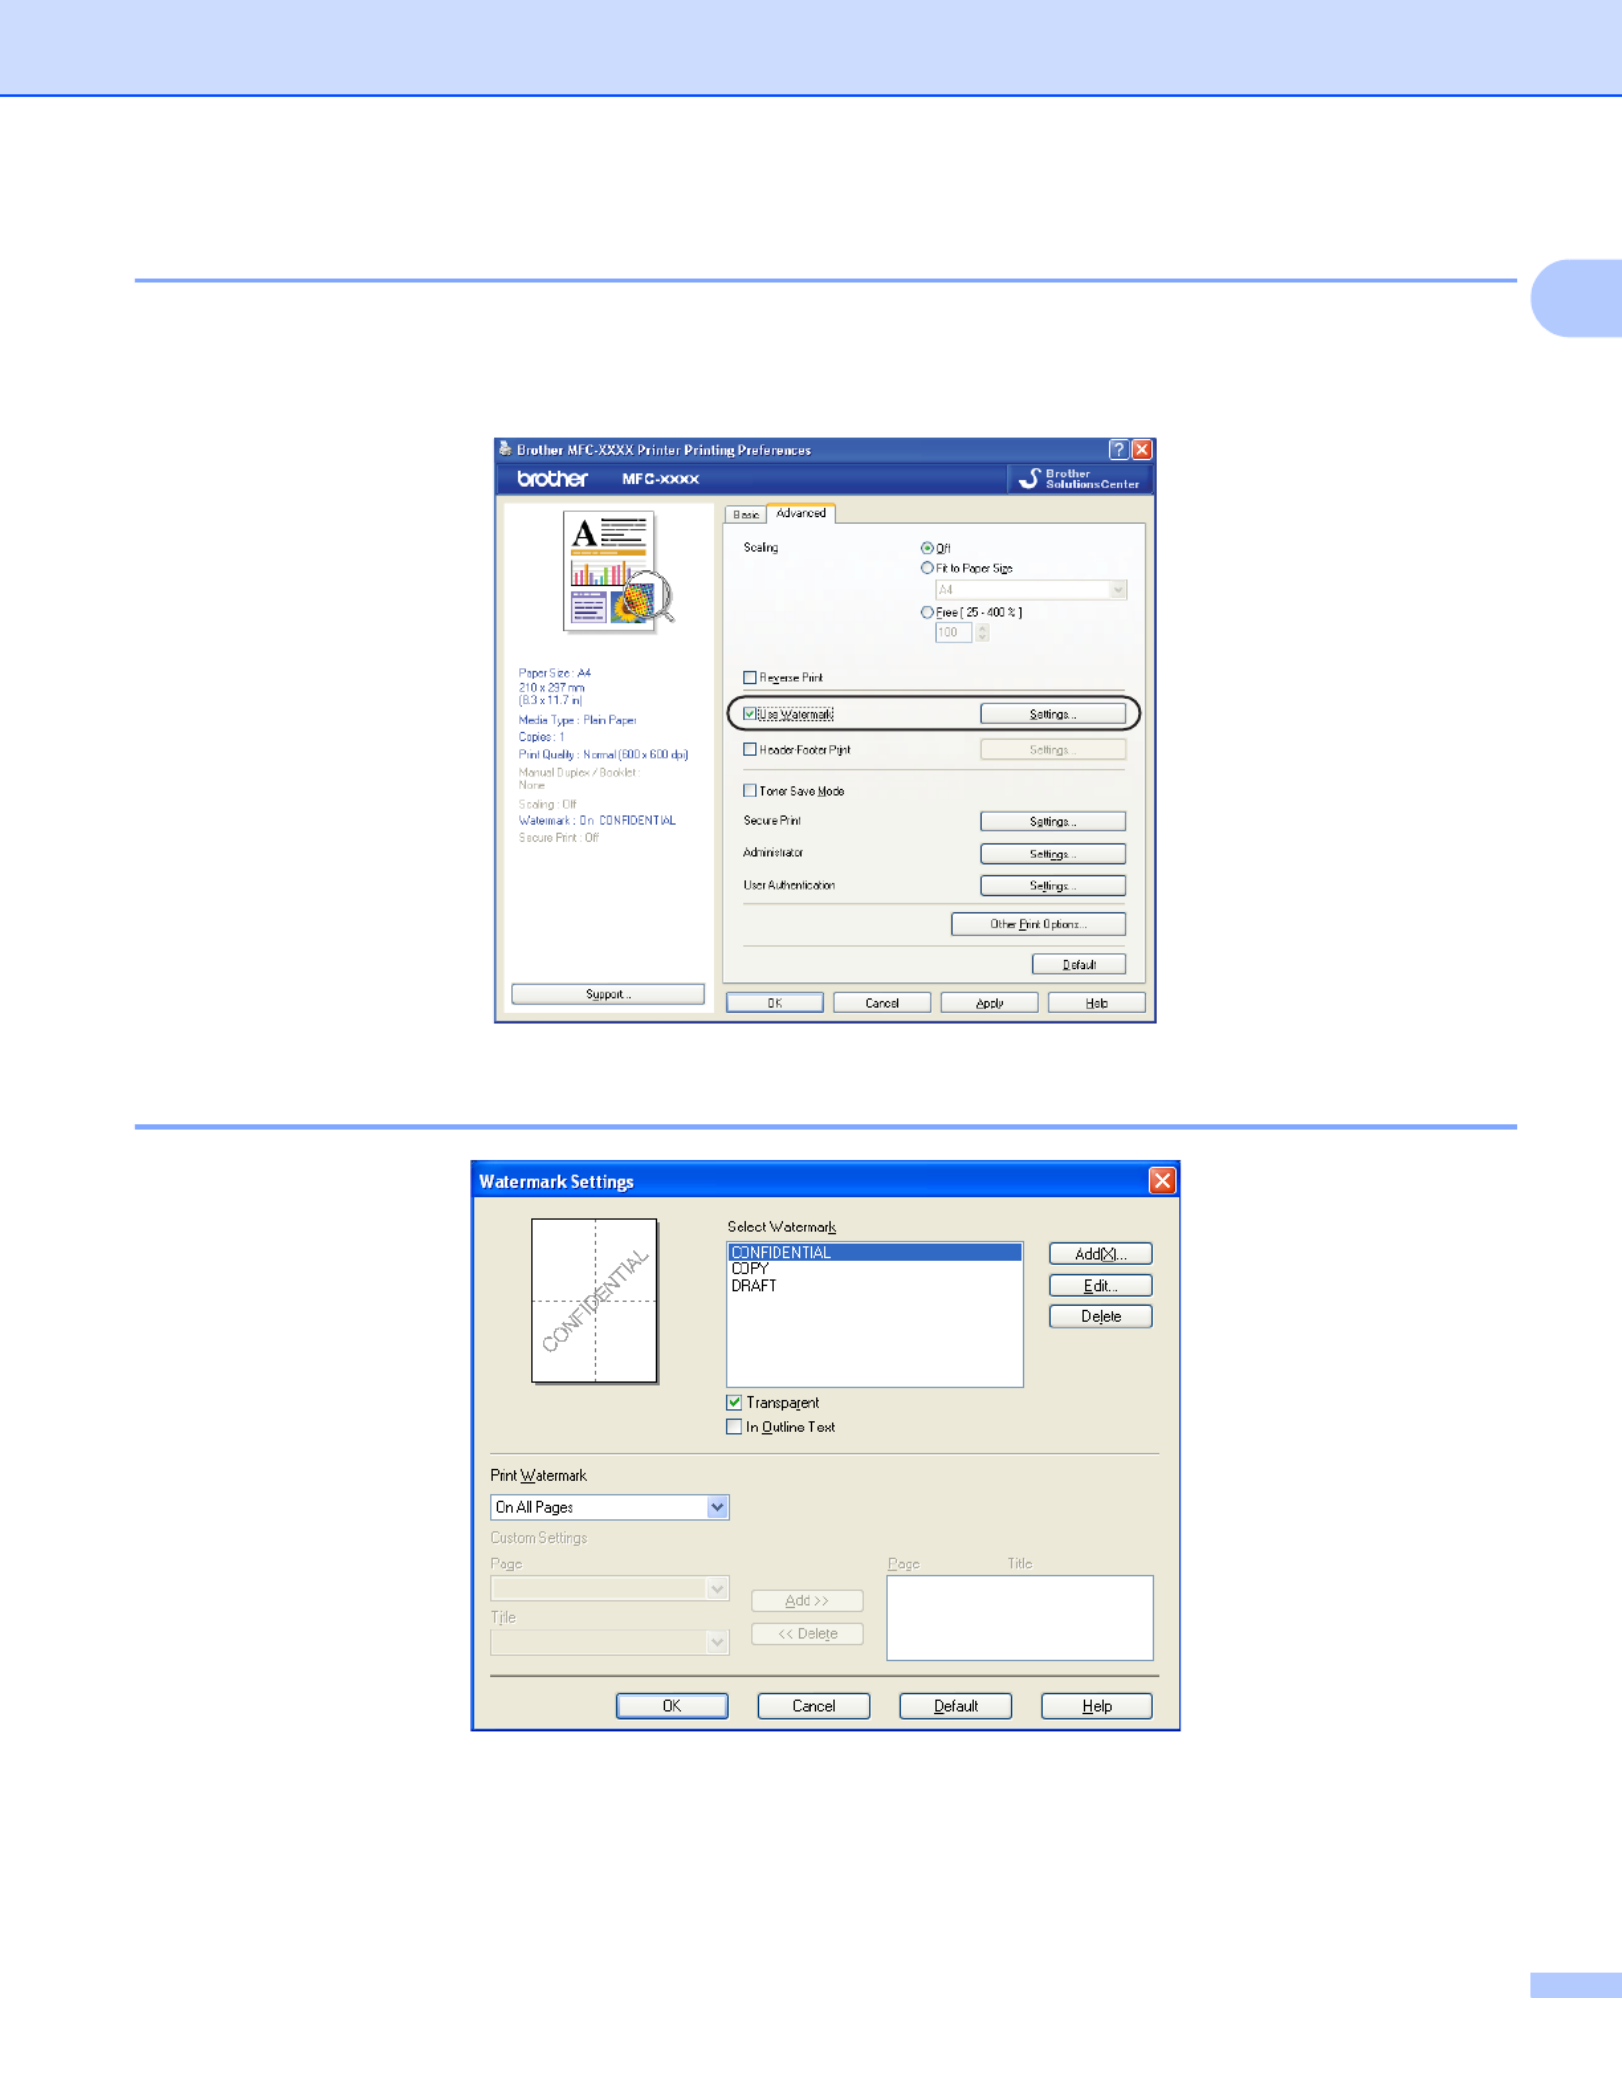
Use Watermark 1
You can put a logo or text into your document as a watermark. You can choose one of the preset Watermarks,
or you can use a bitmap file that you have created. Check and then click the Use Watermark Settings...
button.
Watermark Settings 1
Transparent 1
Check Transparent to print the watermarked image in the background of your document. If this feature is not
checked then the watermark will be printed on top of your document.

Printing
23
1
In Outline Text 1
Check In Outline Text if you only want to print an outline of the watermark. It is available when you choose
a text watermark.
Print Watermark 1
You can print the watermark in any of the following ways.
On All Pages
On First Page Only
From Second Page
Custom
Click the Edit button to change the watermark settings.
You can change the watermark’s size and position on the page by selecting the watermark, and clicking the
Edit button. If you want to add a new watermark, click the Add button, and then choose or Use Text
Use Bitmap File in the Watermark Style.
Title
Enter a title you like in the field.
Text
Enter your Watermark Text into the Text box, and then choose the Font, Style, Size and Choose Colour.
Bitmap
Enter the file name and location of your bitmap image in the File box, or click Browse to search for the
file. You can also set the scaling size of the image.
Position
Use this setting if you want to control the position of the watermark on the page.

Printing
25
1
Administrator 1
Administrators have the authority to limit access to functions such as scaling and watermark.
Password
Enter the password into this box.
Note
Click Set Password... to change the password.
Copies Lock
Lock the copy pages selection to prevent multiple copy printing.
Multiple Page & Scaling Lock
Lock the scaling setting and multiple page setting.
Colour / Mono Lock
Lock the Colour / Mono settings as Mono to prevent colour printing.
Watermark Lock
Lock the current settings of the Watermark option to prevent changes being made.
Header-Footer Print Lock
Lock the current settings of the Header-Footer Print option to prevent changes being made.

Printing
26
1
User Authentication (MFC-9320CW only) 1
If you are restricted from PC Print by Secure Function Lock 2.0 feature, you need to set your ID and PIN in
the User Authentication dialog. Click Settings of the User Authentication and enter your ID and PIN. If
your PC login name is registered to Secure Function Lock 2.0, you can check the Use PC Login Name box
instead of entering your ID and PIN.
For more information about Secure Function Lock 2.0, see the Network User’s Guide on the CD-ROM we
have supplied.
Note
• If you want to see the information for your ID such as the status of a restricted feature and the number of
remaining pages you are allowed to print, click . The Verify Authentication result dialog will appear.
• If you want to make the Authentication result dialog appear each time you print, check the
Show print status before printing.
• If you want to enter your ID and PIN each time you print, check the
Enter ID Name/PIN for each print job.
Other Print Options 1
You can set the following in Printer Function:
Colour Calibration
Improve Print Output
Colour Calibration 1
The output density of each colour may vary depending on the temperature and humidity of the environment
the printer is in. This setting helps you to improve colour density by letting the printer driver use the colour
calibration data stored in your printer.
Use Calibration Data
If the printer driver successfully gets the calibration data, the printer driver will automatically check this box.
Remove the check mark if you do not want to use the data.
Start Colour Calibration
If you click this button, your machine will start colour calibration and then the printer driver will attempt to
get the calibration data from your printer.
Note
If you print by using the Direct Print feature, PictBridge feature or BR-Script printer driver, you need to
perform the calibration from the control panel. See User’s Guide for more information.

Printing
27
1
Improve Print Output 1
This feature allows you to improve a print quality problem.
Reduce Paper Curl
If you choose this setting, the paper curl may be reduced.
If you are printing only a few pages, you do not need to choose this setting. We recommend that you
change the printer driver setting in Media Type to a thin setting.
Note
This operation will decrease the temperature of the machine's fusing process.
Improve Toner Fixing
If you choose this setting, the toner fixing on paper may be improved. If this selection does not provide
enough improvement, select Thicker Paper in Media Type settings.
Note
This operation will increase the temperature of the machine's fusing process.

Printing
28
1
Tray Settings tab 1
Note
From the Start menu, select Control Panel and then Printers and Faxes. Right-click the
Brother MFC-XXXX Printer (Brother DCP-XXXX Printer) icon and select Properties to access the
Tray Settings tab.
You can define the paper size for each paper tray and auto detect the serial number in the Tray Settings tab
as follows.
Paper Source Setting (1)
This feature recognizes the paper size set from the control panel menu for each paper tray by clicking
Auto Detect (3).
Serial No. (2)
By clicking Auto Detect (3), the printer driver will probe the printer and display its serial number. If it fails
to receive the information, the screen will display “---------”.
Note
The Auto Detect (3) function is not available under the following printer conditions:
• The printer power switch is off.
• The printer is in an error state.
• The printer is in a network shared environment.
• The cable is not connected to the printer correctly.
(1)
(2)
(3)
Printing
29
1
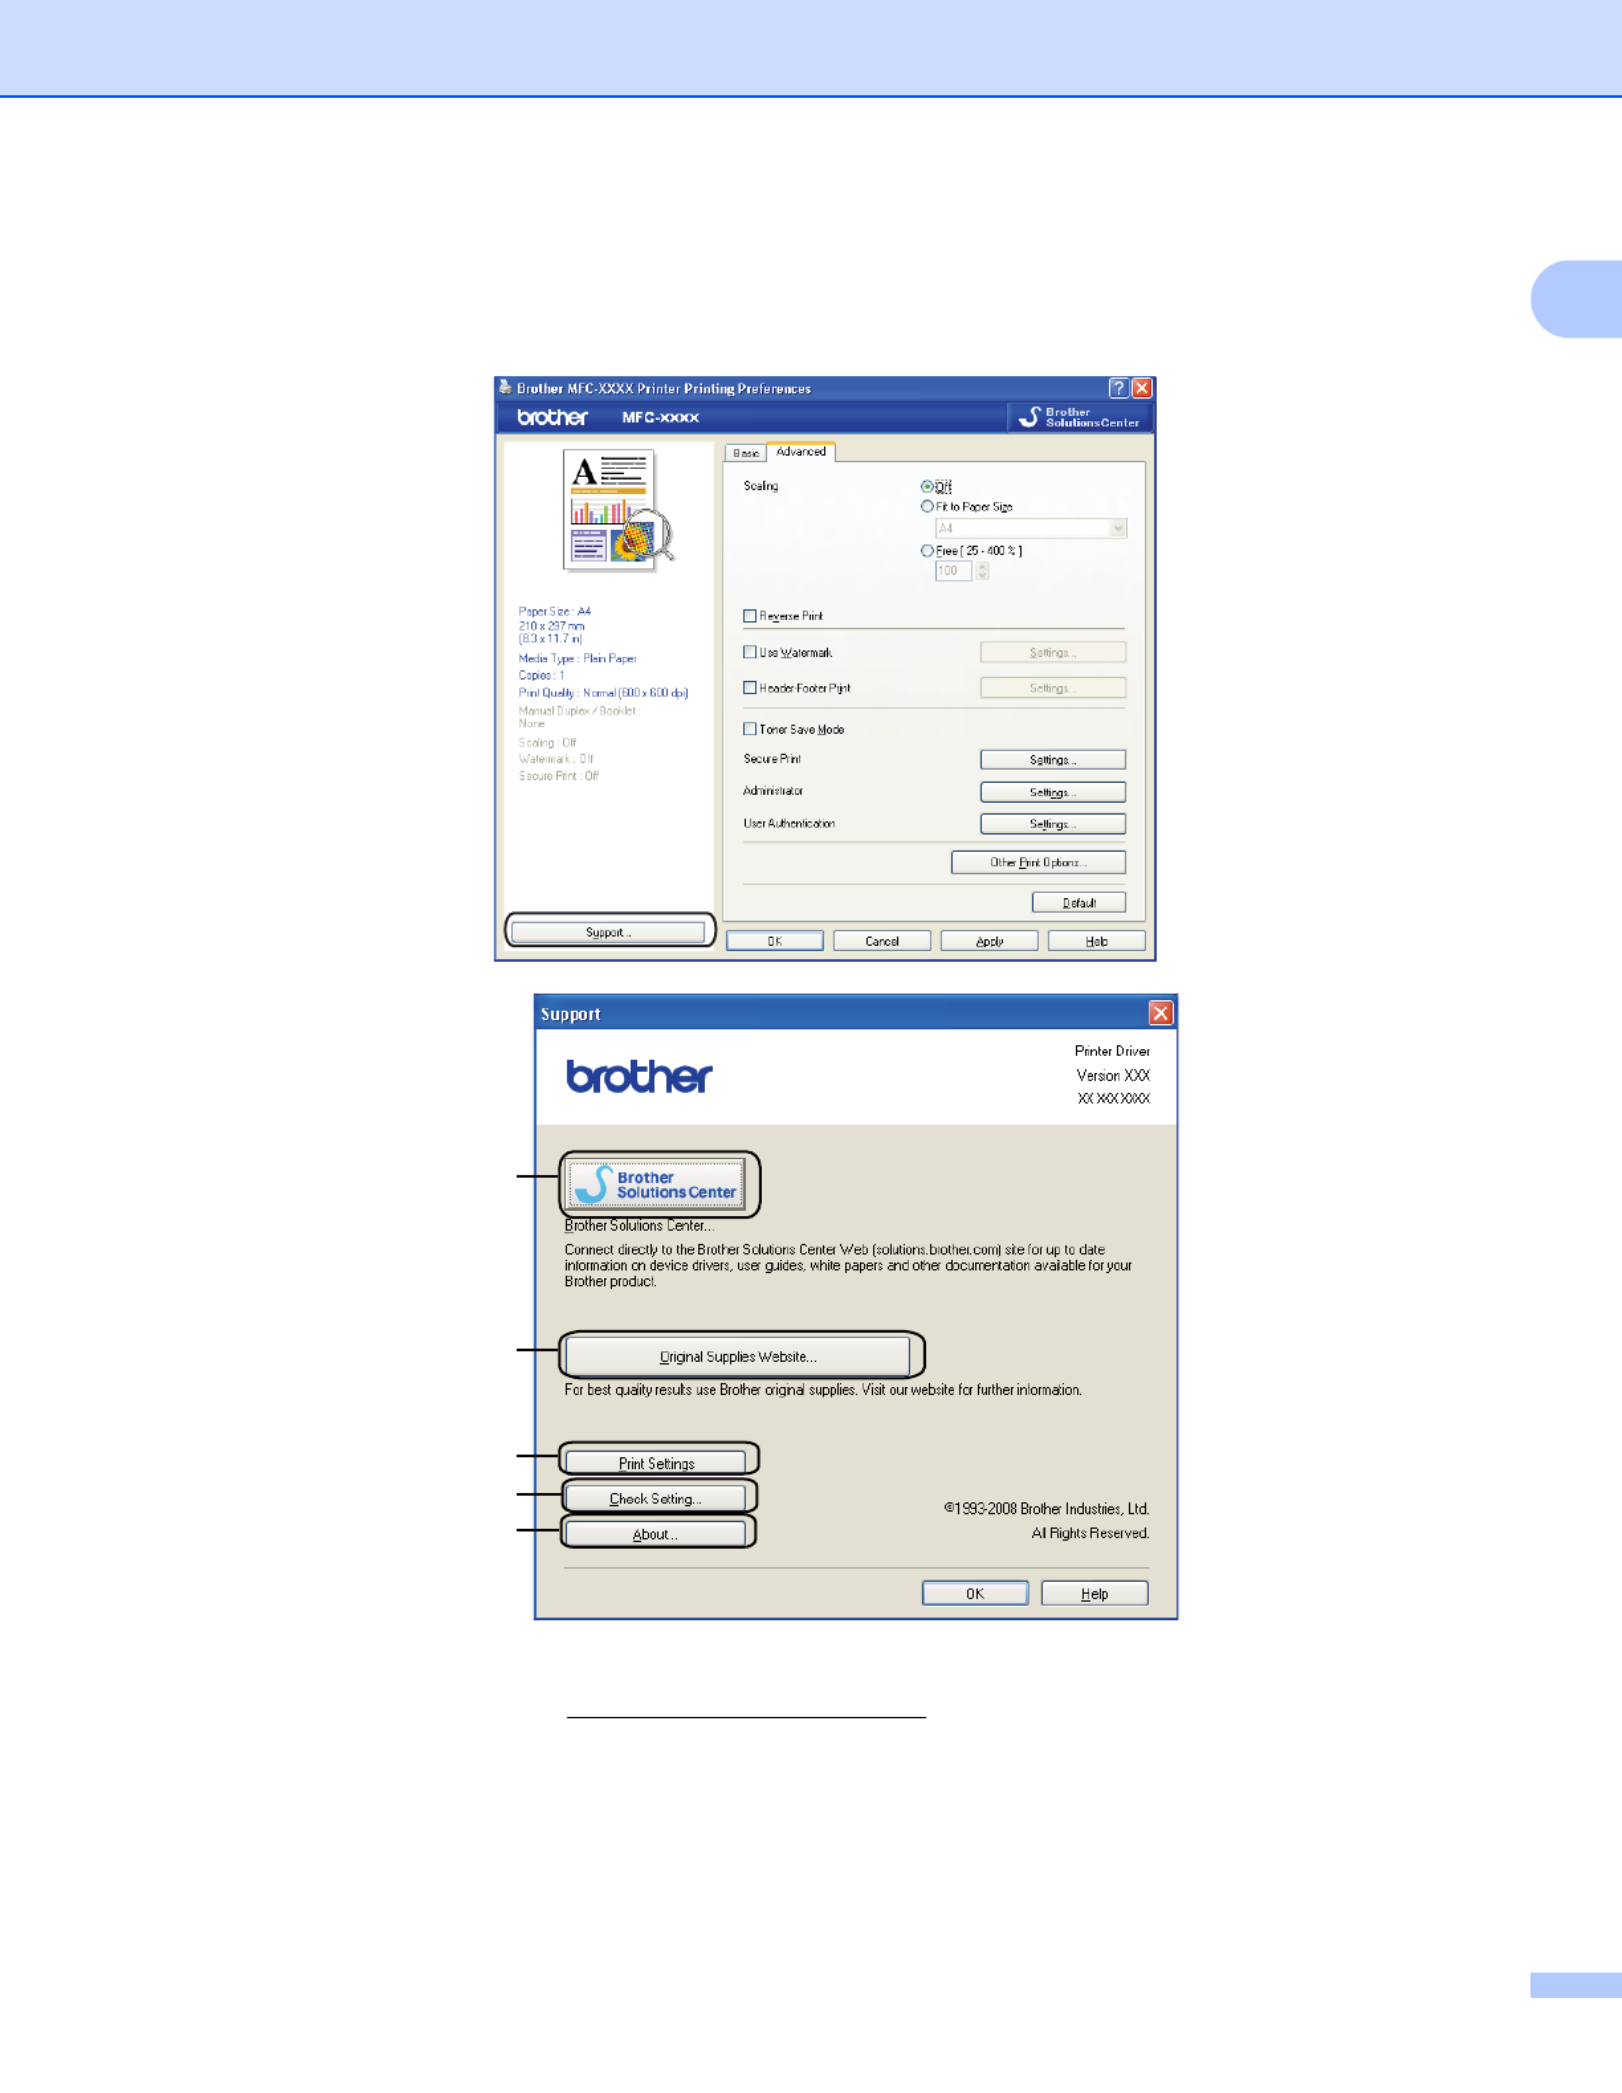
Support 1
Click dialog box.Support... in the Printing Preferences
Brother Solutions Center (1)
The Brother Solutions Center (http://solutions.brother.com/) is a web site offering information about your
Brother product including FAQs (Frequently Asked Questions), User’s Guides, driver updates and tips for
using your printer.
Original Supplies Website (2)
You can visit our website for original/genuine Brother supplies by clicking this button.
(1)
(2)
(3)
(4)
(5)

Printing
30
1
Print Settings (3)
This will print the pages that show how the internal settings of the printer have been configured.
Check Setting (4)
You can check the current driver settings.
About (5)
This will show the list of the printer driver files and version information.
Printing
31
1
Features in the BR-Script (PostScript® 3™ language
emulation) printer driver 1
For more information, see the text in the printer driver.Help
Note
The screens in this section are from Windows® XP. The screens on your PC may vary depending on your
operating system.
Printing Preferences 1
Note
You can access the Printing Preferences dialog box by clicking Printing Preferences... in the General
tab of the Brother MFC-XXXX BR-Script3 Properties (or Brother DCP-XXXX BR-Script3 Properties)
dialog box.
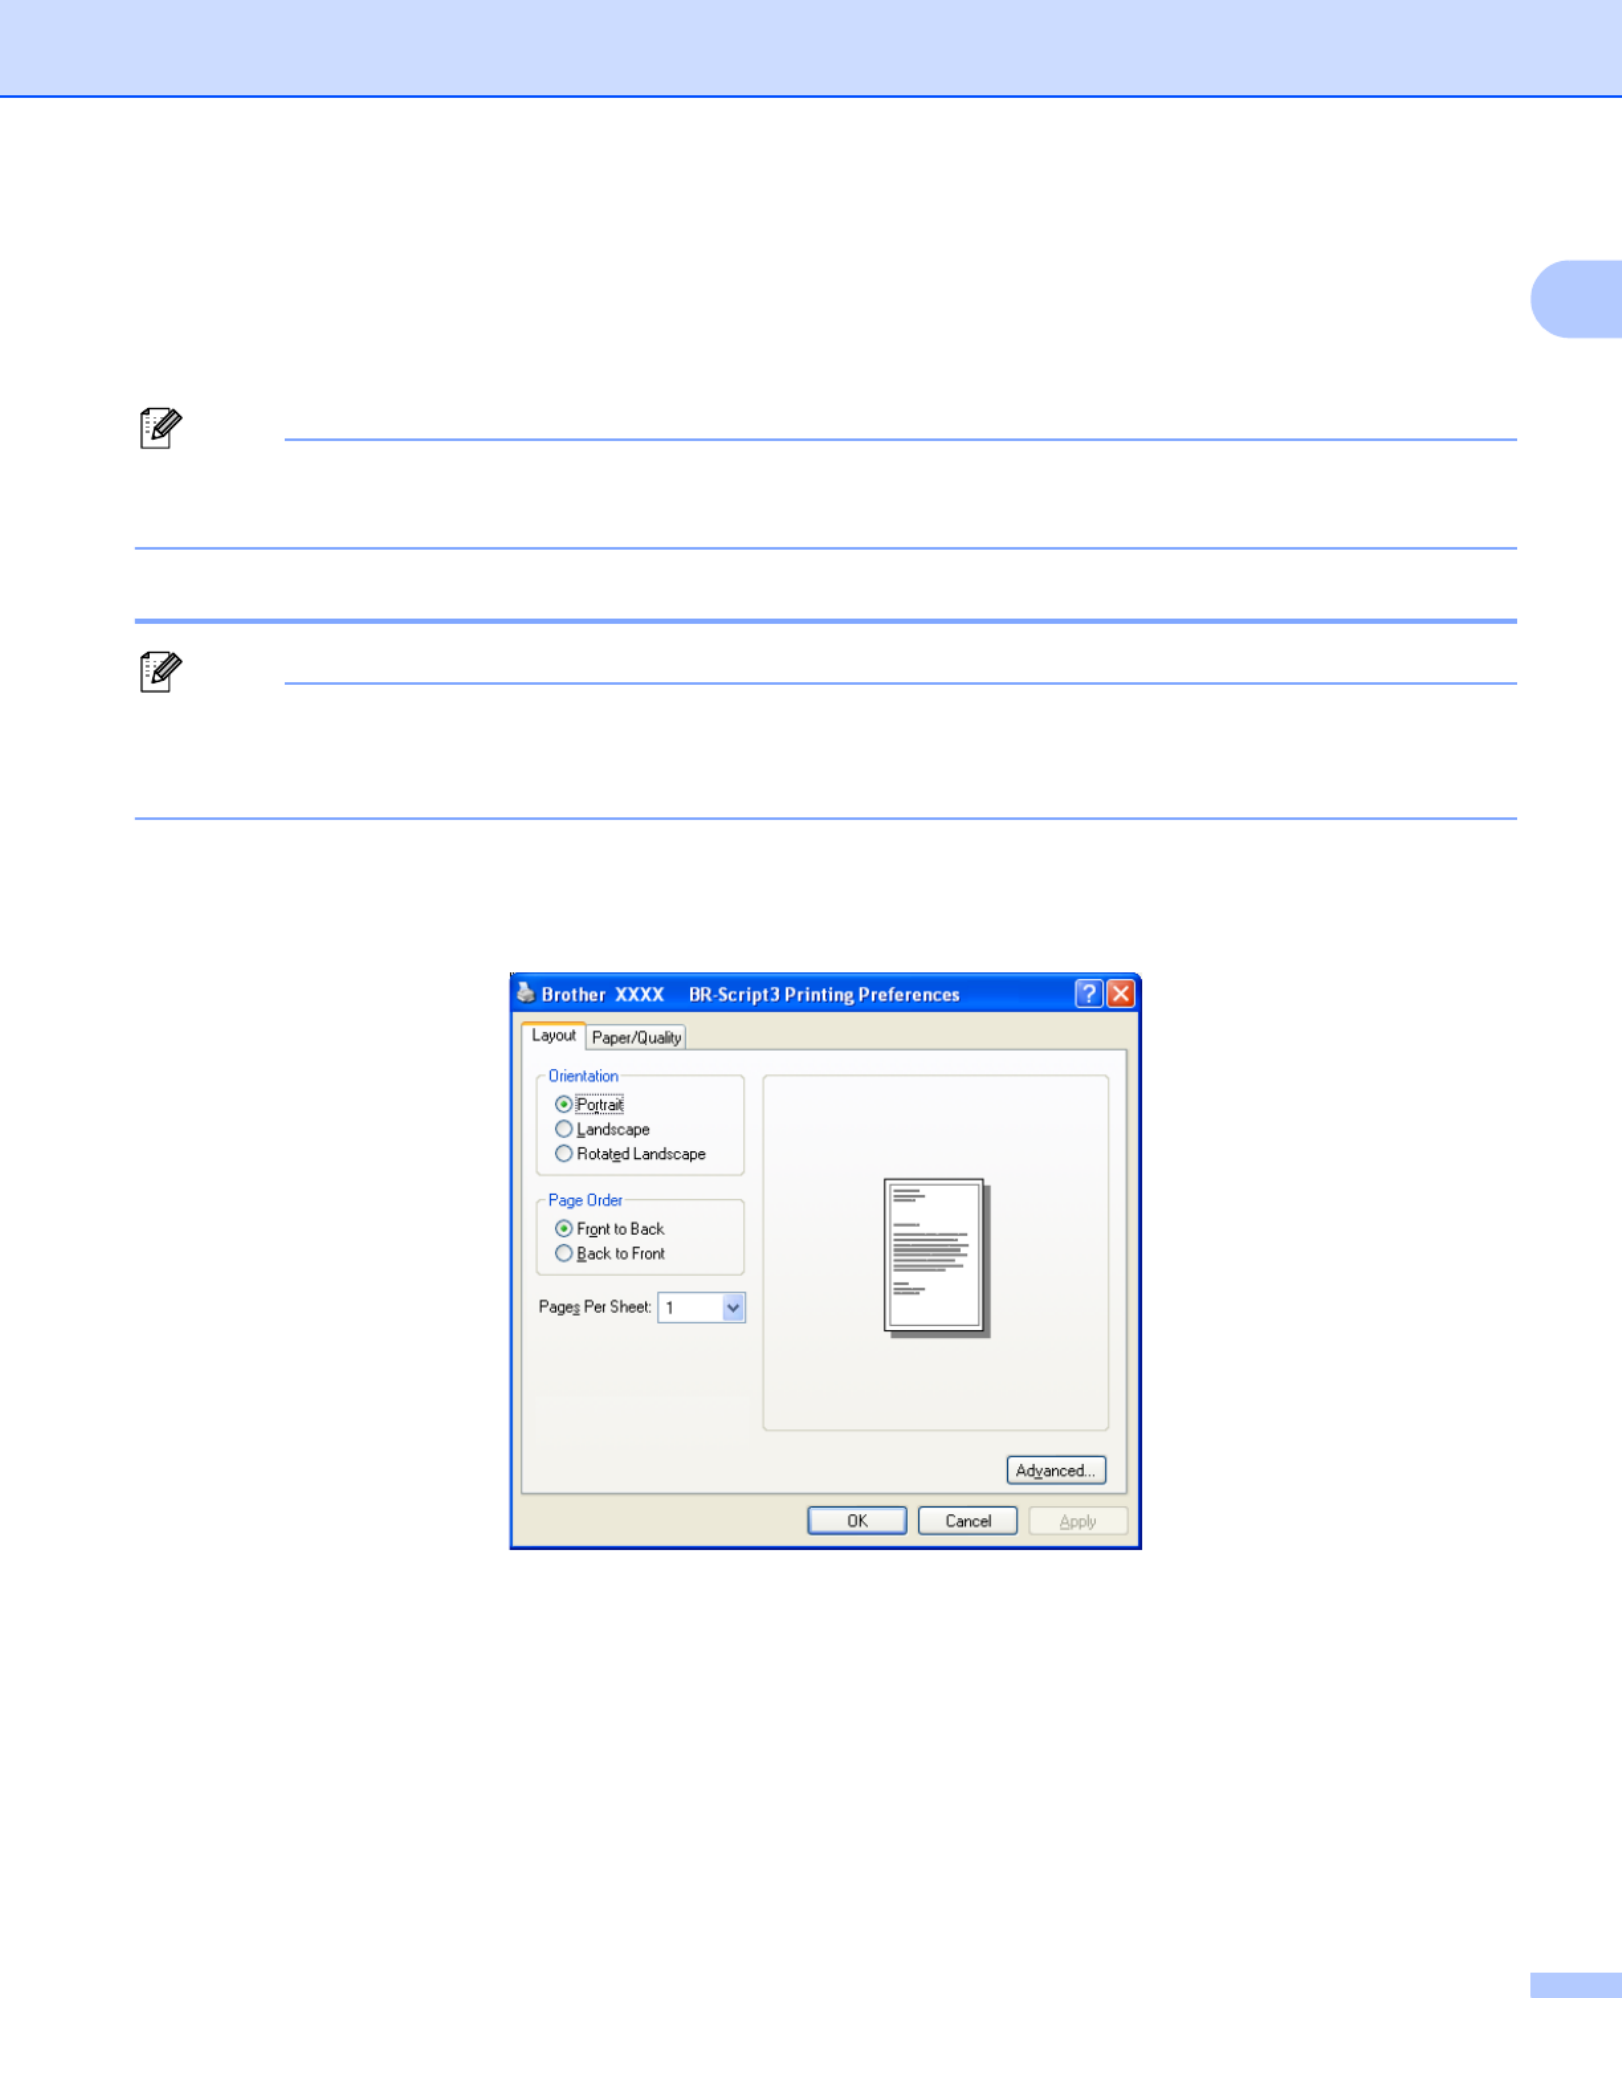
Layout tab
You can change the layout setting by choosing the settings for Orientation, Page Order and
Pages Per Sheet.
•Orientation
Orientation selects the position of how your document will be printed.
( )Portrait, Landscape or Rotated Landscape
•Page Order
Specifies the order in which the pages of your document will be printed. Front to Back prints the
document so that page 1 is on top of the stack. prints the document so that page 1 is on Back to Front
the bottom of the stack.
•Pages Per Sheet
Choose how many pages will appear on each side of the paper.

Printing
32
1
Paper/Quality tab
Choose the Paper Source.
•Paper Source
You can choose Automatically Select, Tray1 or Manual Feed.
Automatically Select
This setting will automatically pull paper from any paper source (tray or manual feed slot) that has a
paper size defined in the printer driver that matches your document.
Tray1
This setting will pull paper from Tray1.
Manual Feed
This setting will pull any size of paper from the Manual Feed Slot.
•Color
Choose how to print colour graphics either Black & White or Color.

Printing
33
1
Advanced options 1
You can access the by clicking the Advanced options Advanced... button on the Layout tab or
Paper/Quality tab.
aChoose the Paper Size and Copy Count (1).
Paper Size
From the drop-down box choose the Paper Size you are using.
Copy Count
The copy selection sets the number of copies that will be printed.
bSet the Image Color Management, Scaling and TrueType Font settings (2).
Image Color Management
Specifies how to print your colour graphics.
• If you don’t want to enable Image Color Management, click ICM Disabled.
• If you want the calculations for colour matching to be performed on the host computer before it
sends the document to the printer, click ICM Handled by Host System.
• If you want the calculations for colour matching to be performed on your printer, click
ICM Handled by Printer using printer calibration.
Scaling
Specifies whether to reduce or enlarge documents, and by what percentage.
TrueType Font
Specifies the TrueType font options. Click Substitute with Device Font (the default) to use
equivalent printer fonts for printing documents that contain TrueType fonts. This will permit faster
printing; however, you might lose special characters not supported by the printer font. Click
Download as Softfont to download TrueType fonts for printing instead of using printer fonts.
(1)
(2)

Printing
35
1
Toner Save
You can conserve toner use with this feature. When you set Toner Save to On, print appears lighter.
The default setting is Off.
Note
We do not recommend Toner Save for printing Photo or Greyscale images.
Color/Mono
You can choose the following colour mode:
•Auto
The printer checks the content of your documents for colour. If colour is detected, it prints in colour.
If no colour content is detected, it prints in monochrome.
•Color
The device will print all pages in full colour mode.
•Mono
Selecting Mono mode prints your documents in greyscale.
Note
If the Cyan, Magenta or Yellow toner reaches the end of its life, choosing Mono will allow you to keep
printing as long as the Black toner does not reach the end of its life.
Color Mode
The following options are available in Colour Matching mode:
•Normal
This is the Default colour mode.
•Vivid
The colour of all elements are adjusted to become a more vivid colour.
•None
If you want to apply the colour management settings of your application, choose this setting. The
printer driver will not adjust the colour.
Improve Grey Colour
You can improve the image of a shaded area.
Enhance Black Printing
If a black graphic cannot print correctly, choose this setting.
Halftone Screen Lock
Stops other applications from modifying the Halftone settings. The default setting is On.
High Quality Image Printing
You can get high quality image printing. If you set High Quality Image Printing to On, the printing
speed will be slower.

Printing
36
1
Improve Print Output
This feature allows you to improve a print quality problem.
•Reduce Paper Curl
If you choose this setting, the paper curl may be reduced. If you are printing only a few pages, you
do not need to choose this setting. We recommend that you change the printer driver setting in
Media Type to a thin setting.
Note
This operation will decrease the temperature of the machine's fusing process.
•Improve Toner Fixing
If you choose this setting, the toner fixing on paper may be improved. If this selection does not
provide enough improvement, select Thicker Paper in Media Type settings.
Note
This operation will increase the temperature of the machine's fusing process.
Ports tab 1
If you want to change the port where your printer is connected or the path to the network printer you are using,
choose or add the port you want to use.

37
2
2
The scanning operations and drivers will be different depending on your operating system. The machine uses
a TWAIN compliant driver for scanning documents from your applications.
(Windows® XP/Windows Vista®/Windows® 7)
Two scanner drivers are installed. A TWAIN compliant scanner driver (See Scanning a document using
the TWAIN driver on page 37) and a Windows® Imaging Acquisition (WIA) driver (See Scanning a
document using the WIA driver (Windows® XP/Windows Vista®/Windows® 7) on page 44).
Note
• For ScanSoft™ PaperPort™ 11SE, see Using ScanSoft™ PaperPort™ 11SE with OCR by NUANCE™
on page 54.
• If your PC is protected by a firewall, and is unable to network scan, you may need to configure the firewall
settings to allow communication through port number 54925 and 137. (See Firewall settings (For Network
users) on page 104.)
Scanning a document using the TWAIN driver 2
The Brother MFL-Pro Suite software includes a TWAIN compliant scanner driver. TWAIN drivers meet the
standard universal protocol for communicating between scanners and applications. This means that you can
not only scan images directly into the PaperPort™ 11SE viewer that Brother included with your machine, but
you can also scan images directly into hundreds of other software applications that support TWAIN scanning.
These applications include popular programs like Adobe ® Photoshop®, Adobe® PageMaker®, CorelDraw®
and many more.
Scanning a document into the PC 2
There are two ways in which you can scan a whole page. You can either use the ADF (automatic document
feeder) or the scanner glass.
aLoad your document.
bStart the ScanSoft™ PaperPort™ 11SE software that was installed during the MFL-Pro Suite installation
to scan a document.
Note
The instructions for scanning in this Guide are for when you use ScanSoft™ PaperPort™ 11SE. The
scanning steps may vary when using other software applications.
cClick File, then Scan or Get Photo.... You can also click the Scan or Get Photo button.
The Scan or Get Photo panel appears on the left side of the screen.
dClick the Select button.
Scanning 2

Scanning
38
2
eChoose the scanner you are using from the Available Scanners list.
Note
Choose TWAIN: TW-Brother MFC-XXXX (TWAIN: TW-Brother DCP-XXXX) or
TWAIN: TW-Brother MFC-XXXX LAN TWAIN: TW-Brother DCP-XXXX LAN ( ).
fCheck the Display scanner dialog box on the Scan or Get Photo panel.
gClick Scan.
The Scanner Setup dialog box appears.
hAdjust the following settings, if needed, in the Scanner Setup dialog box:
Scan (Image Type) (1)
Resolution (2)
Scan Type (3)
Reduce Noise (4)
Brightness (5)
Contrast (6)
Document Size (7)
iClick Start.
When scanning is finished, click Cancel to return to the PaperPort™ 11SE window.
Note
After you select a document size, you can adjust the scanning area further by clicking the left mouse button
and dragging it. This is required when you want to crop an image when scanning. (See Pre-Scanning to
crop a portion you want to scan on page 39.)
7

Scanning
40
2
eLoad your document again.
Note
Skip this step if you loaded the document on the scanner glass in step a.
fClick Start.
This time only the chosen area of the document appears in the PaperPort™ 11SE window (or your
application window).
gIn the PaperPort™ 11SE window, use the options available to refine the image.
Settings in the Scanner Setup dialog box 2
Image Type 2
Choose the output image type from Photo, Web or Text. Resolution and Scan Type will be altered for each
default setting.
The default settings are listed in the table below:
Resolution 2
You can choose a scanning resolution from the Resolution drop-down list. Higher resolutions take more
memory and transfer time, but produce a finer scanned image. The following table shows the resolutions you
can choose and the available colours.
Image Type Resolution Scan Type
Photo Use for scanning photo images. 300 x 300 dpi 24bit Colour
Web Use for attaching the scanned image to web pages. 100 x 100 dpi 24bit Colour
Text Use for scanning text documents. 200 x 200 dpi Black & White
Resolution Black & White/
Grey (Error Diffusion)
256 Colour True Grey/24bit Colour
100 x 100 dpi Yes Yes Yes
150 x 150 dpi Yes Yes Yes
200 x 200 dpi Yes Yes Yes
300 x 300 dpi Yes Yes Yes
400 x 400 dpi Yes Yes Yes
600 x 600 dpi Yes Yes Yes
1200 x 1200 dpi Yes No Yes
2400 x 2400 dpi Yes No Yes
4800 x 4800 dpi Yes No Yes
9600 x 9600 dpi Yes No Yes
19200 x 19200 dpi Yes No Yes

Scanning
41
2
Scan Type 2
Black & White
Use for text or line art.
Grey (Error Diffusion)
Use for photographic images or graphics. (Error Diffusion is a method for creating simulated grey images
without using true grey dots. Black dots are put in a specific pattern to give the appearance of grey.)
True Grey
Use for photographic images or graphics. This mode is more exact because it uses up to 256 shades of
grey.
256 Colour
Uses up to 256 colours to scan the image.
24bit Colour
Uses up to 16.8 million colours to scan the image.
Although using 24bit Colour creates an image with the most accurate colour, the image file will be about
three times larger than a file created with 256 Colour. It requires the most memory and has the longest
transfer time.
Reduce Noise 2
You can improve and enhance the quality of your scanned images with this selection. The Reduce Noise
setting is available when using 24bit Colour and scan resolutions of 300 × 300 dpi, 400 400 dpi or 600 × ×
600 dpi.
Brightness 2
Adjust the setting (-50 to 50) to get the best image. The default value is 0, representing an average.
You can set the Brightness level by dragging the slide bar to the right or left to lighten or darken the image.
You can also enter a value in the box to set the level.
If the scanned image is too light, set a lower Brightness level and scan the document again. If the image is
too dark, set a higher Brightness level and scan the document again.
Note
The Brightness setting is only available when Black & White, Grey (Error Diffusion) or True Grey is
chosen.

Scanning
42
2
Contrast 2
You can increase or decrease the Contrast level by moving the slide bar to the left or right. An increase
emphasizes dark and light areas of the image, while a decrease reveals more detail in grey areas. You can
also enter a value in the box to set the Contrast.
Note
The Contrast setting is only available when Grey (Error Diffusion) or True Grey is chosen.
When scanning photographs or other images for use in a word processor or other graphics application, try
different settings for the contrast and resolution to see which setting best suits your needs.
Document Size 2
Choose one of the following sizes:
A4 210 x 297 mm (8.3 x 11.7 in)
JIS B5 182 x 257 mm (7.2 x 10.1 in)
Letter 215.9 x 279.4 mm (8 1/2 x 11 in)
Legal 215.9 x 355.6 mm (8 1/2 x 14 in) (It is available with the ADF.)
A5 148 x 210 mm (5.8 x 8.3 in)
Executive 184.1 x 266.7 mm (7 1/4 x 10 1/2 in)
Business Card 90 x 60 mm (3.5 x 2.4 in)
To scan business cards, choose the Business Card size, and then place the business card face down at
the top left of the scanner glass, as indicated by the document guidelines on the machine.
Photo 10 x 15 cm (4 x 6 in)
Index Card 127 x 203.2 mm (5 x 8 in)
Photo L 89 x 127 mm (3.5 x 5 in)
Photo 2L 13 x 18 cm (5 x 7 in)
Postcard 1 100 x 148 mm (3.9 x 5.8 in)
Postcard 2 (Double) 148 x 200 mm (5.8 x 7.9 in)
Scanning
43
2
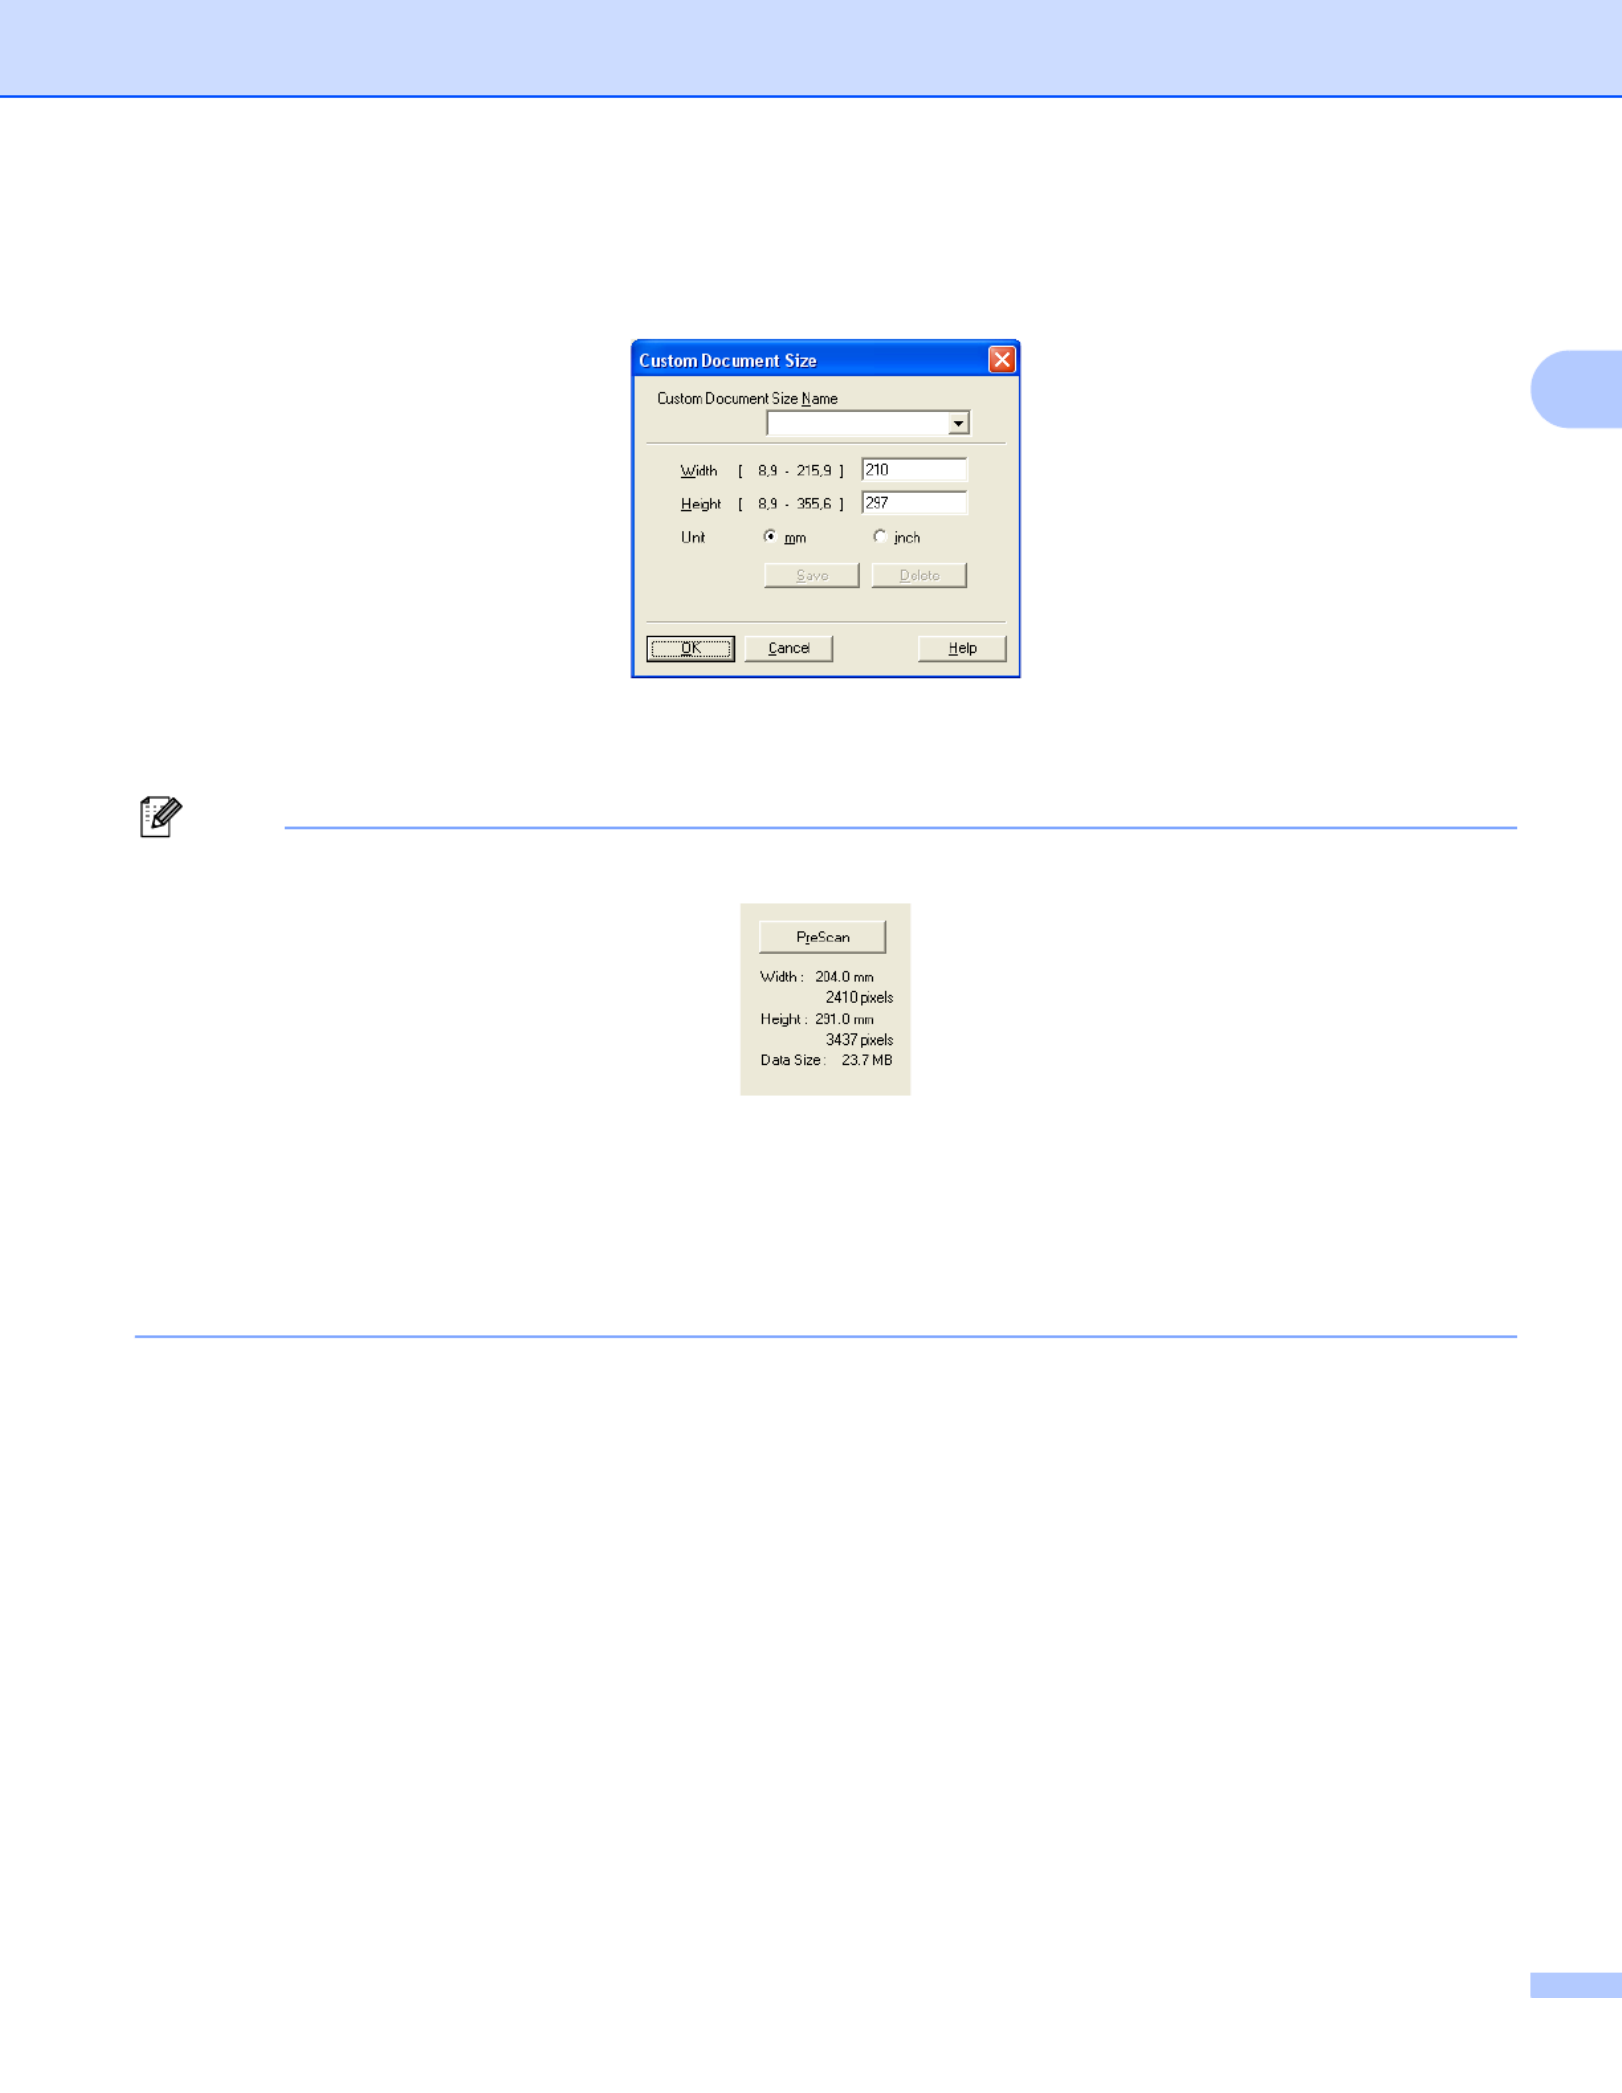
Custom
If you choose Custom as the size, the Custom Document Size dialog box appears.
Enter the Name, Width and Height for the document.
You can choose ‘mm’ or ‘inch’ as the unit for Width and Height.
Note
• You can see the actual paper size you chose on the screen.
•Width: shows the width of scanning area.
•Height: shows the height of scanning area.
•Data Size: shows the rough data size in Bitmap format. The size will be different for other file formats
such as JPEG.
• User adjustable from 8.9 x 8.9 mm to 215.9 x 355.6 mm.

Scanning
44
2
Scanning a document using the WIA driver
(Windows® XP/Windows Vista®/Windows® 7) 2
WIA compliant 2
For Windows® XP/Windows Vista®/Windows® 7 you can choose Windows® Image Acquisition (WIA) for
scanning images from the machine. You can scan images directly into the PaperPort™ 11SE viewer that
Brother included with your machine or any other application that supports you can scan images directly into
WIA or TWAIN scanning.
Scanning a document into the PC 2
There are two ways in which you can scan a whole page. You can either use the ADF (automatic document
feeder) or the scanner glass.
If you want to scan and then crop a portion of a page after pre-scanning the document, you need to use the
scanner glass. (See Pre-Scanning to crop a portion you want to scan using the scanner glass on page 46.)
aLoad your document.
bStart the ScanSoft™ PaperPort™ 11SE software that was installed during the MFL-Pro Suite installation
to scan a document.
Note
The instructions for scanning in this Guide are for when you use ScanSoft™ PaperPort™ 11SE. The
scanning steps may vary when using other software applications.
cClick File, then Scan or Get Photo.... You can also click the Scan or Get Photo button.
The Scan or Get Photo panel appears on the left side of the screen.
dClick Select button.
eChoose the scanner you are using from the Available Scanners list.
Note
Choose WIA: Brother MFC-XXXX (WIA: Brother DCP-XXXX) or WIA: Brother MFC-XXXX LAN
(WIA: Brother DCP-XXXX LAN).
fCheck the Display scanner dialog box on the Scan or Get Photo panel.
gClick Scan.
The Scanner Setup dialog box appears.
Scanning
45
2
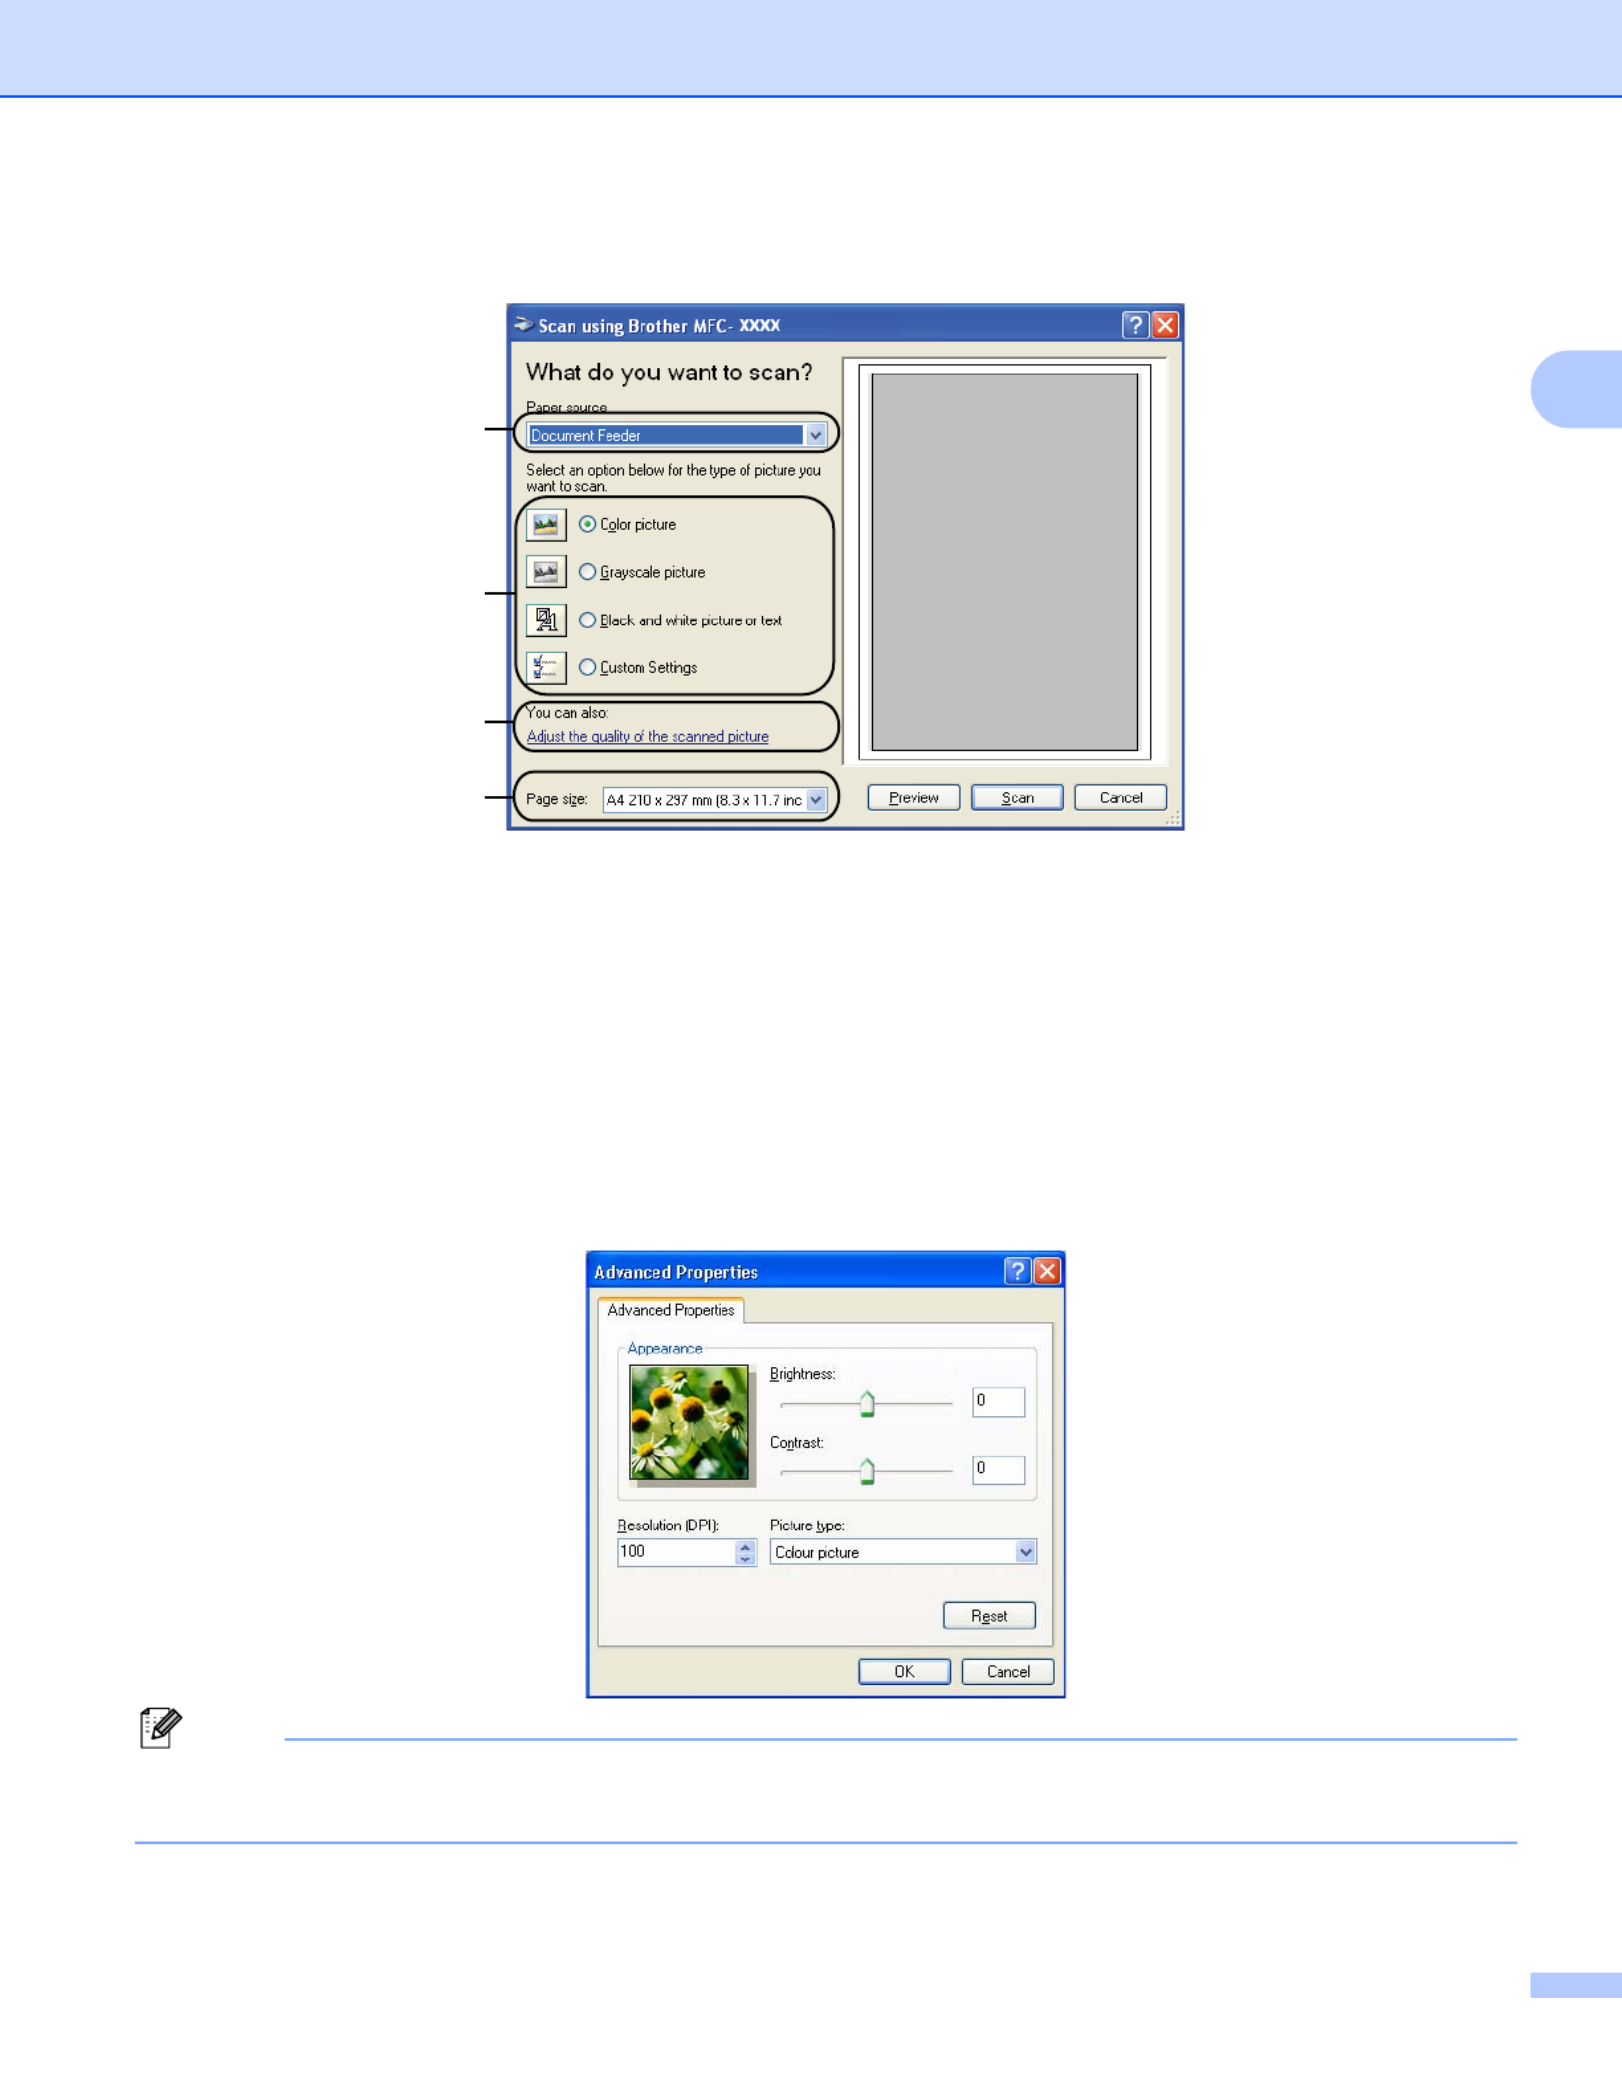
hAdjust the following settings, if needed, in the Scanner Setup dialog box:
1 Paper source
2 Picture type
3 Adjust the quality of the scanned picture
4 Page size
iChoose Document Feeder from the Paper source drop-down list (1).
jChoose the picture type (2).
kChoose the Page size from the drop-down list (4).
lIf you need advanced settings, click Adjust the quality of the scanned picture (3). You can choose
Brightness, Contrast, Resolution and Picture type from Advanced Properties. Click OK after you
choose a setting.
Note
The scanner resolution can be set as high as 1200 dpi.
For resolutions greater than 1200 dpi, use the Scanner Utility. (See Scanner Utility on page 48.)
mClick the Scan button in the Scan dialog box.
The machine starts scanning the document.
1
2
3
4

Scanning
46
2
Pre-Scanning to crop a portion you want to scan using the scanner glass 2
The Preview button is used to preview an image for cropping any unwanted portions from the image. When
you are satisfied with the preview, click the button in the Scan dialog box to scan the image.Scan
aFollow the steps from a g to of Scanning a document into the PC on page 44.
bChoose Flatbed in the Paper source drop-down list (1).
1 Paper source
2 Picture type
3 Adjust the quality of the scanned picture
4 Scanning area
cChoose the picture type (2).
dClick Preview.
The whole image is scanned into the PC and appears in the scanning area (4).
ePress and hold down the left mouse button and drag it over the portion you want to scan.
1
2
4
3

Scanning
47
2
fIf you need advanced settings, click Adjust the quality of the scanned picture (3). You can choose
Brightness, Contrast, Resolution and Picture type from Advanced Properties. Click OK after you
choose a setting.
gClick the Scan button in the Scan dialog box.
The machine starts scanning the document.
This time only the chosen area of the document appears in the PaperPort™ 11SE window (or your
application window).

Scanning
48
2
Scanner Utility 2
The Scanner Utility is used for configuring the WIA scanner driver for resolutions greater than 1200 dpi and
for changing the paper size. If you want to set Legal size as the default size, use this utility to change the
setting. You must restart your PC for the new settings to take effect.
Running the utility
You can run the utility by choosing the located in the Scanner Utility
Start/All Programs/Brother/MFC-XXXX (or DCP-XXXX) (where XXXX is your model name)/
Scanner Settings/Scanner Utility.
The screens in this section are from Windows ® XP. Screens on your PC may vary depending on your
operating system.
Note
If you scan the document at a resolution greater than 1200 dpi, the file size may be very large. Make sure
that you have enough memory and hard disk space for the size of the file you are trying to scan. If you do
not have enough memory or hard disk space then your PC may freeze and you could lose your file.

Scanning
49
2
Note
(Windows Vista ® and Windows ®7) The User Account Control screen appears, do the following.
• (Windows Vista ®) For users who have administrator rights: Click Allow.
(Windows ® 7) For users who have administrator rights: Click Yes.
• (Windows Vista ®)For users who do not have administrator rights: Enter the administrator password and
click OK.
(Windows ® 7) For users who do not have administrator rights: Enter the administrator password and
click Yes.

Scanning
50
2
Scanning a document using the WIA driver
(Windows Photo Gallery and Windows Fax and Scan) 2
Scanning a document into the PC 2
There are two ways in which you can scan a whole page. You can either use the ADF (automatic document
feeder) or the scanner glass.
If you want to scan and then crop a portion of a page after pre-scanning the document, you need to use the
scanner glass. (See Pre-Scanning to crop a portion you want to scan using the scanner glass on page 52.)
aLoad your document.
bOpen your software application to scan the document.
cDo one of the following:
(Windows Photo Gallery)
Click File, then Import from Camera or Scanner.
(Windows Fax and Scan)
Click File, New, then Scan.
dChoose the scanner you want to use.
eClick Import.
The Scan dialog box appears.

Scanning
51
2
fAdjust the following settings, if needed, in the Scanner dialog box.
1 Profile
2 Source
3 Paper size
4 Color format
5 File type
6 Resolution
7 Brightness
8 Contrast
Note
The scanner resolution can be set as high as 1200 dpi.
For resolutions greater than 1200 dpi, use the Scanner Utility. For more information, see Scanner Utility
on page 48.
gClick the Scan button in the Scan dialog box.
The machine starts scanning the document.
1
2
3
4
5
6
7
8
Termékspecifikációk
| Márka: | Brother |
| Kategória: | nyomtató |
| Modell: | DCP-9010CN |
Szüksége van segítségre?
Ha segítségre van szüksége Brother DCP-9010CN, tegyen fel kérdést alább, és más felhasználók válaszolnak Önnek
Útmutatók nyomtató Brother

22 Március 2025
14 Január 2025
11 Január 2025
6 Január 2025
3 Január 2025
3 Január 2025
30 December 2025
15 December 2024
15 December 2024
15 December 2024
Útmutatók nyomtató
- nyomtató Samsung
- nyomtató Sony
- nyomtató Fujitsu
- nyomtató LG
- nyomtató Olympus
- nyomtató Panasonic
- nyomtató Canon
- nyomtató StarTech.com
- nyomtató Sharp
- nyomtató Lenovo
- nyomtató Toshiba
- nyomtató HP
- nyomtató Roland
- nyomtató Digitus
- nyomtató Zebra
- nyomtató AVM
- nyomtató Fujifilm
- nyomtató Dell
- nyomtató Xerox
- nyomtató Primera
- nyomtató Thomson
- nyomtató Polaroid
- nyomtató Kyocera
- nyomtató Ricoh
- nyomtató Epson
- nyomtató Huawei
- nyomtató Renkforce
- nyomtató Mitsubishi
- nyomtató Godex
- nyomtató Citizen
- nyomtató Microboards
- nyomtató Kodak
- nyomtató MSI
- nyomtató Dymo
- nyomtató Testo
- nyomtató Konica Minolta
- nyomtató Datamax O'Neil
- nyomtató Kogan
- nyomtató Honeywell
- nyomtató Velleman
- nyomtató D-Link
- nyomtató Fargo
- nyomtató TSC
- nyomtató Sagem
- nyomtató Olympia
- nyomtató Tomy
- nyomtató Posiflex
- nyomtató ZKTeco
- nyomtató NEC
- nyomtató CUSTOM
- nyomtató Panduit
- nyomtató OKI
- nyomtató Equip
- nyomtató Pantum
- nyomtató Brady
- nyomtató Bixolon
- nyomtató CSL
- nyomtató Nilox
- nyomtató Seiko
- nyomtató Argox
- nyomtató Royal Sovereign
- nyomtató Lexmark
- nyomtató Olivetti
- nyomtató Intermec
- nyomtató Minolta
- nyomtató DNP
- nyomtató Triumph-Adler
- nyomtató Oce
- nyomtató Paxar
- nyomtató Metapace
- nyomtató Ultimaker
- nyomtató Ibm
- nyomtató Toshiba TEC
- nyomtató Frama
- nyomtató Builder
- nyomtató Star Micronics
- nyomtató Dascom
- nyomtató HiTi
- nyomtató GG Image
- nyomtató Vupoint Solutions
- nyomtató Elite Screens
- nyomtató DTRONIC
- nyomtató Phoenix Contact
- nyomtató Videology
- nyomtató Star
- nyomtató EC Line
- nyomtató Colop
- nyomtató Approx
- nyomtató Fichero
- nyomtató Raspberry Pi
- nyomtató Middle Atlantic
- nyomtató IDP
- nyomtató Evolis
- nyomtató Nisca
- nyomtató Epson 7620
- nyomtató Sawgrass
Legújabb útmutatók nyomtató

10 Április 2025
10 Április 2025

10 Április 2025
10 Április 2025
10 Április 2025

10 Április 2025

9 Április 2025

9 Április 2025

9 Április 2025
3 Április 2025