Használati útmutató Artsound FL101T
Olvassa el alább 📖 a magyar nyelvű használati útmutatót Artsound FL101T (267 oldal) a hangszóró kategóriában. Ezt az útmutatót 18 ember találta hasznosnak és 5 felhasználó értékelte átlagosan 4.7 csillagra
Oldal 1/267
44
Ontdek het volledige ArtSound aanbod
op www.artsound.be
Ook verkrijgbaar in deze serie ...
Cette gamme comprend également ...
This range also includes ...
Découvrez la gamme ArtSound
complète sur www.artsound.be
Discover the complete ArtSound
range at www.artsound.be
TM
Art_Sound
sa House of Music nv
Kruishoutem, Belgium
www.artsound.be
Tel. +32 9 380 81 80 - Fax. +32 9 386 12 35
info@artsound.be
NL
Geachte klant, bedankt en profi ciat met de aankoop van uw luidspreker(s).
Gelieve deze instructies aandachtig te lezen en ze te bewaren.
FR
Cher client, merci d'avoir acheté ces enceintes.
Veuillez lire attentivement ces instructions et les conserver.
EN
Dear Customer, Congratulations on the purchase of your loudspeaker(s).
Please read these instructions carefully and keep them for future reference.
p
a
i
n
t
a
b
l
e
FR
Installation (fi g 2 pag.2)
1 Retirez l’enceinte de sa boîte. La boîte contient un
gabarit. Regardez quelle ligne du gabarit il vous faut et
découpez-en la partie intérieure. Ne jetez pas celle-ci
: vous en aurez besoin plus tard ! Tracez au crayon
le contour de l’emplacement où vous allez installer
l’enceinte.
2 Percez un ou plusieurs trous sur l’intérieur du contour
tracé au crayon. Si l’enceinte est carrée ou rectangu-
laire, il est plus pratique de percer quatre trous. Si elle
est ronde, un trou sera probablement suffi sant.
3 Faites une découpe à la scie sauteuse sur le contour
pour former un beau trou rond, carré ou rectangulaire.
4 Prenez l’enceinte encastrable. Vous pouvez aisément
retirer la grille en tirant dessus. Elle n’est maintenue
que par un aimant.
5 Ramenez-les maintenant vers l’extrémité et faites-les
tourner vers l’intérieur. Raccordez le câble d’enceinte.
N’oubliez pas de le faire. Sinon, vous devrez le retirer
plus tard !
6 Connectez l'enceinte entre COM et la puissance
souhaitée.
7 Placez l’enceinte dans le trou. Serrez les vis.
8 Les pinces sur l’arrière vont ainsi automatiquement
tourner vers l’extérieur, de sorte que l’enceinte va se
coincer.
9 Pour retirer l’enceinte ou peindre la grille, vous devez
d’abord retirer la grille. Pour ce faire, il suffi t de tirer
dessus ; elle n’est maintenue que par un aimant.
Vous pouvez aussi peindre la grille, utilisez une brosse
à poils fi ns ou un aérosol
Problèmes
Pour tout problème, contactez votre revendeur agréé, qui
vous posera quelques questions précises. Pour préparer
votre appel, vous pouvez déjà vérifi er les points sui-
vants :
• Vous n'entendez plus rien, autrement dit, l'enceinte ne
fonctionne plus ou ne diffuse plus que les graves ou
les aigus.
• L'autre enceinte fonctionne-t-elle encore ? Ou sont-
elles toutes les deux défectueuses ? Dans ce cas,
mieux vaut vérifi er votre amplifi cateur.
• L'enceinte/les enceintes émet(tent) des craquements.
• Si vous enfoncez légèrement le moteur de l'enceinte
(woofer), celui-ci frotte-t-il ?
De la sorte, votre revendeur saura dans quelle direction
s'orienter pour poser son diagnostic. Merci de votre colla-
boration.
Garantie
2 ans à partir de la date d'achat, dans le cadre d'une
utilisation normale. Les conditions de la facture s'ap-
pliquent.
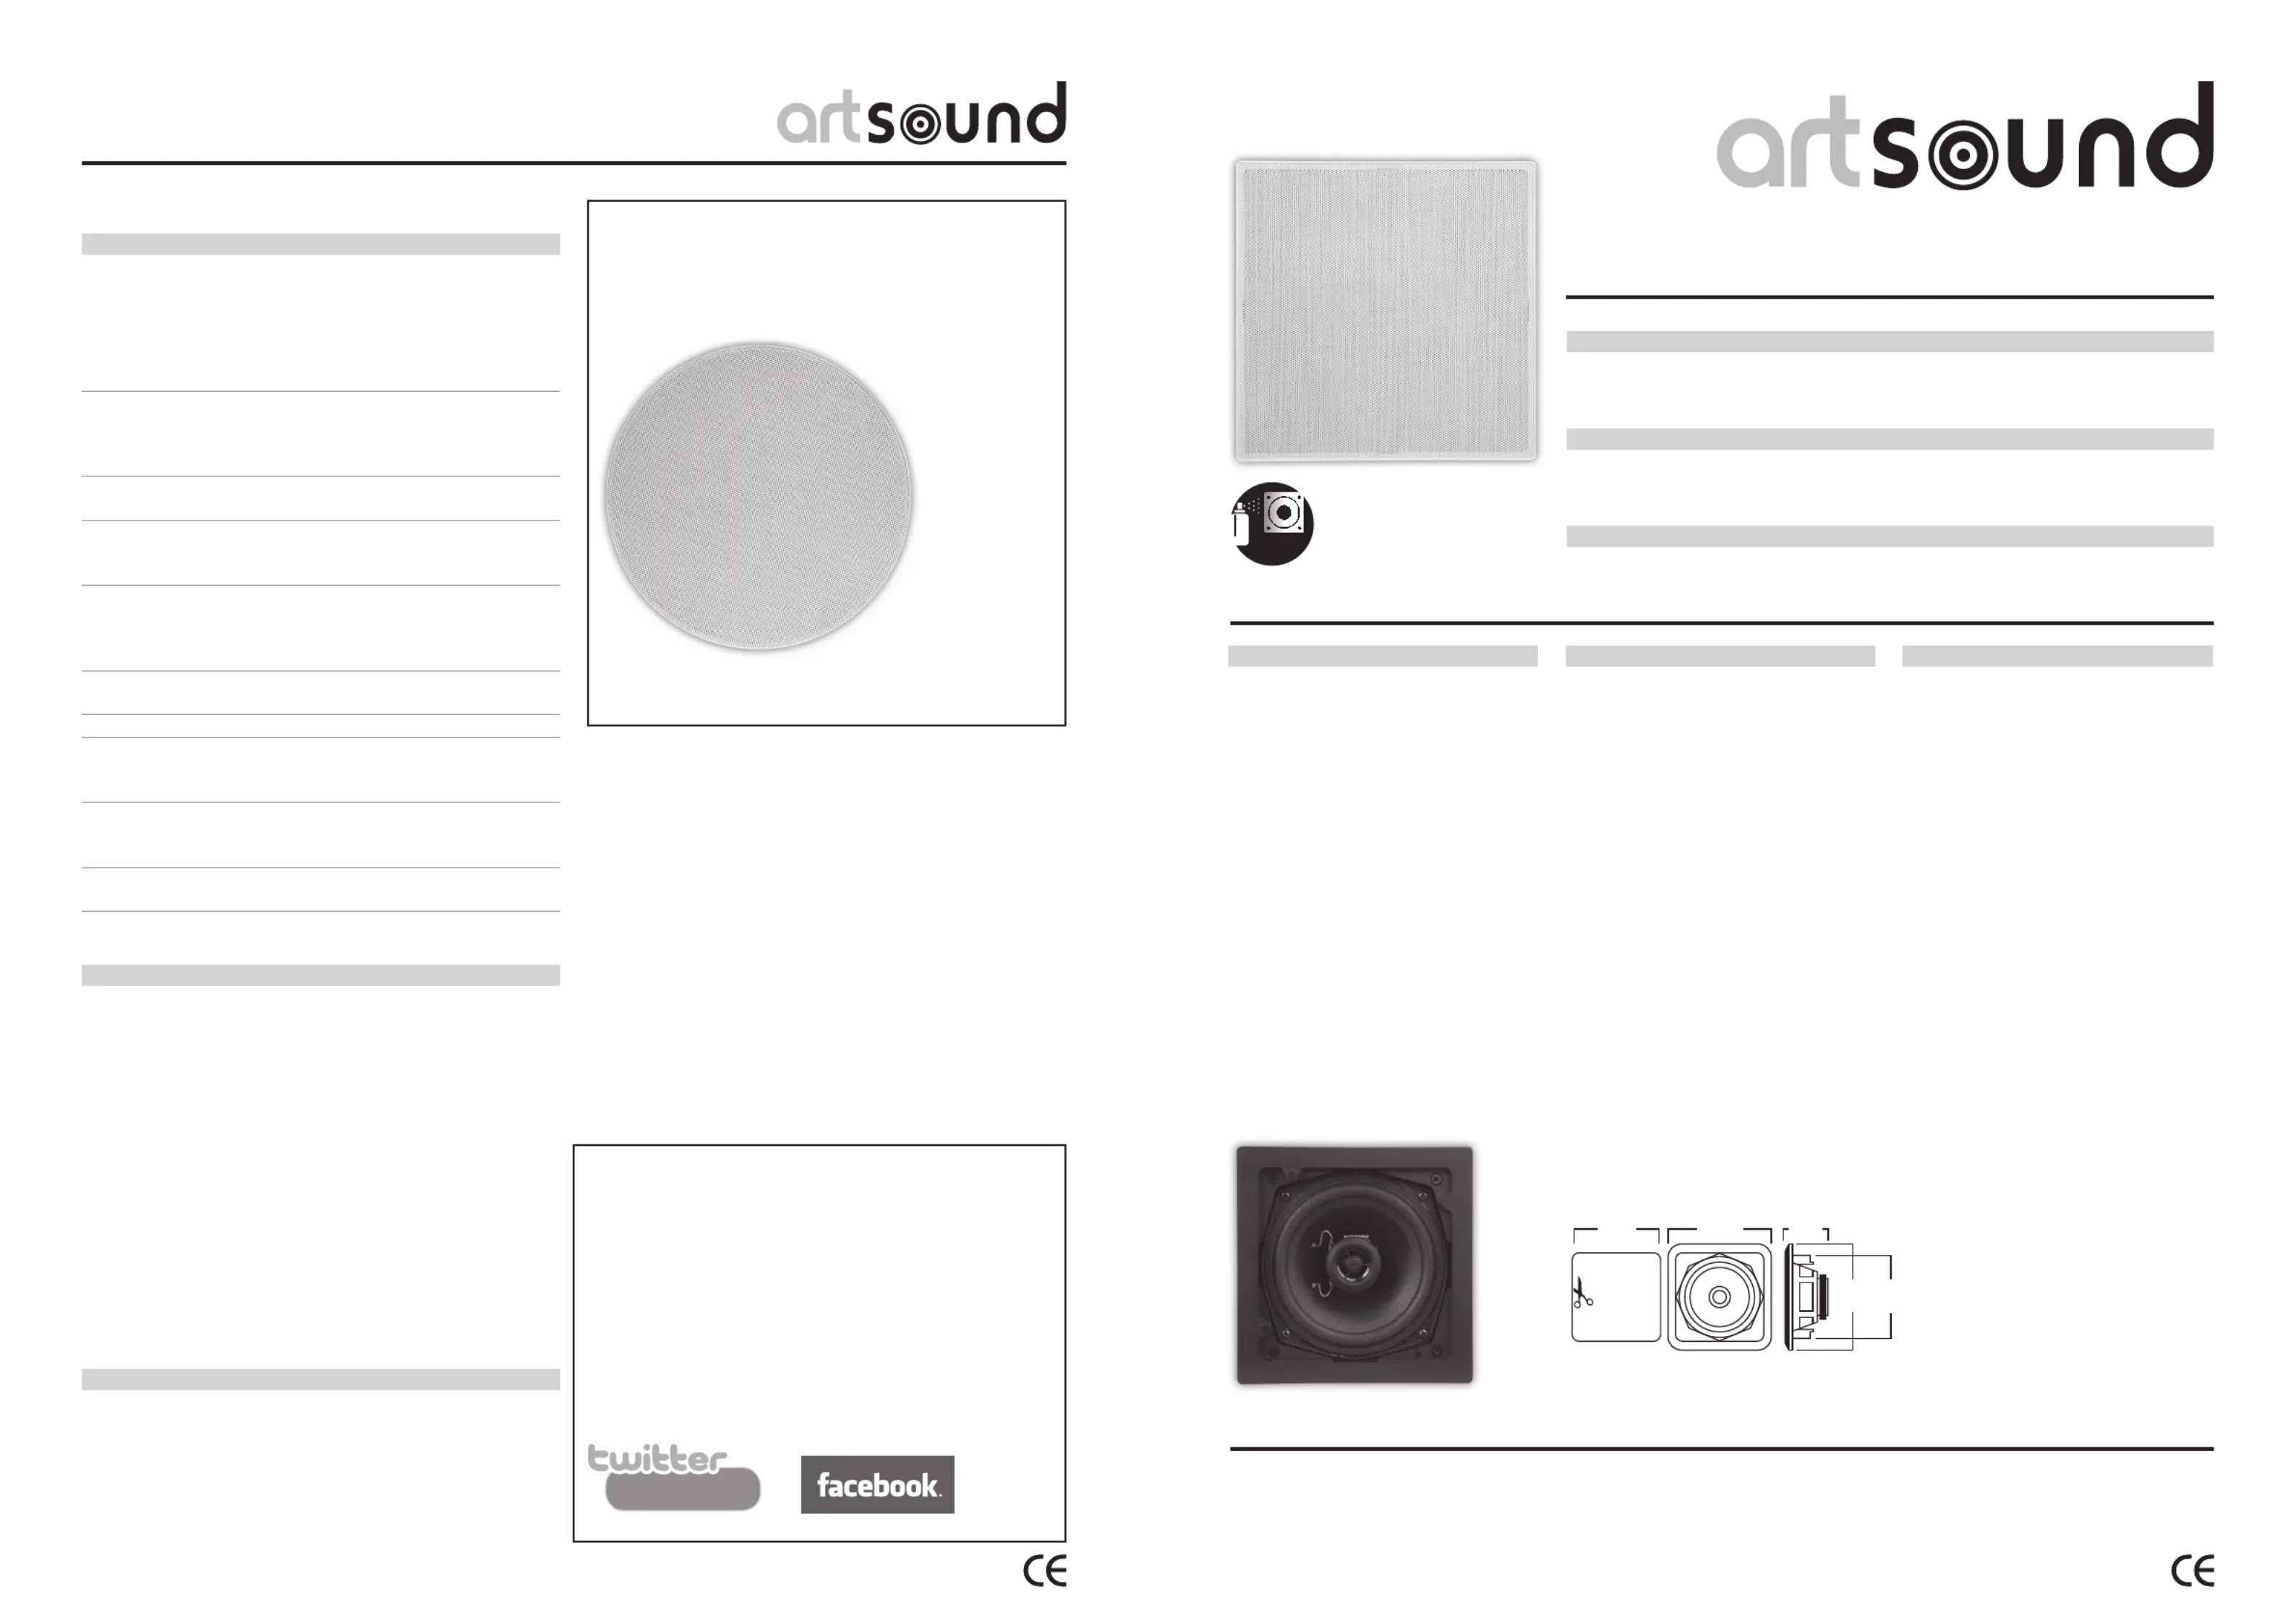
FL101T
FL101T
FL501T
Technische fi che
• systeem: 2-weg coaxiaal
• woofer: 5,25” polypropyleen
carbon
• tweeter: 0,5” polycarbonaat
• max. vermogen: 2.5 W / 5 W /
10 W / 20 W
• gevoeligheid (1 W / 1 m): 88 dB
• frequentiebereik: 65 Hz - 20 kHz
• afm. uitsnit (h x b): 148 x 148 mm
• afm. mm (h x b x d):
170 x 170 x 70
• gewicht: 1,1 kg / stuk
• kleur: wit
• extra:overschilderbaar
• opties : KIT SQ180/180
Fiche technique
• système : 2 voies coaxial
• woofer : 5,25” carbone
polypropylène
• tweeter : 0,5” polycarbonate
• puissance max. : 2.5 W / 5 W /
10 W / 20 W
• sensitivité (1 W / 1 m): 88 dB
• plage de fréquences :
65 Hz - 20 kHz
• dim. de découpe mm (h x l) :
148 x 148 mm
• dim. mm (h x l x p) :
170 x 170 x 70
• poids : 1,1 kg / pièce
• coleur : blanc
• compléments : peut être peint
• options : KIT SQ180/180
Technical specifi cations
• system : 2-way coaxial
• woofer : 5,25” polypropylene
carbon
• tweeter : 0.5” polycarbonate
• max. power : 2.5 W / 5 W /
10 W / 20 W
• sensitivity (1 W / 1 m): 88 dB
• frequency range : 65 Hz - 20 kHz
• dim. cut-out mm (h x w)
: 148 x 148 mm
• dim. mm (h x w x d) :
170 x 170 x 70
• weight : 1,1 kg / piece
• colour : white
• extra : paintable
• options : KIT SQ180/180
148170
70
170148
Termékspecifikációk
| Márka: | Artsound |
| Kategória: | hangszóró |
| Modell: | FL101T |
Szüksége van segítségre?
Ha segítségre van szüksége Artsound FL101T, tegyen fel kérdést alább, és más felhasználók válaszolnak Önnek
Útmutatók hangszóró Artsound

3 Január 2025
10 Szeptember 2024
2 Szeptember 2024
2 Szeptember 2024
2 Szeptember 2024
2 Szeptember 2024
2 Szeptember 2024
2 Szeptember 2024
2 Szeptember 2024
2 Szeptember 2024
Útmutatók hangszóró
Legújabb útmutatók hangszóró
10 Április 2025
10 Április 2025
9 Április 2025
8 Április 2025
8 Április 2025
8 Április 2025
7 Április 2025
7 Április 2025
5 Április 2025
3 Április 2025