Használati útmutató Acer Iconia Tab A100
Olvassa el alább 📖 a magyar nyelvű használati útmutatót Acer Iconia Tab A100 (88 oldal) a tabletta kategóriában. Ezt az útmutatót 7 ember találta hasznosnak és 2 felhasználó értékelte átlagosan 4.5 csillagra
Oldal 1/88

1
User Guide

2
© 2011. All Rights Reserved.
Acer ICONIA TAB User Guide
Model: A100 (Wi-Fi only models) and A101 (Wi-Fi+3G models)
First issue: 06/2011
Acer ICONIA TAB
Model number: __________________________________
Serial number: ___________________________________
Date of purchase: ________________________________
Place of purchase: ________________________________

1
Table of contents
Table of contents
Table of contents
Table of contentsTable of contents
Table of contents
End user license agreement
Getting to know your tablet
Features and functions . . . . . . . . . . . . . . . . . . . . . . . . . . . . . . . . . . . . . . . . . . . 5
Product registration . . . . . . . . . . . . . . . . . . . . . . . . . . . . . . . . . . . . . . . . . . . . . 5
Setting Up
Unpacking your tablet . . . . . . . . . . . . . . . . . . . . . . . . . . . . . . . . . . . . . . . . . . . 6
Getting to know your tablet . . . . . . . . . . . . . . . . . . . . . . . . . . . . . . . . . . . . . . 7
Using your tablet
Using the SIM card slot (only for Wi-Fi+3G models) . . . . . . . . . . . . . . . . . . . 11
Charging your tablet . . . . . . . . . . . . . . . . . . . . . . . . . . . . . . . . . . . . . . . . . . . . 11
Turning on for the first time . . . . . . . . . . . . . . . . . . . . . . . . . . . . . . . . . . . . . 12
Locking your tablet . . . . . . . . . . . . . . . . . . . . . . . . . . . . . . . . . . . . . . . . . . . . . 13
Using the touchscreen . . . . . . . . . . . . . . . . . . . . . . . . . . . . . . . . . . . . . . . . . . 13
The Home screen . . . . . . . . . . . . . . . . . . . . . . . . . . . . . . . . . . . . . . . . . . . . . . .14
The onscreen keyboard . . . . . . . . . . . . . . . . . . . . . . . . . . . . . . . . . . . . . . . . . . 20
Editing text . . . . . . . . . . . . . . . . . . . . . . . . . . . . . . . . . . . . . . . . . . . . . . . . . . . 22
Connecting devices to your tablet
Connecting to AC power . . . . . . . . . . . . . . . . . . . . . . . . . . . . . . . . . . . . . . . . 24
Inserting a microSD card (optional) . . . . . . . . . . . . . . . . . . . . . . . . . . . . . . . . 24
Connecting to a PC as a USB storage device . . . . . . . . . . . . . . . . . . . . . . . . . 24
Connecting a Bluetooth device . . . . . . . . . . . . . . . . . . . . . . . . . . . . . . . . . . . 25
Connecting to a television with HDMI . . . . . . . . . . . . . . . . . . . . . . . . . . . . . .25
Connecting to the dock (optional) . . . . . . . . . . . . . . . . . . . . . . . . . . . . . . . . . 26
Going online
Managing Wi-Fi connections . . . . . . . . . . . . . . . . . . . . . . . . . . . . . . . . . . . . . 27
Browsing the Internet . . . . . . . . . . . . . . . . . . . . . . . . . . . . . . . . . . . . . . . . . . . 27
Setting up Gmail (Google mail) . . . . . . . . . . . . . . . . . . . . . . . . . . . . . . . . . . . 28
Composing an email . . . . . . . . . . . . . . . . . . . . . . . . . . . . . . . . . . . . . . . . . . . . 28
Setting up the Email application . . . . . . . . . . . . . . . . . . . . . . . . . . . . . . . . . . 29
Online applications . . . . . . . . . . . . . . . . . . . . . . . . . . . . . . . . . . . . . . . . . . . . .29
Acer content folders
Using the content folders . . . . . . . . . . . . . . . . . . . . . . . . . . . . . . . . . . . . . . . . 36

2
Reading an eBook or pdf
LumiRead . . . . . . . . . . . . . . . . . . . . . . . . . . . . . . . . . . . . . . . . . . . . . . . . . . . . . 39
Playing music and video
Multimedia playback . . . . . . . . . . . . . . . . . . . . . . . . . . . . . . . . . . . . . . . . . . . 45
Media Server . . . . . . . . . . . . . . . . . . . . . . . . . . . . . . . . . . . . . . . . . . . . . . . . . . 49
Dolby Mobile . . . . . . . . . . . . . . . . . . . . . . . . . . . . . . . . . . . . . . . . . . . . . . . . . . 49
Managing contacts
Using the camera
Camera icons and indicators . . . . . . . . . . . . . . . . . . . . . . . . . . . . . . . . . . . . . . 53
Taking a photo . . . . . . . . . . . . . . . . . . . . . . . . . . . . . . . . . . . . . . . . . . . . . . . . 54
Shooting a video . . . . . . . . . . . . . . . . . . . . . . . . . . . . . . . . . . . . . . . . . . . . . . . 55
Using a cellular data network
(only for Wi-Fi+3G models)
Installing a SIM card . . . . . . . . . . . . . . . . . . . . . . . . . . . . . . . . . . . . . . . . . . . . 57
Adjusting connection settings . . . . . . . . . . . . . . . . . . . . . . . . . . . . . . . . . . . . 58
Internet sharing . . . . . . . . . . . . . . . . . . . . . . . . . . . . . . . . . . . . . . . . . . . . . . . .59
Advanced settings
Sound . . . . . . . . . . . . . . . . . . . . . . . . . . . . . . . . . . . . . . . . . . . . . . . . . . . . . . . . 61
Screen . . . . . . . . . . . . . . . . . . . . . . . . . . . . . . . . . . . . . . . . . . . . . . . . . . . . . . . . 61
Putting your tablet in Airplane mode . . . . . . . . . . . . . . . . . . . . . . . . . . . . . .62
Activating or deactivating connections . . . . . . . . . . . . . . . . . . . . . . . . . . . . . 62
Adjusting Bluetooth settings . . . . . . . . . . . . . . . . . . . . . . . . . . . . . . . . . . . . . 63
Connecting to a PC . . . . . . . . . . . . . . . . . . . . . . . . . . . . . . . . . . . . . . . . . . . . . 63
Synchronization . . . . . . . . . . . . . . . . . . . . . . . . . . . . . . . . . . . . . . . . . . . . . . . . 63
Setting the date and time . . . . . . . . . . . . . . . . . . . . . . . . . . . . . . . . . . . . . . . 64
Setting alarms . . . . . . . . . . . . . . . . . . . . . . . . . . . . . . . . . . . . . . . . . . . . . . . . . 64
Changing language and text options . . . . . . . . . . . . . . . . . . . . . . . . . . . . . . 65
Managing applications . . . . . . . . . . . . . . . . . . . . . . . . . . . . . . . . . . . . . . . . . . 65
Updating your tablet’s operating system . . . . . . . . . . . . . . . . . . . . . . . . . . . 65
Resetting your tablet . . . . . . . . . . . . . . . . . . . . . . . . . . . . . . . . . . . . . . . . . . . 65
Appendix
FAQ and troubleshooting . . . . . . . . . . . . . . . . . . . . . . . . . . . . . . . . . . . . . . . . 67
Other sources of help . . . . . . . . . . . . . . . . . . . . . . . . . . . . . . . . . . . . . . . . . . . 68
Specifications . . . . . . . . . . . . . . . . . . . . . . . . . . . . . . . . . . . . . . . . . . . . . . . . . . 69
Safety . . . . . . . . . . . . . . . . . . . . . . . . . . . . . . . . . . . . . . . . . . . . . . . . . . . . . . . . 71

3End user license agreement
End user license agreement
End user license agreement
End user license agreement
End user license agreementEnd user license agreement
IMPORTANT - READ CAREFULLY: THIS END USER LICENSE AGREEMENT ("AGREEMENT") IS A LEGAL AGREEMENT BETWEEN
YOU (EITHER AN INDIVIDUAL OR A SINGLE ENTITY), AND ACER INC. INCLUDING ITS SUBSIDIARIES ("ACER") FOR THE
SOFTWARE (WHETHER PROVIDED BY ACER OR BY ACER'S LICENSORS OR SUPPLIERS) THAT ACCOMPANIES THIS
AGREEMENT, INCLUDING ANY ASSOCIATED MEDIA, PRINTED MATERIALS AND RELATED USER ELECTRONIC
DOCUMENTATION WHICH MAY BE BRANDED "ACER" ("SOFTWARE"). AGREEMENTS RELATING TO ANY OTHER PRODUCT
OR TOPIC ARE NEITHER INTENDED NOR SHOULD THEY BE IMPLIED. BY INSTALLING THE ACCOMPANYING SOFTWARE OR
ANY PORTION THEREOF, YOU AGREE TO BE BOUND BY THE TERMS AND CONDITIONS OF THIS AGREEMENT. IF YOU DO
NOT AGREE TO ALL OF THE TERMS AND CONDITIONS OF THIS AGREEMENT, DO NOT CONTINUE THE INSTALLATION
PROCESS AND IMMEDIATELY DELETE ALL INSTALLED FILES, IF ANY, OF THE ACCOMPANYING SOFTWARE FROM YOUR
DEVICE.
IF YOU DO NOT HAVE A VALIDLY-LICENSED COPY OF THE APPLICABLE SOFTWARE, YOU ARE NOT AUTHORIZED TO
INSTALL, COPY OR OTHERWISE USE THE SOFTWARE, AND HAVE NO RIGHTS UNDER THIS AGREEMENT.
The Software is protected by U.S. and international copyright laws and conventions as well as other intellectual property
laws and treaties. The Software is licensed, not sold.
GRANT OF LICENSE
Acer grants to you the following non-exclusive and non-transferable rights with respect to the Software. Under this
Agreement, you may:
1. Install and use the Software only on a single designated device. A separate license is required for each device on
which the Software will be used;
2. Make one copy of the Software solely for backup or archival purposes;
3. Make one hard copy of any electronic documents included in the Software, provided that you receive the
documents electronically.
RESTRICTIONS
You may NOT:
1. Use or copy the Software except as provided in this Agreement;
2. Rent or lease the Software to any third party;
3. Modify, adapt, or translate the Software in whole or in part;
4. Reverse engineer, decompile, or disa create derivative wossemble the Software or rks based upon the Software;
5. Merge the Software with any other program or modify the Software, except for your personal use; and
6. Sublicense or otherwise make the Software available to third parties, except that you may, after prior written
notification to Acer, transfer the Software as a whole to a third party so long as you do not retain any copies of the
Software and such third party accepts the terms of this Agreement.
7. Transfer your rights under this Agreement to any third parties.
8. Export the Software in contravention of applicable export laws and regulations, or (i) sell, export, re-export,
transfer, divert, disclose technical data, or dispose of, any Software to any prohibited person, entity, or destination
including, without limitation, Cuba, Iran, North Korea, Sudan and Syria; or (ii) use any Software for any use
prohibited by the laws or regulations of the United States.
SUPPORT SERVICES
Acer is not obligated to provide technical or other support for the Software.
ACER LIVE UPDATE
Certain software contains elements that enable the use of the Acer Live Update service, which allows for updates for such
software to be automatically downloaded and installed on your device. By installing the software, you hereby agree and
consent that Acer (or its licensors) may automatically check the version of such software that you are using on your device
and may provide upgrades to such software that may be automatically downloaded on to your device.
OWNERSHIP AND COPYRIGHT
Title, ownership rights and intellectual property rights in and to the Software and all copies thereof shall remain with Acer
or Acer's licensors or suppliers (as applicable). You do not have or shall not gain any proprietary interest in the Software
(including any modifications or copies made by or for you) or any related intellectual property rights. Title and related
rights in the content accessed through the Software is the property of the applicable content owner and may be protected
by applicable law. This license gives you no rights to such contents. You hereby agree
1. Not to remove any copyright or other proprietary notices from the Software;
2. To reproduce all such notices on any authorized copies you make; and
3. To use best efforts to prevent any unauthorized copying of the Software.
TRADEMARKS
This Agreement does not grant to you any rights in connection with any trademarks or service marks of Acer or of Acer's
licensors or suppliers.
DISCLAIMER OF WARRANTIES
TO THE MAXIMUM EXTENT PERMITTED BY APPLICABLE LAW, ACER, ITS SUPPLIERS, AND ITS LICENSORS, PROVIDE THE
SOFTWARE "AS IS" AND WITH ALL FAULTS, AND HEREBY DISCLAIM ALL OTHER WARRANTIES AND CONDITIONS, EITHER
EXPRESS, IMPLIED OR STATUTORY, INCLUDING, BUT NOT LIMITED TO, ANY IMPLIED WARRANTIES, DUTIES OR
CONDITIONS OF MERCHANTABILITY, OF FITNESS FOR A PARTICULAR PURPOSE, OF ACCURACY OR COMPLETENESS OF
RESPONSES, OF RESULTS, OF WORKMANLIKE EFFORT, OF LACK OF VIRUSES, AND OF LACK OF NEGLIGENCE, ALL WITH
REGARD TO THE SOFTWARE AND THE PROVISION OF OR FAILURE TO PROVIDE SUPPORT SERVICES. ALSO, THERE IS NO

4
WARRANTY OR CONDITION OF TITLE, QUIET ENJOYMENT, QUIET POSSESSION, CORRESPONDENCE TO DESCRIPTION OR
NON-INFRINGEMENT WITH REGARD TO THE SOFTWARE.
EXCLUSION OF INCIDENTAL, CONSEQUENTIAL AND CERTAIN OTHER DAMAGES
TO THE MAXIMUM EXTENT PERMITTED BY APPLICABLE LAW, IN NO EVENT SHALL ACER, ACER'S SUPPLIERS, OR ACER'S
LICENSORS, BE LIABLE FOR ANY SPECIAL, INCIDENTAL, INDIRECT, PUNITIVE, OR CONSEQUENTIAL DAMAGES
WHATSOEVER (INCLUDING, BUT NOT LIMITED TO, DAMAGES FOR LOSS OF PROFITS OR CONFIDENTIAL OR OTHER
INFORMATION, FOR BUSINESS INTERRUPTION, FOR PERSONAL INJURY, FOR LOSS OF PRIVACY, FOR FAILURE TO MEET ANY
DUTY INCLUDING OF GOOD FAITH OR OF REASONABLE CARE, FOR NEGLIGENCE, AND FOR ANY OTHER PECUNIARY OR
OTHER LOSS WHATSOEVER) ARISING OUT OF OR IN ANY WAY RELATED TO THE USE OF OR INABILITY TO USE THE
SOFTWARE, THE PROVISION OF OR FAILURE TO PROVIDE SUPPORT SERVICES, OR OTHERWISE UNDER OR IN CONNECTION
WITH ANY PROVISION OF THIS AGREEMENT, EVEN IN THE EVENT OF THE FAULT, TORT (INCLUDING NEGLIGENCE), STRICT
LIABILITY, BREACH OF CONTRACT OR BREACH OF WARRANTY OF ACER OR ITS SUPPLIERS OR LICENSORS, AND EVEN IF
ACER AND ITS SUPPLIERS AND LICENSORS HAVE BEEN ADVISED OF THE POSSIBILITY OF SUCH DAMAGES.
LIMITATION OF LIABILITY AND REMEDIES
NOTWITHSTANDING ANY DAMAGES THAT YOU MIGHT INCUR FOR ANY REASON WHATSOEVER (INCLUDING, WITHOUT
LIMITATION, ALL DAMAGES REFERENCED ABOVE AND ALL DIRECT OR GENERAL DAMAGES), THE ENTIRE LIABILITY OF
ACER, ITS SUPPLIERS, AND ITS LICENSORS, UNDER ANY PROVISION OF THIS AGREEMENT, AND YOUR EXCLUSIVE REMEDY
FOR ALL OF THE FOREGOING, SHALL BE LIMITED TO THE AGGREGATE AMOUNT PAID BY YOU FOR THE SOFTWARE. THE
FOREGOING LIMITATIONS, EXCLUSIONS AND DISCLAIMERS (INCLUDING DISCLAIMER OF WARRANTIES AND EXCLUSION OF
INCIDENTAL, CONSEQUENTIAL AND CERTAIN OTHER DAMAGES ABOVE) SHALL APPLY TO THE MAXIMUM EXTENT
PERMITTED BY APPLICABLE LAW, EVEN IF ANY REMEDY FAILS ITS ESSENTIAL PURPOSE; PROVIDED, HOWEVER, THAT
BECAUSE SOME JURISDICTIONS DO NOT ALLOW THE EXCLUSION OR LIMITATION OR LIABILITY FOR CONSEQUENTIAL OR
INCIDENTAL DAMAGES, THE ABOVE LIMITATION MAY NOT APPLY TO YOU.
TERMINATION
Without prejudice to any other rights, Acer may immediately terminate this Agreement without notice if you fail to
comply with any terms and conditions of this Agreement.
In such event, you must:
1. Cease all use of the Software;
2. Destroy or return to Acer the original and all copies of the Software; and
3. Delete the Software from all devices on which it was resident.
All disclaimers of warranties and limitation of liability set forth in this Agreement shall survive termination of this
Agreement.
GENERAL
This Agreement represents the complete agreement between you and Acer relating to this license for the Software and
supersedes all prior agreements, communications, proposals and representations between the parties and prevails over
any conflicting or additional terms of any quote, order, acknowledgement or similar communication. This Agreement may
only be modified by a written document signed by both parties. If any provision of this Agreement is held by a court of
competent jurisdiction to be contrary to law that provision will be enforced to the maximum extent permissible and the
remaining provisions of this Agreement will remain in full force and effect.
ADDITIONAL PROVISIONS APPLICABLE TO THIRD PARTY SOFTWARE AND SERVICES
Software provided hereunder by Acer's licensors or suppliers ("Third Party Software") is made available to you for your
personal, non-commercial use only. You may not use the Third Party Software in any manner that could damage, disable,
overburden, or impair the services provided by Acer's licensors or suppliers hereunder ("Third Party Services").
Furthermore, you may not use the Third Party Software in any manner that could interfere with any other party's use and
enjoyment of the Third Party Services, or the services and products of Acer's licensors' or suppliers' third party licensors.
Your use of the Third Party Software and Third Party Services is also subject to additional terms and conditions and policies
which can be accessed through our global website.
Privacy policy
During registration you will be asked to submit some information to Acer. Please refer to Acer’s privacy policy at
www.acer.com or your local Acer website.
Music recognition technology and related data are provided by Gracenote
®. Gracenote®,
Gracenote logo and logotype, and the "Powered by Gracenote" logo are either a
registered trademark or a trademark of Gracenote, Inc. in the United States and/or other
countries.
XT9 and the XT9 logo are registered trademarks of Nuance Communications, Inc. or its
subsidiaries in the United States of America and/or other countries.

5Getting to know your tablet
Getting to know your tablet
Getting to know your tablet
Getting to know your tablet
Getting to know your tabletGetting to know your tablet
Features and functions
Your new tablet offers leading, easy-to-access multimedia and entertainment
features. You can:
• Connect to the Internet via Wi-Fi or, if your tablet includes 3G features,
HSDPA+.
• Access your email while on the move.
• Keep in touch with your friends via your Contacts and social networking
applications.
• Listen to rich, full-impact audio via Dolby Mobile.
Product registration
When using your product for the first time, it is recommended that you
immediately register it. This will give you access to useful benefits, such as:
• Faster service from our trained representatives.
• Membership in the Acer community: receive promotions and participate
in customer surveys.
• The latest news from Acer.
Hurry and register, as other advantages await you!
How to register
To register your Acer product, please visit www.acer.com
www.acer.com
www.acer.com
www.acer.comwww.acer.com. Click Registra
Registra
Registra
RegistraRegistration
tion
tion
tiontion and
follow the simple instructions.
You can also register directly from your tablet by tapping the Acer Regis
Acer Regis
Acer Regis
Acer RegisAcer Registration
tration
tration
trationtration
icon.
After we receive your product registration, you will be sent a confirmation
email with important data that you should keep in a safe place.

6
Setting Up
Setting Up
Setting Up
Setting UpSetting Up
Unpacking your tablet
Your new tablet comes packed in a protective box. Carefully unpack the box
and remove the contents. If any of the following items is missing or damaged,
contact your dealer immediately:
• Acer ICONIA TAB
• Poster / product and saftey information / safety leaflet
• USB cable
• AC adapter
• Warranty card / ITW
• GPL notice

7Setting Up
Getting to know your tablet
Front
1
2
3
4
view
No.
No.
No.
No.No. Item
Item
Item
ItemItem Descripti
Descripti
Descripti
DescriptiDescription
on
on
onon
1 Touchscreen 7-inch, 1024 x 600 pixel capacitive touchscreen.
2 Home button Tap this icon to go directly to the Home screen.
3 Front-facing camera A 2-megapixel camera for video chatting and
self-portrait images.
4 Light sensor Detects ambient light and automatically adjusts
the screen brightness.

8
Back
1
2
view
Top
1 2
view
No.
No.
No.
No.No. Item
Item
Item
ItemItem Descripti
Descripti
Descripti
DescriptiDescription
on
on
onon
1 5 MP camera A 5-megapixel camera for taking high-
resolution images.
2 LED flash Lights to illuminate images.
No.
No.
No.
No.No. Item
Item
Item
ItemItem Descripti
Descripti
Descripti
DescriptiDescription
on
on
onon
1 Power button Long press to turn the tablet on, press briefly to
turn the screen on/off or enter sleep mode;
press and hold to turn the tablet off.
2 3.5 mm headphone jack Connects to stereo headphones.

9Setting Up
Bottom
1 2 3 624 5
view
Side
1
2
3
view
No.
No.
No.
No.No. Item
Item
Item
ItemItem Descripti
Descripti
Descripti
DescriptiDescription
on
on
onon
1 Reset button Insert a small thin object (such as a paperclip) to
reset power to the tablet.
2 Speakers Emits stereo audio.
3 Micro HDMI (Type D)
connector
Connects to an HDMI cable with a Type D
connector.
4 Docking port Connect your tablet to the dock accessory.
5 Micro USB connector
(Slave)
Connects to a computer with a USB cable.
6 DC-in jack Connects to the DC power supply.
No.
No.
No.
No.No. Item
Item
Item
ItemItem Descripti
Descripti
Descripti
DescriptiDescription
on
on
onon
1 Screen rotation lock
switch
Use this switch to lock the screen rotation or
allow the screen to match the tablet’s
orientation.
2 Volume control key Increase and decrease the tablet volume.
11Using your tablet
Using your tablet
Using your tablet
Using your tablet
Using your tabletUsing your tablet
Using the SIM card slot (only for Wi-Fi+3G
models)
Certain tablets include a SIM slot for internet access. To take full advantage of
your tablet’s Internet capabilities, you should install a SIM card with data
subscription
before
turning on your tablet.
See “Installing a SIM card” on page
See “Installing a SIM card” on page
See “Installing a SIM card” on page
See “Installing a SIM card” on pageSee “Installing a SIM card” on page
57.
57.
57.
57.57.
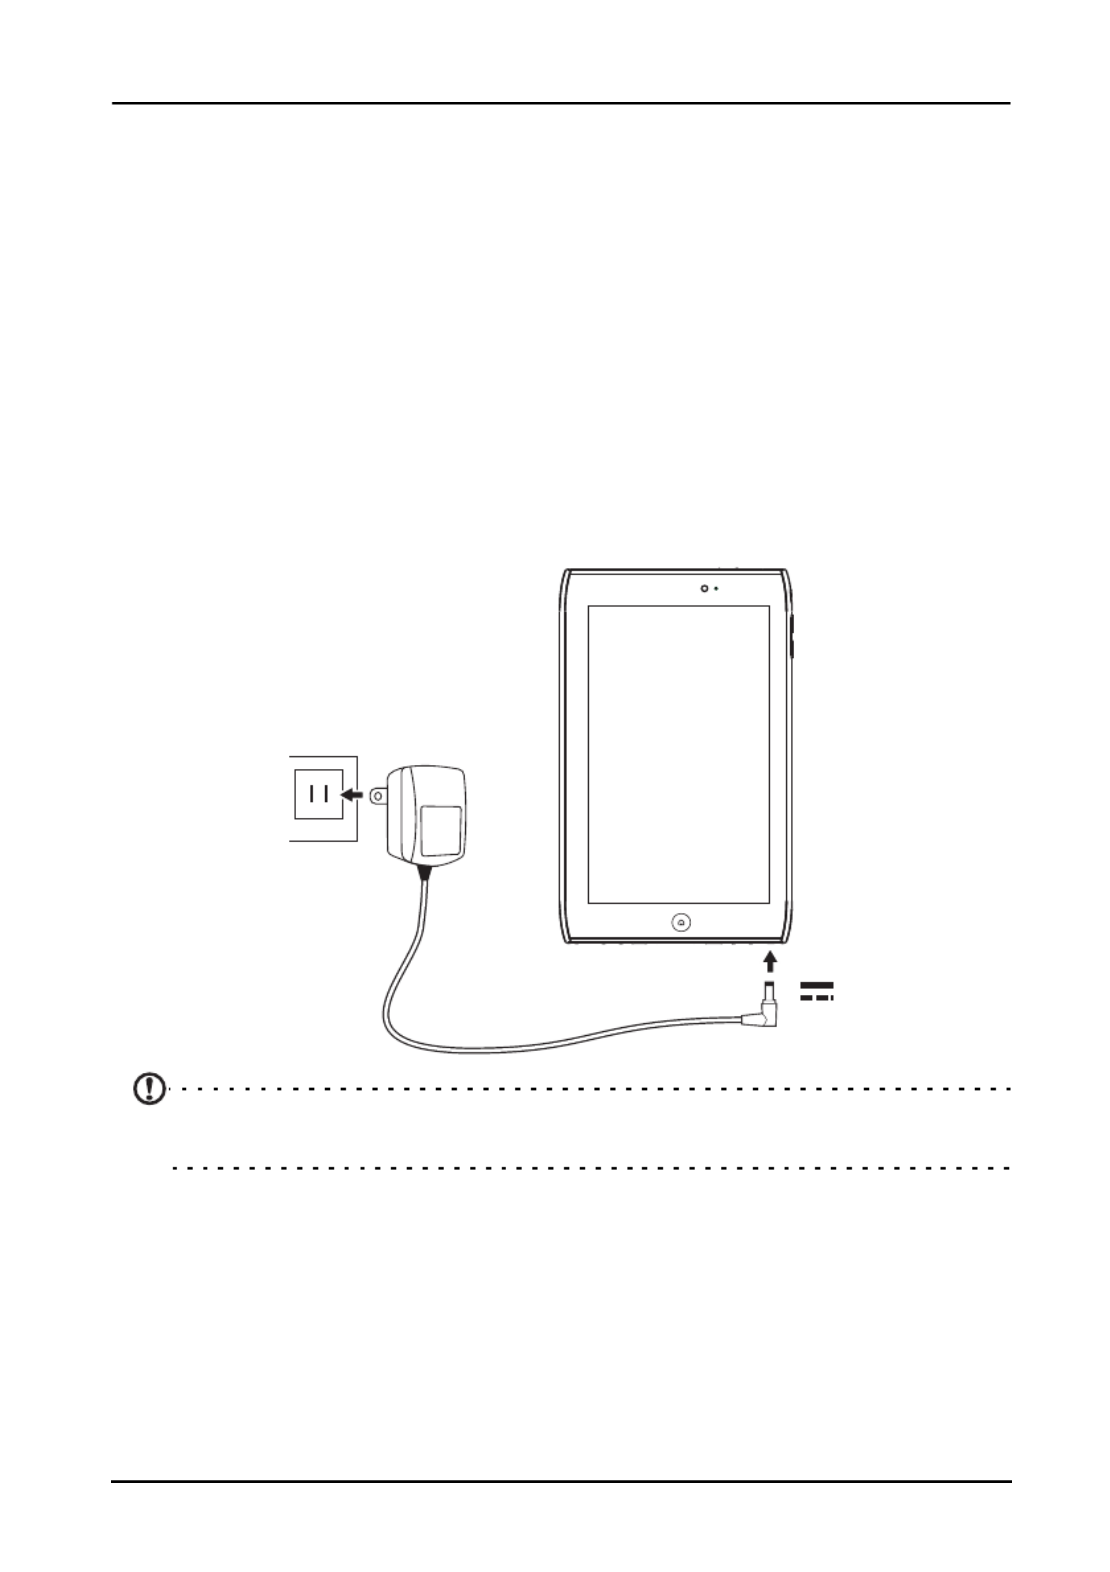
Charging your tablet
For first-time use, you need to charge your tablet for four hours. After that you
can recharge the battery as needed.
Connect the DC-in jack to your tablet and plug the AC adapter into any AC
outlet.
Note:
Note:
Note:
Note:Note: It is normal for the tablet surface to become warm during charging or
long periods of use.
13Using your tablet
Locking your tablet
If you will not use your tablet for a while, briefly press the power button to lock
access. This saves power and ensures your tablet does not unintentionally use
any services. Your tablet will lock automatically if it is not used after a while. To
change the delay, tap Apps
Apps
Apps
AppsApps > Se
Se
Se
SeSettings
ttings
ttings
ttingsttings > Screen
Screen
Screen
Screen Screen > Timeout
Timeout
Timeout
Timeout Timeout.
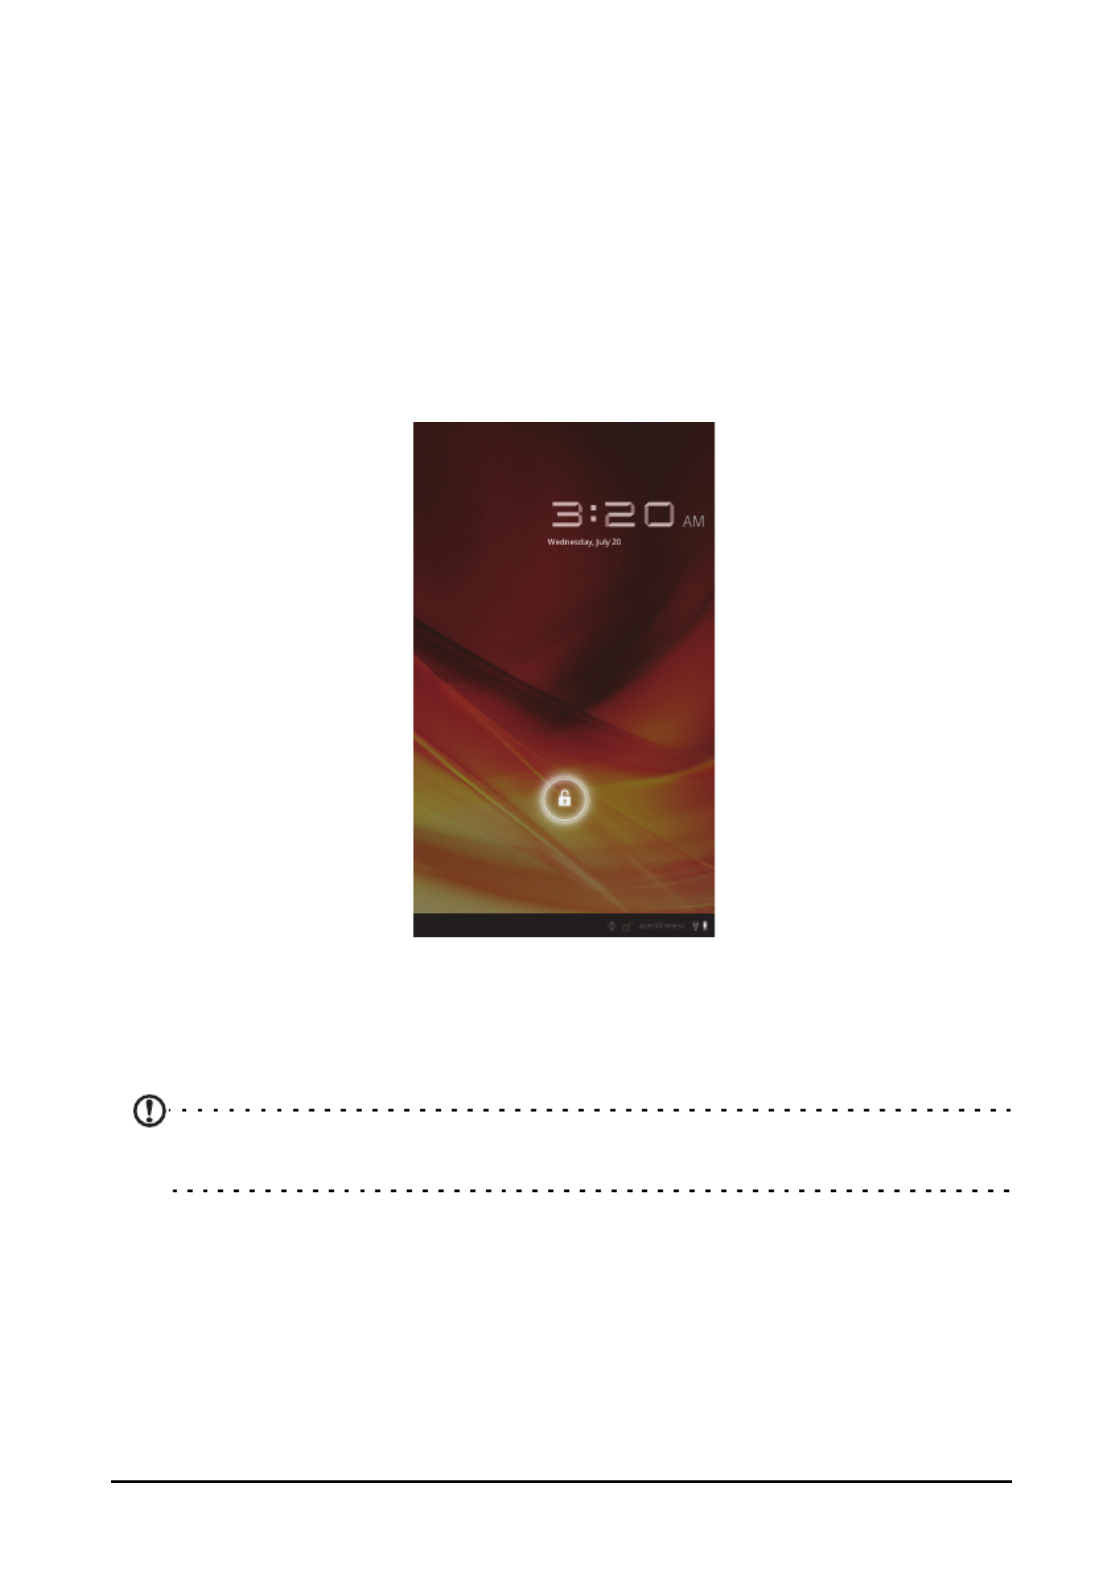
Waking your tablet
If the screen is off and the tablet does not react to any taps on the screen, then
it has been locked and is in sleep mode.
To wake your tablet, press the power button. Your tablet will display the Lock
screen. Drag the lock symbol to the edge of the circle to unlock the tablet.
For additional security, you may set a code or number that must be entered to
access the tablet, such as an unlock pattern (a set of dots that must be tapped in
the correct order). Open the Home screen and tap Apps
Apps
Apps
Apps Apps > Settings
Settings
Settings
Settings Settings > Location &
Location &
Location &
Location & Location &
security
security
security
security security > Configure lock screen
Configure lock screen
Configure lock screen
Configure lock screen Configure lock screen.
Note:
Note:
Note:
Note:Note: If you forget an unlock pattern or PIN, please refer to “Unlock
“Unlock
“Unlock
“Unlock “Unlock
pattern“
pattern“
pattern“
pattern“pattern“ on page 68
on page 68
on page 68
on page 68 on page 68.
Using the touchscreen
Your tablet uses a touchscreen for selecting items and entering information.
Use your finger to tap the screen.
Tap
Tap
Tap
TapTap: Touch the screen once to open items and select options.
Drag
Drag
Drag
DragDrag: Hold your finger on the screen and drag across the screen to select text
and images.

15Using your tablet
Navigation
Back
Back
Back
BackBack Home
Home
Home
HomeHome Recent
Recent
Recent
RecentRecent
To navigate through menus and options, three (or
more) icons are shown in the bottom-left corner.
Back
Tap this icon to go to the previous page, or to go up one level in a
menu. This icon may be replaced with the
hide
icon in certain cases
(such as if the keyboard or list of recent applications is shown).
Hide
Hide
Hide
HideHide
Home
Tap this icon to go directly to the Home screen.
Recent
Tap this icon to see recently opened applications. Tap an application to open it,
or tap anywhere on the screen to return to the Home screen.
Settings
This icon is displayed in some applications. Tap this icon to open a list
of options.
The extended Home screen
The Home screen extends to either side of the initial Home screen, giving you
more room to add widgets or organize shortcuts. To view the extended Home
screen, swipe your finger to the left or right.
A total of five pages are available, two to the left and two to the right. To
change or add widgets on any of the screens see “Personalizing the Home
“Personalizing the Home
“Personalizing the Home
“Personalizing the Home “Personalizing the Home
screen“ on page 19
screen“ on page 19
screen“ on page 19
screen“ on page 19screen“ on page 19.
Home screen
Home screen
Home screen
Home screenHome screen

16
The application menu
The application menu displays applications installed on your tablet.
Two categories are available: All
All
All
AllAll and My a
My a
My a
My aMy apps
pps
pps
ppspps. All
All
All
AllAll displays all applications that
are installed on your tablet; My
My
My
MyMy apps
apps
apps
apps apps displays applications that you have
installed from the Android Market.
Note:
Note:
Note:
Note:Note: All images are for reference only. The applications installed on your
tablet can be different from the applications shown in illustrations.
Applications are displayed in alphabetical order. If more applications are
available, an outline of the second page will be shown on the side of the
screen. Swipe the outline towards the center of the screen to switch pages.
Tap and hold an icon to add a shortcut to one of your Home screens. While a
shortcut is selected, thumbnails of the Home screens are shown below the list of
applications, simply drag the shortcut to a screen.
Status and notification area
Status and notification icons are shown in the
bottom-right corner of the screen.
Time
Time
Time
TimeTime Wireless
Wireless
Wireless
WirelessWireless Battery
Battery
Battery
Battery Battery
charge
charge
charge
chargecharge
reception
reception
reception
receptionreception
status
status
status
statusstatus
This area contains a variety of icons to inform you
of your tablet’s status. The icons on the right side
of the clock indicate connectivity and battery
status. The left side of the clock displays the event
notification icons.

17Using your tablet
Tap the status icons to view more status information and a summary of events.
Tap the status area again to view more controls. While viewing a notification,
tap the summary to see more information, if available. Some event summaries
include controls, such as media controls if music is playing.
Status and notification icons
Connection and battery status icons
Note:
Note:
Note:
Note:Note: Network connection icons are blue if you have an active Google
account.
Icon
Icon
Icon
IconIcon Description
Description
Description
DescriptionDescription Icon
Icon
Icon
IconIcon Description
Description
Description
DescriptionDescription
Connected to a wireless
network (waves indicate
connection strength)
Battery is very low
An open wireless network is
available
Battery is low
Bluetooth is on Battery is partially drained
Connected to a Bluetooth
device
Battery is full
Airplane mode (wireless
connectivity disconnected)
Battery is charging

19Using your tablet
Personalizing the Home screen
You may personalize your Home screen by adding or removing application
shortcuts or widgets, and by changing the wallpaper.
Adding or removing shortcuts or widgets
To add shortcuts or widgets open the Add to Ho
Add to Ho
Add to Ho
Add to HoAdd to Home
me
me
meme screen: tap (+)
(+)
(+)
(+)(+) next to Apps
Apps
Apps
AppsApps
in the top-right corner of the Home screen. Alternatively, tap and hold
anywhere on the Home screen.
Tap Widgets
Widgets
Widgets
WidgetsWidgets to see small applications that you can add to a Home screen.
Widgets are small applications that display constantly-updated information or
quick shortcuts to applications or special functions.
Tap Ap
Ap
Ap
ApApplications
plications
plications
plicationsplications to open a list of shortcuts to applications and settings you can
drag to a Home screen.
Tap Wal
Wal
Wal
WalWallpapers
lpapers
lpapers
lpaperslpapers to change the current wallpaper. You can choose from a set of
pre-formatted wallpapers, images stored in the Gallery, or Live wallpapers
featuring animated or interactive backgrounds.
Tap More
More
More
MoreMore to add icons, shortcuts, ‘groups’ of contacts or links to specific
settings.
To move any item on the Home screen, tap and hold the item until it is selected.
You may drag the item to any free area on the screen. To move the item to a
different Home screen, drag it to the side of the screen, the Home screen will
switch to the screen in that direction. Release the item when it is positioned
correctly.
To remove an item from the Home screen, tap and hold the item until the trash
icon appears in the top-right corner of the screen. Simply drag the item to the
trash icon.

20
Adding shortcuts from the Application menu
You can add shortcuts to the Home screen directly from the Application menu.
Open the Application menu then tap and hold an icon until an image of the
Home screens appears. Drag the icon to a Home screen to create a shortcut.
The onscreen keyboard
When you tap a text box to enter text, an onscreen keyboard will appear.
Simply tap on keys to enter text.
Tap the ?123
?123
?123
?123?123 button to see numbers and special characters, and then tap the
More
More
More
MoreMore key to see more options. Tap and hold a key to select alternative
characters (if available), such as letters with accents.
The layout of the keyboard varies slightly, depending on the application and
information that is required.
Changing Android keyboard settings
To use a different keyboard language or change settings, tap the Input
Input
Input
Input Input
options
options
options
optionsoptions key, then select either Input languages
Input languages
Input languages
Input languagesInput languages or Android keyboar
Android keyboar
Android keyboar
Android keyboarAndroid keyboard
d
d
d d

21Using your tablet
settings
settings
settings
settingssettings. These settings include Auto-correction and keyboard sounds and
vibration.
Predictive text or auto correction
The Android keyboard can provide predictive text input. As you tap the letters
of a word, a selection of words are displayed that continue the sequence of
letters tapped, or are a close match allowing for errors. The word list changes
after every key press. If the word you need is displayed, you can tap on it to
insert it into your text.
To turn predictive text on or off with the Android keyboard, tap the Input
Input
Input
Input Input
options
options
options
optionsoptions key, and then Android keyboard settings
Android keyboard settings
Android keyboard settings
Android keyboard settingsAndroid keyboard settings. Tap Auto correc
Auto correc
Auto correc
Auto correcAuto correction
tion
tion
tiontion or Show
Show
Show
Show Show
correction suggestions
correction suggestions
correction suggestions
correction suggestionscorrection suggestions and select one of the options.
Changing the keyboard
To use a different keyboard type, tap the Keyboard status
Keyboard status
Keyboard status
Keyboard statusKeyboard status icon; this will
open a menu listing the text input methods available on your tablet. Tap
your preferred input method.
Typically three options are available: two types of Android Keyboard
Android Keyboard
Android Keyboard
Android KeyboardAndroid Keyboard (keyboard
and voice) and XT9 Text
XT9 Text
XT9 Text
XT9 TextXT9 Text .
Input
Input
Input
InputInput
XT9 Text Input
The XT9 keyboard provides an alternative to the standard Android keyboard.
Tap the ?123
?123
?123
?123?123 button to see numbers and special characters, and then tap the
ALT
ALT
ALT
ALTALT key to see more options. Tap and hold a key to select alternative characters
(if available), such as letters with accents.
Additional keys vary depending on the type of text you enter, e.g. a key to add
a smiley is available when typing a text message. Like other keys, tap and hold
to see if additional options are available.
Text assistance
The standard XT9 keyboard has various features that assist you to enter correct
text. To use these features, tap the Keyboard status
Keyboard status
Keyboard status
Keyboard statusKeyboard status icon; this will open a menu

22
listing the text input methods available on your tablet. Tap the settings icon
next to the XT9 Text Input
XT9 Text Input
XT9 Text Input
XT9 Text InputXT9 Text Input entry.
Editing text
You can select and edit text in certain applications, such as text you have
entered in text fields. Selected text can be cut or copied and later pasted within
the same application, or to a different application.
Note:
Note:
Note:
Note:Note: Certain applications may not support text selection, or only support it
in certain areas. Other applications offer specialized commands to select
text that is only available in that application.
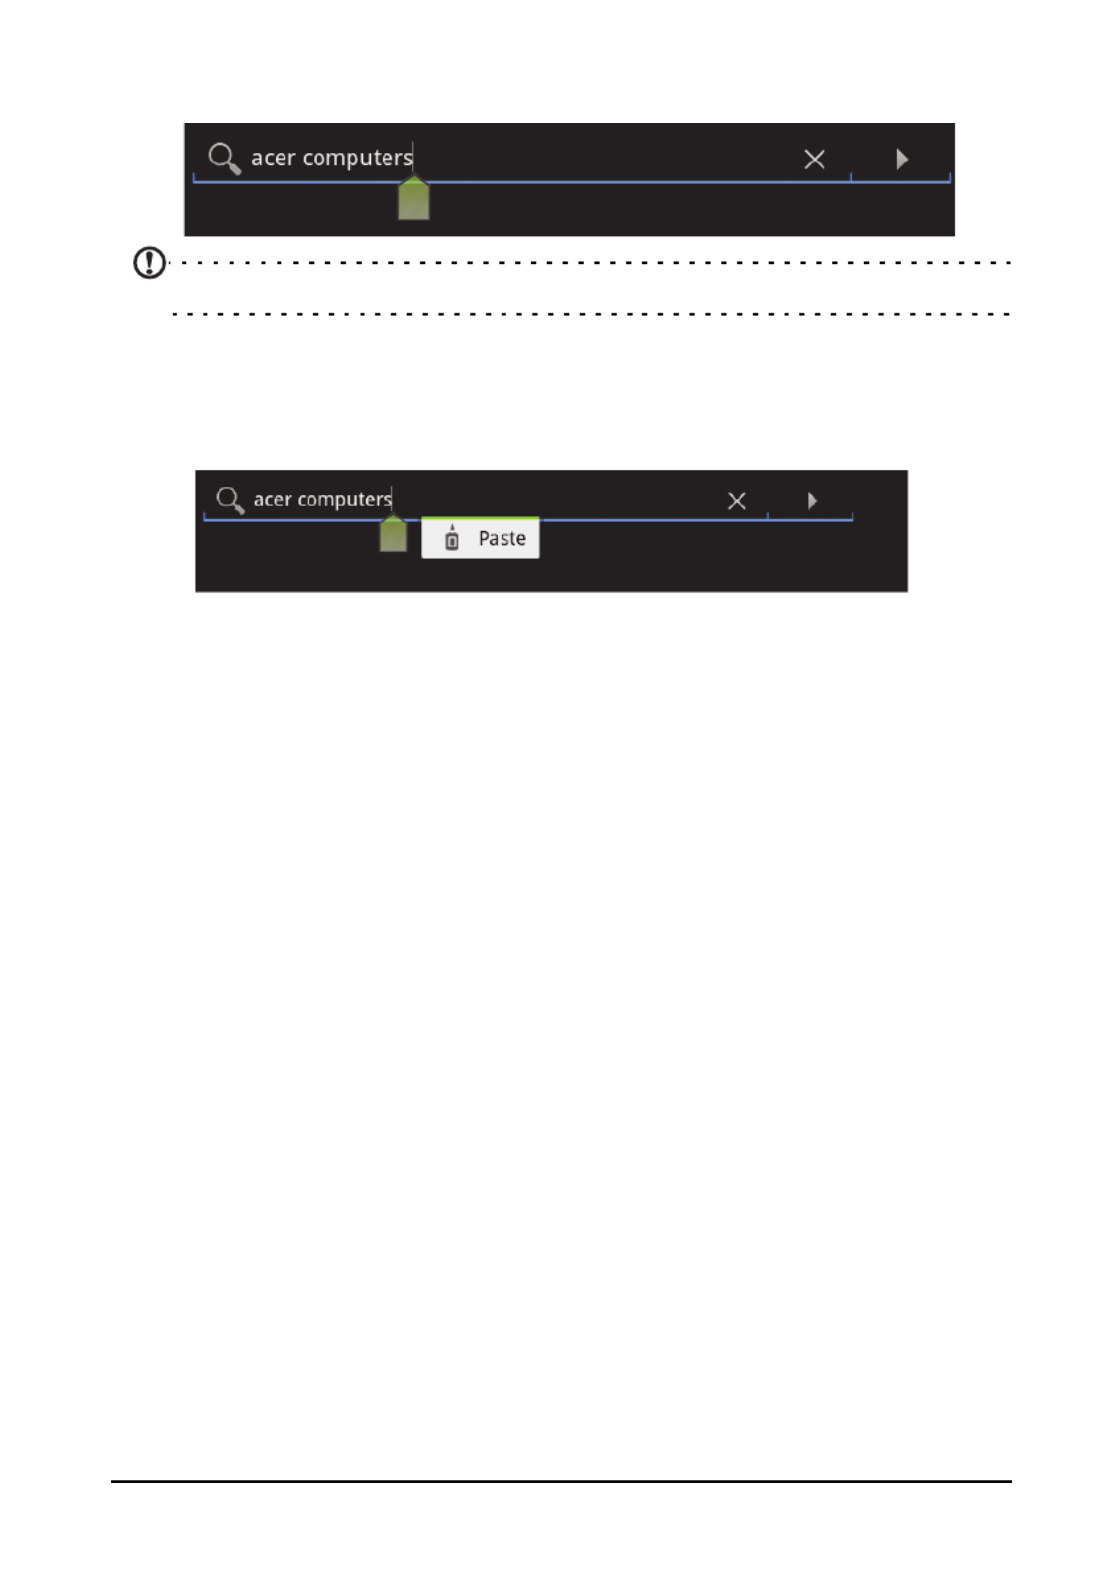
Selecting text
To select text that you want to cut, copy, delete or replace:
1. Tap the text you want to select. If you can select this text, a cursor is inserted
below the text.
Note:
Note:
Note:
Note:Note: The cursor indicates where text you type or paste will be inserted.
2. Tap and hold the text or word you want to select.
The selected text is highlighted, with a tab at each end of the selection.
3. Drag either tab to expand or reduce the amount of selected text, or tap
Select all
Select all
Select all
Select allSelect all.
4. To cut or copy the text, tap the Cu
Cu
Cu
CuCut
t
t
tt or Copy
Copy
Copy
CopyCopy button.
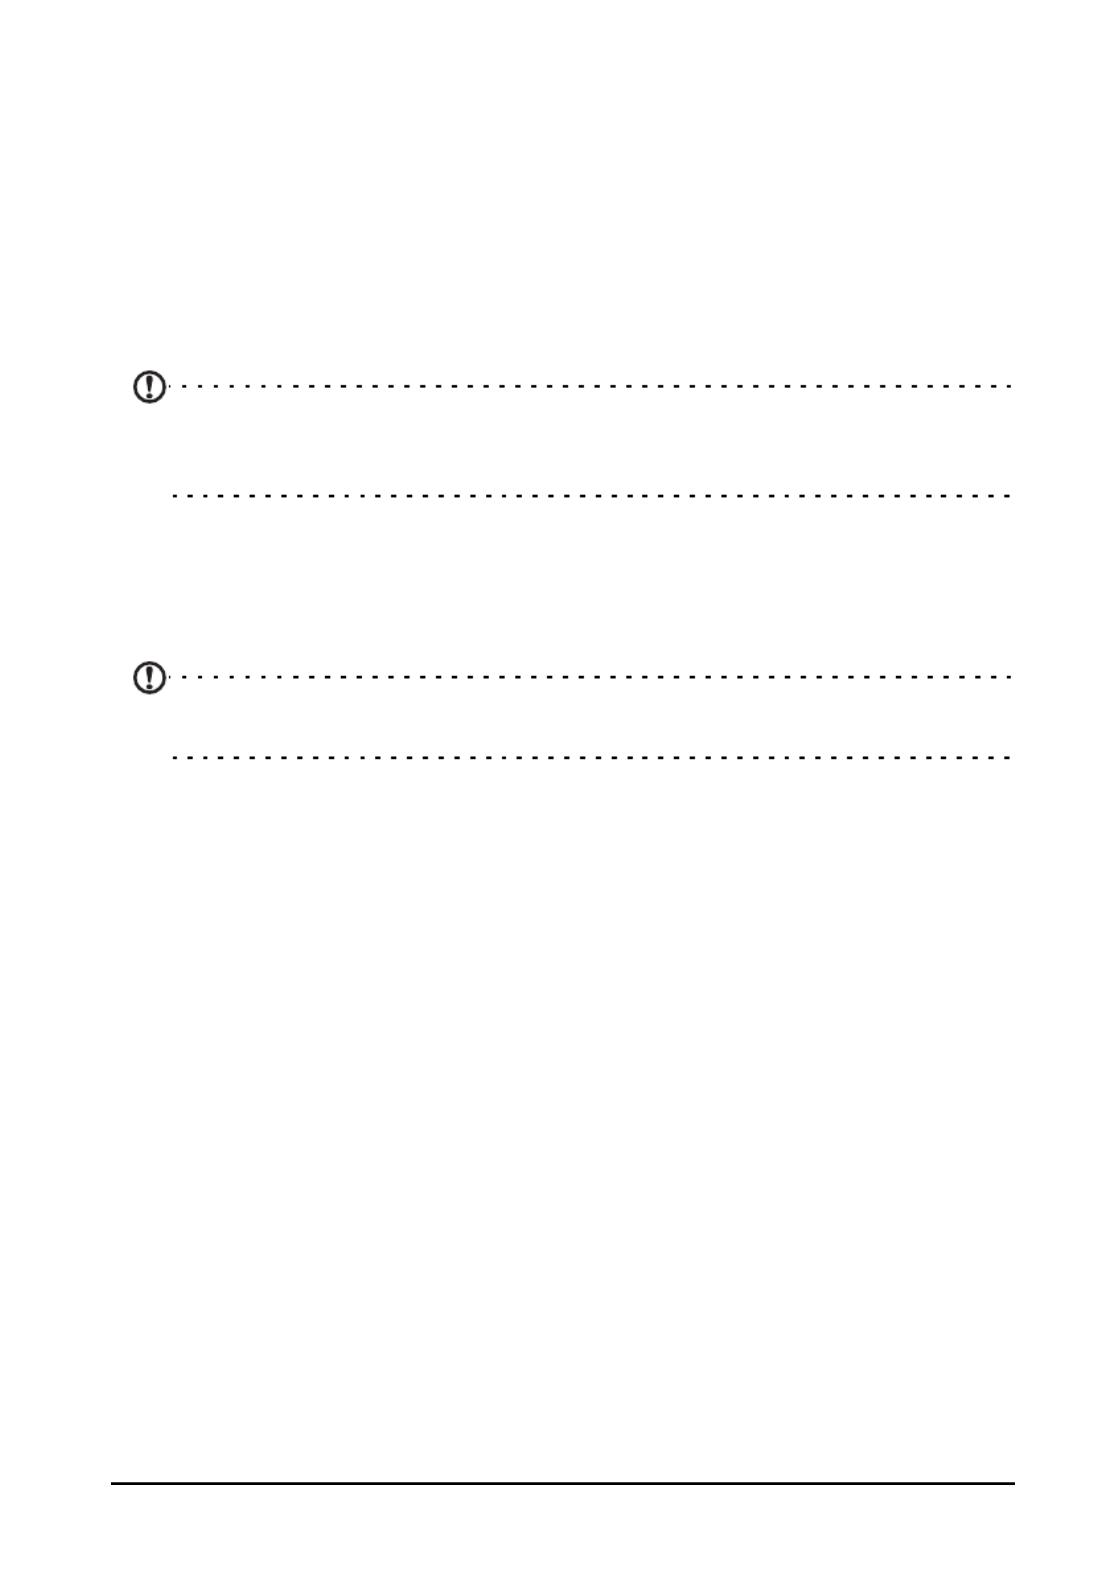
Inserting text
To type new text or add text that you have copied:
Function
Function
Function
FunctionFunction Descripti
Descripti
Descripti
DescriptiDescription
on
on
onon
Languages and
settings
Set the languages that will be available.
If you have selected more than one language, tap
the globe in the text prediction bar to cycle
through the languages. Tap and hold the globe
to see a list of selected languages.
Preferences Change your text input preferences.
23Using your tablet
1. Tap the text you want to select. If you can select this text, a cursor is inserted
below the text.
Note:
Note:
Note:
Note:Note: The cursor indicates where text you type or paste will be inserted.
2. If the cusor is not in the desired position, simply drag it to the correct
position.
If you previously copied (see below) text, a
Paste
button appears briefly
above the cursor. Tap the button to paste the text.
3. Modify the text: Type, paste or delete text.
4. Tap Enter on the keyboard, or tap the Cl
Cl
Cl
ClClose Keyboard
ose Keyboard
ose Keyboard
ose Keyboardose Keyboard button.

24
Connecting devices to your tablet
Connecting devices to your tablet
Connecting devices to your tablet
Connecting devices to your tabletConnecting devices to your tablet
Connecting to AC power
See “Charging your tablet” o
See “Charging your tablet” o
See “Charging your tablet” o
See “Charging your tablet” oSee “Charging your tablet” on page
n page
n page
n pagen page
11.
11.
11.
11.11.
Inserting a microSD card (optional)
You may install a microSD card to expand your device's storage space.
Note:
Note:
Note:
Note:Note: Your tablet only supports microSD cards that use the FAT or FAT32 file
system.
1. Open the card slot cover.
2. Insert the microSD card as shown. Ensure
that the microSD card is inserted all the way
into the card slot.
3. Replace the card slot cover.
Check card capacity in the Exter
Exter
Exter
ExterExternal SD card
nal SD card
nal SD card
nal SD cardnal SD card
section of Apps
Apps
Apps
AppsApps > >
Settings
Settings
Settings
SettingsSettings Storage
Storage
Storage
StorageStorage.
Transferring files between a microSD card and your PC
Remove the card from the tablet and use a card reader or USB adapter to access
the card as an external storage device.
Note:
Note:
Note:
Note:Note: Check that your tablet is not using the microSD card before removing
it from the tablet. Take care when removing the card, the slot is spring-
loaded.
Connecting to a PC as a USB storage device
Download and install the latest USB driver on your computer before connecting
your tablet to the computer. Visit www.acer.com
www.acer.com
www.acer.com
www.acer.comwww.acer.com for the latest drivers: Select
Support
Support
Support
SupportSupport, Do
Do
Do
DoDownload
wnload
wnload
wnloadwnload, Tablet
Tablet
Tablet
TabletTablet. Select your tablet model, and then the Driver
Driver
Driver
DriverDriver tab,
select USB
USB
USB
USBUSB and accept the download.
microSD

26
Note:
Note:
Note:
Note:Note: When using the micro HDMI port to connect the tablet to an external
device, the tablet's screen will switch orientation to landscape to mimic the
aspect ratio of the external device.
Connecting to the dock (optional)
The optional dock holds your tablet and allows you to easily charge the battery
with a single connection.
The dock provides extra ports that replace your tablet's built-in ports while it is
docked. Please check the dock’s specifications for the exact features provided.
Warning! The screen will remain locked
Warning! The screen will remain locked
Warning! The screen will remain locked
Warning! The screen will remain lockedWarning! The screen will remain locked in landscape mode when the tablet
in landscape mode when the tablet
in landscape mode when the tablet
in landscape mode when the tablet in landscape mode when the tablet
is connected to the dock.
is connected to the dock.
is connected to the dock.
is connected to the dock.is connected to the dock.

30
3. Follow the instructions on your computer screen to configure Acer Sync and
start the synchronization.
Configuring Acer Sync on your tablet
1. Tap Apps
Apps
Apps
AppsApps > Acer Sync.
Acer Sync.
Acer Sync.
Acer Sync.Acer Sync.
2. Tap the settings icon in the top-right corner.
3. Select Se
Se
Se
SeSettings
ttings
ttings
ttingsttings from the menu.
Acer Planner
Acer Planner helps you to manage events and work efficiently.
Tap Pla
Pla
Pla
PlaPlanner
nner
nner
nnernner.
Acer Planner will automatically link to your email account that can be setup via
the Email application. See “Setting up the Email ap
See “Setting up the Email ap
See “Setting up the Email ap
See “Setting up the Email apSee “Setting up the Email application” on pag
plication” on pag
plication” on pag
plication” on pagplication” on page
e
e
ee
29.
29.
29.
29.29.
Within the Acer Planner you will see four tabs:
Today
Today
Today
TodayToday, Agenda
Agenda
Agenda
AgendaAgenda, Note
Note
Note
NoteNote, and Priority
Priority
Priority
PriorityPriority.

33Going online
You may keep track of the download progress from the status area.
Important
Important
Important
ImportantImportant: Some applications may require payment before you can
download them. You will need to have a Google Checkout account in order
to pay for these applications.
Using downloaded applications
Once you’ve downloaded and installed an application, you may find it in the
My apps
My apps
My apps
My appsMy apps or All
All
All
AllAll sections of the Application menu.
Certain applications also provide widgets, or only provide a widget (with no
application icon). Widgets can be found in the Widget section when
personalizing your Home screen. See “Personalizing the Home screen” on
page 19.
Uninstalling downloaded applications
Once you’ve downloaded and installed an application, you may uninstall the
application by pressing and holding the application icon and dragging it to the
trash can located on the top-right corner of the screen.
Alternatively, you can go to Settings
Settings
Settings
SettingsSettings from the application menu and select
Applications
Applications
Applications
ApplicationsApplications > Manage applications
Manage applications
Manage applications
Manage applicationsManage applications. Tap the application you wish to uninstall,
tap Uninstall
Uninstall
Uninstall
UninstallUninstall and confirm the uninstall.

34
Google Talk
Note:
Note:
Note:
Note:Note: Google Talk may not be available in all countries and regions.
Note:
Note:
Note:
Note:Note: You need to activate a Google account before you can use Google
Talk.
Tap Talk
Talk
Talk
TalkTalk from application menu to open Google Talk. Here you can see a list of
your contacts connected to Google Talk services. Tap on a contact to open a
chat session. After you have connected, you can open a video chat session.
Use the front-facing camera so the person you call can see you while you can
see them on the screen; hold your tablet in portrait mode to improve the
camera position.
LumiRead
The LumiRead application allows you to purchase, store and read books on your
tablet. Tap the LumiRead
LumiRead
LumiRead
LumiReadLumiRead shortcut in the Application menu, or the eReading
content folder, to open the Books application.
Viewing your books
All books stored on your tablet may be seen on the LumiRead application main
screen. If you have many books, swipe the screen left to see them.
Simply tap a book to open it. Rotate your tablet to the best angle to read the
book.
Adding books
You may either add books that you already own, or download new books
directly to your tablet.
To download books, click on the Shop icon in the top right of the screen. A new
web browser window will open to the Google ebookstore.

35Going online
To add books you alread own, see “Transferring files bet
“Transferring files bet
“Transferring files bet
“Transferring files bet“Transferring files between a microSD card
ween a microSD card
ween a microSD card
ween a microSD card ween a microSD card
and your PC“ on page 24
and your PC“ on page 24
and your PC“ on page 24
and your PC“ on page 24and your PC“ on page 24 or “Conn
“Conn
“Conn
“Conn“Connecting to a PC as a USB storage device“ on
ecting to a PC as a USB storage device“ on
ecting to a PC as a USB storage device“ on
ecting to a PC as a USB storage device“ on ecting to a PC as a USB storage device“ on
page 24
page 24
page 24
page 24page 24.
Reading a book
Simply swipe across a page to change the page. More options, such as
searching the book, or jumping to a different chapter are available by clicking
on the appropriate icon in the top-right of the screen.

36
Acer content folders
Acer content folders
Acer content folders
Acer content foldersAcer content folders
Your tablet includes content folders that allow you to easily organize and
access your favorite applications.
Choose one of the four categories on the Home screen or application menu:
eRea
eRea
eRea
eReaeReading
ding
ding
dingding, Games
Games
Games
GamesGames, Multimedia
Multimedia
Multimedia
MultimediaMultimedia or Social
Social
Social
SocialSocial.
Tap the shortcut to open a screen containing applications from that category.
Using the content folders
Each category already contains shortcuts to essential applications. Simply tap a
shortcut to open the application. The shelves along the bottom of the screen
may contain links to portals that allow you to download related applications
from trustworthy publishers.
Selecting a content folder
The folder shortcuts on the home screen or Application menu give you direct
access to any of the four categories. If you have opened a category, you can
easily change category by swiping the screen to the left or right.

39Reading an eBook or pdf
Reading an eBook or pdf
Reading an eBook or pdf
Reading an eBook or pdf
Reading an eBook or pdfReading an eBook or pdf
LumiRead
The LumiRead application allows you to purchase, store and read books on your
tablet. Tap the LumiRead
LumiRead
LumiRead
LumiReadLumiRead shortcut in the Application menu, or the eReading
content folder, to open the LumiRead application.
The bookshelves
All the books available on your tablet are shown on the bookshelves.
If you have many books, swipe the screen up or down to display more titles.
Note:
Note:
Note:
Note:Note: To add books to the bookshelves, see “Adding boo
“Adding boo
“Adding boo
“Adding boo“Adding books to your tablet“
ks to your tablet“
ks to your tablet“
ks to your tablet“ ks to your tablet“
on page 42
on page 42
on page 42
on page 42on page 42.
Tool bar
The tool bar is at the top of the screen.
This area displays icons that allow you to look for new books or change how
books are displayed.
Icon
Icon
Icon
IconIcon Item
Item
Item
ItemItem Description
Description
Description
DescriptionDescription
Shopping
cart
Opens the Bookstore page, where you can choose
where to purchase books.
Search Searches the Internet or your books for text.
Sort by
Changes how books are organized on the bookshelves.

40
Recently read
The first shelf (at the top) displays books you have recently read. This list will
change to reflect your activity.
Favorites / tags
As you add books to your tablet, you may find it difficult to find the book you
need. You may either search for a specific title or author, add books to your
Favorites
Favorites
Favorites
FavoritesFavorites, or choose only to display books with a certain tag, to reduce the
number of books displayed at one time.
Normally Al
Al
Al
AlAll
l
l
ll books are displayed, but you can select a tag (All, Favorites, PDF or
a tag you have created). While a tag is selected, only books with that tag will be
displayed.
Tap (+)
(+)
(+)
(+)(+) to create new tags, or tap the Settings
Settings
Settings
SettingsSettings icon and select Tags
Tags
Tags
TagsTags to create,
rename or delete tags.
Adding a tag
To add a tag, tap and hold a book, then drag it to one of the tags shown at the
top of the screen. Drag the book to the (+)
(+)
(+)
(+)(+) to create a new tag.
Removing a tag
To remove a tag from a book, tap the name of the tag at the top of the screen,
so that only books with that tag are displayed. Tap and hold the book, then
drag it to the remove tag icon.
Dictionary
The Dictionary allows you to check the definitions of words. Open the
dictionary and type the word you want to check, then tap Search Dictionary
Search Dictionary
Search Dictionary
Search DictionarySearch Dictionary.
Note:
Note:
Note:
Note:Note: Internet access is required to search the dictionary as definitions are
retrieved from the Google dictionary service.
Display Changes how the books are shown.
Settings Opens settings to manage folders, register an Adobe
ID, change the theme or edit tags.
Icon
Icon
Icon
IconIcon Item
Item
Item
ItemItem Description
Description
Description
DescriptionDescription

41Reading an eBook or pdf
Reading eBooks on your tablet
Your tablet is able to display ePub and pdf books. Most eBook sites provide files
in these formats.
Warning! Cer
Warning! Cer
Warning! Cer
Warning! CerWarning! Certain vendors
tain vendors
tain vendors
tain vendors tain vendors may use copy
may use copy
may use copy
may use copymay use copyright protection systems that cannot
right protection systems that cannot
right protection systems that cannot
right protection systems that cannot right protection systems that cannot
be opened by your tablet. Please
be opened by your tablet. Please
be opened by your tablet. Please
be opened by your tablet. Pleasebe opened by your tablet. Please check
check
check
check check which DRM (Digital Rig
which DRM (Digital Rig
which DRM (Digital Rig
which DRM (Digital Rigwhich DRM (Digital Rights
hts
hts
hts hts
Management
Management
Management
ManagementManagement) system is us
) system is us
) system is us
) system is us) system is used.
ed.
ed.
ed.ed.
LumiRead supp
LumiRead supp
LumiRead supp
LumiRead suppLumiRead supports books pr
orts books pr
orts books pr
orts books prorts books protected with Ad
otected with Ad
otected with Ad
otected with Adotected with Adobe ID.
obe ID.
obe ID.
obe ID.obe ID.
In order to read certain books, you must activate your tablet with an Adobe ID.
See “Your Adobe ID” on page
See “Your Adobe ID” on page
See “Your Adobe ID” on page
See “Your Adobe ID” on pageSee “Your Adobe ID” on page
43
43
43
4343.
.
.
..
Opening a book
All books stored on your tablet may be seen on the shelves on the main screen.
If you have many books, swipe the bookshelves up to see them.
Simply tap a book to open it. Rotate your tablet to the best angle to read the
book.
Reading a book
Simply swipe across a page to change the page. More options, such as searching
the book, changing text size or marking sections for future reference
(
Bookmarks
or
Highlights
) are available: either tap the page or the settings
icon.
Highlighting text and adding a note
Quickly tap twice on a word to highlight it, then tap a second word to highlight
a section of text between the selected words. Tap the Highlight
Highlight
Highlight
HighlightHighlight icon and add a
note if desired; tap Save
Save
Save
SaveSave to highlight the selected section.
Note:
Note:
Note:
Note:Note: You can also tap twice on a word to search for it in the dictionary, or
on the Internet.
Jumping to Contents, Bookmarks or Highlights
You may jump directly to selected sections in a book; tap the page or the
settings icon, and select Contents
Contents
Contents
ContentsContents. Select Contents
Contents
Contents
ContentsContents, Bookmarks
Bookmarks
Bookmarks
BookmarksBookmarks or Highlights
Highlights
Highlights
HighlightsHighlights,
then tap on an entry to jump directly to that item in the book.
Taking a snapshot
You can take a ‘snapshot’ of a page and save it as an image for future
reference. Tap the settings icon at the bottom of the screen and select
Snapshot
Snapshot
Snapshot
SnapshotSnapshot. An image of the page will be saved to the LumiBooks/
LumiBooks/
LumiBooks/
LumiBooks/LumiBooks/
clipbook
clipbook
clipbook
clipbookclipbook folder in your tablet’s internal memory.
42
Adding books to your tablet
You may either add books that you already own, or download new books
directly to your tablet.
Books you download (see “Shopping” on page
“Shopping” on page
“Shopping” on page
“Shopping” on page“Shopping” on page
43
43
43
4343) will be automatically added
to the bookshelves.
To add books to your tablet’s internal memory or to a microSD card, copy the
books to the LumiBooks folder, see “Transferring files betwe
“Transferring files betwe
“Transferring files betwe
“Transferring files betwe“Transferring files between a microSD card
en a microSD card
en a microSD card
en a microSD card en a microSD card
and your PC“ on page 24
and your PC“ on page 24
and your PC“ on page 24
and your PC“ on page 24and your PC“ on page 24 or “Conn
“Conn
“Conn
“Conn“Connecting to a PC as a USB storage device“ on
ecting to a PC as a USB storage device“ on
ecting to a PC as a USB storage device“ on
ecting to a PC as a USB storage device“ on ecting to a PC as a USB storage device“ on
page 24
page 24
page 24
page 24page 24.
Note:
Note:
Note:
Note:Note: Connect your tablet to a computer and add books to the
LumiBooks
folder on your tablet’s internal memory or microSD card to see them on the
LumiRead bookshelves.
Instead of using the LumiBooks folder, you may add your own book folders,
and have any contents displayed on the LumiRead bookshelves.
Tap the settings icon and select Manage my book
Manage my book
Manage my book
Manage my bookManage my book folders. You will see a list of
folders that are displayed in on the bookshelves.
Note:
Note:
Note:
Note:Note: Folders that begin /mnt/sdcard/ are on your tablet’s internal memory.
Folders that begin /mnt/external_sd/ are on the microSD card.
Tap Add Book Folder
Add Book Folder
Add Book Folder
Add Book FolderAdd Book Folder, look for the folder in the list and tap the circle on the
right to select it; tap on a folder name to see sub-folders. When you have
selected all the folders you want to add, tap Add
Add
Add
AddAdd. After a short delay books in
the selected folders will be added to the bookshelves.
To remove a folder, tap and hold the folder name in the Manage my book
folders list, and select Remove Book Folder
Remove Book Folder
Remove Book Folder
Remove Book FolderRemove Book Folder, then Yes
Yes
Yes
YesYes.

43Reading an eBook or pdf
Shopping
Tap the shopping cart and select your region to see a featured bookstore. On
the right, additional bookstores are listed. Tap (+)
(+)
(+)
(+)(+) to add links to your favorite
sites.
Note:
Note:
Note:
Note:Note: You must create a customer account before purchasing items from the
featured bookstore.
Your Adobe ID
Some books available for purchase are protected with Adobe DRM (Digital
Rights Management). Before you can read them, you must enter an Adobe ID
to activate your tablet. Only one activation is required, as it covers all purchases.
If you already have an Adobe ID, you may use this to activate your tablet.
To create an Adobe ID:
1. Open LumiRead
LumiRead
LumiRead
LumiReadLumiRead.
2. Tap the Settings
Settings
Settings
SettingsSettings button.
3. Tap Register Adobe ID
Register Adobe ID
Register Adobe ID
Register Adobe IDRegister Adobe ID.
4. Tap Cr
Cr
Cr
CrCreate an Ado
eate an Ado
eate an Ado
eate an Adoeate an Adobe Account
be Account
be Account
be Accountbe Account.
5. Enter the information requested to create login information for your
account.
Note:
Note:
Note:
Note:Note: The email address you enter will be your Adobe ID. Make sure you
remember your password.
6. Select Continue
Continue
Continue
ContinueContinue.
Your Adobe ID is now registered.
Entering your Adobe ID
To register your tablet, follow these steps:
1. Open LumiRead
LumiRead
LumiRead
LumiReadLumiRead.

46
Note:
Note:
Note:
Note:Note: You can return to the Home page while playing music; a Music
icon is displayed with the notification icons. Tap this icon to control
playback.
Acer clear.fi
clear.fi automatically connects all of the devices on your home network (your
smartphone, notebook, all-in-one PC, HD media player, home storage, etc.) and
gathers media files from those devices, then categorizes them as Videos,
Photos, or Music. This lets you easily manage, store, share and enjoy your media
from any device, in any room, at home. In addition, you can connect to your
Facebook, Flickr and YouTube accounts via clear.fi to check out photos and
videos, as well as publish your own media to those sites.
Note:
Note:
Note:
Note: Note: To use clear.fi, your devices need be on the same network (wired or
wireless) with clear.fi-installed software.
Note
Note
Note
NoteNote: When using an external USB storage device to access media files, the
device may not be recognized for a few minutes.
Tap clear.fi
clear.fi
clear.fi
clear.ficlear.fi.
Acer clear.fi will automatically detect devices that are connected to the
network and are also running Acer clear.fi. These devices are displayed at the
bottom of the screen, with your tablet as the default device on the leftmost
side. Tap any of the connected devices and then tap Photo
Photo
Photo
PhotoPhoto, , or
Video
Video
Video
VideoVideo Mu
Mu
Mu
MuMusic
sic
sic
sicsic to
browse media files on that connected device.
49Playing music and video
nemoPlayer
Open nemoPlayer from the Application menu to play media you have stored on
your tablet.
nemoPlayer enables you to listen to music, view video clips and pictures in all
the formats supported by your tablet. See “Multimedia” on page
See “Multimedia” on page
See “Multimedia” on page
See “Multimedia” on pageSee “Multimedia” on page
69.
69.
69.
69.69.
Media Server
Your tablet can act as a digital media server using UPnP technology. This means
that you can use it to send media content to other UPnP-enabled home
entertainment devices that are connected to a home wireless network.
To set up the media server, open the application menu and tap M
M
M
MM
edia Server
edia Server
edia Server
edia Serveredia Server.
You will need to enable Sha
Sha
Sha
ShaShare contents
re contents
re contents
re contentsre contents before you can start using the service.
You may select to share Video
Video
Video
VideoVideo, Ph
Ph
Ph
PhPhoto
oto
oto
otooto or Music
Music
Music
MusicMusic. Tap a category to control which
files are shared.
Dolby Mobile
To access Dolby Mobile settings go to the application menu and tap Settings
Settings
Settings
SettingsSettings >
Dolby Mobile
Dolby Mobile
Dolby Mobile
Dolby MobileDolby Mobile. Here you can switch Dolby Mobile on or off, set Treble, Natural
Bass, Music EQ and Video EQ.

51Managing contacts
You may now edit the new contact entry.
Editing a contact
If you have opened an new or existing contact you can enter information about
the contact:
Simply tap on a box and type the appropriate information. Click on the arrow
next to the name entry to see options, such as adding a name prefix or phonetic
name.
To enter multiple entries, such as separate entries for mobile and home phone
numbers, tap (+)
(+)
(+)
(+)(+) to create a second entry. Tap (-)
(-)
(-)
(-)(-) to remove an entry.
Tap Ad
Ad
Ad
AdAdd another field
d another field
d another field
d another fieldd another field for more categories.
To assign an image to your contact, tap the silhouette and select an image from
your tablet’s picture gallery (select Gallery
Gallery
Gallery
GalleryGallery if requested). You may also take and
crop a new photo.
Tap Do
Do
Do
DoDone
ne
ne
nene to finish and save the contact.
Tip:
Tip:
Tip:
Tip:Tip: Set each phone number to match the type of network as this can
determine some functions, i.e. certain applications only recognise ‘Mobile’
numbers as they require a function only available on a mobile network.
Opening a contact
To see the information stored for a contact, tap on the contact’s name in the list
on the left.
Tap on an entry (such as an email address) to open the application linked to
that type of entry. For example, tap an email address to open the Gmail
Gmail
Gmail
GmailGmail
application.

52
To add or change information, tap the pencil icon.
Tap Do
Do
Do
DoDone
ne
ne
nene to save changes, or Cancel
Cancel
Cancel
CancelCancel to discard them.
Starred contacts
You may quickly access your favorite contacts by adding a
star
. First open the
contact, then tap the star next to the contact’s name. Tap All contacts
All contacts
All contacts
All contactsAll contacts and
select Starre
Starre
Starre
StarreStarred
d
d
dd to see only your favorite contacts.
Editing a contact on your computer
If you have synchronized your Google account and contacts, you can use your
computer to access and edit your contact list. Open the Internet browser on
your computer and go to con
con
con
concontacts.google.com
tacts.google.com
tacts.google.com
tacts.google.comtacts.google.com. Sign in to your account then
select and edit contacts from the list; the next time your tablet synchronizes
with your computer, these changes will also be made to your tablet’s contact
list.
Warning! Ba
Warning! Ba
Warning! Ba
Warning! BaWarning! Back up your cont
ck up your cont
ck up your cont
ck up your contck up your contacts before
acts before
acts before
acts beforeacts before making any chan
making any chan
making any chan
making any chan making any changes. Tap
ges. Tap
ges. Tap
ges. Tap ges. Tap
the Menu button and select Impo
the Menu button and select Impo
the Menu button and select Impo
the Menu button and select Impothe Menu button and select Import/Export. You may then E
rt/Export. You may then E
rt/Export. You may then E
rt/Export. You may then Ert/Export. You may then Export
xport
xport
xport xport
your contact lis
your contact lis
your contact lis
your contact lisyour contact list to your tab
t to your tab
t to your tab
t to your tabt to your tablet’s internal
let’s internal
let’s internal
let’s internal let’s internal memory, or othe
memory, or othe
memory, or othe
memory, or othememory, or other options
r options
r options
r options r options
depending on installed applications.
depending on installed applications.
depending on installed applications.
depending on installed applications.depending on installed applications.

56
2. Frame your subject and steady your tablet and zoom in or out as needed.
3. Tap the record icon to begin recording.
4. Tap the record icon to stop recording.
Note:
Note:
Note:
Note:Note: Zoom is only available in certain resolutions.
Supported formats
Viewing photos and videos
After you have taken your photo or video, it is automatically saved; normally to
internal memory.
After taking a photo or video, you can view it in the Gallery by tapping the
thumbnail in the bottom-left corner of the screen. Alternatively, open the
application menu and tap Gallery
Gallery
Gallery
GalleryGallery, then Camera
Camera
Camera
CameraCamera. Select the photo or video you
want to view (videos are marked with a small play symbol).
From the Gallery you can share the file directly using various services. Tap Menu
Menu
Menu
MenuMenu
and then Share
Share
Share
ShareShare.
Note:
Note:
Note:
Note:Note: Share options vary depending on the file type.
Type
Type
Type
TypeType Formats
Formats
Formats
FormatsFormats
Image JPEG
Video H.264BP
Audio AAC-LC

57Using a cellular data network (only for Wi-Fi+3G models)
Using a cellular data network
Using a cellular data network
Using a cellular data network
Using a cellular data network Using a cellular data network
(only for Wi-Fi+3G models)
(only for Wi-Fi+3G models)
(only for Wi-Fi+3G models)
(only for Wi-Fi+3G models)(only for Wi-Fi+3G models)
‘3G’, or data over a cellular network, is only available on models equiped with a
SIM card slot, or through a separate 3G modem (not supplied - available from
your mobile Internet provider, check for compatibility).
Importan
Importan
Importan
ImportanImportant:
t:
t:
t: t: Please check the information provided by your mobile internet
provider. Not all options and settings described in this section will be
available, and different applications may be provided.
Installing a SIM card
Certain tablets include a SIM slot for Internet access. To take full advantage of
your tablet’s Internet capabilities, you should install a SIM card with data
subscription
before
turning on your tablet.
1. Turn off the tablet by pressing and holding the power button.
2. Insert the SIM card as shown.
SIM card
3. Replace the card slot cover.
Note:
Note:
Note:
Note:Note: Ensure that the SIM card is inserted all the way into the card slot.
Caution:
Caution:
Caution:
Caution: Caution: Turn off your tablet before installing or removing a SIM card. You
may damage the card or your tablet if the power is still on.
Activating a new SIM card and PIN
If you are using a SIM card for the first time, it may require activation. Contact
your network operator for details on how to do this.
When you install a SIM card for the first time, you may need to enter a PIN.
Termékspecifikációk
| Márka: | Acer |
| Kategória: | tabletta |
| Modell: | Iconia Tab A100 |
Szüksége van segítségre?
Ha segítségre van szüksége Acer Iconia Tab A100, tegyen fel kérdést alább, és más felhasználók válaszolnak Önnek
Útmutatók tabletta Acer

8 Augusztus 2024
4 Augusztus 2024
3 Augusztus 2024
2 Augusztus 2024
2 Augusztus 2024
1 Augusztus 2024
1 Augusztus 2024
1 Augusztus 2024
1 Augusztus 2024
31 Július 2024
Útmutatók tabletta
- tabletta Samsung
- tabletta Sony
- tabletta Fujitsu
- tabletta LG
- tabletta Grundig
- tabletta Realme
- tabletta Philips
- tabletta Oregon Scientific
- tabletta Panasonic
- tabletta Nokia
- tabletta Lenovo
- tabletta Evolveo
- tabletta Toshiba
- tabletta HP
- tabletta Hyundai
- tabletta Hisense
- tabletta Apple
- tabletta Medion
- tabletta Motorola
- tabletta Alcatel
- tabletta TCL
- tabletta Zebra
- tabletta Xiaomi
- tabletta GoGen
- tabletta CAT
- tabletta Dell
- tabletta Cyrus
- tabletta Gigabyte
- tabletta Thomson
- tabletta Polaroid
- tabletta Aiwa
- tabletta Tesco
- tabletta Huawei
- tabletta Microsoft
- tabletta Asus
- tabletta Vtech
- tabletta PocketBook
- tabletta Haier
- tabletta Navitel
- tabletta Sencor
- tabletta AOC
- tabletta Telefunken
- tabletta Nevir
- tabletta Kobo
- tabletta Doro
- tabletta Logitech
- tabletta Viewsonic
- tabletta Denver
- tabletta Bush
- tabletta Trevi
- tabletta Aluratek
- tabletta Amazon
- tabletta MSI
- tabletta Tesla
- tabletta Energy Sistem
- tabletta Google
- tabletta Honor
- tabletta SPC
- tabletta Control4
- tabletta ZTE
- tabletta ESTAR
- tabletta Vodafone
- tabletta ModeCom
- tabletta Terratec
- tabletta Overmax
- tabletta OnePlus
- tabletta Archos
- tabletta Kogan
- tabletta Honeywell
- tabletta Intenso
- tabletta Prestigio
- tabletta Media-Tech
- tabletta Digiland
- tabletta Manta
- tabletta Blaupunkt
- tabletta IRiver
- tabletta Razer
- tabletta AKAI
- tabletta TechniSat
- tabletta Pyle
- tabletta Salora
- tabletta Lenco
- tabletta Maxell
- tabletta ECG
- tabletta Micromax
- tabletta Best Buy
- tabletta Vorago
- tabletta Newland
- tabletta GoClever
- tabletta Krüger&Matz
- tabletta Getac
- tabletta Allview
- tabletta RCA
- tabletta Orion
- tabletta Creative
- tabletta ECS
- tabletta Adj
- tabletta Wacom
- tabletta Bluebird
- tabletta Packard Bell
- tabletta TechBite
- tabletta Majestic
- tabletta IGET
- tabletta Lava
- tabletta I.safe Mobile
- tabletta Vivitar
- tabletta Xiron
- tabletta Yarvik
- tabletta Lexibook
- tabletta Proscan
- tabletta Trekstor
- tabletta Sonim
- tabletta Gemini
- tabletta Easypix
- tabletta Konrow
- tabletta Cresta
- tabletta Brigmton
- tabletta Sunstech
- tabletta Sylvania
- tabletta Binatone
- tabletta Blackberry
- tabletta Audiosonic
- tabletta Exagerate
- tabletta Coby
- tabletta Bigben Interactive
- tabletta Wolder
- tabletta Audiovox
- tabletta Disgo
- tabletta Olivetti
- tabletta Pantech
- tabletta Laser
- tabletta Naxa
- tabletta RugGear
- tabletta Ricatech
- tabletta Hema
- tabletta Arnova
- tabletta Mpman
- tabletta Vizio
- tabletta Cello
- tabletta Logicom
- tabletta Ematic
- tabletta Hannspree
- tabletta Zagg
- tabletta Ingo
- tabletta Plum
- tabletta Difrnce
- tabletta Nextbook
- tabletta Memup
- tabletta Engel Axil
- tabletta BQ
- tabletta Butler
- tabletta Rand McNally
- tabletta Odys
- tabletta Dragon Touch
- tabletta Primux
- tabletta DEXP
- tabletta Eken
- tabletta Tom-tec
- tabletta Mediacom
- tabletta Xoro
- tabletta Billow
- tabletta Empire
- tabletta Woxter
- tabletta Storage Options
- tabletta Advantech
- tabletta Kurio
- tabletta Linx
- tabletta Ferguson
- tabletta Leap Frog
- tabletta I-onik
- tabletta Microtech
- tabletta Empire Electronix
- tabletta Vulcan
- tabletta Storex
- tabletta Skytex
- tabletta Electrovaya
- tabletta Durabook
- tabletta Mymaga
- tabletta Vinci
- tabletta Vizmo
- tabletta General Dynamics Itronix
- tabletta Xplore
- tabletta Lark
- tabletta Bookeen
- tabletta Elements
- tabletta I-Joy
- tabletta Hamlet
- tabletta Approx
- tabletta Leotec
- tabletta Bauhn
- tabletta ADS-TEC
- tabletta Nabi
- tabletta Barnes And Noble
- tabletta Sungale
- tabletta Aqprox
- tabletta Fossibot
- tabletta Hip Street
Legújabb útmutatók tabletta

9 Április 2025
3 Április 2025

1 Április 2025
1 Április 2025
1 Április 2025
1 Április 2025
1 Április 2025
31 Március 2025

30 Március 2025

30 Március 2025